In this guide, a button in a p5.js program hosted at Glitch.com will be used to trigger an IFTTT recipe that sends a tweet from a connected Twitter account.
p5.js in Glitch → IFTTT → Twitter
Here is a p5.js program hosted at Glitch.com which sends a signal that serves as an IFTTT trigger: https://glitch.com/~glitch-p5-to-ifttt-webhooks. (You can experience the project without its code and project files at https://glitch-p5-to-ifttt-webhooks.glitch.me/): To use this project as a template for your own work, log in to Glitch.com and click on the “Remix This” button in the lower right:
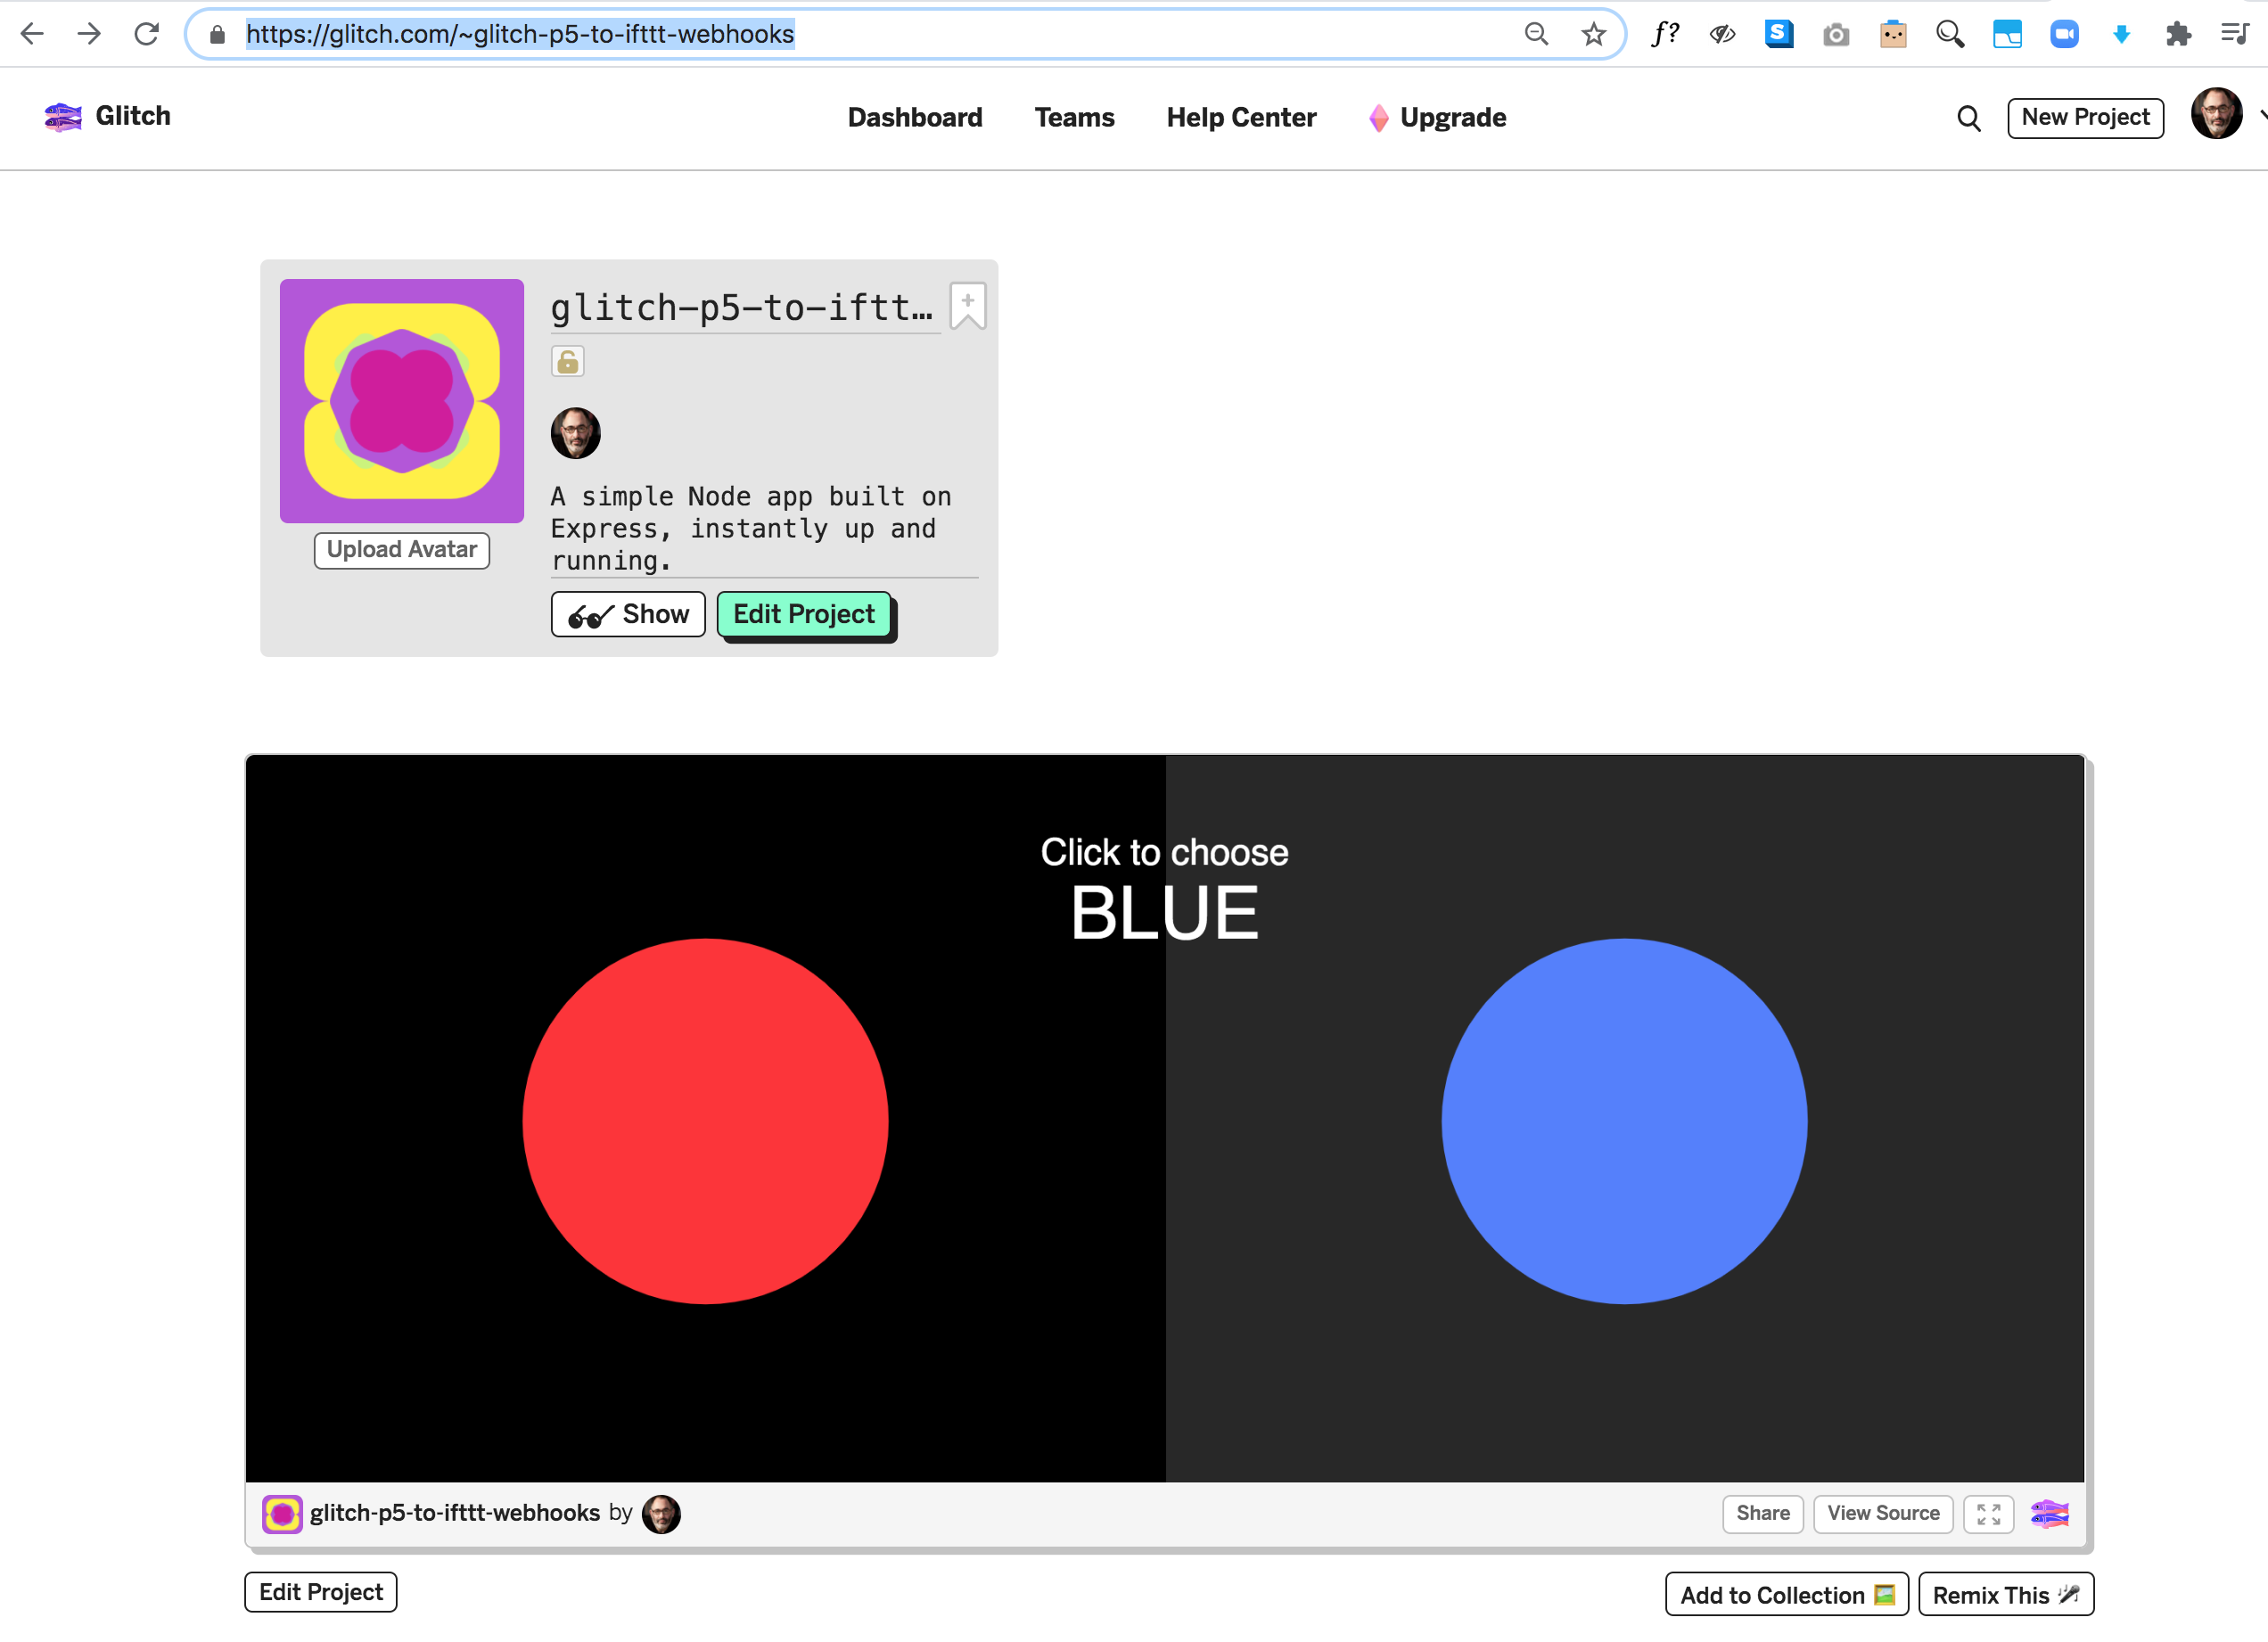
Once you’re logged in and editing the project, you should see this, assuming you’re editing the p5.js code, sketch.js. Note that I have selected the “Next to the Code” preview mode by clicking on the “Show” sunglasses button in the upper left.
The program has two “buttons”, red and blue, and a variable, RorB, which stores a string (“RED” or “BLUE”) representing the user’s most recent choice. When the user clicks, this variable is stored (in line 44) as a property called “Value1” in a small JSON object called data. This JSON object is then packed up and sent to IFTTT.

The p5.js sketch works in cooperation with some additional JavaScript code in the server.js file, which is also part of the same project on Glitch.com. All of the communications magic happens in line 21 of this file, where a special URL string is constructed, and line 24, which executes a curl command containing that string. That’s the trigger to IFTTT.
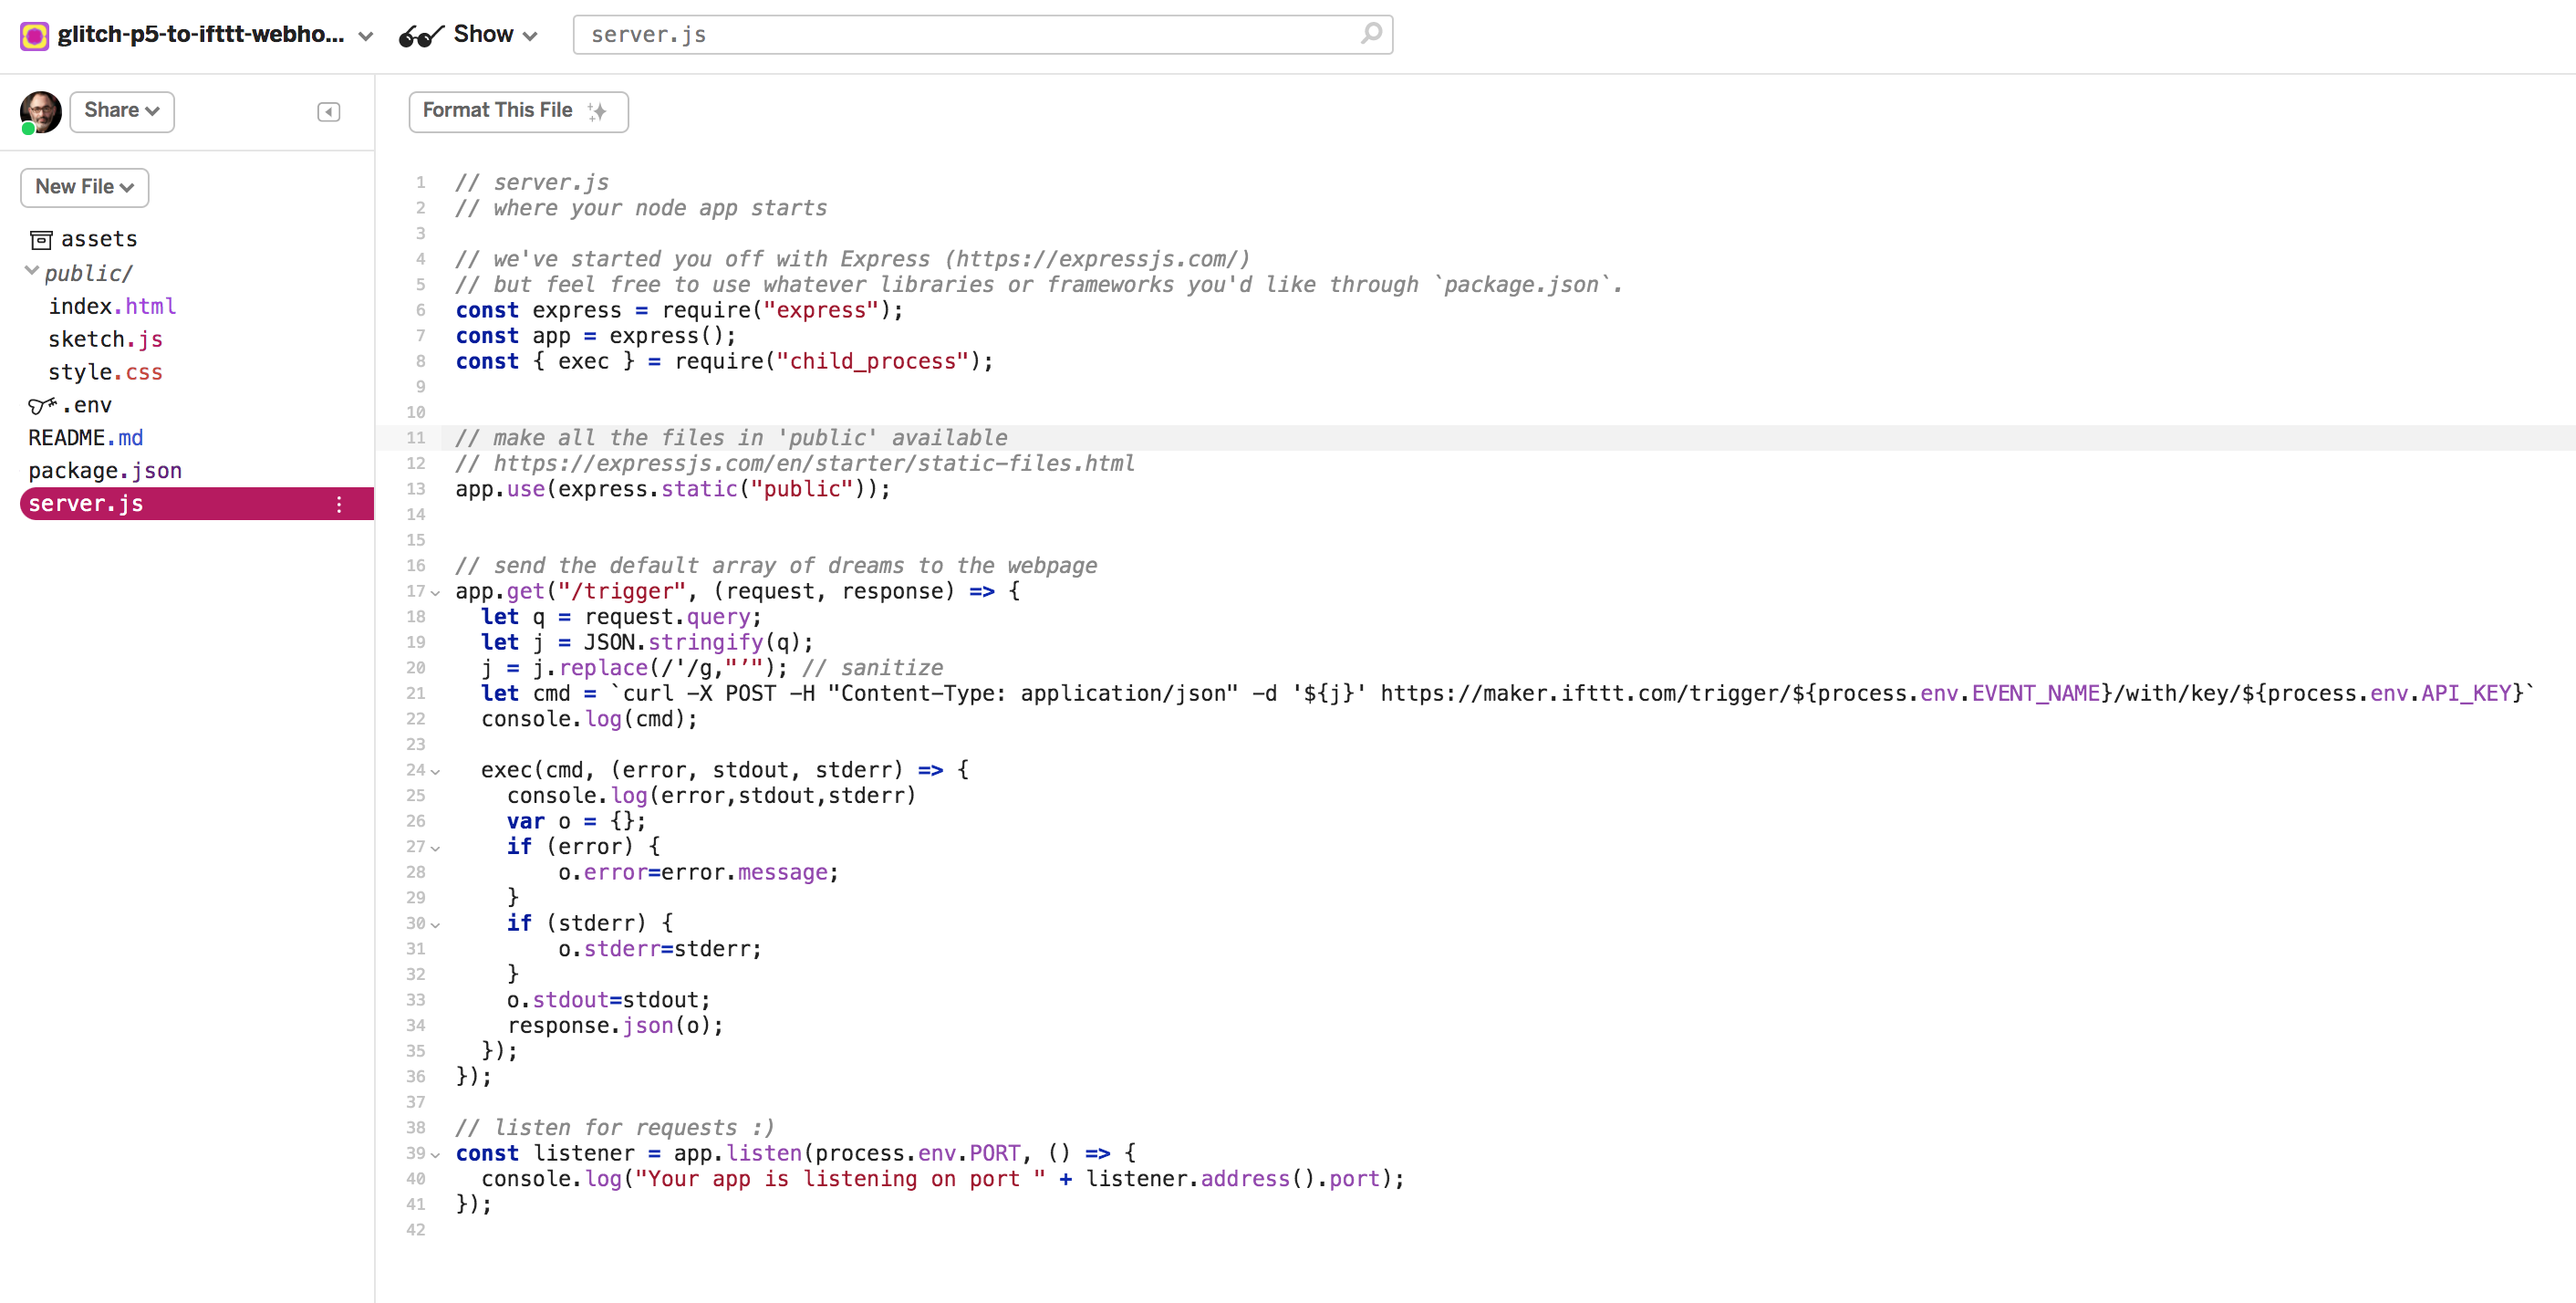
As you can see, there are some special string values that get substituted into the URL string: EVENT_NAME and API_KEY. Where are they stored and where do they come from? They are stored in your project’s special key file, 🗝.env:
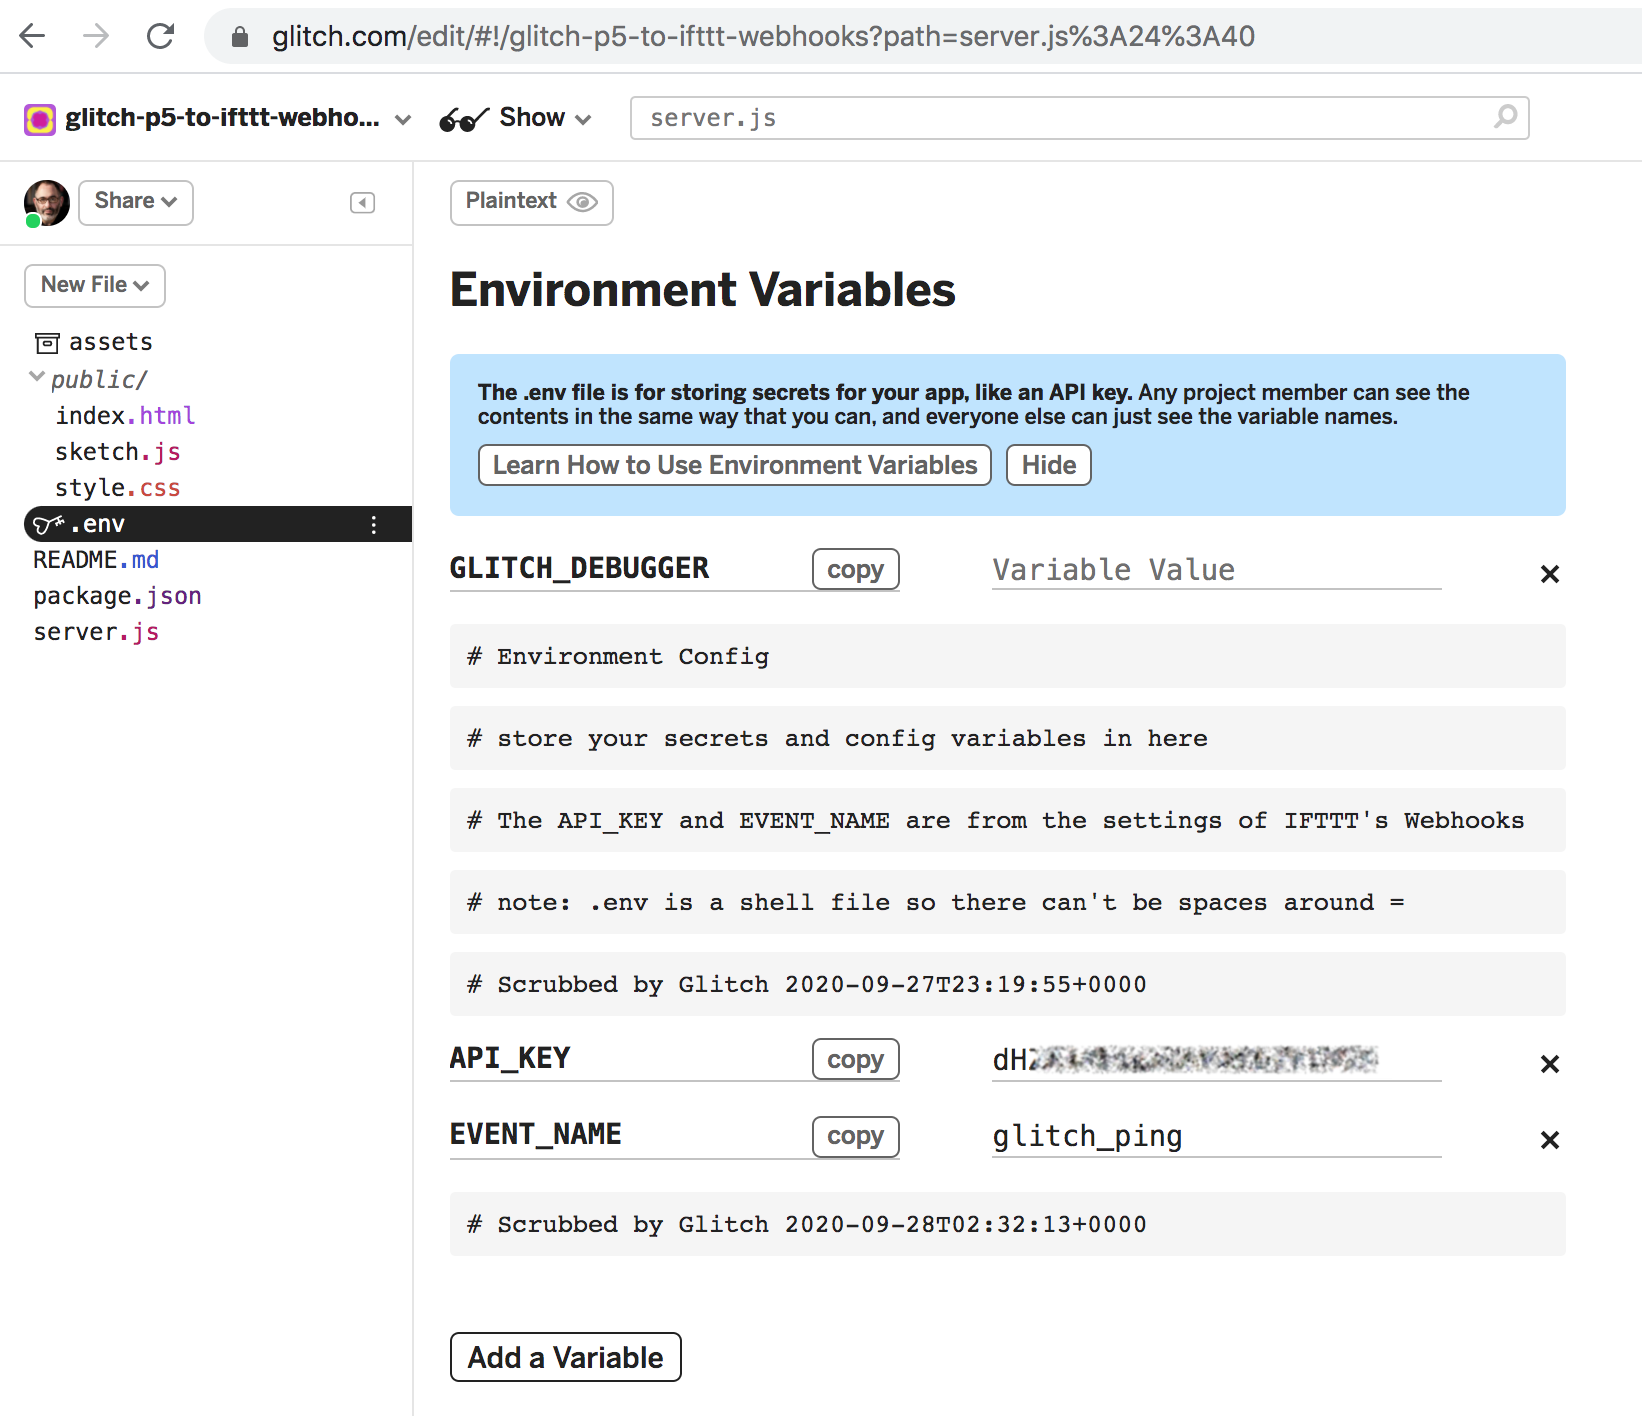
Note that when you forked my copy of the Glitch project to create your own, this private information was scrubbed. You’ll have to get your own API key (and make your own EVENT_NAME) at IFTTT. Skip on over to IFTTT.com, create your account, log in, and click “Create”. You’ll be able to make 3 “applets” (recipes) with your free account.
First, you’ll specify the service that is the “trigger”. IFTTT offers hundreds of different services; we’ll select WebHooks. IFTTT’s WebHooks service allows you to “create Applets that work with any device or app that can make or receive a web request.”
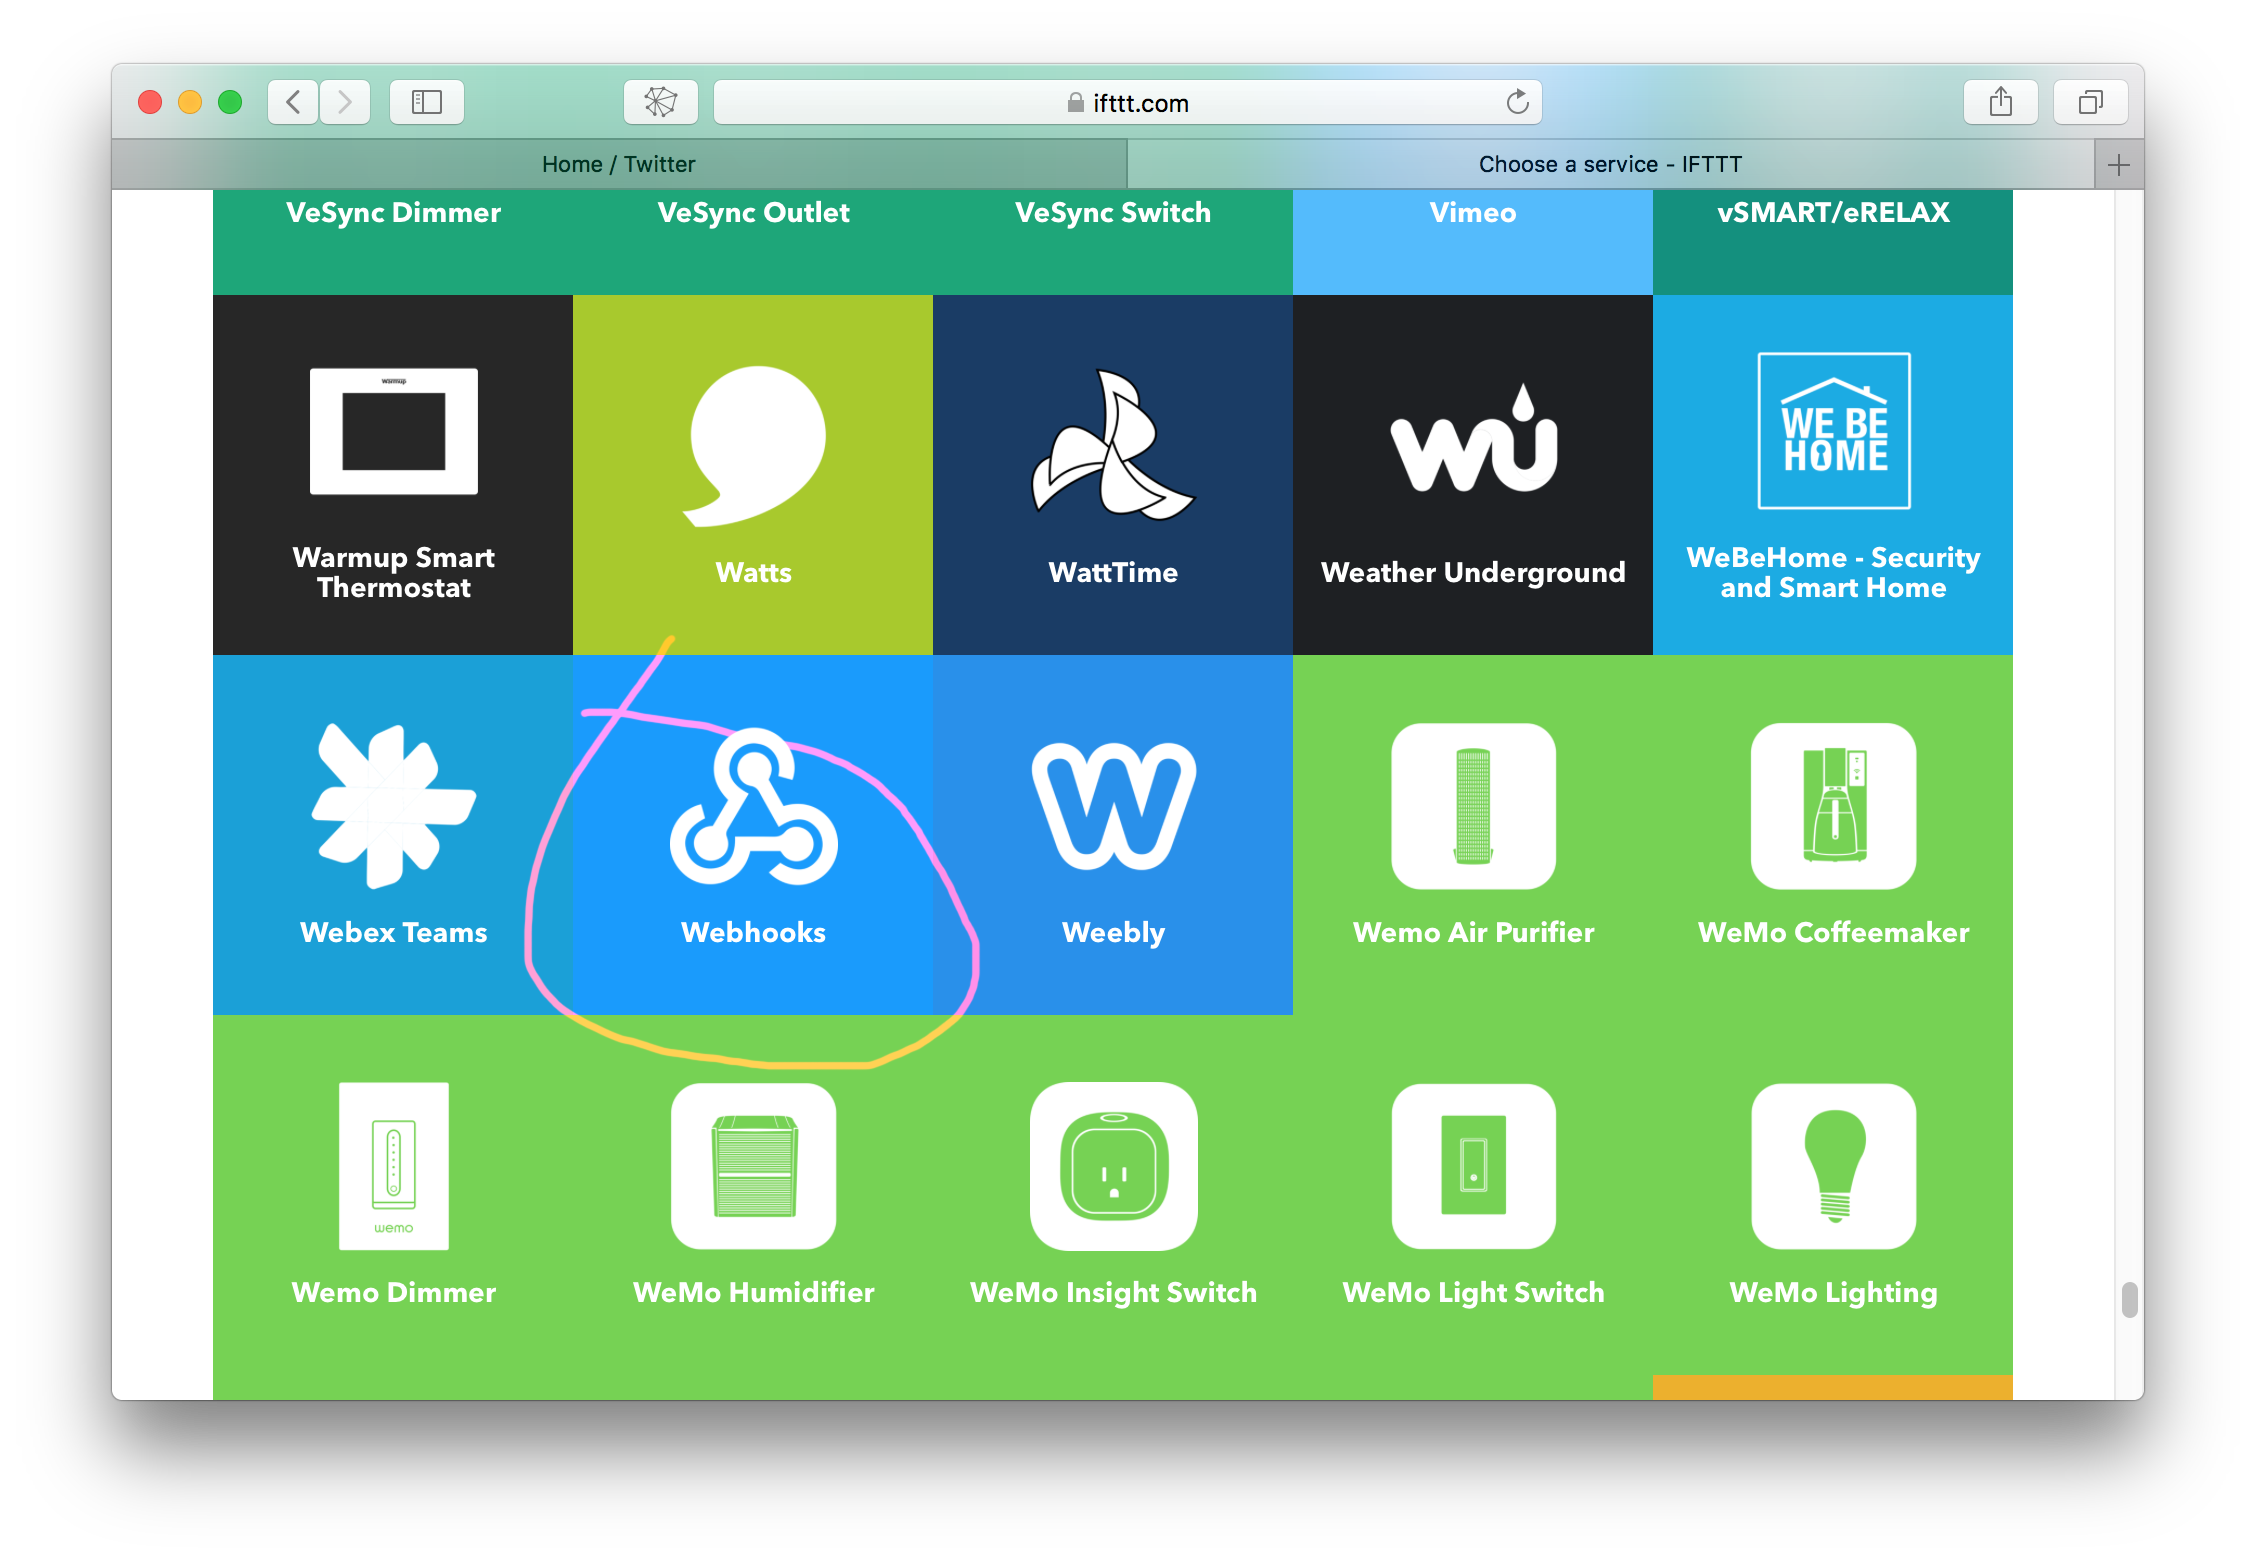
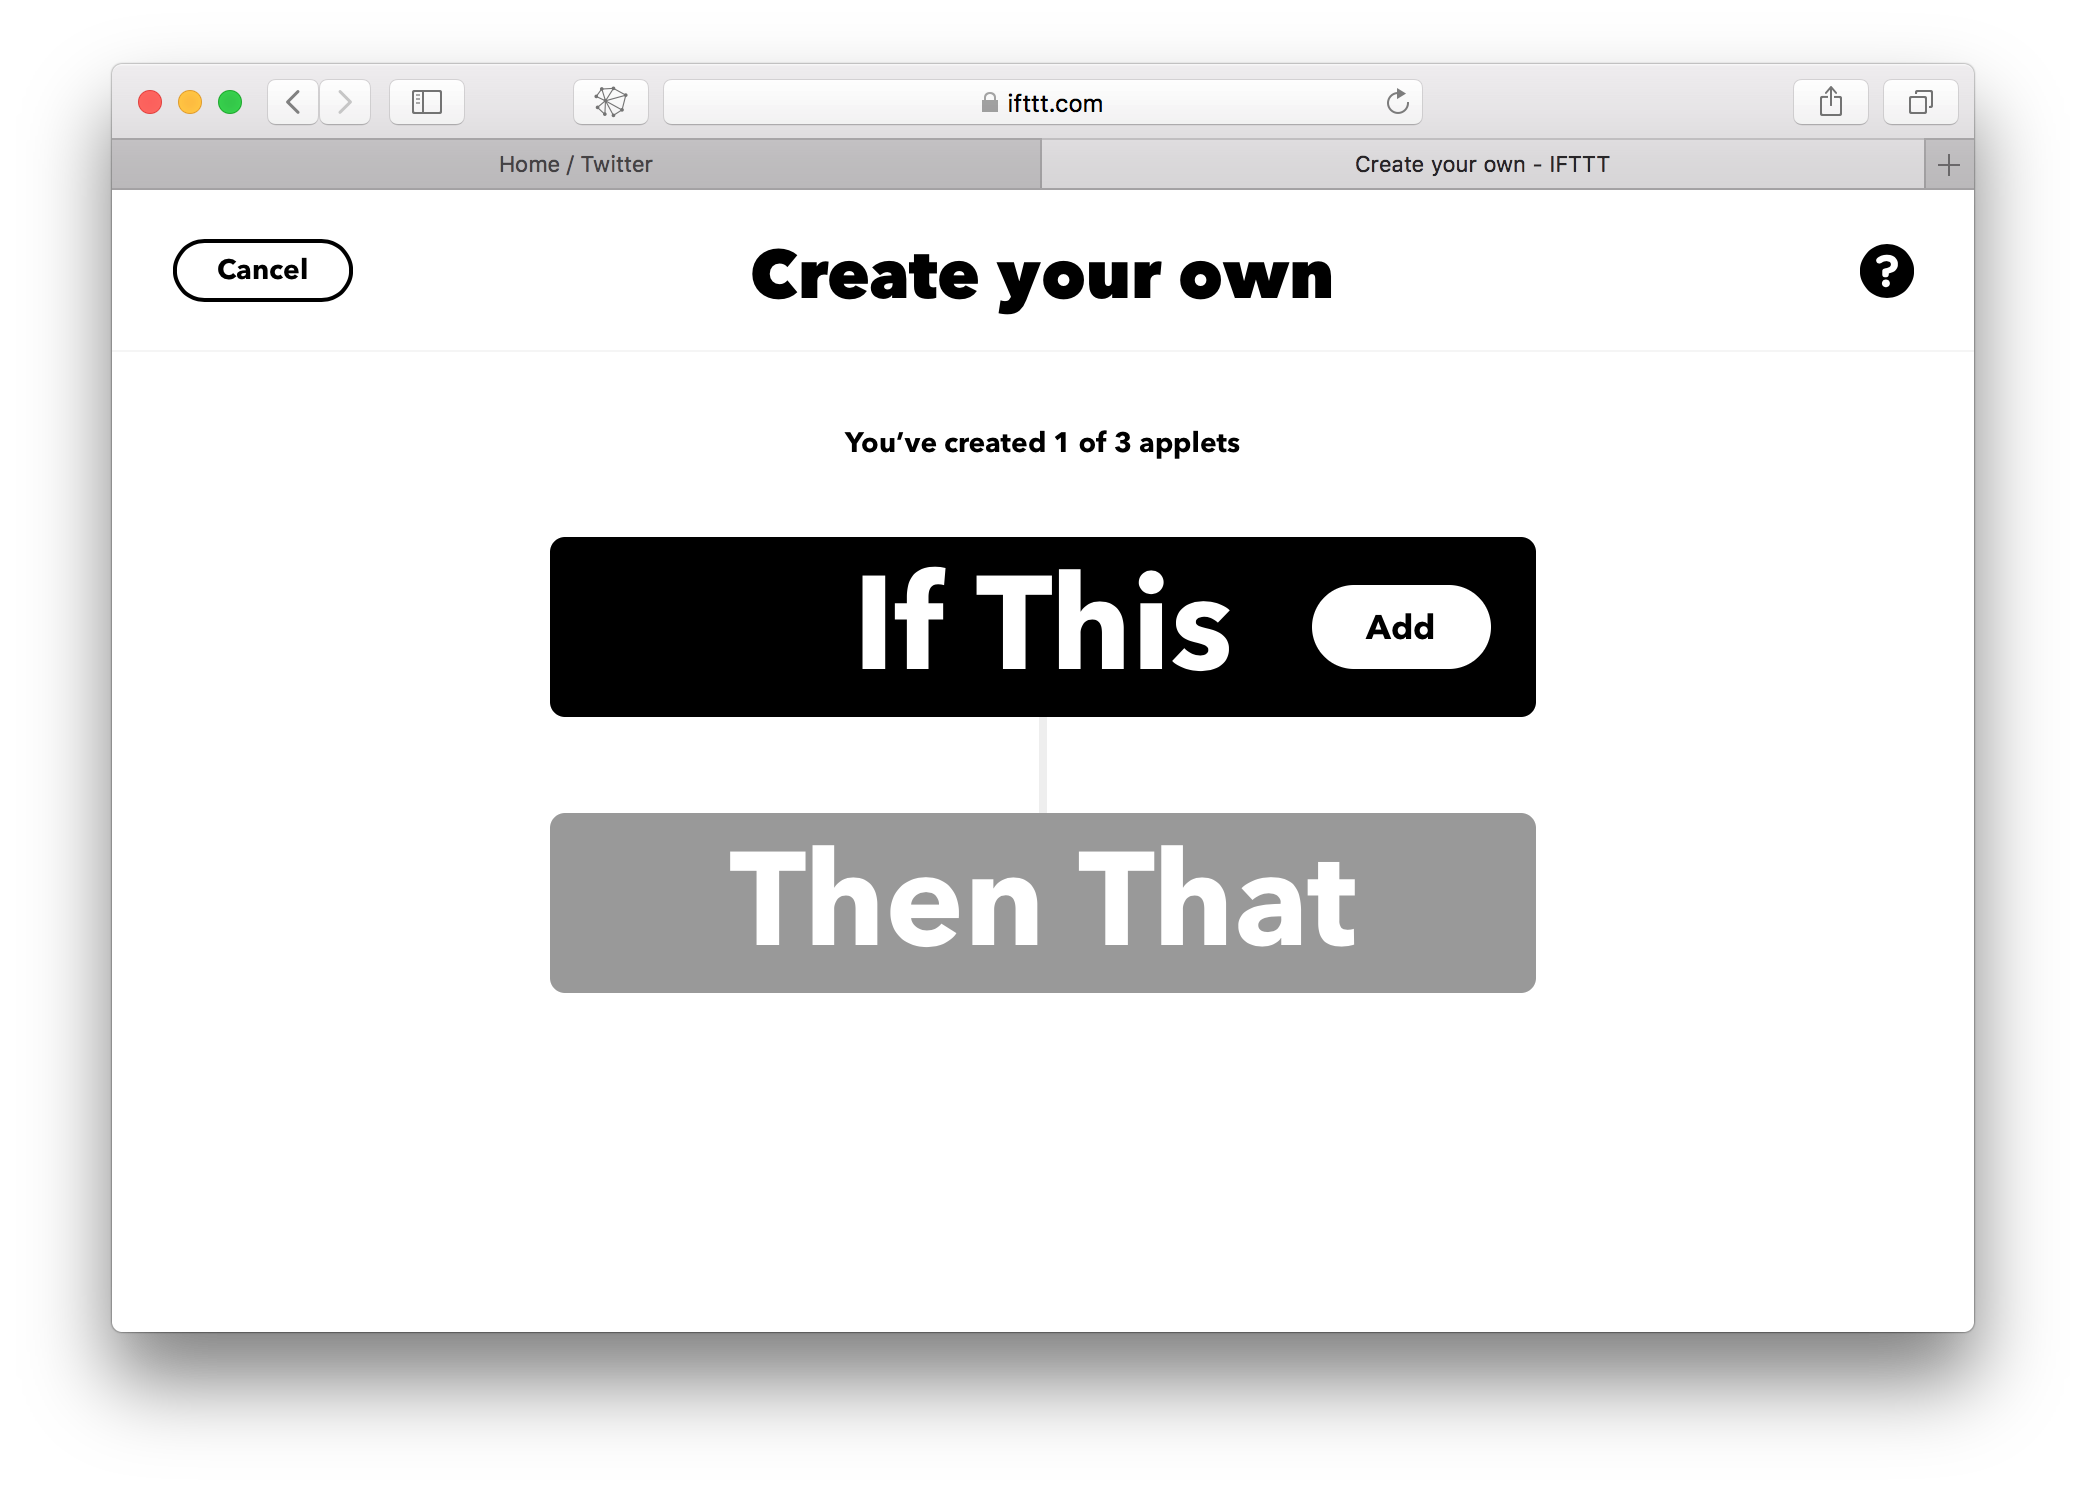
Then click “Receive a web request”; you’ll be able to specify details about how IFTTT should receive a web request, i.e., specific details about the trigger to which IFTTT will respond. 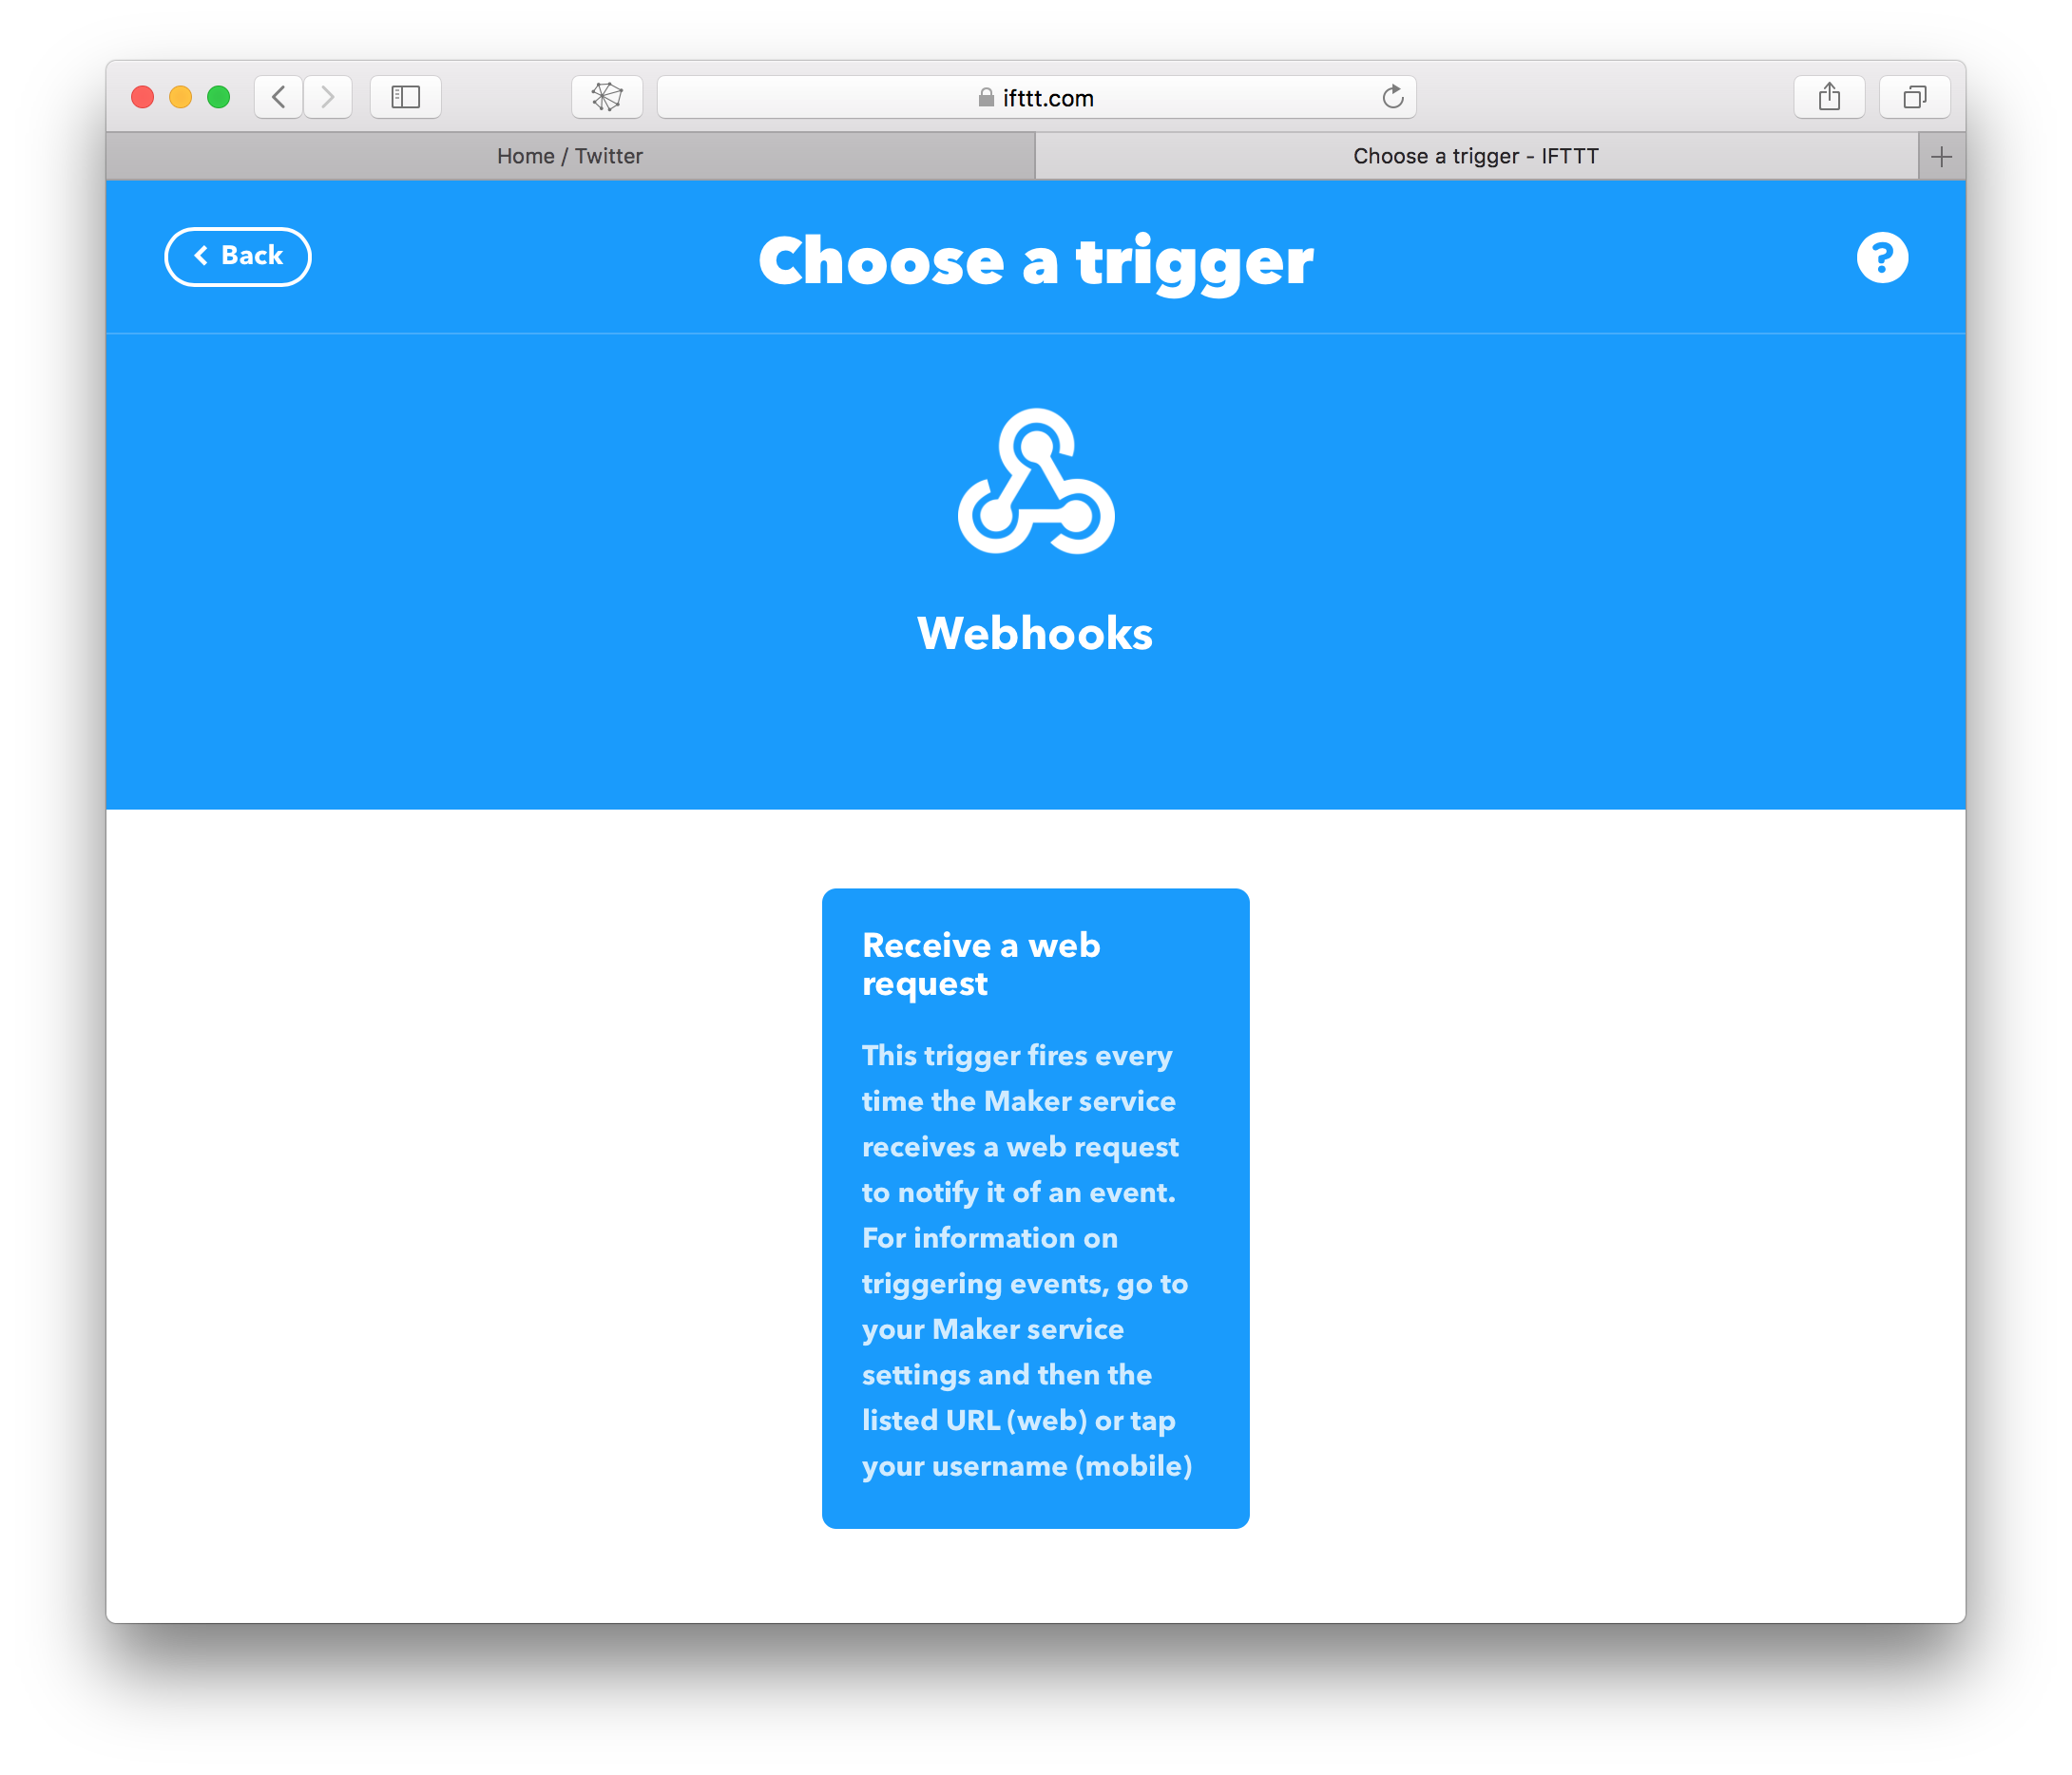
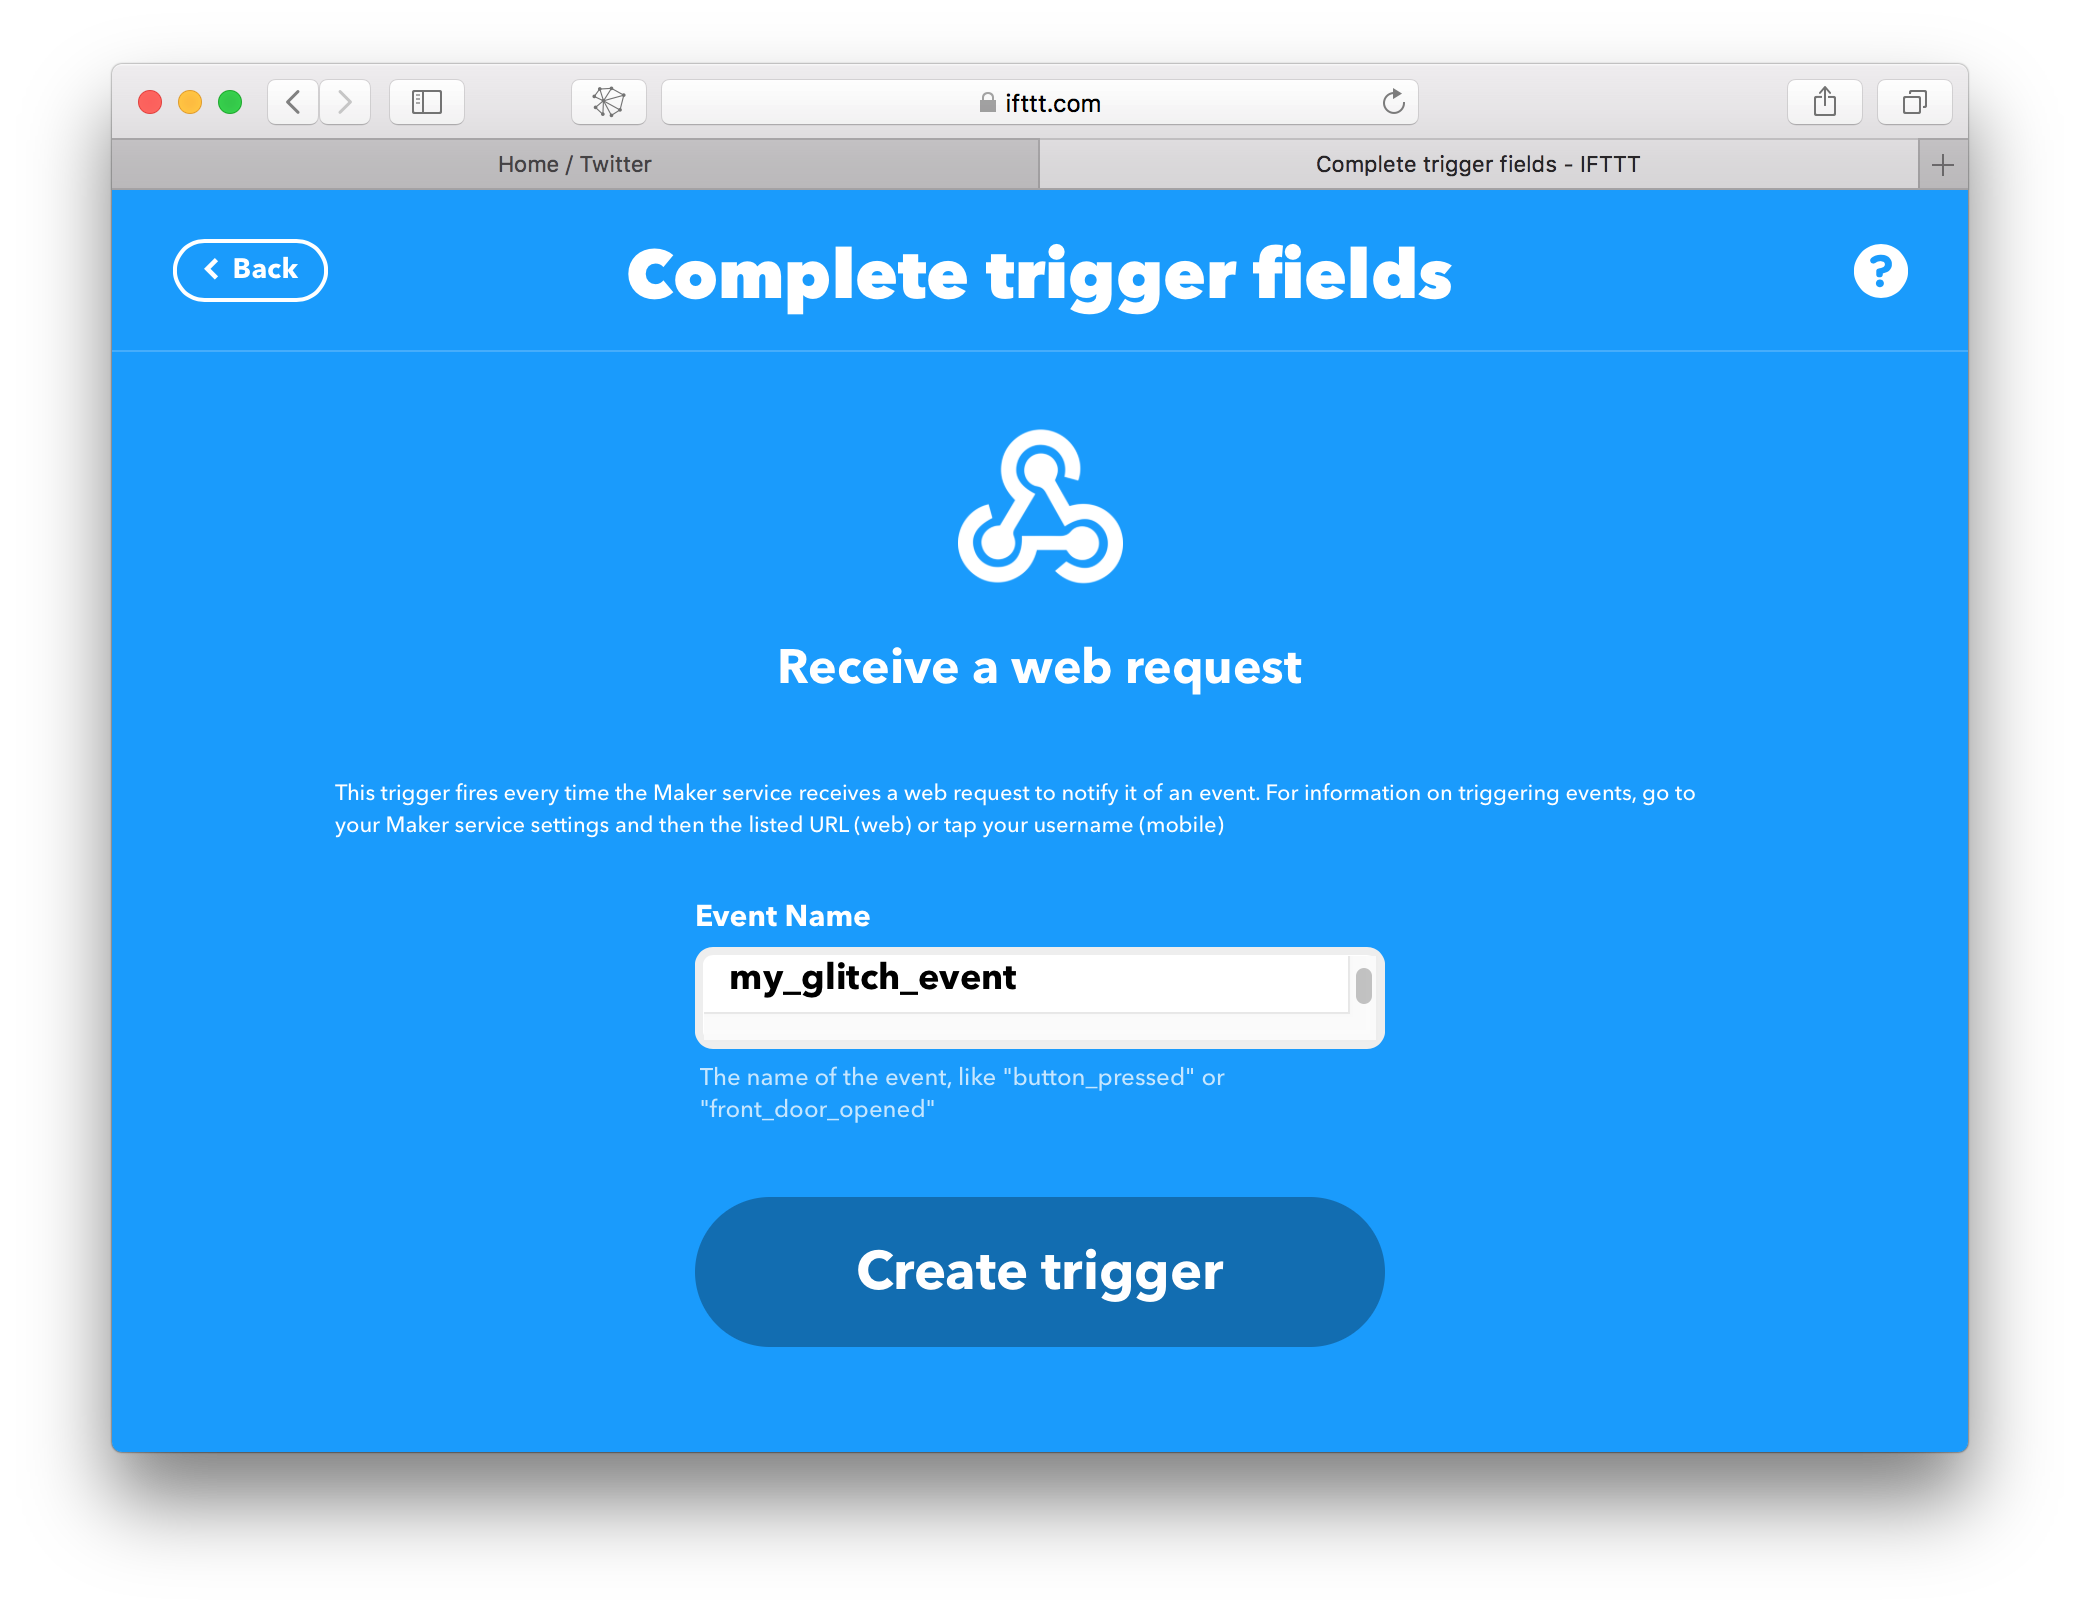
You’ll have a field where you can enter the “Event Name”. Earlier, I named my event glitch_ping, but you could call yours whatever you want, such as my_glitch_event. Make a note of this, because this is the string you will use for the EVENT_NAME property in the 🗝.env file in your Glitch project!
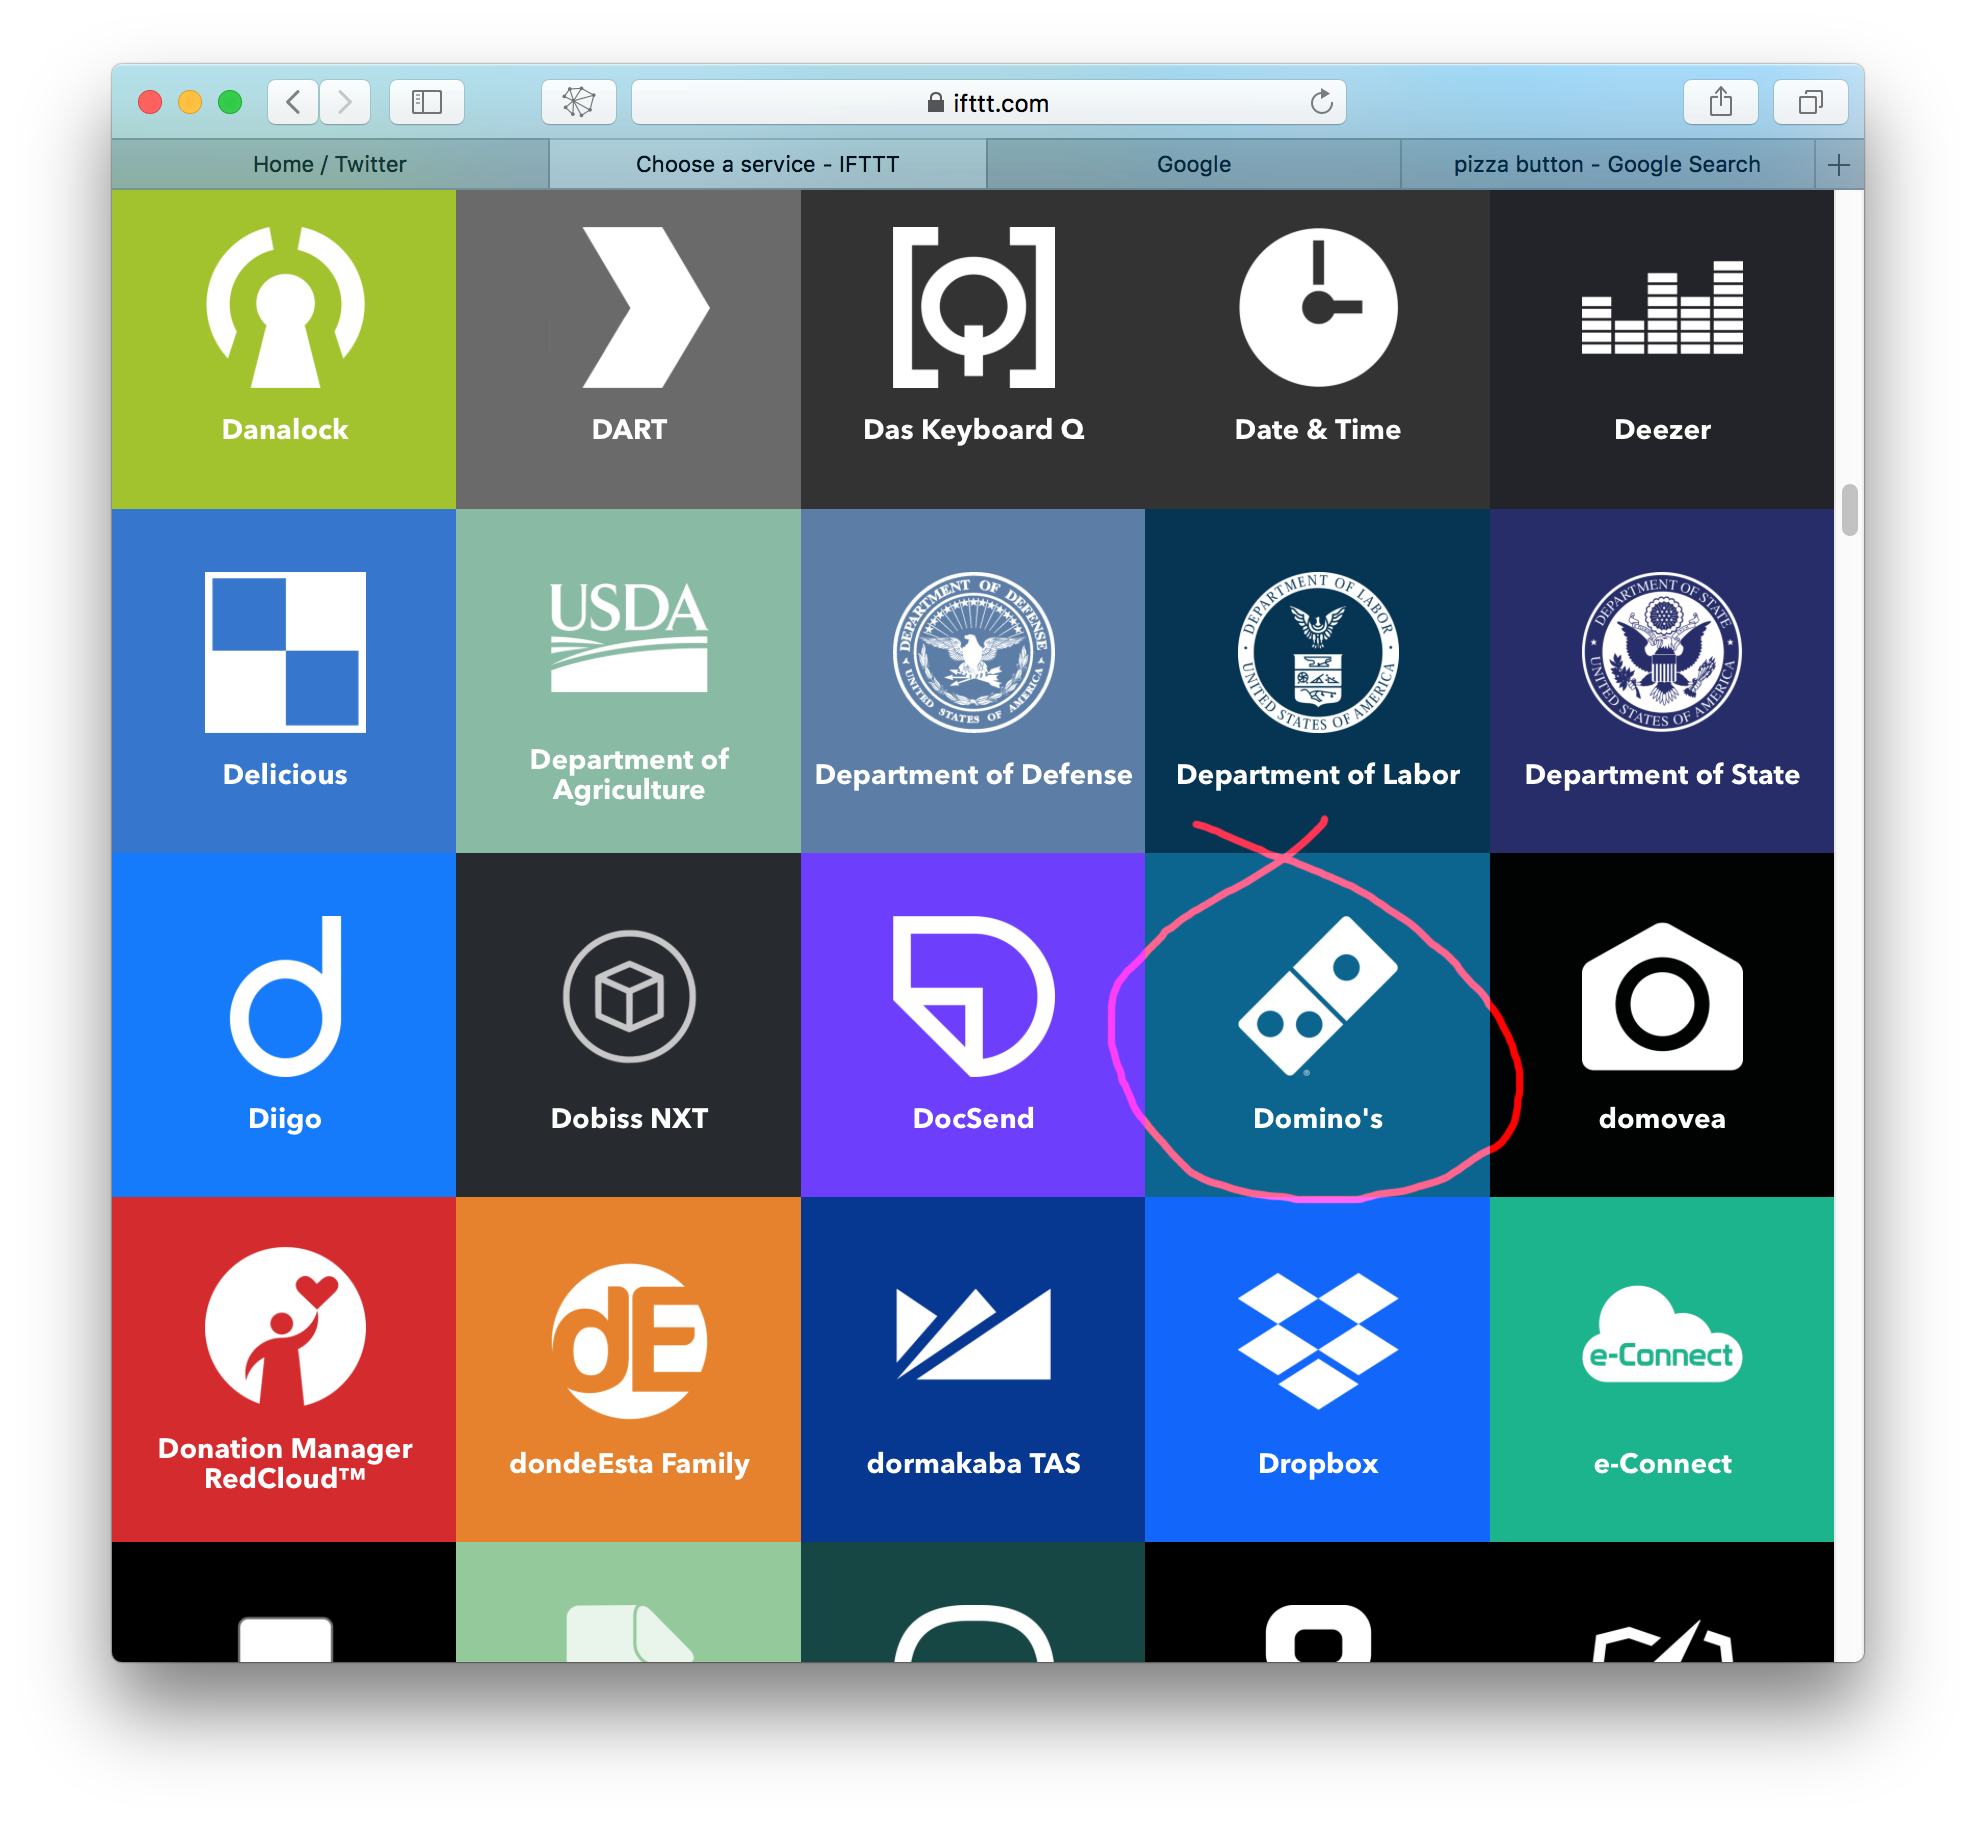
We’ve told IFTTT what trigger to respond to (…the “if this“). Now it’s time to tell it how to act in the world (…the “then that“). In my case, I’ll use IFTTT to send a tweet from my spare Twitter account, @golancourses, but IFTTT has lots of possible services; for example, instead of sending a tweet, your trigger could save a file to a Google spreadsheet, or cause a pizza to be ordered and delivered from Domino’s….
I’ve made sure to log in to my Twitter account within the same web browser that’s logged into my IFTTT account. In my IFTTT applet wizard, I select Twitter, and I connect up my Twitter account (giving IFTTT permission to send tweets from my account). I then choose to have IFTTT “Post a tweet” whenever it receives the trigger.
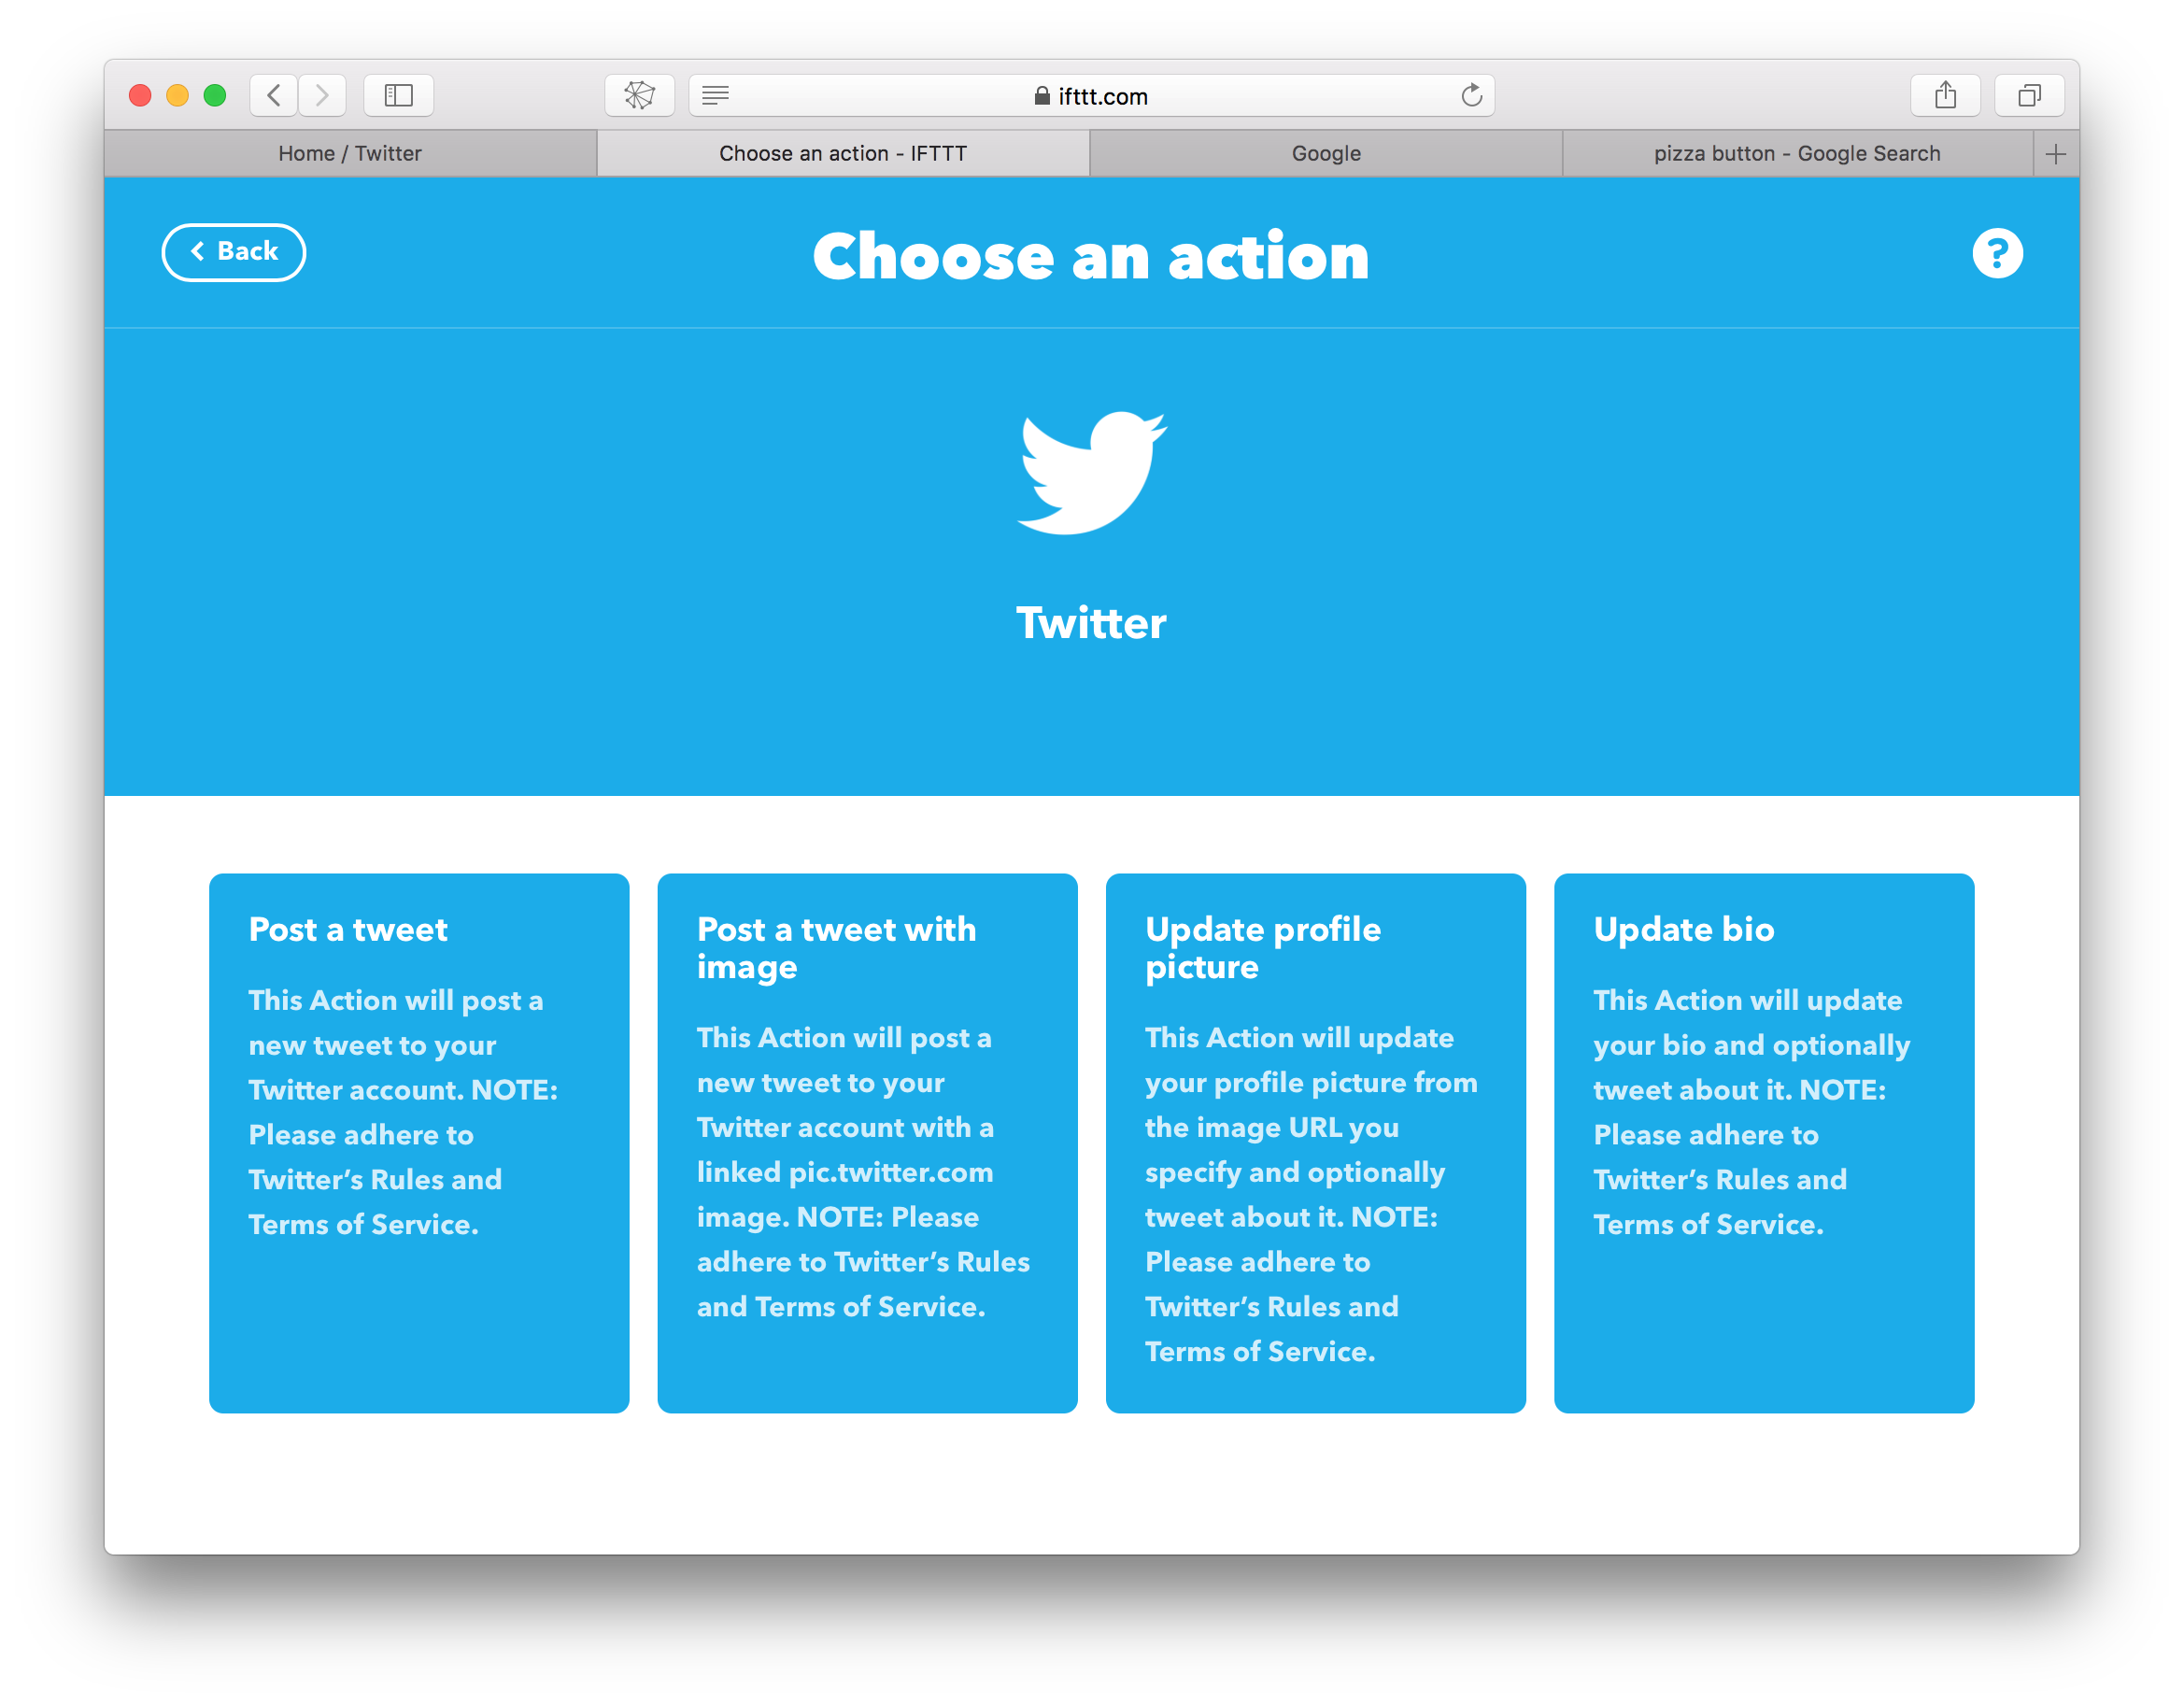
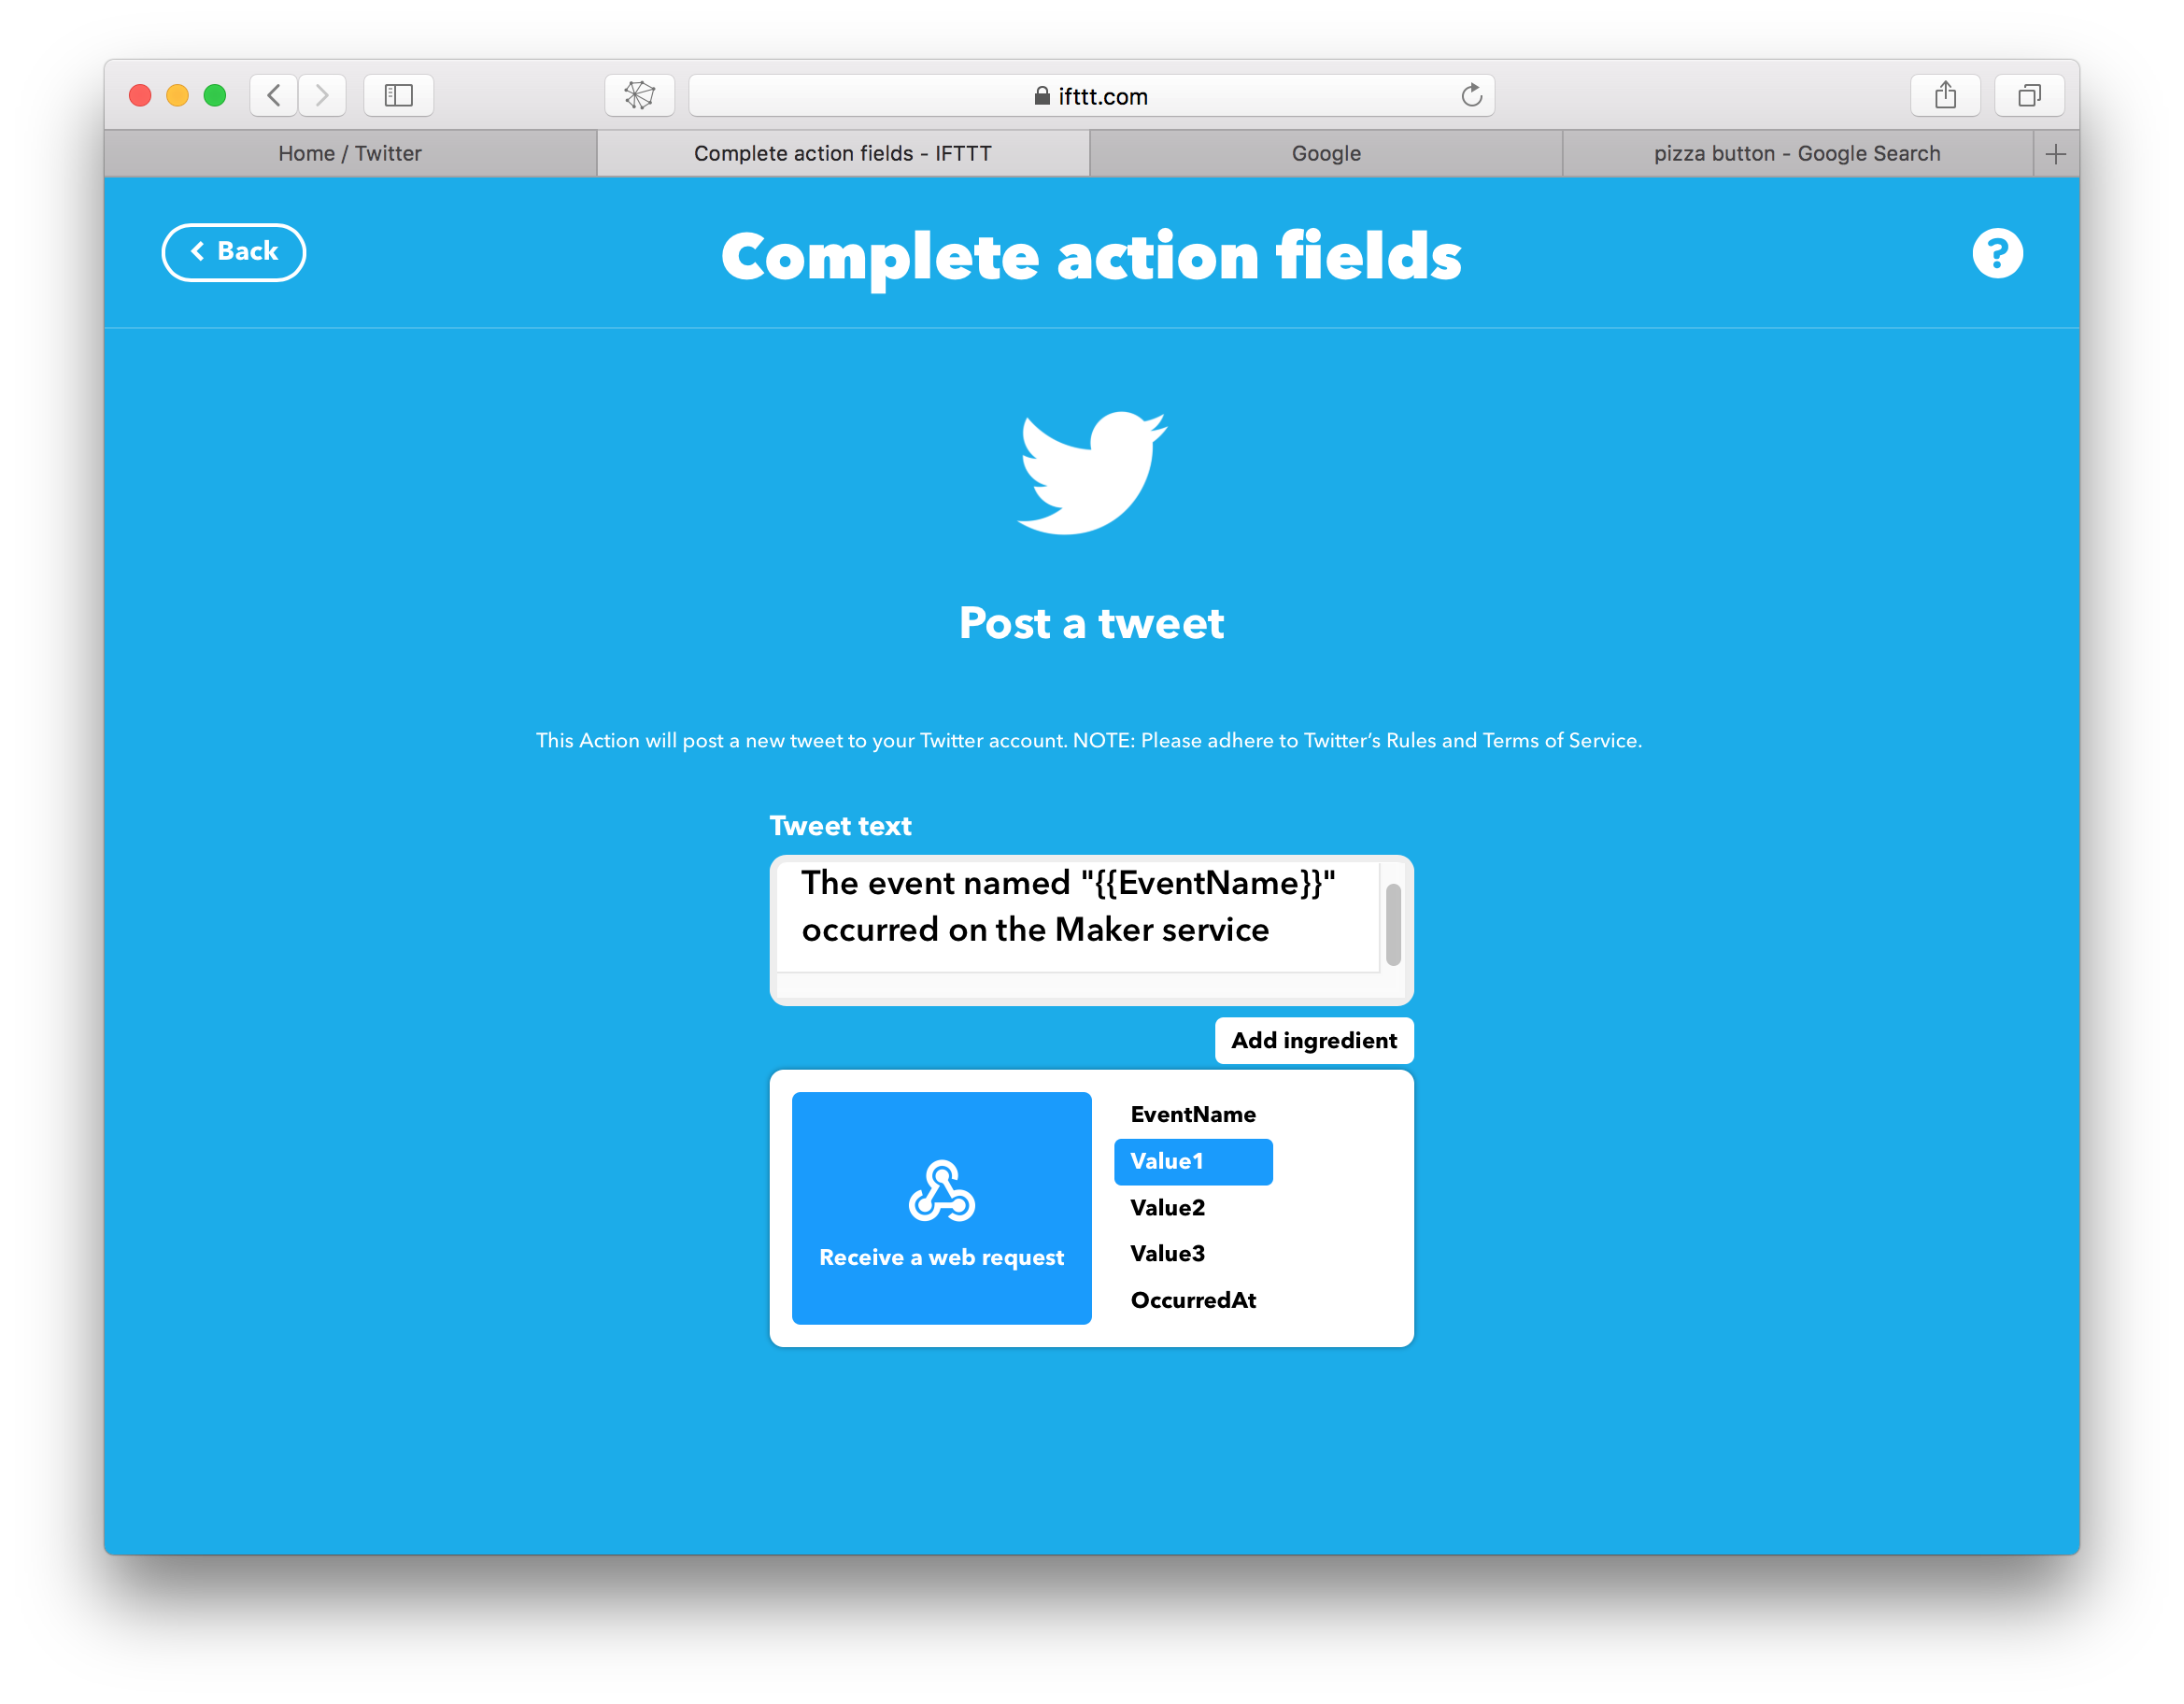
IFTTT provides a modest editor that allows you to compose the specific textual phrasing of this tweet. This includes a small number of special strings, including the event name, the current time (OccurredAt) and up to three generic values — Value1, Value2, and Value3 — that are presumed to be coming in from the trigger event.
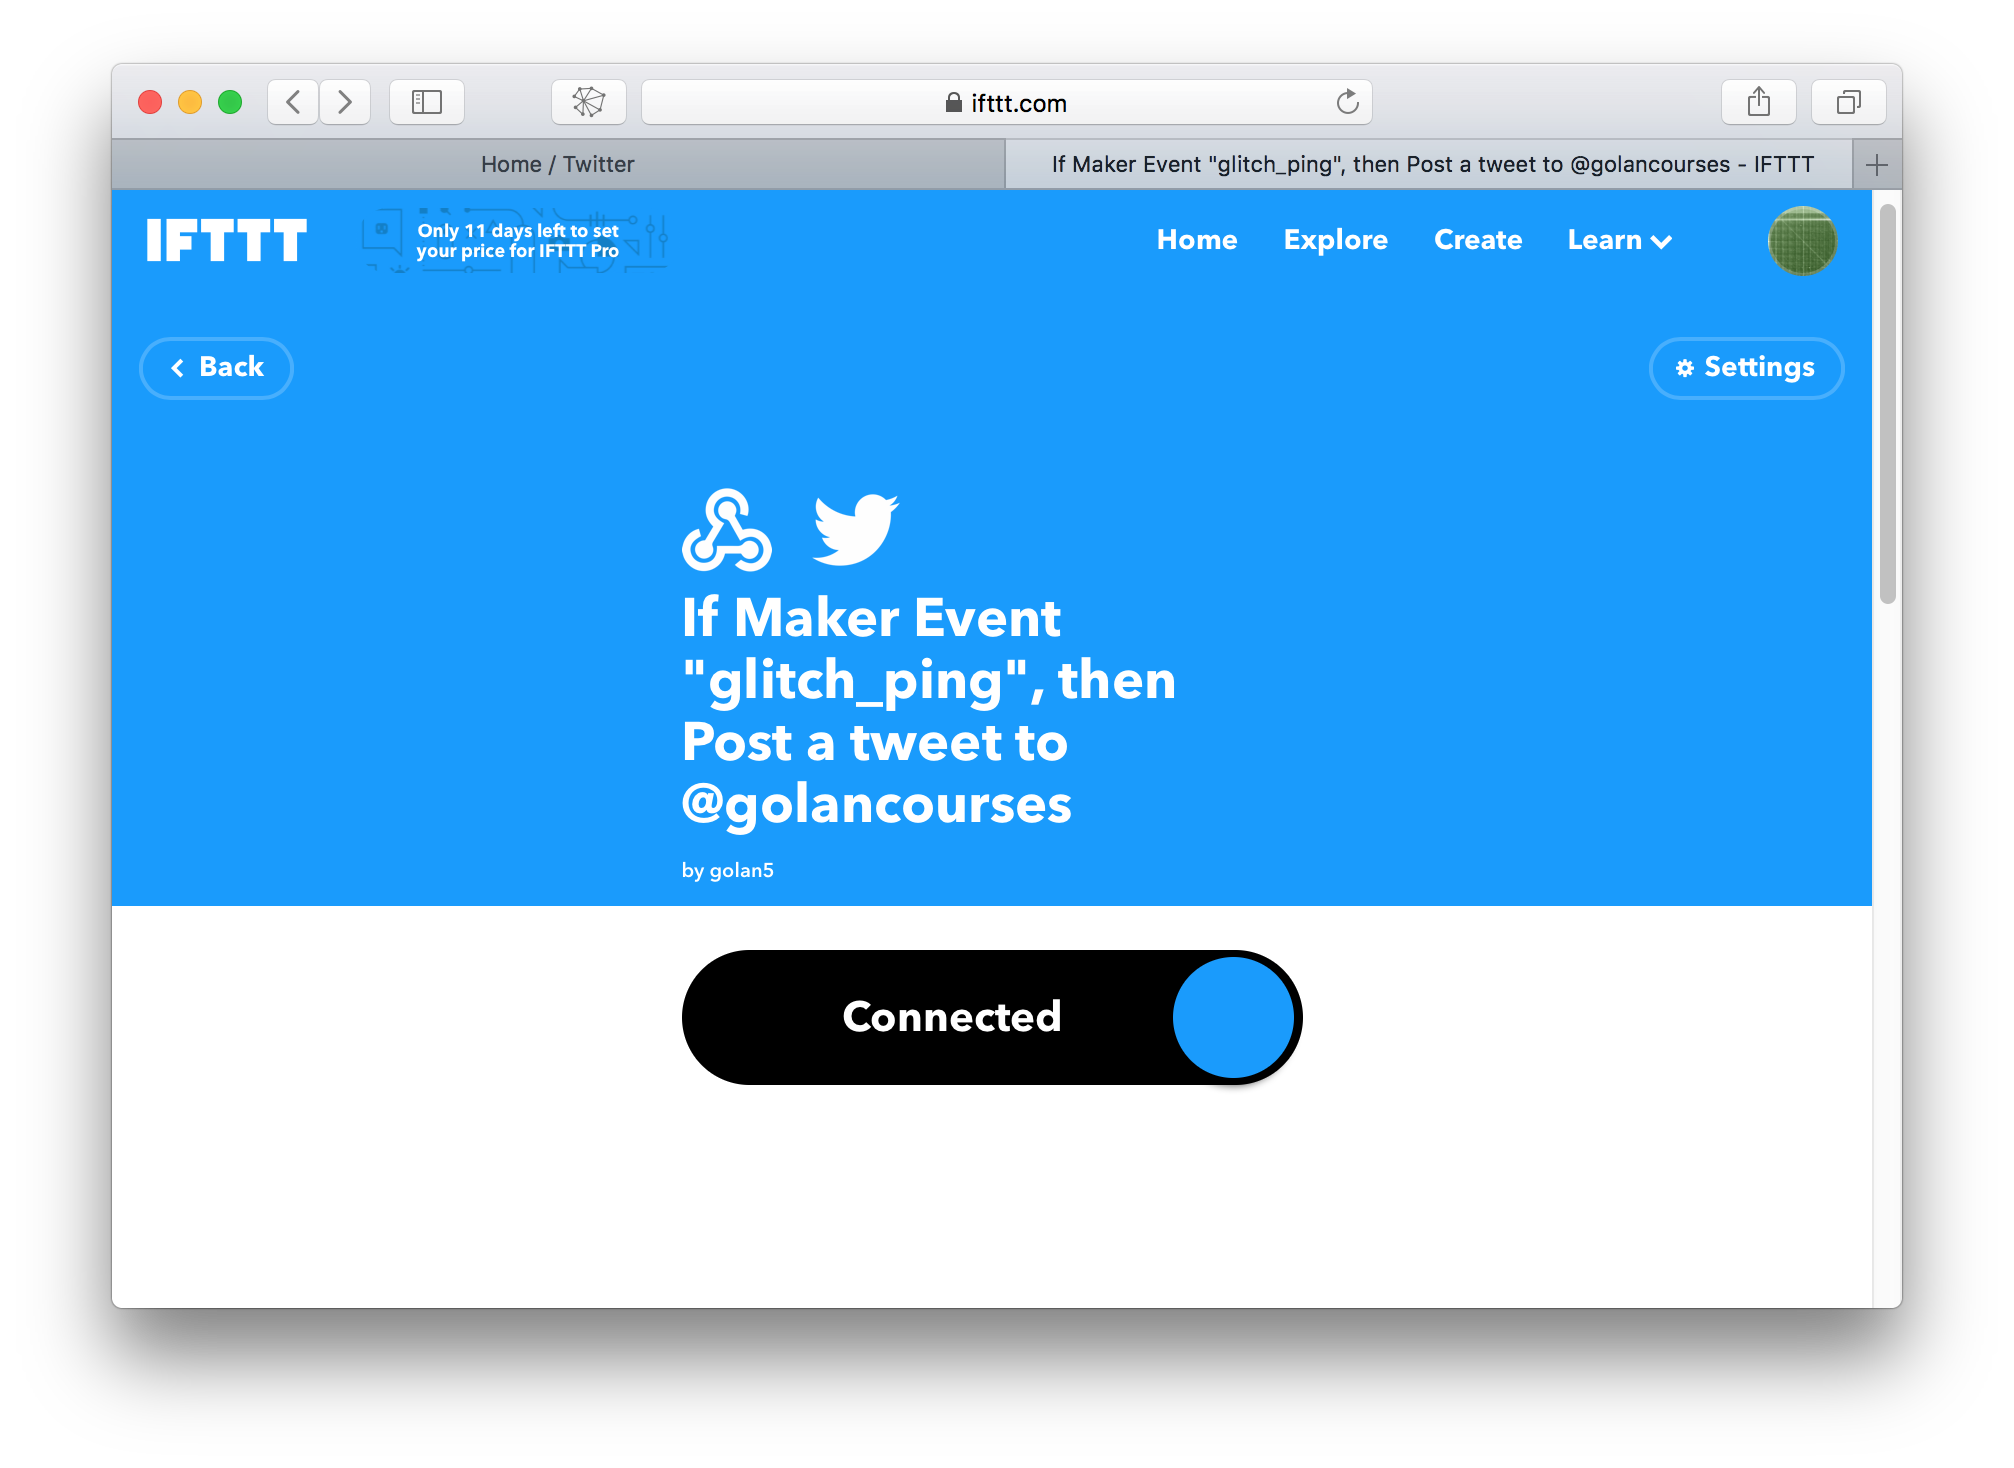
At this point you’ve created the IFTTT applet! You should see a screen that looks like this,
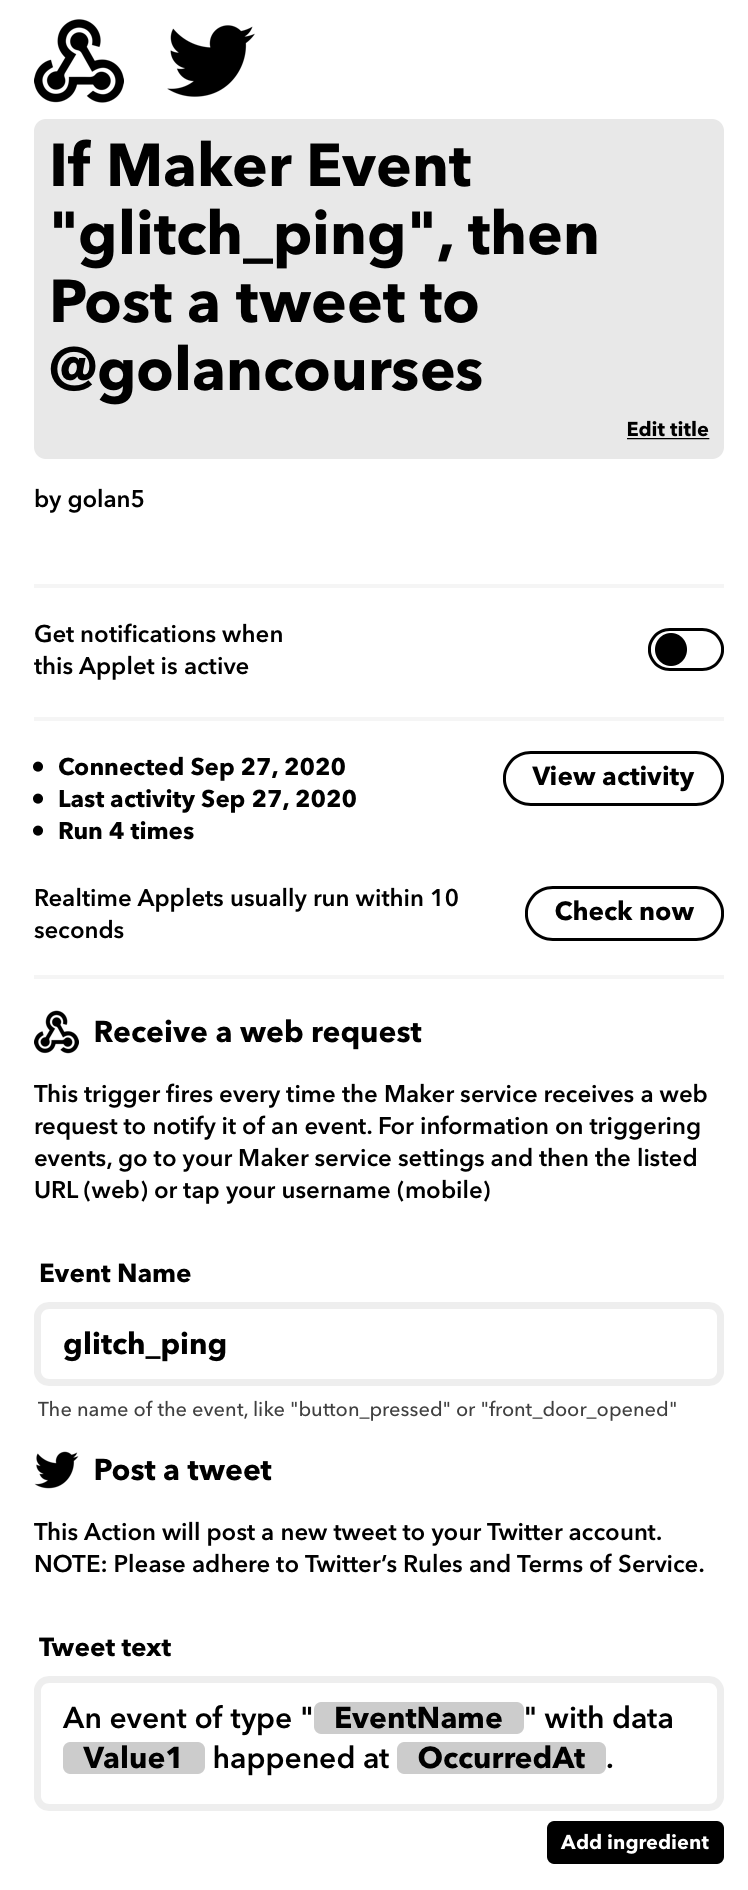
…and clicking on “Settings” (in the upper right) will pull up a summary of your applet which looks something like this:
There’s just one last thing to do, which is to locate your API key, and provide it to your Glitch project. In IFTTT, click on your account icon (in the upper right), select “My services” from the dropdown menu, choose WebHooks,

…and select “Documentation” or “Settings”
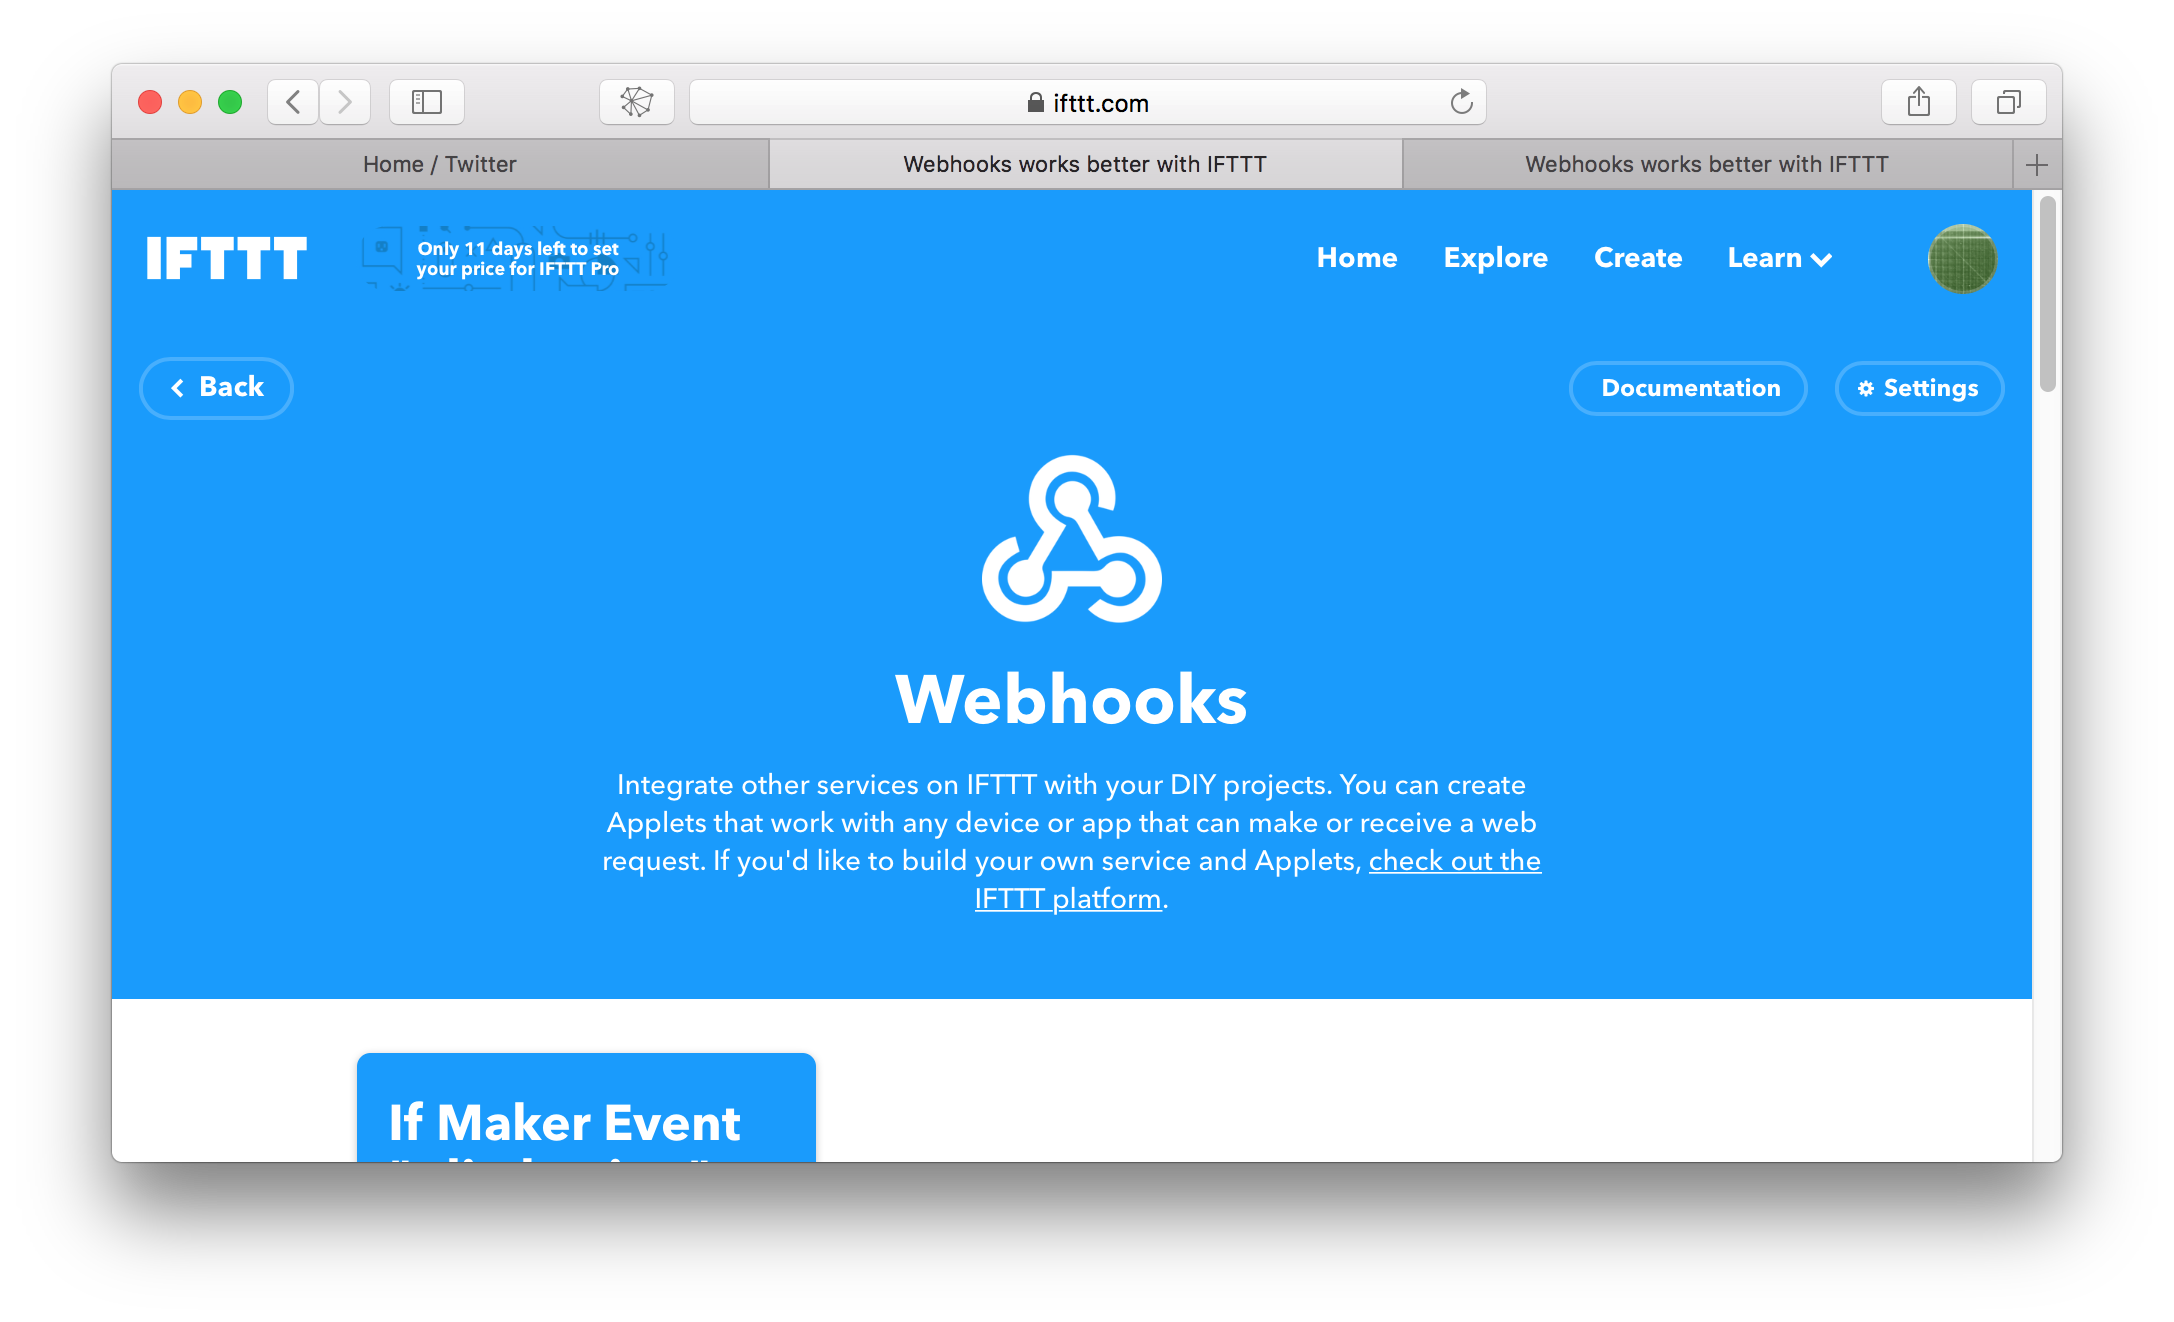
You’ll see a page that looks like this. The crazy-looking string is the API_KEY for your IFTTT WebHooks trigger. Copy-paste this in the key file in your Glitch project!

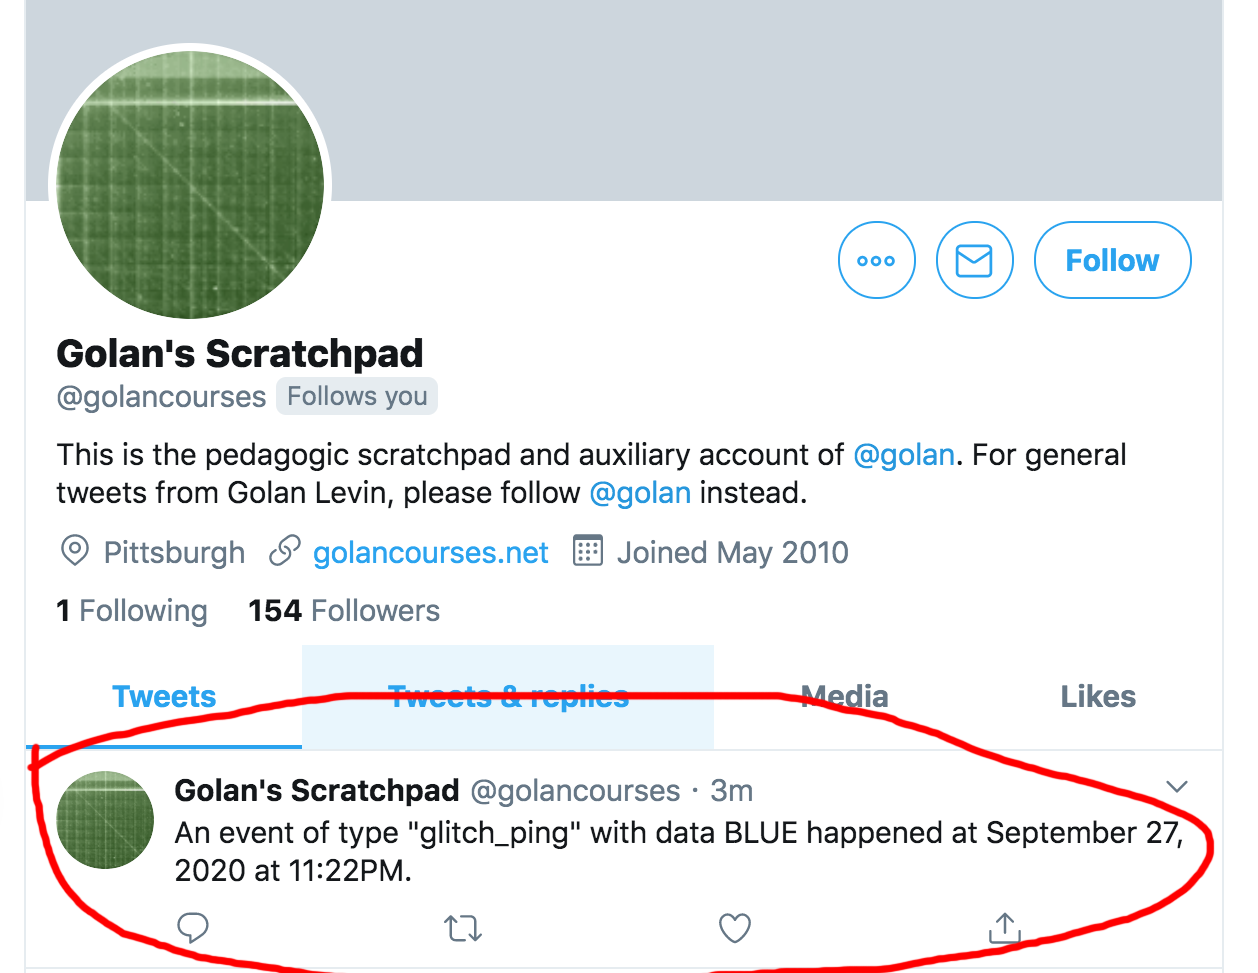
Run your project at Glitch.com and press the button on the p5.js canvas. If all goes well, you’ll have sent a Tweet! Here’s what it looks like for me:
Soli → IFTTT → ???
It’s straightforward to extend the above template to use Soli events. For example, you could make an app which, when someone approached the phone, it placed an order for a pizza, etc. My assistant Lingdong has made a Soli-to-IFTTT template project for you along these lines:
- https://glitch.com/~solifttt (code)
- http://solifttt.glitch.me/ (live)