For this assignment, I thought about how I could incorporate light and emotion, simply because I wanted to experiment with LEDs. It got me thinking about how people in your life enhance your emotions and can affect your personality.
“Light up my life”
This then got me thinking about a system that requires another person to work, similar to how friends and people can figuratively light up your life.
The concept: A garment that can be worn and connected to a sensor that when a buddy interacts with it, controls the lights on the garment.
Materials:
- White 3.3V LEDs
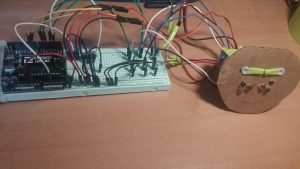
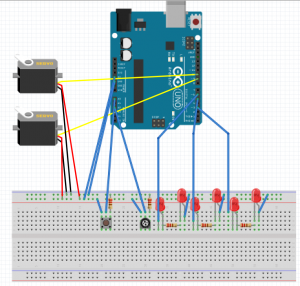
- photoresistor
- breadboard
- Arduino UNO
- 10K resistor
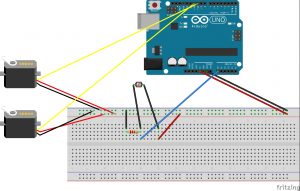
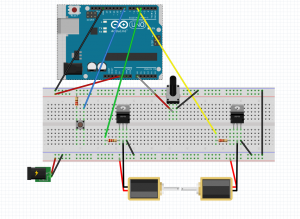
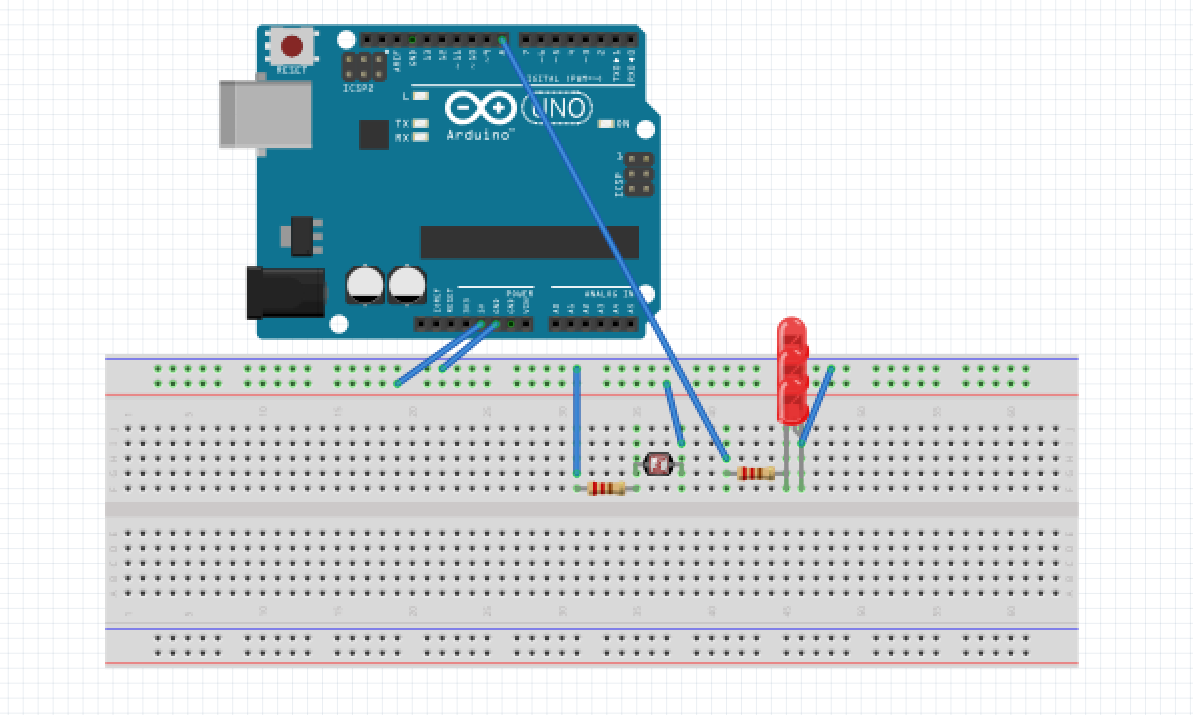
Circuit:
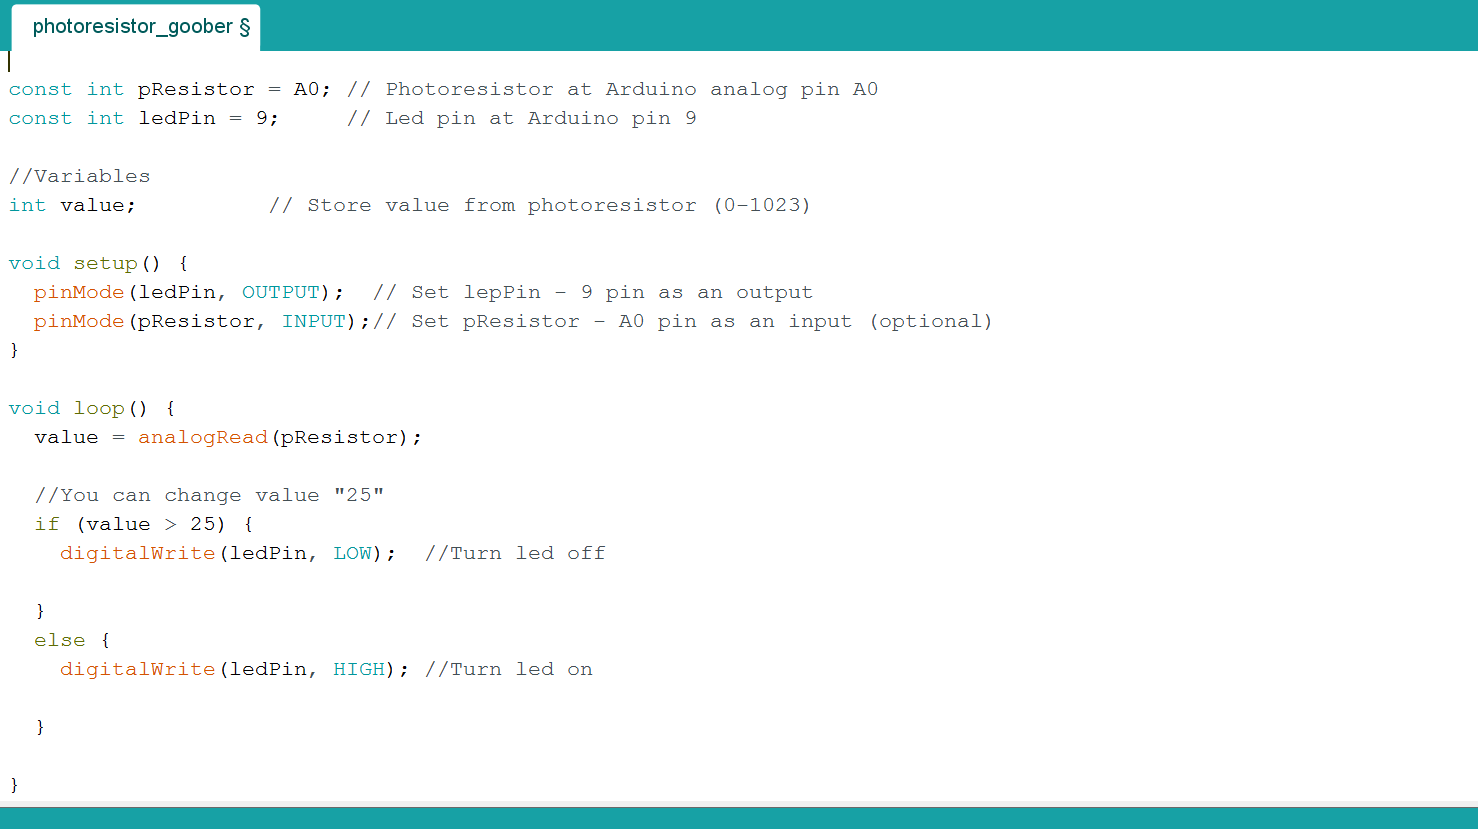
Code:
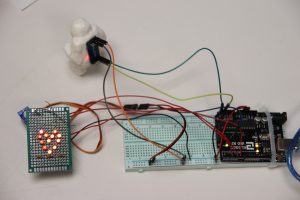
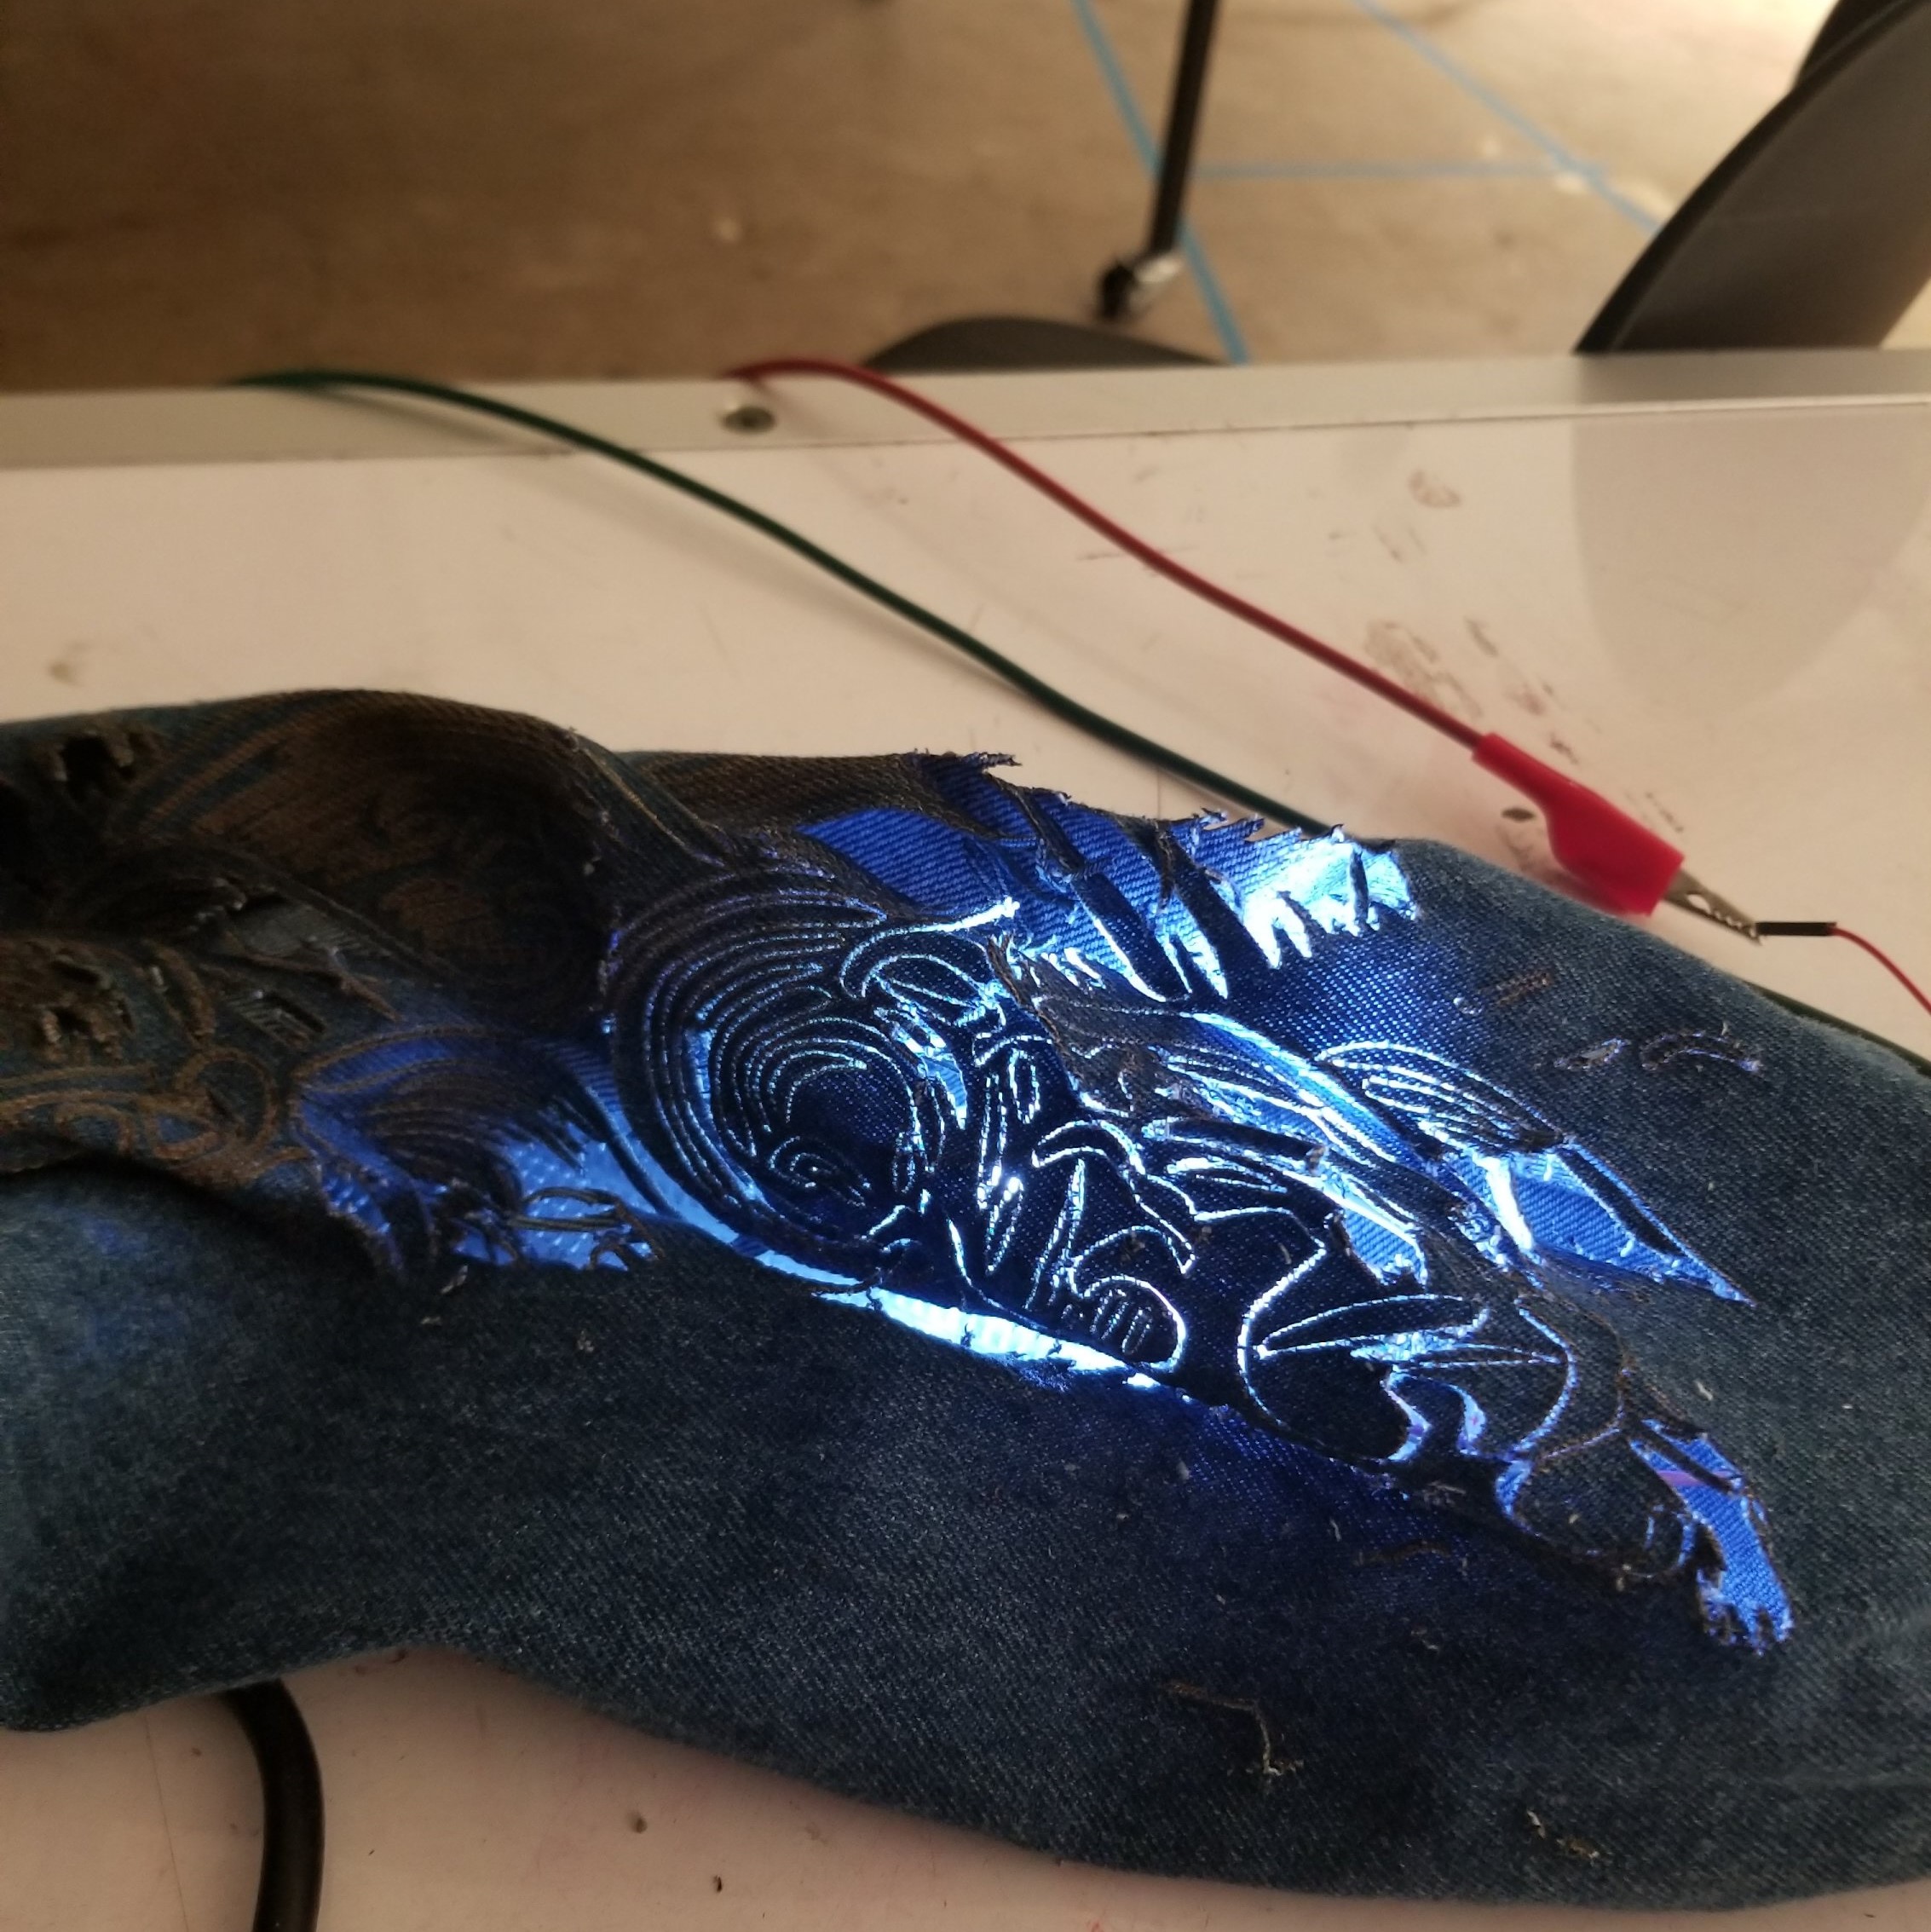
Final:
I lasercut a pattern on the sleeve of the garment for the LEDs to backlight and it came out pretty well. It was my first time cutting denim and I definitely learned alot.
Some issues, I came across included how to hook up multiple LEDs and also how to keep the intricate cut from literally falling apart. In the end, I taped the LEDs to the interior of the garment. I then connected the photoresistor to a long cable so it could be used further away.
https://drive.google.com/a/andrew.cmu.edu/file/d/1D7Aqdvy5j_6Vw1Z2MNTsgaQRJGrlnicv/view?usp=sharing