Categories
Gallery Tapestry Weavings

Weaving Final Reflection – Carol

Visual Portfolio, Posts & Image Gallery for WordPress

Progress

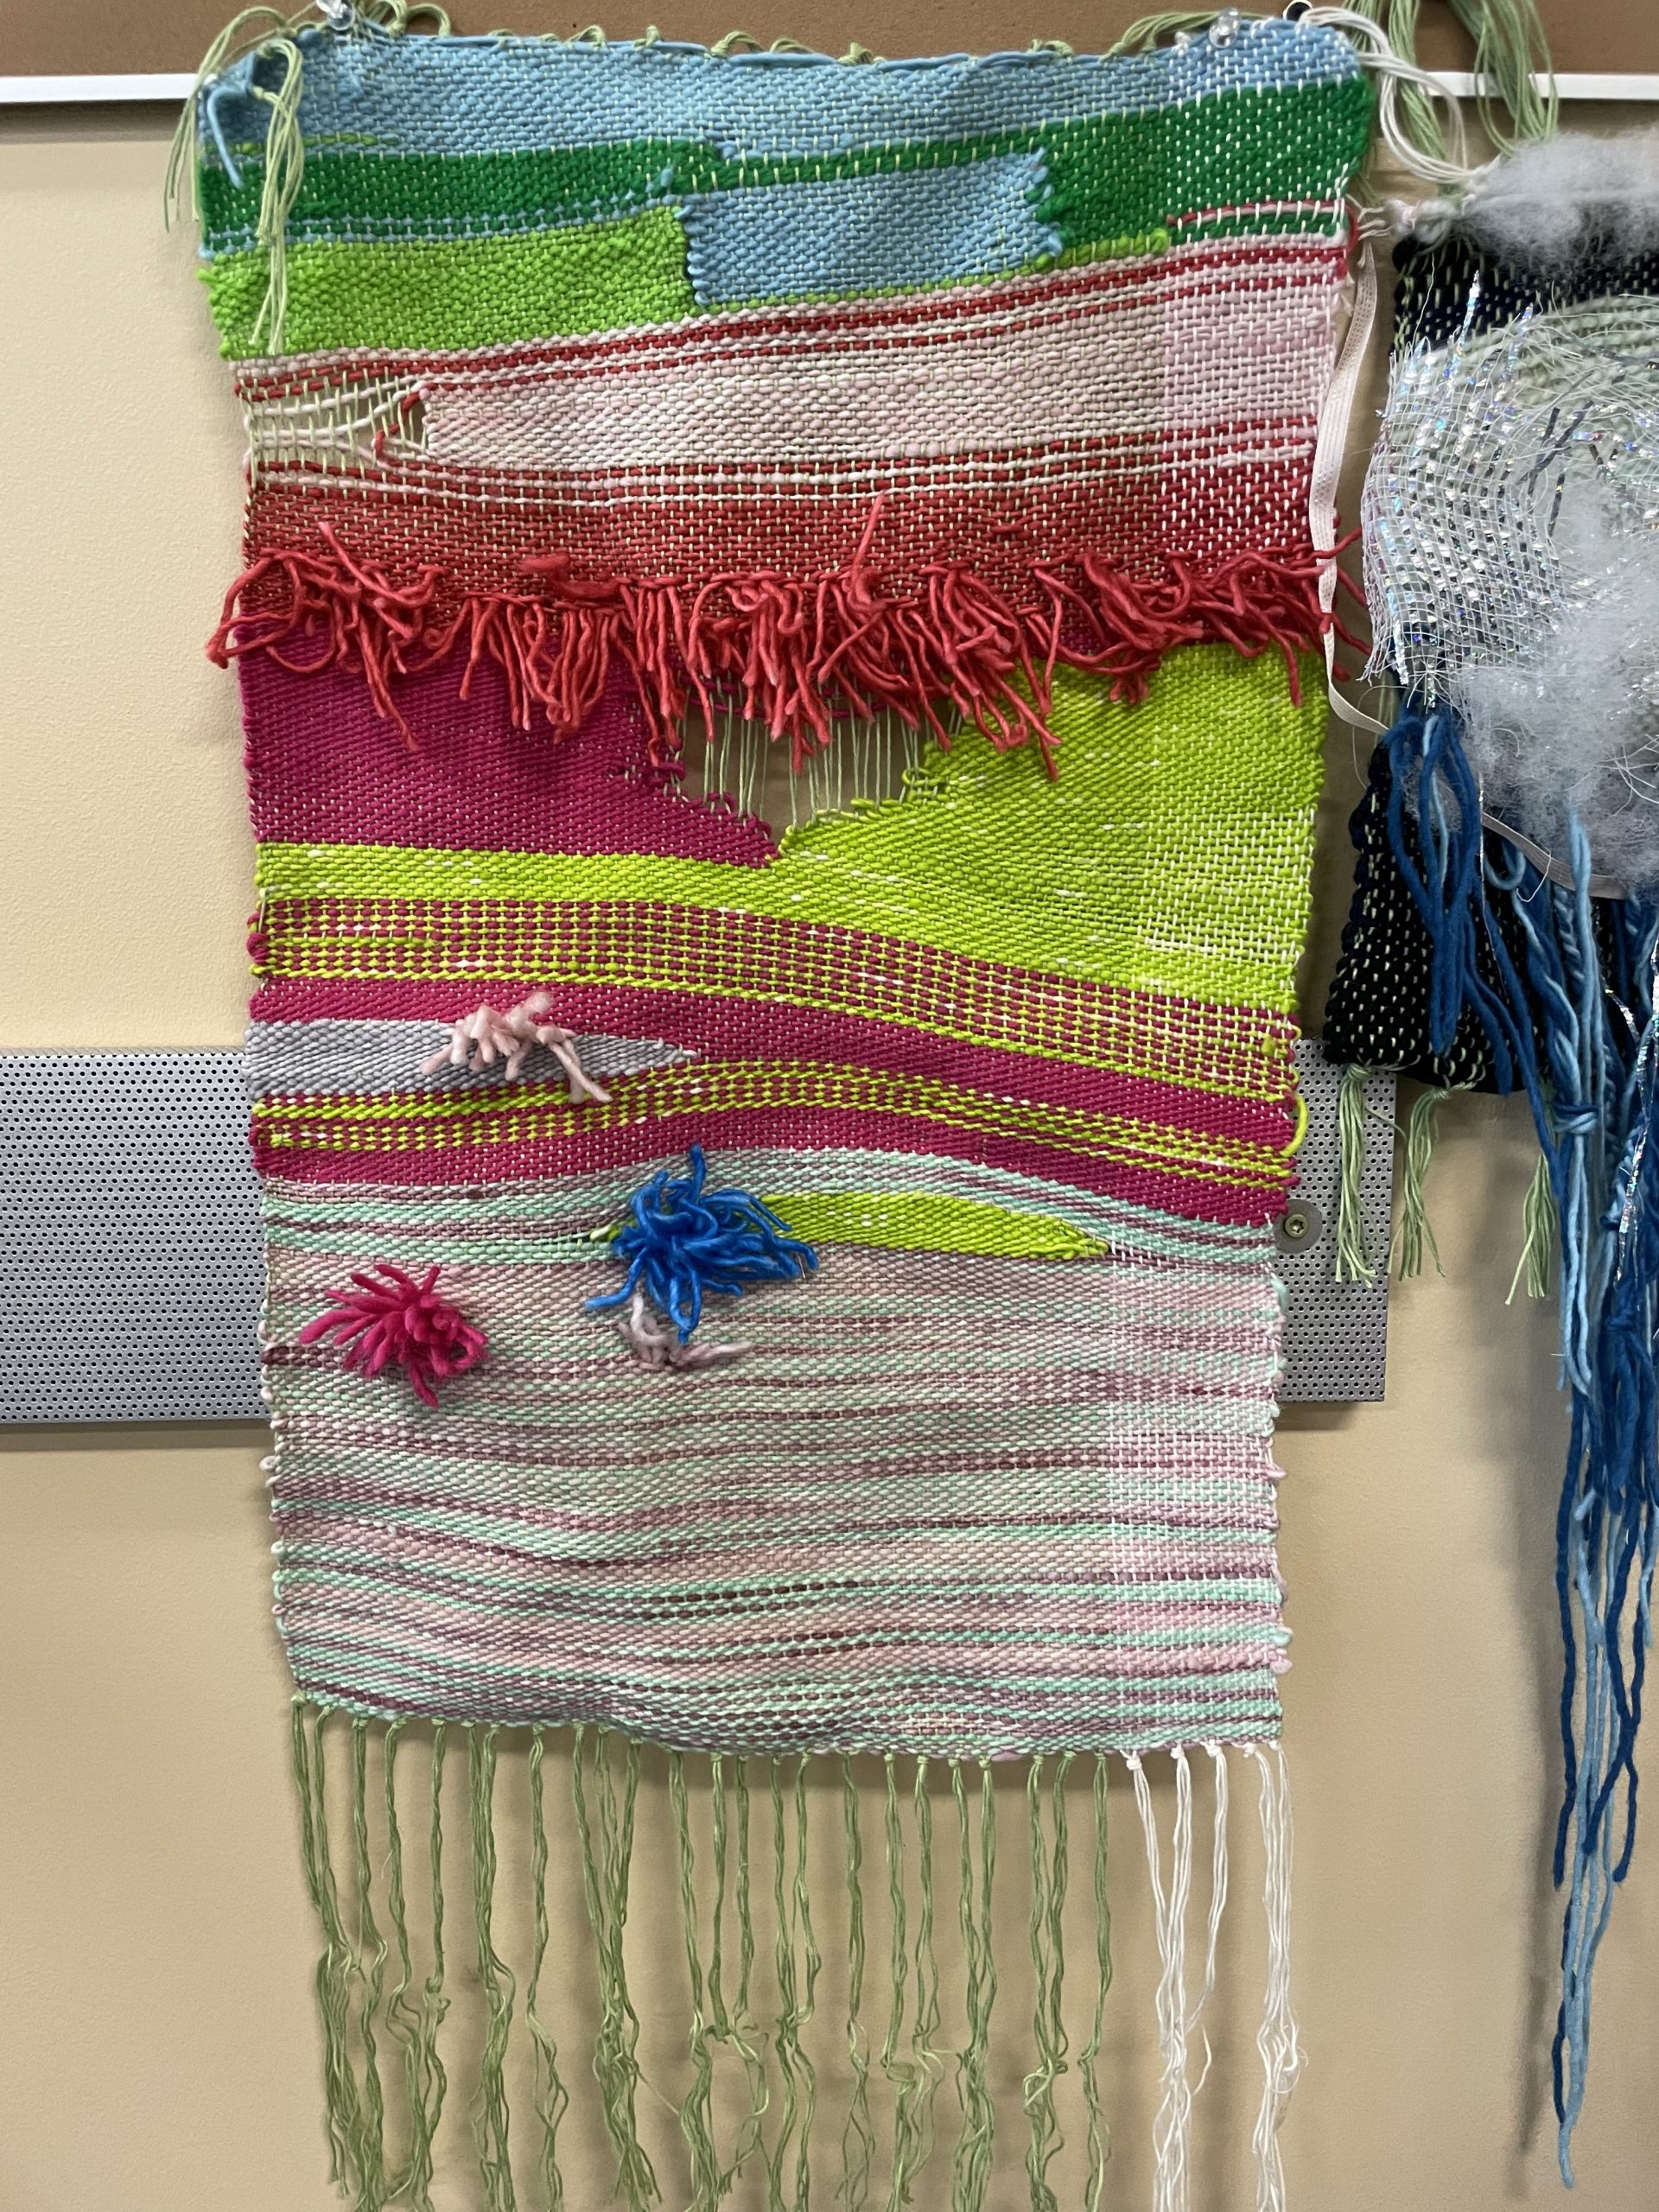
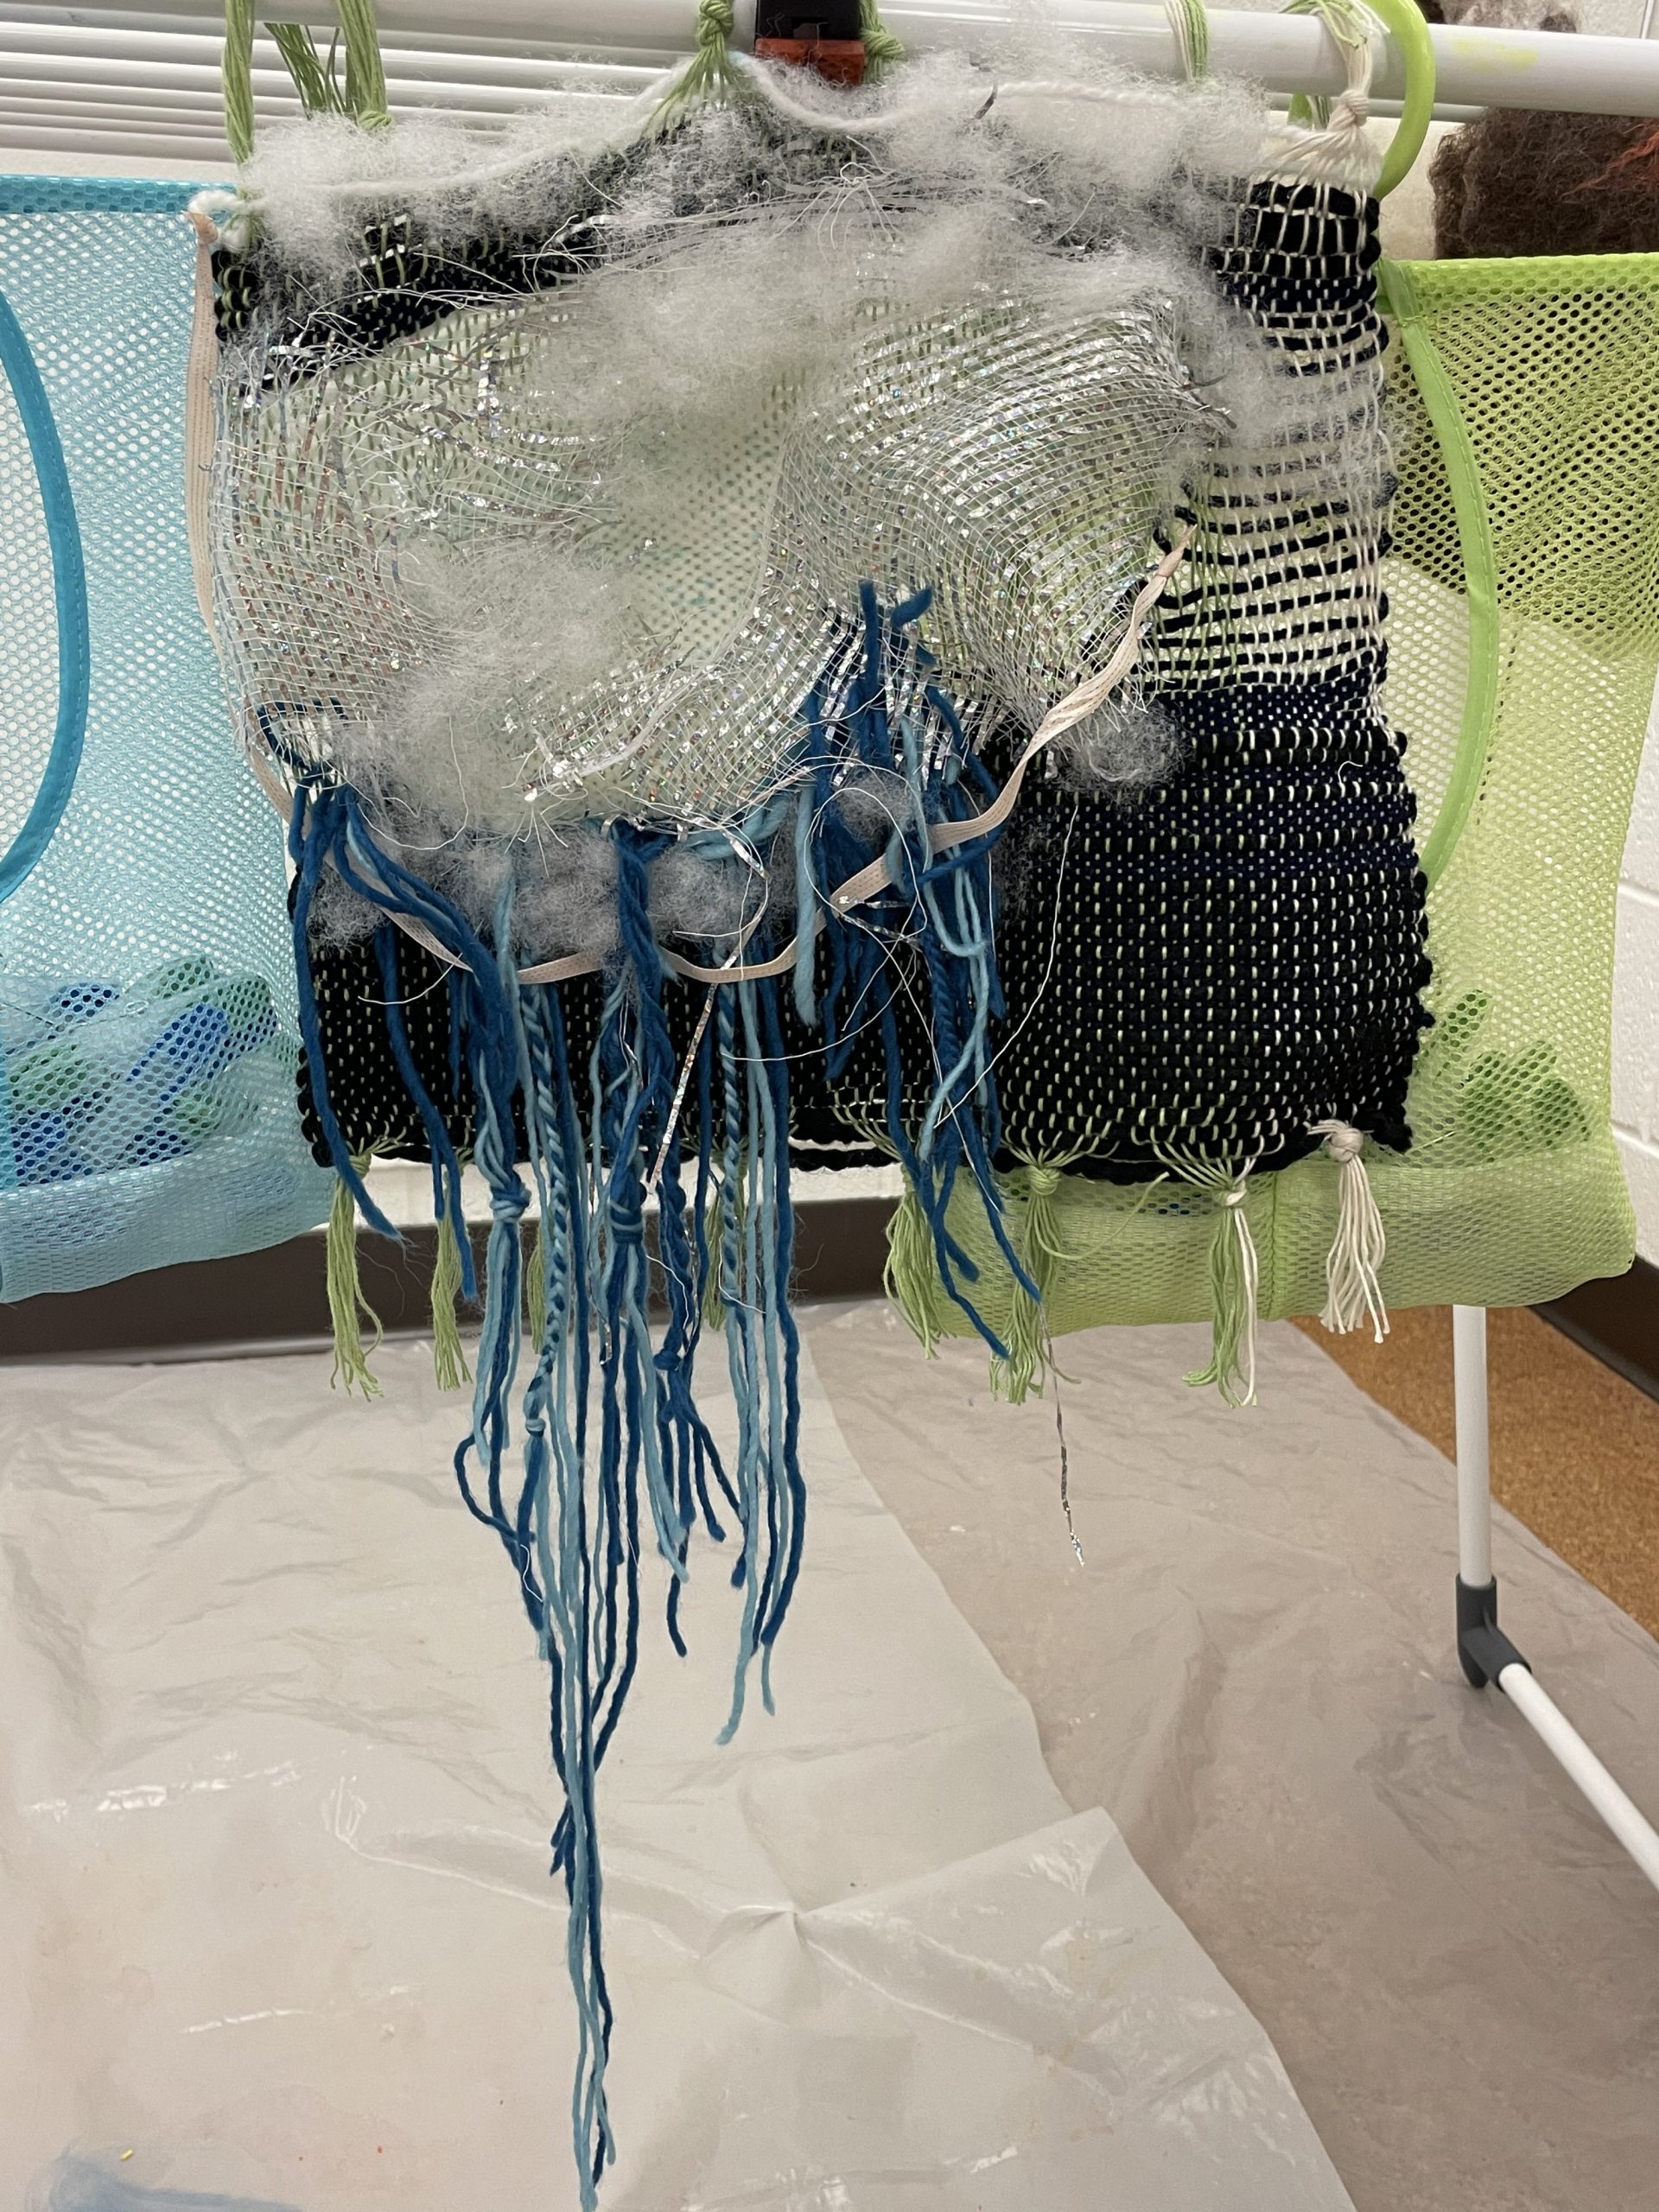
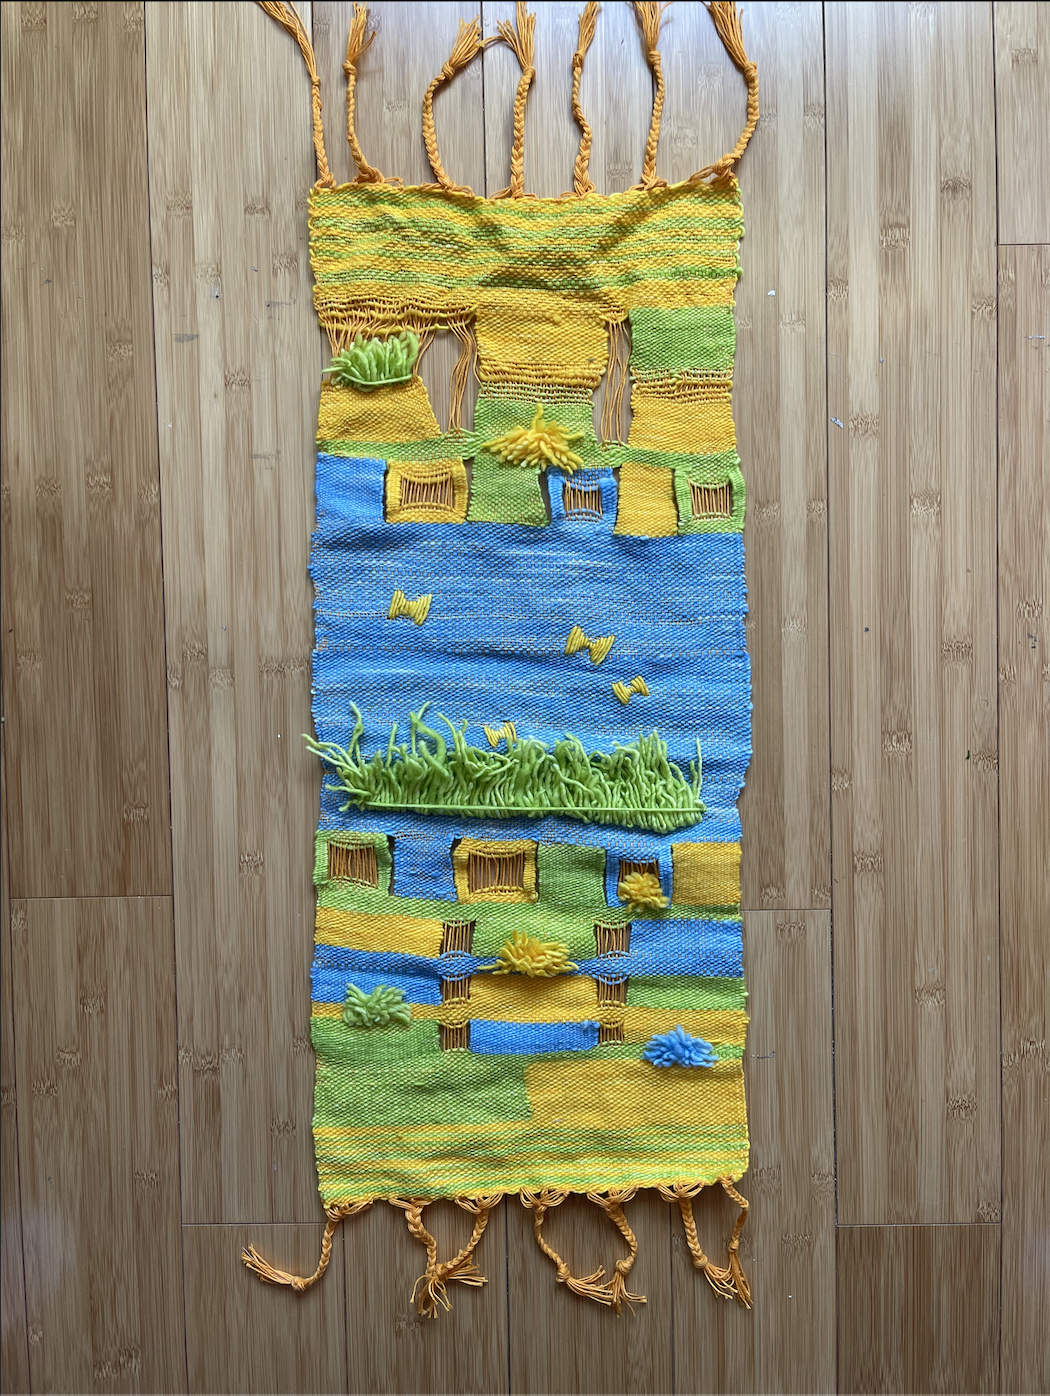
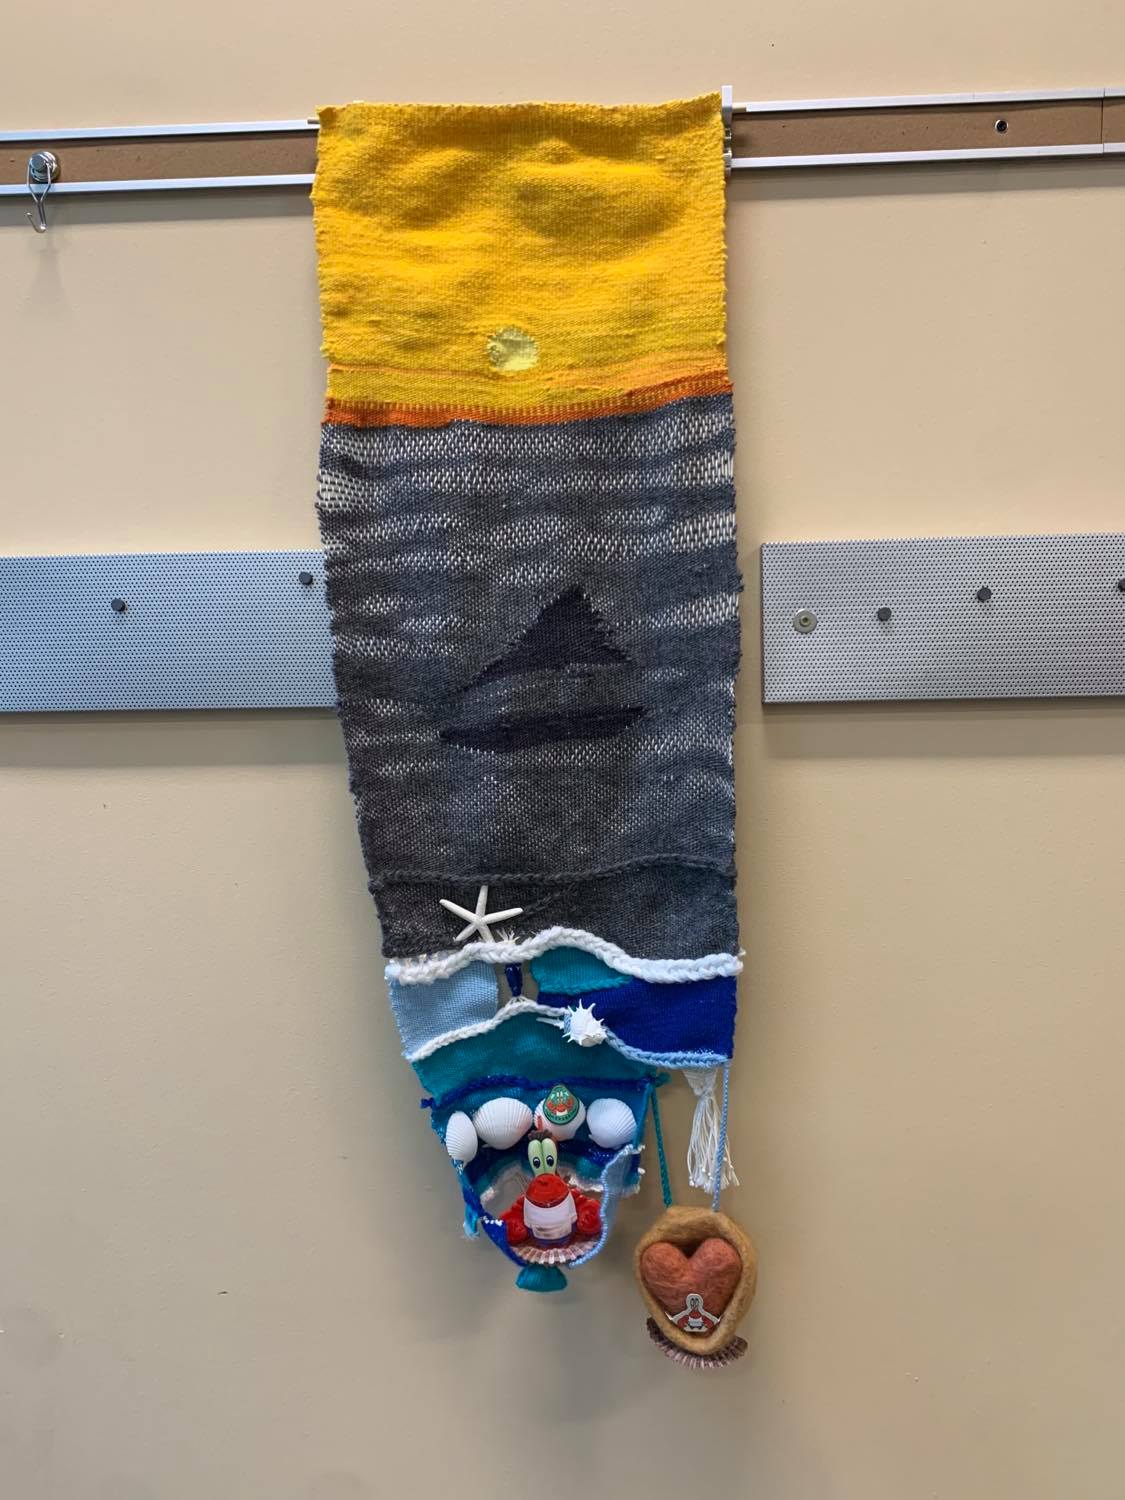
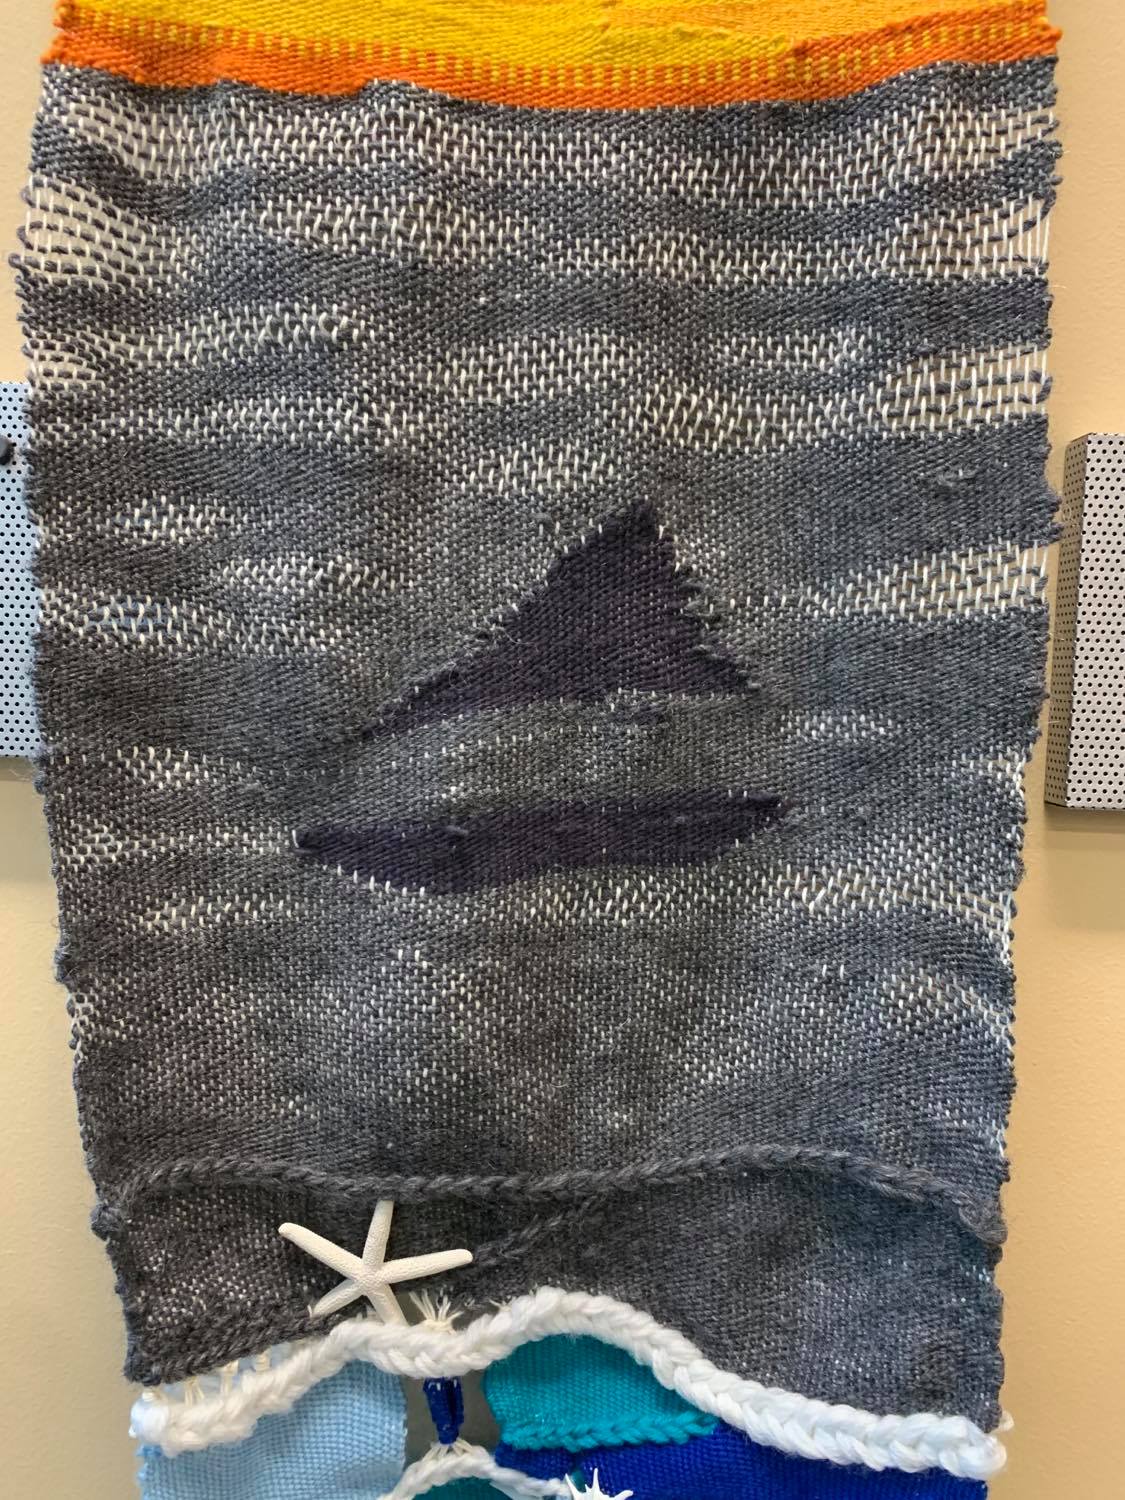
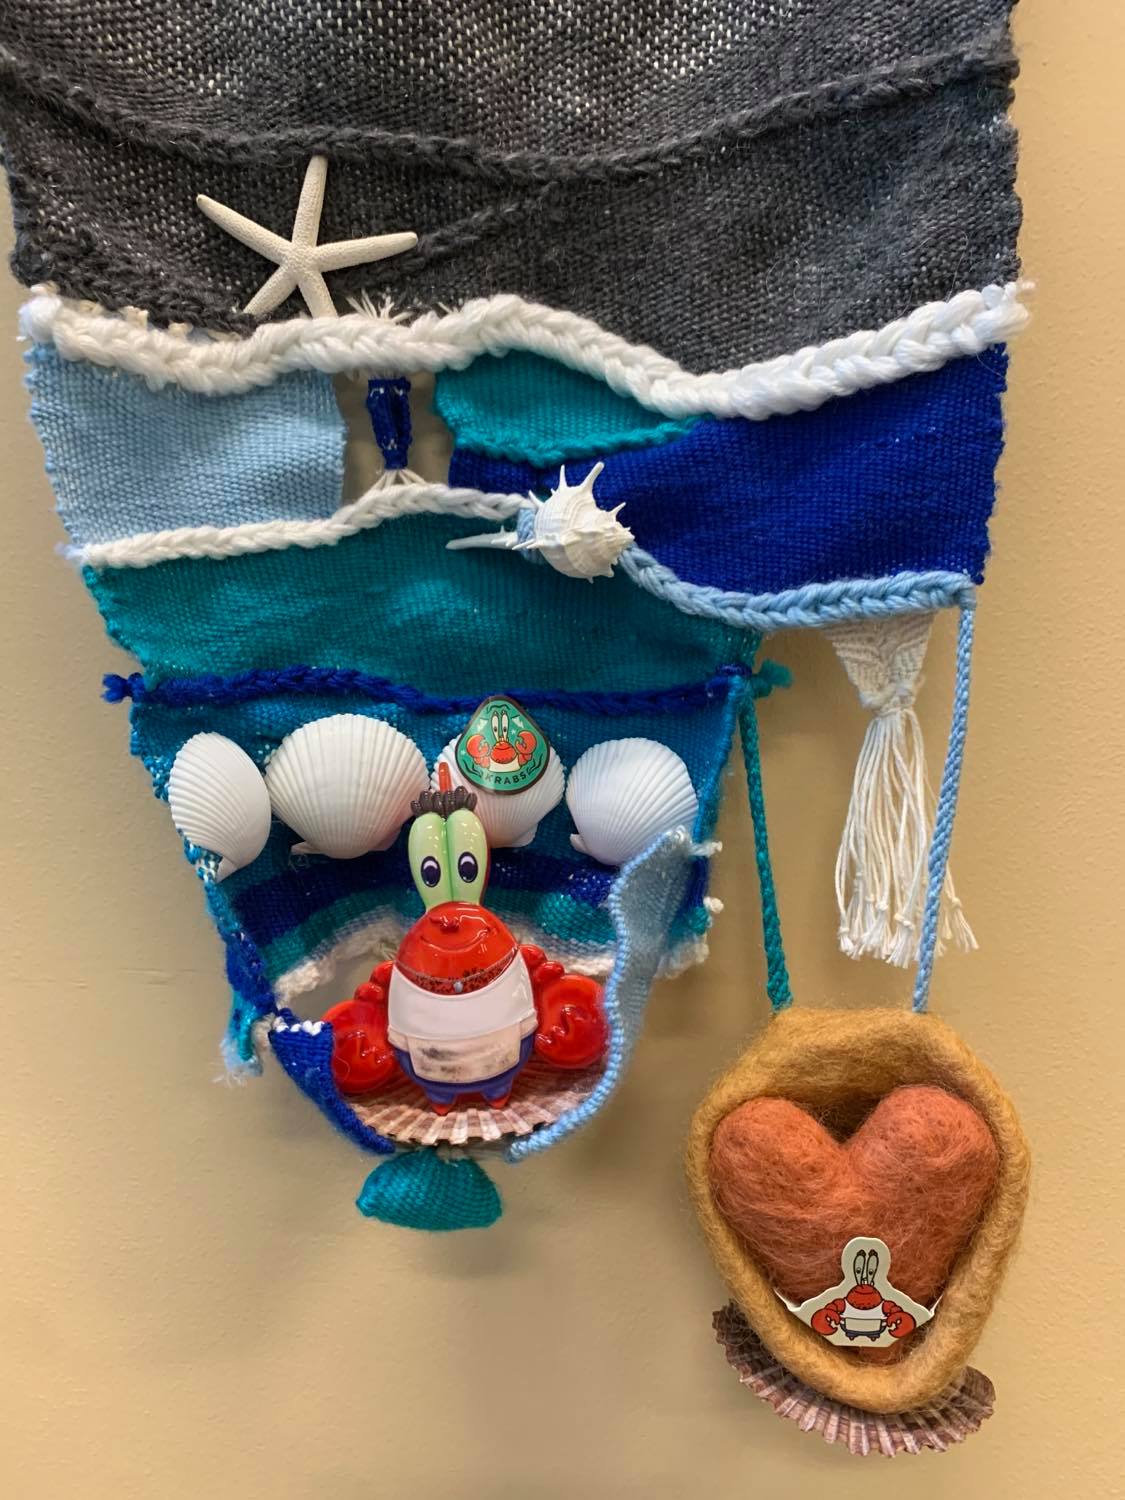
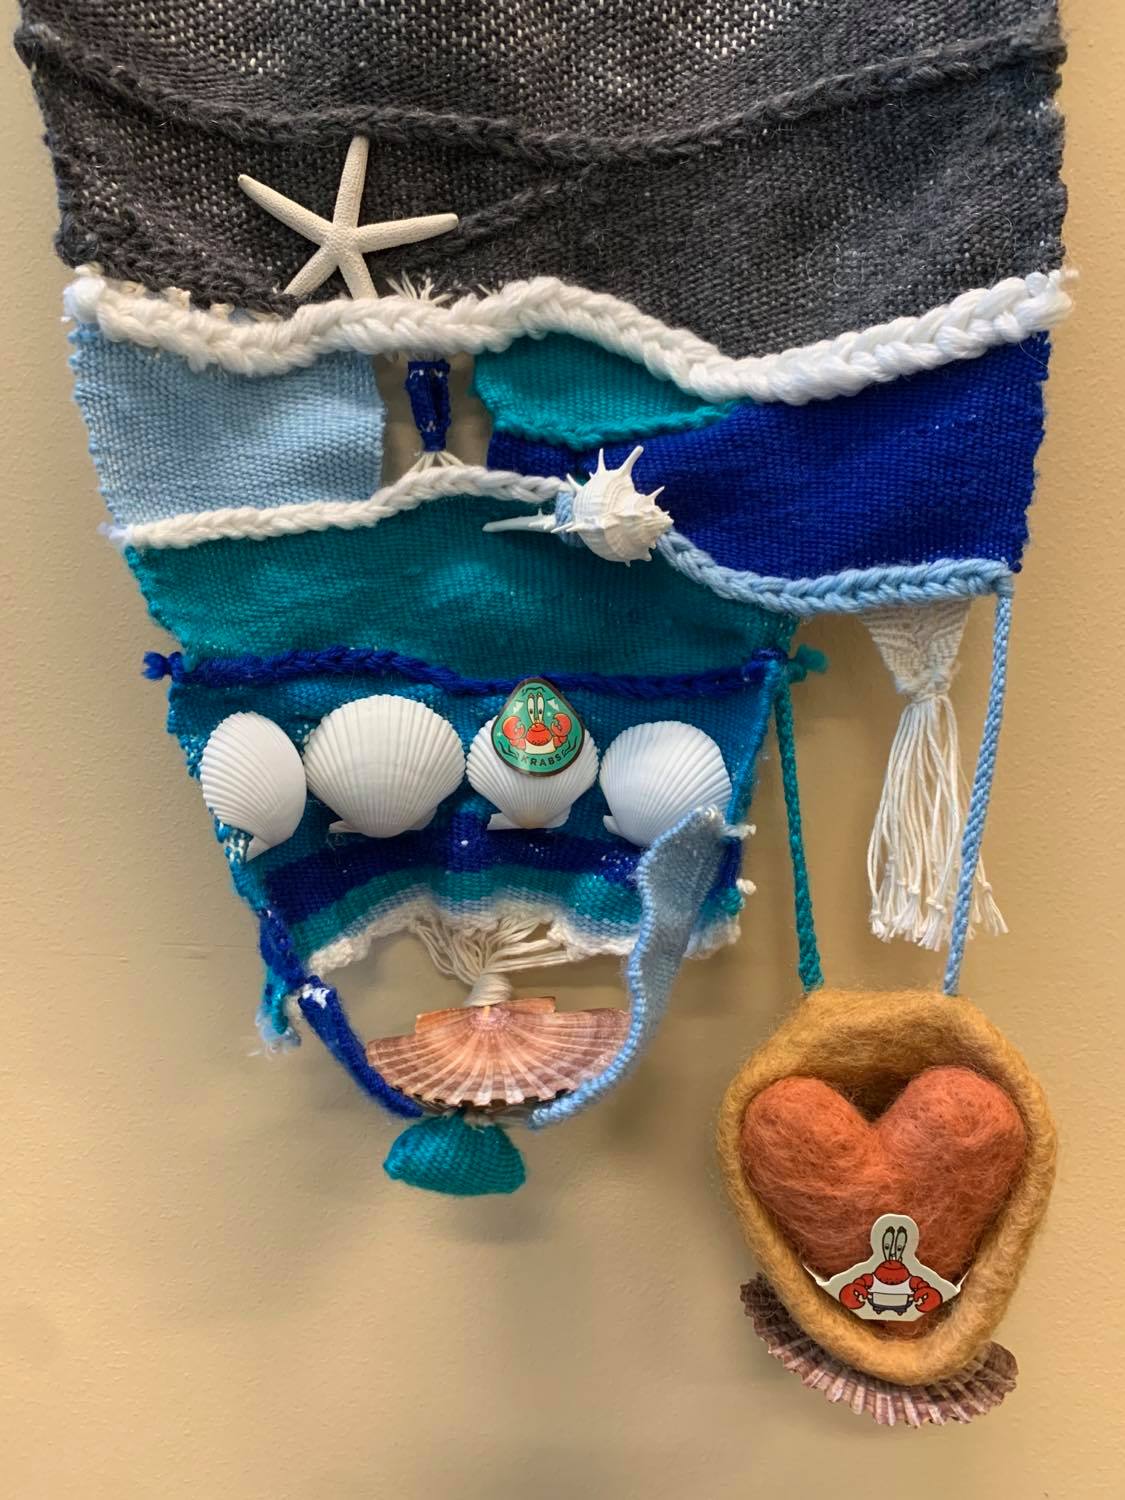
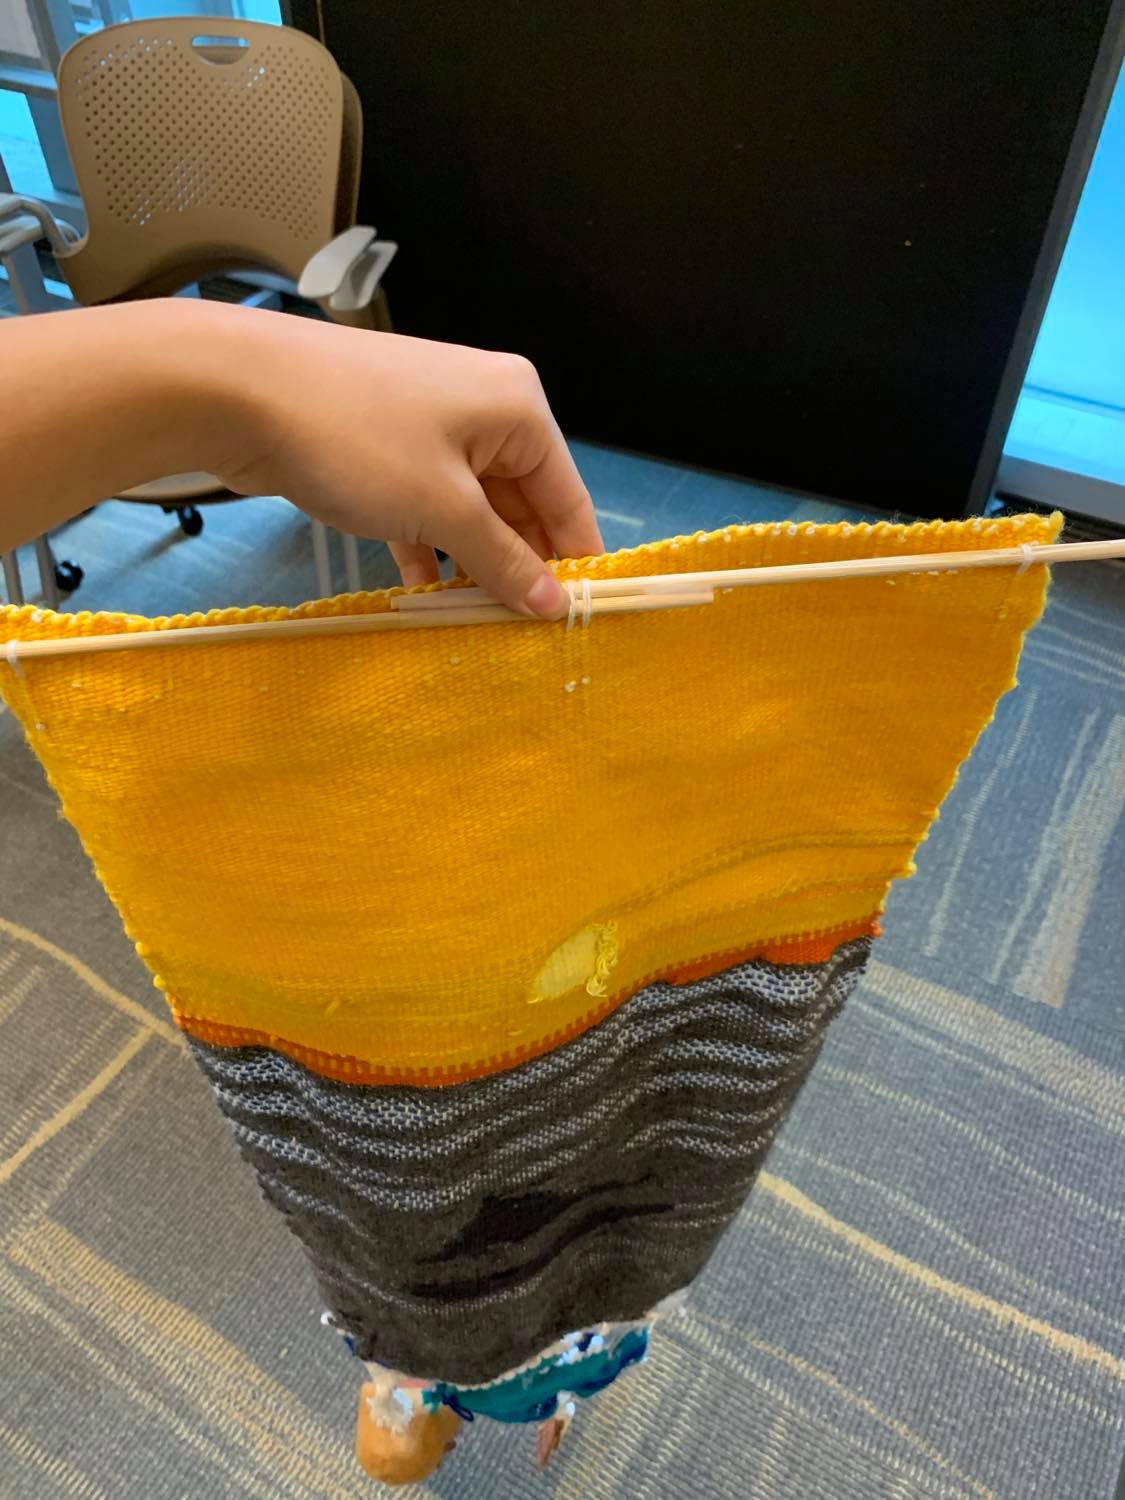
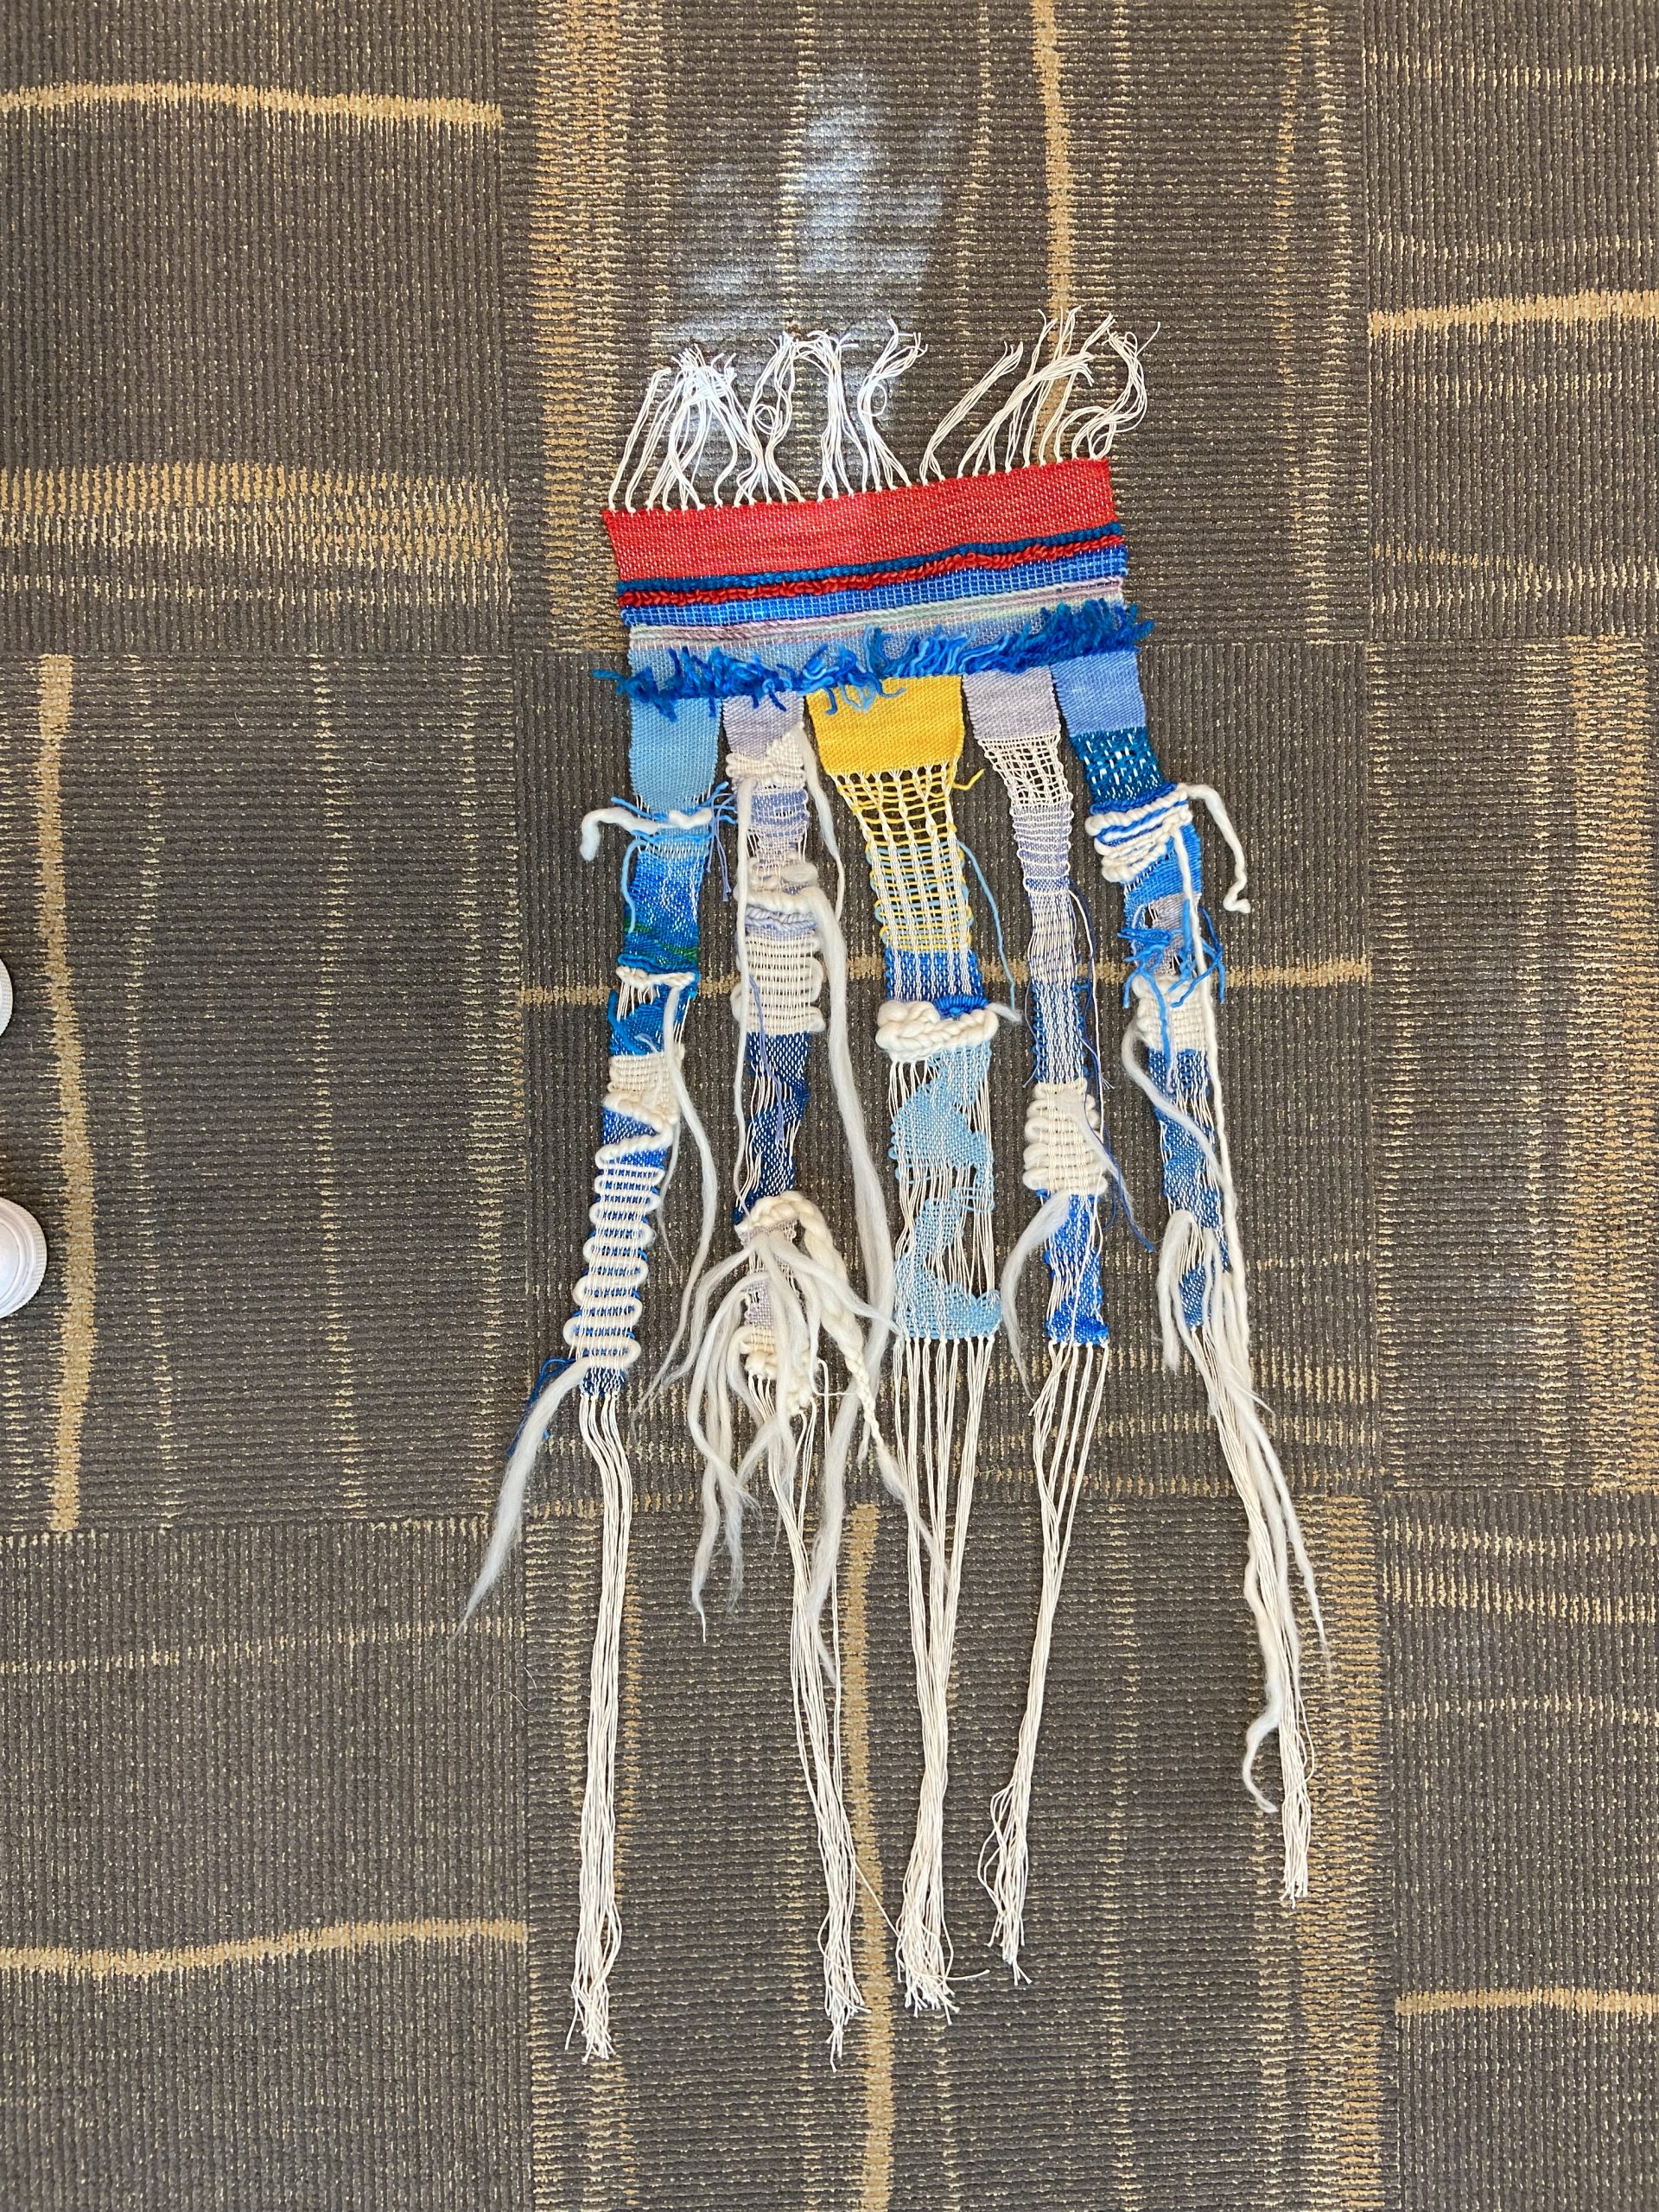
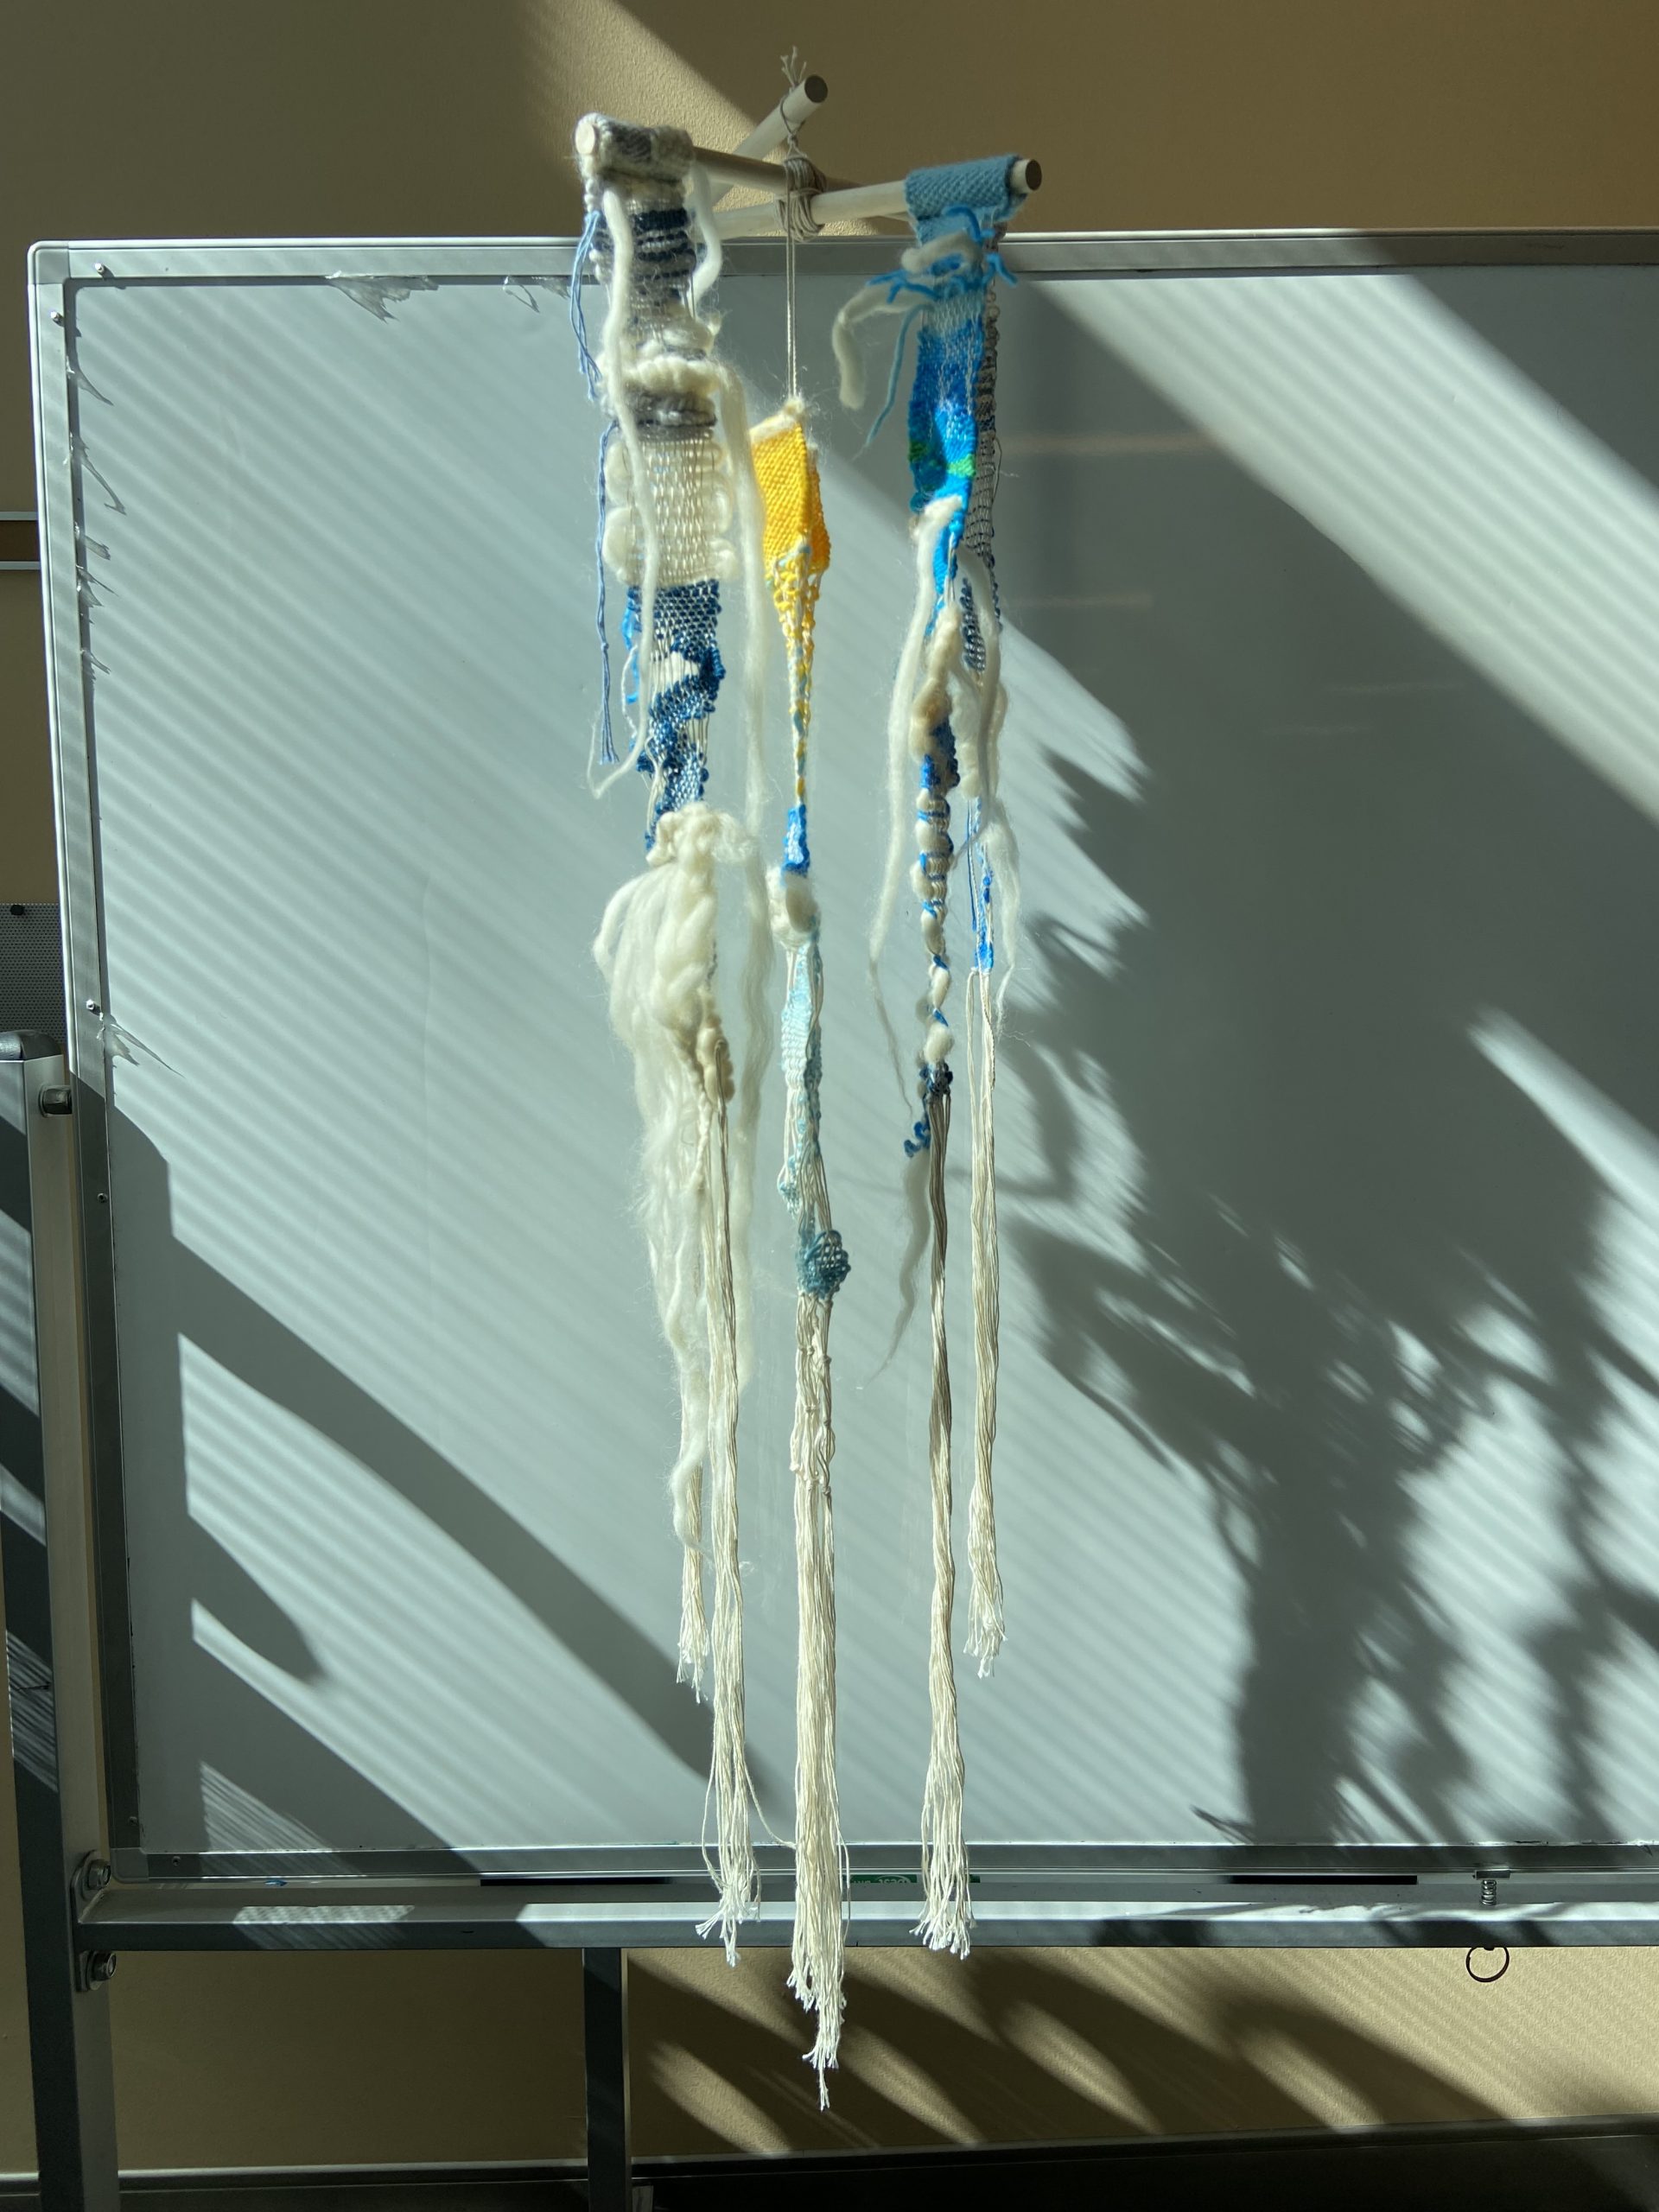
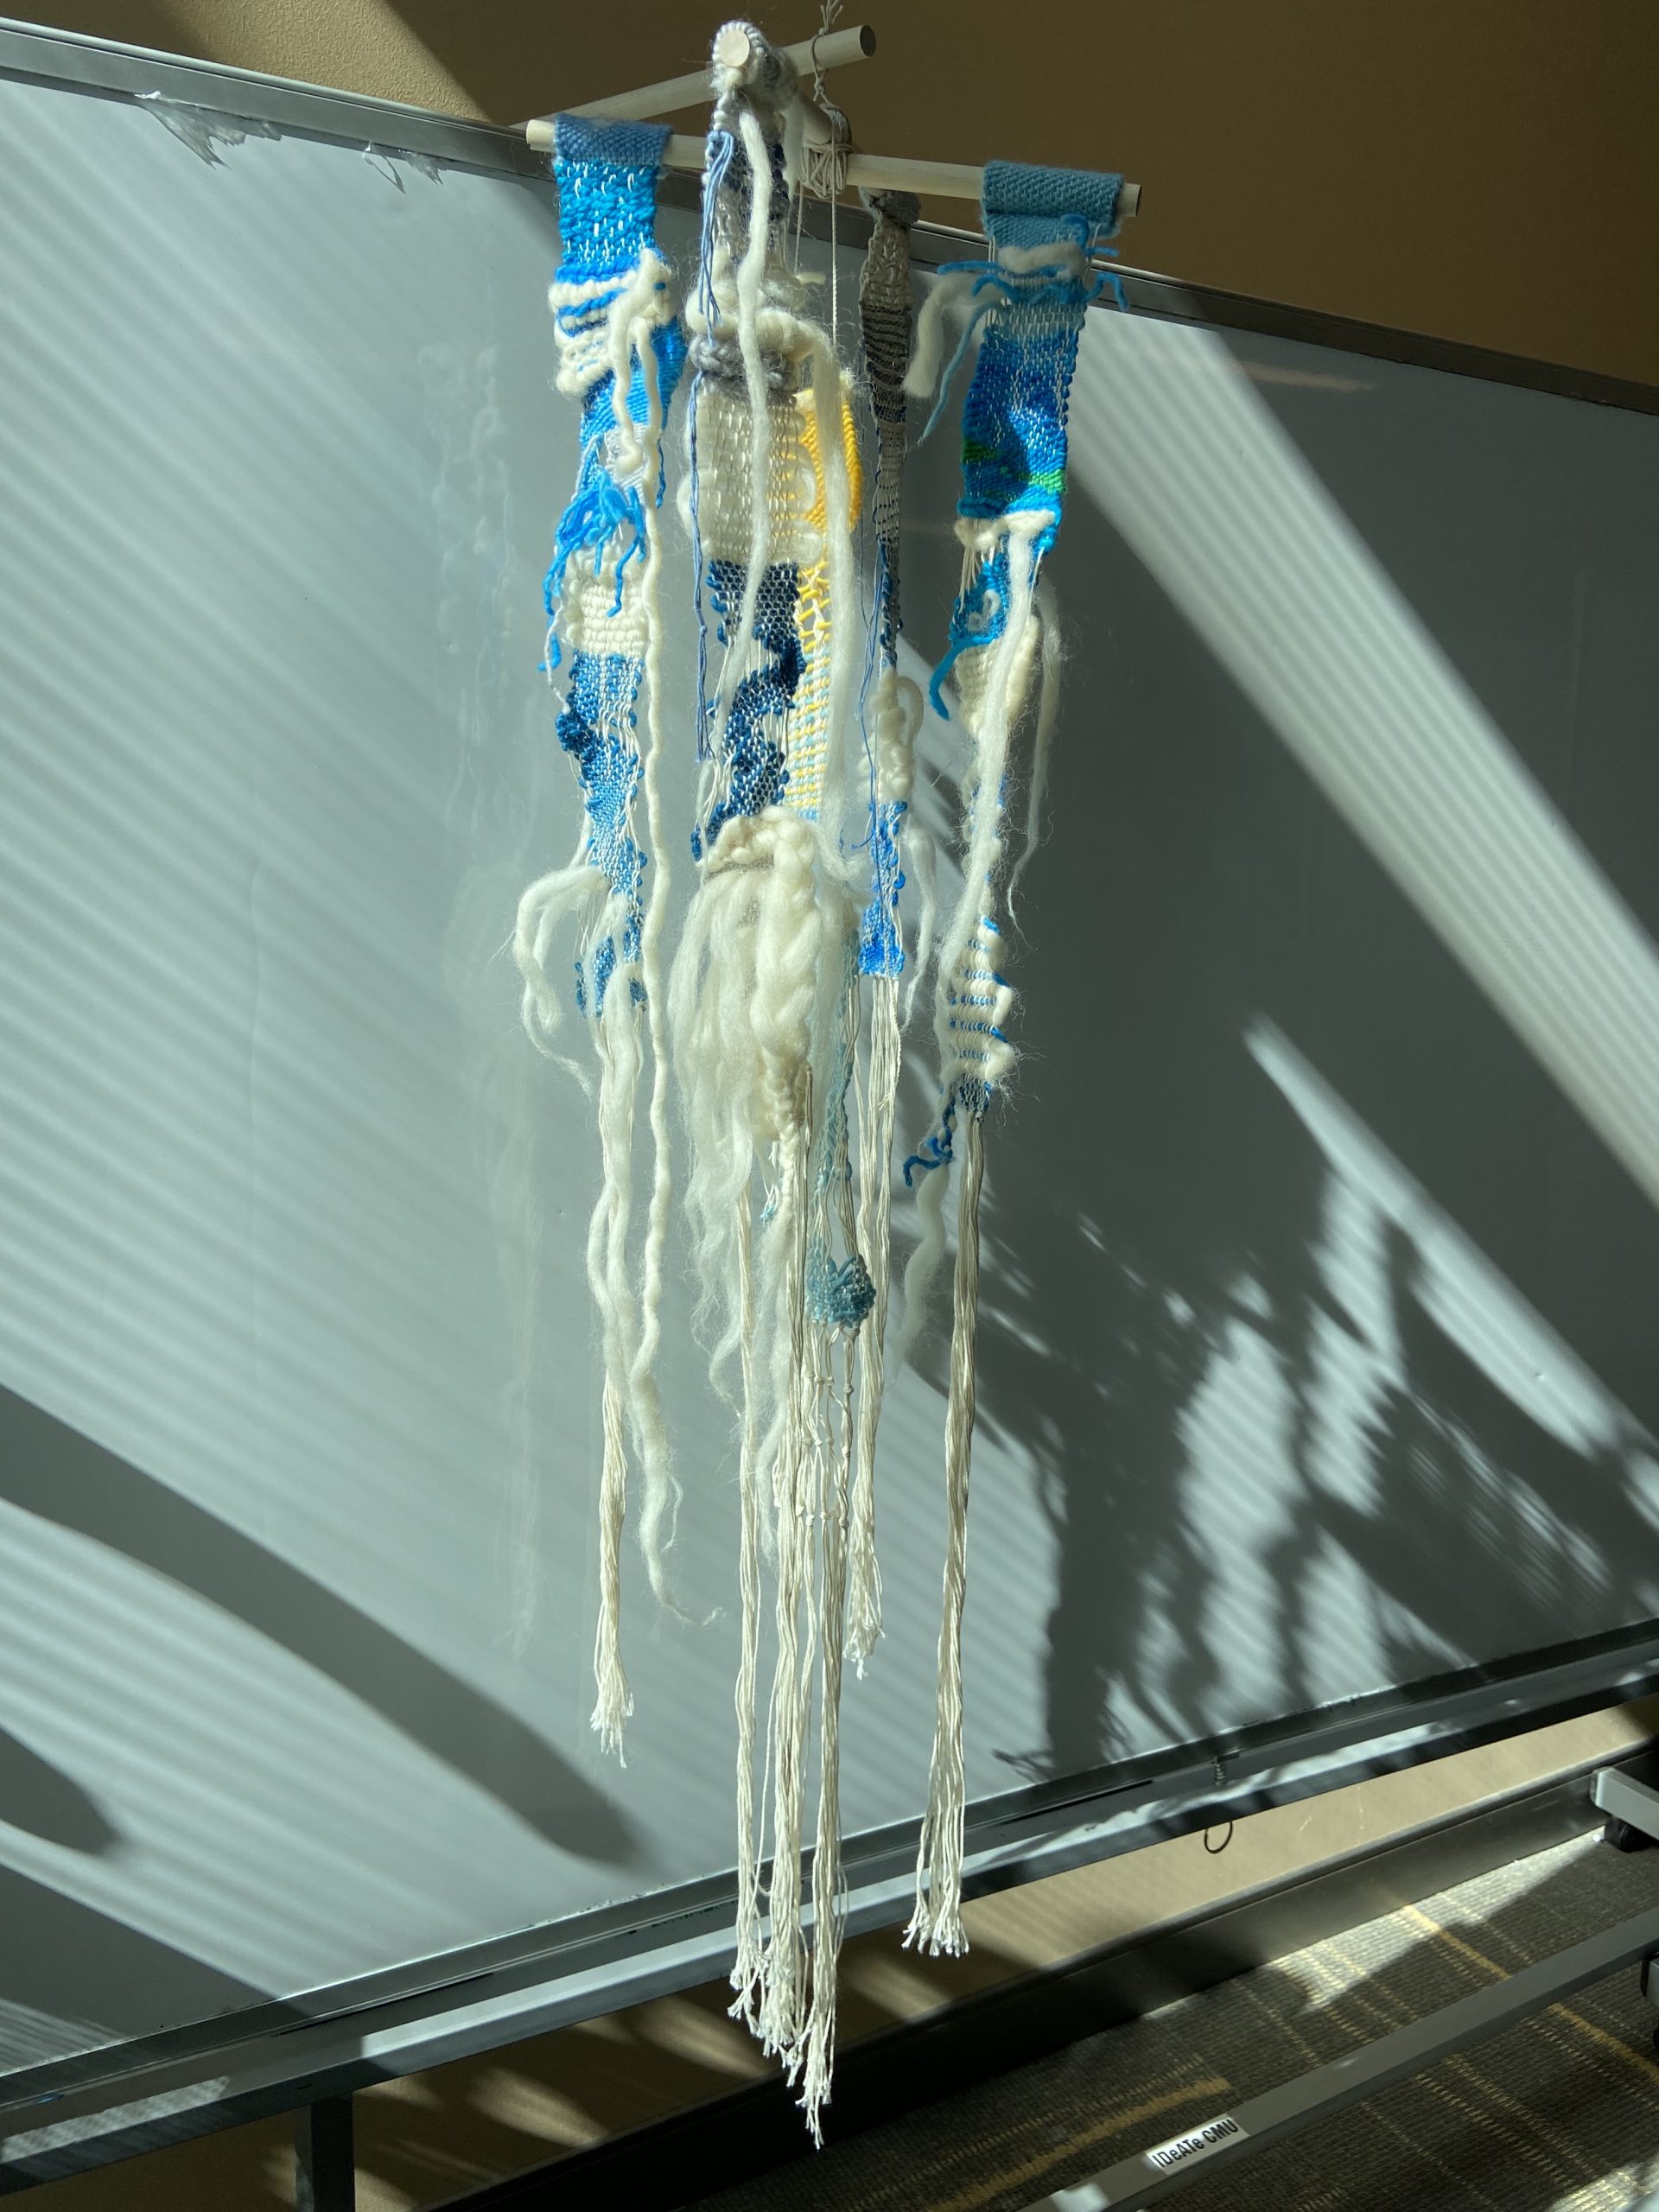
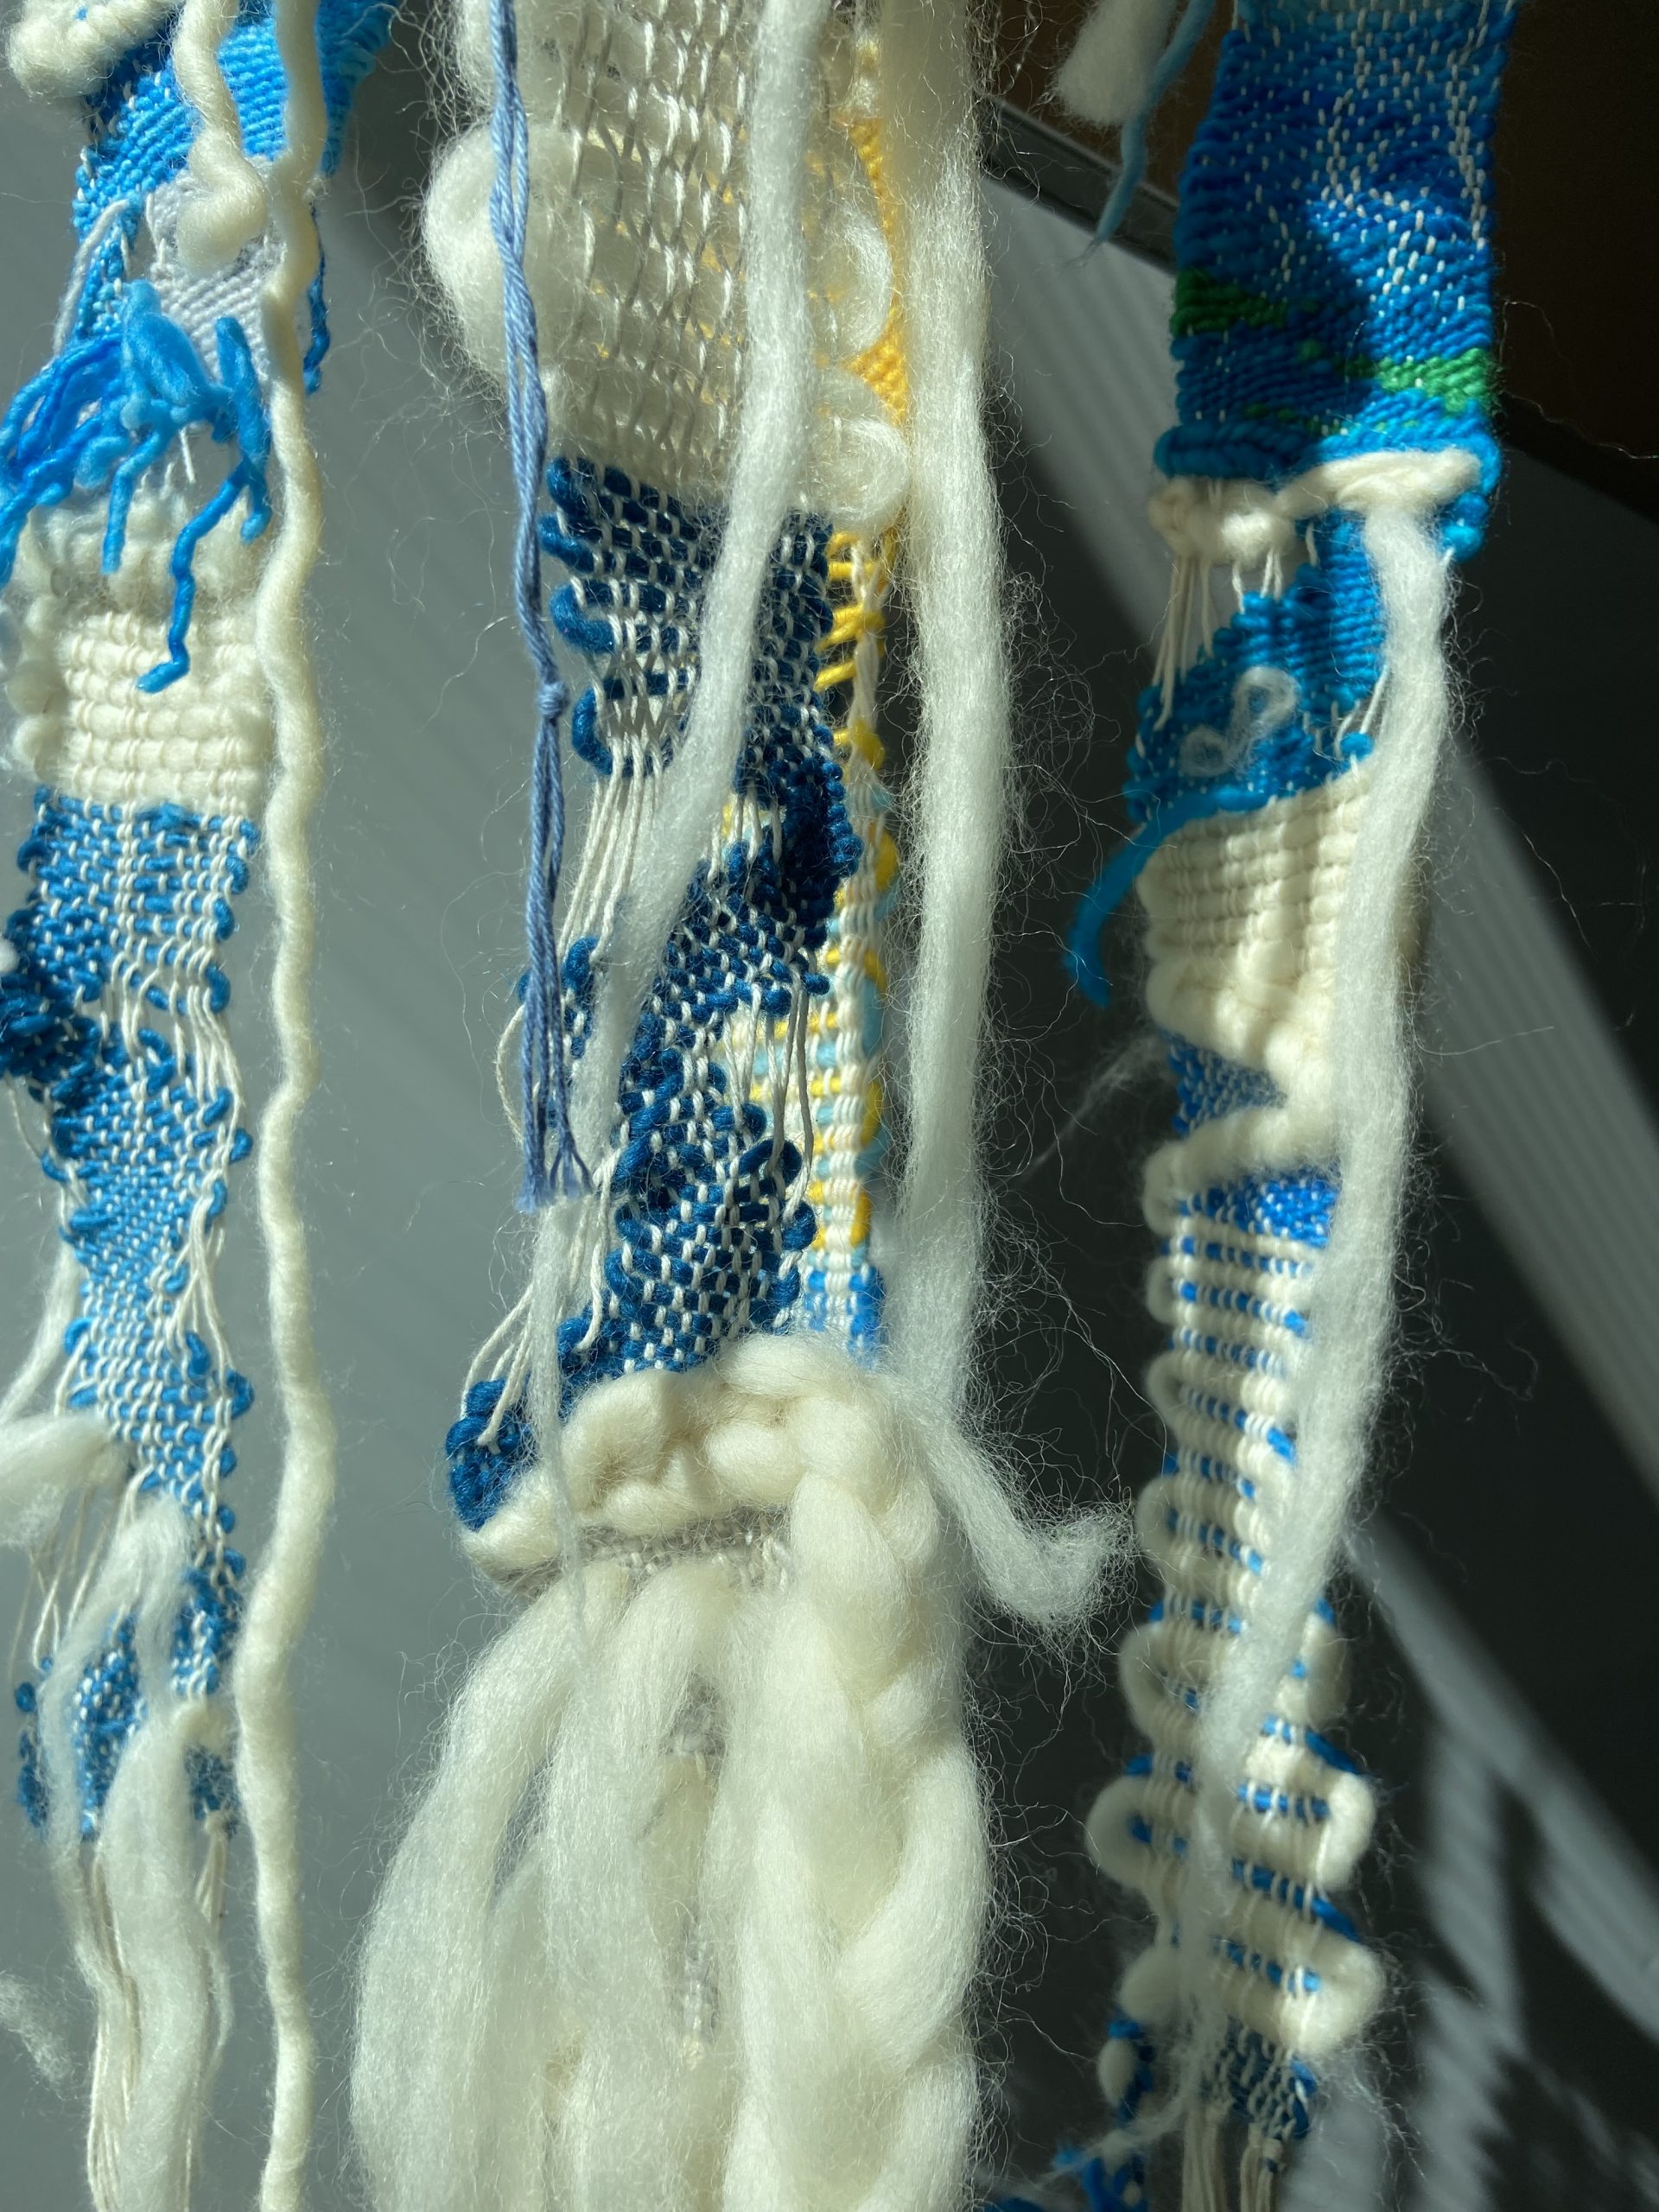
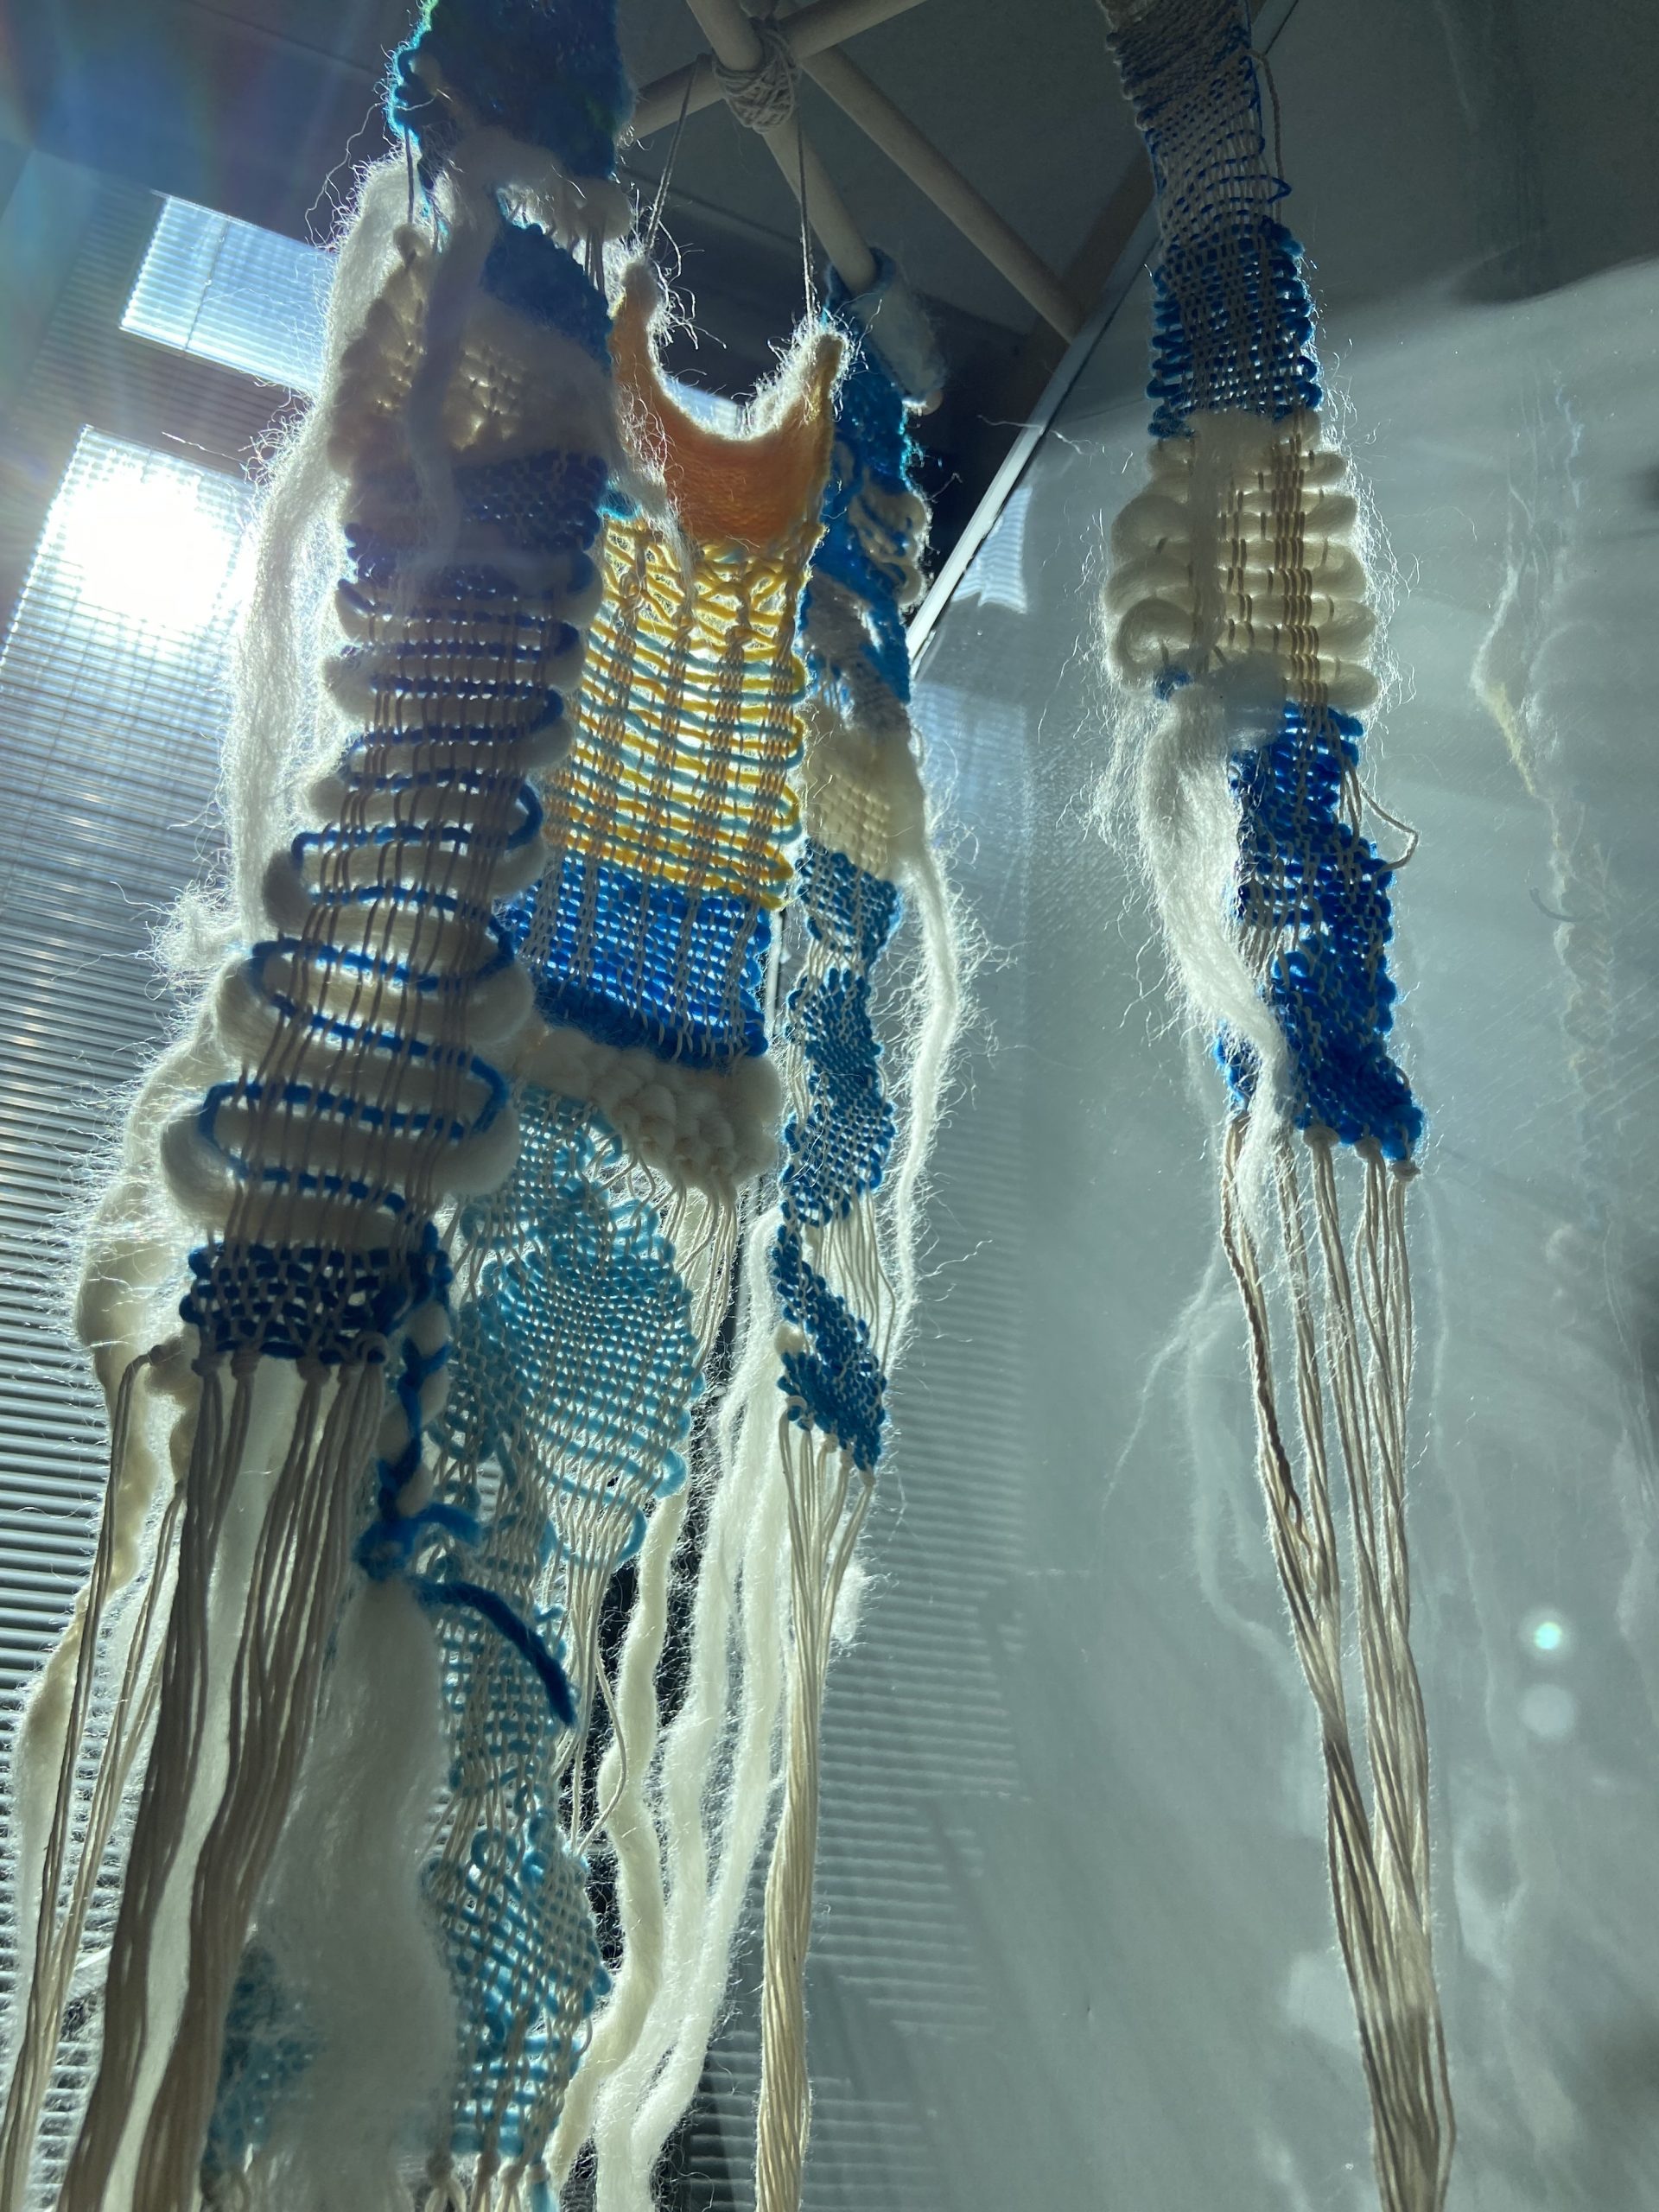
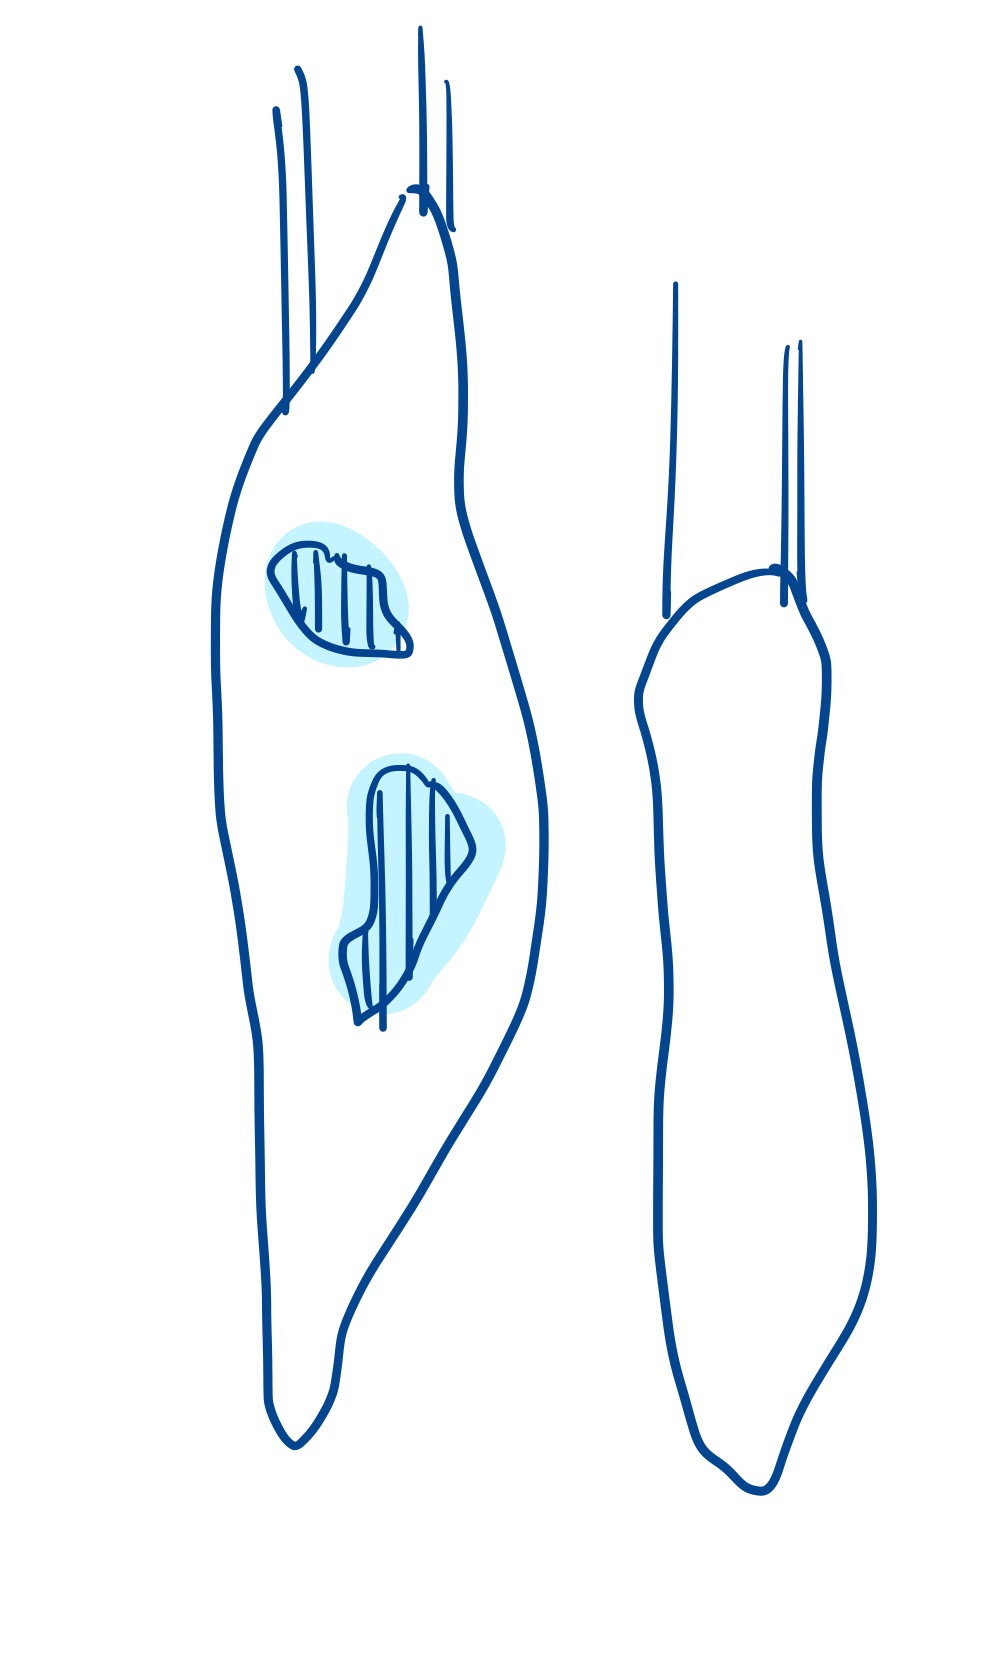
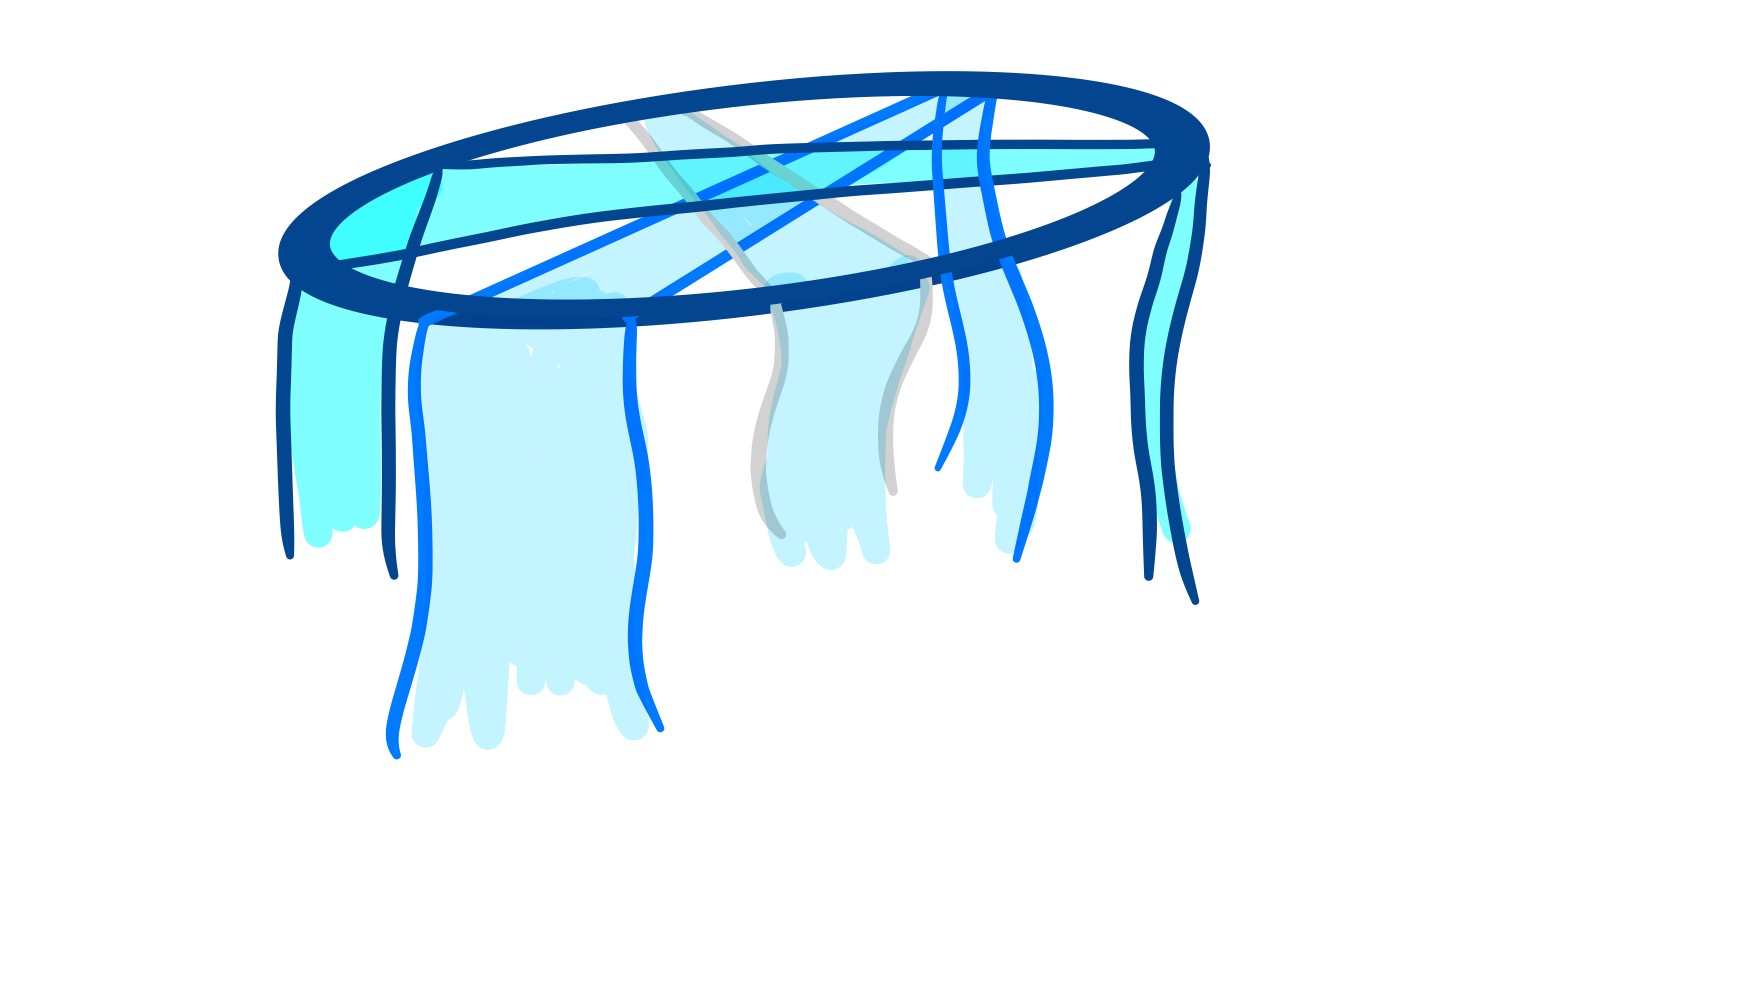
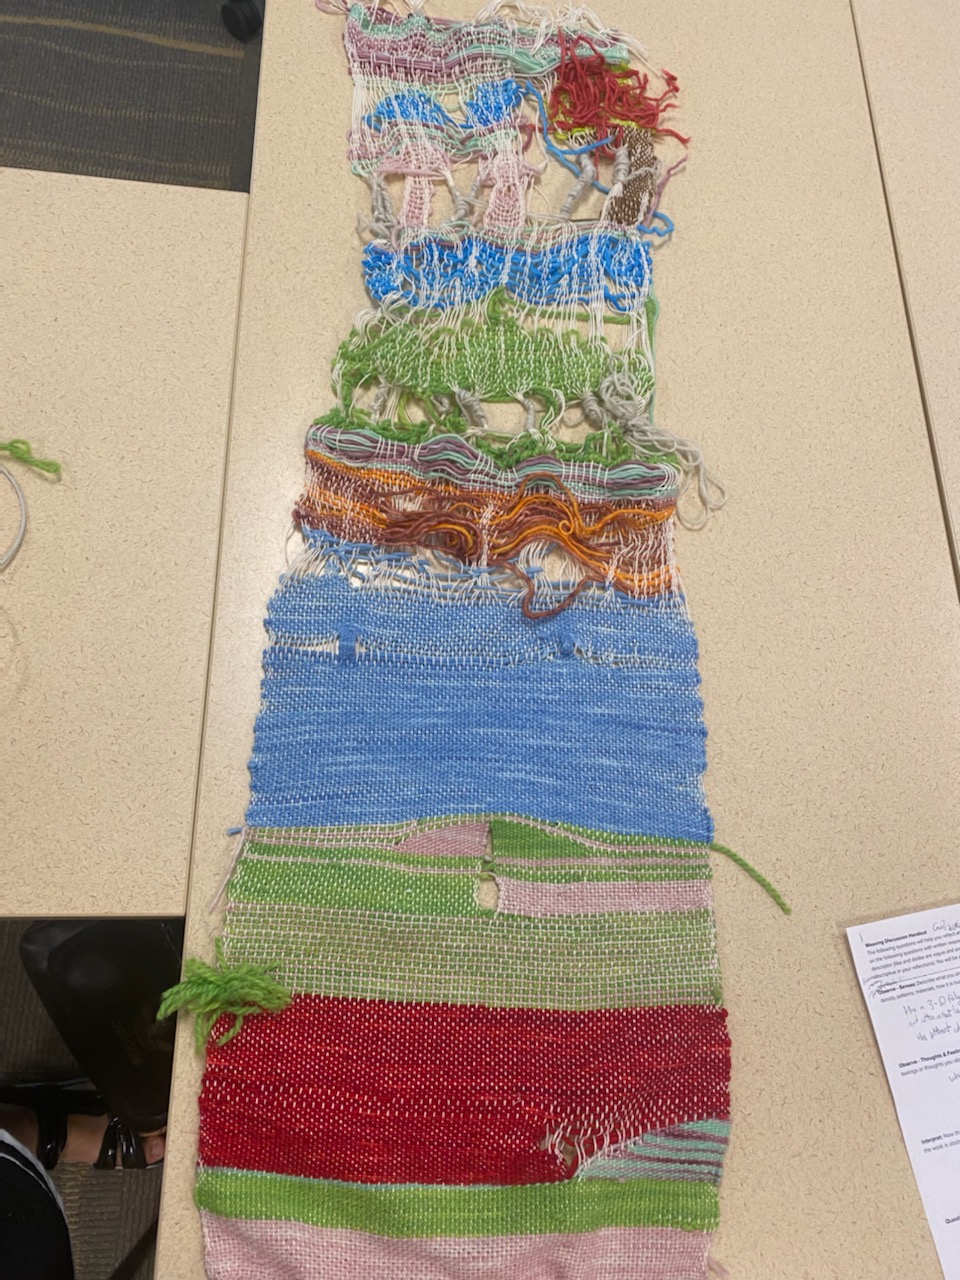
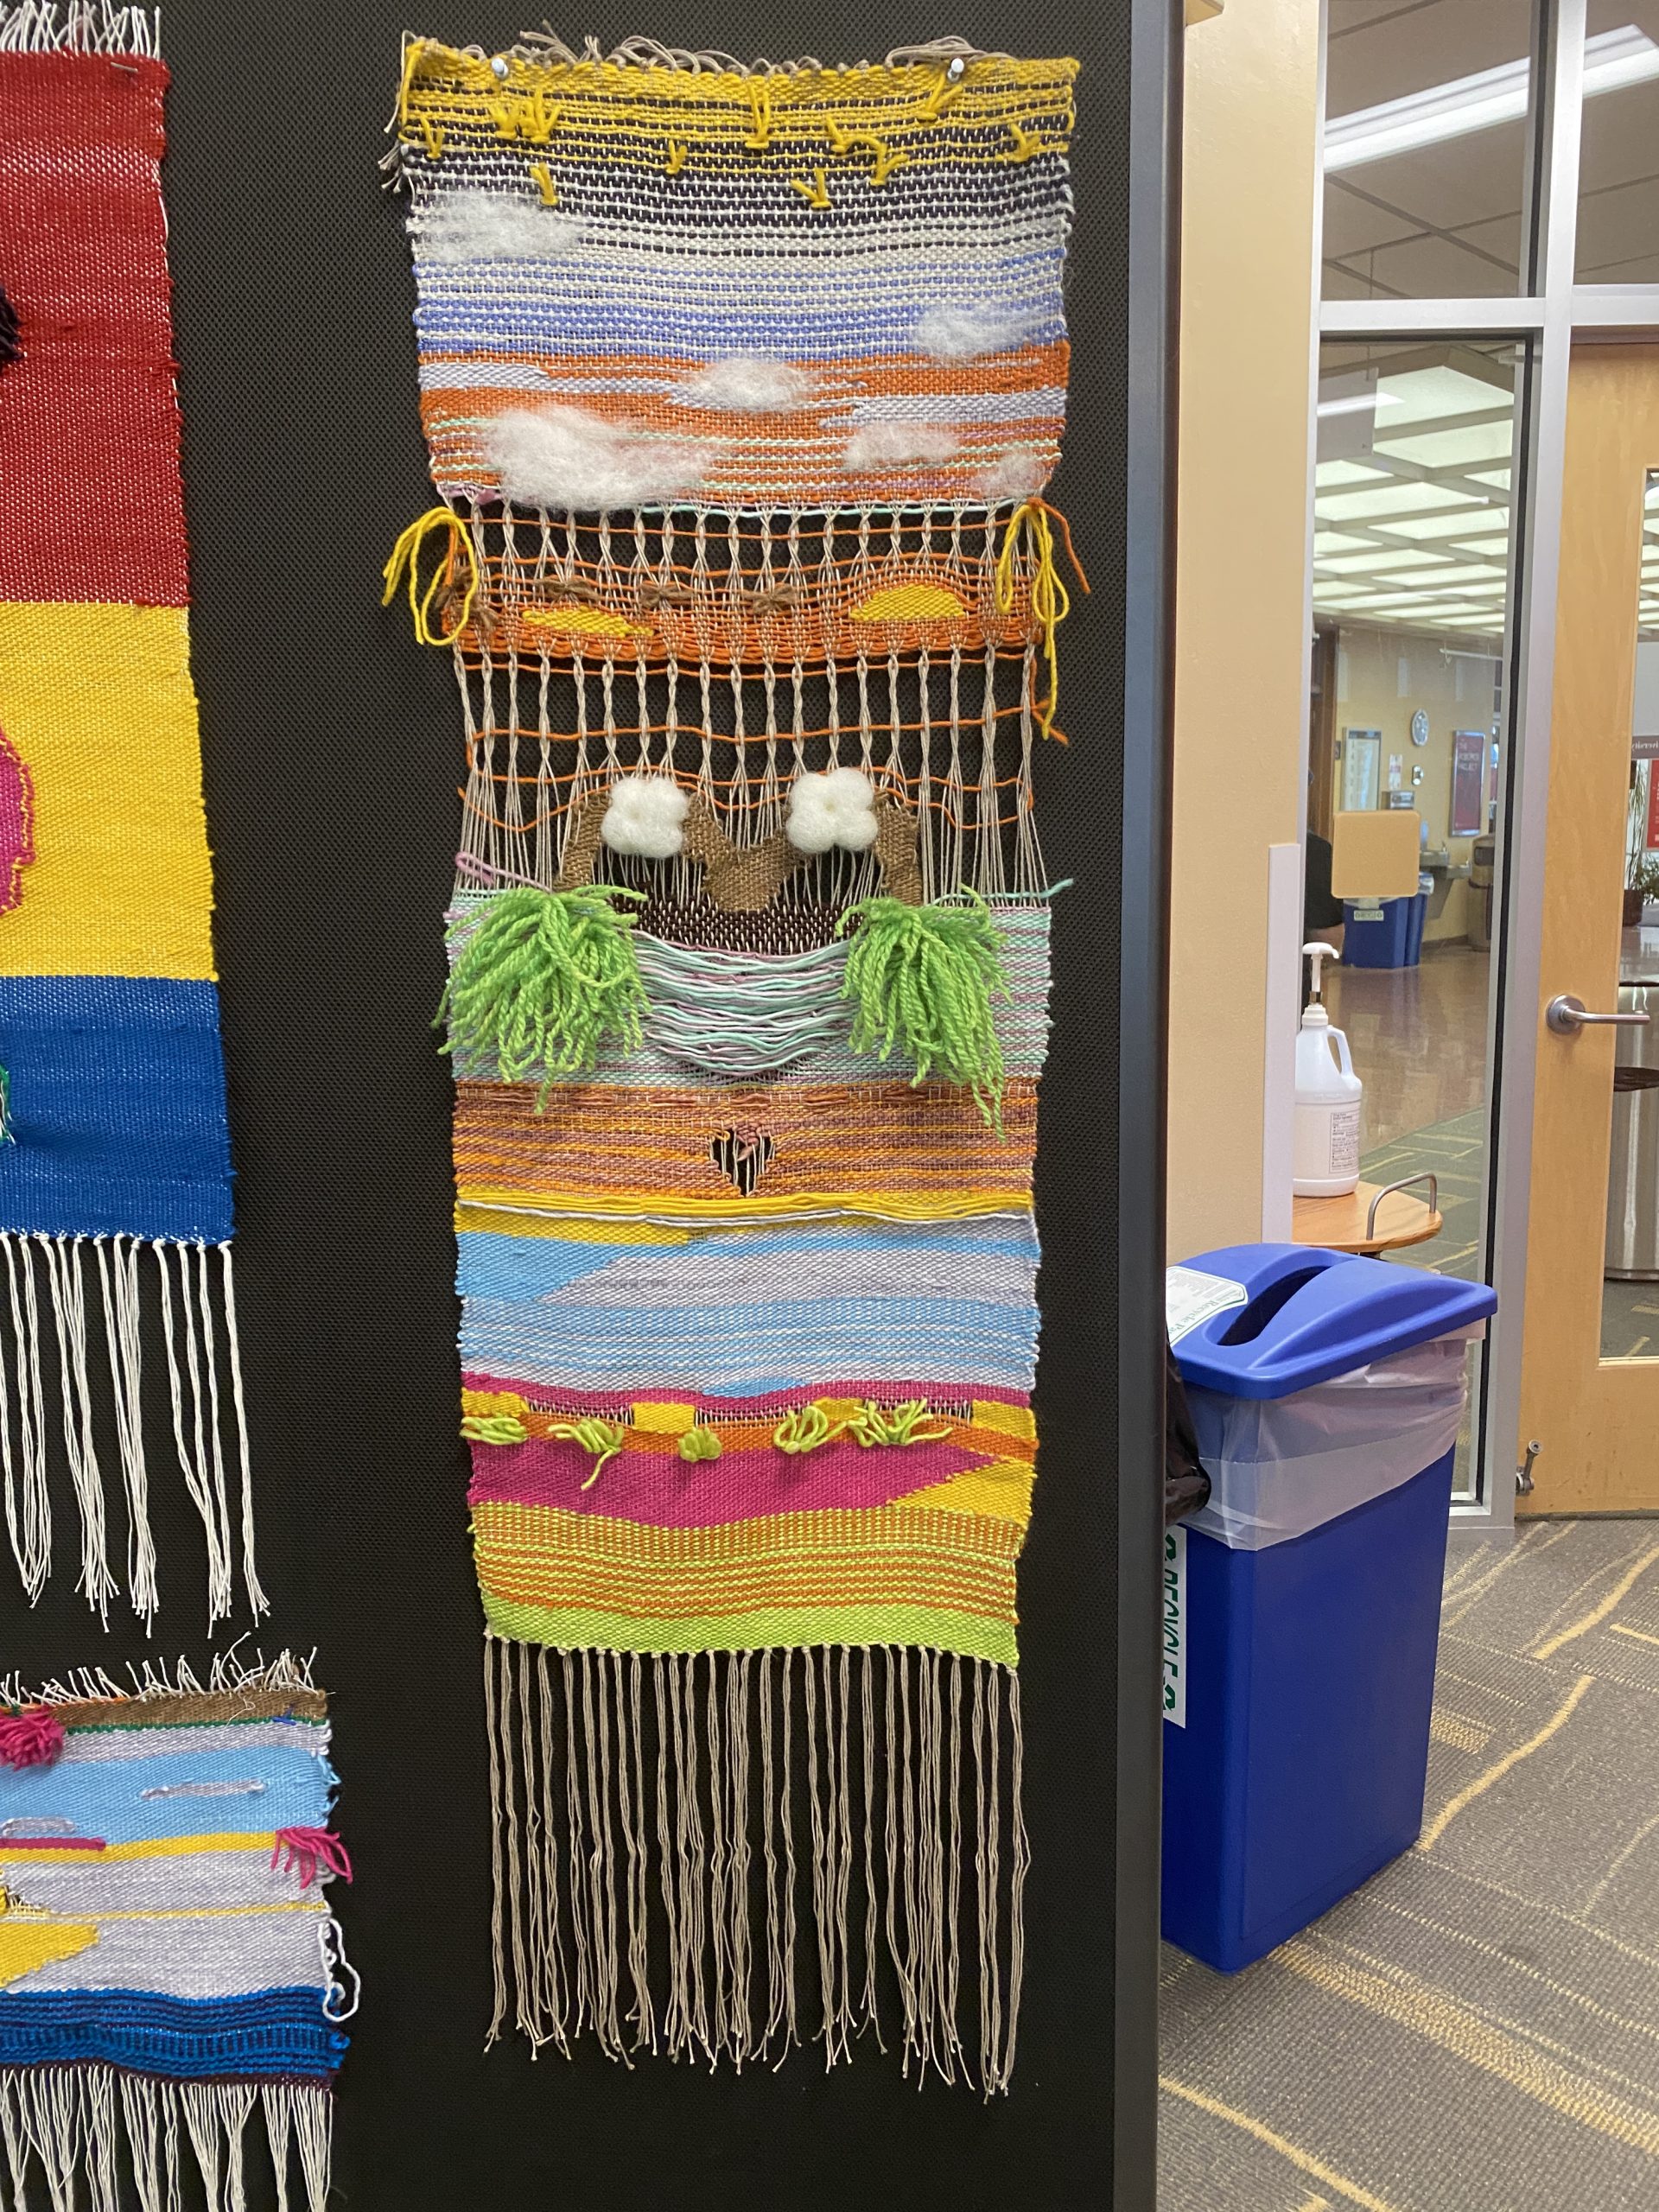
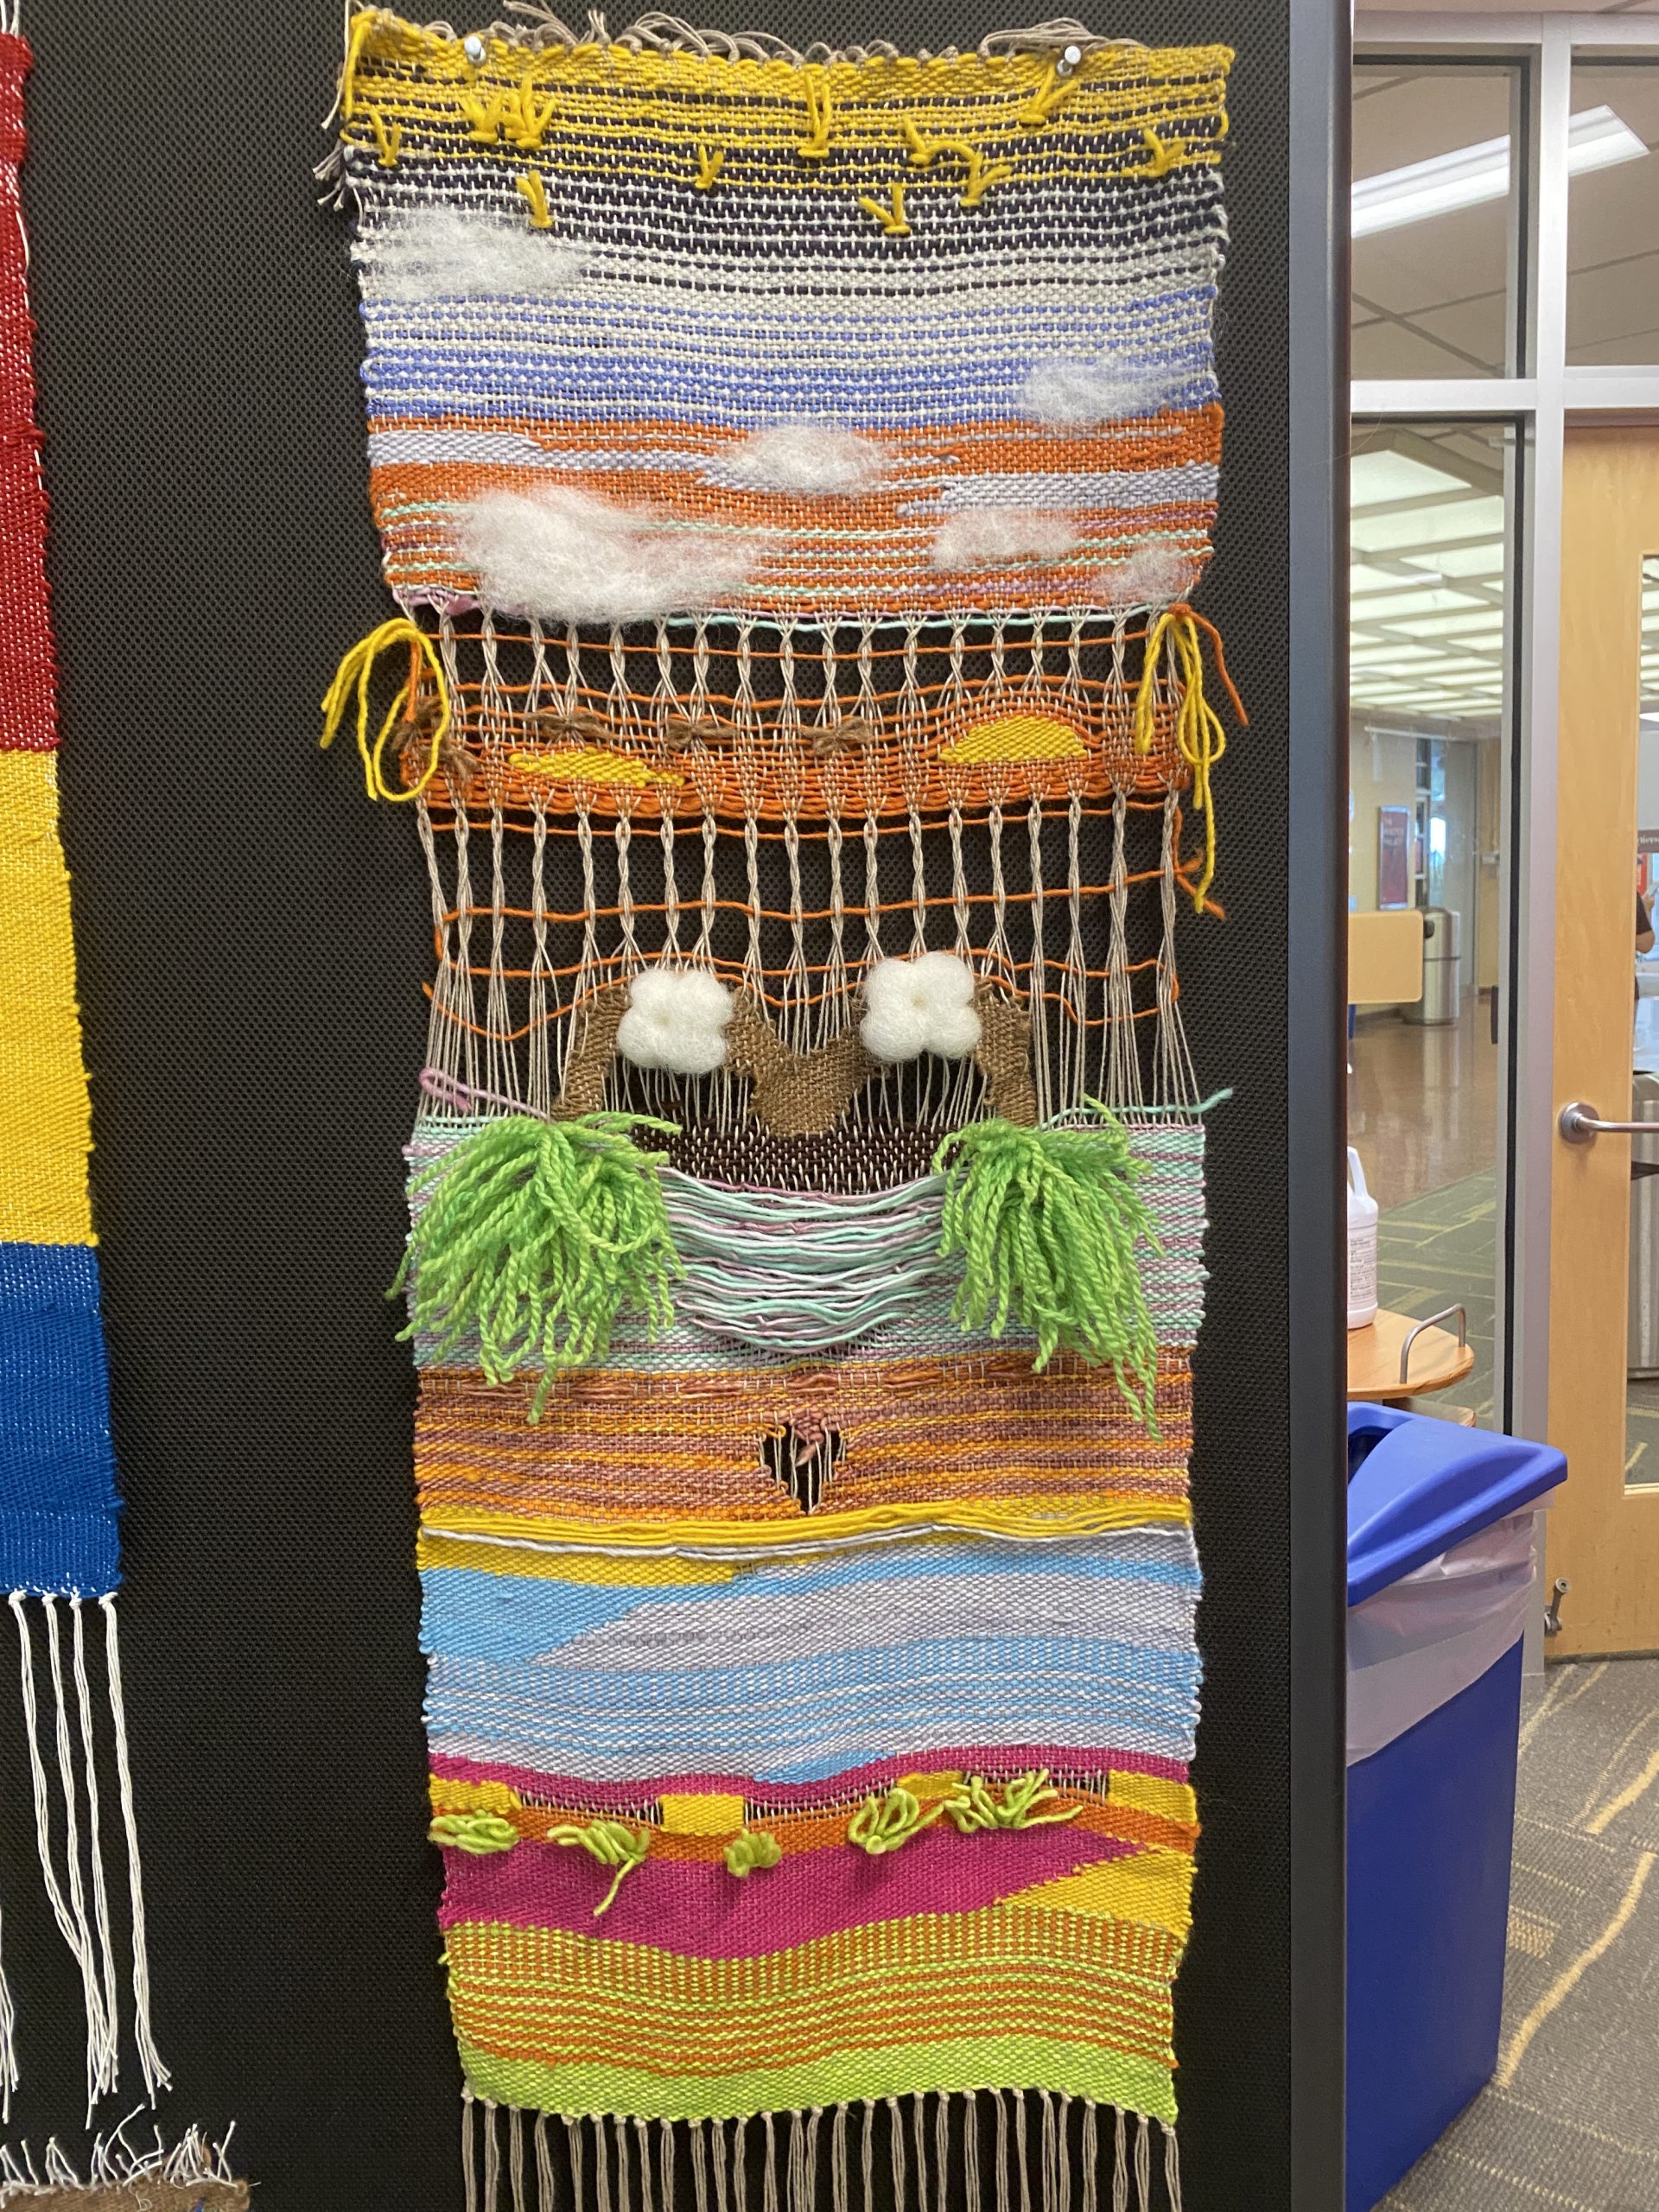
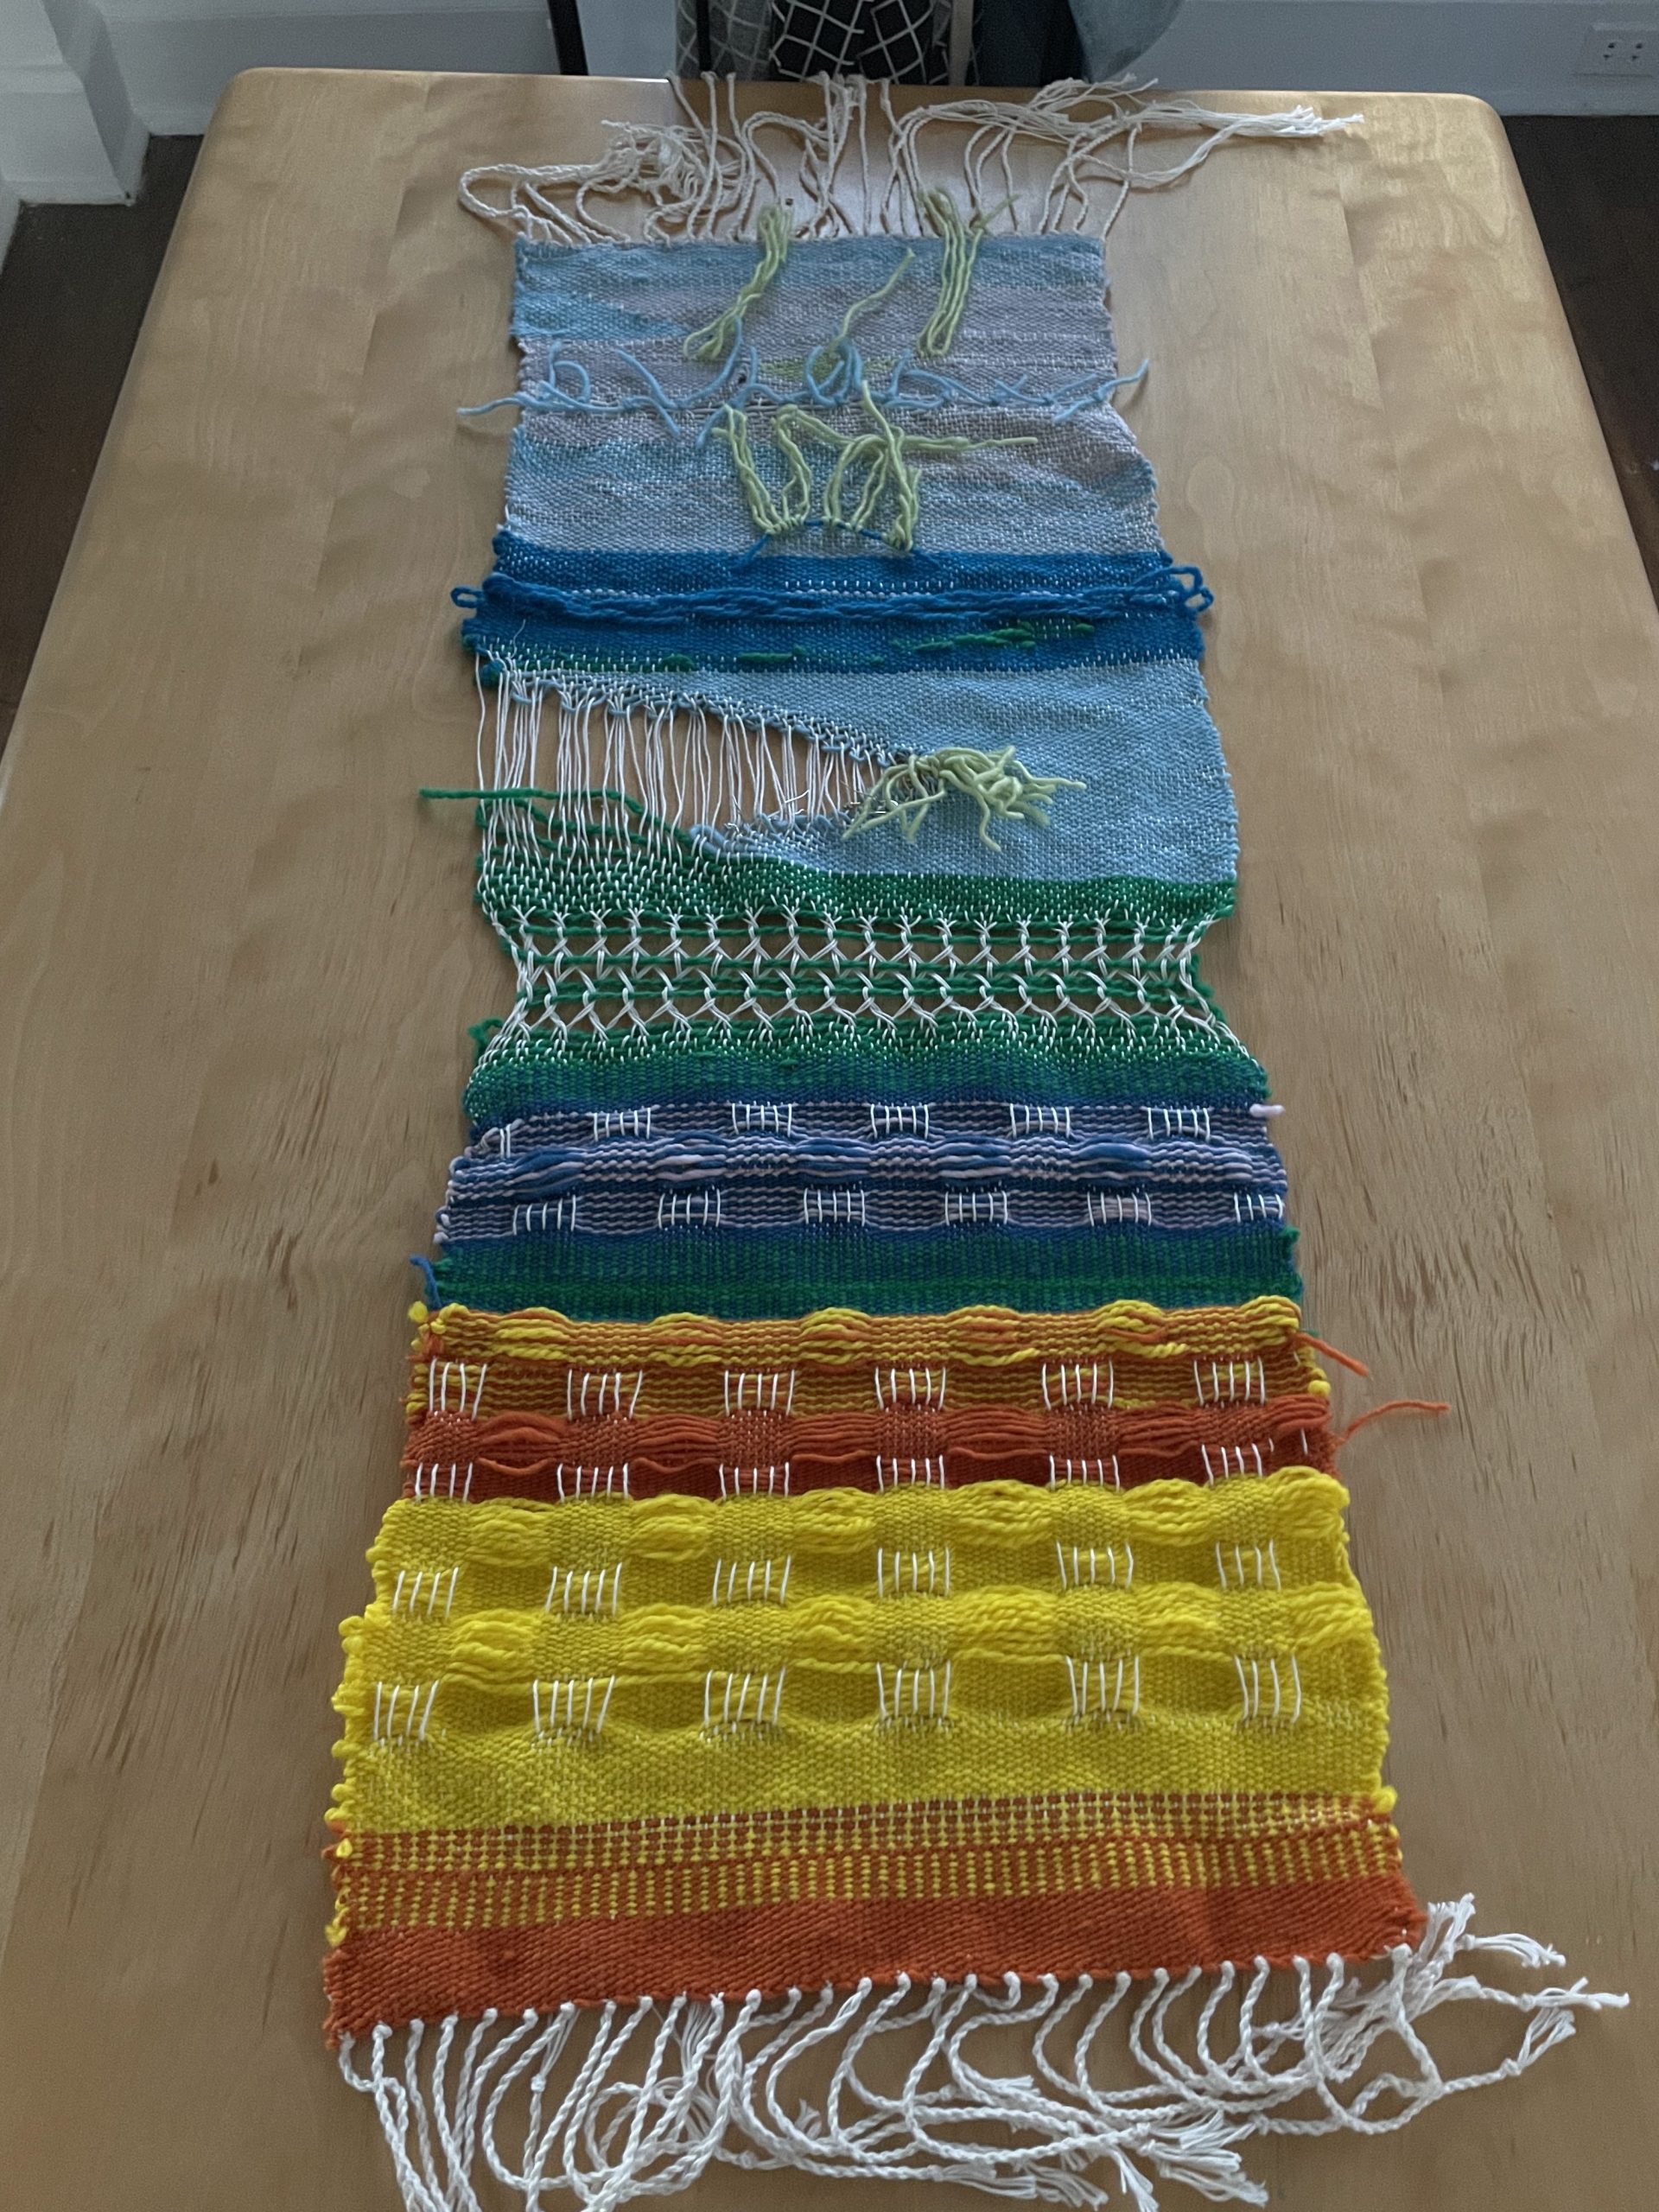
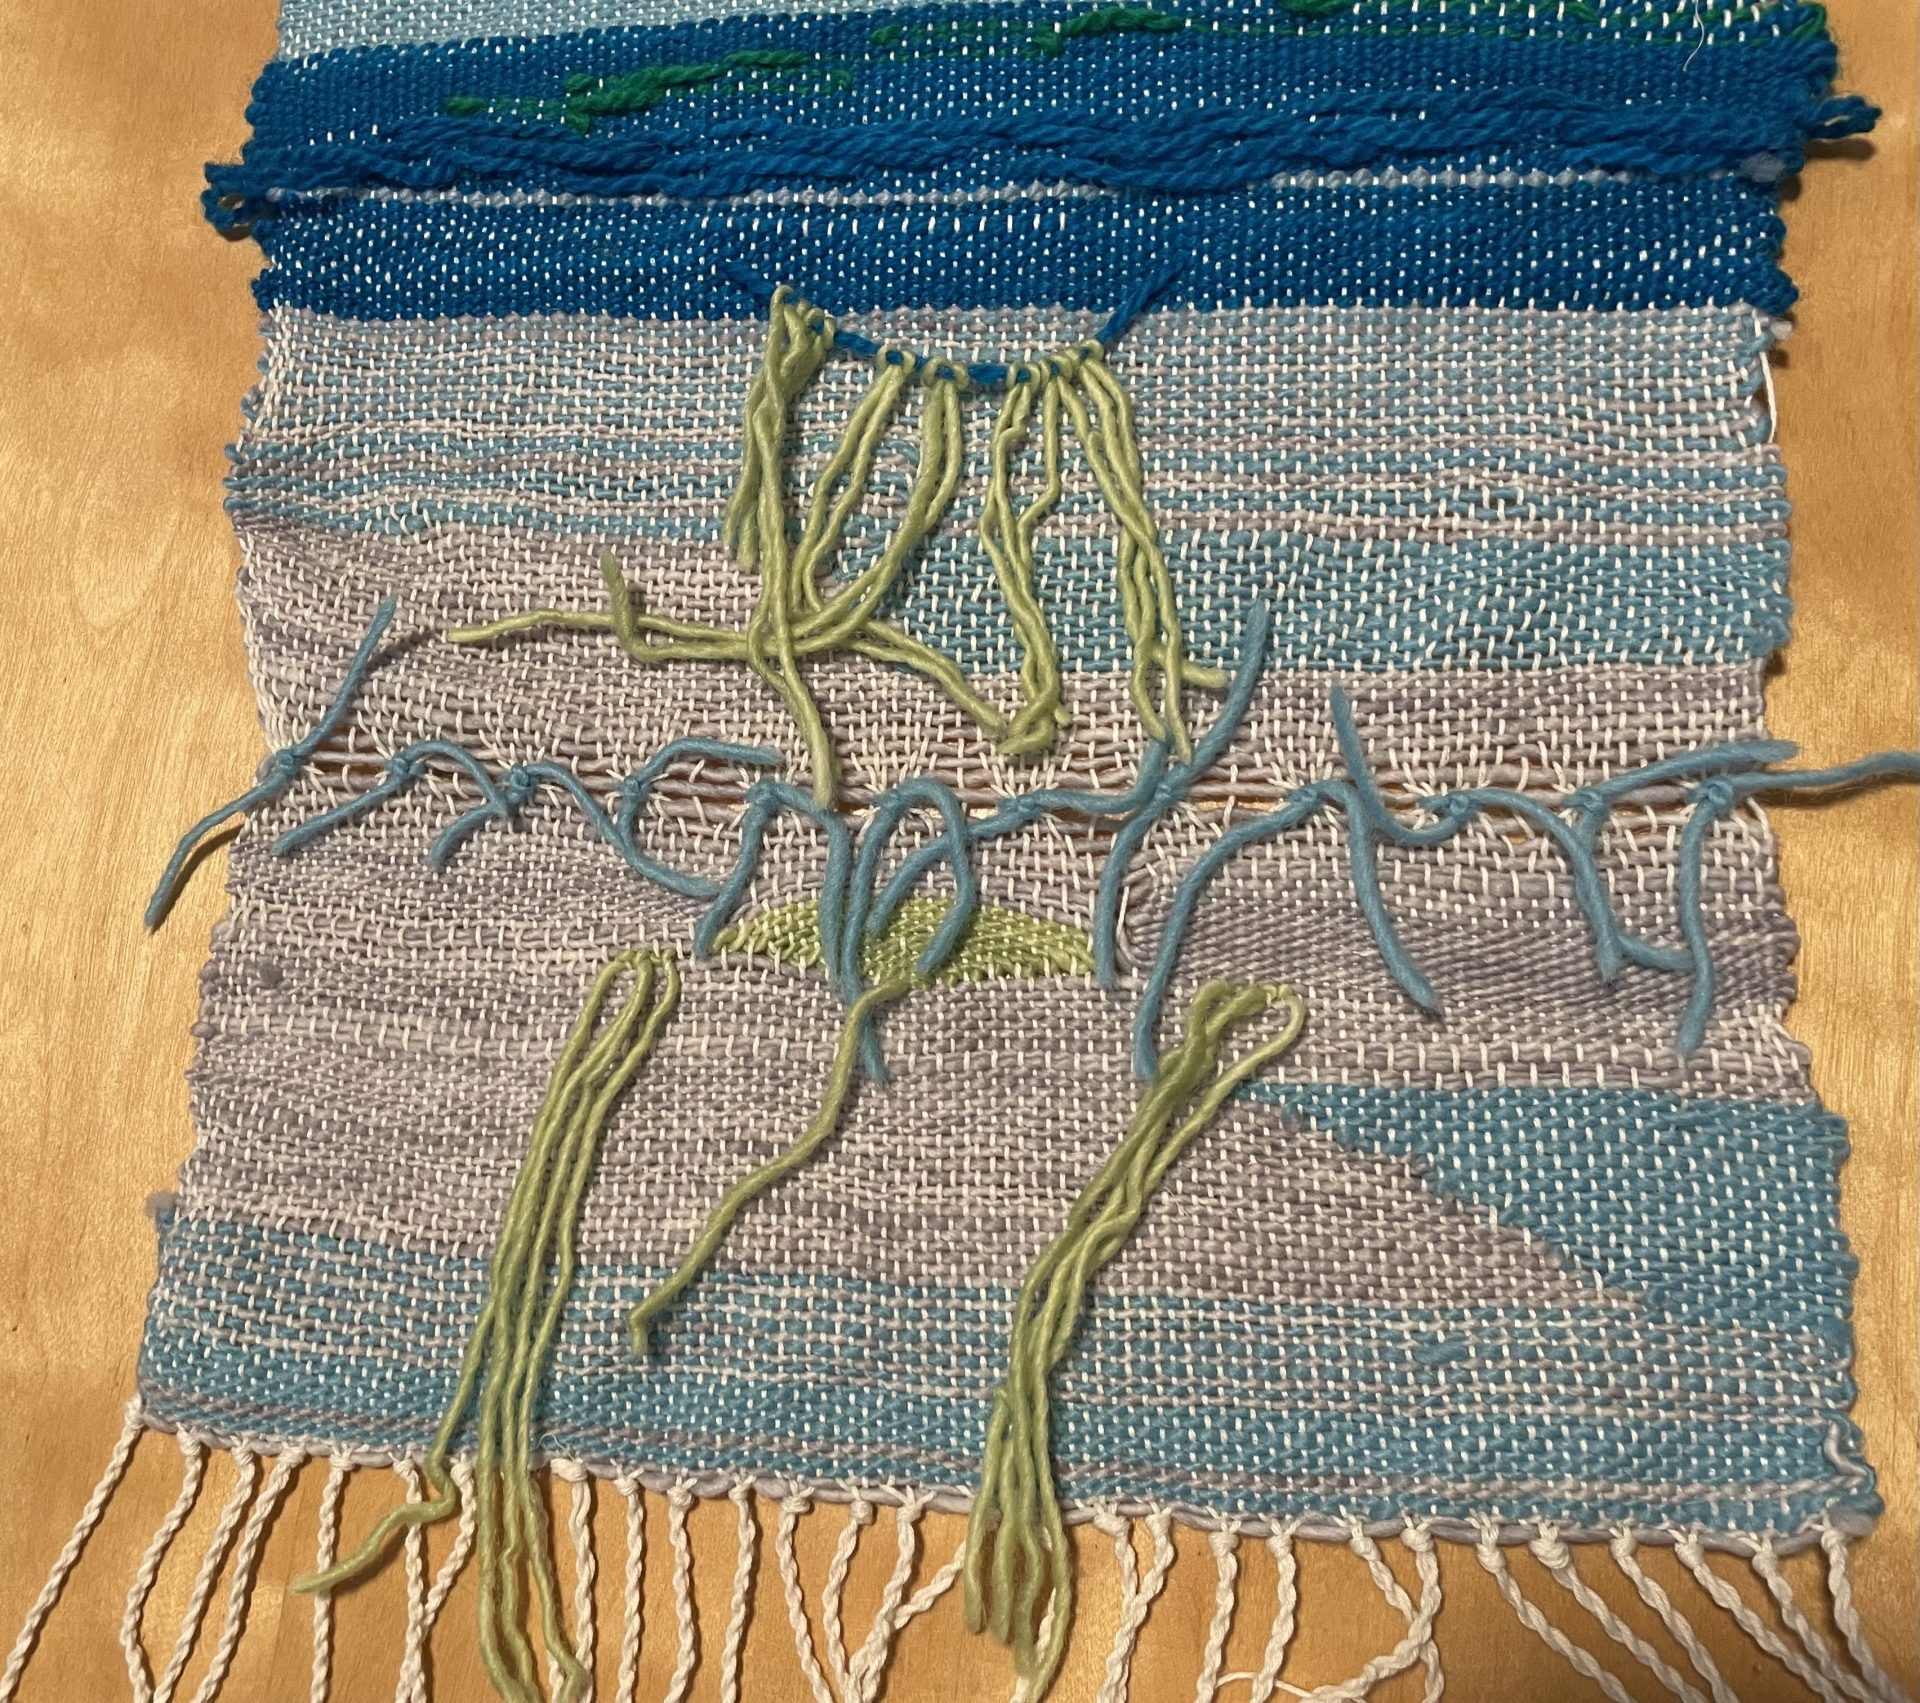
Since the last weaving progress check, I have finished and tied off my test/experiment piece and weaved an additional, shorter companion piece with different colors, materials, and themes. For my final piece I initially wanted to create images of jellyfish deep in the ocean, but things did not go entirely as planned. It was much more difficult to create exact imagery than I had anticipated. Both my test and final pieces ended up becoming products of much experimentation, with surprising details that I both liked and disliked. As a result I have mixed feelings about my final piece, mainly due to how different it turned out from my expectations. My final idea is that the piece still maintains some semblance of an abstract jellyfish, but it also represents chaos and branching of thought. In a way it represents my weaving process, discovery, troubles, and all.

What worked well

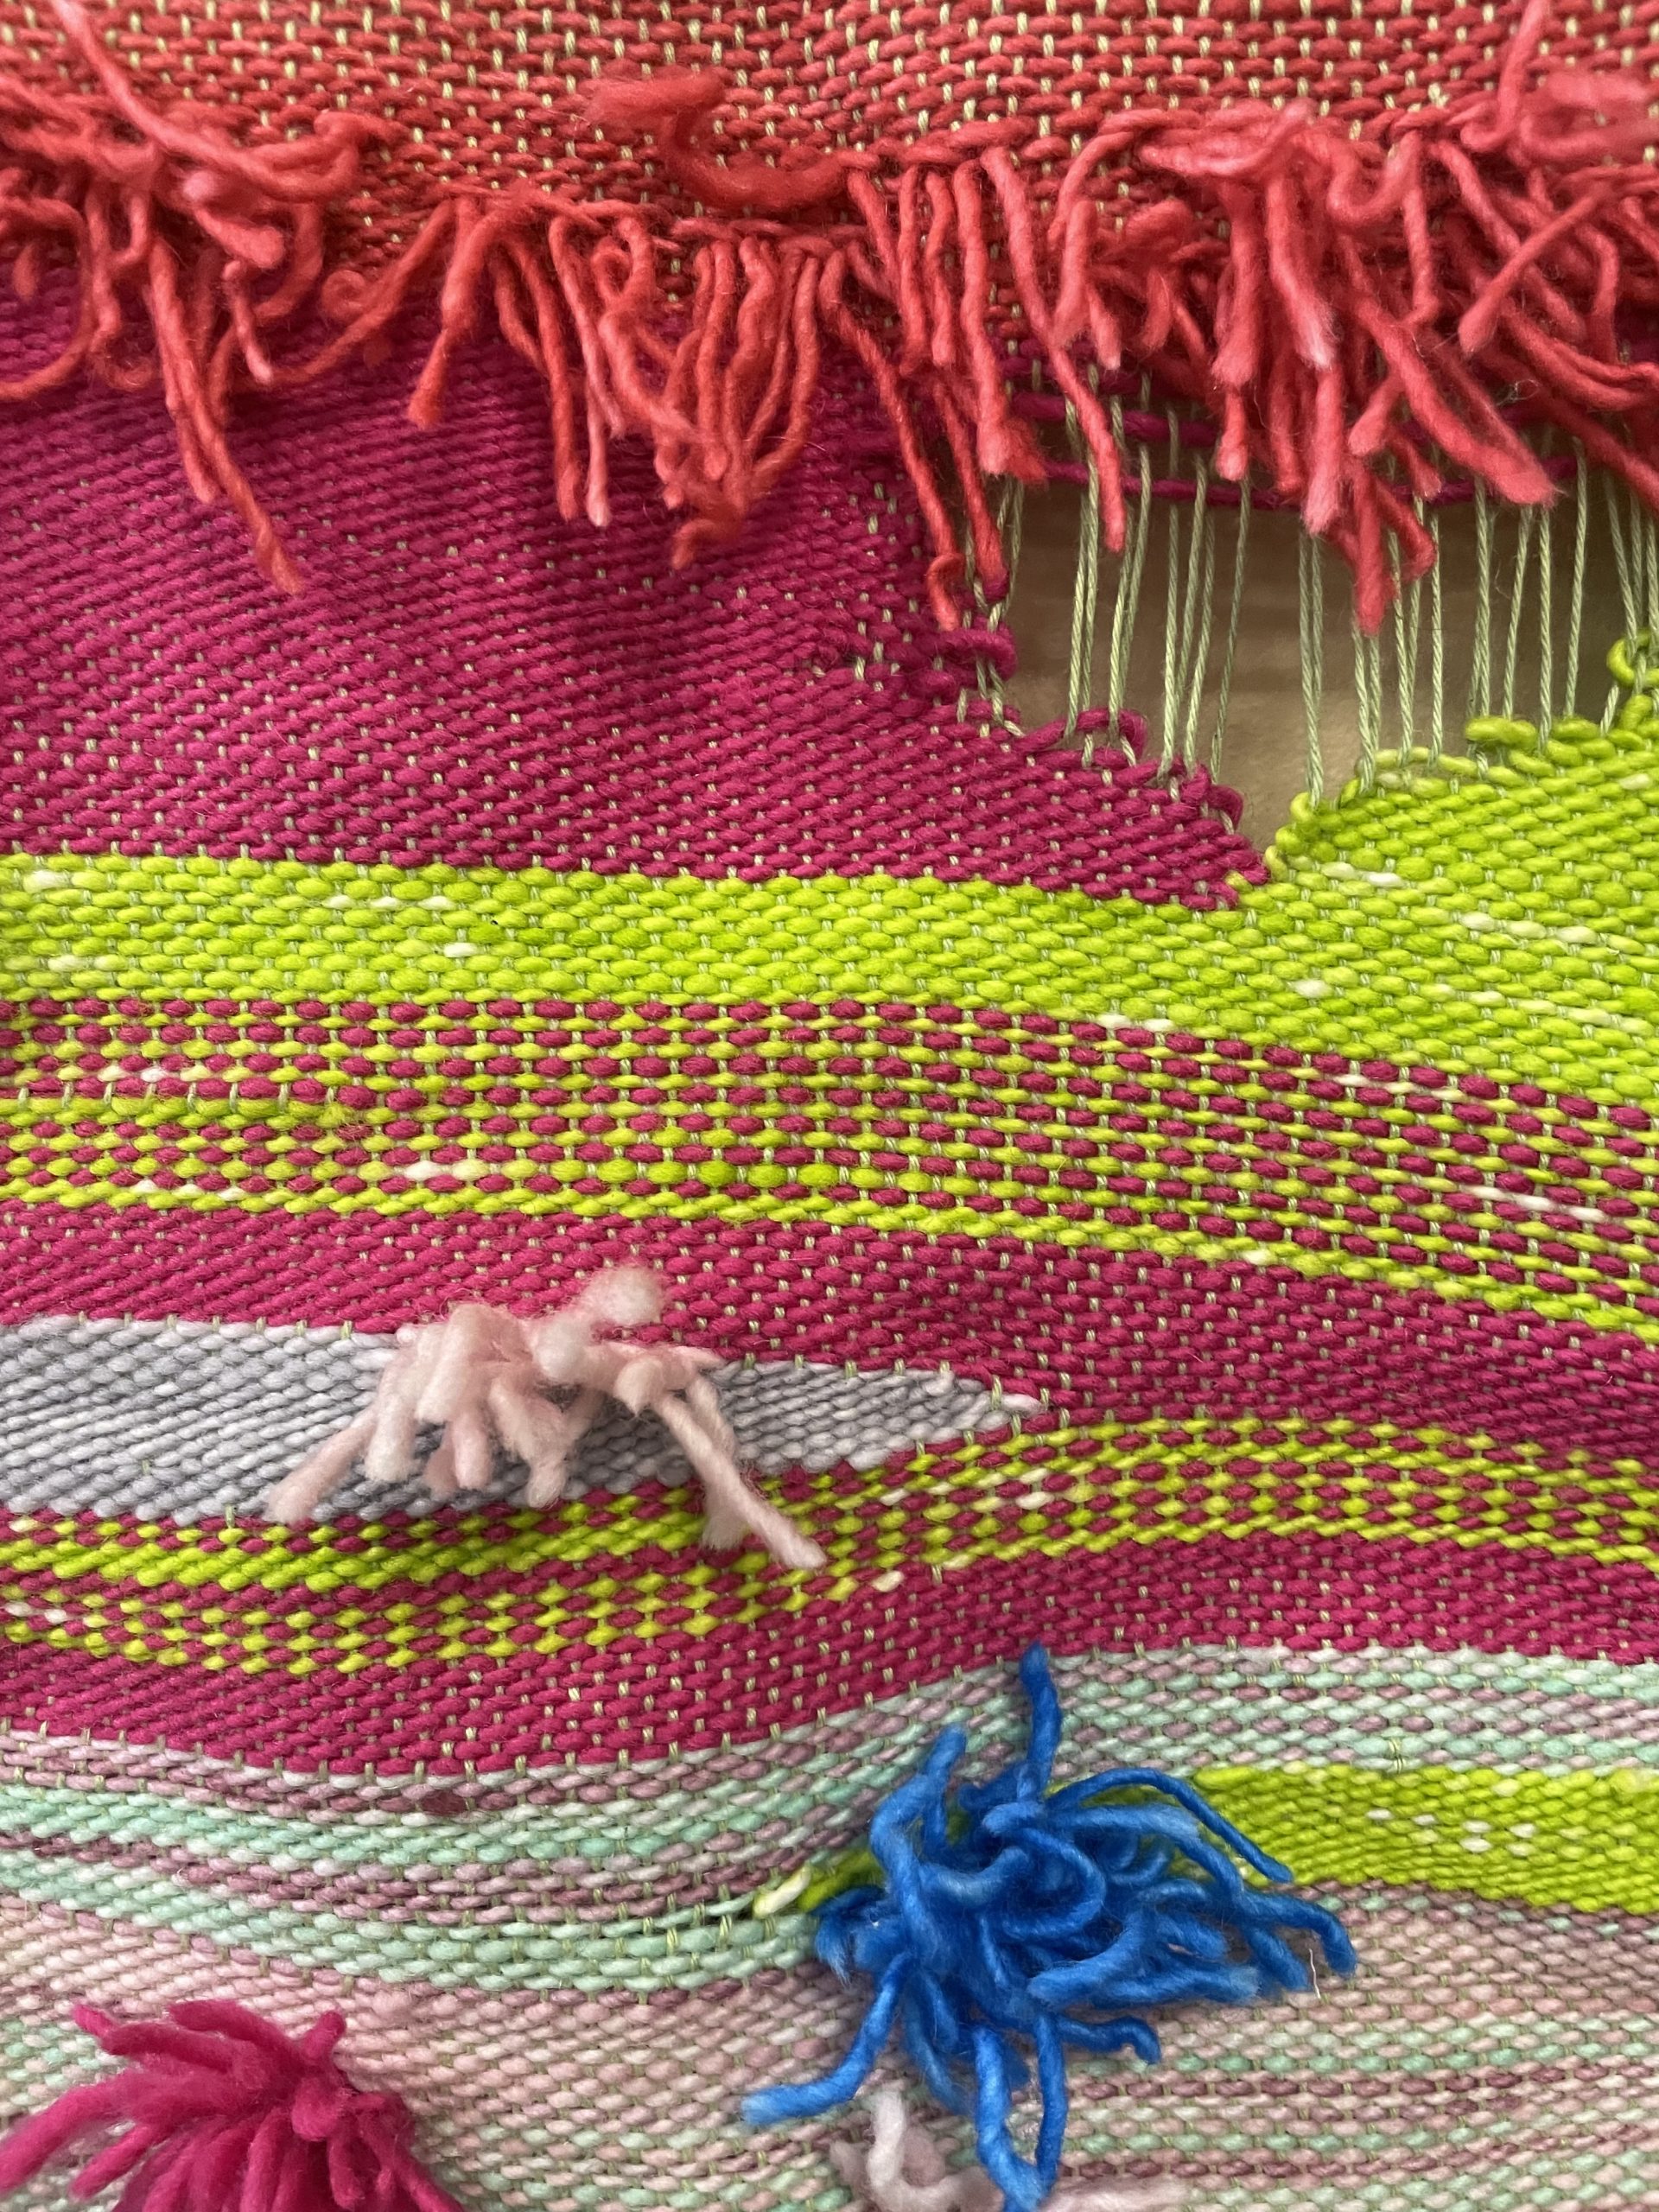
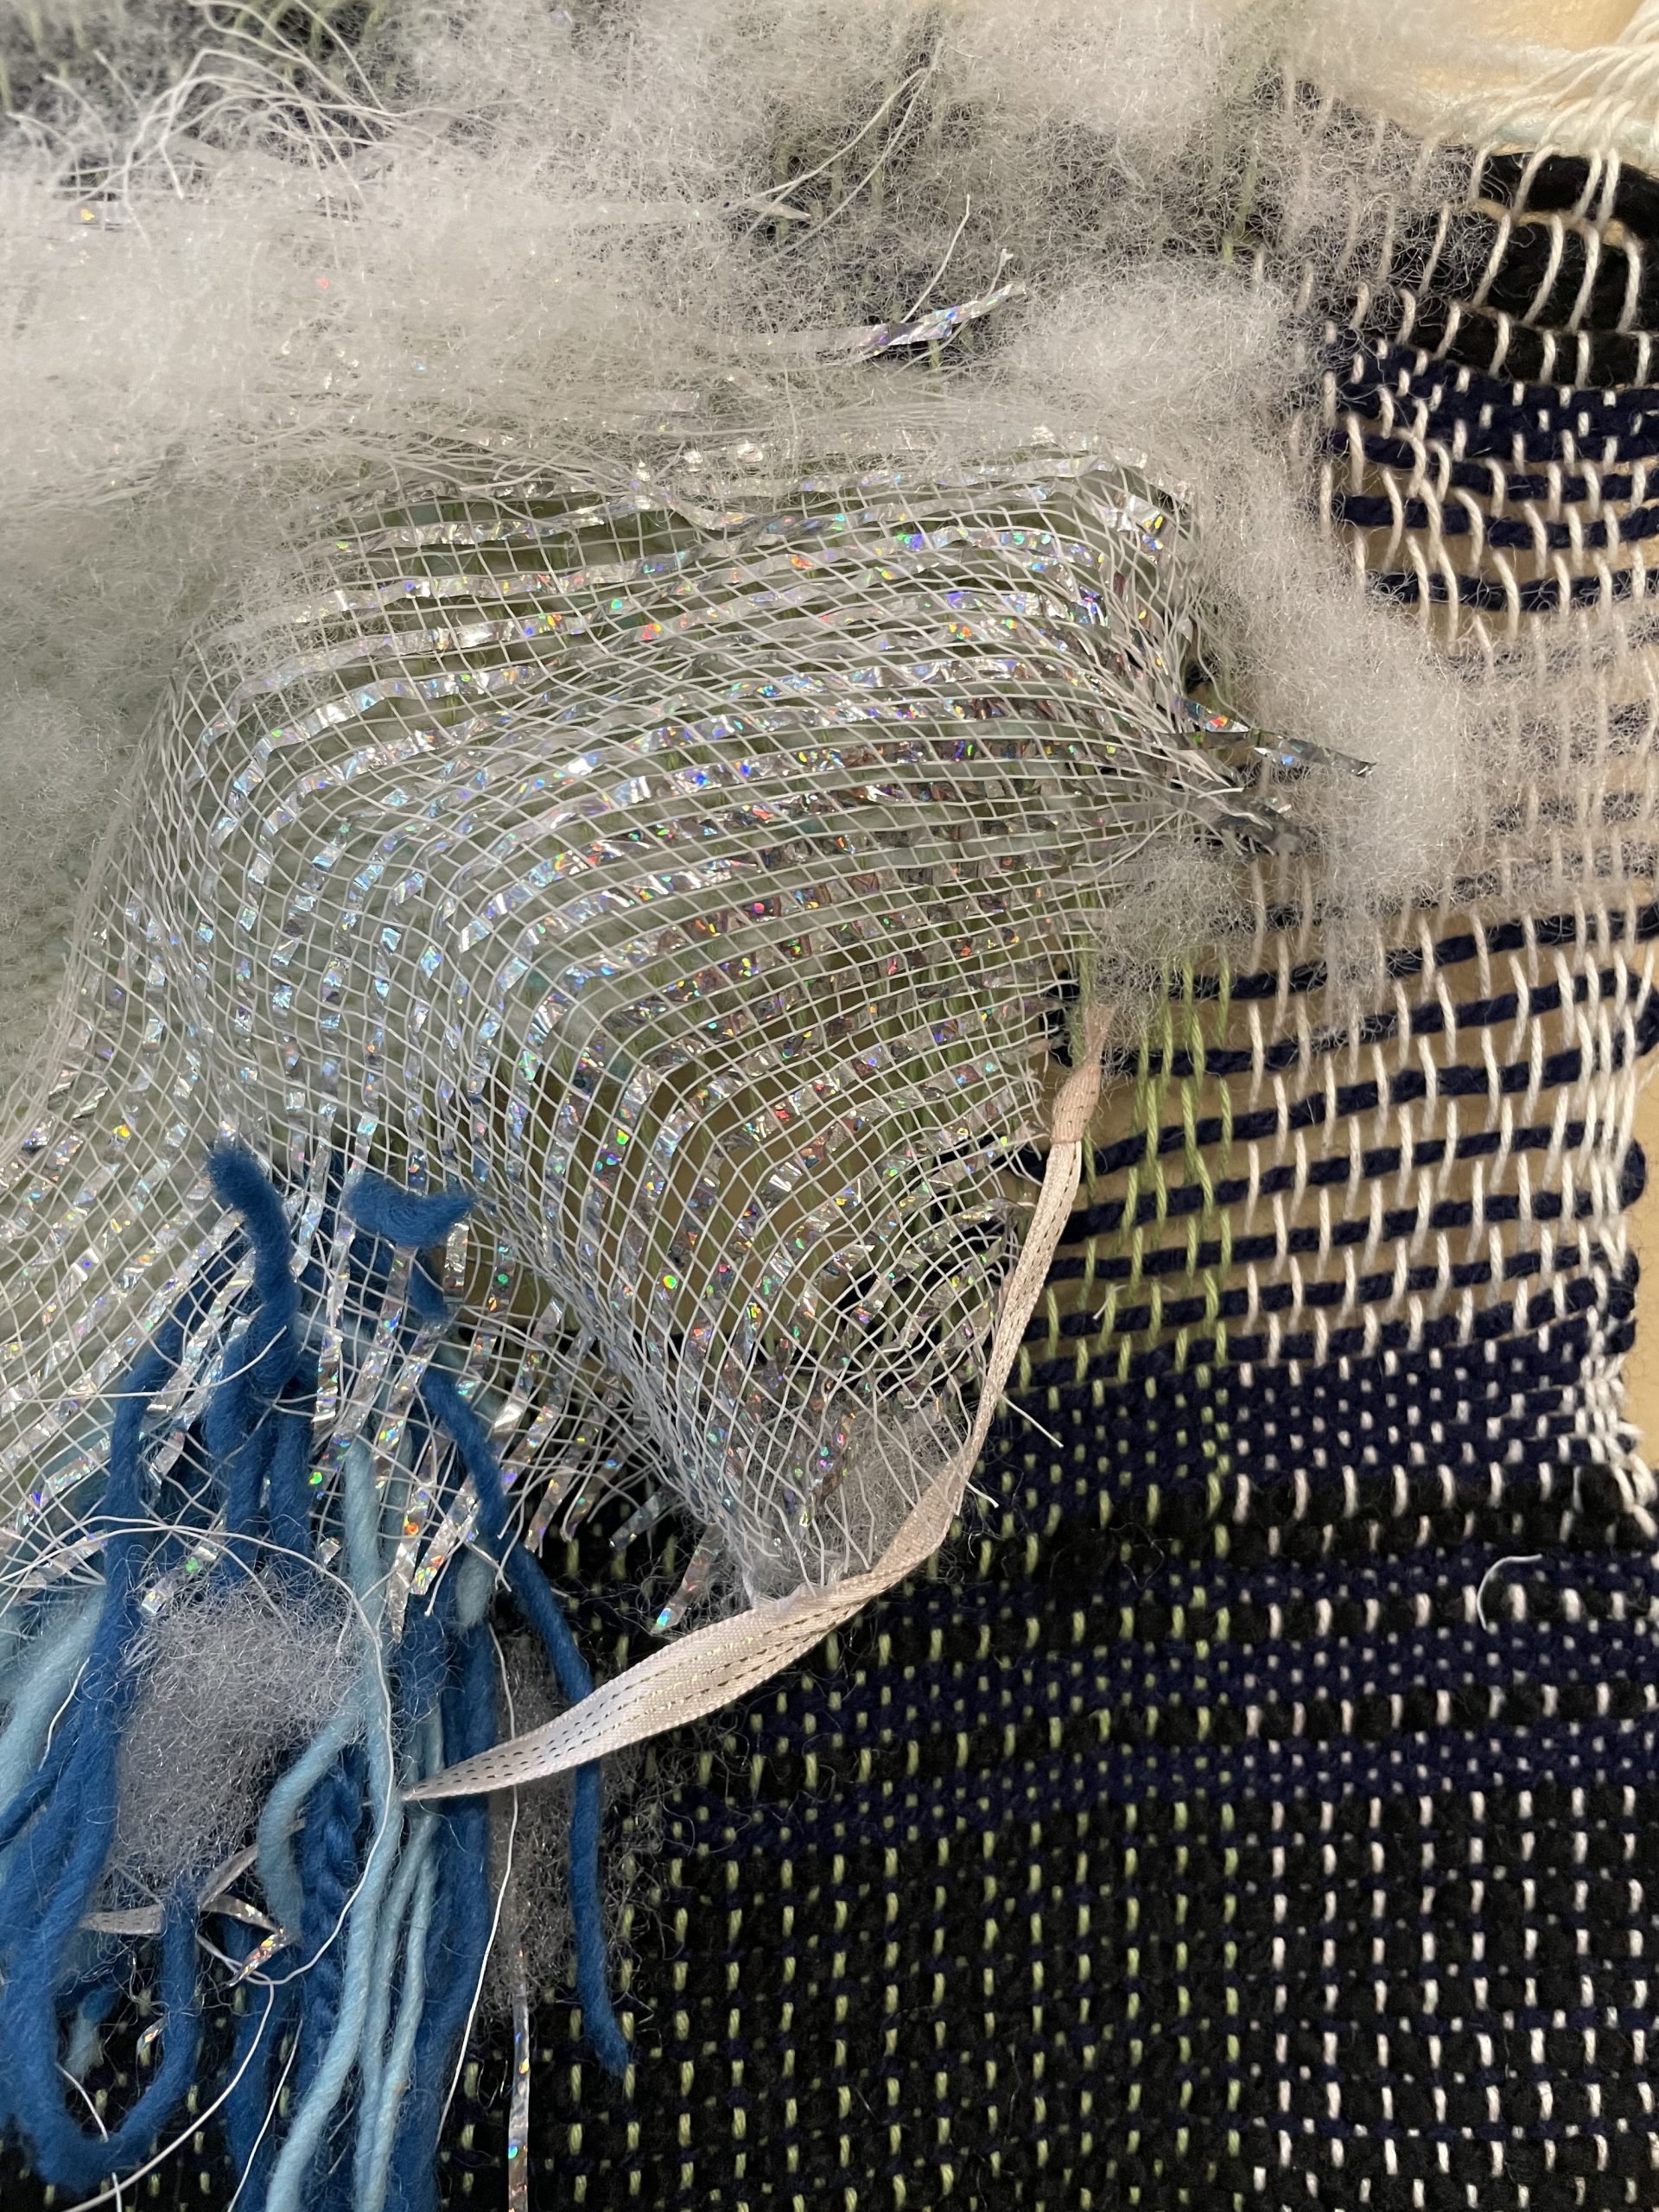
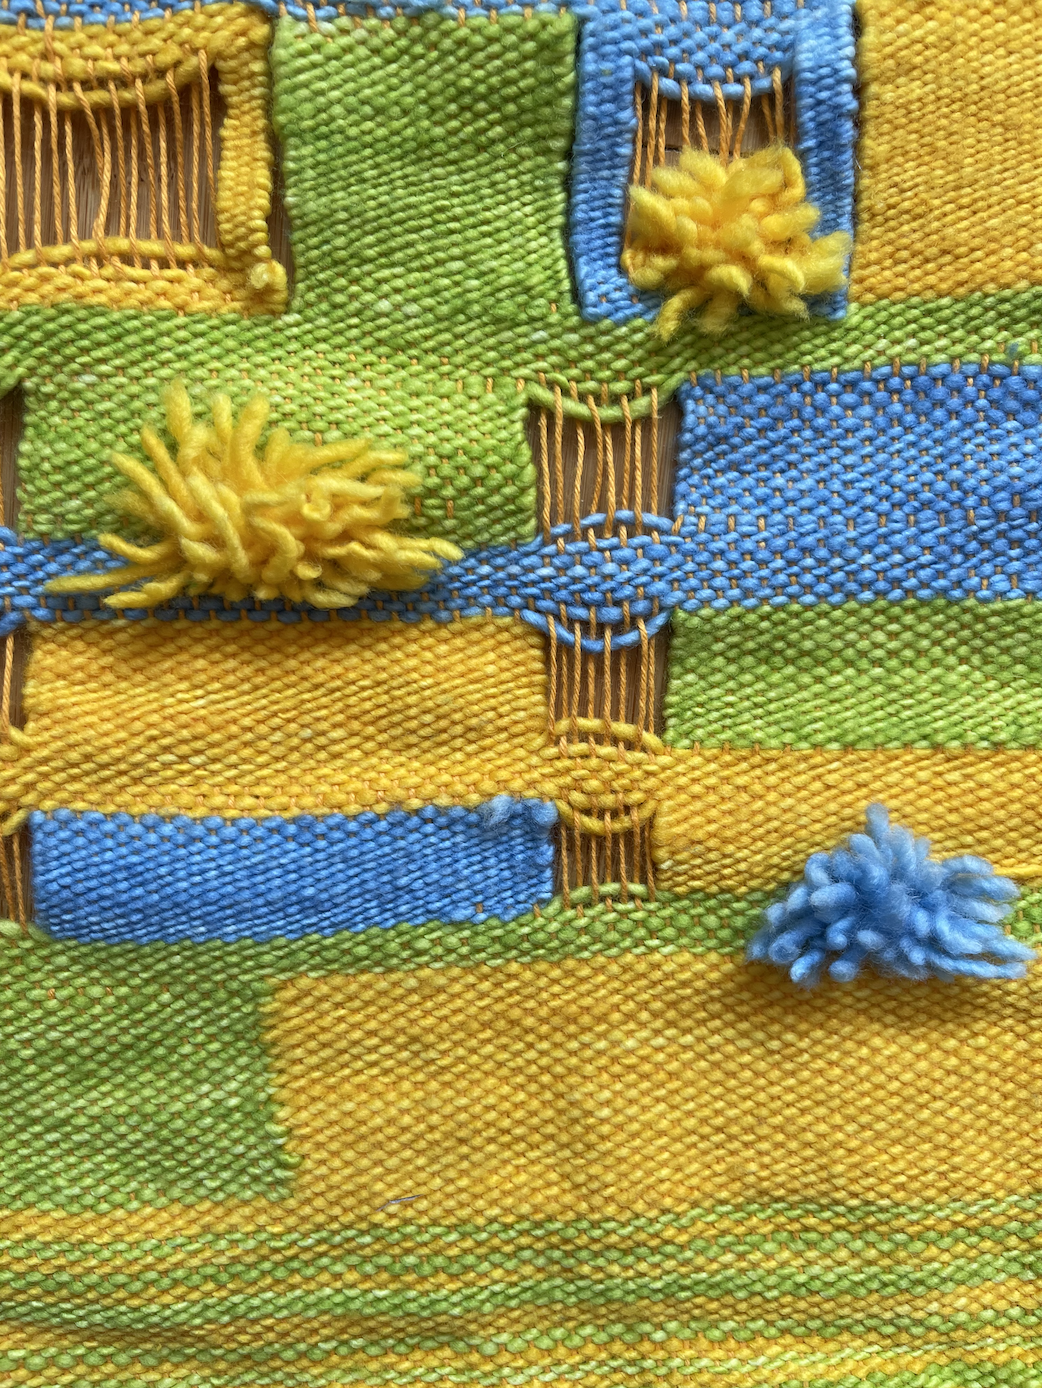
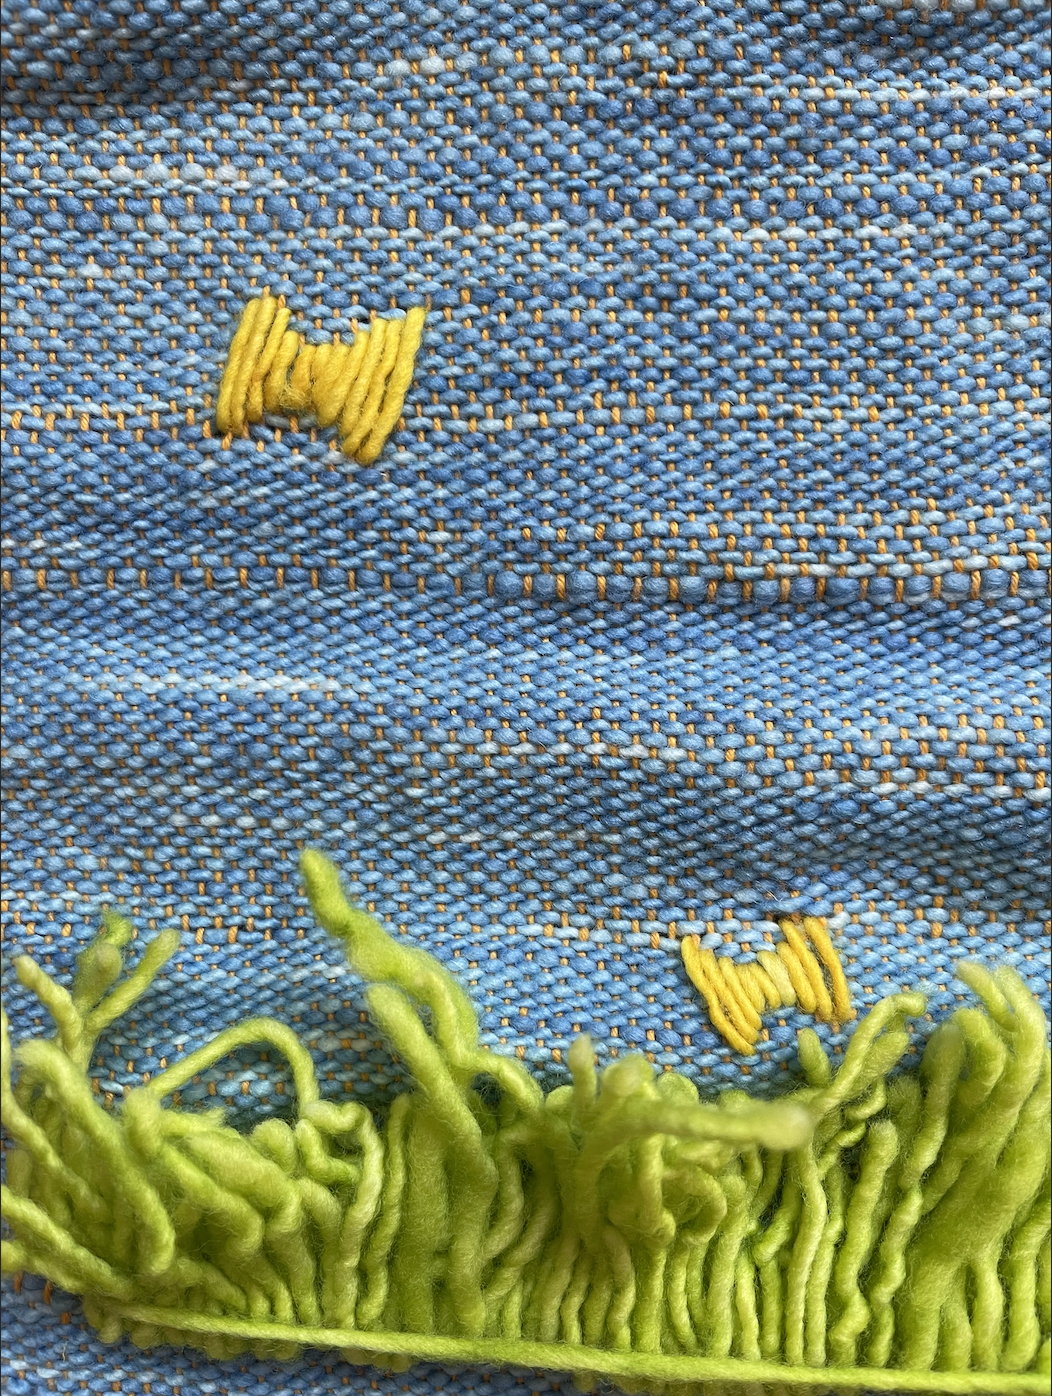
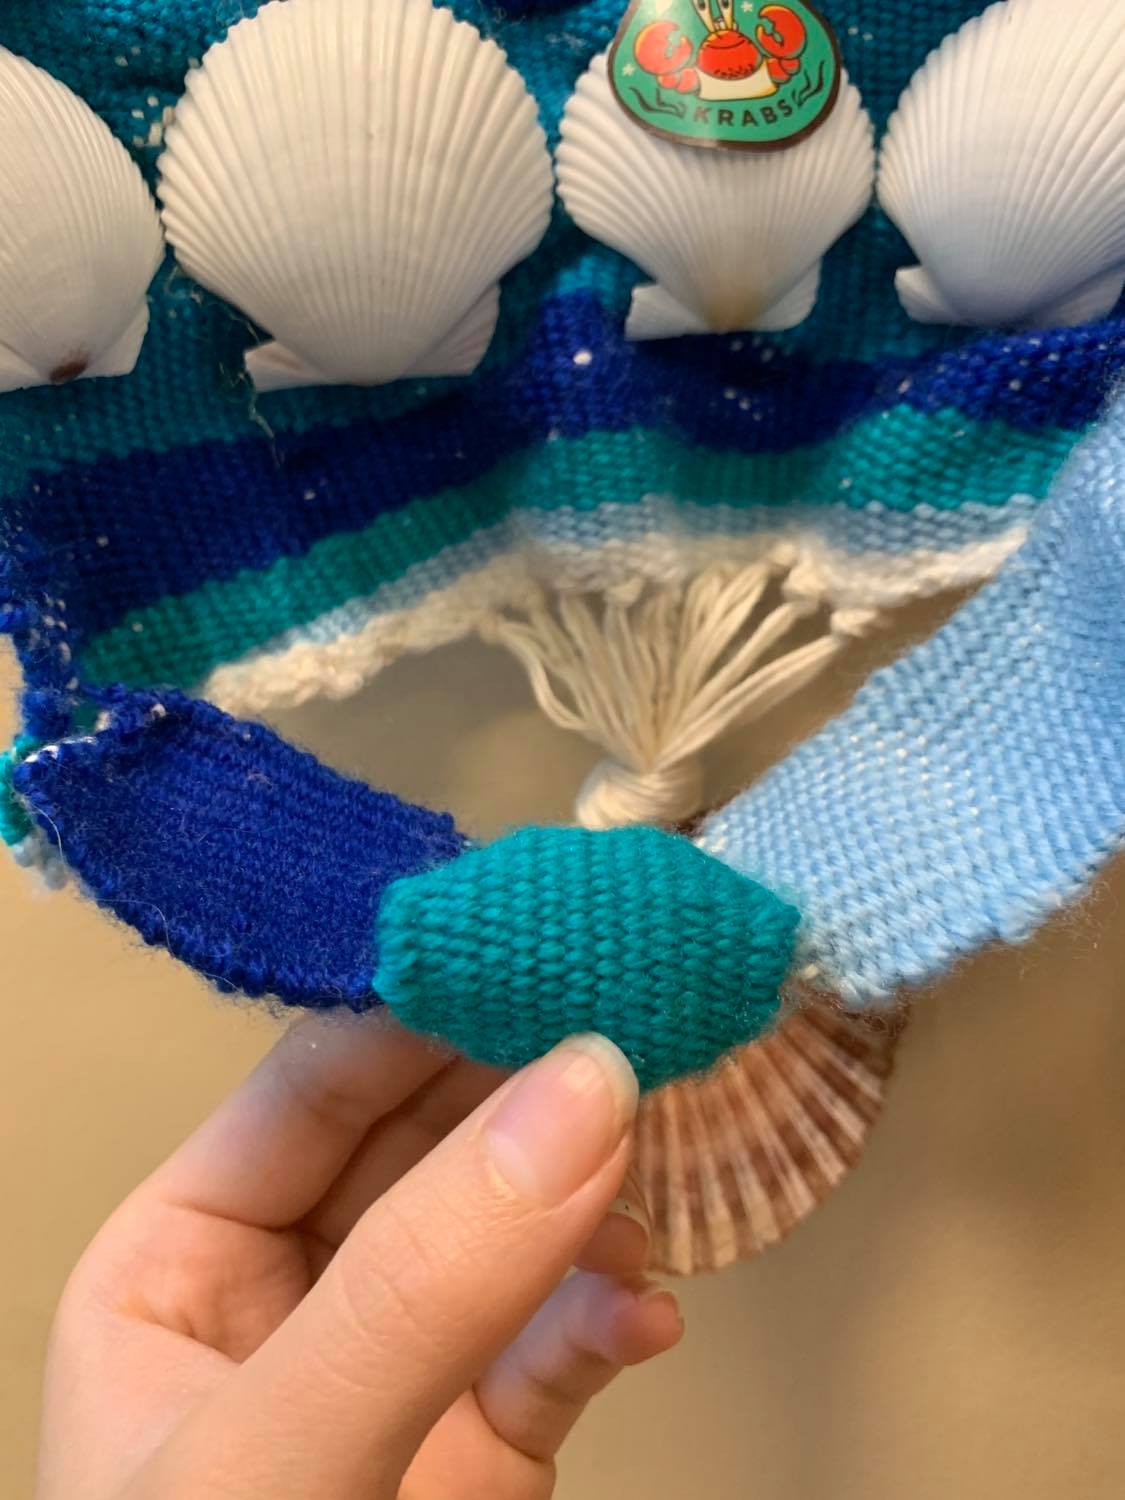
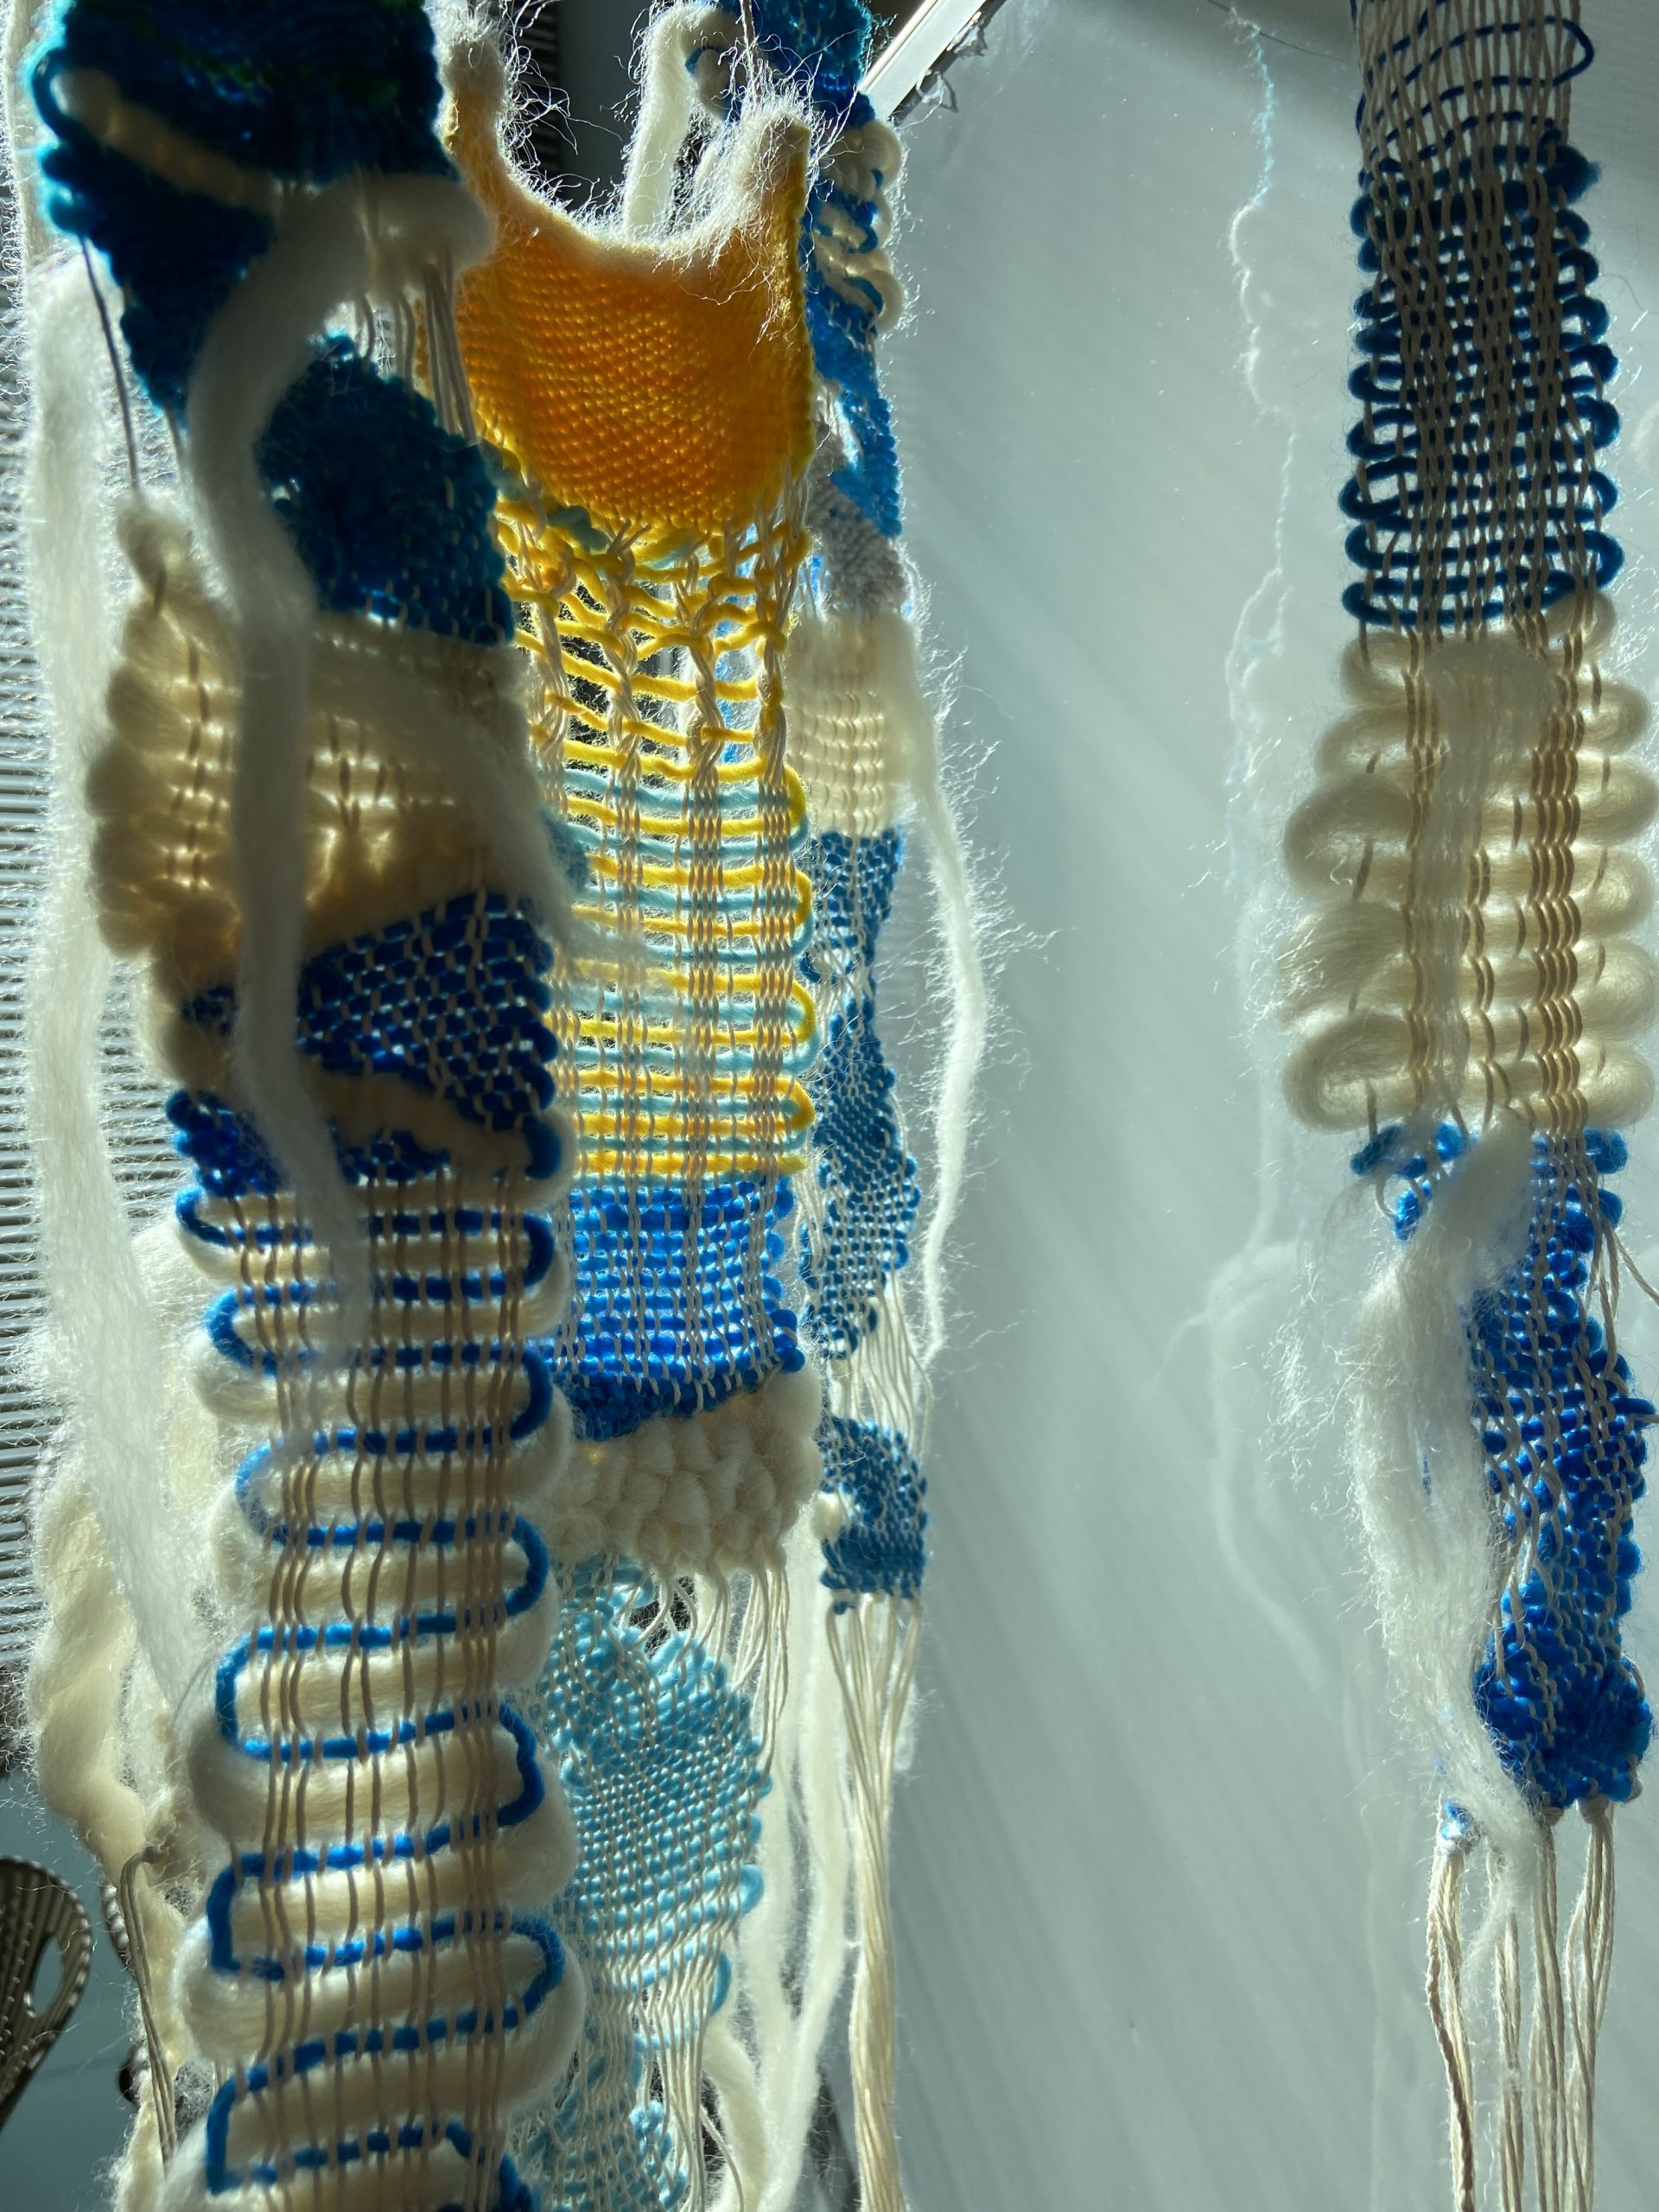
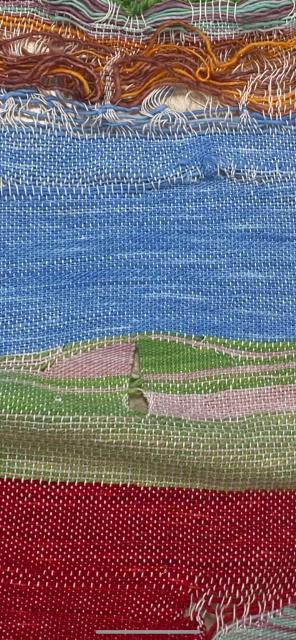
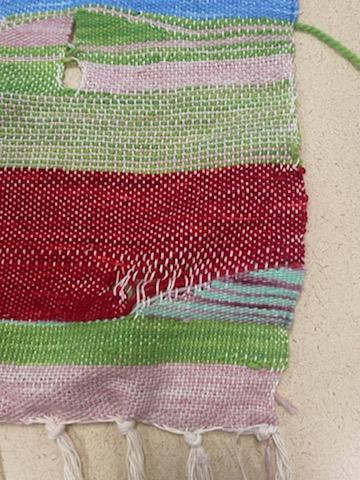
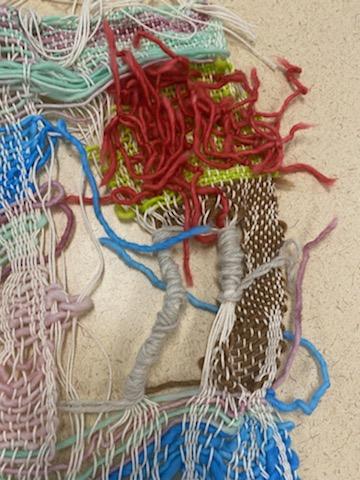
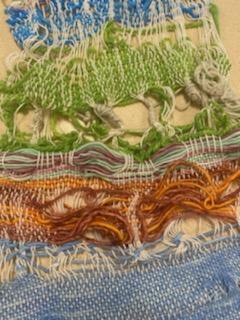
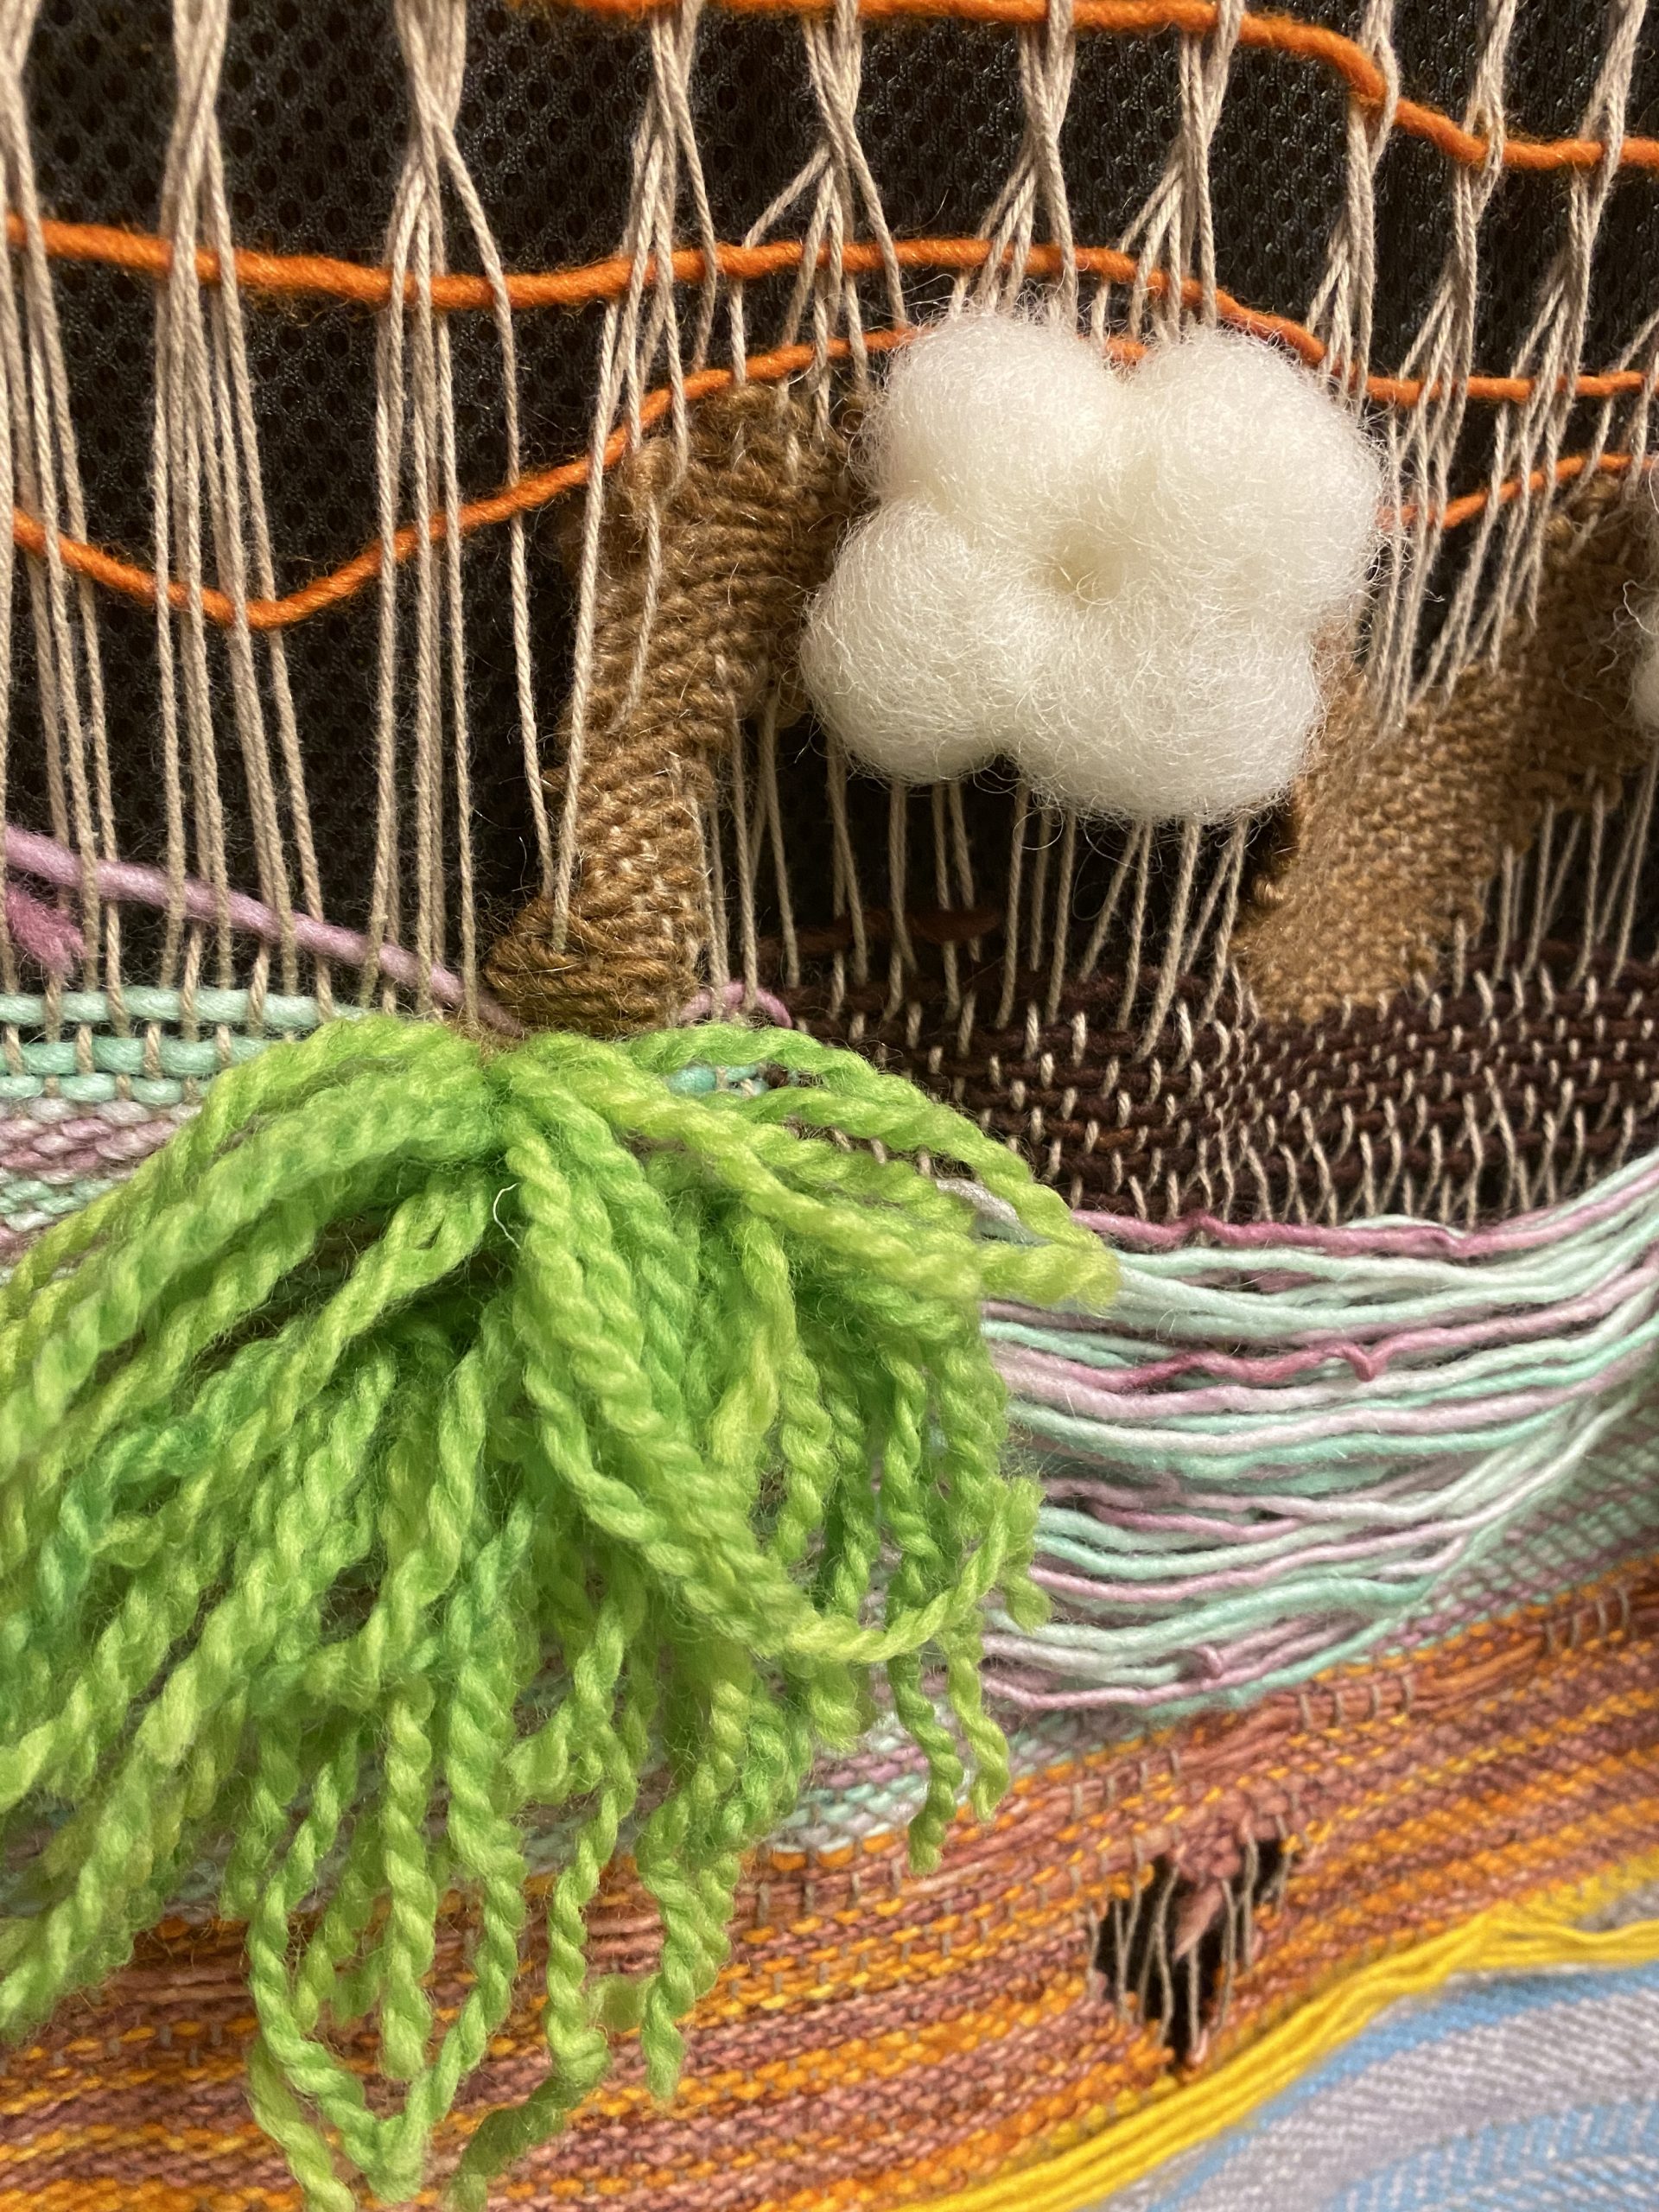
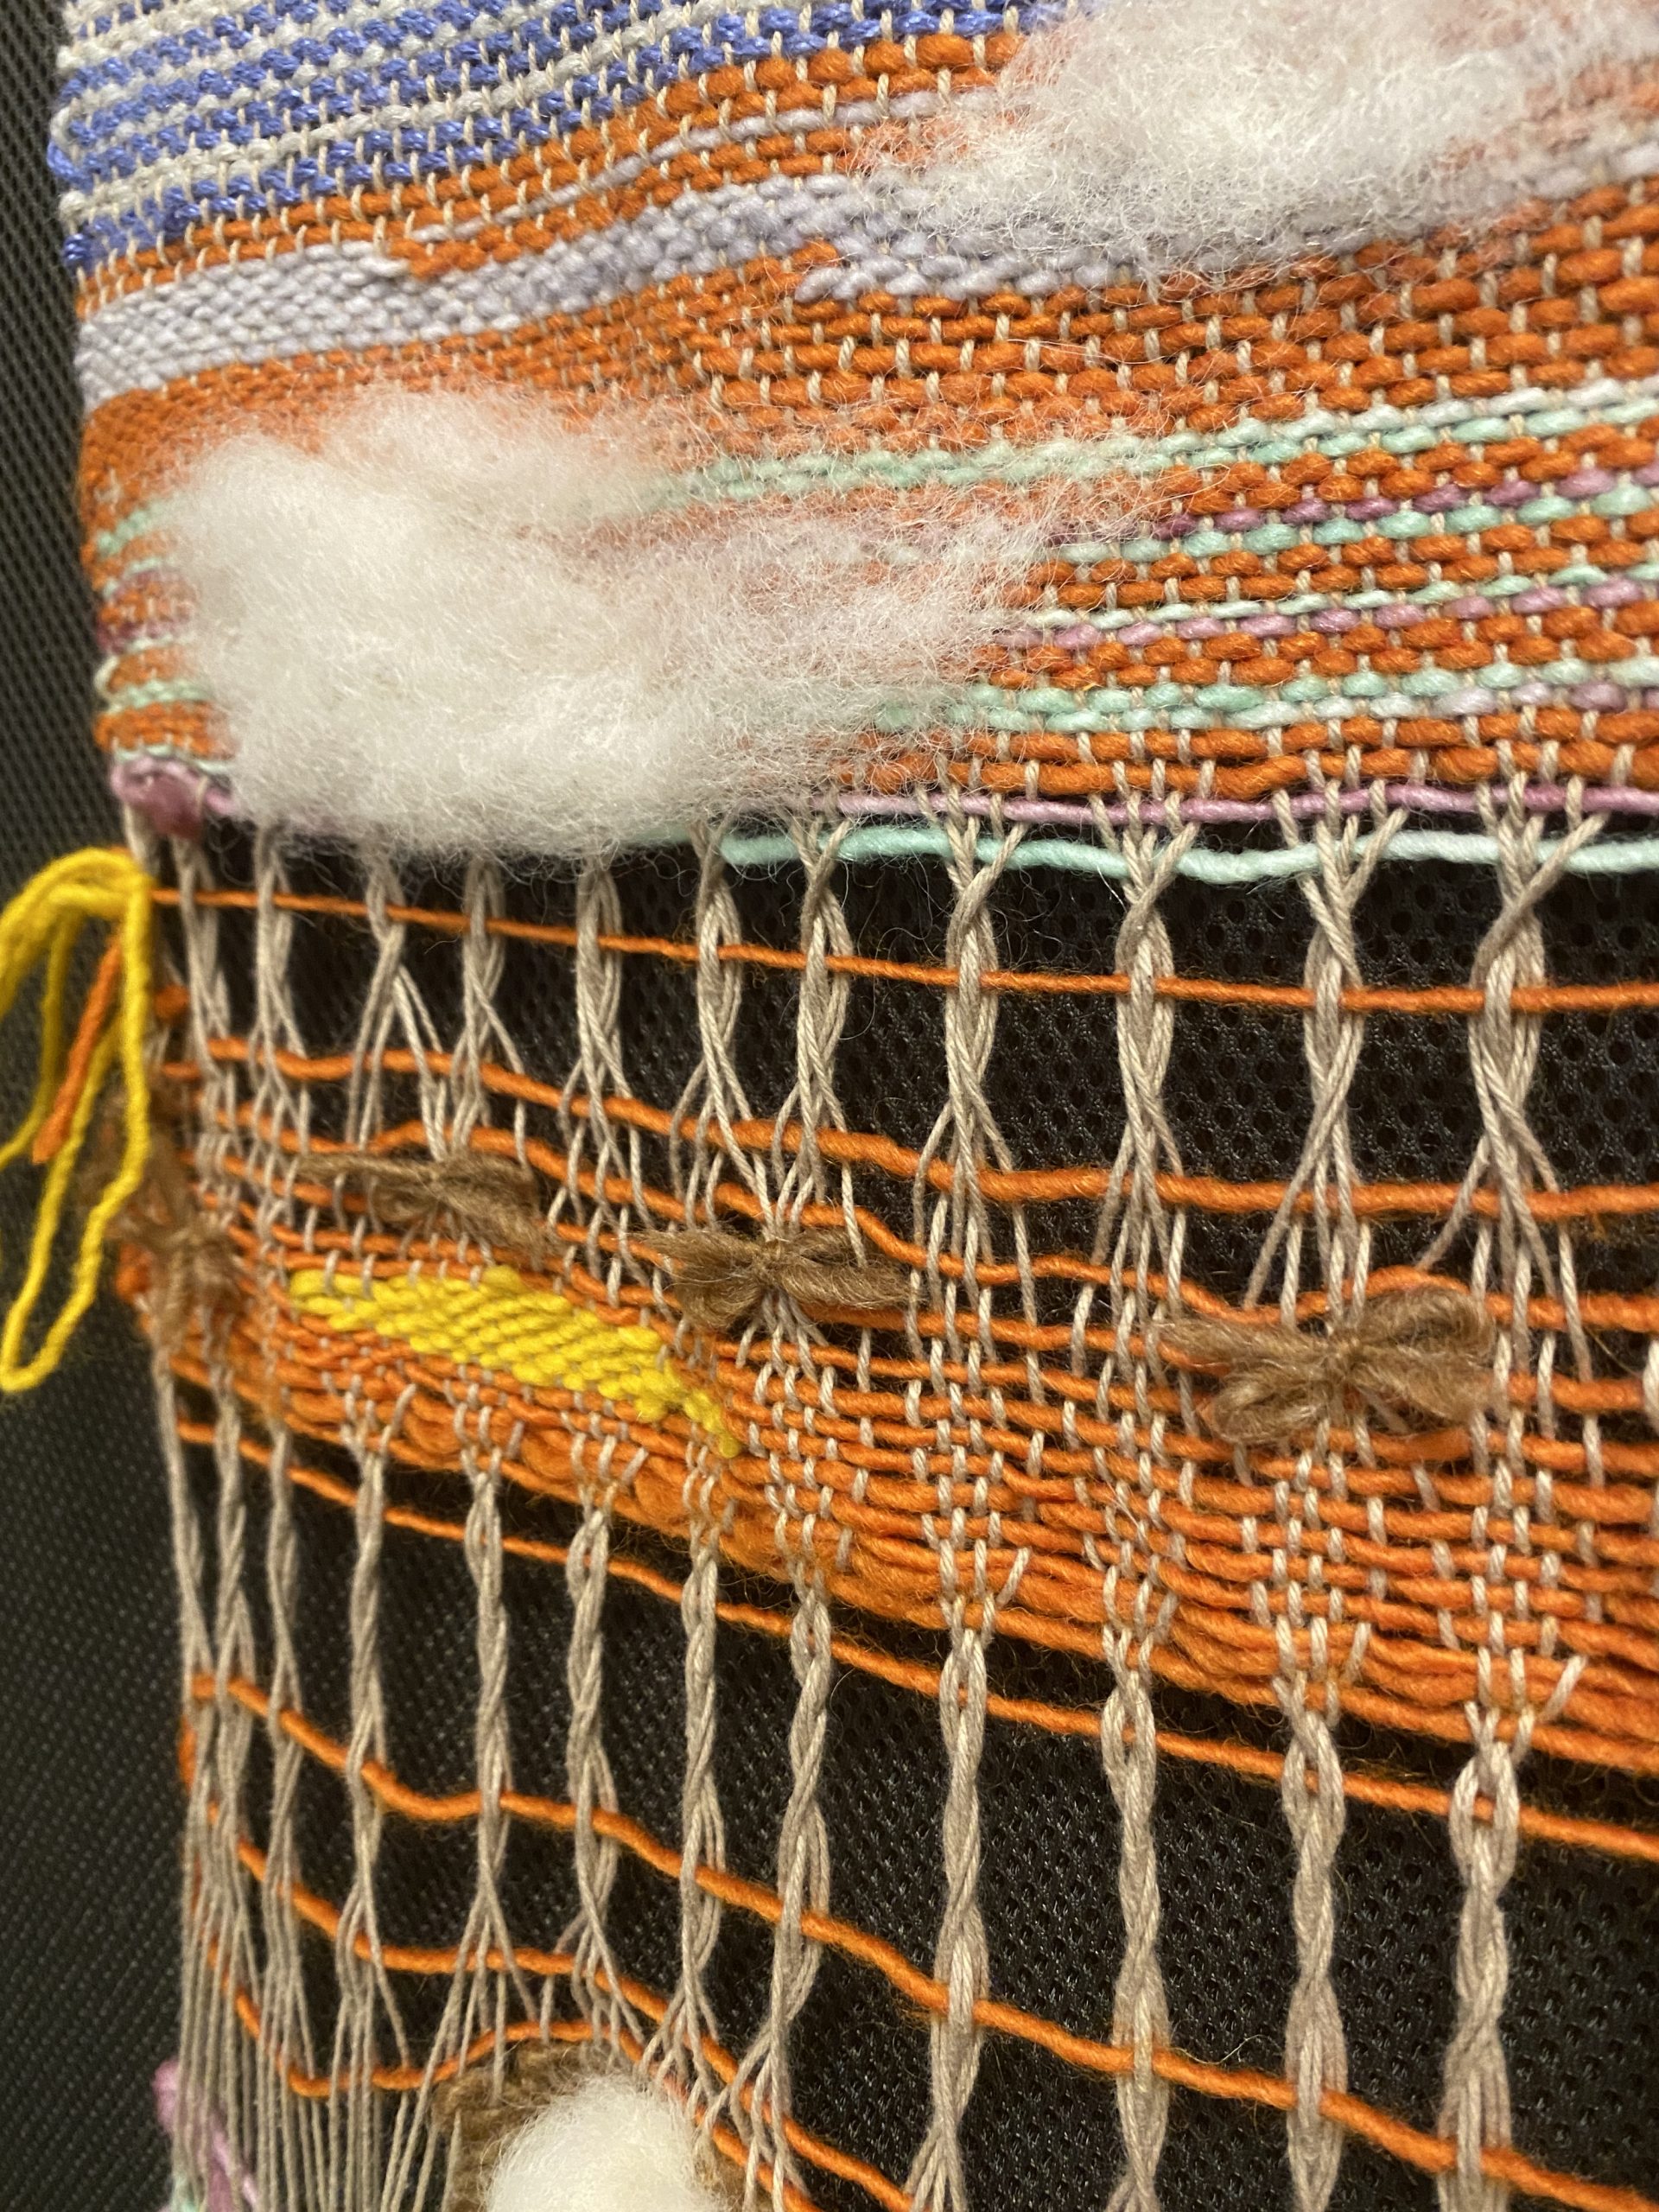
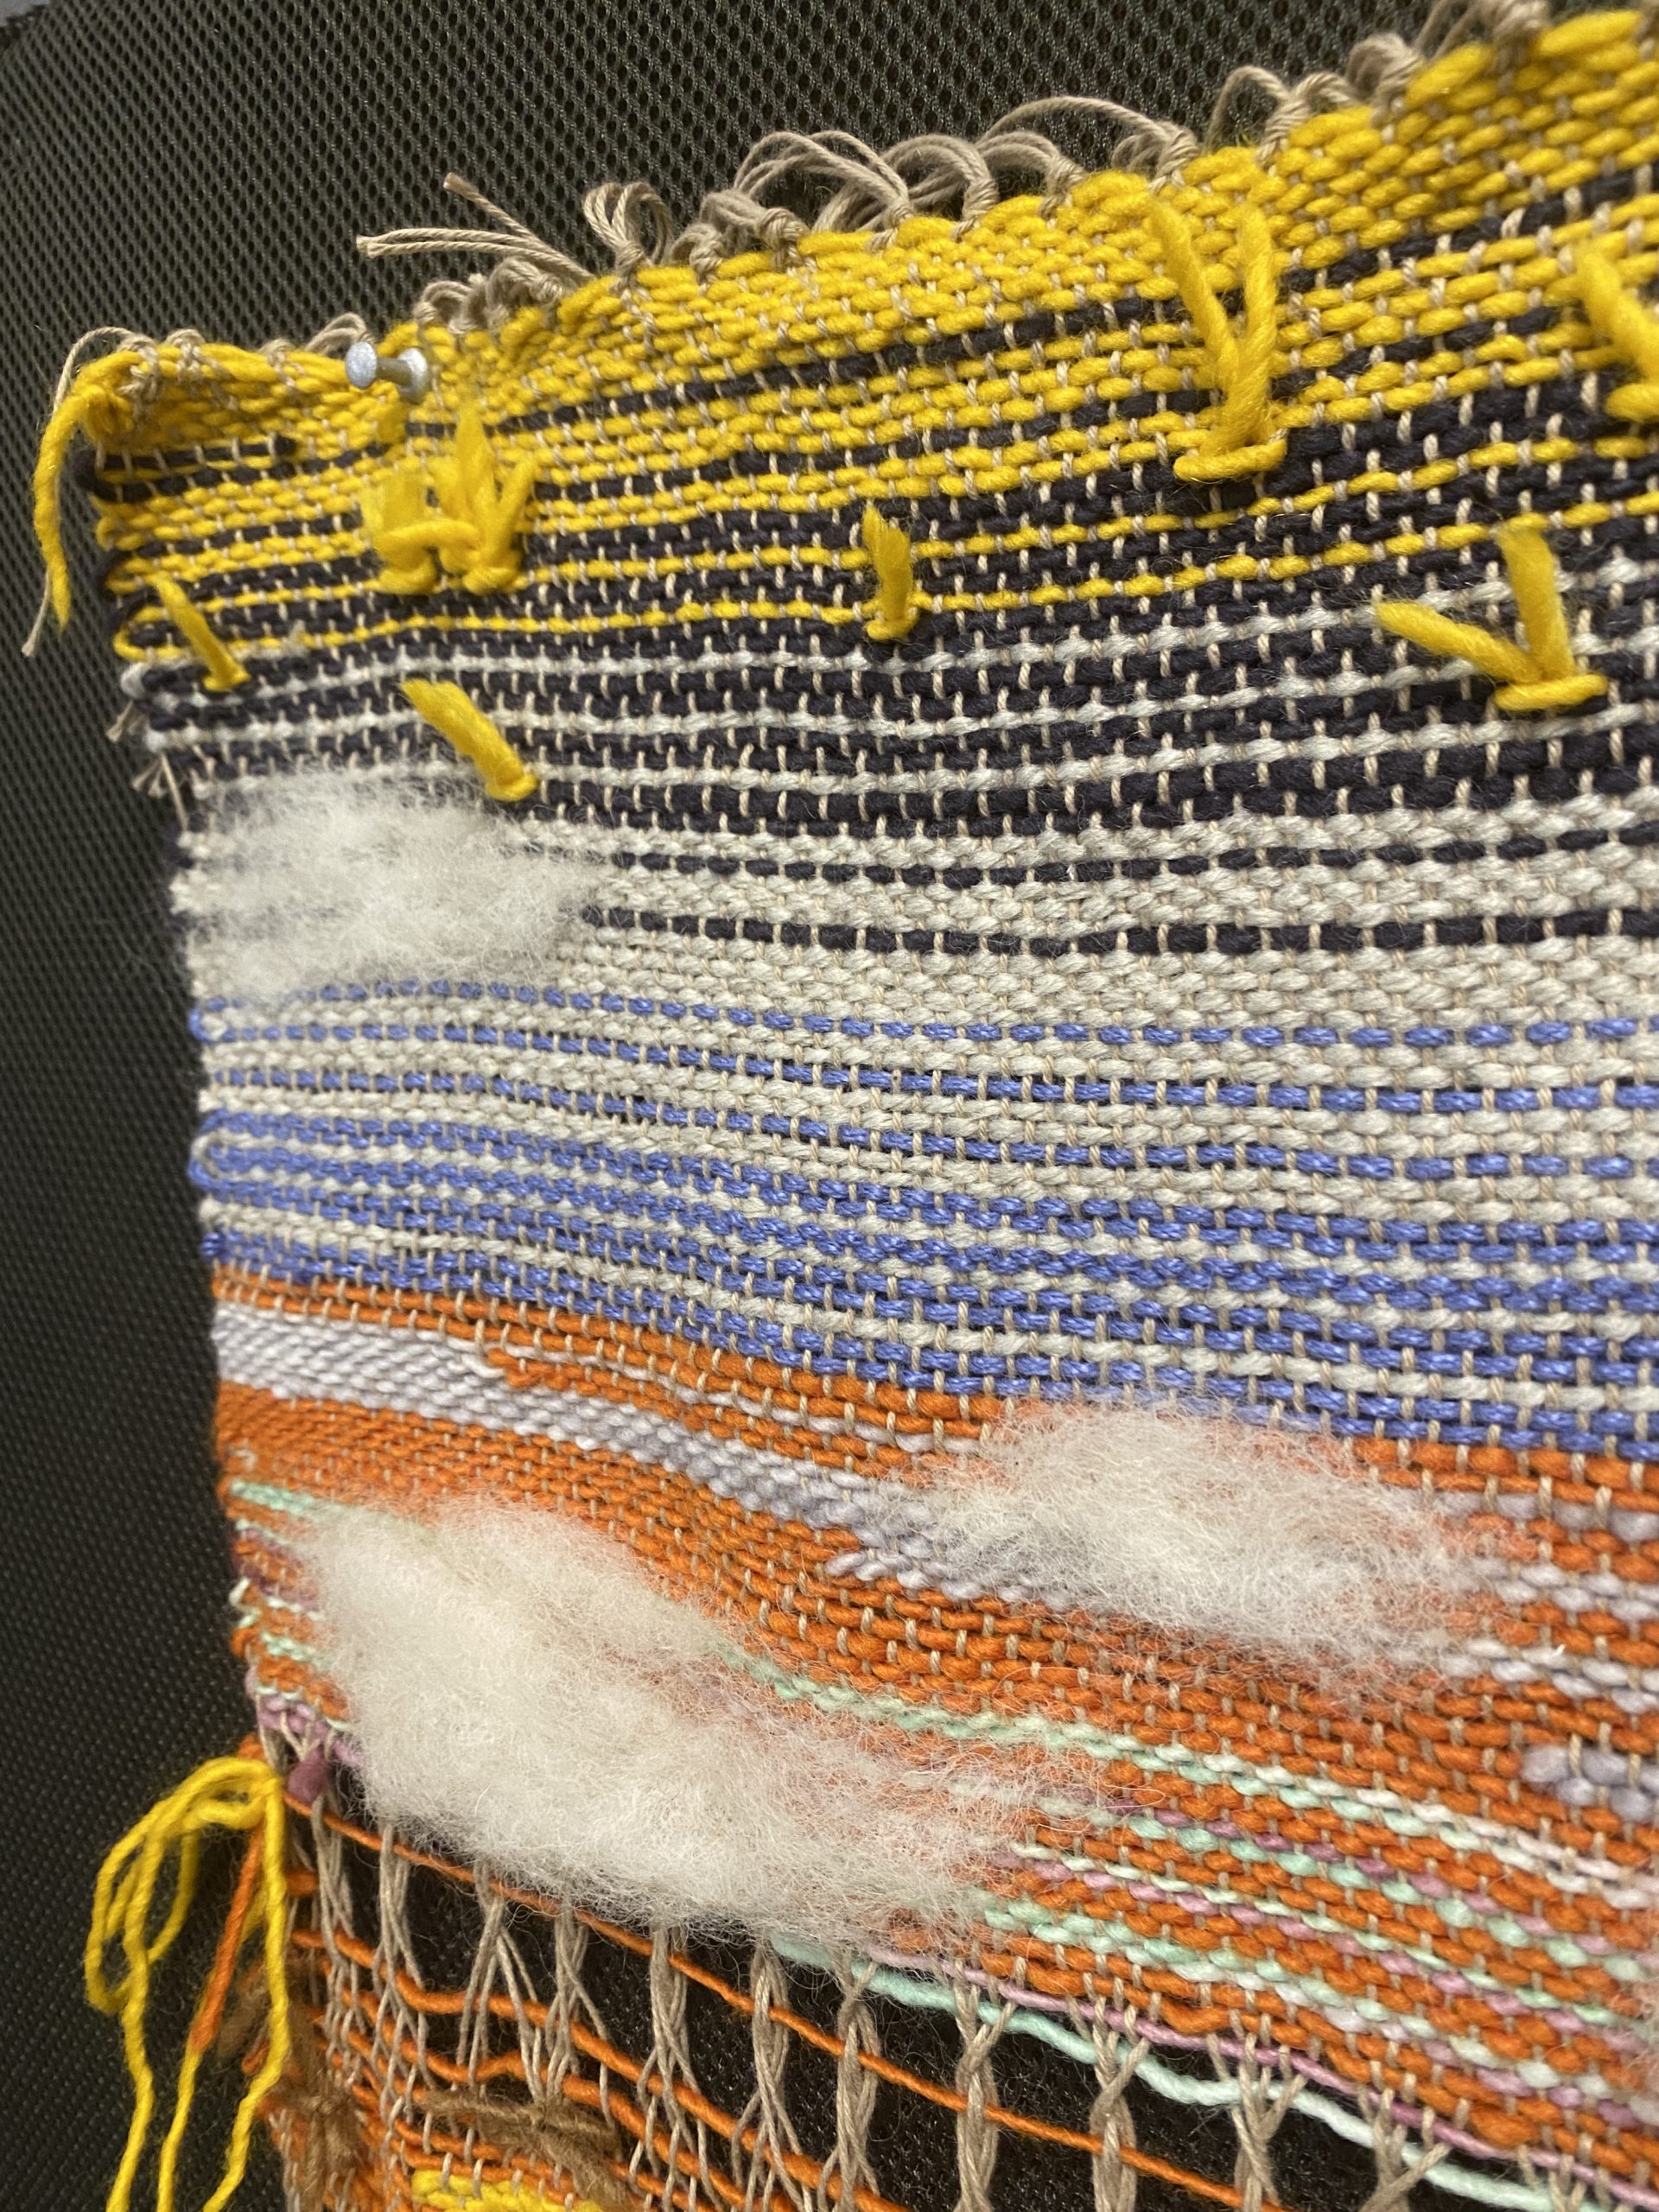
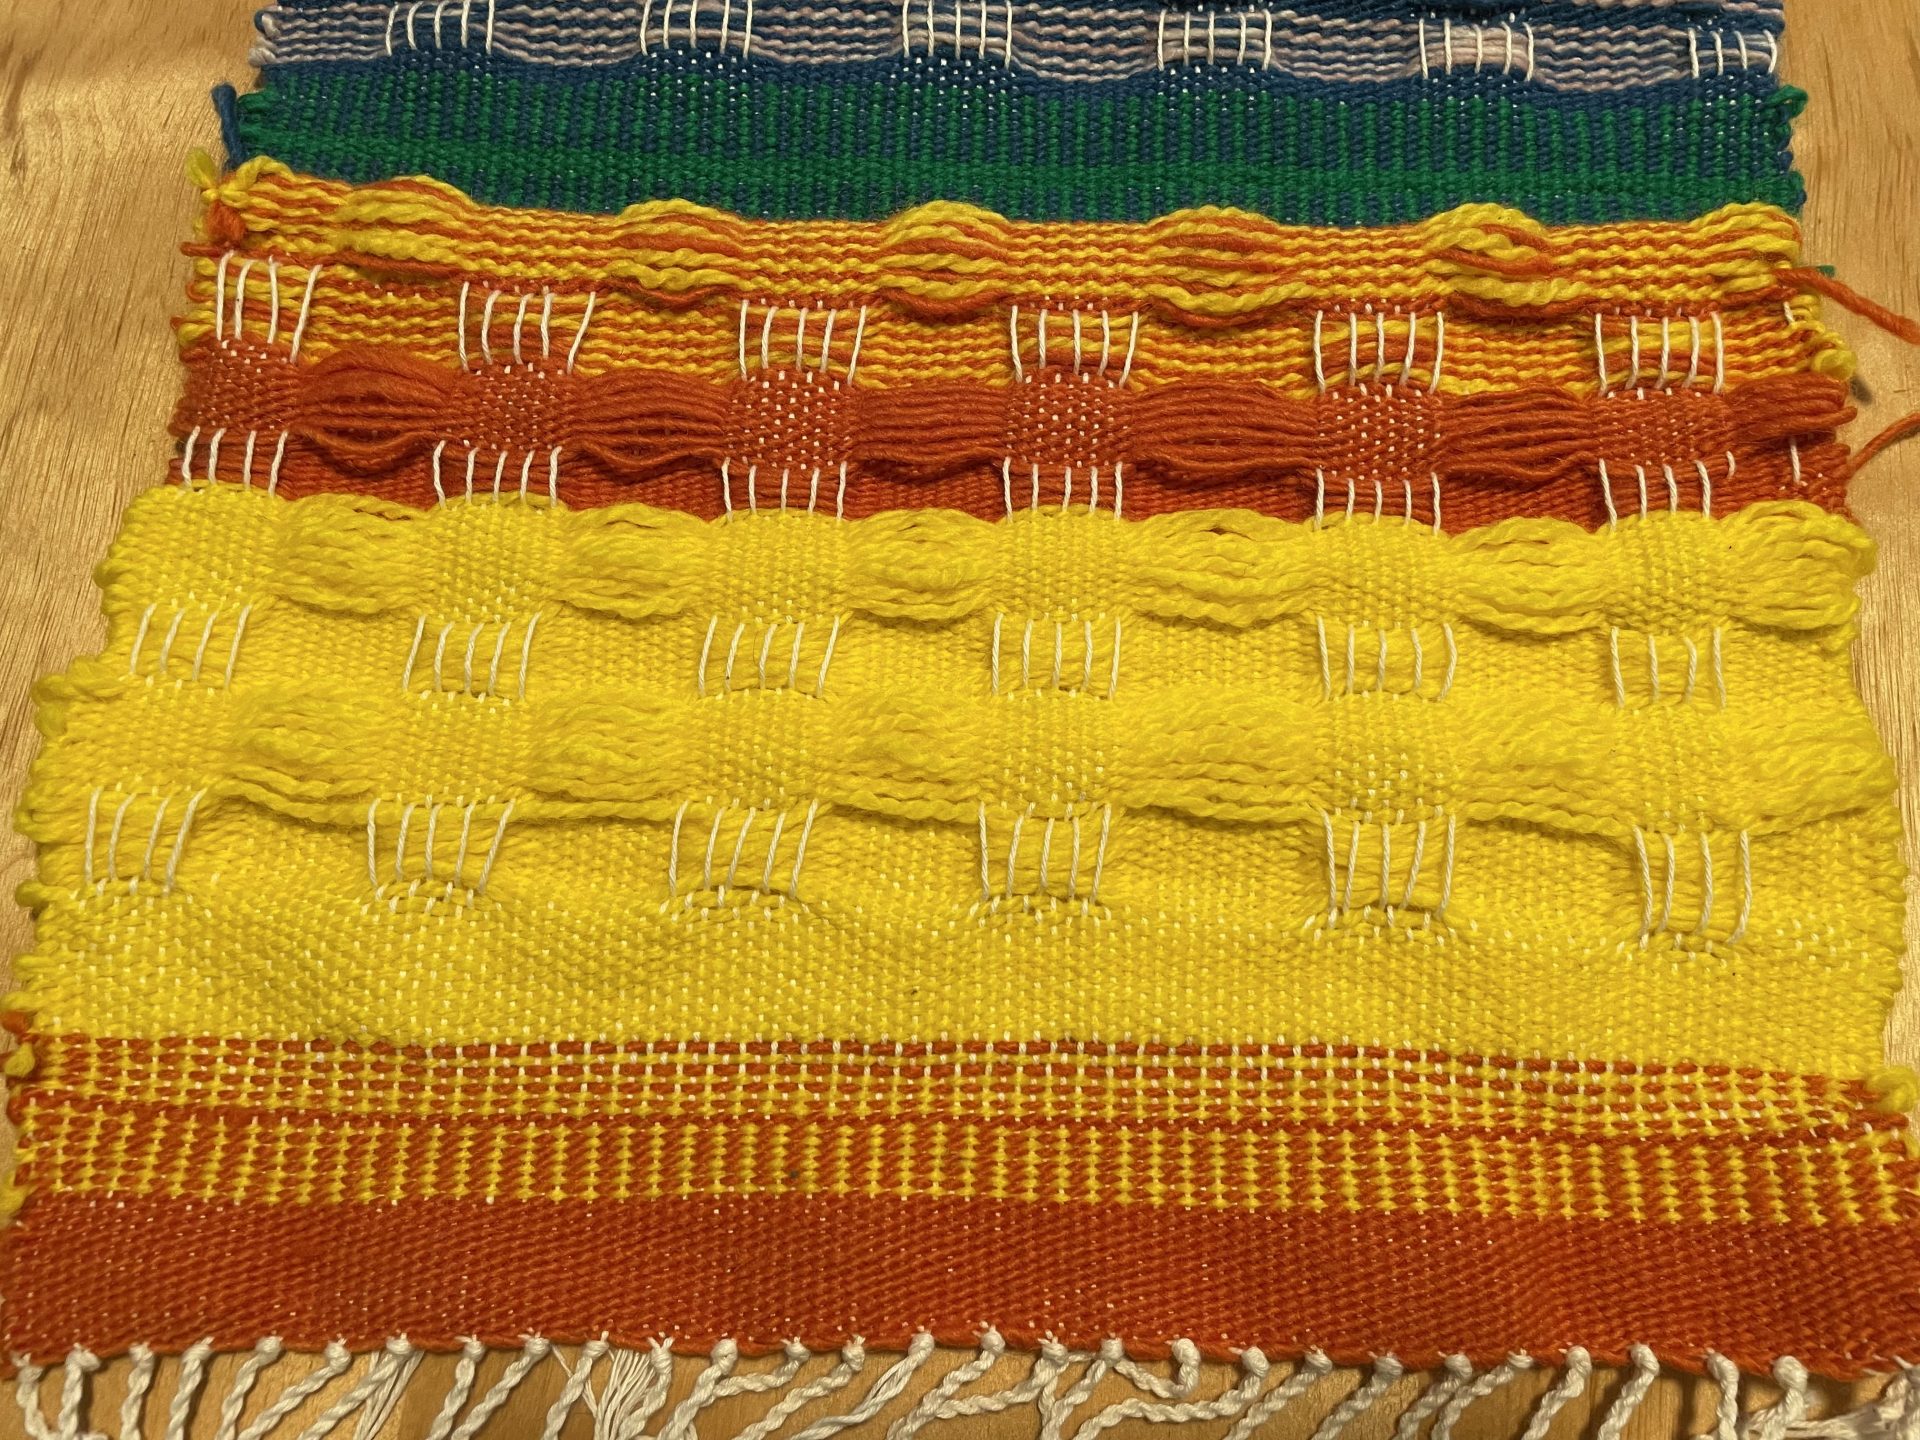
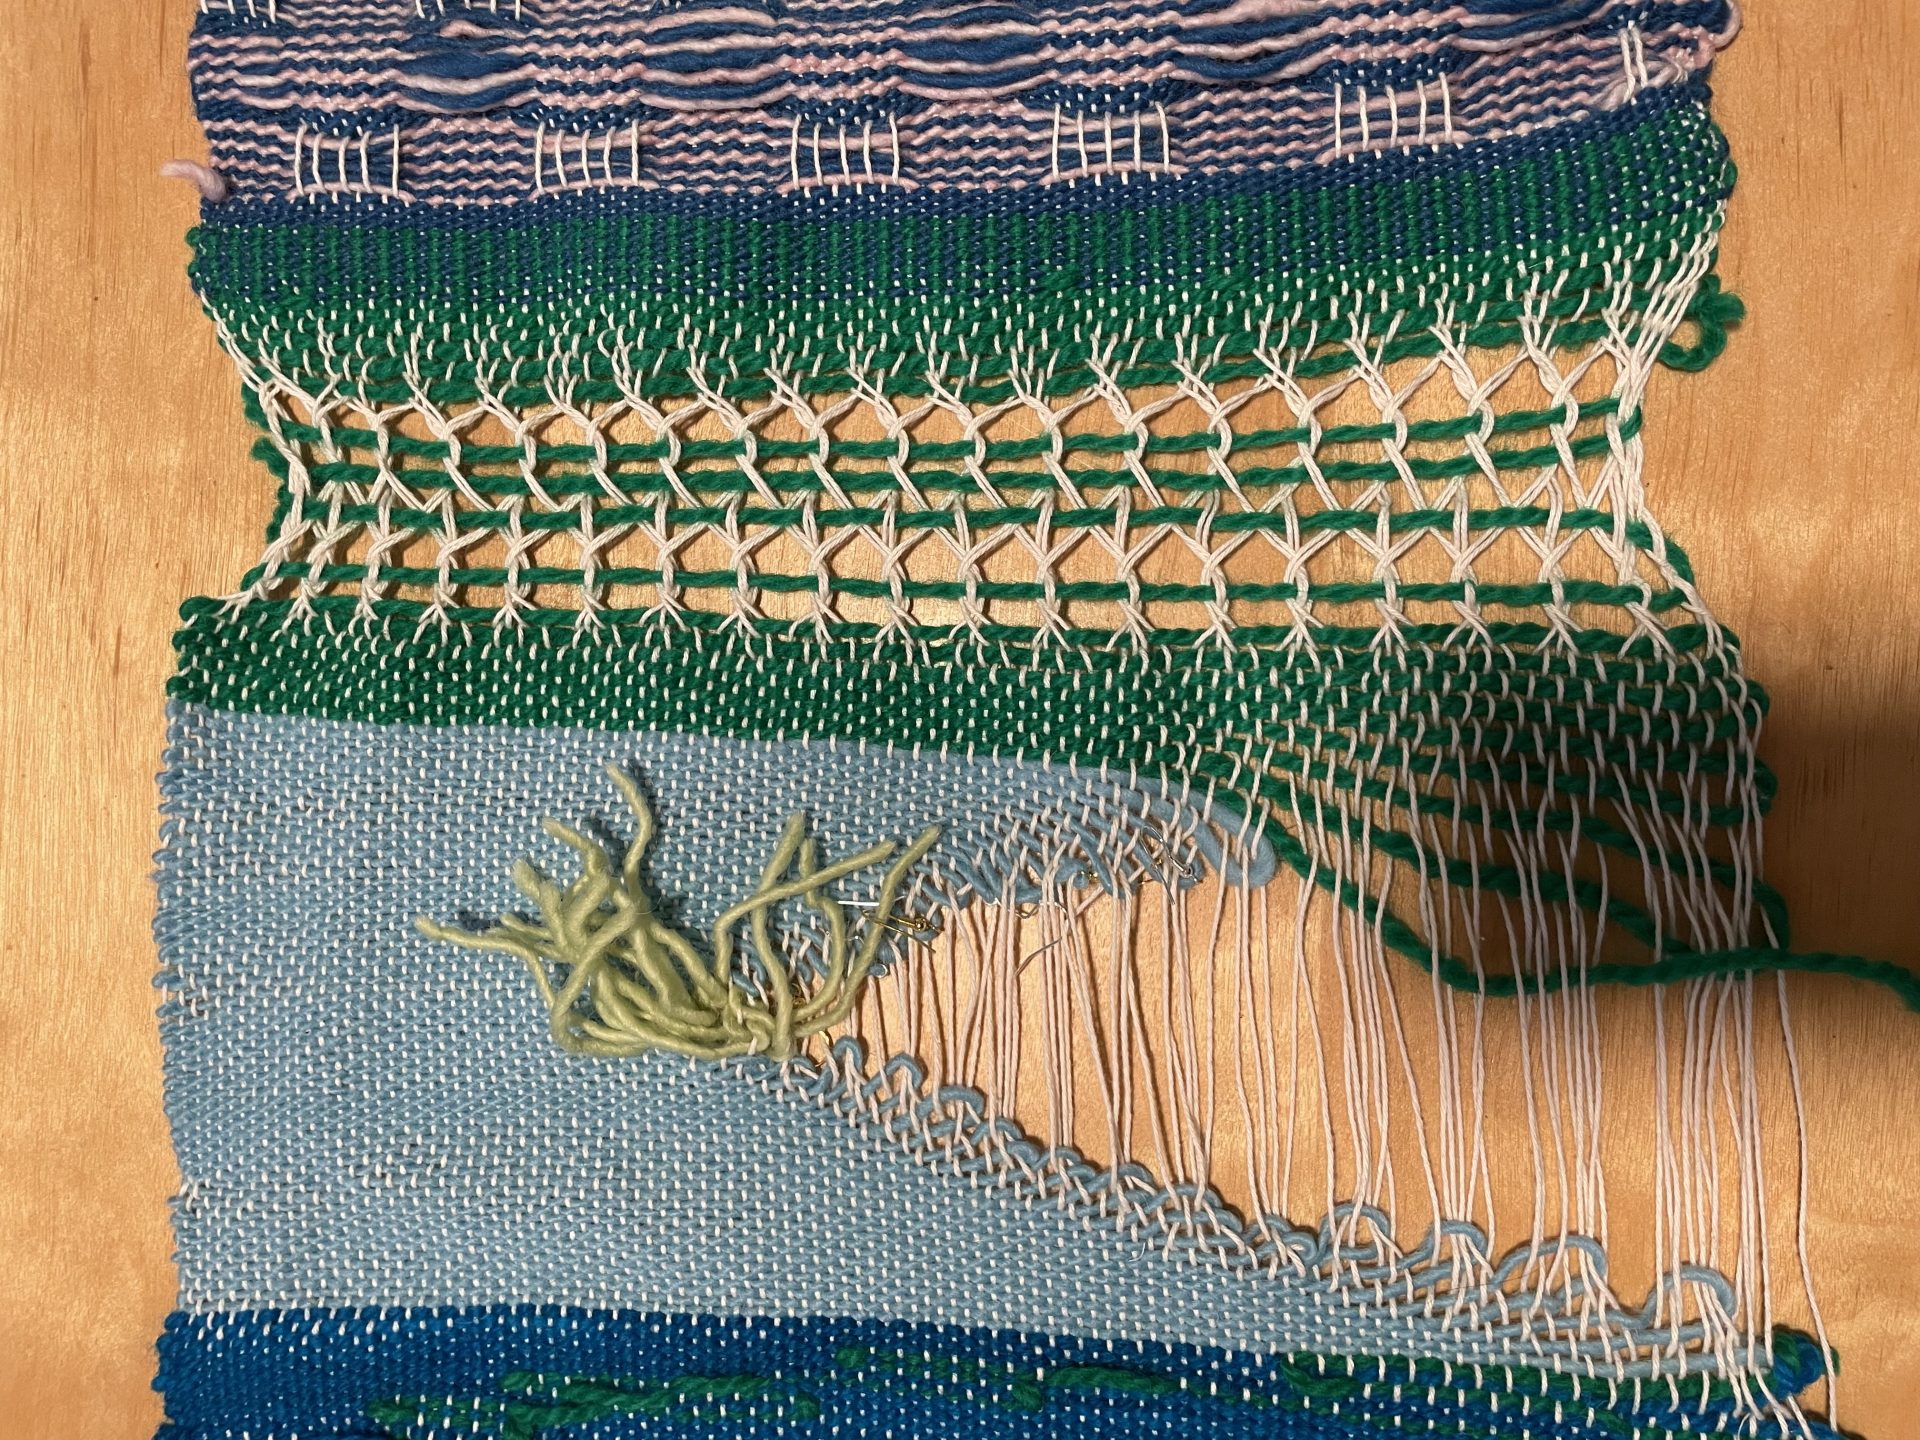
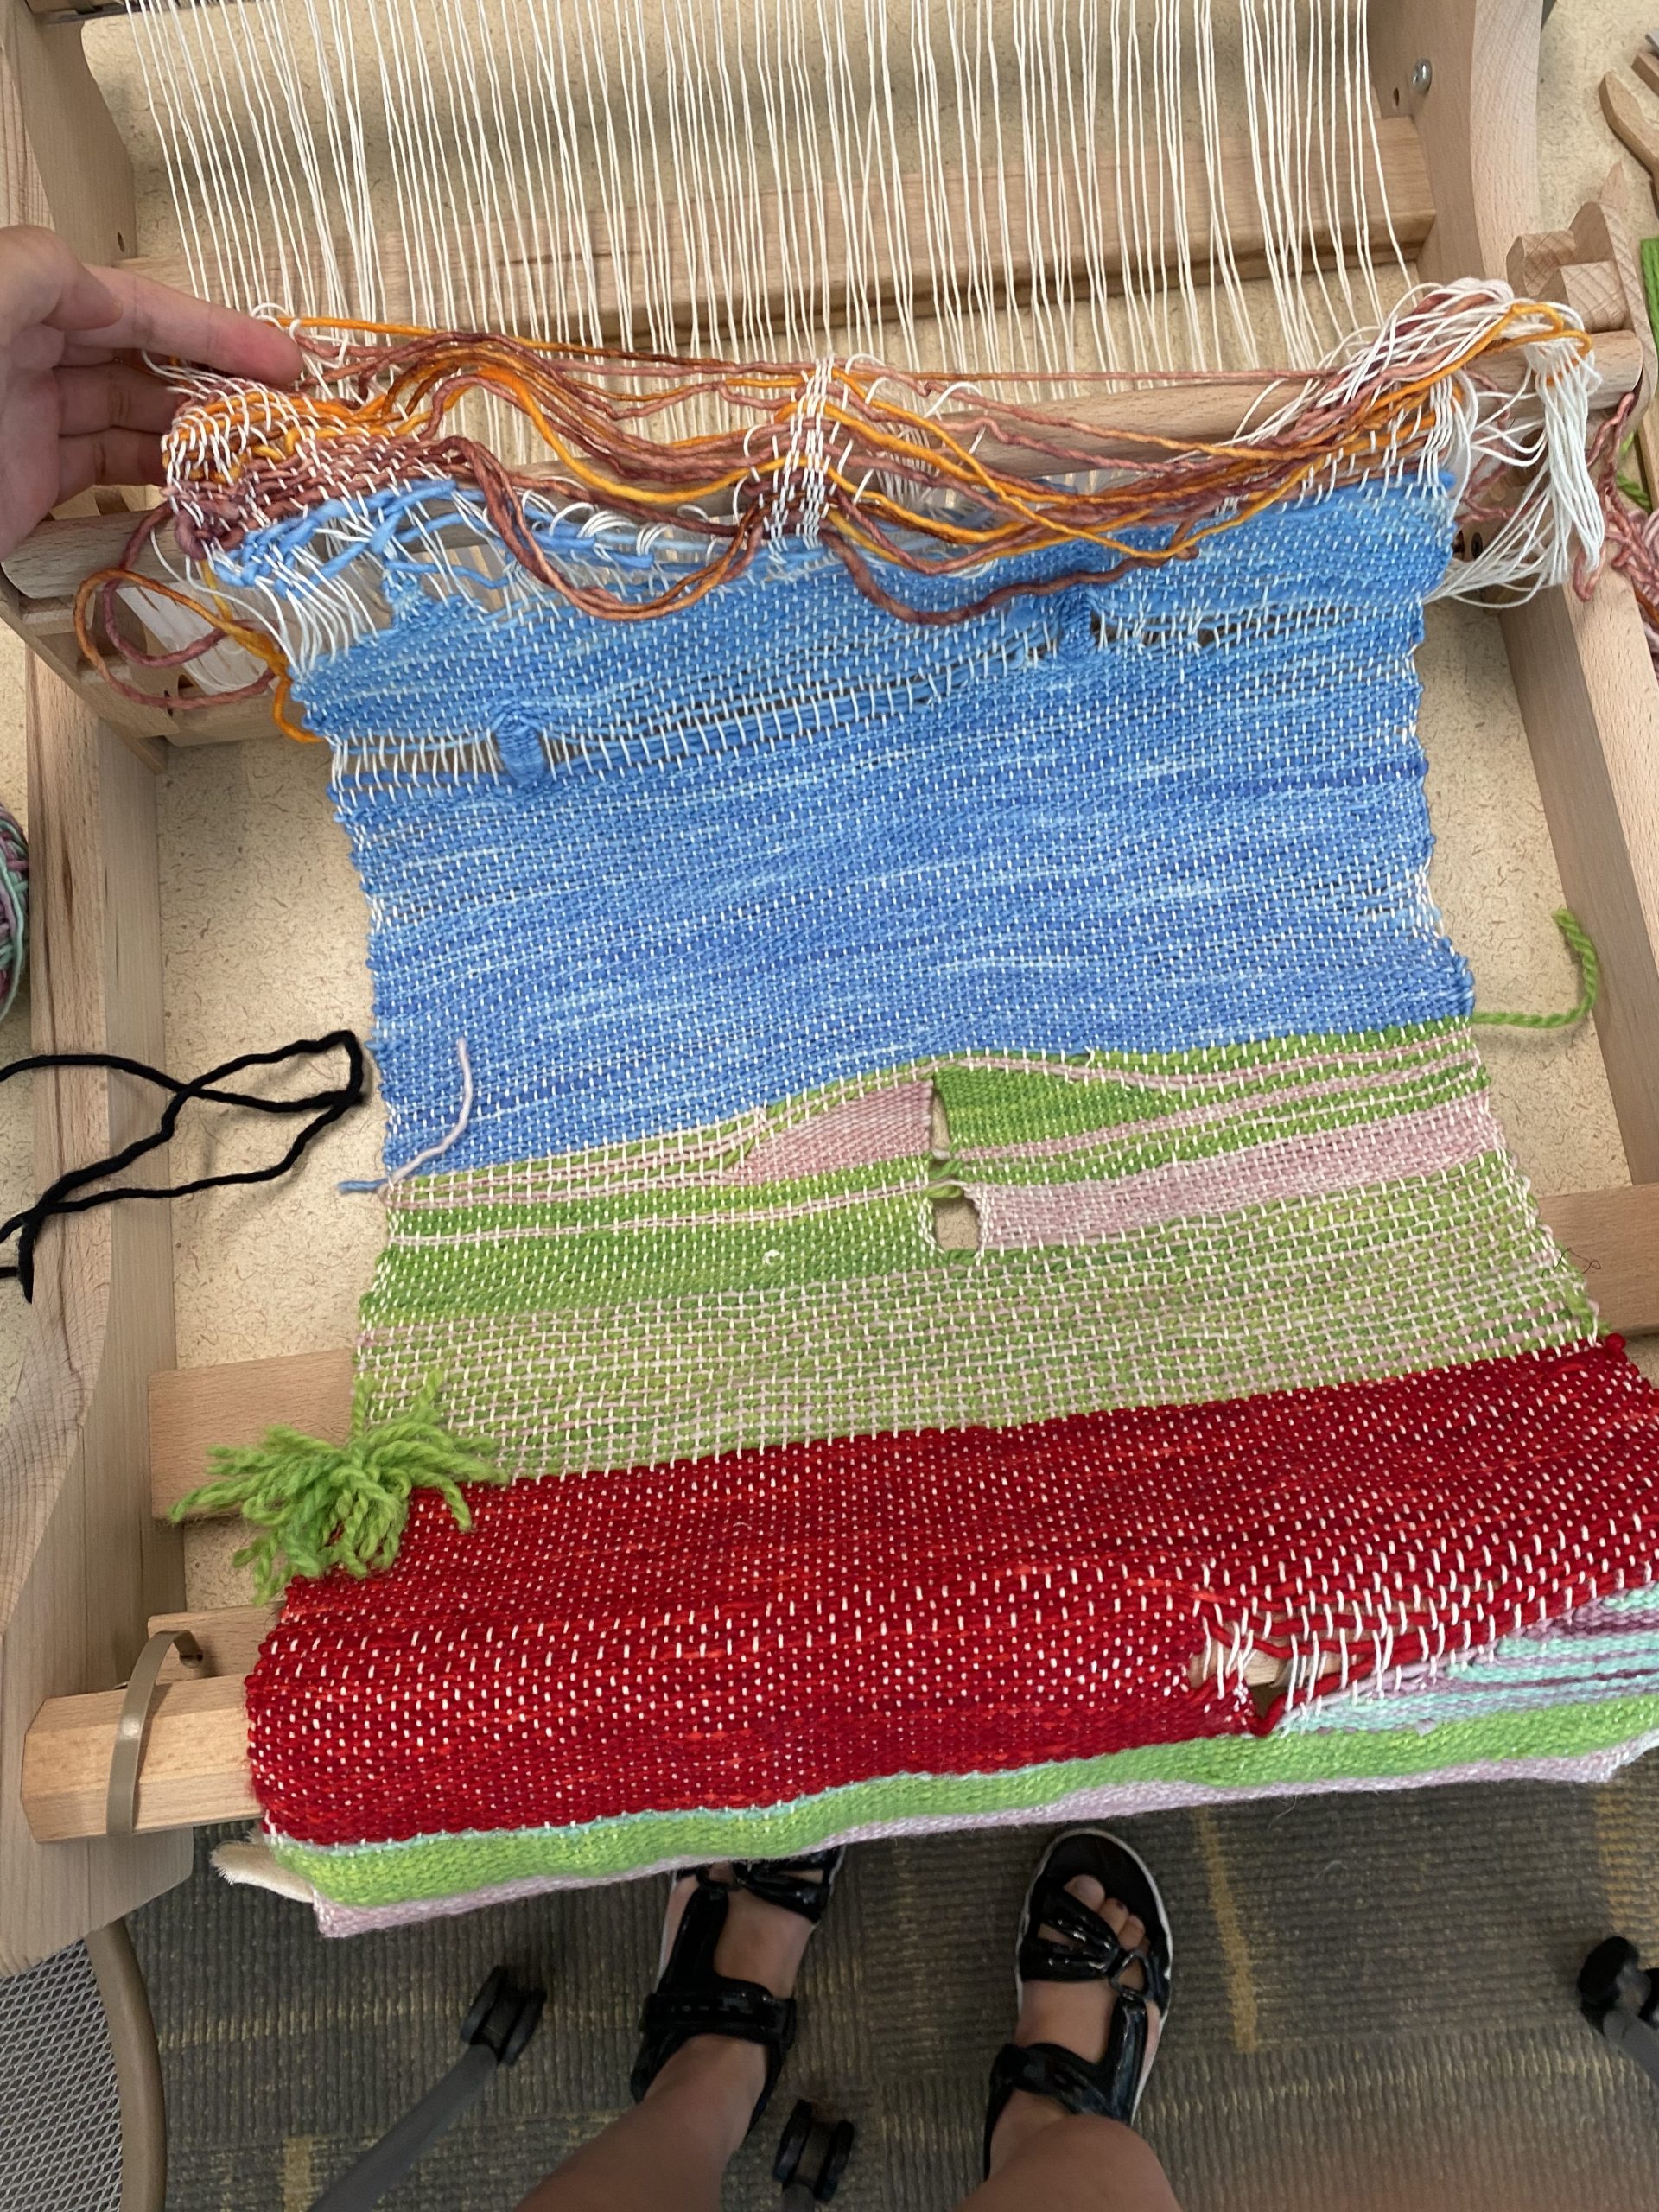
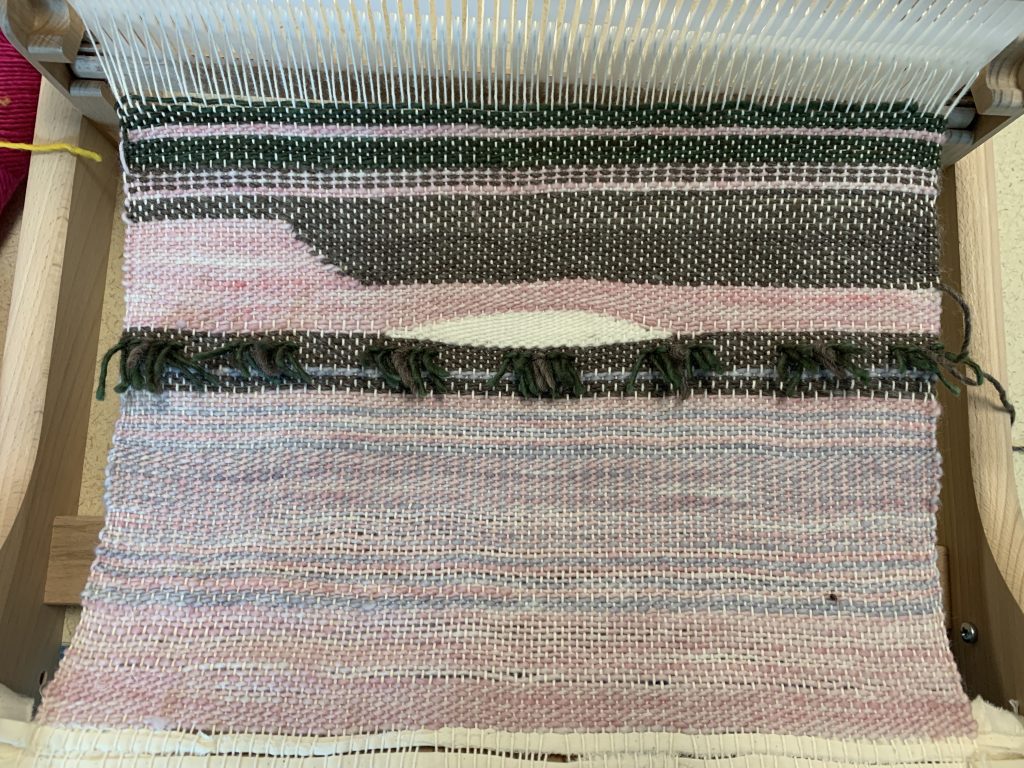
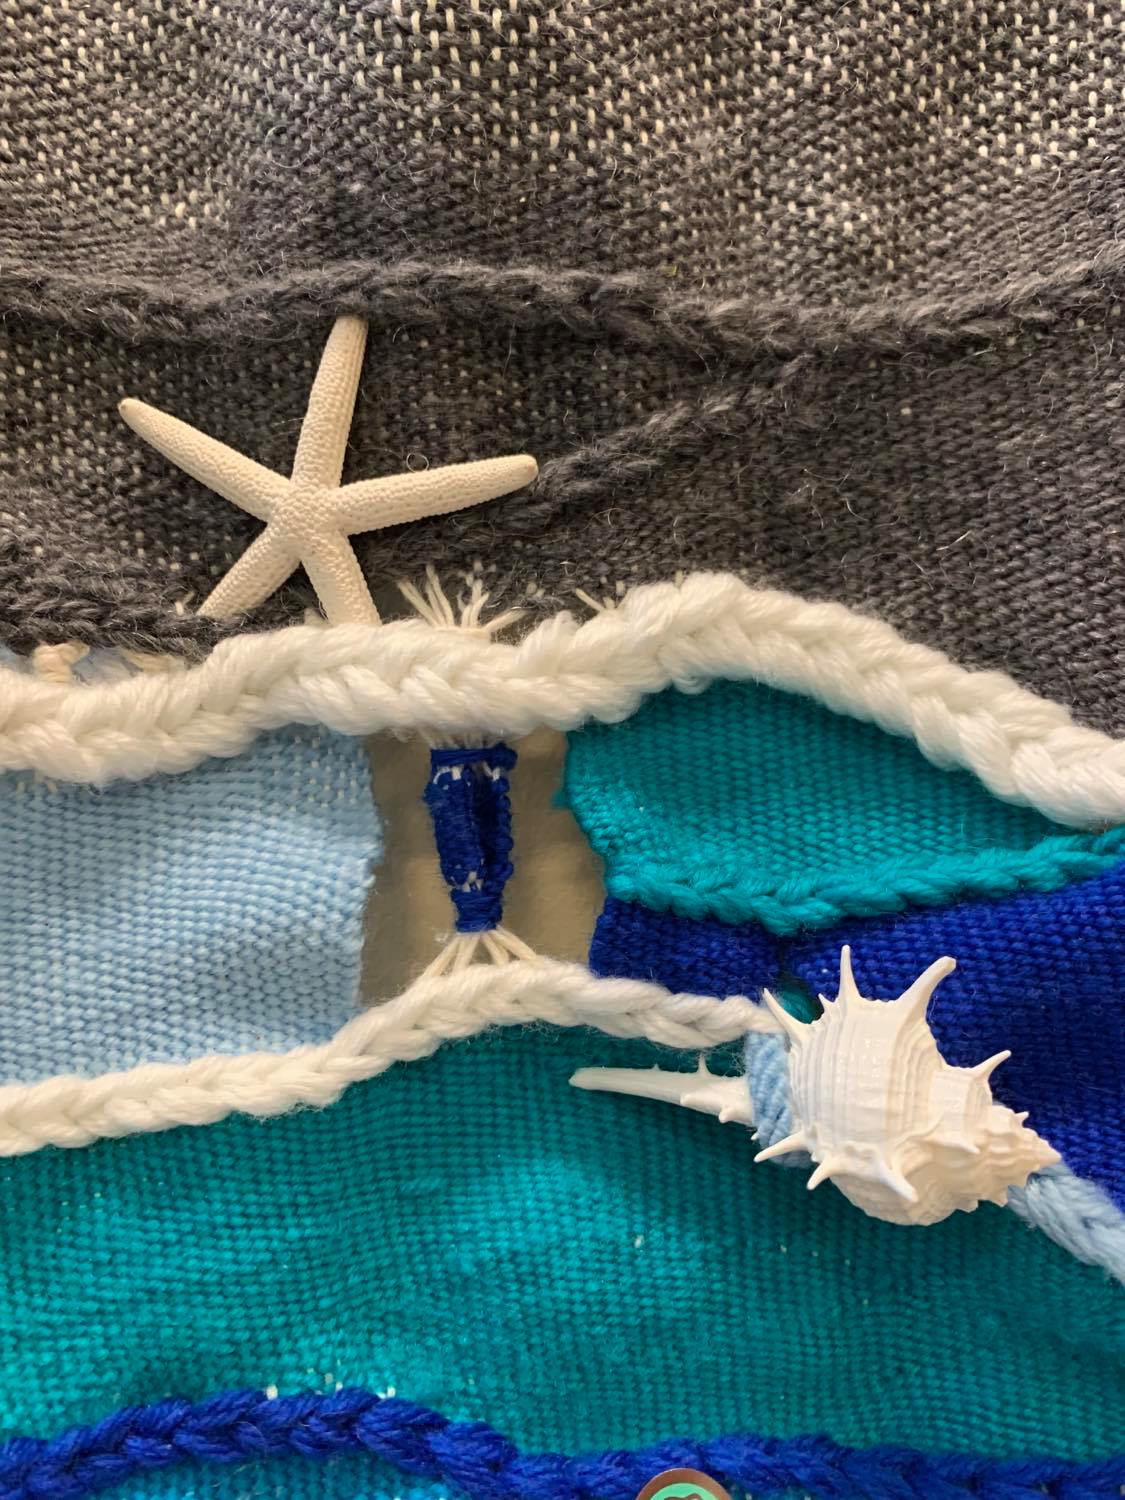
The variety of colors used, as well as contrast between light and dark colors, worked well in both final pieces. In the test piece, I started with soft, pastel colors before moving to bright, almost neon greens and pinks. In the final piece, there were contrasting blacks, blues, and green-whites. Additionally, I think the choice of unusual materials in the final piece worked well. I used wool, ribbon, and a shiny, textured, woven net material I found in class. The presentation of the different materials was interesting, as they provided new textures and lighting that regular weaving could not. I was very drawn to the difference in texture that the wool provided, and reflected light that came from the net material. The experimentation with different techniques, lines, and knots also worked well.

Improvements

The initial planning stages could have been improved. At first, I did not know whether or not the test piece would be included in our final submissions. Thus I did not have as much of a vision for the first weaving portion (not to say that that’s a terrible thing). In retrospect I would have liked to plan it out more while also incorporating experimentation. There could have also been improvements in fully incorporating the unusual materials used into the tapestry. A lot of the material utilizes the clinginess and fine strands of yarn used. In the future I would like to either weave it in more fully or sew it on top. It was difficult for the material I chose to work with. Finally, I would improve the neatness of the final presentation, as the final piece felt a little messy to me. A part of me appreciated the chaos while another part of me wished it would be neater somehow.

Lessons learned

I learned how to weave which is really cool! I learned basic techniques of weaving, including simple patterns, knots, and incorporating outside elements. I learned not only to not be afraid of trying new things and experimenting, but also to have some structure and planning involved for optimal results. I learned about what others were doing with their weavings and took inspiration for the future.

Five directions

  • A dark piece because I enjoyed using dark and contrasting colors. I would like to see a darker and more contrasting piece with tight weaving (no warp threads seen).
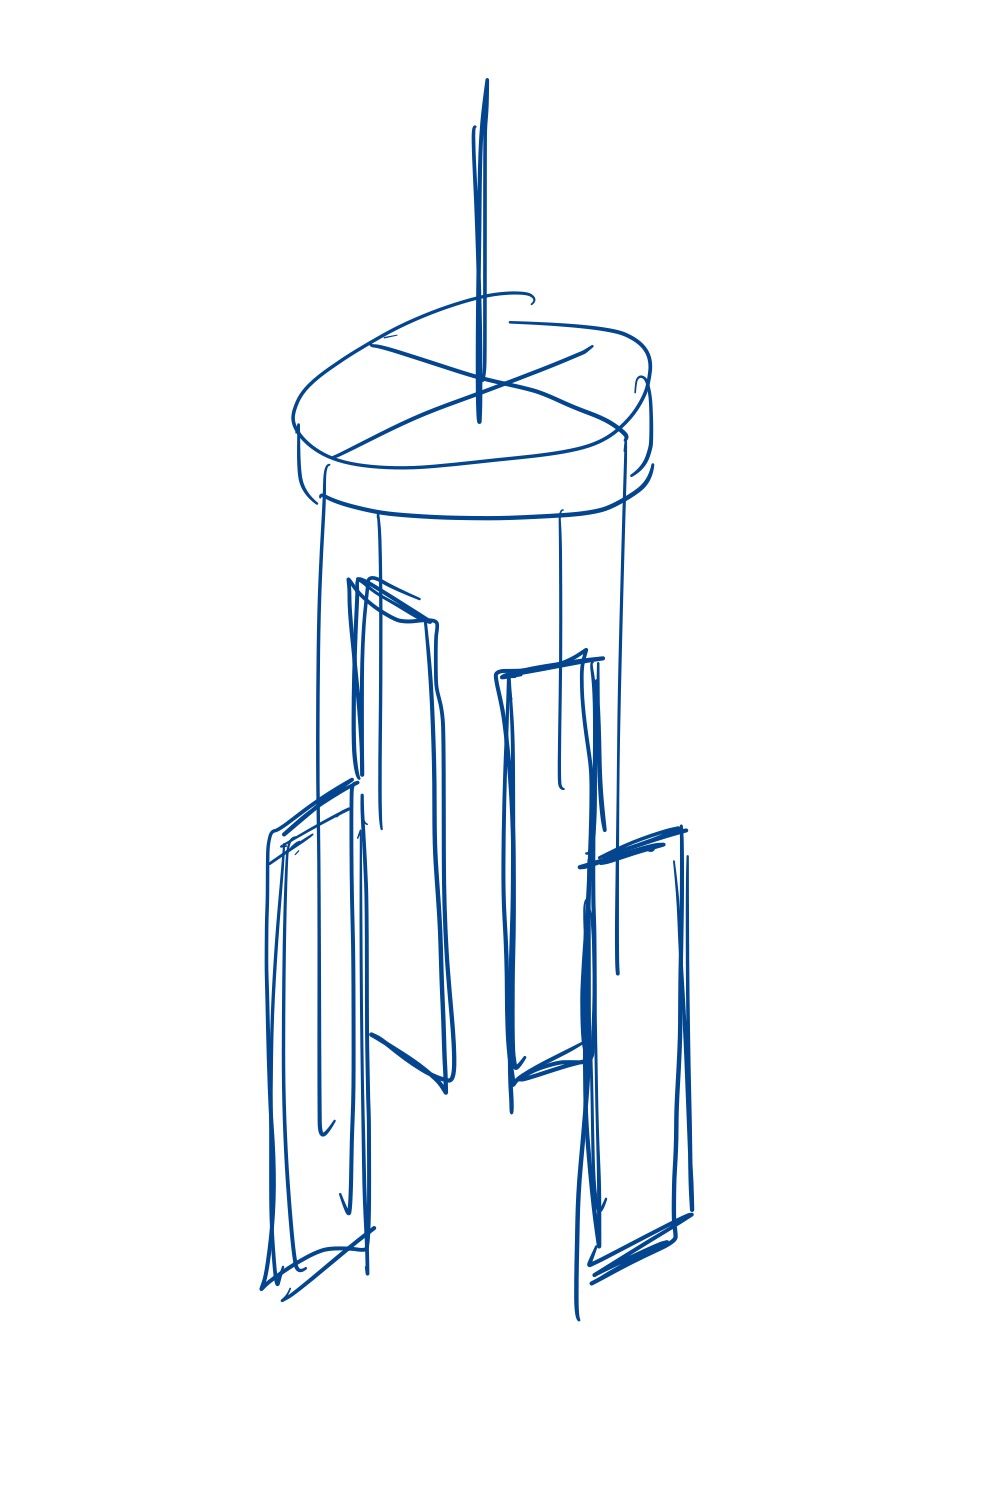
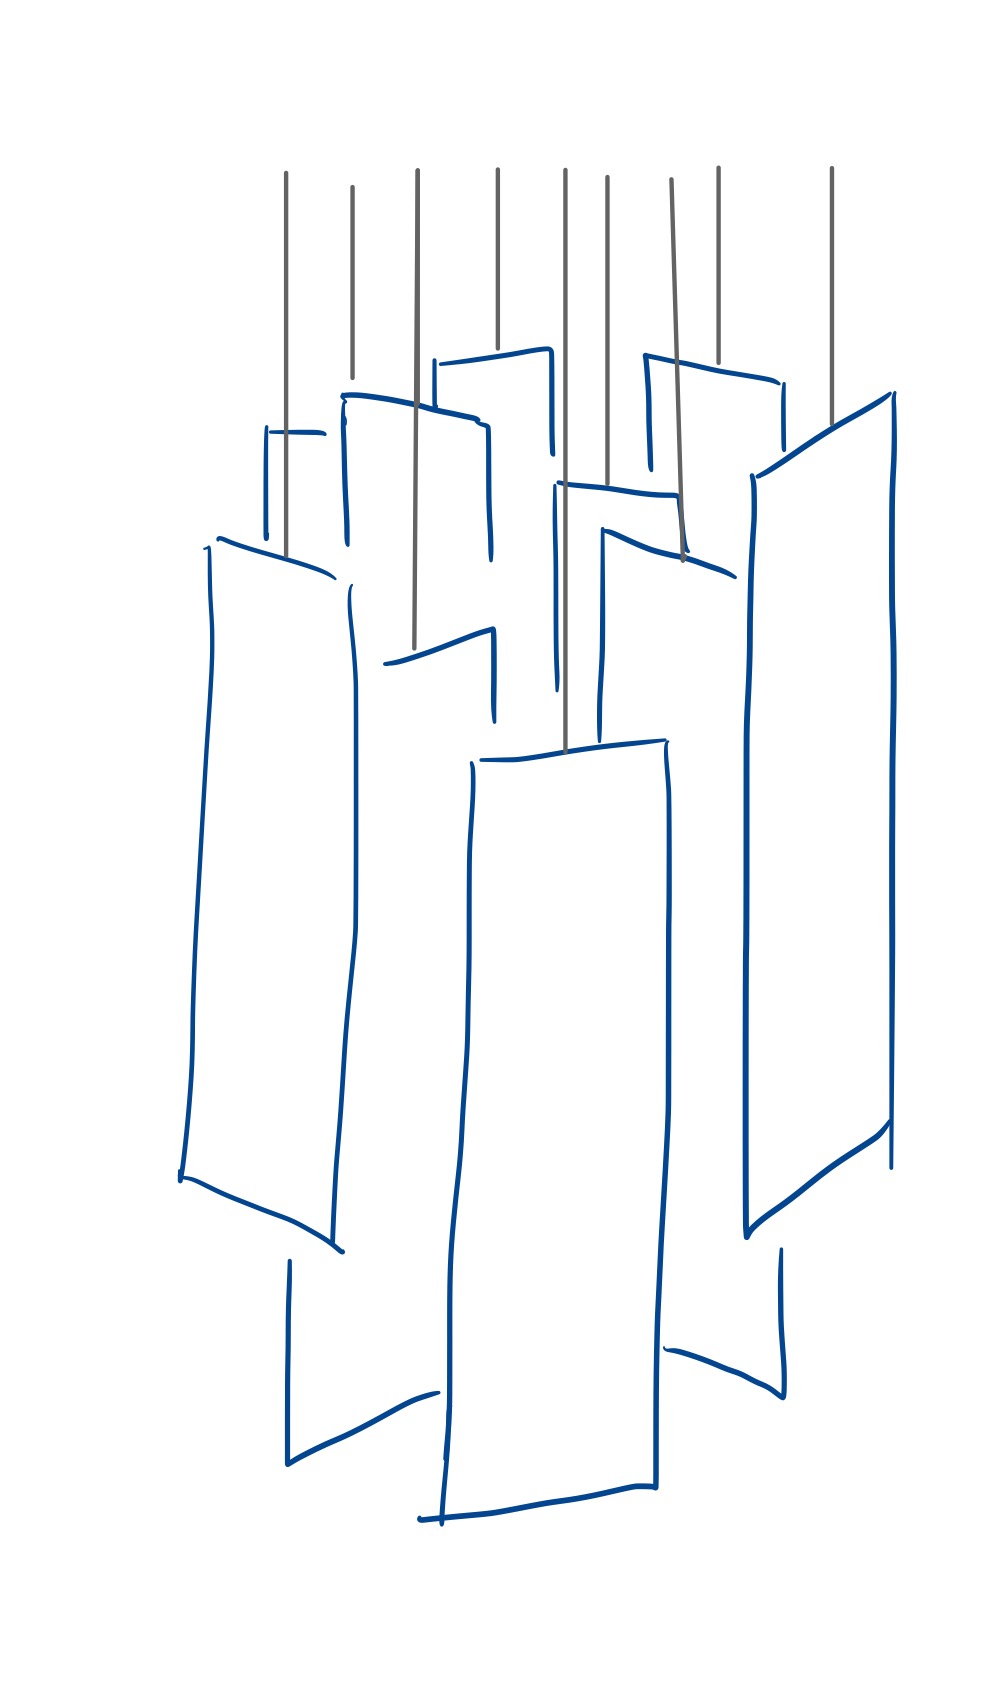
  • A piece with structural experimentation, unlike the typical top down woven tapestry. It could use wooden sticks or the loom itself to create interesting 3D shapes upheld by weaving.
  • A piece that kept the test and final piece together to create a longer work. I would like to experiment with gradients and complimenting colors all the way down, then sew and embellish with details over the weaving.
  • A piece involving new techniques such as braiding, felting, exposed warp threads, and integrating puff balls.
  • A piece resembling a woven chess board, with a woven checkered pattern and chess pieces that could either be attached or detached from the piece. It would be possible to actually play chess with the tapestry laid out on a table if one wished.
Categories
Tapestry Weavings

Weaving Documentation – Rose

Visual Portfolio, Posts & Image Gallery for WordPress

The concept of this weaving was heavily derived from my experimental weaving section that primarily used yellow and green. The colors inspired me to go in a more playful and childlike direction, hence the bright blocks, flowers, grass, and butterflies. I wanted the weaving to remind people of playing outside as a kid.

Since I stuck with three colors and repeated several patterns, I think it helped the weaving look more cohesive. However, I also would’ve loved to incorporate alternative patterns as well. For future projects I think I would spend more time designing the tapestry before I start to weave. I’d also focus on the edges more, reinforce my windows, and not pack too tightly.

If I were to do another iteration of this I would (1) make the tapestry 3-dimensional (weave a cube template and fold the weaving into an actual cube) (2) still stick with the color scheme so that it keeps the playful vibe (3) include the ria knot flowers but make them bigger and more prominent (4) braid the blank spaces and let them fold into the inside of the cube (5) pay attention to details and improve on the skills I’ve mentioned above.

Categories
Tapestry Weavings

Weaving Final Reflection – Sophia

Visual Portfolio, Posts & Image Gallery for WordPress

Progress:

For this project, I really hope to use different techniques to create an image. In the beginning, I was just learning how to weave using one color: orange. After weaving for many inches, I realized that it is starting to look like a sunset and I decided to test out the idea of sunset and see where it takes me. After adding the yellow for the sun and some patterns to mimic a sunset, I decided to also add water so that it looks like a sunset at the beach. After completing the middle grey water area, I wanted to use brighter blue to make the waves and then light brown for the sand. However, as I was creating the waves using light blue, I realized that it would be better if I were to use the idea of under the sea instead of my original plan. I also really enjoy making friendship bracelets and so I use that braiding technique for the leftover yarn from making the waves. Towards the end of my weaving, I realized that the braid looks like swings and so I added a cup I wet felt as swings. I also wanted to add a dangling piece to the original weaving and that also turned into a swing. After completing the weaving, I made some final touches with shells, small decorations, and chopsticks on the top to use for hanging the weaving.

What worked well?

Overall, I think my decision to turn the bottom part into “under the sea” worked out well. When I was doing the grey area, I didn’t really know what was next. I googled some images and really liked one where there are braided waves across and so I decided to try that. This was also taking a risk because my choice of color is drastically different from what I was using. I think that it worked well because it allowed me to be more creative and gave the entire weaving more energy. It allowed me to add different patterns and gaps making the weaving more 3D. I also think that weaving backward worked well. At first, it was hard because I wanted to create images like the ship. However, I later realized that going from top-down allowed me to be more flexible with what I want to include and it was also much easier to add objects/elements to the weaving.

What to improve?

I would have improved the overall shape of the weaving. After taking it off the loom, I realized that some areas are not as straight as others. I also realized that the left side kind of gathers inwards. Someone from class commented that it looks like 1/2 a surfboard. I actually really like the idea of a surfboard and think that it would have gone really well with the weaving. Next time I would make sure that the tension of the yarn is consistent and I would also plan the final shape of the weaving.

What did I learn?

On top of how to weave and how to make different patterns, I also learned that adding objects to the weaving can help bring it to life and that it is okay to not know what to weave. For my weaving, I incorporated a lot of different objects and elements and I think that these things made the weaving more interesting and real. Since the beginning of the weaving, I wanted to create an image and I wanted to plan everything. I feel reassured when I know exactly what to add and what colors I want to use. However, towards the middle, my plans did not really work and I had to pivot. As I continued weaving, the outcome started to give me new ideas which I realized are better than my old ones. For my future weavings, I hope to also add objects/elements and to also let my weaving guide me.

Five Directions:

  1. Another sunset but with birds, adding origami cranes
  2. The beach with sand and water, adding shells to the sand
  3. Full under the sea idea with jellyfish
  4. Under the sea with Spongebob
  5. Only the waves but using different patterns and different materials to braid
Categories
Tapestry Weavings

Final Weaving Reflection – Heeyun

Process

One of the biggest inspirations for my weaving is one of the weavings from a past student of this course, which we saw in class. It is the one with the red warp threads and metal pieces at the bottom. This weaving made me think of wind chimes. This then made me think of how fabric moves when wind blows on it. The flowing movement reminded me of water, the ocean, so I decided to draw inspiration from the sea and everything related to it. For instance, the more obvious inspirations came from the colors –blues and some greens and white. But I also thought about water caustics –the way the bright, warm sun causes those irregular, dancing reflections of light underwater. I wanted to find ways to incorporate all of those aspects of the ocean to turn the weaving into more of an immersive experience than just a piece of fabric to look at. 

Regarding that “immersive experience,” I initially pondered about how it would feel like to walk through an installation of tall, long, flowy weavings. However, due to time constraints, I realized that that project idea would be too ambitious for me to accomplish, so I decided to keep my weaving small but still incorporate that 3D aspect that I originally thought of.

The first few inches of my weaving were purely an experimentation and familiarization process, not thinking much about color or form; it was more for skill-building and practice. But as soon as I constructed an image of what I wanted to make for my final weaving, I split up the warp threads into 5 sections to make 5 different weavings that I would later assemble into a “wind chime.” This part of my weaving was also highly experimental. I realized that I often get too caught up in my own perfectionist tendencies, so I decided to let my fingers weave fluidly as ideas came to me, rather than planning every detail of my weaving from the get-go. I figured that if I wanted to portray the fluidity and calm of the ocean, maybe I should also try to adopt the same sort of mindset while weaving. 

Visual Portfolio, Posts & Image Gallery for WordPress

What Worked Well

Because of how highly experimental my entire process was, I feel like I was able to embody that acceptance of fluidity and slightly messy experimentation that resembles the fluctuating nature of the ocean. The fact that my warp thread increasingly got looser and looser the further down I went along my weaving also contributed to the irregularity of my weaving. Moreover, because I was weaving five separate sections simultaneously, I could vary the “patterns” and shapes I weaved along the lengths of the weaving and beat them with my fingers rather than with the shuttle. Something else that helped me convey the flowy nature of the sea was the not-spooled wool that I used. I really liked the texture and diversity in volume it added to my weaving, as I tried to keep as much of the texture intact as possible. I also realized that instead of applying it in a regular weave, using it with soumak made better use of its voluminous shape.

I did not want to use the first few inches of weaving where I was mainly practicing different techniques, but this portion was too close to the 5-sectioned portion that I did want to use, so I had to needle-felt that intersection in order to keep both portions of my weaving intact after separating them. I fortunately had the perfect amount of plain weave at the starts of each of my 5 smaller sections of weaving to needle-felt and then loop to fit a dowel through for hanging. This almost felt miraculous to me, as it worked out so much more smoothly than I thought it would prior to Olivia advising me to needle-felt. 

Improvements & Changes

I would have liked to have woven longer, wider strands, because my weaving felt very small and could not, therefore, really induce much of an “immersive experience” as I would have liked. Scale could improve how much viewers can sense the feelings and experiences I wanted to portray through my weaving.

I also would like to vary the lengths of each weaving section more to further lean into that theme of irregularity. The fact that I had to needle-felt one edge of all 5 sections of weaving did feel a little limiting in how I wanted to vary the length at which the weaving would hang from the dowels. I would still incorporate needle-felting for some pieces, but having a few other pieces hang from the dowels through the warp threads instead would have also been an interesting way of adding irregularity to my weaving. 

What I Learned

Because I was initially intending to make my weaving a wind chime, I wanted to embrace the ocean theme and use recycled glass for the chime portion of my weaving. I initially thought of breaking a tinted glass bottle and sanding the pieces myself, but due to time constraints, I did not manage to do that. I also considered somehow incorporating a “DIY” ocean drum into the wind chime to further embody the sea in an auditory sense. In order to make my weaving an immersive experience and not just a visual installation, I wanted to incorporate sound. 

However, after hearing what my peers commented on my (“mute wind chime”) weaving, I realized that maybe not having incorporated any sound-causing components was a better choice. Someone mentioned that despite my weaving being very silent, they could still somehow “feel” sound coming from it, which was very interesting to me. I had not intended to instigate that sort of experience from anyone viewing my weaving. I really like that notion of being able to incite feelings or senses that are not actually explicitly present but that can be just felt from other external cues that the piece of work contains. I hope to further explore different ways to achieve this in future projects. 

Five Directions

  1. Large-scale (bigger than human-scaled) installation of weavings taller than the average person, placed in a large room with a tall ceiling.
    The weavings in this case would have to be much lighter in order to be able to flow similarly to how my final weaving did, though. 
  2. More weaving pieces in a larger/wider “wind chime” conformation, hanging at different lengths.
    This would likely include maybe one more dowel to also vary the angles at which the pieces hang.
  3. Use of vertical and horizontal weaving pieces and light source above to play with lights and shadows.
    This would be more of an exploration of how I could portray the way light reflects and shines through the ocean onto a tapestry weaving. I could also explore with different kinds of materials that would allow for more light to pass through. 
  4. Ocean drum put together by weavings.
    Since the common shape of ocean drums is circular, I could imagine a ring on the outside being the “ocean drum instrument” portion, while at the center would lie weavings going across the length of the ring, almost like a web. There could be some pieces that hang over the ring and flow down to keep that imagery of “flowy water.”
  5. Actual (non-silent) wind chime with sound-making materials naturally found in the ocean and/or beach (e.g. sea glass, seashells), but also with human-made trash polluting our oceans today.
    This would delve more into the current state of our very polluted oceans and how the beauty of the sea is tainted by our human-made pollutants. 
Visual Portfolio, Posts & Image Gallery for WordPress
Categories
Gallery Tapestry Weavings

Final Tapestry Reflection

Visual Portfolio, Posts & Image Gallery for WordPress

Visual Portfolio, Posts & Image Gallery for WordPress
No items were found matching your selection.

Process

For this project, after sampling many different types of weaves using different colors and I was thinking of creating a weave that symbolized more of nature, more of what is a part of me. I usually create projects that represent who I am, that everything is related to nature, and that the weave is made from my hand work and symbolizes nature. I wanted to start with the ocean, and then diamond blocks that all connected with each other. I had a picture in my head of these individual weaved blocks and connecting them altogether like a spider web (as you would see in nature), and alongside that the green scenery of grass, trees, and real life objects. What ended up occurring is I had first created a solid ocean, then a jungle and then the trees. With certain unique elements throughout the piece such as an opening circle. I really like to have the solidified yarn weaves connect with each other, however it seemed to have been a bit more soft and thus I tried to strengthen parts of the weavings with strong tangled yarn pieces.

What worked well

The opening circle hill turned out very beautiful, with the two different opposing colors really seemed . Also, I think the tangled green pieces popping up really brought weight and liveliness to the entire piece overall, as though it was an actual jungle, similarly with the waves of yarn popping out (the red-orange-ish colors). I think my creation of the tree and mushrooms also look very much real and stays true to what I am trying to show in nature.

What I would improve or change

What I would improve is to have weaved more solidified backgrounds for the pieces such as the tree and mushroom. I would also have changed instead of having more waves 3D popping out, but to play more with solid weaves and then attach 3D objects out from it (such as cotton for clouds, and leaves). I would want to have better control on the

What I learned through this project and for future projects

I learned that the image I had in my head might not always come out to life, but that I can always continue with my creativity and piece it together in the end. I should not be afraid of trying many different techniques and to continuously be a growing learner and research techniques. For future projects, I will definitely try to sample as many techniques as I could in the beginning and also create pieces as I am working on it instead of having a whole image in the back of my head.

Five Directions 

  1. I would create separate blocks of weaves with different colors. A bit like having separate pieces.
  2. I would use more needling so stabilize the pieces that were more stand-alone (ie. mushroom).
  3. I would tighten up the parts that were more 3D so they were not as messy.
  4. I would braid pieces of yarn to connect together the wrapping jungle-like weaves.
  5. I would make more hollow shapes similar to the open circle, such as a wave of the ocean, and with a stronger weaving technique as well.

Categories
Tapestry Weavings

Weaving Reflection: Aaron

The Process

For my weaving, I wanted to make something pictorial, something that is instantly recognizable as something in the real world. Since I was new to weaving, the first ten inches largely consisted of experimentation, where I exposed myself to the main techniques that I would end up using in my final weaving. After the ten-inch mark, I ended up taking a middle ground between letting my weaving guide me and creating something pictorial. The “tree pot” was initially supposed to be a giant bubblegum, but I saw the half-finished sphere as an opportunity to weave a plant on top. This inspiration extended itself into a complete view of the horizon in the sunset, with birds and stars lighting up the orange sky amongst the clouds. I found the process to be tedious at times but extremely rewarding overall.

What Worked Well

I was surprised at how well the rya knots and the felted material turned out. To represent the leaves on the tree, I bundled ten threads together and used the rya knot technique on the same two wrap threads. This created a spreading out effect among the green threads which matches how I imagine palm trees’ leaves spread out. It also gave a very distinct 3D effect to the weaving which I was very pleased by. As for the felted flower and clouds, I really liked how the dry pieces maintain both their shape and fluffiness. The flower had differing heights to represent the petals and its inner organs, and the clouds had different sizes and densities to mirror what we see in nature. It added a very interesting layer on top of the threads, which I was very happy with.

Areas of Improvement

Even though I was very happy with my end product, there are a few areas where I think I can definitely do better, them being the fringes and pattern usage. For the fringes, there are some notable inconsistencies in the tension for each line of weaving, resulting in the final piece having somewhat varying widths in different areas. I could definitely have left more room before beating each line of thread onto my weaving in some places. As for the patterns, I feel I could have explored some more of the left-right patterns. The weaving is currently very up-down oriented and it would have added another interesting dynamic to the overall piece.

What I Learned

Among the many things I learned, the two standouts on top of learning how to weave are patience and the joys of exploration. I never knew that weaving could take as much time as it did for me. Especially for the interlocking and branch-making portions, it was somewhat sad to see myself making progress at the rate of less than two inches an hour. This journey not only gave me the opportunity to rediscover what it means to be patient and work on something attentively for hours, it also gave me a newfound respect for artists who do weave professionally. I could never imagine the dedication that they must have to complete works that are measured in yards rather than inches. When my piece was still unfinished, I found it very rewarding to find inspiration from my existing piece and build it into something interesting. It was this initial exploration before every “section” that allowed me to build a pictorial representation of a tree under the sunset. Usually, I’m used to pre-planning my entire work before executing on it. This experience definitely opened me up to trying new things and letting my mind go for a bit before consolidating on an idea and turning it into reality. I will be carrying this attitude into the future projects are to come.

Five Directions

  1. The same tree but under purely the night sky, shooting stars, and a shining moon
  2. A sprout under the same background with its leaves weaved in the piece instead of using rya knots
  3. The same tree but without the leaves and in the winter. Can incorporate elements of snow and maybe even a snowman
  4. A flower plant with much more extensive dry felting for the flowers. Can use different colors for different flowers.
  5. A giant bubblegum to pay homage to my initial inspiration

Categories
Tapestry Weavings

Final Weaving Reflection – Lea

Process

Rather than having a specific image in mind that I wanted to create, I let the tools, fabric, and mood determine where my piece will go for the beginning of the weaving. I thought that if I had a goal in mind, it would restrict the creative process too much. I wouldn’t be able to discover new techniques or interesting combinations. I also didn’t want to force my weaving into something that I wasn’t sure if I’m technically able to do yet. Since this is my first weaving, I wanted to learn about what different techniques would look like and potentially use them in another project. 

I particularly like the look of having warps showing rather than hiding it. I wanted to learn more about ways that I can let the warps coexist in harmony with the weft. 

After the exploration phase, I wanted to do something more regular and pattern-based. The beginning of the weaving looked very abstract and that represents the more creative side of me. The checker pattern represents the part of me that is very organized. I see myself as someone who needs routine and a plan or else I’ll be too stressed. 

What worked well

The checker pattern worked better than expected. I liked how it is also reversible: the back shows the same pattern in a different sequences. I also tried color combinations that I wouldn’t have thought would go well with each other such as blue and pink. The color contrasted each other nicely and I was pleasantly surprised. I also enjoyed how the pattern is still visible even when I only used one color (yellow). The pattern created 3 different types of texture although I only used 2 techniques. 

What I would improve

I want to be better at controlling the sides of the weaving. Some parts of the weaving were wide and some parts were tight. I was trying to make the width consistent throughout, but I was having difficulties with that. 

I originally had very muted colors in the weaving. I didn’t think it contrasted with each other or the warp well. After adding bolder colors, I feel like the weaving was more “powerful.” It stood out much better than before. 

What I learned through this project

  1. Don’t be afraid to use vibrant colors together. It could actually be complementary and make both colors stand out.
  2. Even if you’re only using one color, other elements can also make the piece interesting. 
  3. I enjoy doing things more experimental at first and learning the techniques. 
  4. Things may not turn out exactly as how you imagined, but you still might get something cool or at least learned a technique.

Five Directions 

  1. I could use the same pickup stick technique throughout the weaving in order to create long rectangular stripes rather than checkers. 
  2. I could try bold colors for experimental and muted colors for the pattern.
  3. I could braid the rya knots together so that they are not just dangling threads. This would also make it less chaotic. 
  4. I could make the contrast between regular and chaotic vertical instead of horizontal. (Left and right rather than top-down) 
  5. I could use varying lengths for each section of the pattern. (Instead of square shapes, maybe long rectangles with short rectangles.
Categories
Tapestry Weavings

Weaving in-progress

Visual Portfolio, Posts & Image Gallery for WordPress
Categories
Tapestry Weavings

Weaving in Progress – Sophia

Categories
Gallery Tapestry Weavings

Weaving in progress-Claire