Charlotte Lamm – Improvisation Inflatables

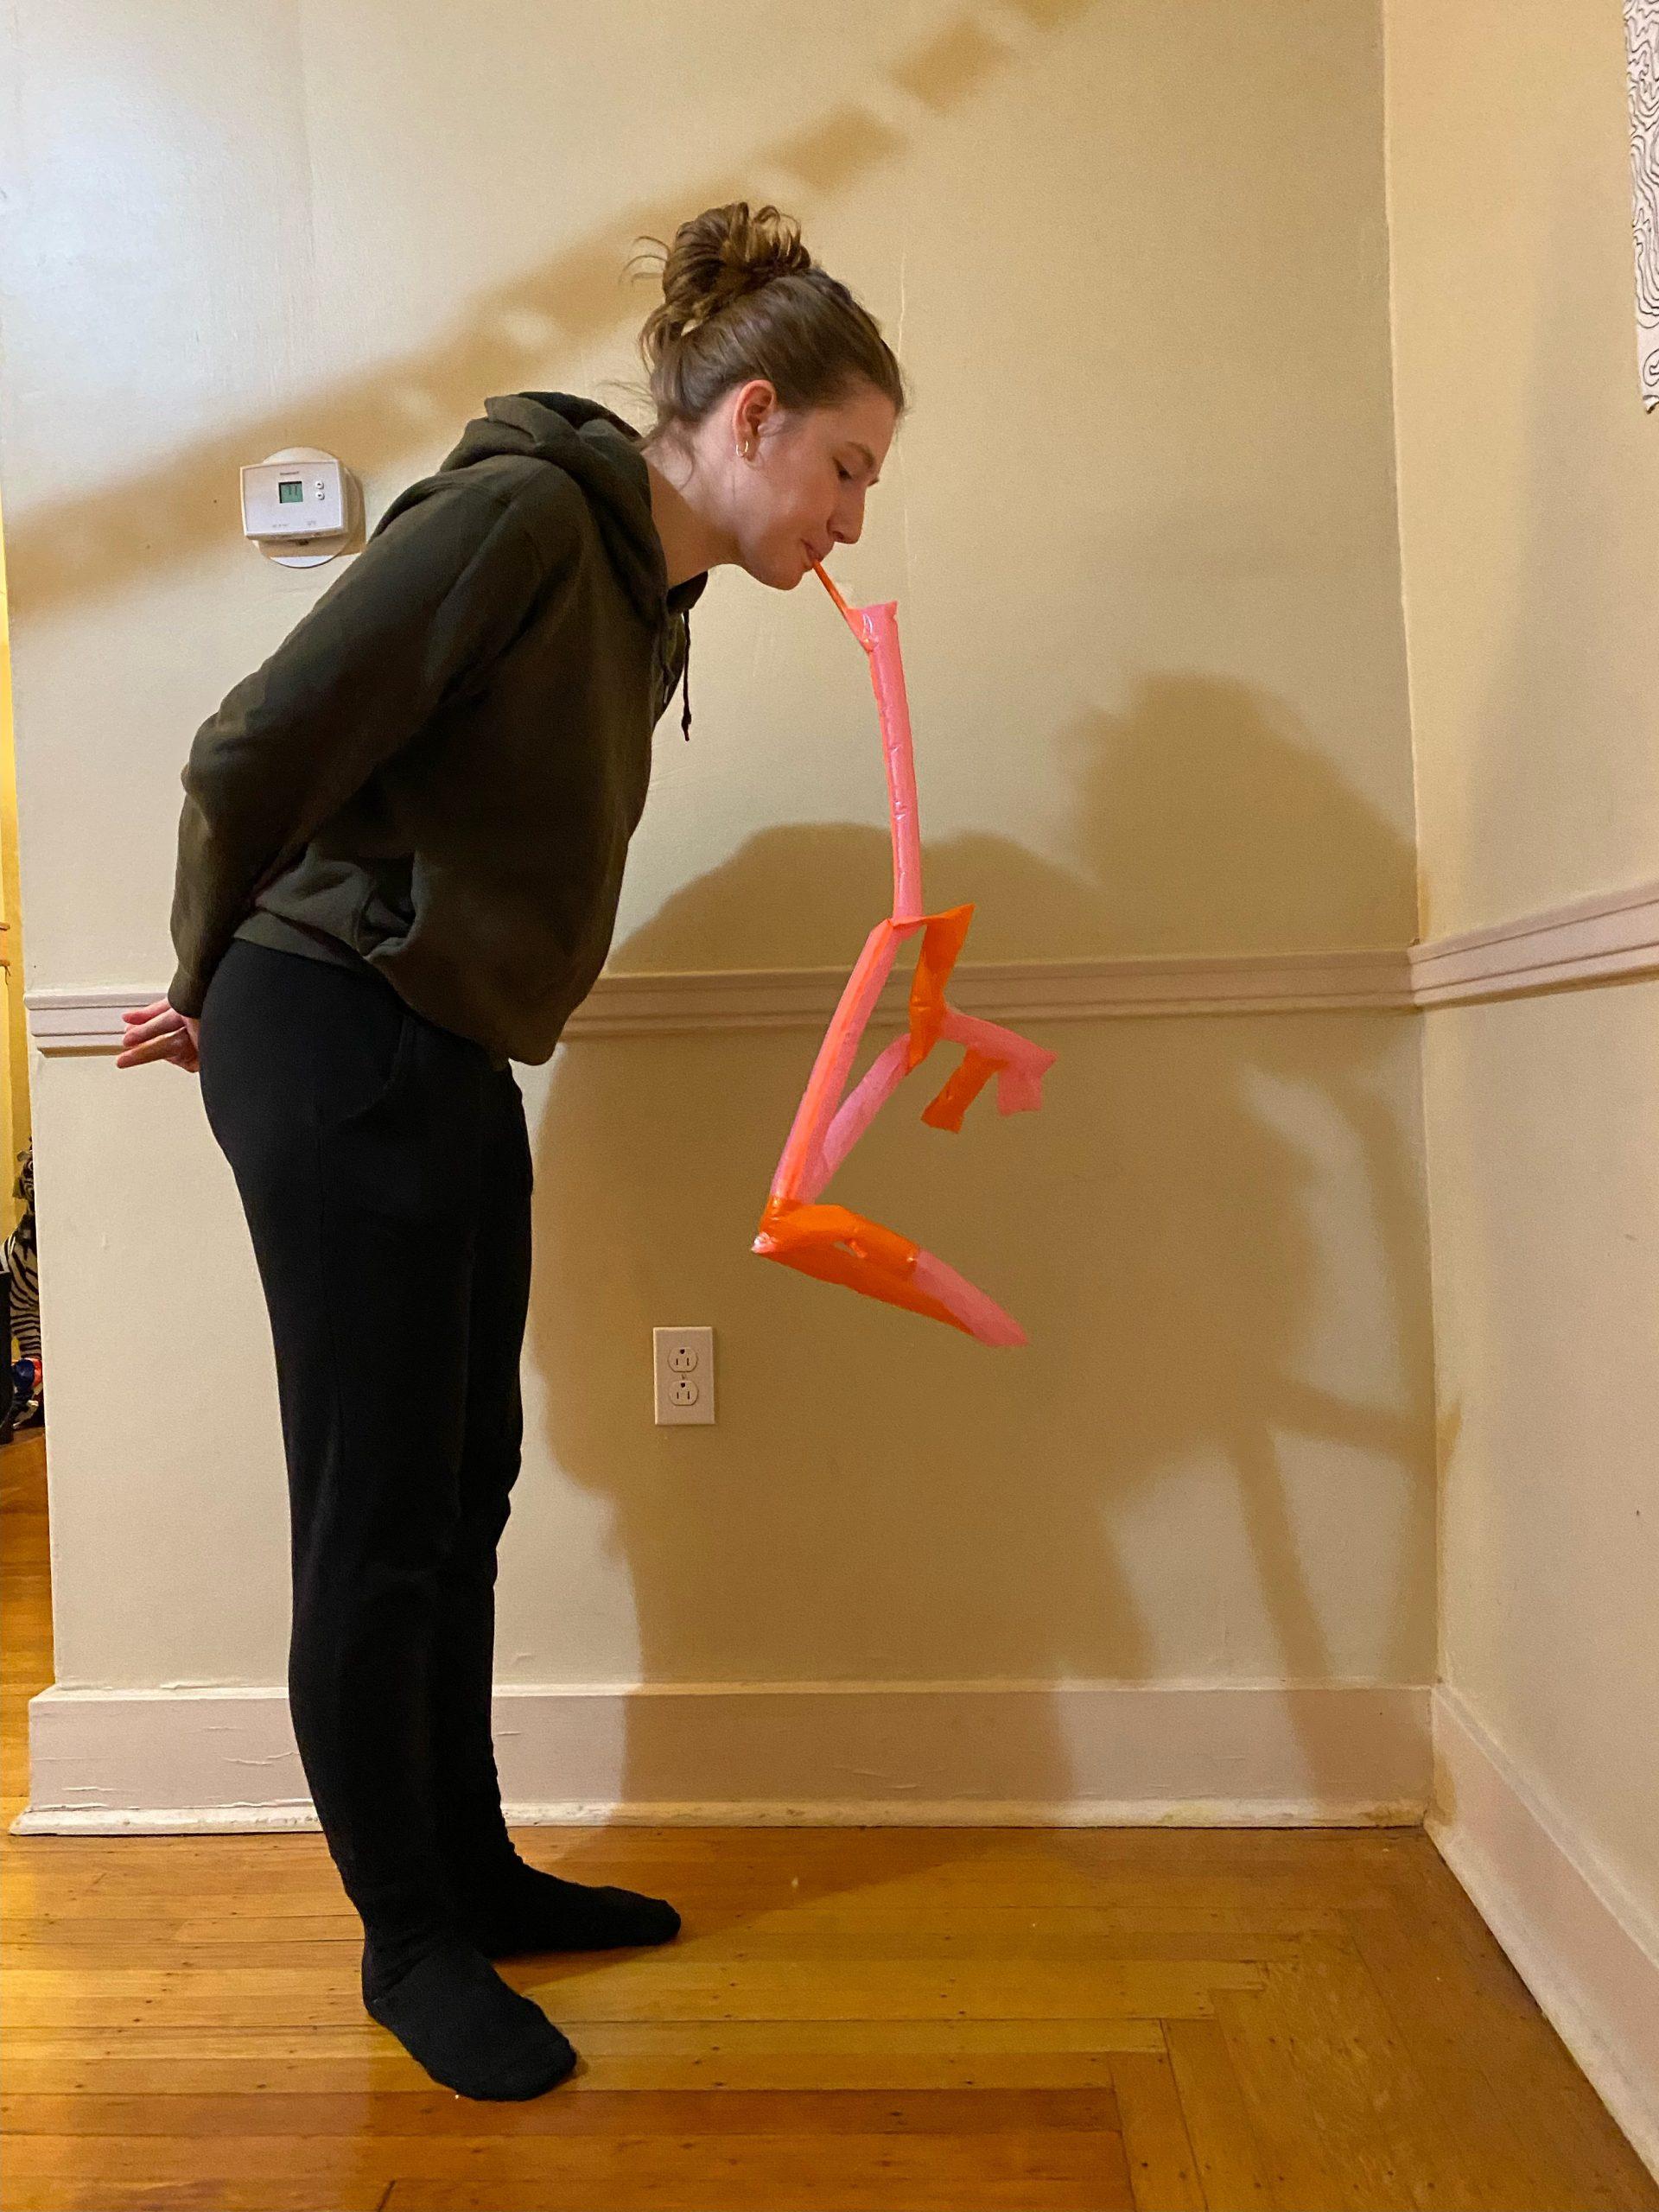
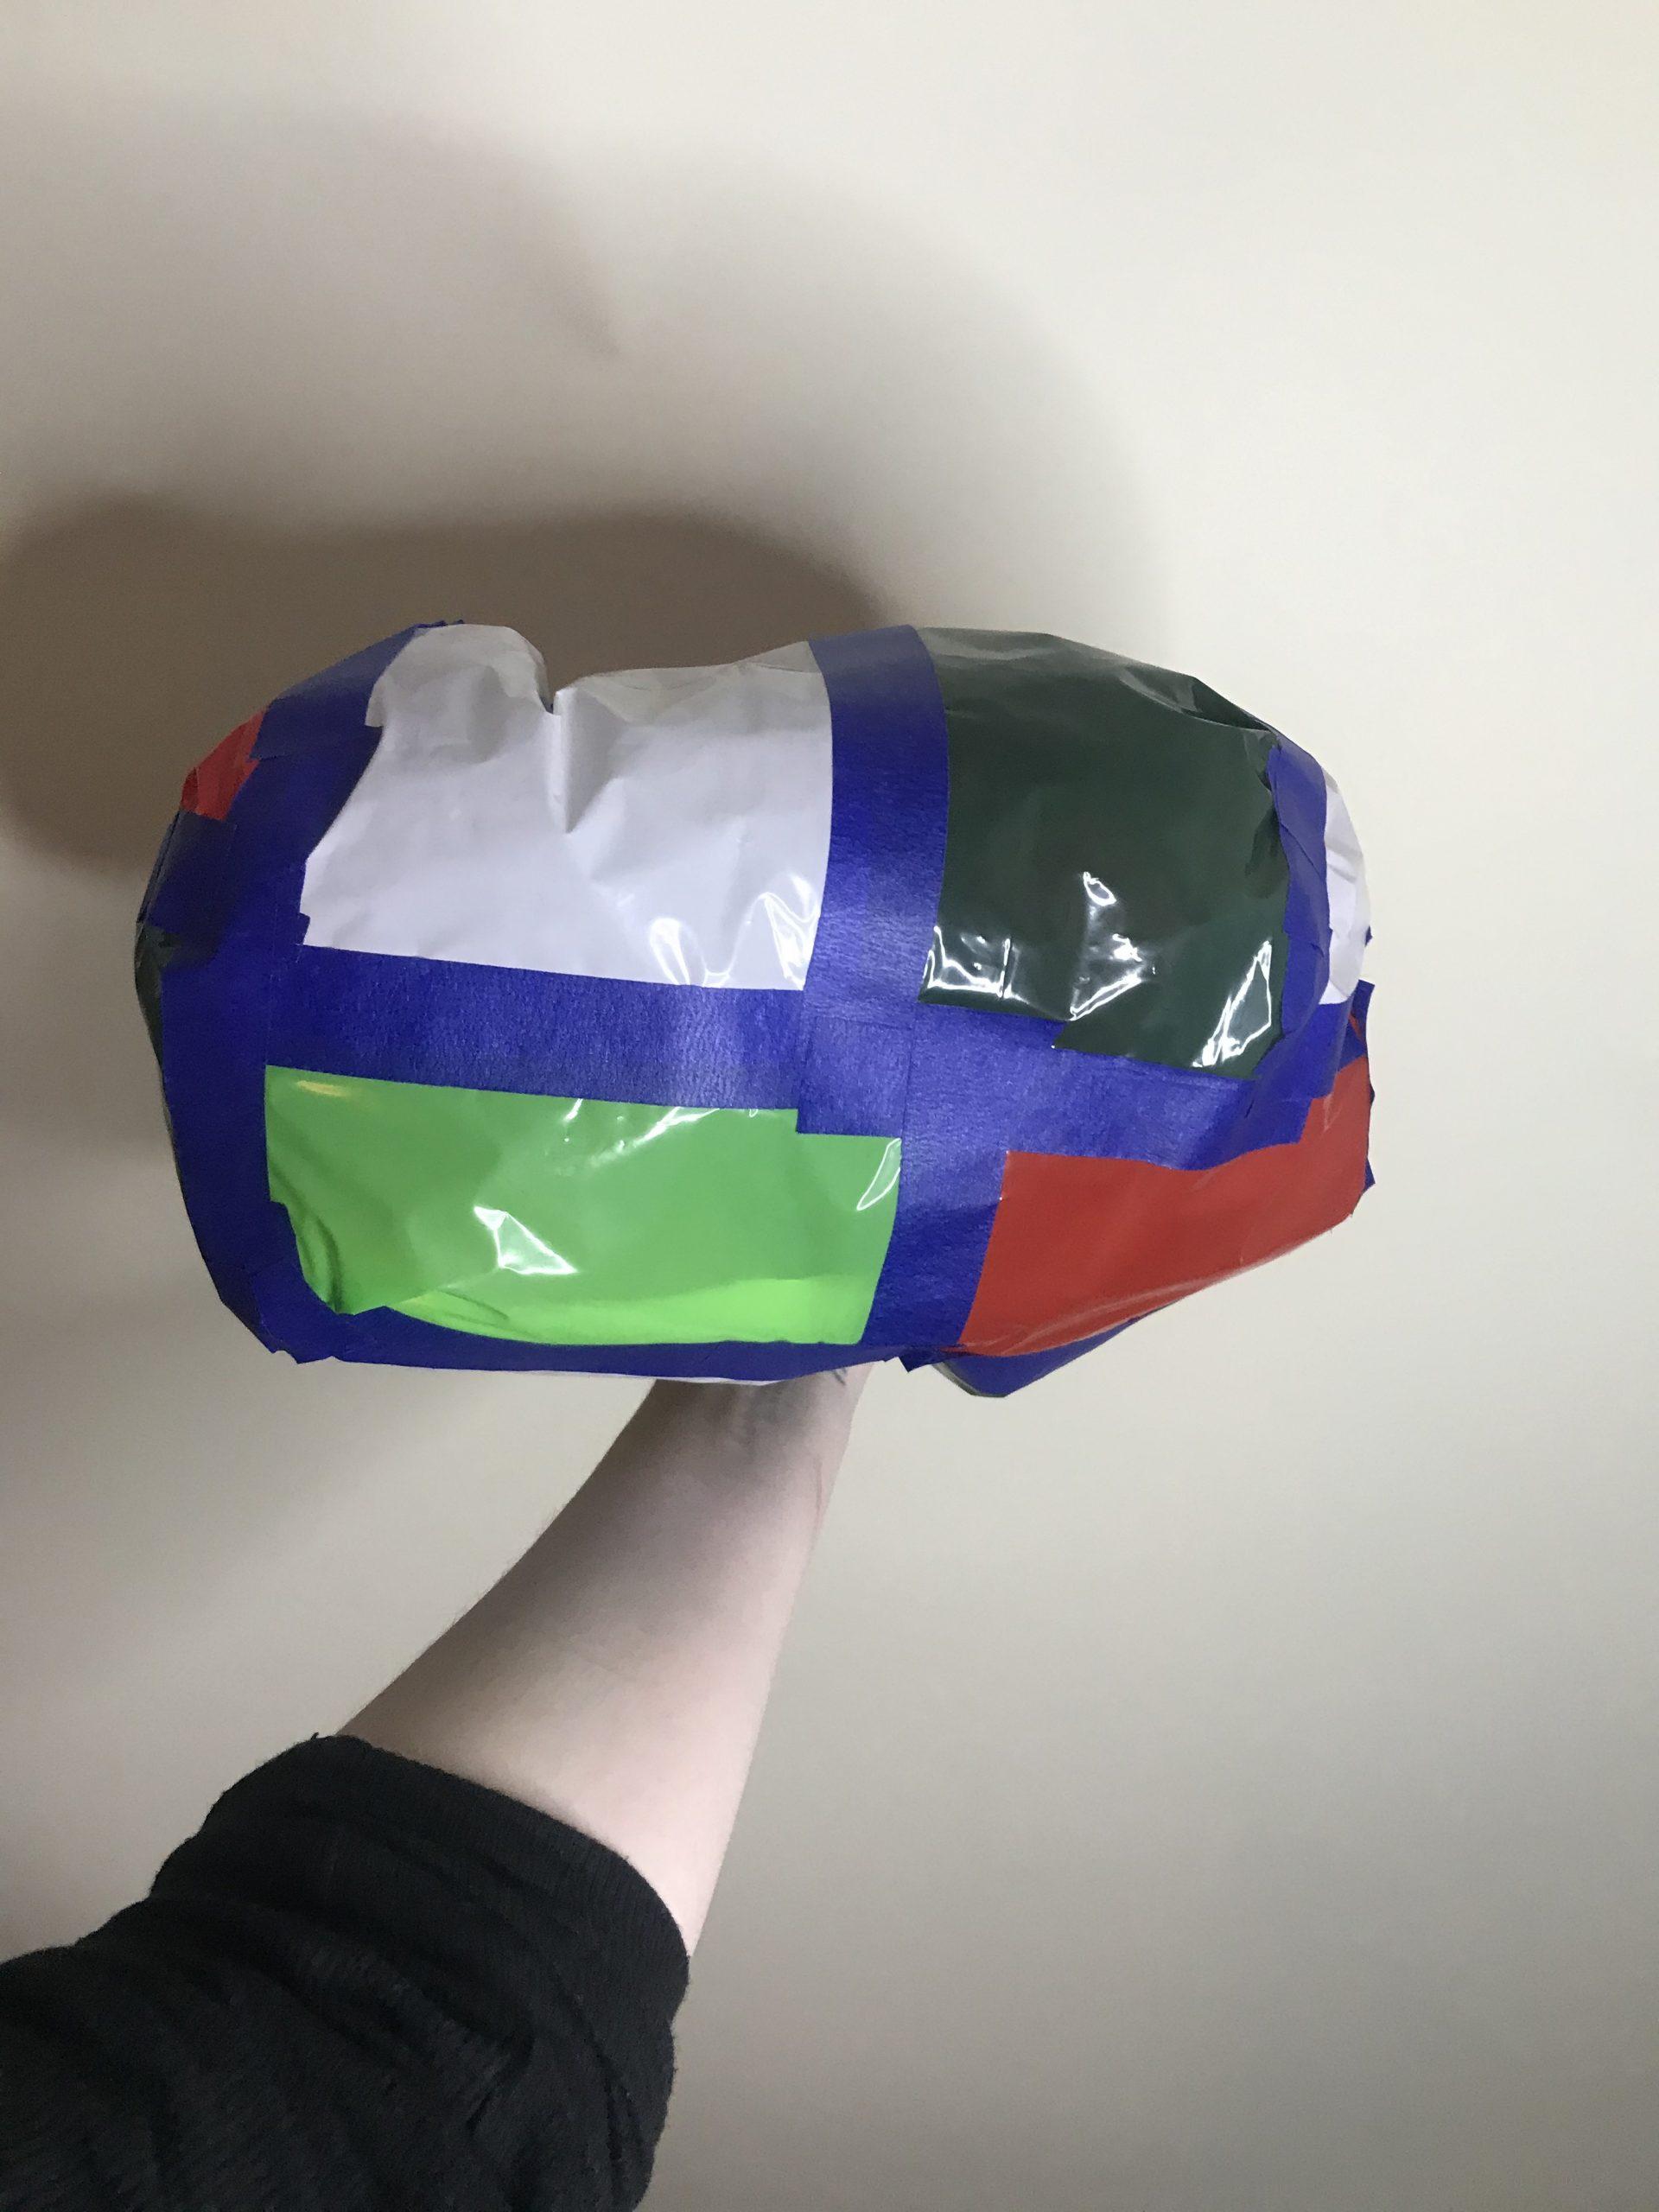
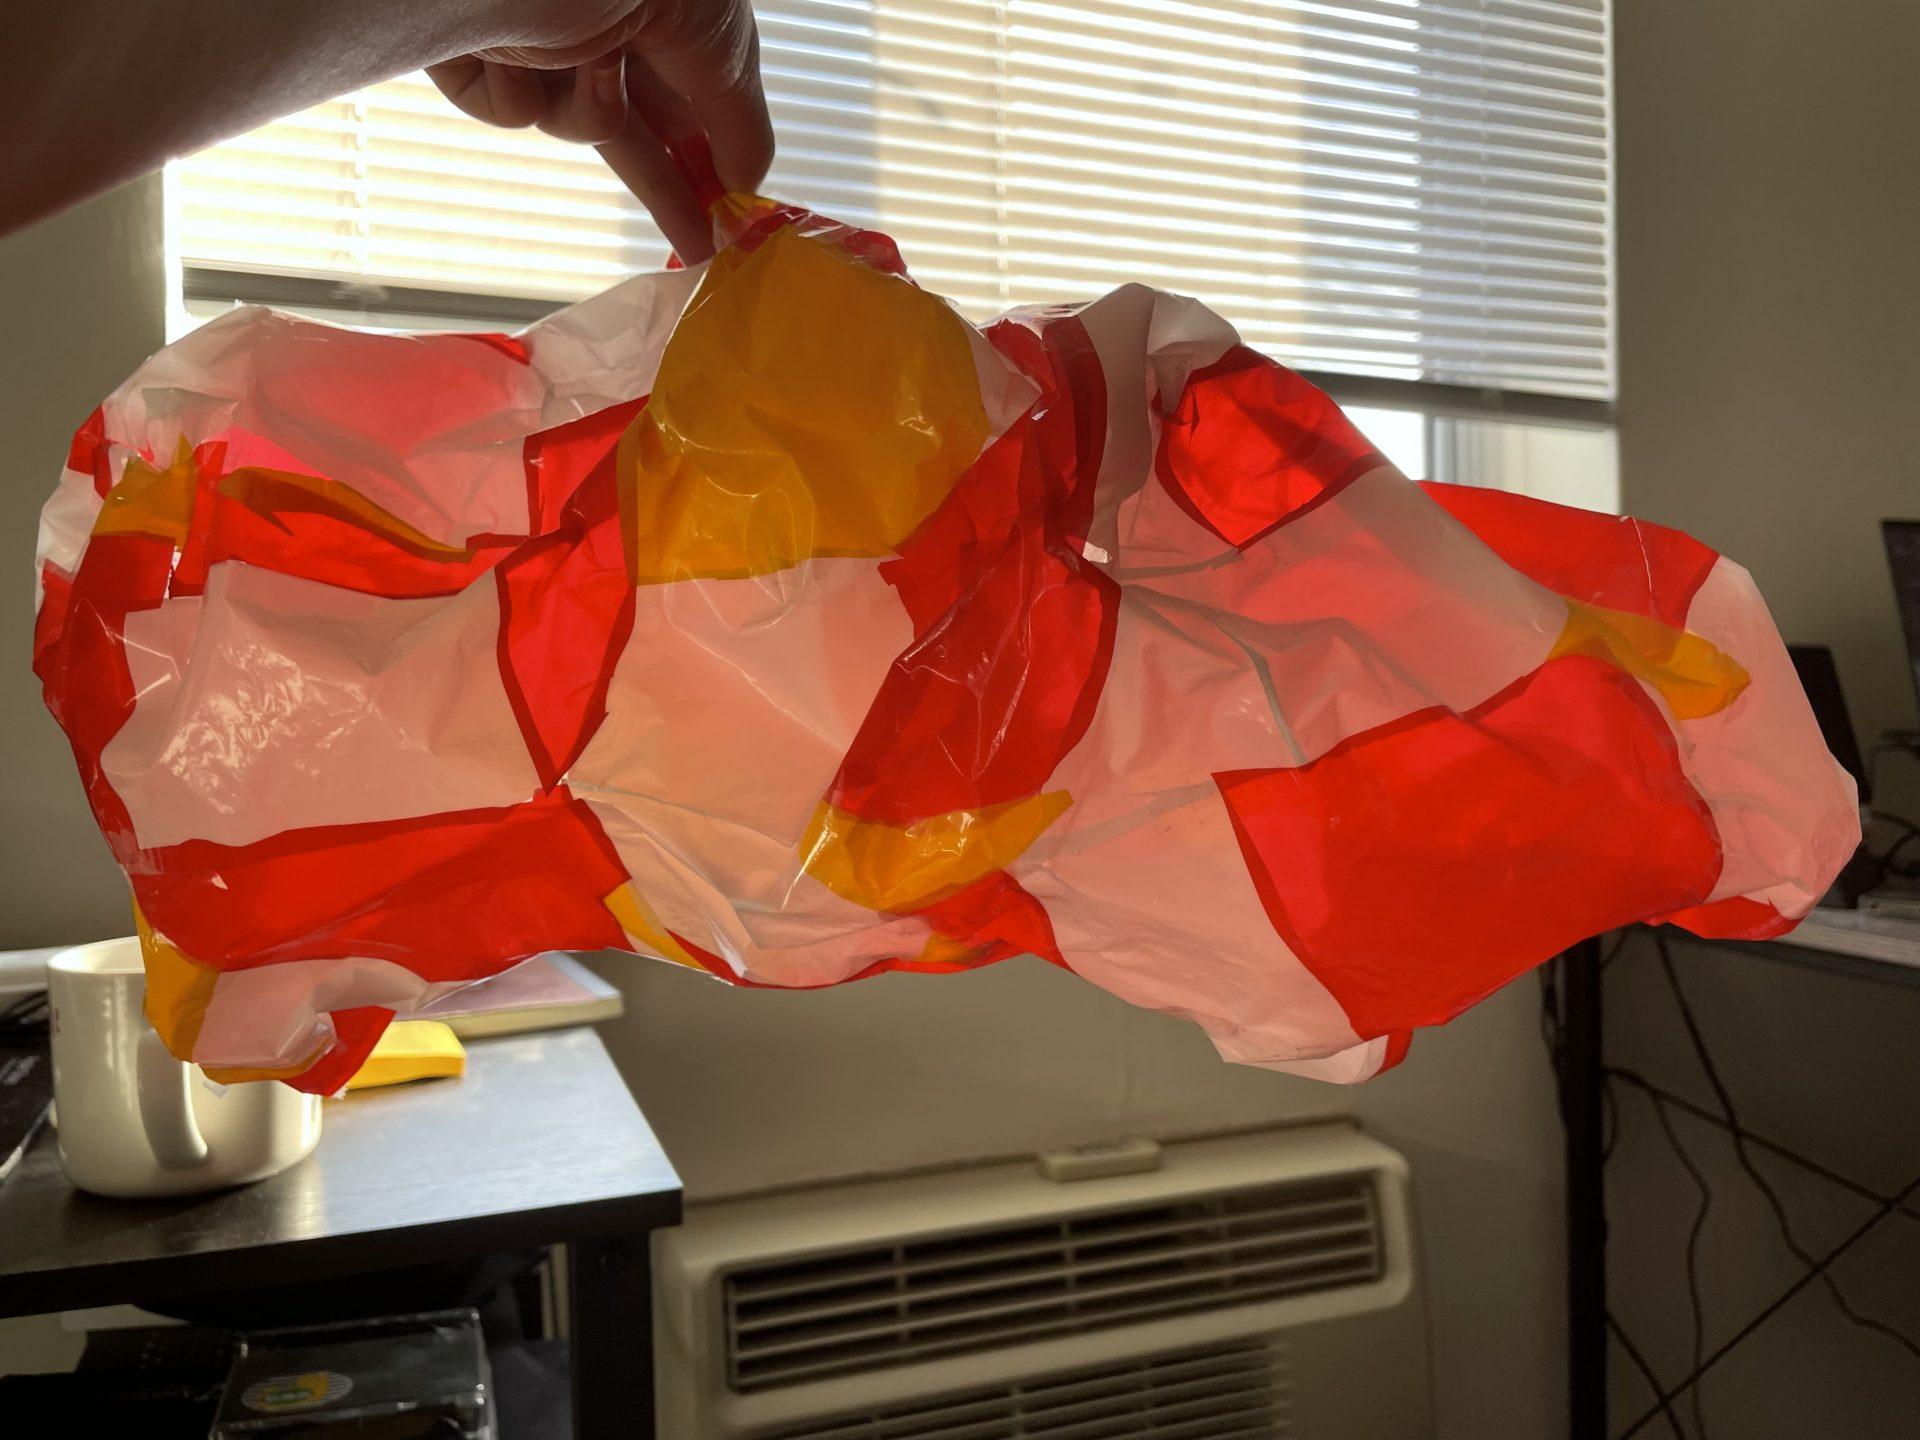
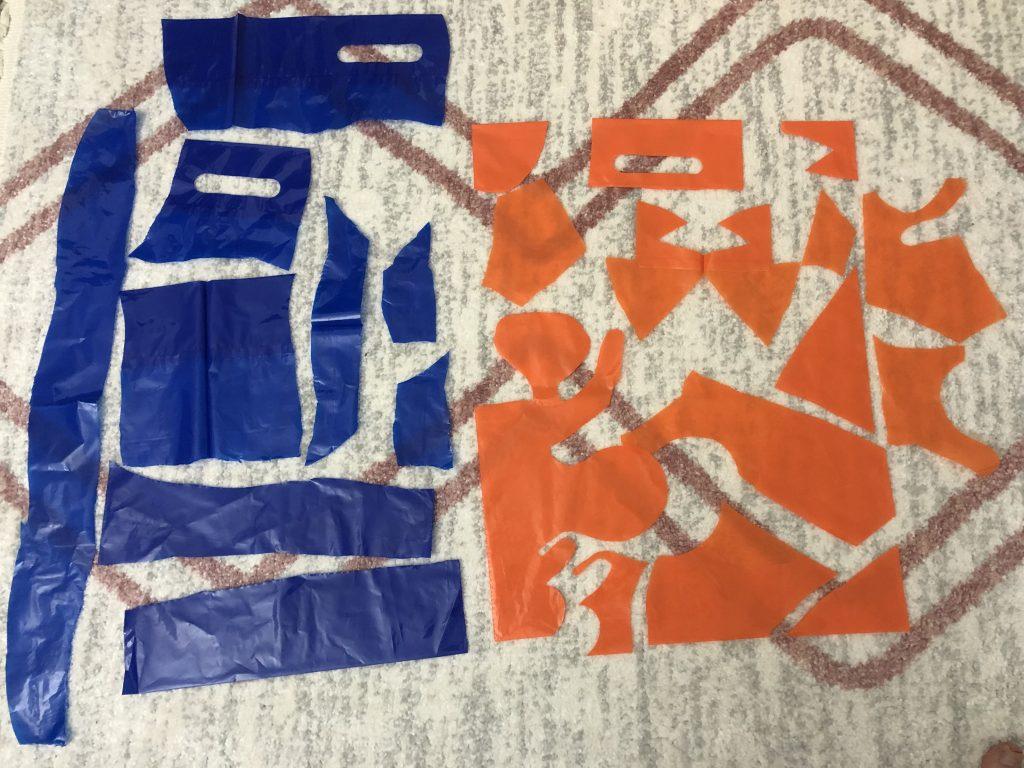
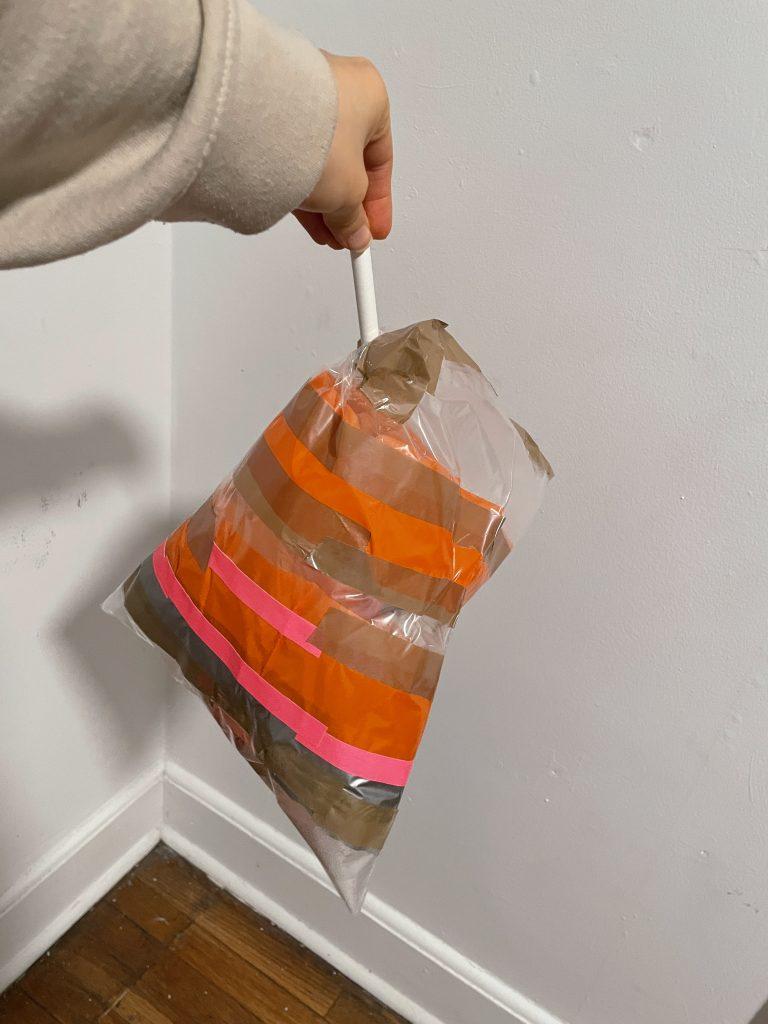
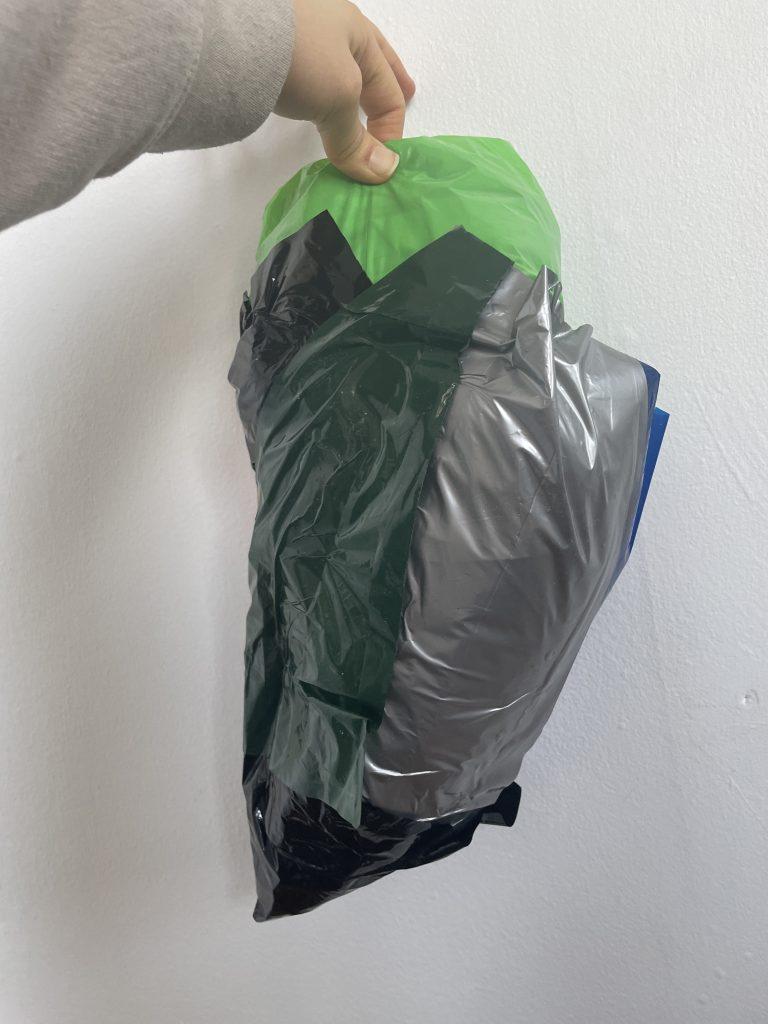
First I made this green and purple inflatable. I wasn’t sure how much trouble I would have wrangling the tape and plastic so I kept it simple with some angular shapes. It was helpful to use the corners and sides of the bags as edges because I didn’t have to tape them together, but I was expecting much more angularity from them than I really got. It seems like it is quite difficult to get hard straight edges with inflatables, but you can get soft edges and pretty good points.

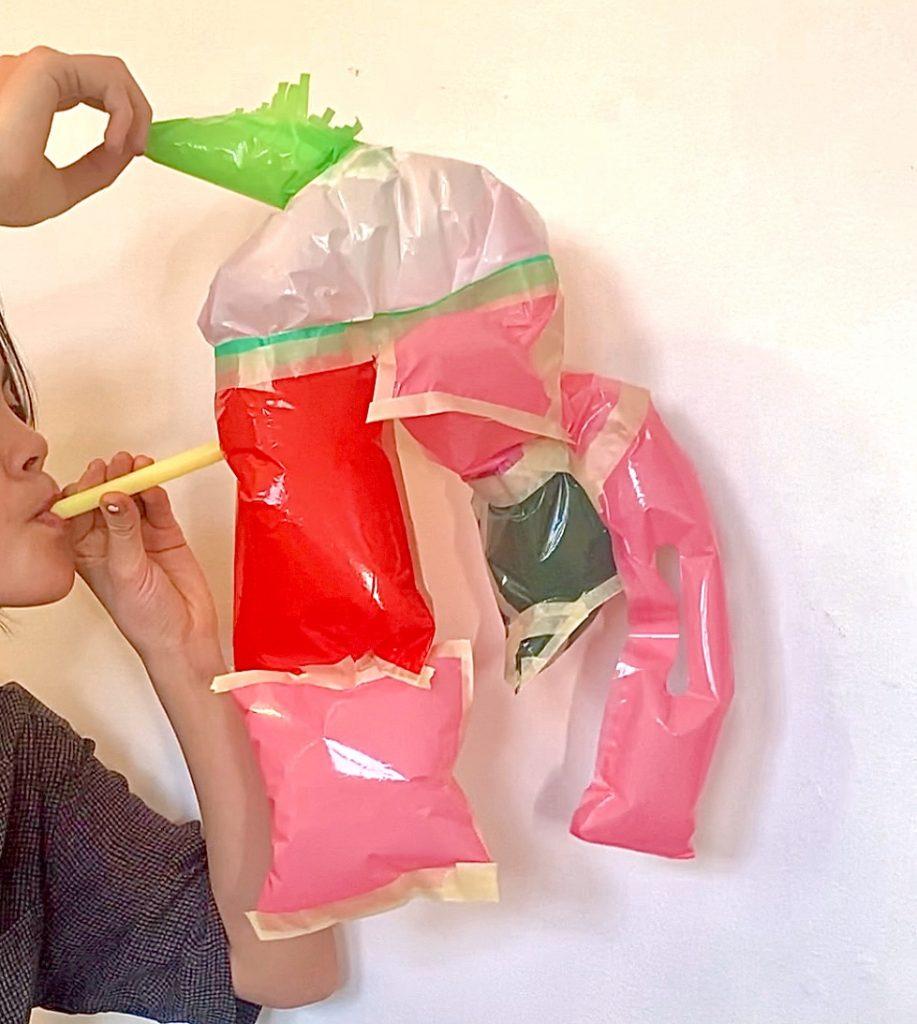
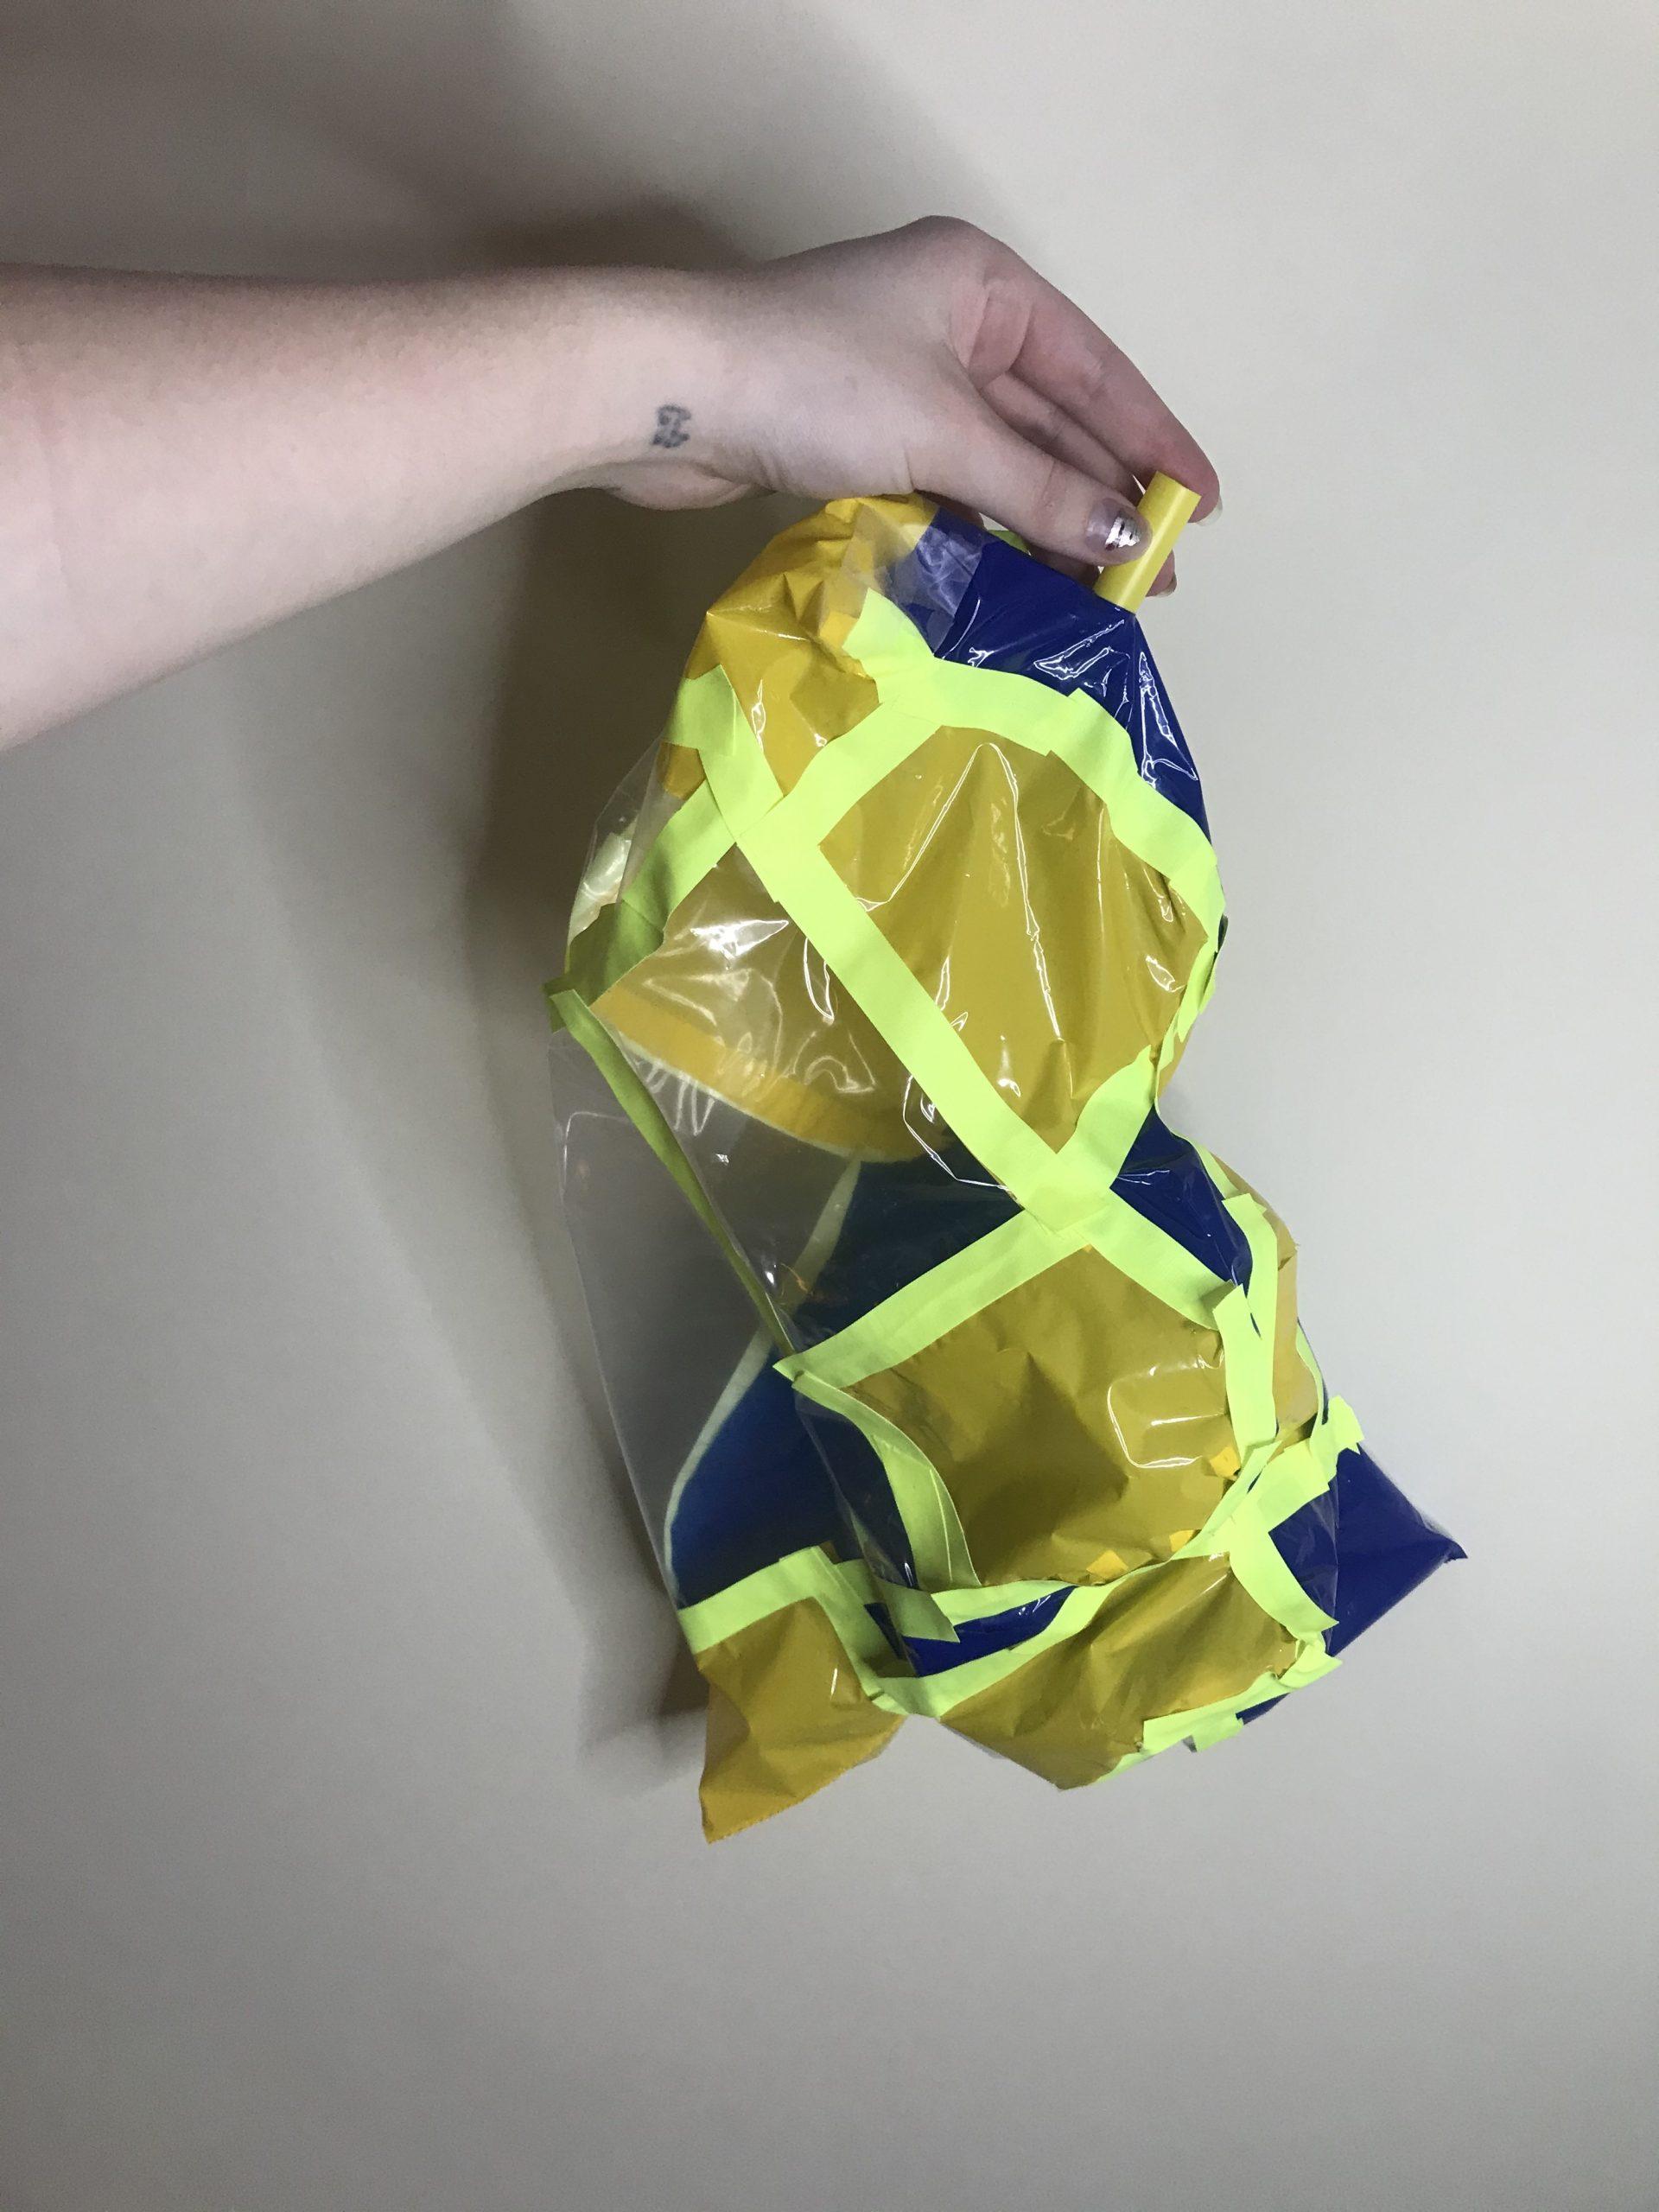
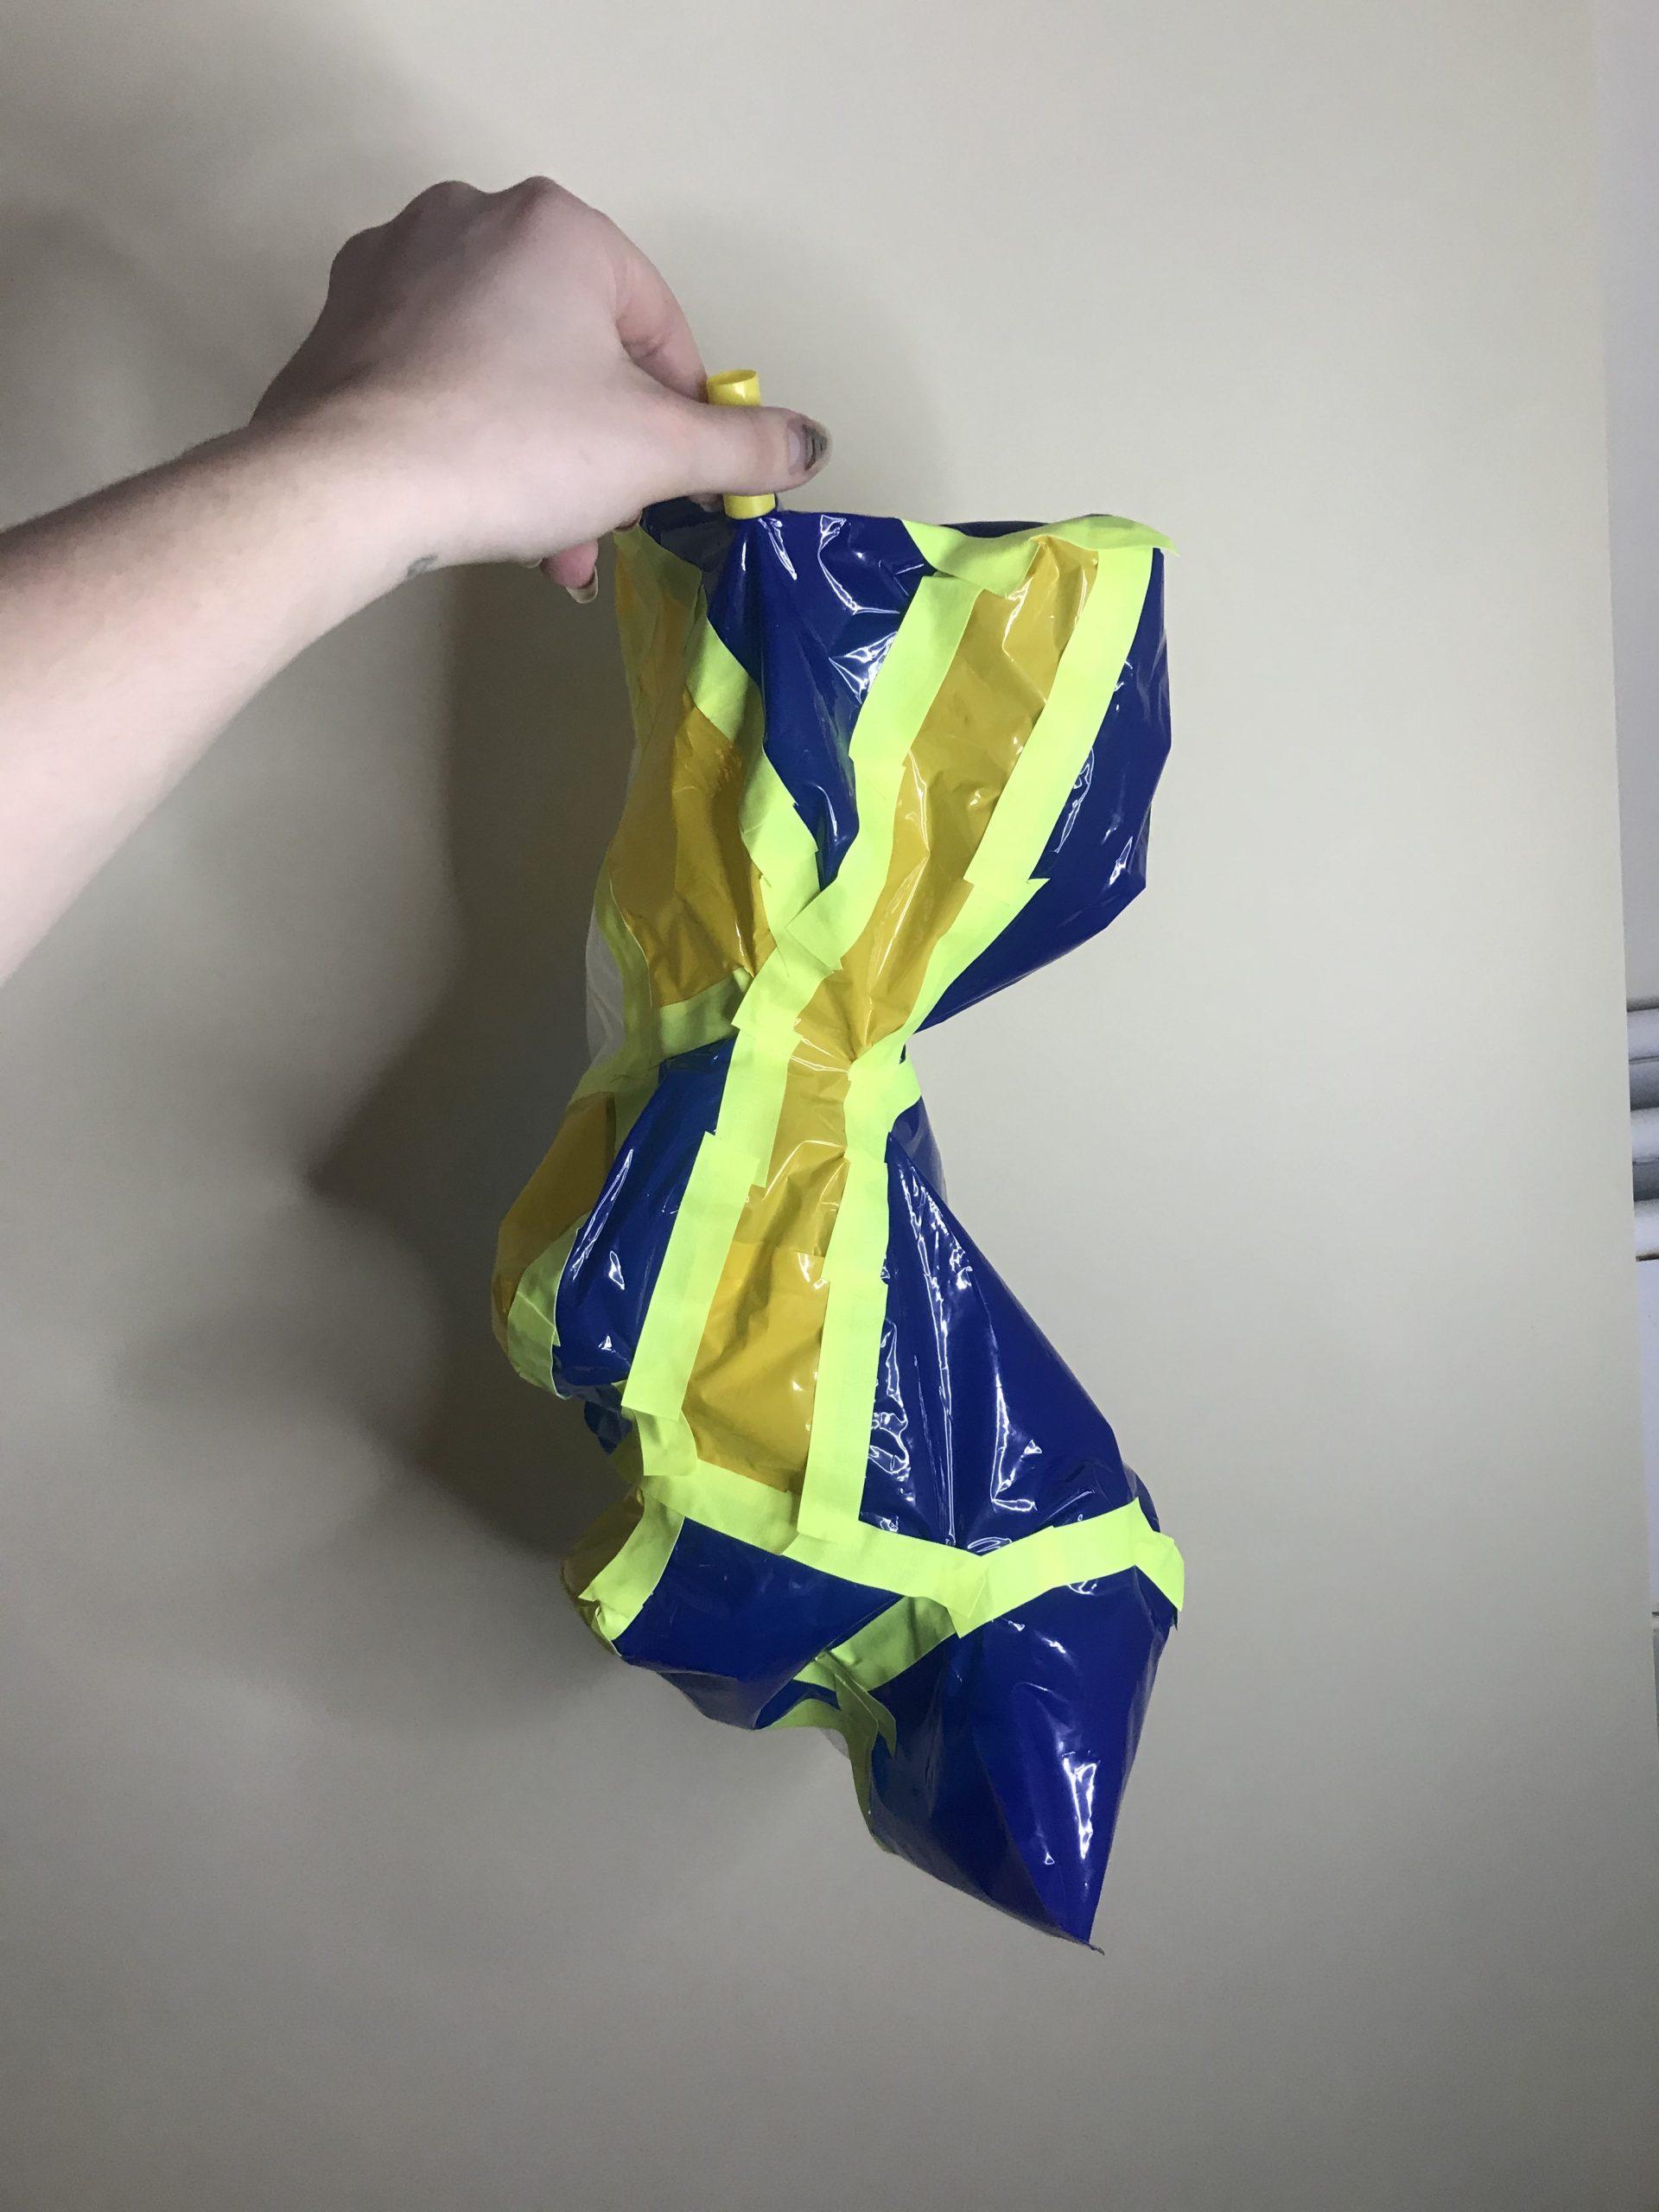
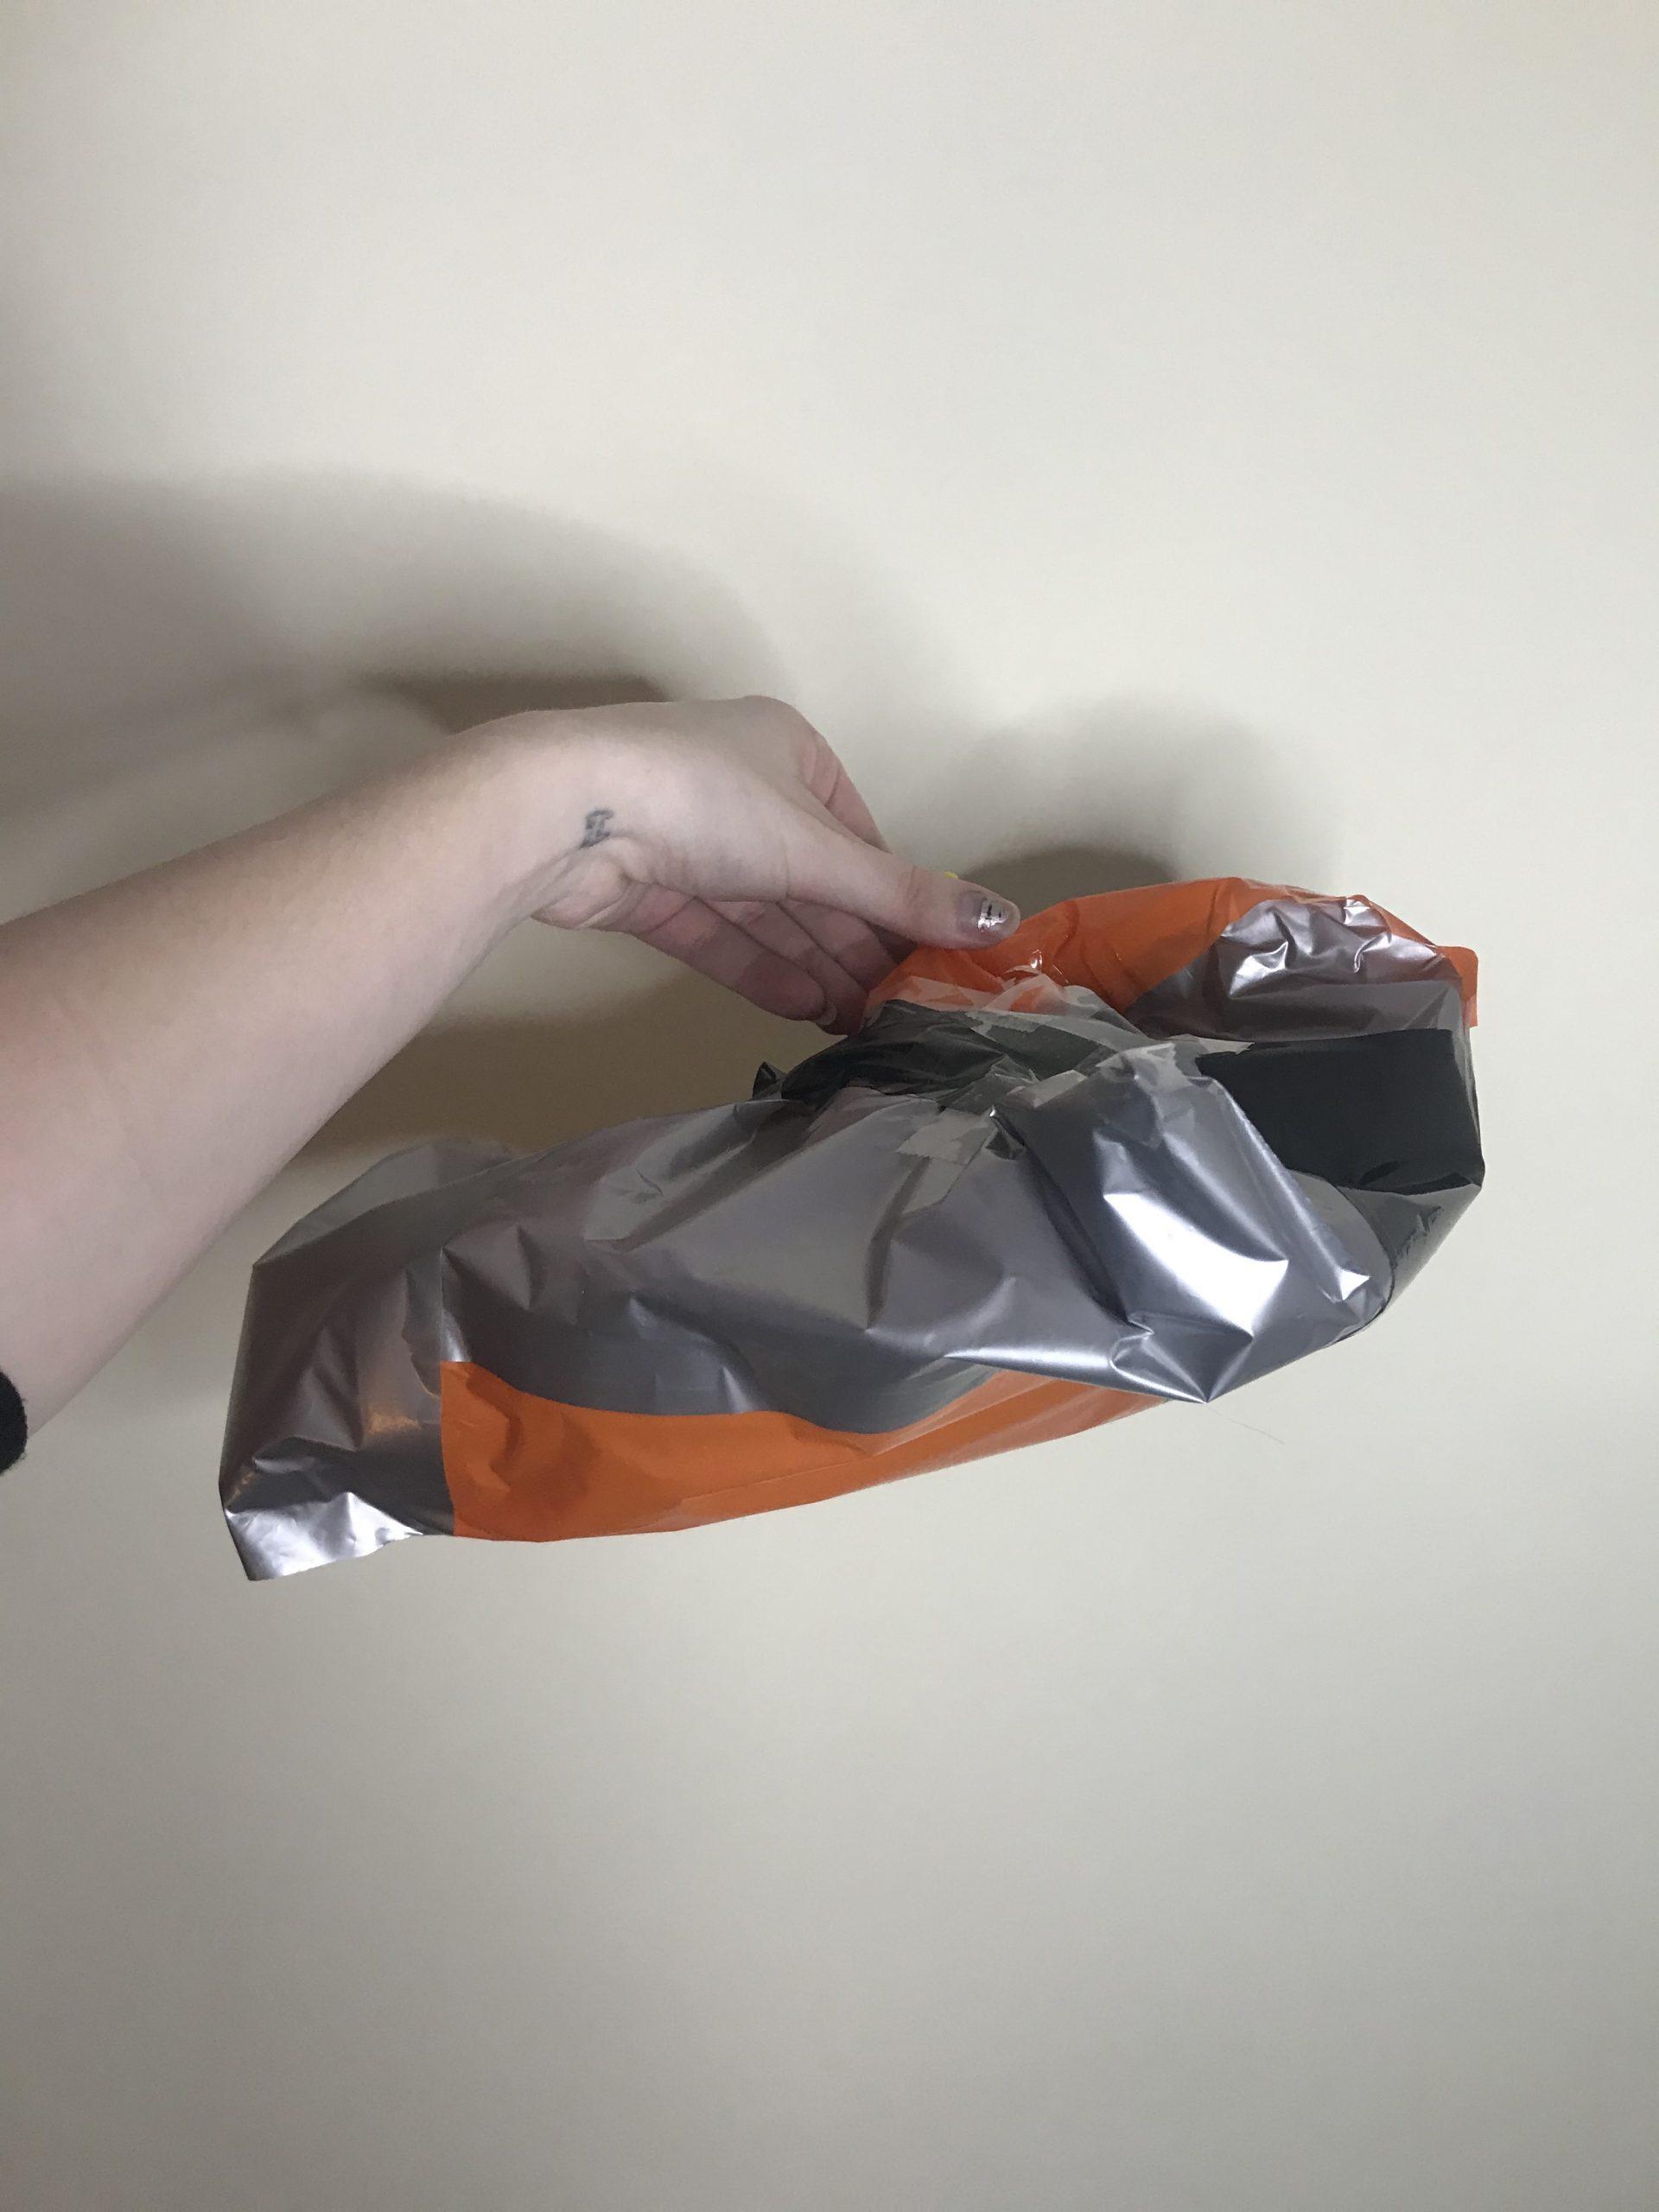
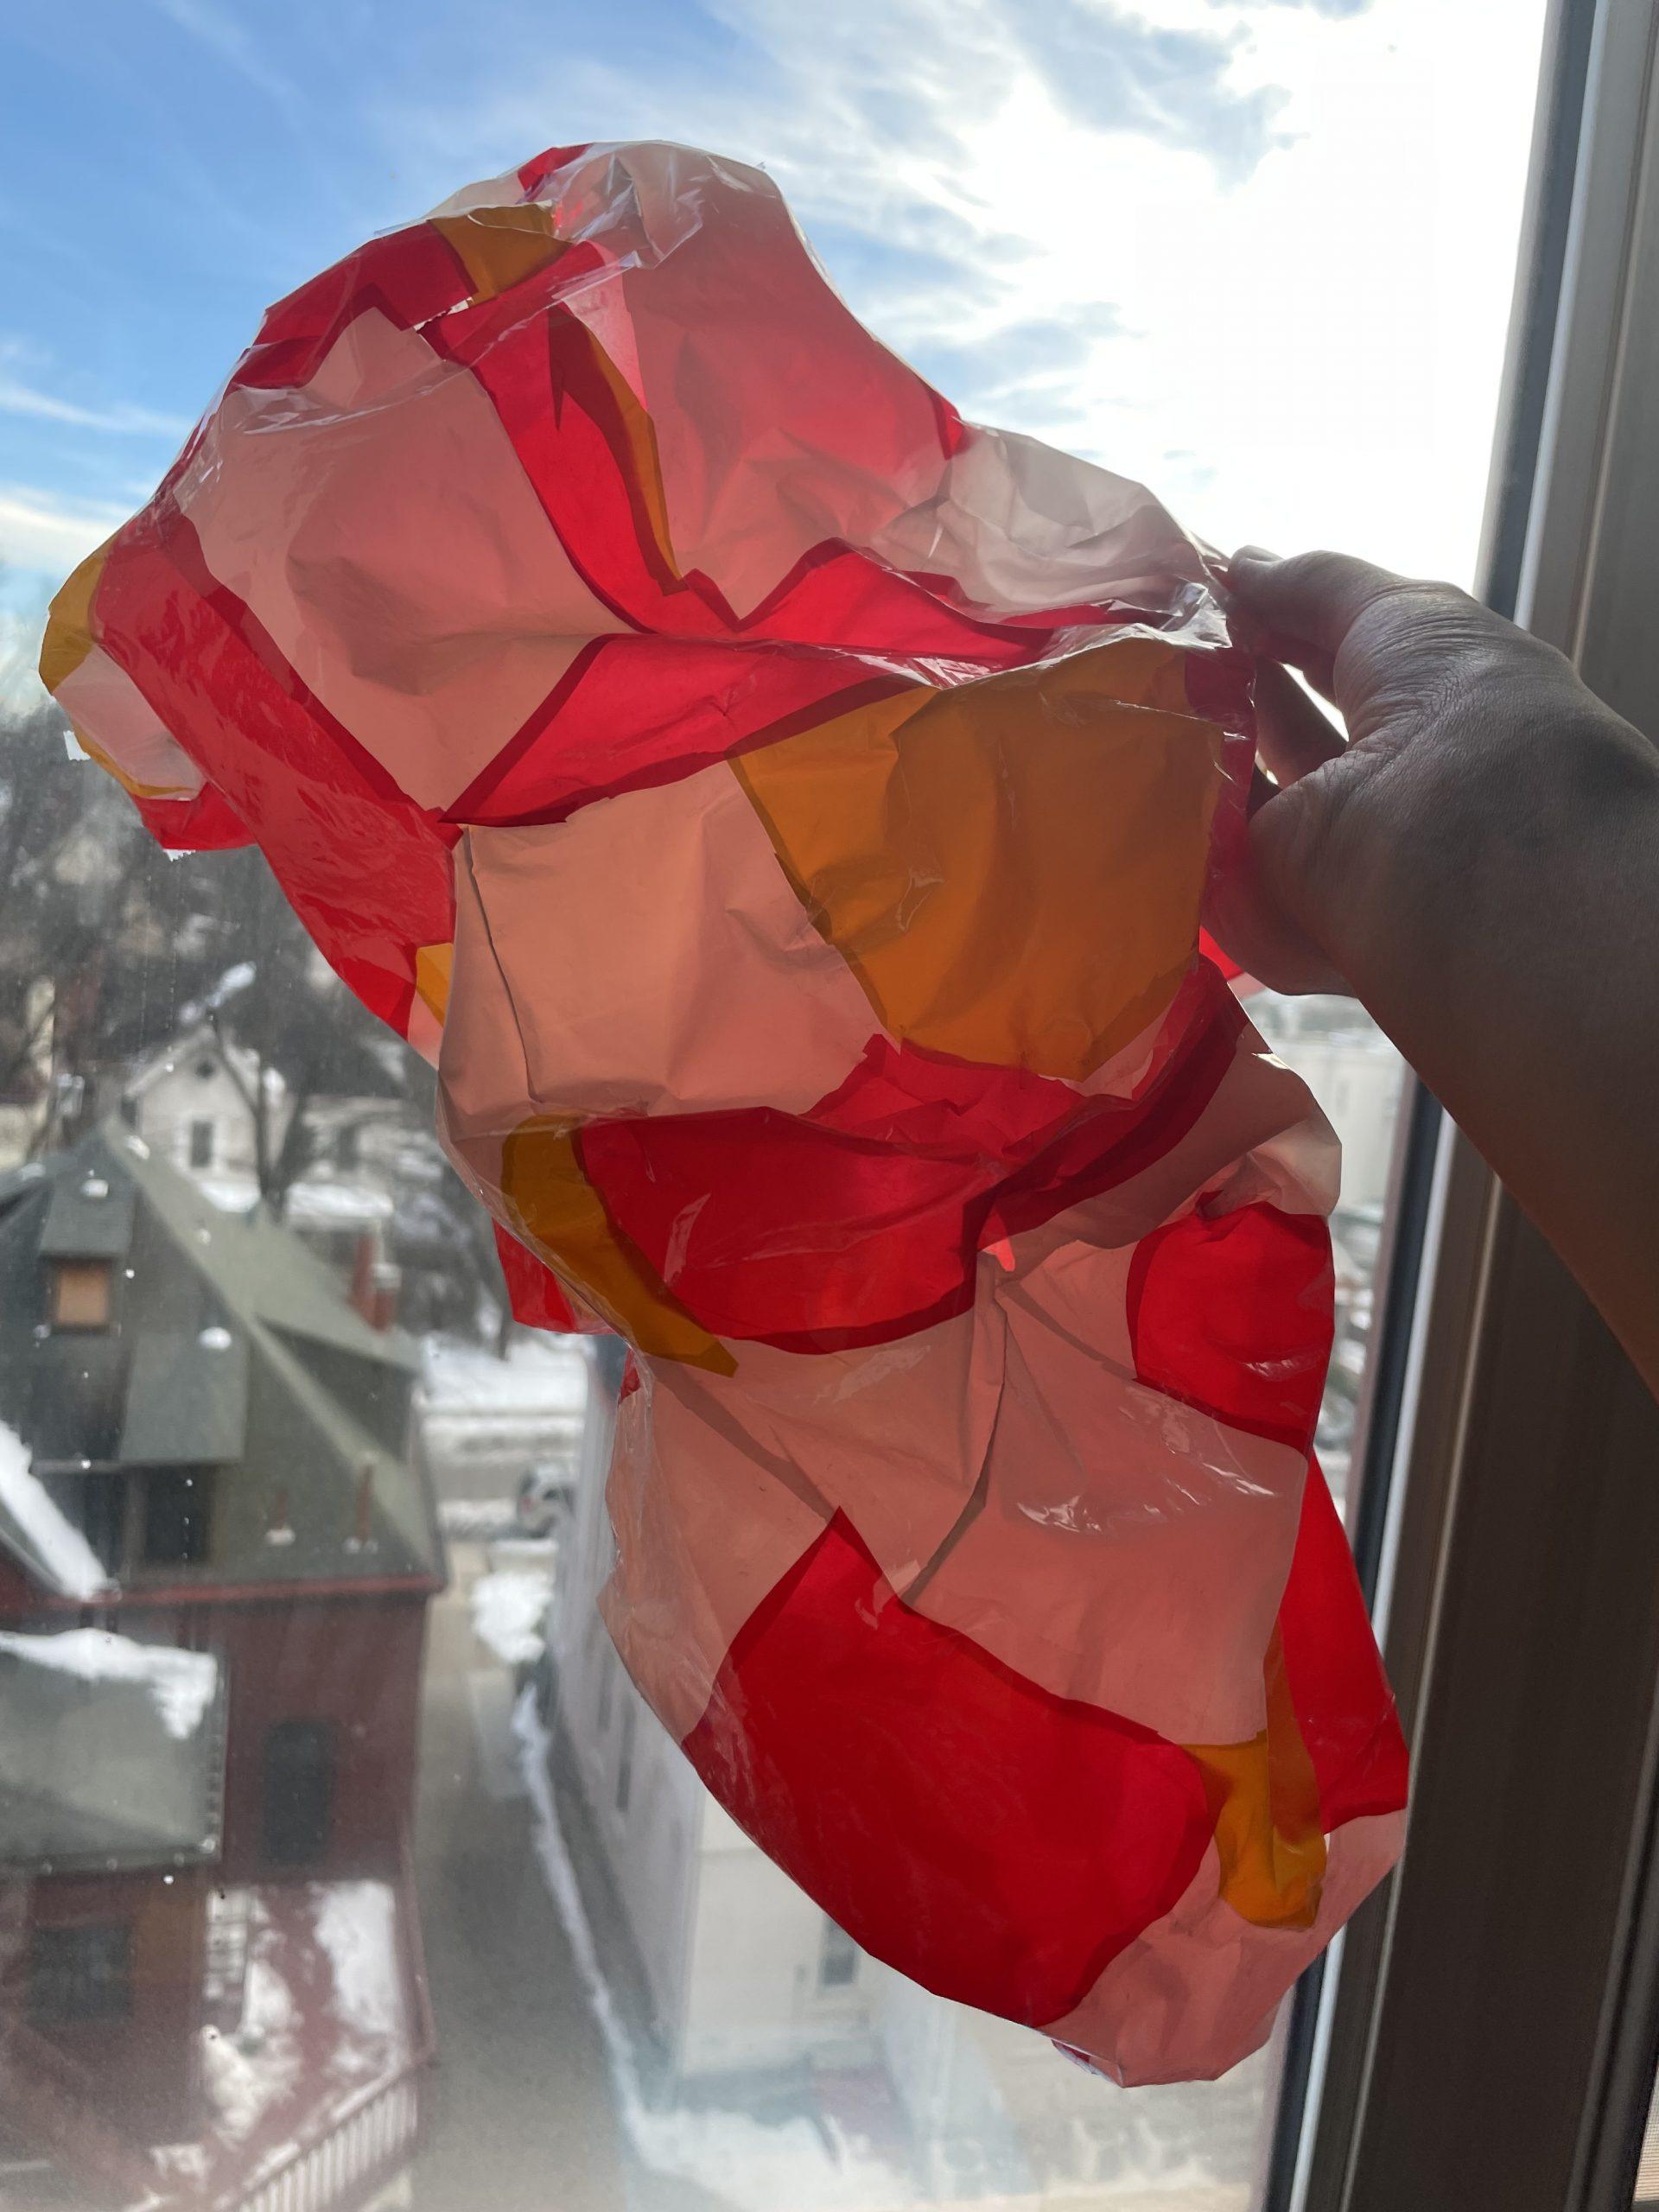
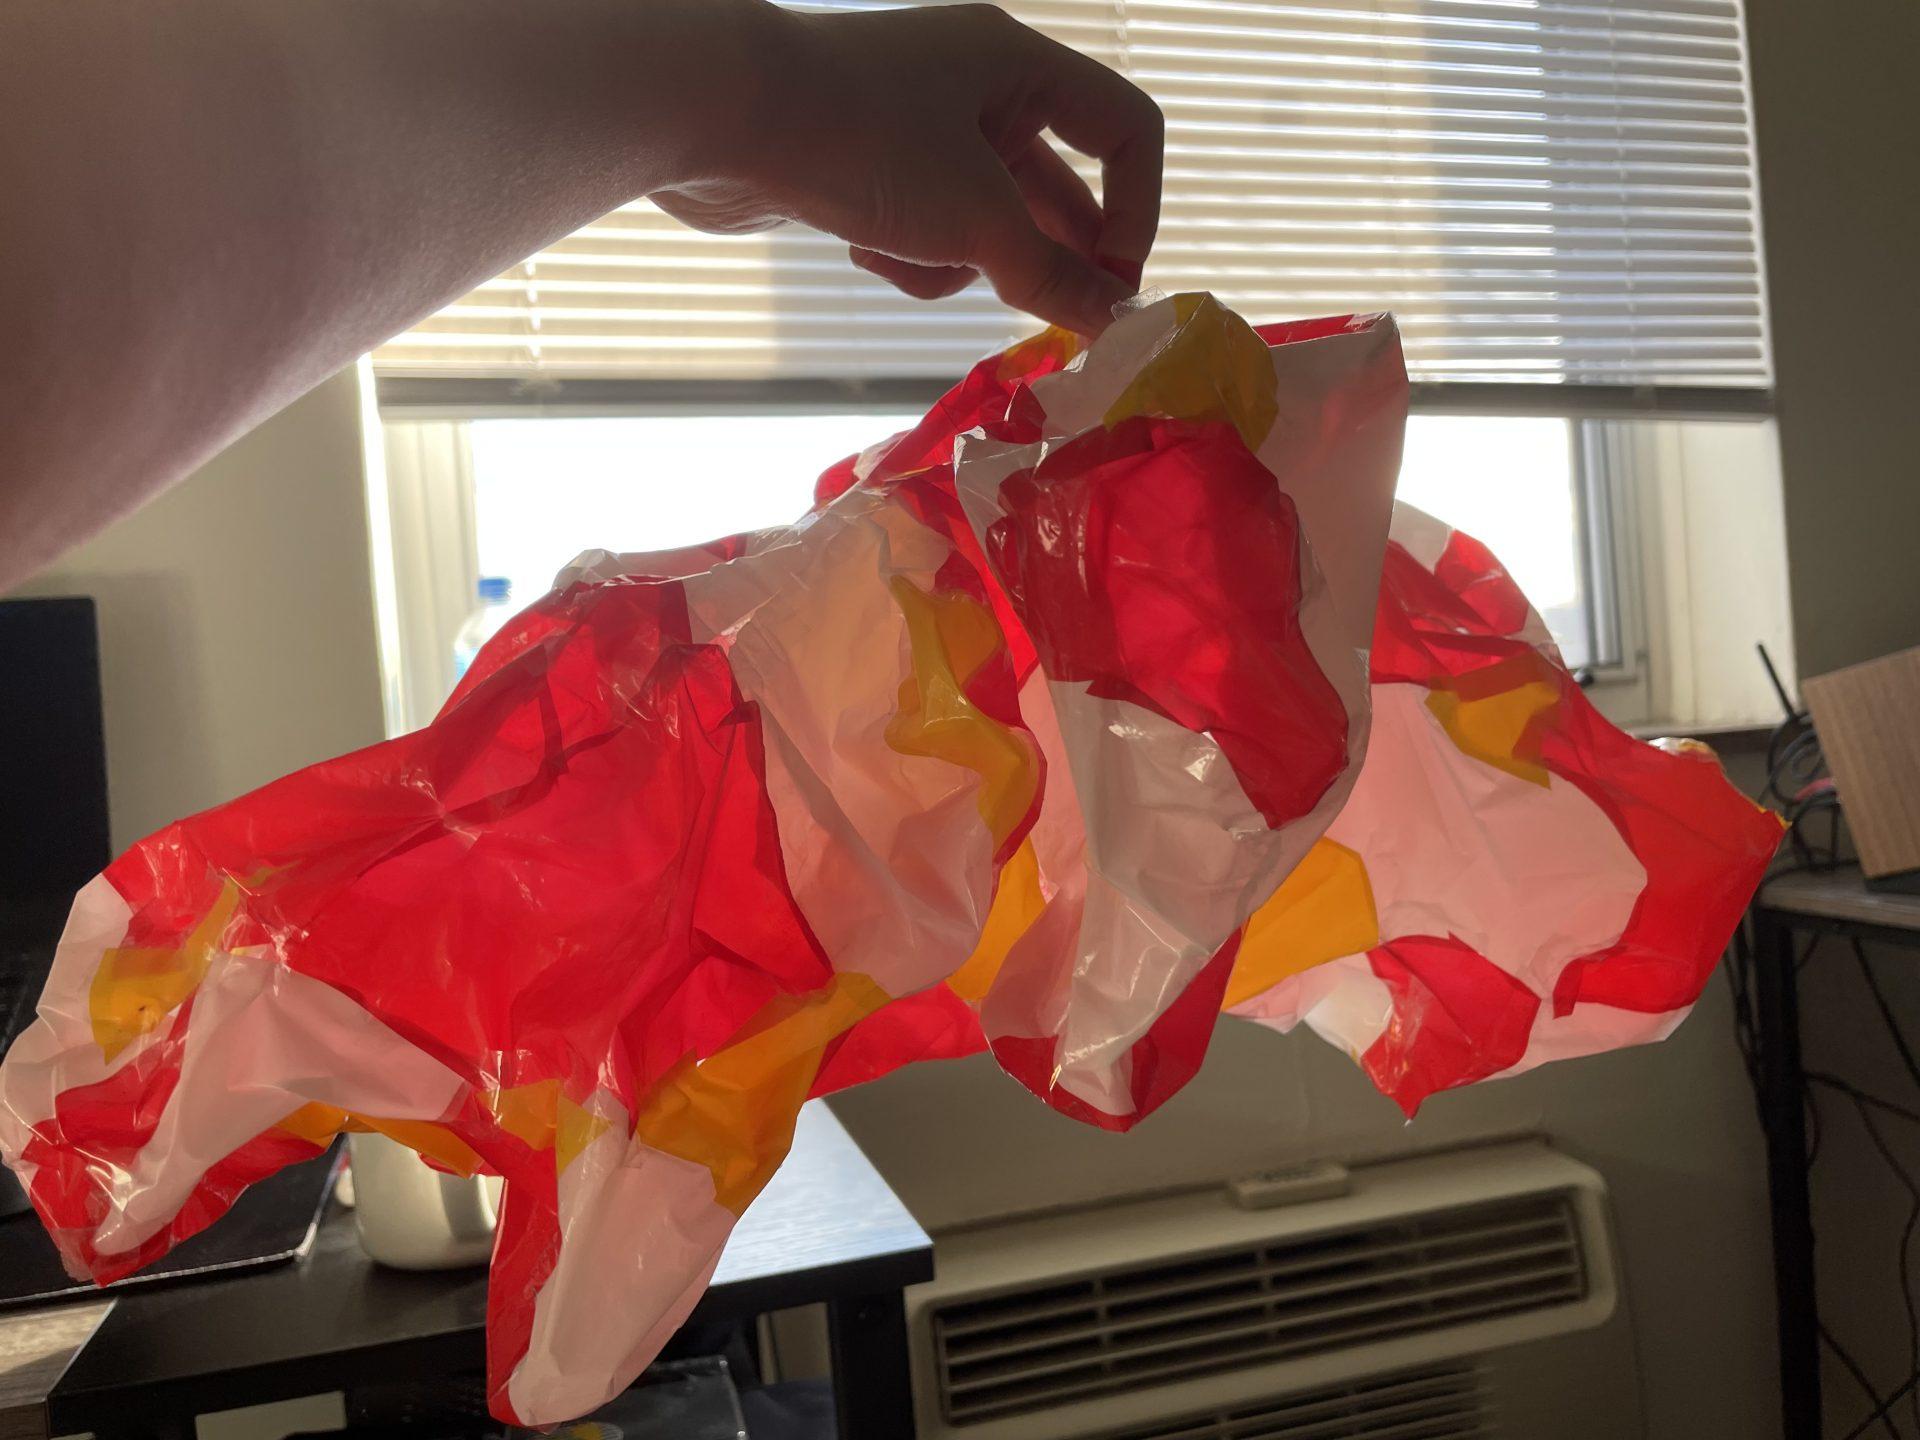
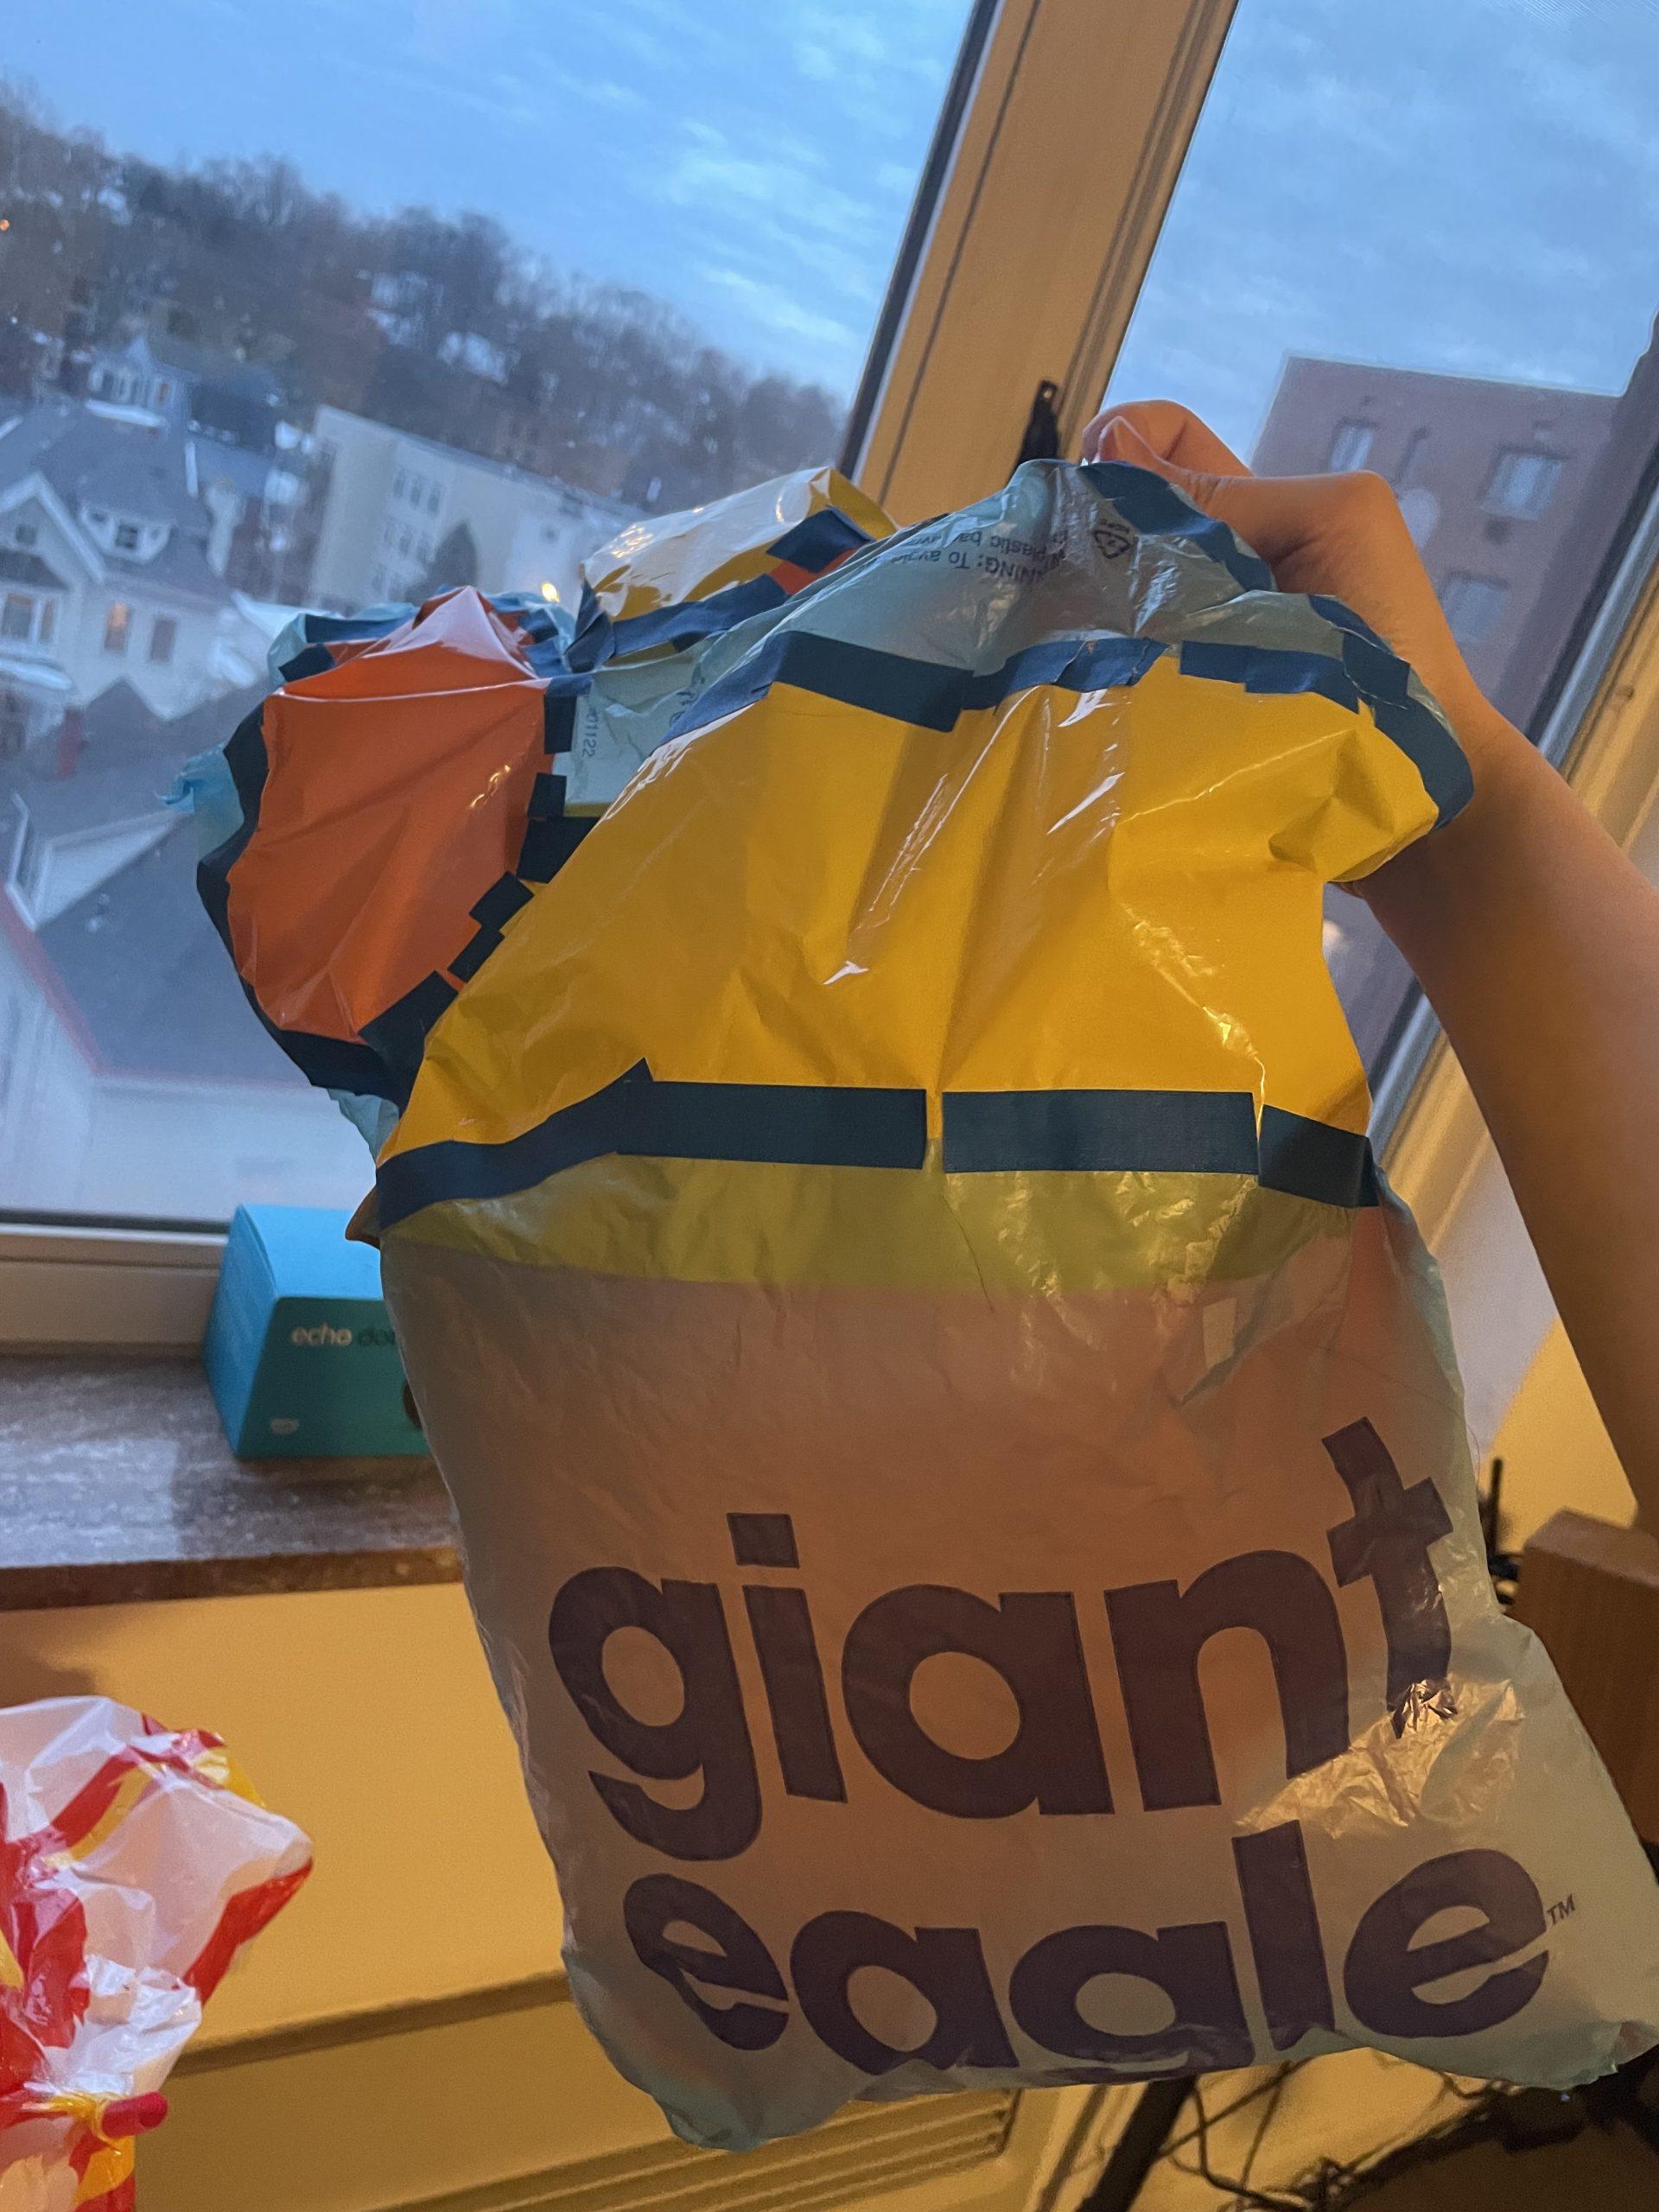
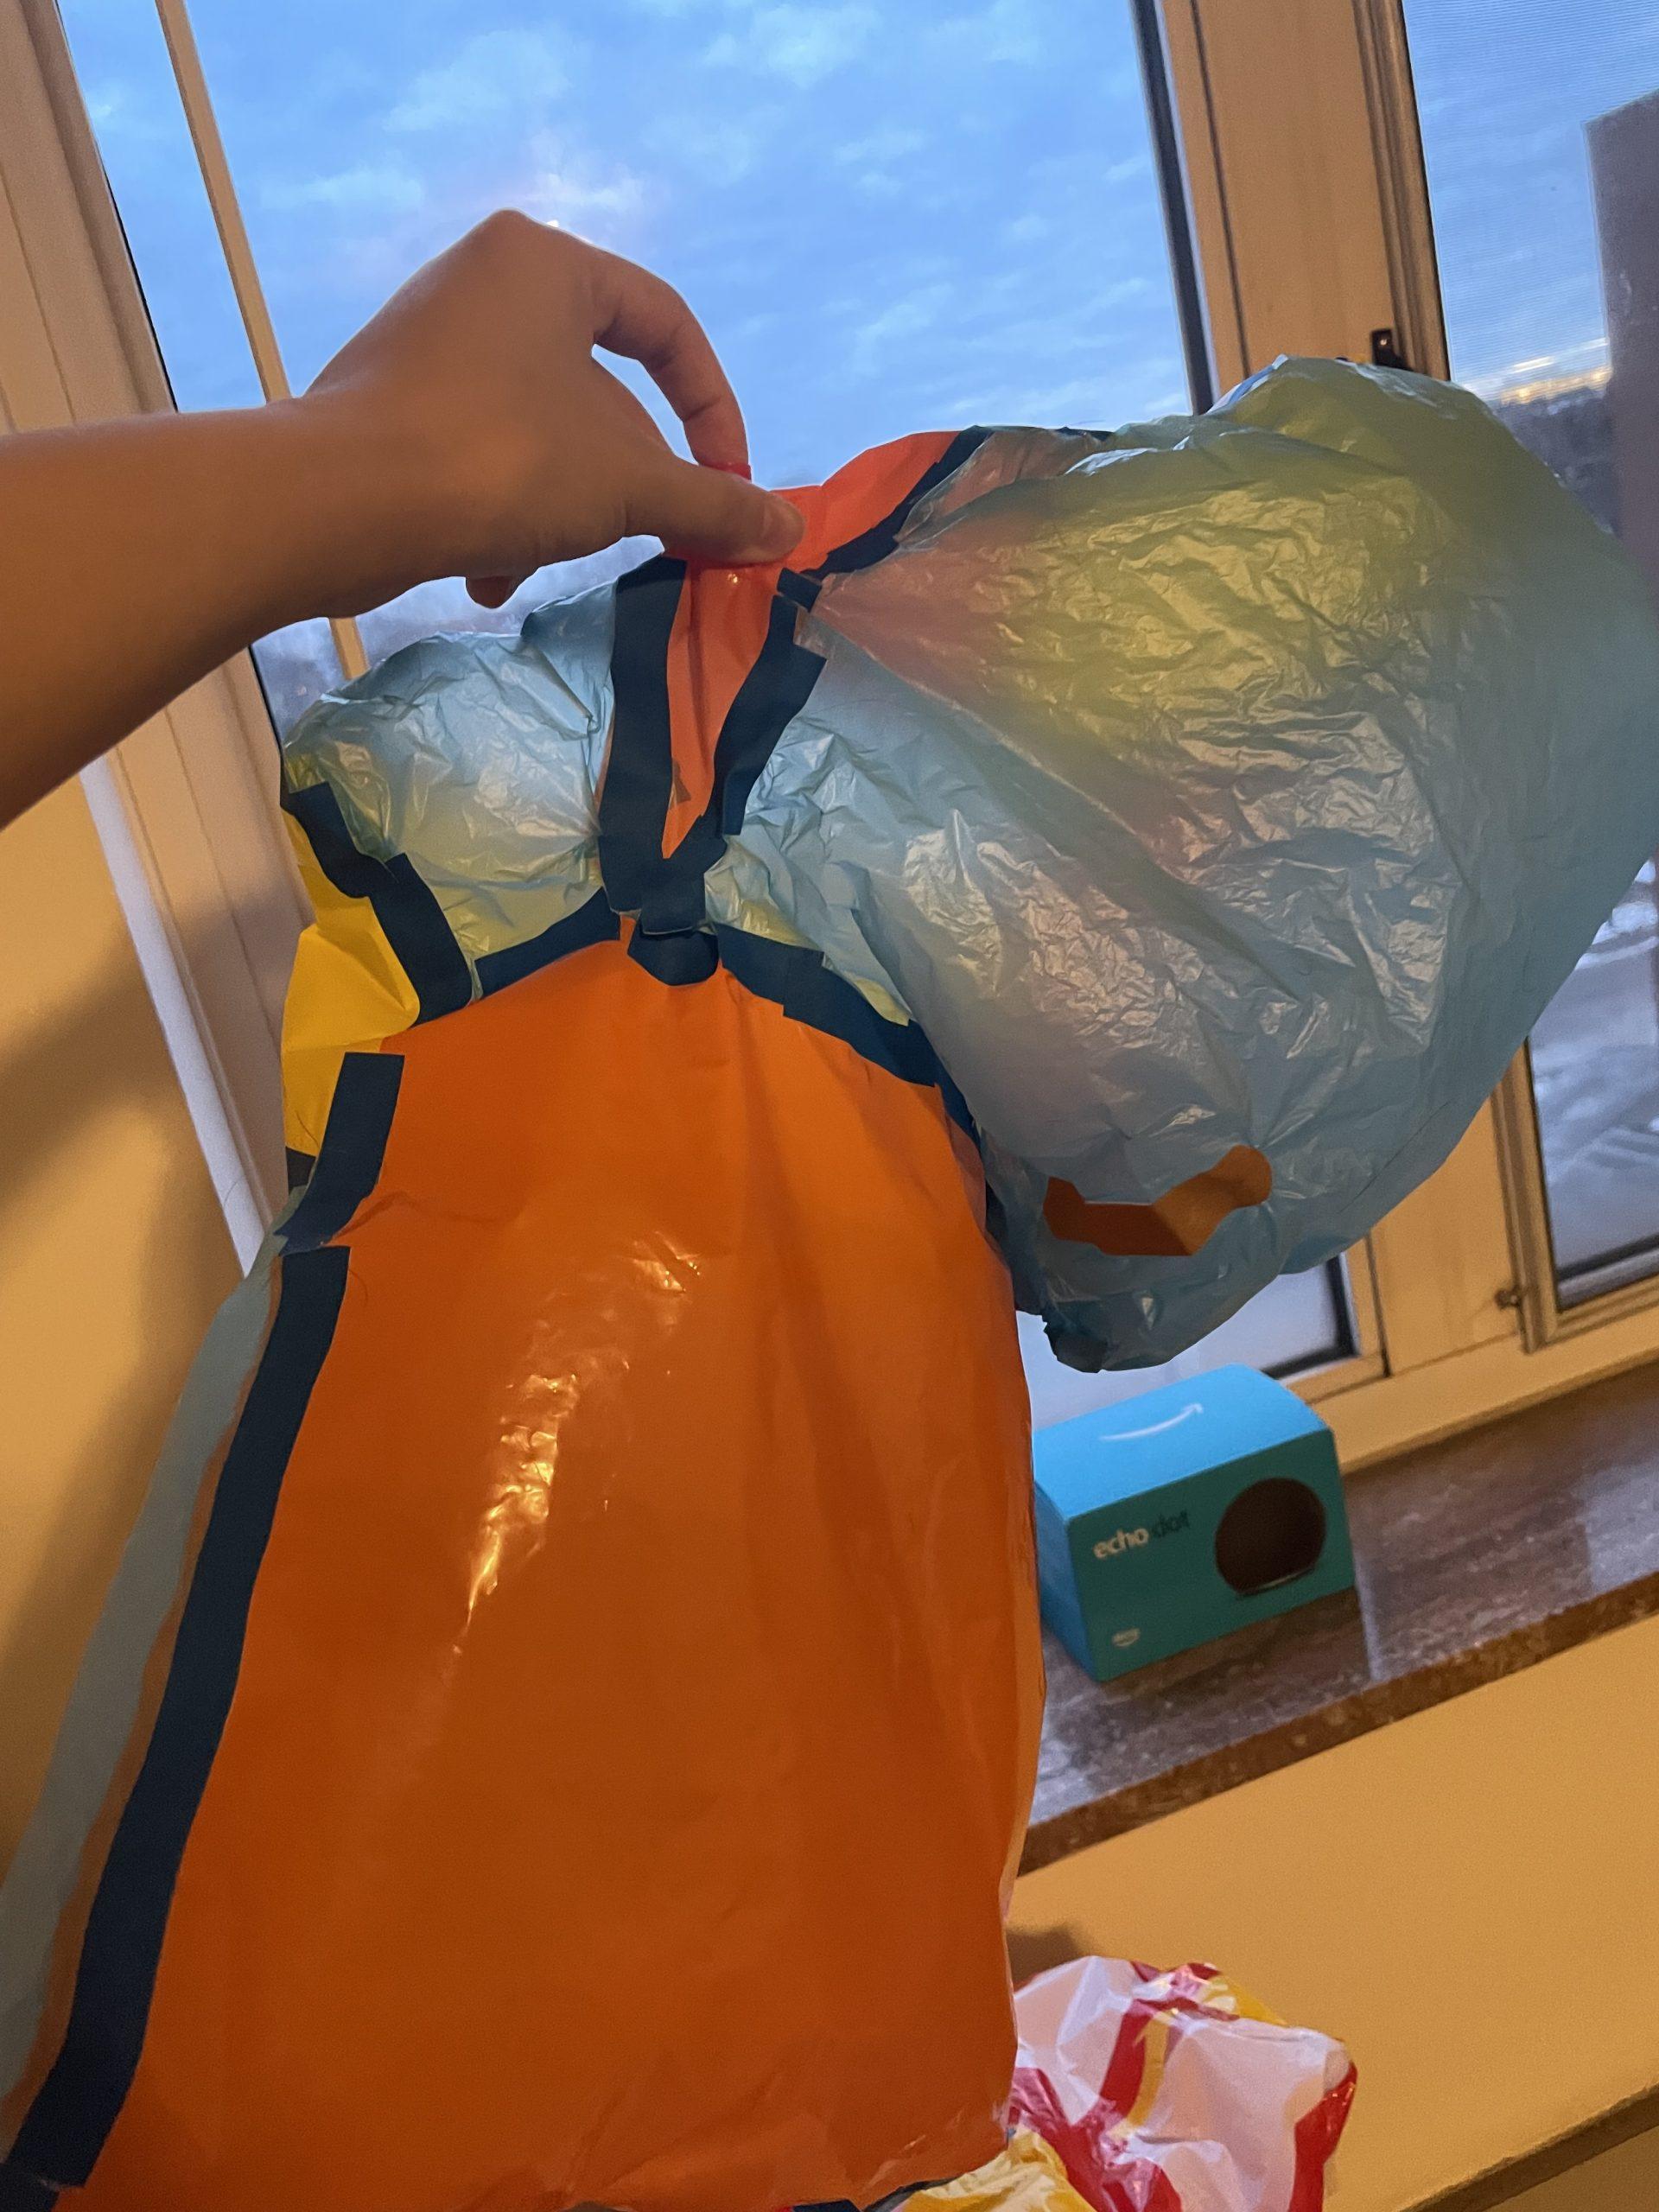
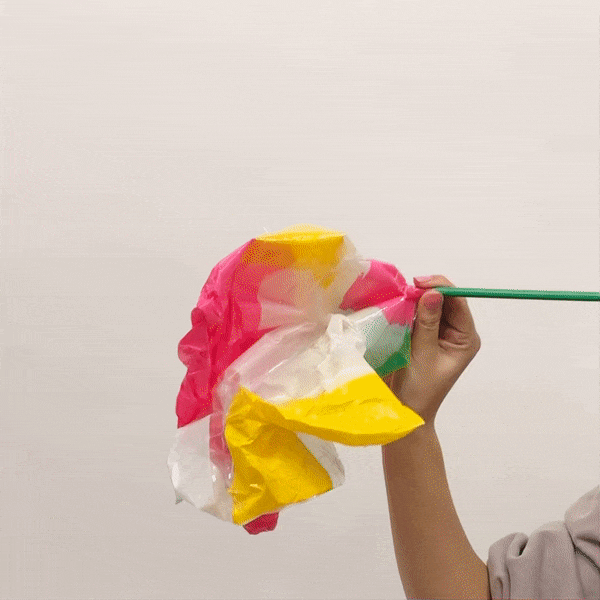
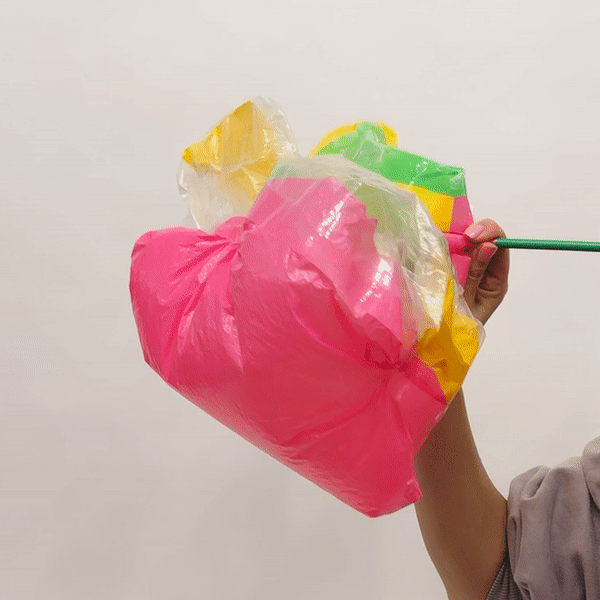
For my next inflatable I wanted to start with something round. I cut a piece of the white plastic into a circle, then ripped off a long piece of tape. I put the edge of the circle at the lefthand side of the tape, then went around the edge of the circle pleating and connecting the pieces to the tape. Once I was finished pleating, I connected the two ends of the tape. This piece looked sort of like a dome, but I was wondering what would happen if you connected two sides of the circle at a small point in between. Looking from the opening of the dome to the very top of it, it looked like the number 8. I thought it would make a cool shape, but when inflated the dome had too many gaps caused by the pleating for it to fully expand and show this shape. In the future, I would like to experiment more with this idea with better understanding of how it would work. The left “leg” of the inflatable was constructed by connecting two basic square shapes but only by part of one edge. By doing this, the shapes can more freely twist about. I thought this was cool. On the other “leg” of the inflatable, I was mostly just trying to practice taping cleanly. I was interested in what would happen if I used the handle of the bag. Again, too much air was escaping for it to fully inflate, but I still think more could have been done here. What about other shapes looping through that hole? Like an inflatable chain? Or an inflatable knot? There is certainly more to explore.

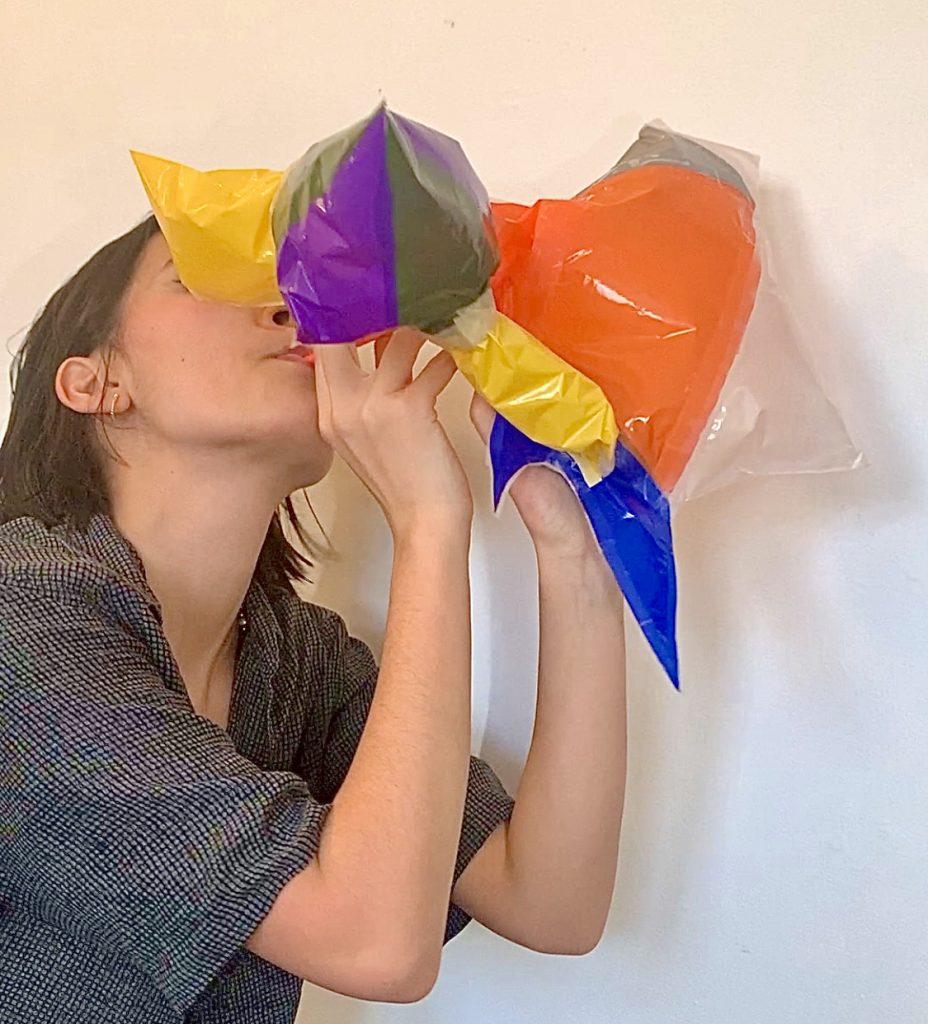
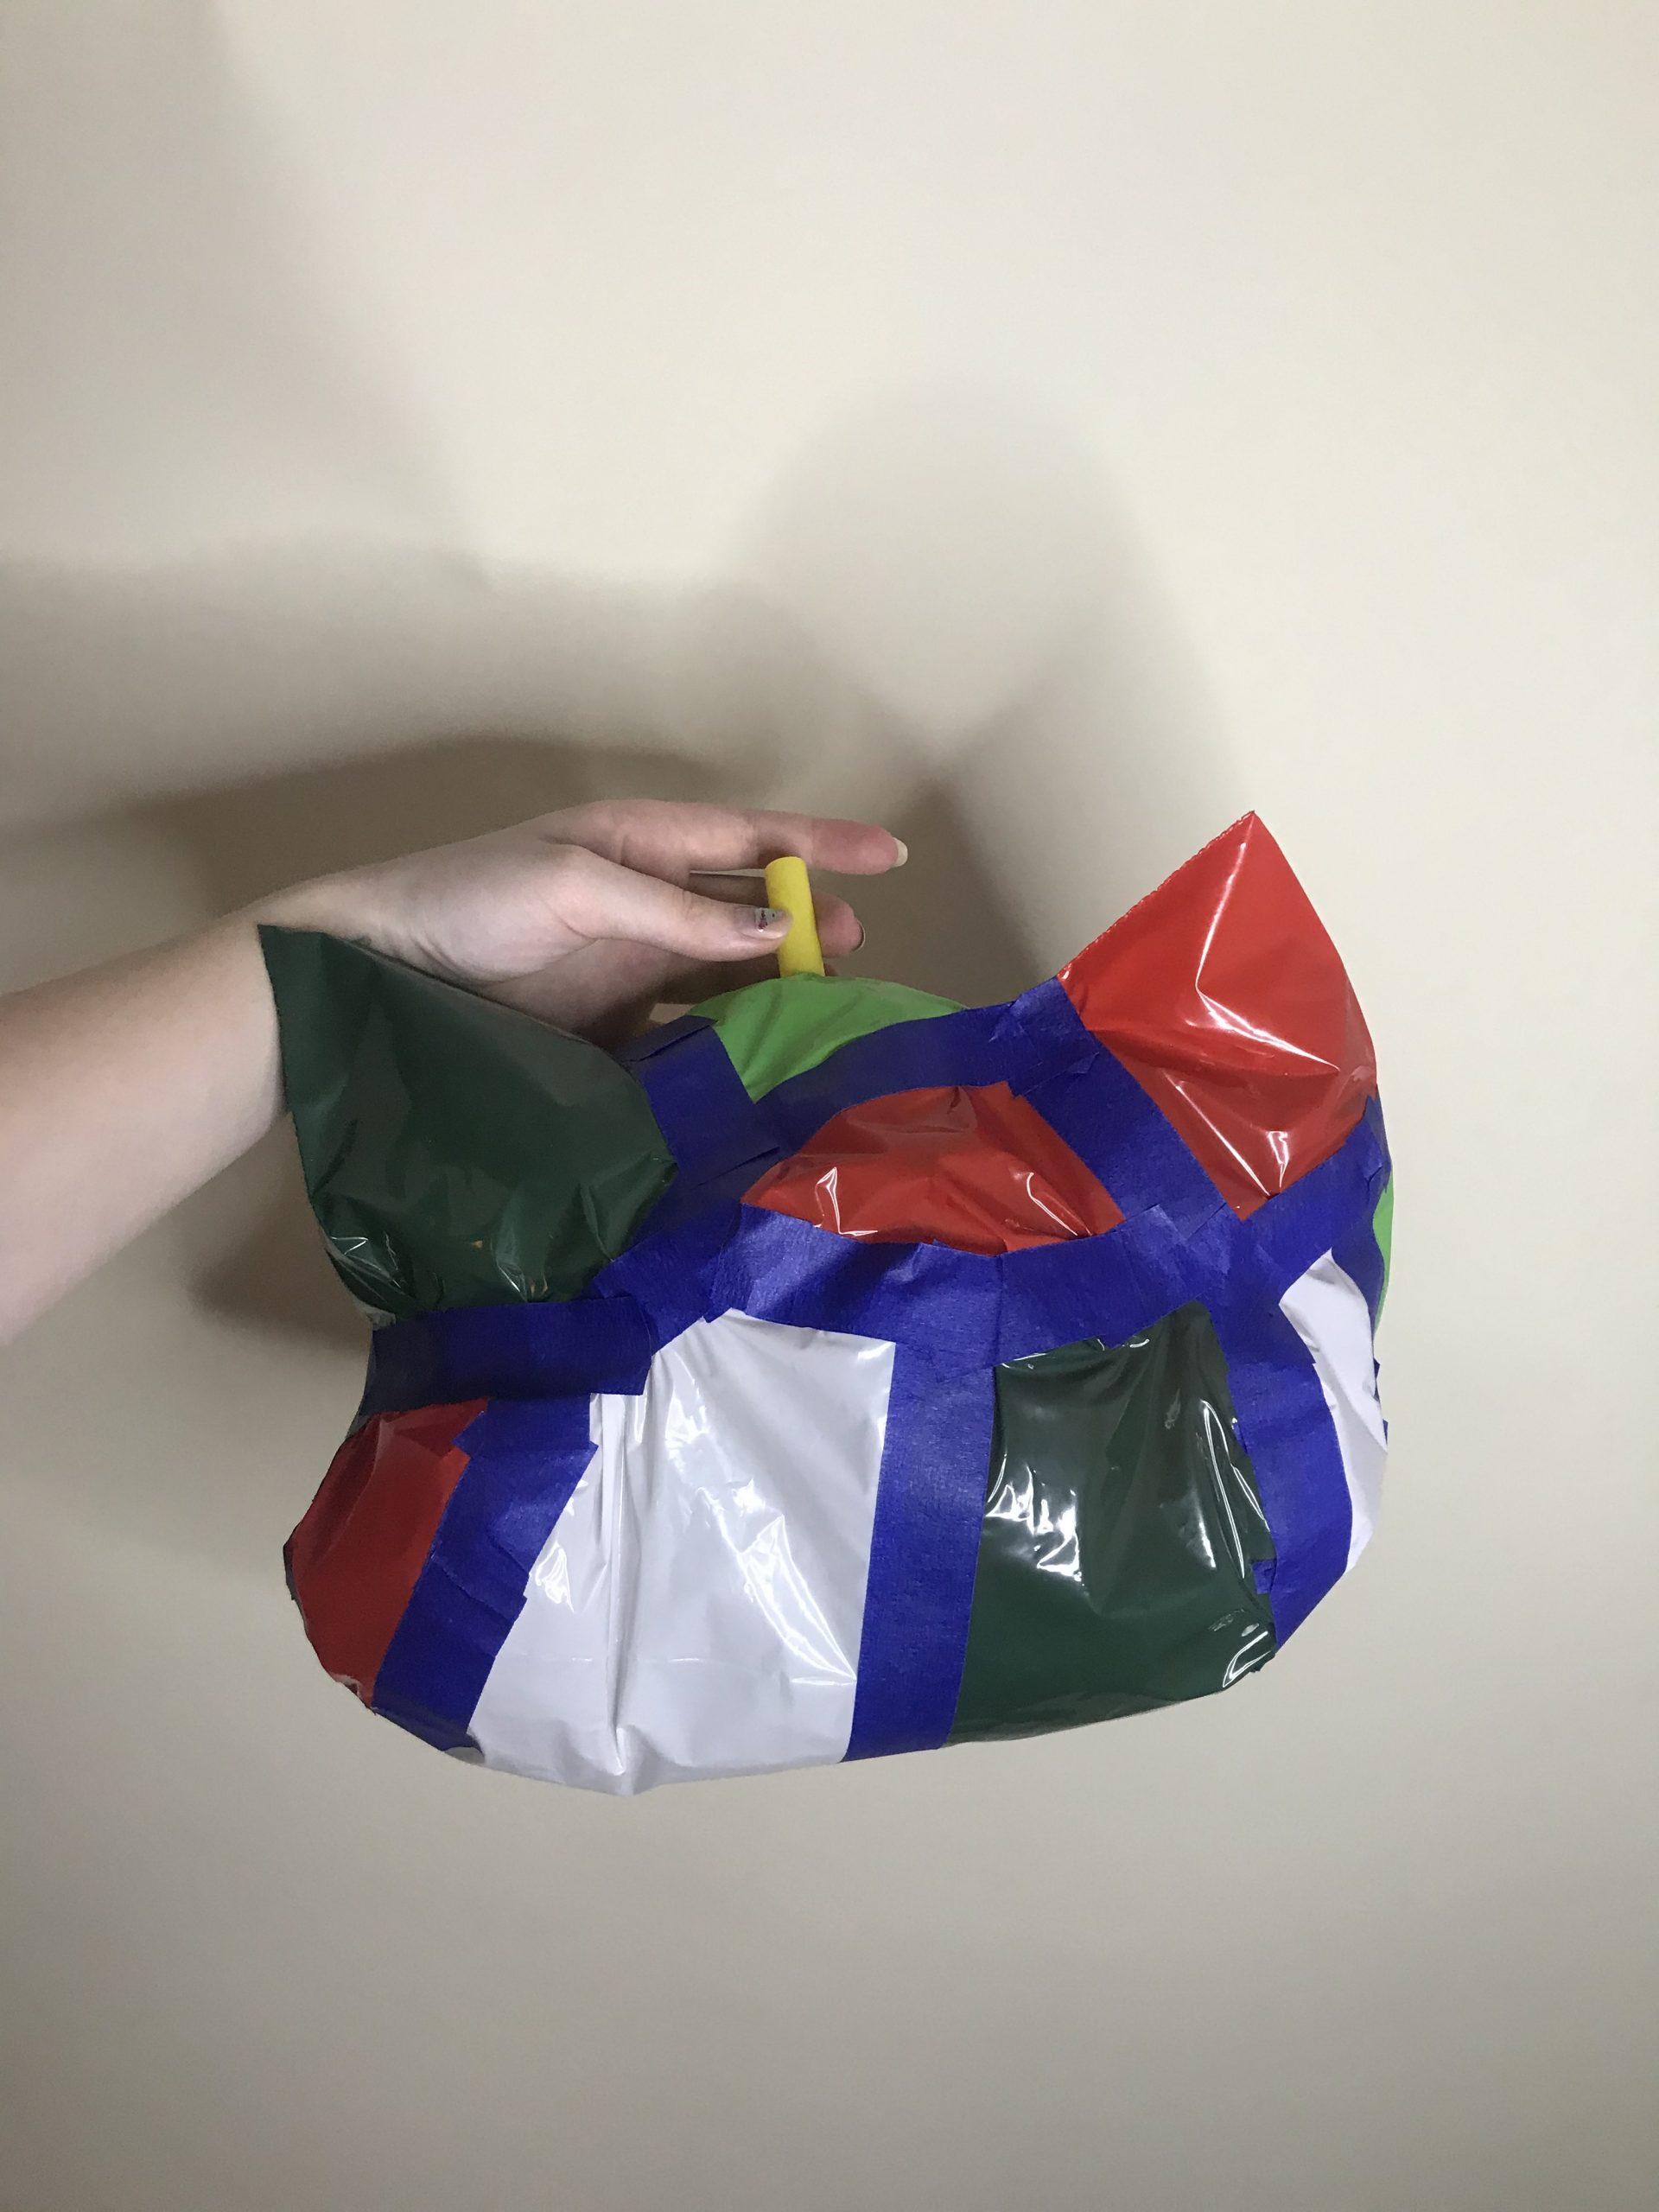
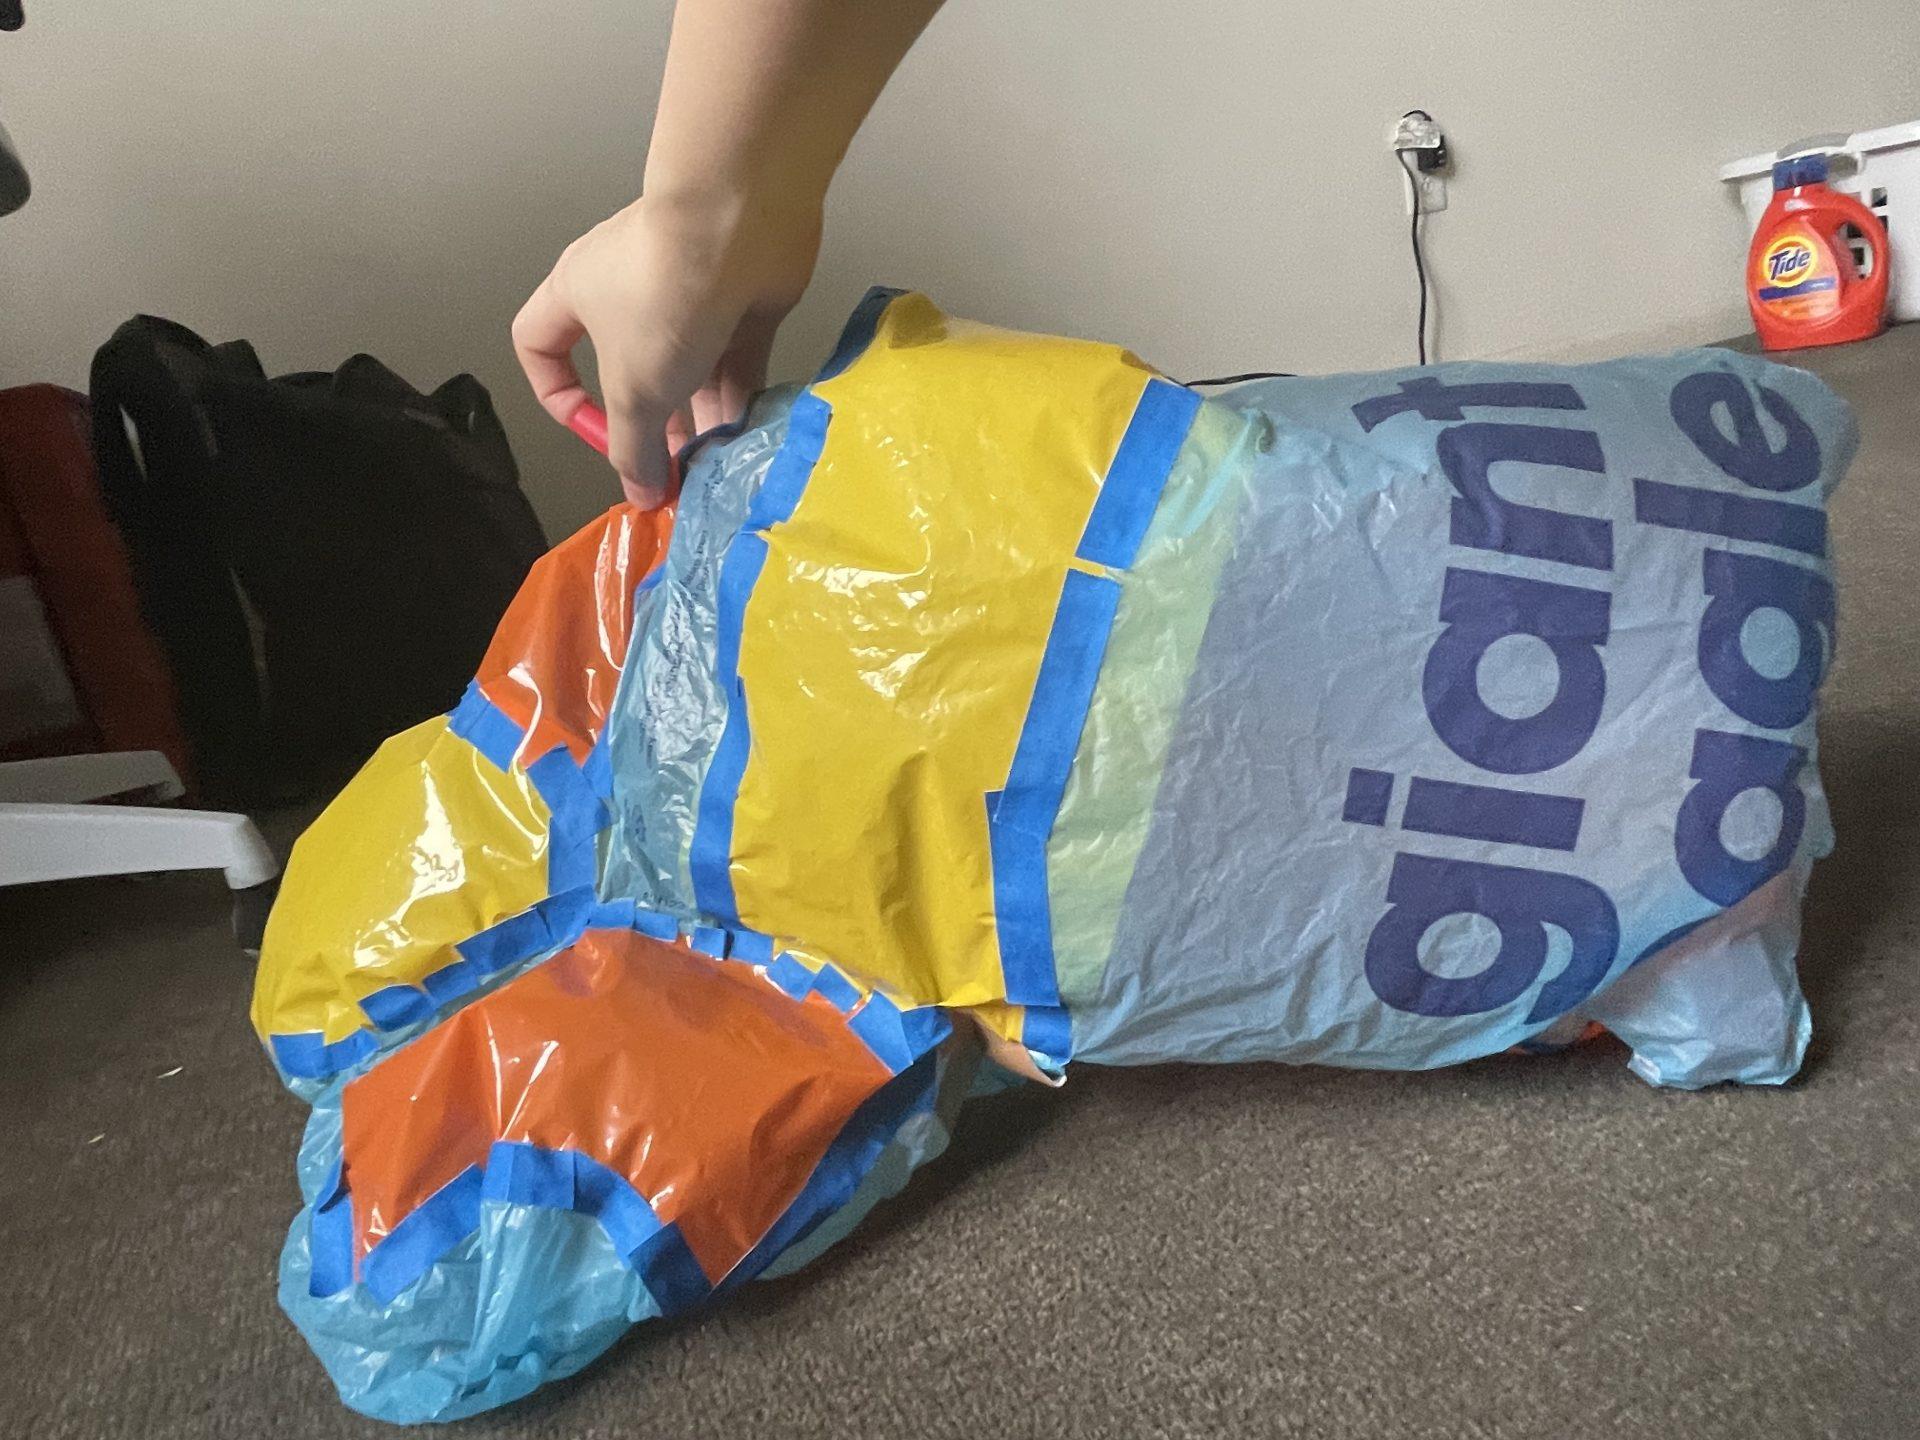
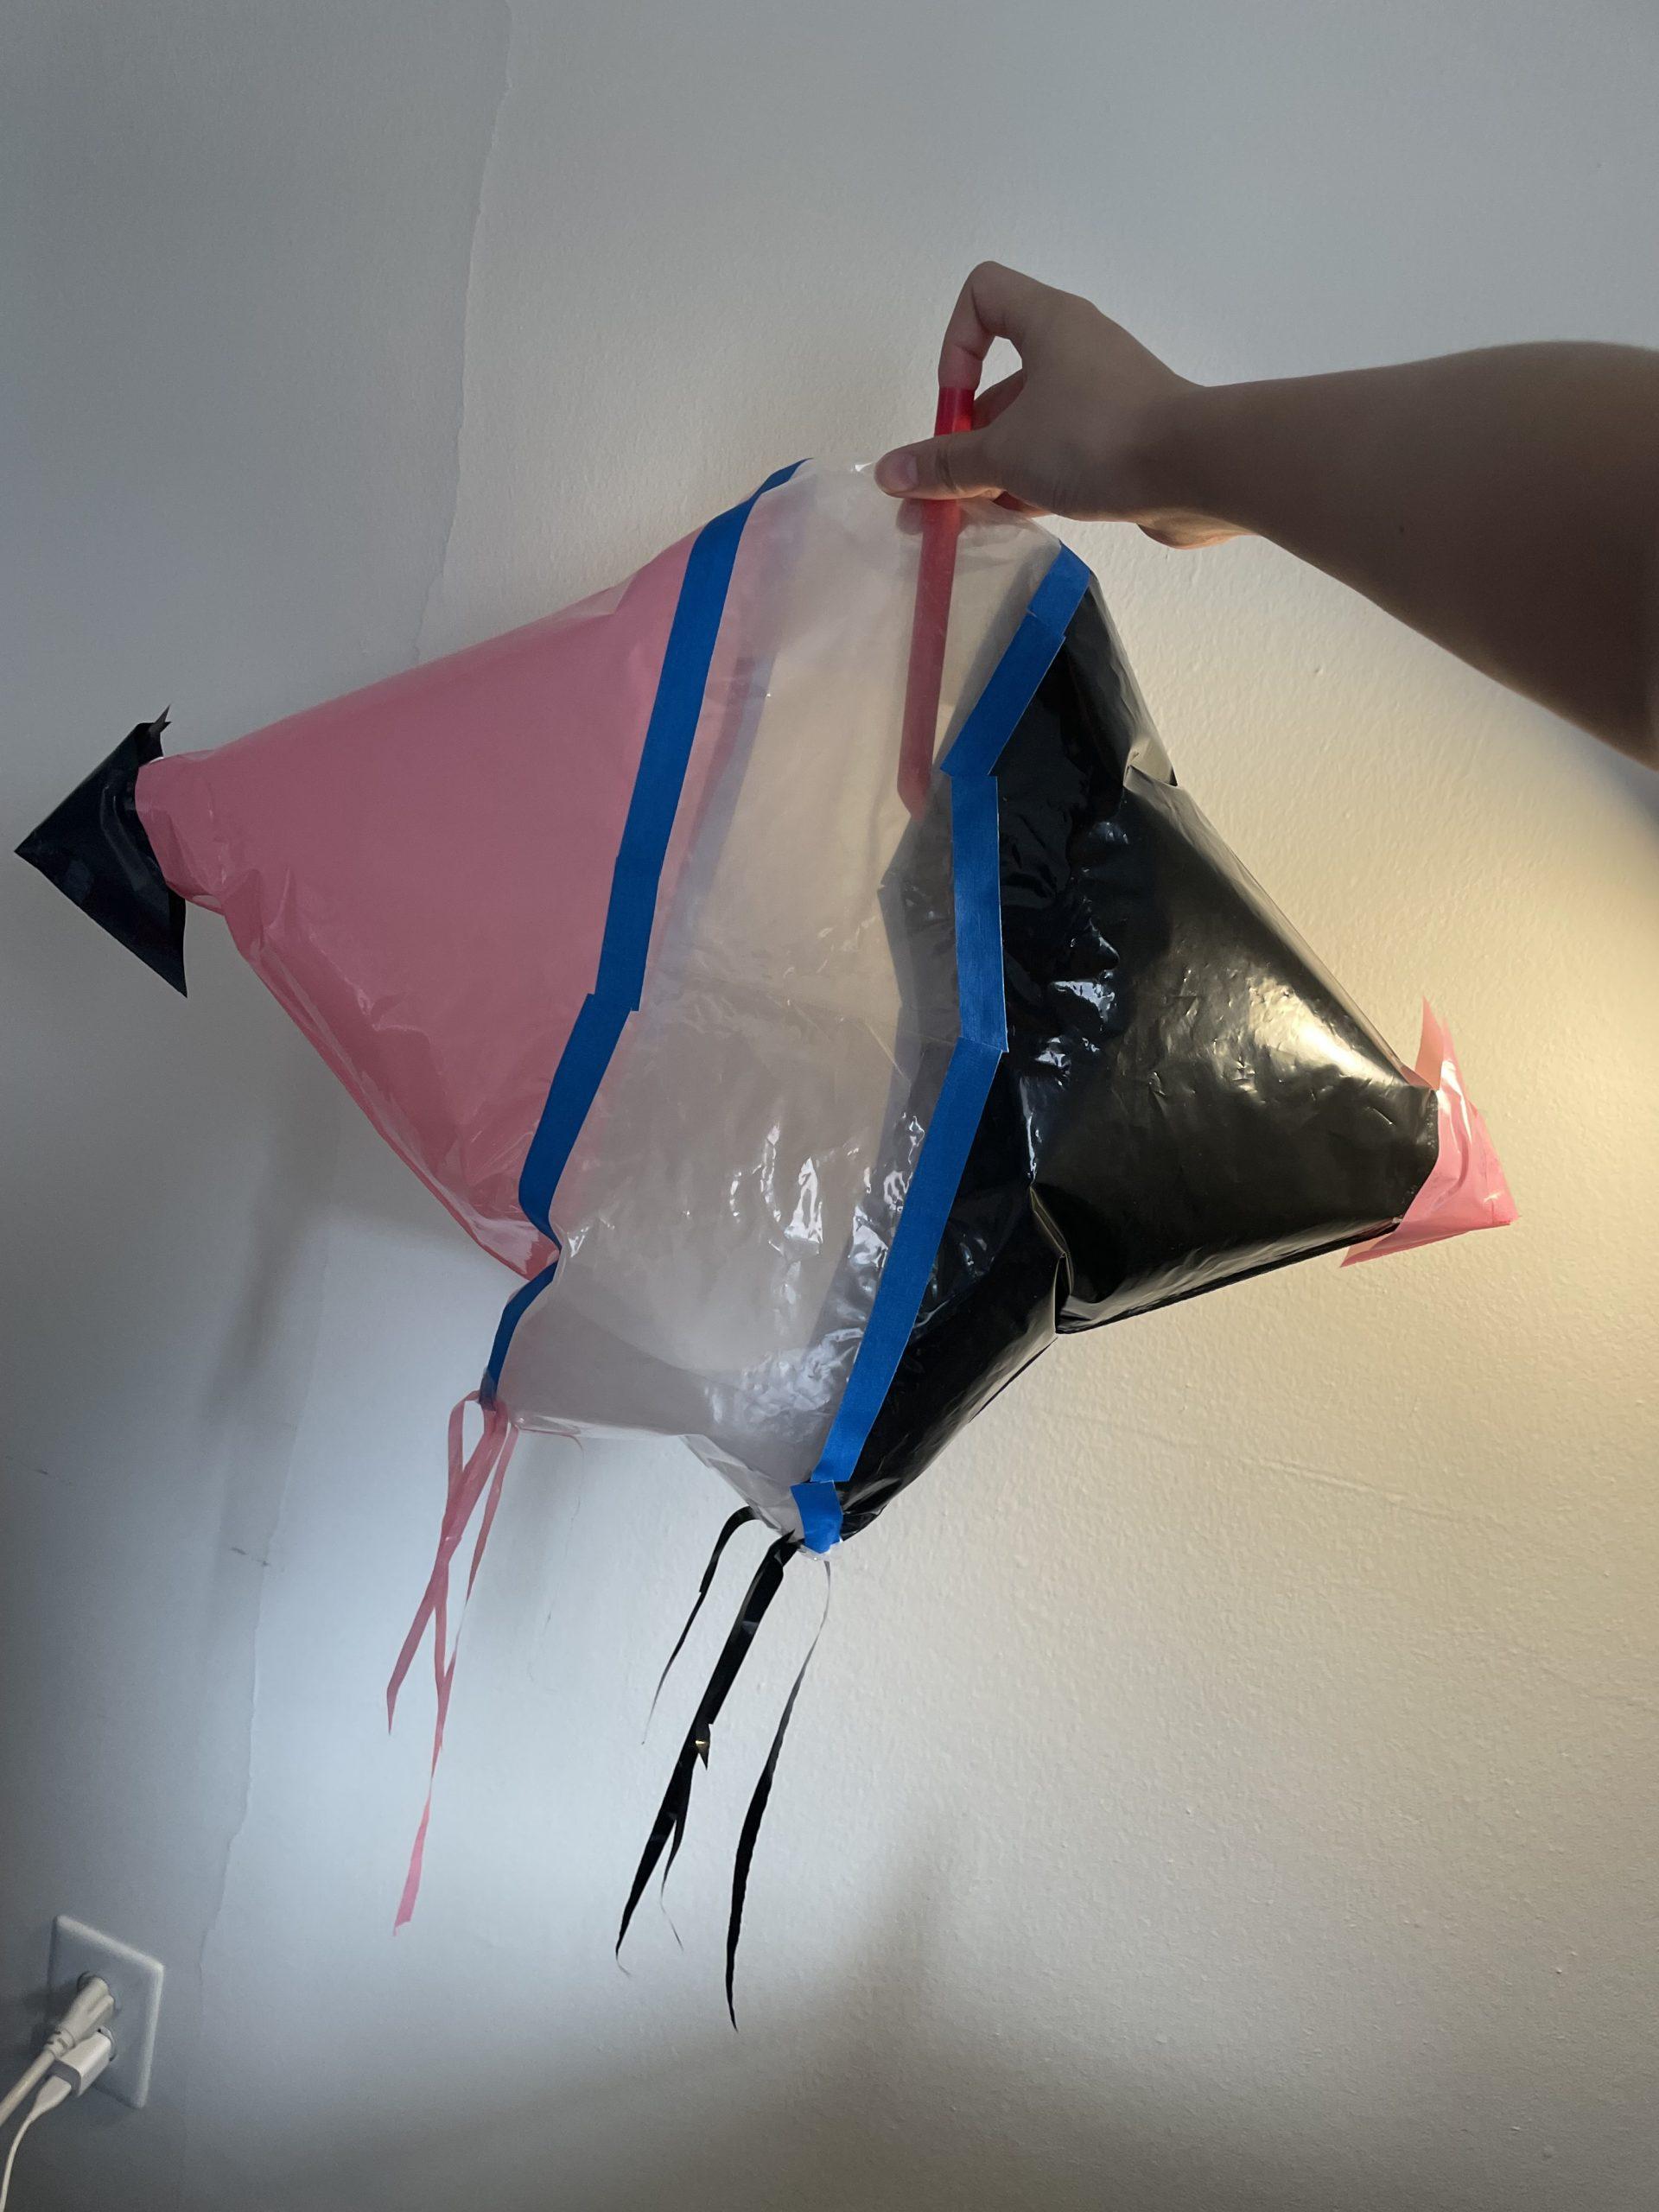
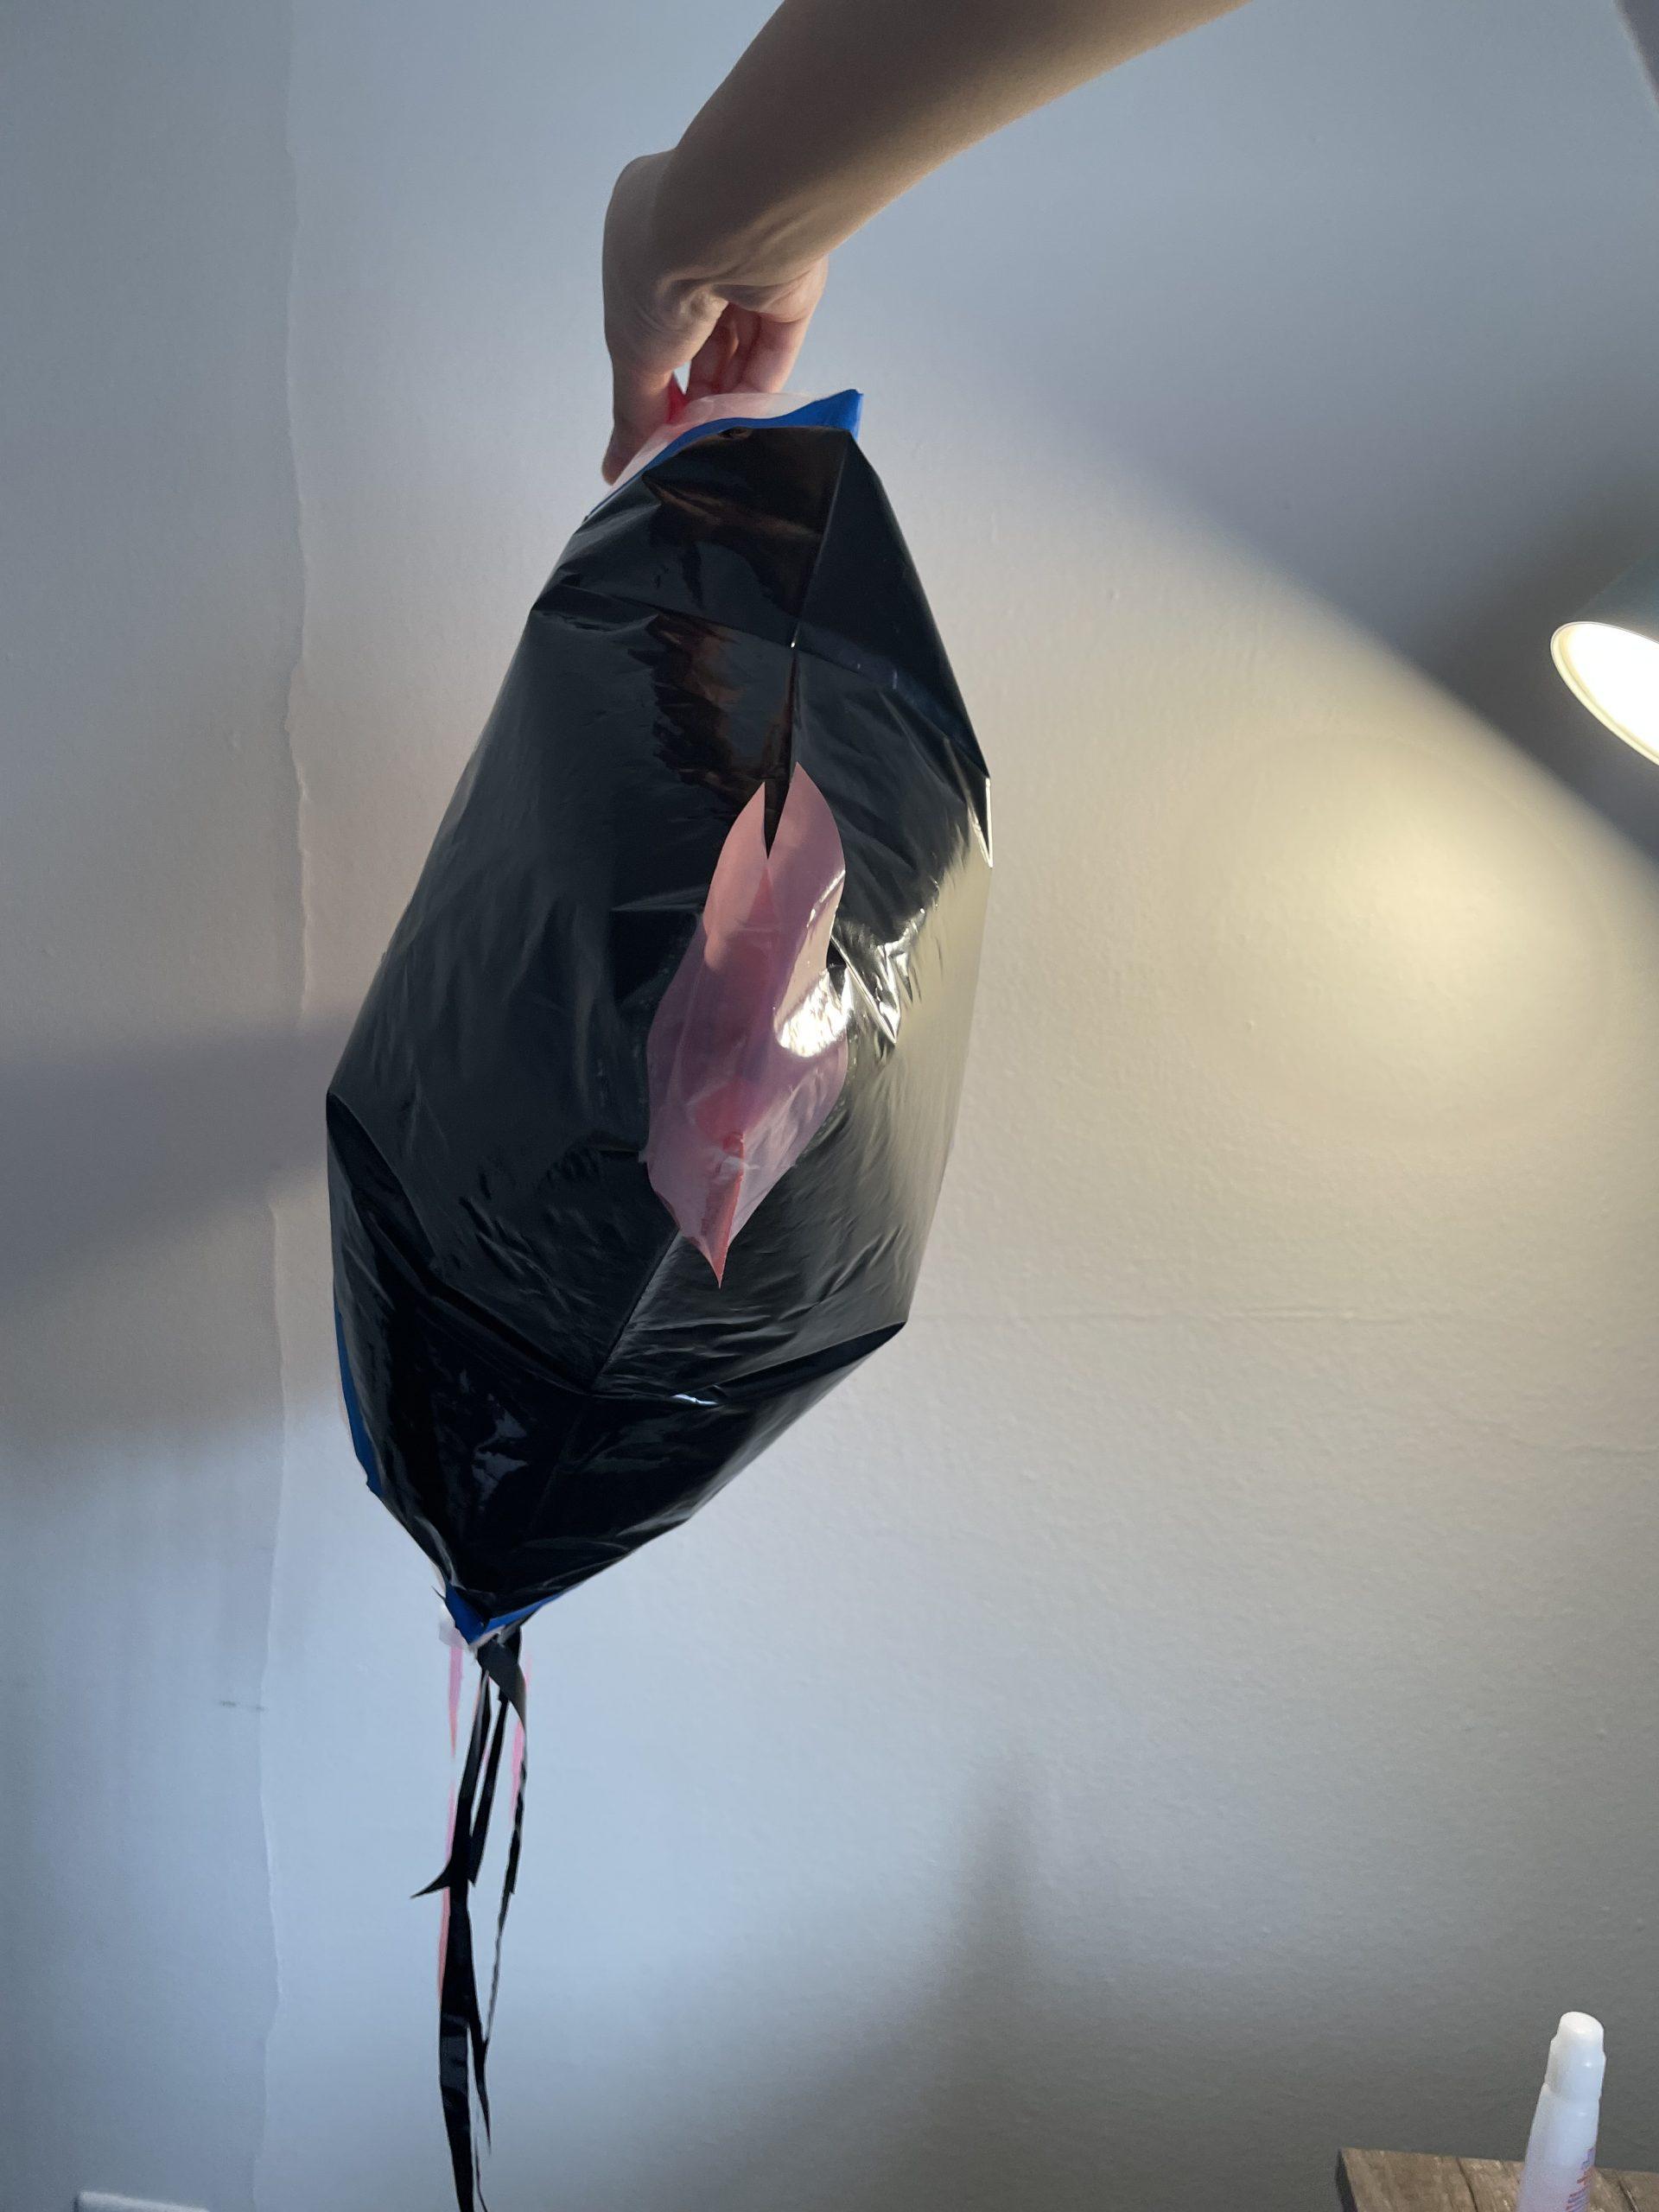
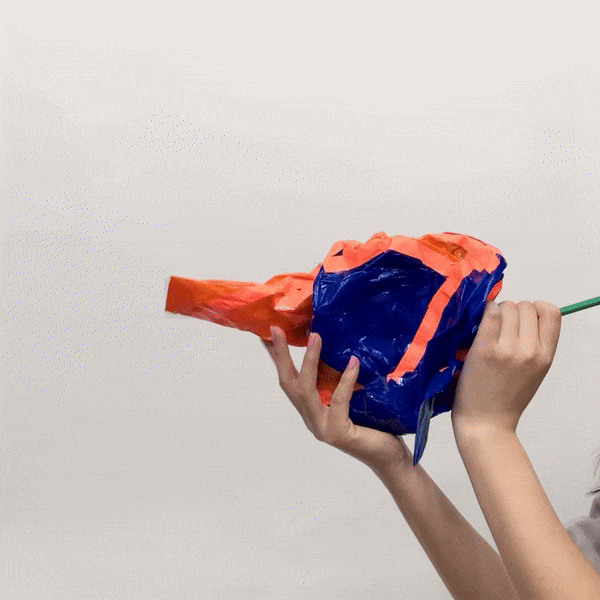
For the last inflatable I constructed, I was thinking a little more about what it would look like in the end. I also tried to be more conscious about the shapes I was cutting out; before, I cut the shapes one by one and tried to make them all fit together. I found that using this method made connecting the last few joints really difficult. I liked the little blue piece at the bottom. It was a little tricky to tape but I love playing with curves and points… and I suppose that’s most of what you can do with things that inflate.

Skylar – Improvisation Inflatables

This is my first inflatable. I cut out a lot of small shapes and did not try to predict the final structure in any way. This one actually turned out pretty good, I didn’t really have any difficulties other than learning to tape specific shapes. It as actually easier than the other two since all of the pieces I was connecting were flat. I like that it looks kind of like a cartoon creature. My friend said it looks like a pokemon.

Visual Portfolio, Posts & Image Gallery for WordPress

This is my second inflatable. I wanted to make it have a lot of long and skinny pieces, so I cut out a bunch of strips from the bags. I still tried to spontaneously decide the angles at which I was taping the bags to each other. This one was a lot harder to put together, partly because I was using packing tape but cutting it into thirds so it was thinner. It aslo was really hard to get the corners, and I think my final product still had a few holes despite my efforts to patch them. When I finished taping the interior together, I realized there wasn’t enough structure to let it inflate fully, so I taped a couple pieces together on the outside to help. I liked how it turned out but I had to constantly blow into it for it to stay inflated to that’s why the pictures aren’t as good!

This was my third inflatable, which I did several days after the first two. I wanted to try using larger pieces of bag, so I mostly just cut a big shape out of each one. This one was also somewhat hard to tape, because there were a lot of smaller connections as opposed to my first one which mostly came together in one cohesive shape. However, I felt like I figured out some way better strategies for taping all sorts of connections than the first two. I think I was able to get most of the holes taped up, and I got it done more quickly and felt less like I was struggling while doing it. The clear part with the green was also kind of hard (mostly doing the corners), but I put confetti in it which I think makes it more fun! There is also a lindor truffle wrapper that I incorporated. I liked how this one inflated in pieces rather than blowing up like a balloon like my first one. It also held air better than my second one.

Improvisation Inflatables

Visual Portfolio, Posts & Image Gallery for WordPress

My blue and yellow and clear inflatable was the first one I did. I did not go in thinking about what I was going to make, I only tried to match my colors. I ended up cutting a lot of pieces that were small, so I did a lot of work taping and fitting pieces together. I made lots of long rectangular shapes and squares as well as half circles. I tried to keep some of the bag angles from the original bag to make spikes. My first model ended up having air leaks but it was still able to inflate. I noticed how the tightness of me pulling and taping my pieces together in this model made it look like it had a cinched waist. (I was not able to get a photo for this one, but the reflection of it hanging in the sun is very pretty)

For my second model which is the orange black and silver one, I ended up doing similar random cutting but decided to use scotch tape instead and to hide my tape inside the form instead of displaying outside. For some reason after my form began to move from flat to having angles when I added rounded pieces, it became difficult to tape the inside, so especially around the top there is visible tape. This one ended up turning more round. I think it was because I used some bigger pieces and did not make or use any hard edges. Once again this one had some inflating difficulties like the last, but the form still inflated almost all the way.

For my last piece (the one that looks like a cat) I wanted to try another tape I had, which was painters tape. This help my piece together and ended up helping with my air problems. This piece became very symmetrical when I was doing it and I put two rounded shapes on the corners of what I am calling the cats cheeks which allowed my shape to round there. When doing it I did not realize that the top spikes would end up looking like ears, but I think it is a happy accident.

The one thing that I did really struggle with was actually cutting the plastic pieces, I do not know if all my scissors are dull, but I ended up tearing a good amount of plastic because it would not cut.

Jiyeon Chun – Improvisation Inflatables

For my first inflatable, I was aiming mostly just to get a sense of the material, what works, what doesn’t, what techniques are best, etc. I started out by choosing a few colors, cutting out some shapes, and taping sides/pieces that fit together. I learned quickly that curves are significantly harder to put together than straight edges, they require the “stitching” method and multiple pieces of tape. This one took quite a while, as I was really figuring it out as I went, and the inflatable ended up being just a bit bigger than the size of my head. For the second the third inflatables, I began to play more with scale, and color. I switched to clear tape I had lying around, as I had begun to run out of the pink cloth tape provided. Also, for the second inflatable, I flipped it inside out so that most of the tape was on the inside, creating a more seamless look– almost like a quilt, whereas the first one exhibited more prominent edges and borders. I learned that how you close up the pieces together especially impacts the shape of the inflatable, for example, taping a long piece into a sort of cone shape makes for a pointy cone extrusion out of the inflatable.

Yiyang Lai — Improvisation Inflatables

I create three improvisation inflatables.

No.1 is made of totally randomly cut pieces. I find it is hard to tape these pieces together because they are too random and too small. It took me over four hours to just fit them all together. I also used my own tape for No.1 and this tape was not very steady. I put it on my floor overnight and the next day I woke up, all those tapes fell off and I had to re-tape them again to take photos (and that was painful).

No.1 was not very ‘successful’ since its inflatability is not as good. Due to the bad tape quality and too many small pieces, it was hard to have it sealed. Air leaked out pretty quick and I failed to having it as expanded as I desire. But still, this one is my personal favorite. I love its colour and how it reacts under light. Since I used transparent tape, the overlapped area gives No.1 a different taste under sun light. At the same time, No.1 is the most usual shape among all my works. It looks like a shoe under certain angle.

Visual Portfolio, Posts & Image Gallery for WordPress

I used some plastic bags from Giant Eagle on No.2 (I live somewhere near Giant Eagle and I have tons of bags at home). Plastic bags from Giant Eagle have a very different texture than those given bags. I learnt from No.1 so this time I cut pieces much larger than the first one. And I intended to keep the word ‘Giant Eagle’ visible. I also used some band-aids on No.2 because there are holes on plastic bags. This one expanded larger than No.1.

I ran out of tapes for No.3 so I used a mix of blue duck tape and my own transparent tape. Since I want to record a video of expanding process, this one had a much simpler shape and made of four pieces in total. It turned out to be really successful! It looks like a jellyfish.

Today’s weather is great so I take a picture of sun light piercing through No.3 (it is probably not related to this but I hope you enjoy it).

Visual Portfolio, Posts & Image Gallery for WordPress

The biggest challenge is mainly on No.1. It had air leaking issue and too many irregular pieces. The biggest takeaway from these three inflatables is its unpredictable shape. I intended to make No.3 look that way but I did not plan anything for No.1 and No.2. It is just amazing to see them forming into random shapes.

Catherine Yu – Improvisational Inflatable

I First started with just two colors and cut into small pieces of irregular shapes. I was curious to see the effect of connecting irregular shapes together.

But I soon realized that it is very difficult to connect and tape irregular shapes together, and in order to close it, I added a piece of red plastic to it. This piece turned out to be more “regular” than I expected. I also ran out of the given tape during the first piece, so I used packaging tape for the rest of the assignment.

For this second piece, I cut the plastic into much larger pieces, and also cut strips to connect the larger ones. I wanted to explore the overall shape so my goal was to make a letter “C”, but not the perfect “C”.

I really like how this turned out to be, and how the corners affect the overall shape after inflation. I also find it interesting that there is a repeatable directional change when inflated/deflated.

For this last one, I wanted to create a irregular 3D shape. Learned from the first inflated piece, I cut the plastic bags into larger pieces instead of smaller pieces. This time if was lot more successful and I specifically really enjoyed the final breathing effect.

The biggest overall challenge that I had was the air leaking. I tried to use an air-pump to inflate my closed-up pieces, but because I have so many leakages, the small air-pump that I had was not pumping fast enough.

Another challenge that I encountered was the packing tape being too rigid. As a result, the parts that had too much tapes weren’t inflating as well.

Lea Emerlyn – Improvisational Inflatable

I started off by cutting random shapes off the bag. Attaching the different shapes together was easy until I needed to merge edges to form angles in order to turn them into a 3D shape. I tried going slowly and cutting off small pieces of tape. After getting the general attachment strategy down, I used a longer tape to attach the entire edge together.

Another difficulty I ran into was closing off the shape. After the hole of the inflatable gets smaller as I attach more pieces, I needed to start thinking about what piece to cut off next in order to fit it into the remaining space.

I started exploring how to take advantage of the different transparencies of plastic. When I was using the clear bag, I thought that it would be interesting to put scraps inside the inflatable so that viewers can see what is inside. As I was doing that I also had an idea of inflating my next object with scrap fabric/yarn instead of air.

For the inflatable that had tape on the inside, I found it really challenging to tape on the inside. I think I would have been better off trying to tape on the outside, then turning the entire thing inside out. The most challenging part is closing off the inflatable because I could not think of a way to not have tape showing for the final edge.

Inflatable 1

Inflatable 2

Inflatable 3