For this project, I had two different paths of exploring primary forms. First, I wanted to explore ways to connect separate forms into a more unique and complex form.
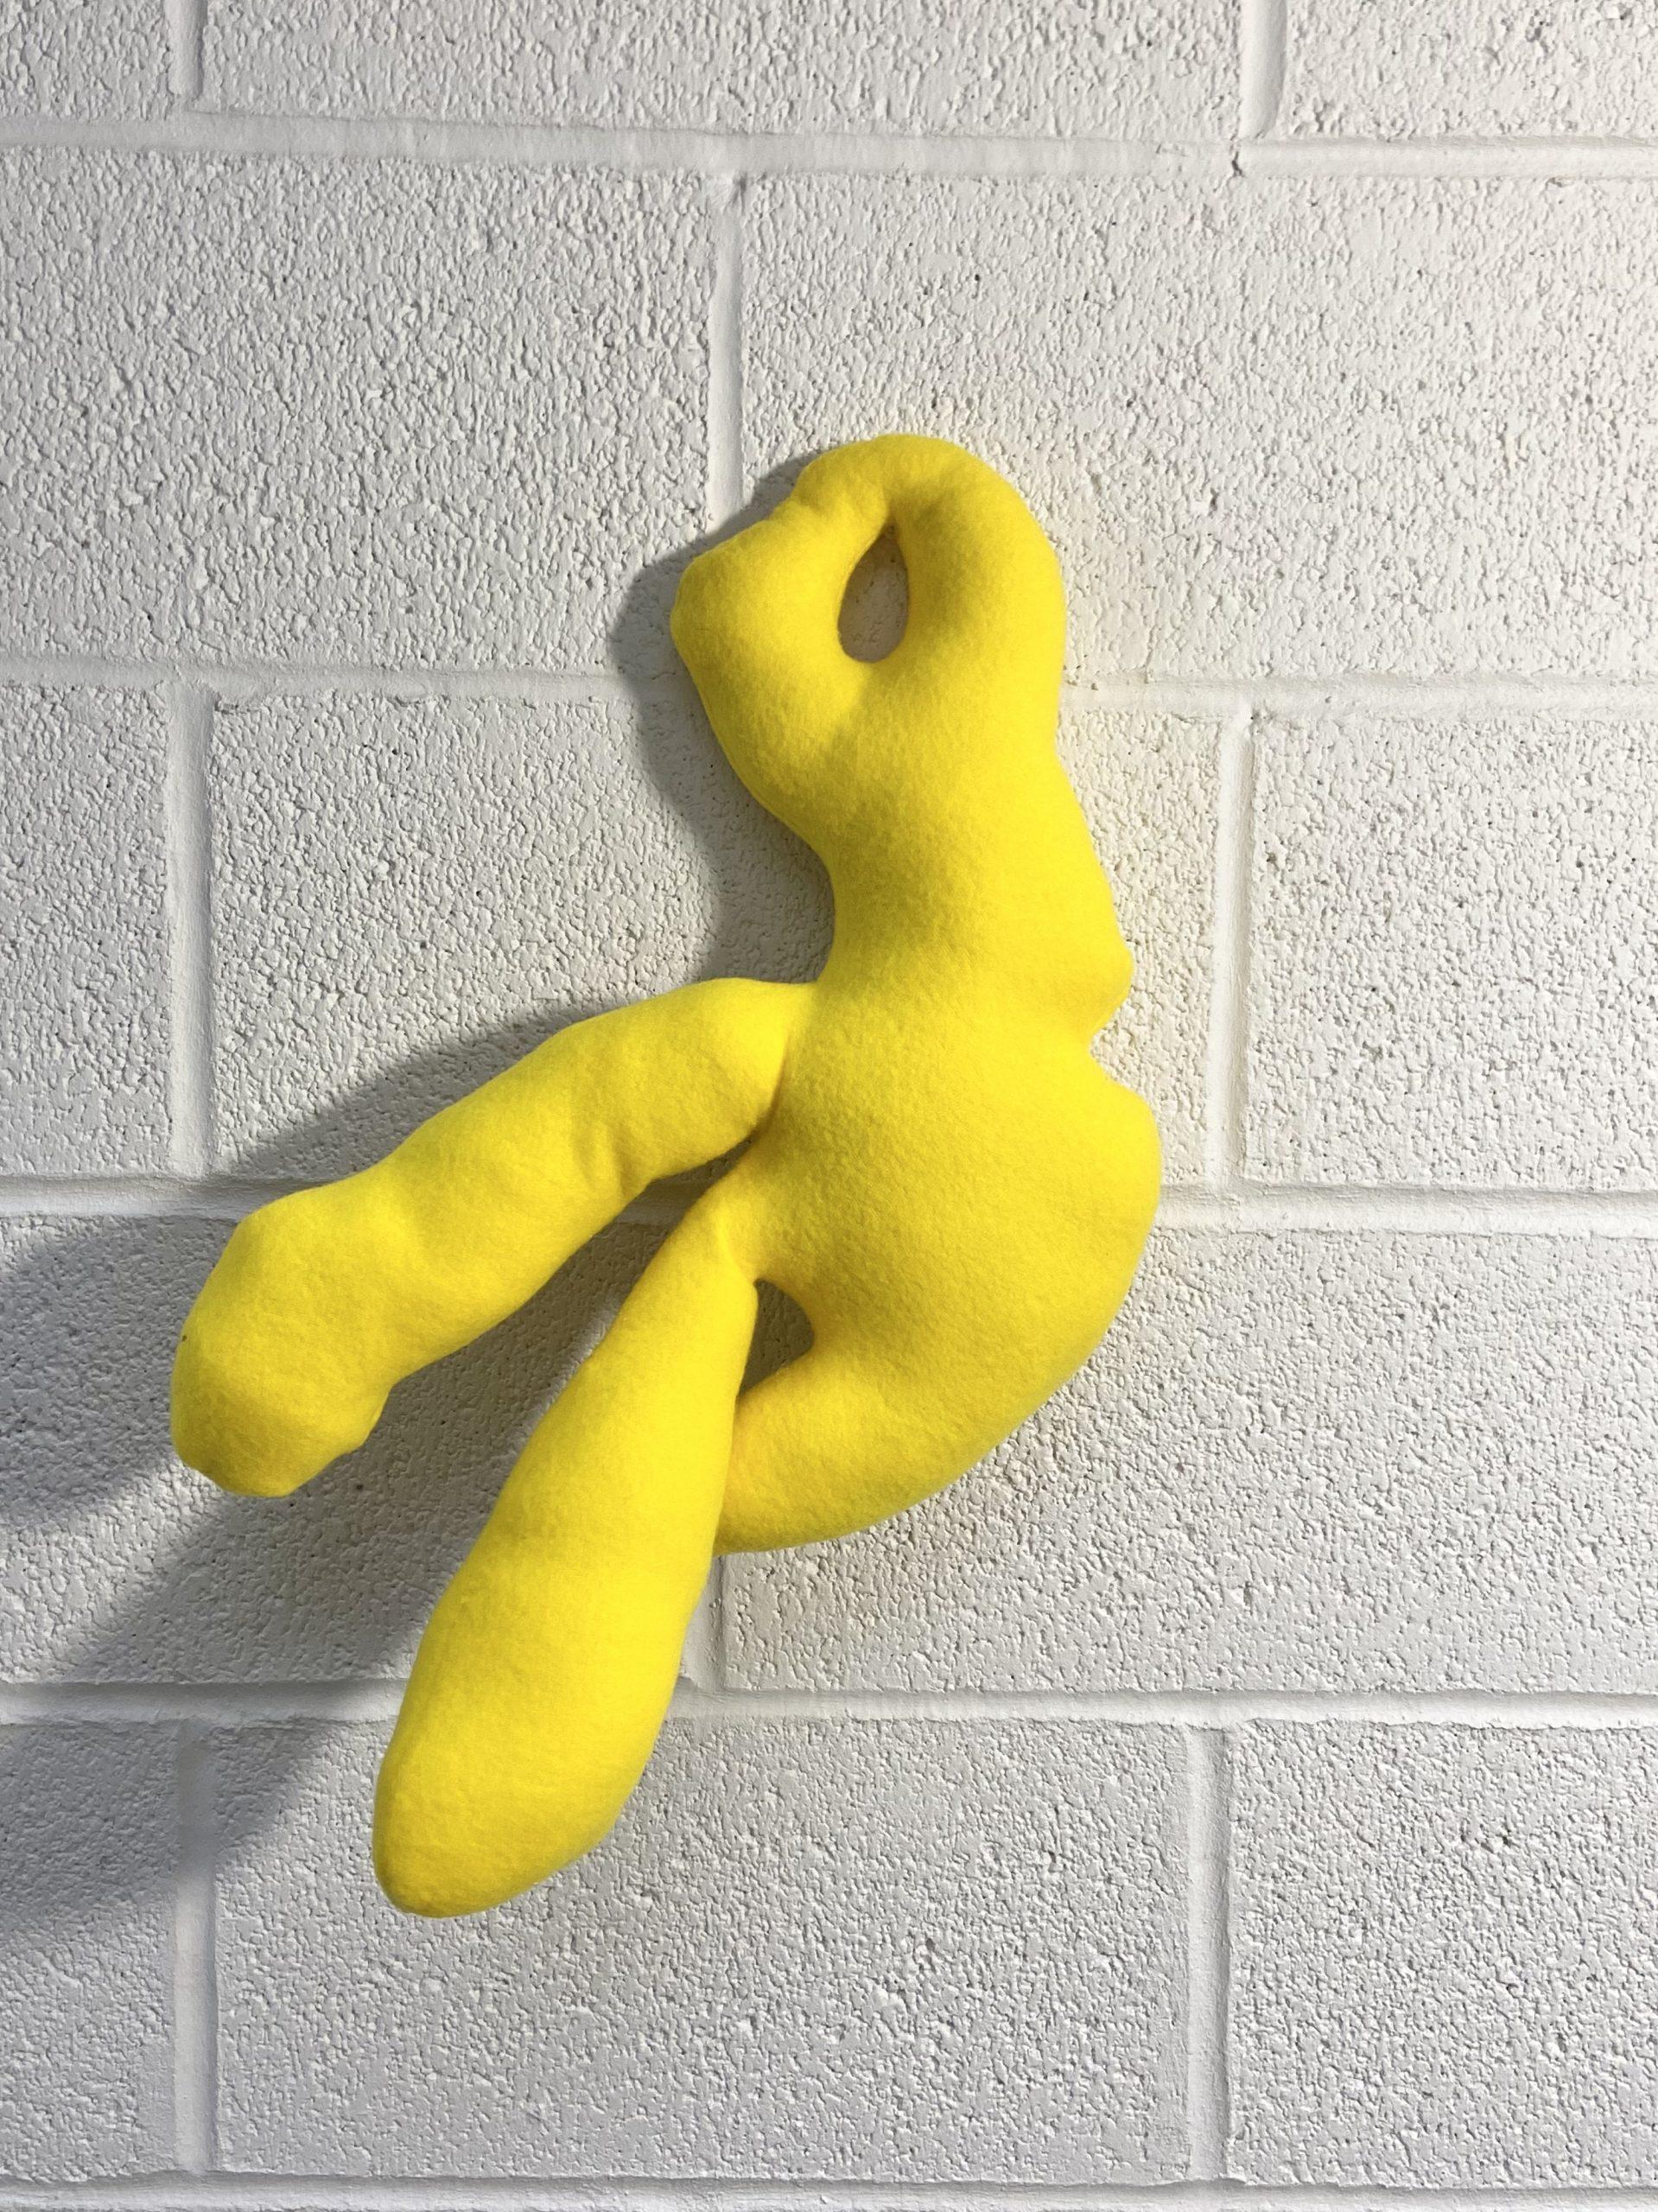
Inspired by the process of jewelry making, I scaled-up created chains, rings, and charms with a hole in them. The organic forms of charms were inspired by Henri Matisse’s cutouts. My original goal was to create multiples so I can create a mobile that can be hung on the ceiling.
In a continuation of scaled-up jewelry making, I made chains by applying the donut shape into more rectangular shapes. While it wasn’t planned, I found myself interacting with the chains like accessories or body pillow which was extremely fun.
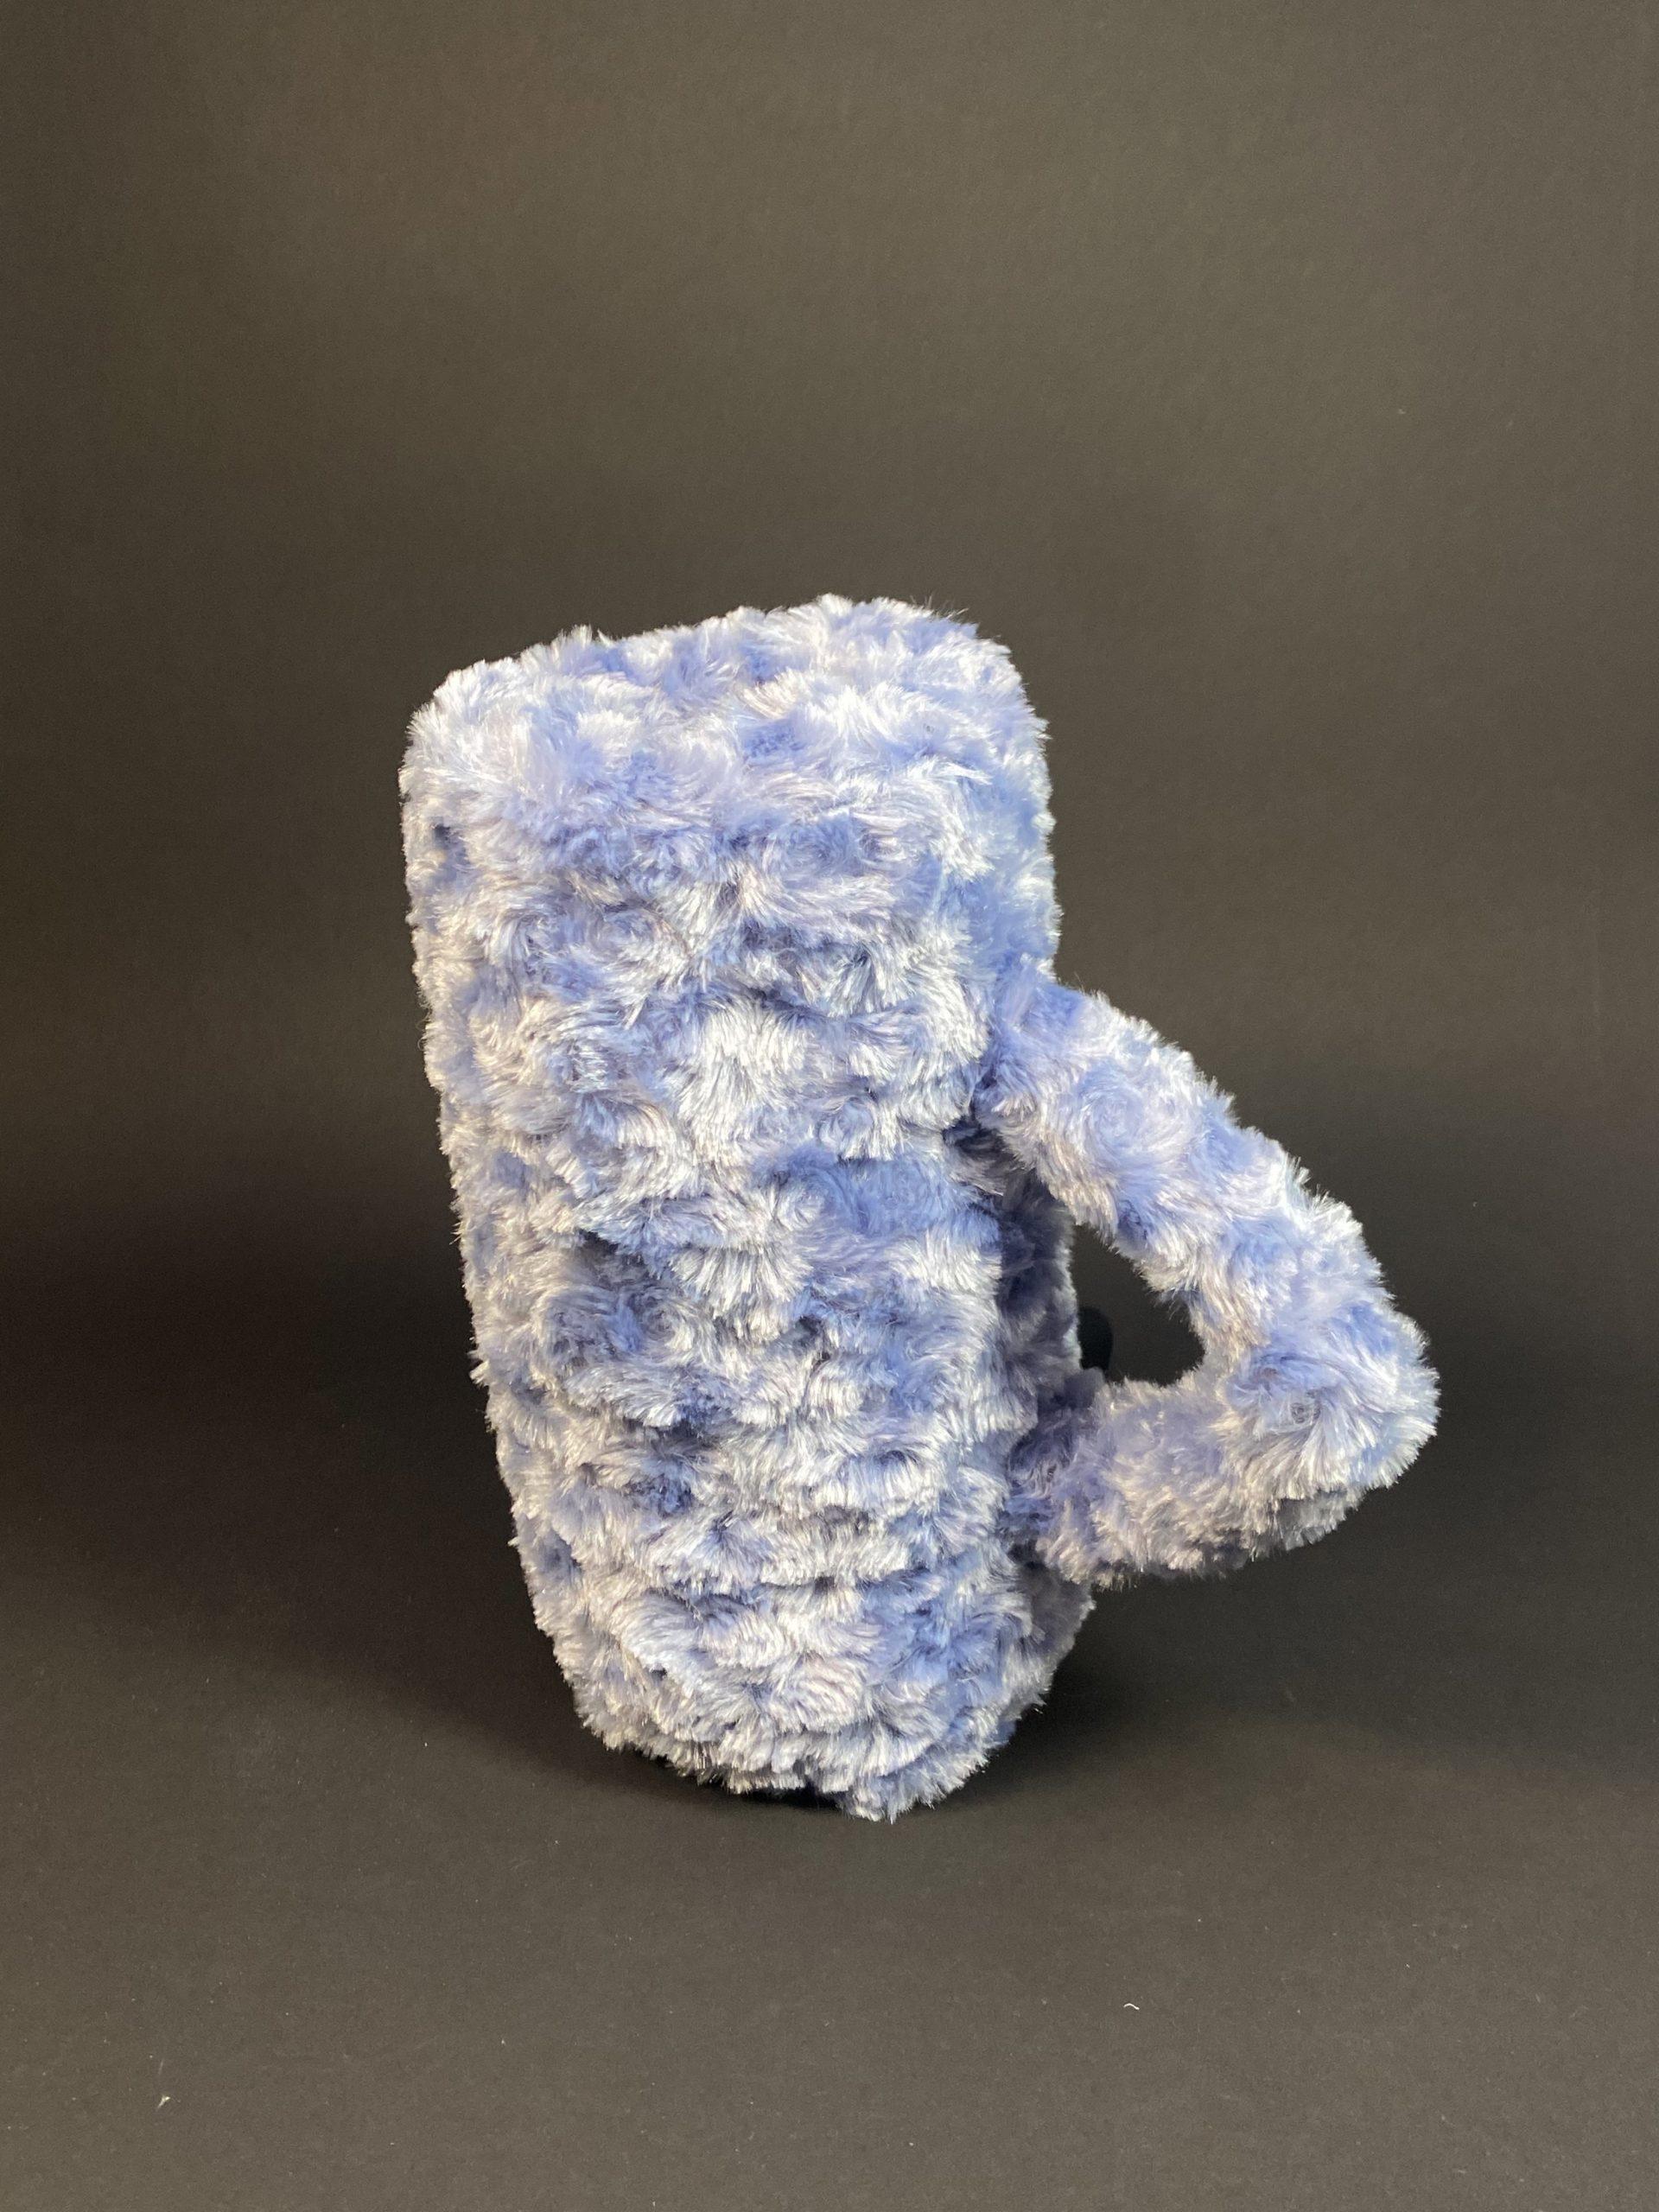
For the second path, I was inspired to make a vase of some sort. I first started with a simple cylinder within a cylinder shape that resembles a mug. Using fur fabric, I wanted to make the mug-like vase feel surreal with its unusual texture.
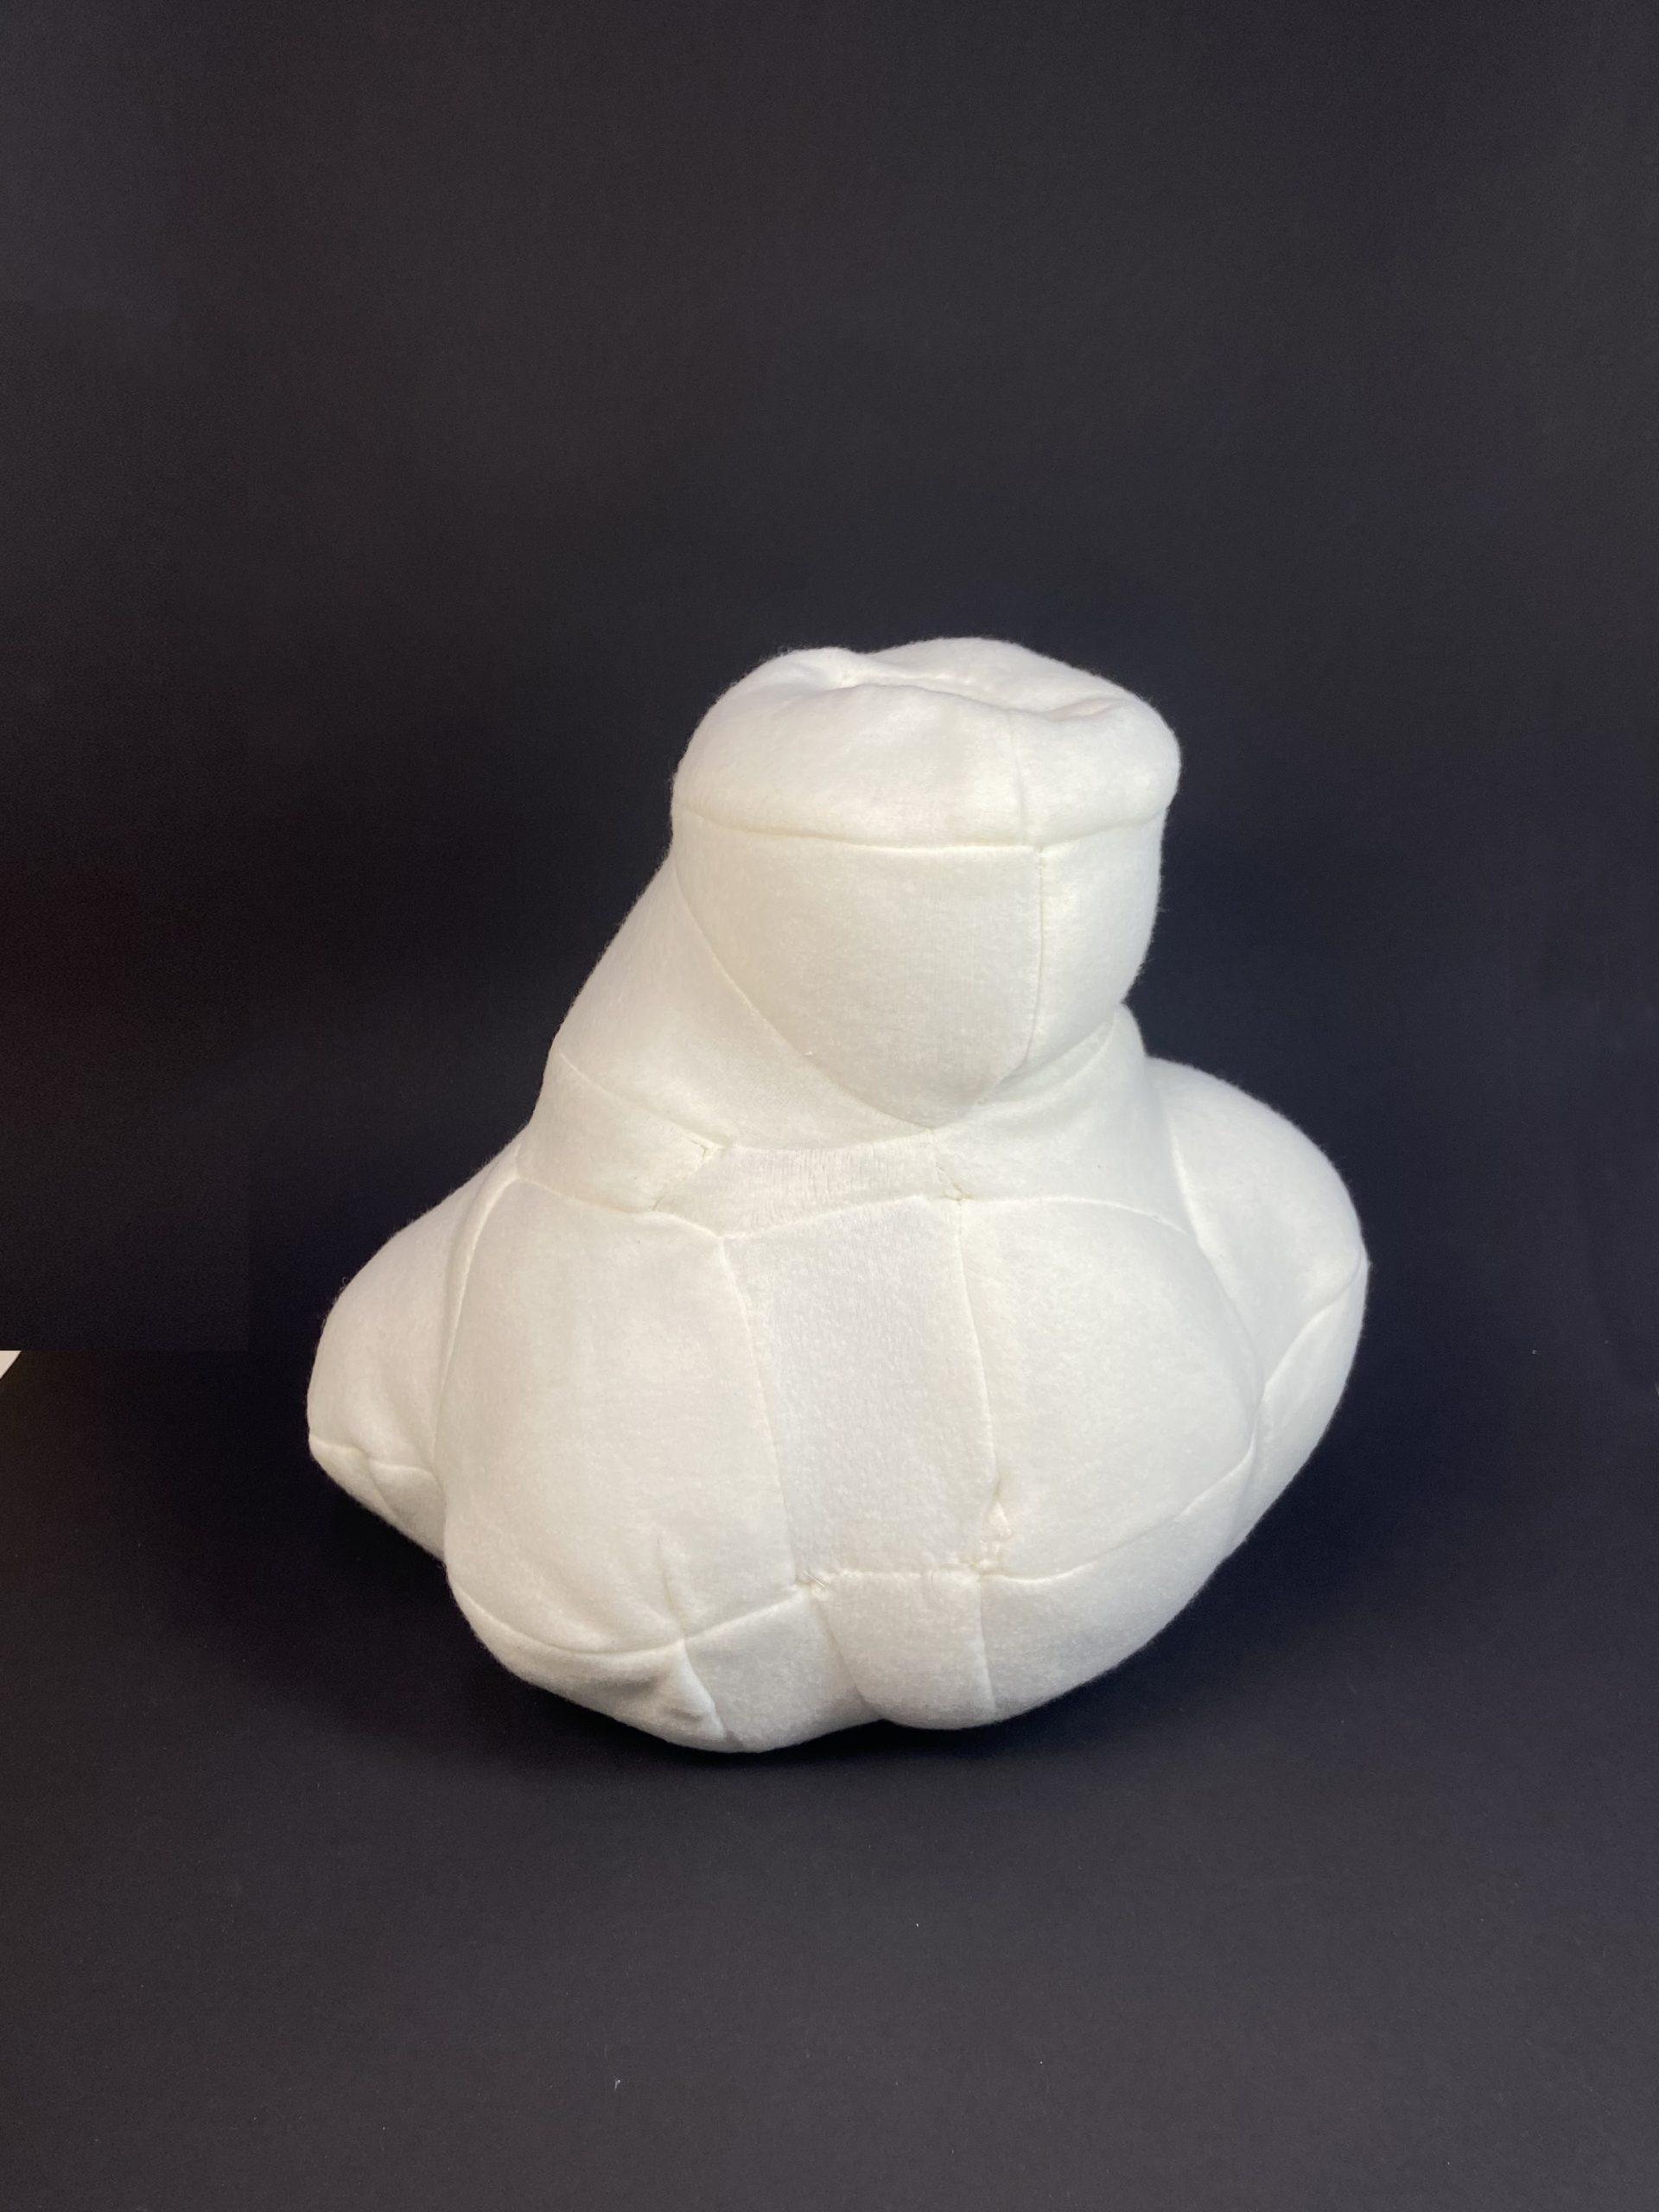
For this final piece, I used rhino to mash 6 spheres to make a cloud-like shape with a cylinder cut out. This one was a further exploration of the “vase” but more abstract and complicated. Then I cut off the form with 3 planes to split them into patterns.
I enjoyed the process of creating as I go, being inspired by the shapes and the interactions I would have with those objects. Mastering the donut technique was fun and I found myself wanting to make more of those in different scales, patterns, and fabric. I also loved the sensation these stuffed objects created, and it is definitely something that I want to keep exploring and making. My biggest challenge was sewing the rhino file together. Since the 2D patterns were very complicated to begin with, it was a challenge to piece them all together and create a perfect sphere.
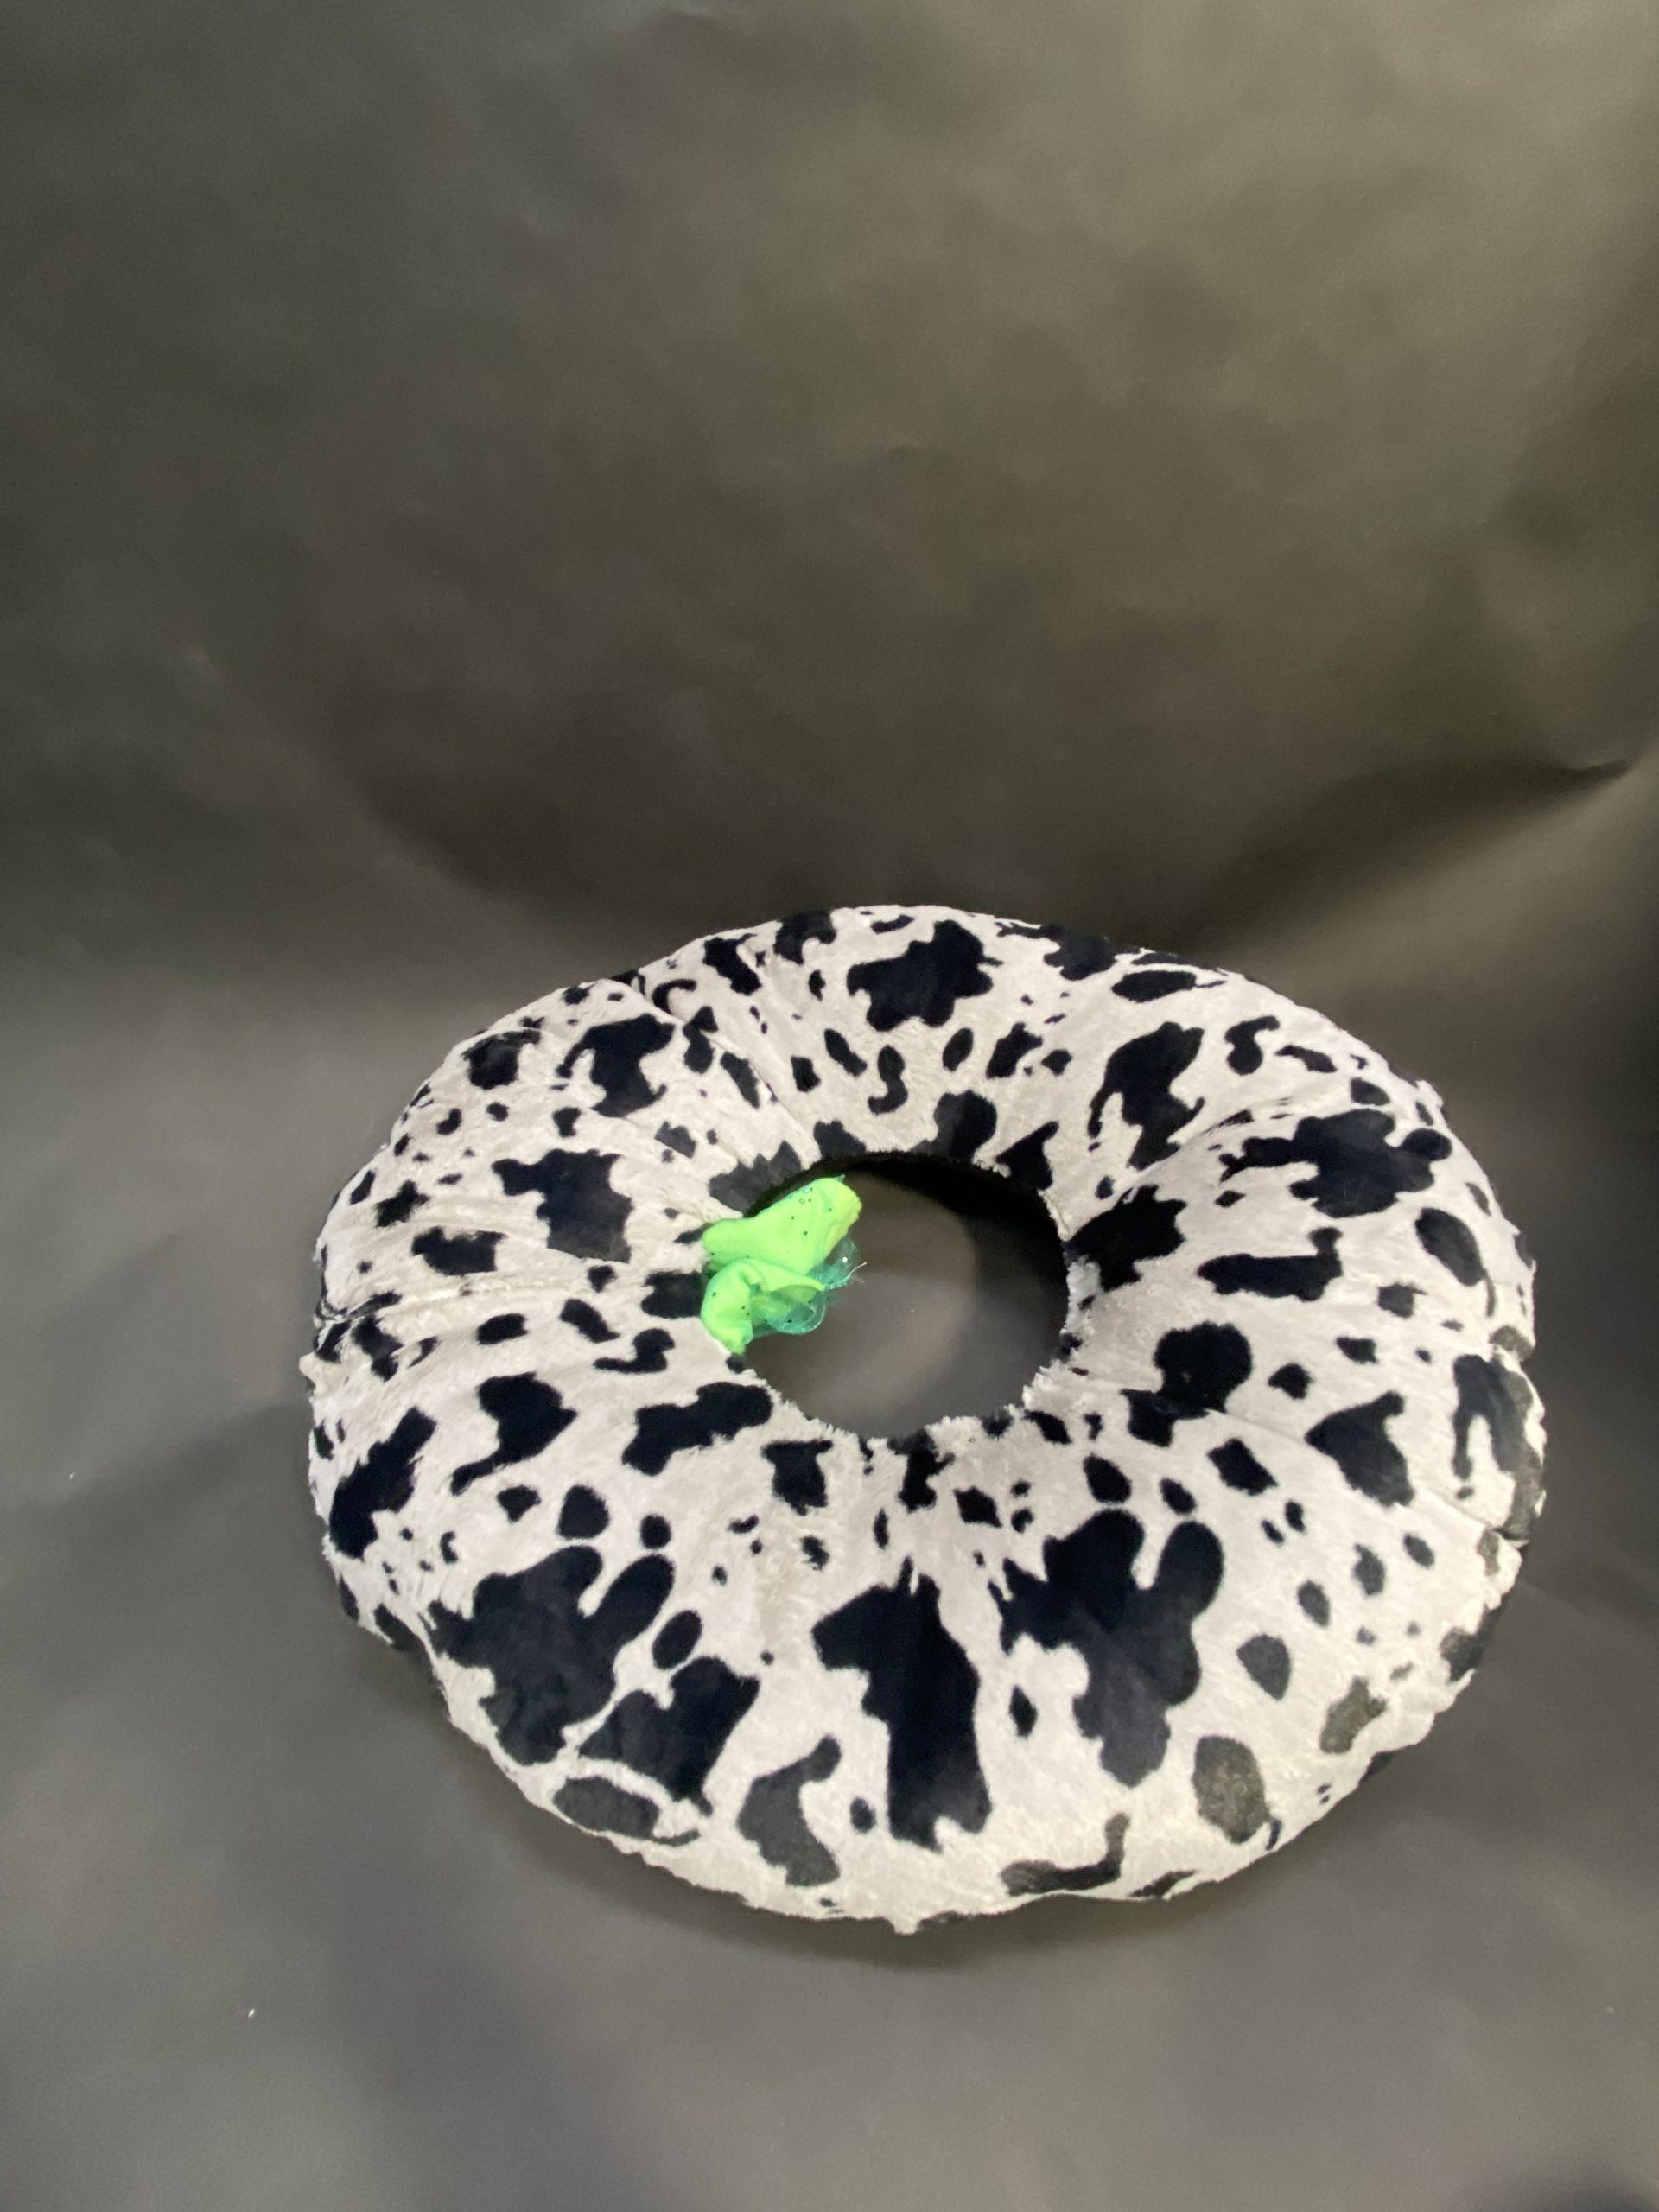
This is the first piece I made and the last one I finished! I had to figure out the best way to turn the donut inside out. I left it as a donut for a couple weeks and when I came back to it to sew it up and make additions I felt really uninspired. I liked the versatility and simplicity of just a donut and each modification I tried just seemed unnecessary or distracting, so I finally decided to see what it would be like to put a tie through the central seam. I really liked how the shape ended up and made this still a comfortable, useful cushion, but with the ability to change shape and be slightly more rigid than the unfurled donut.
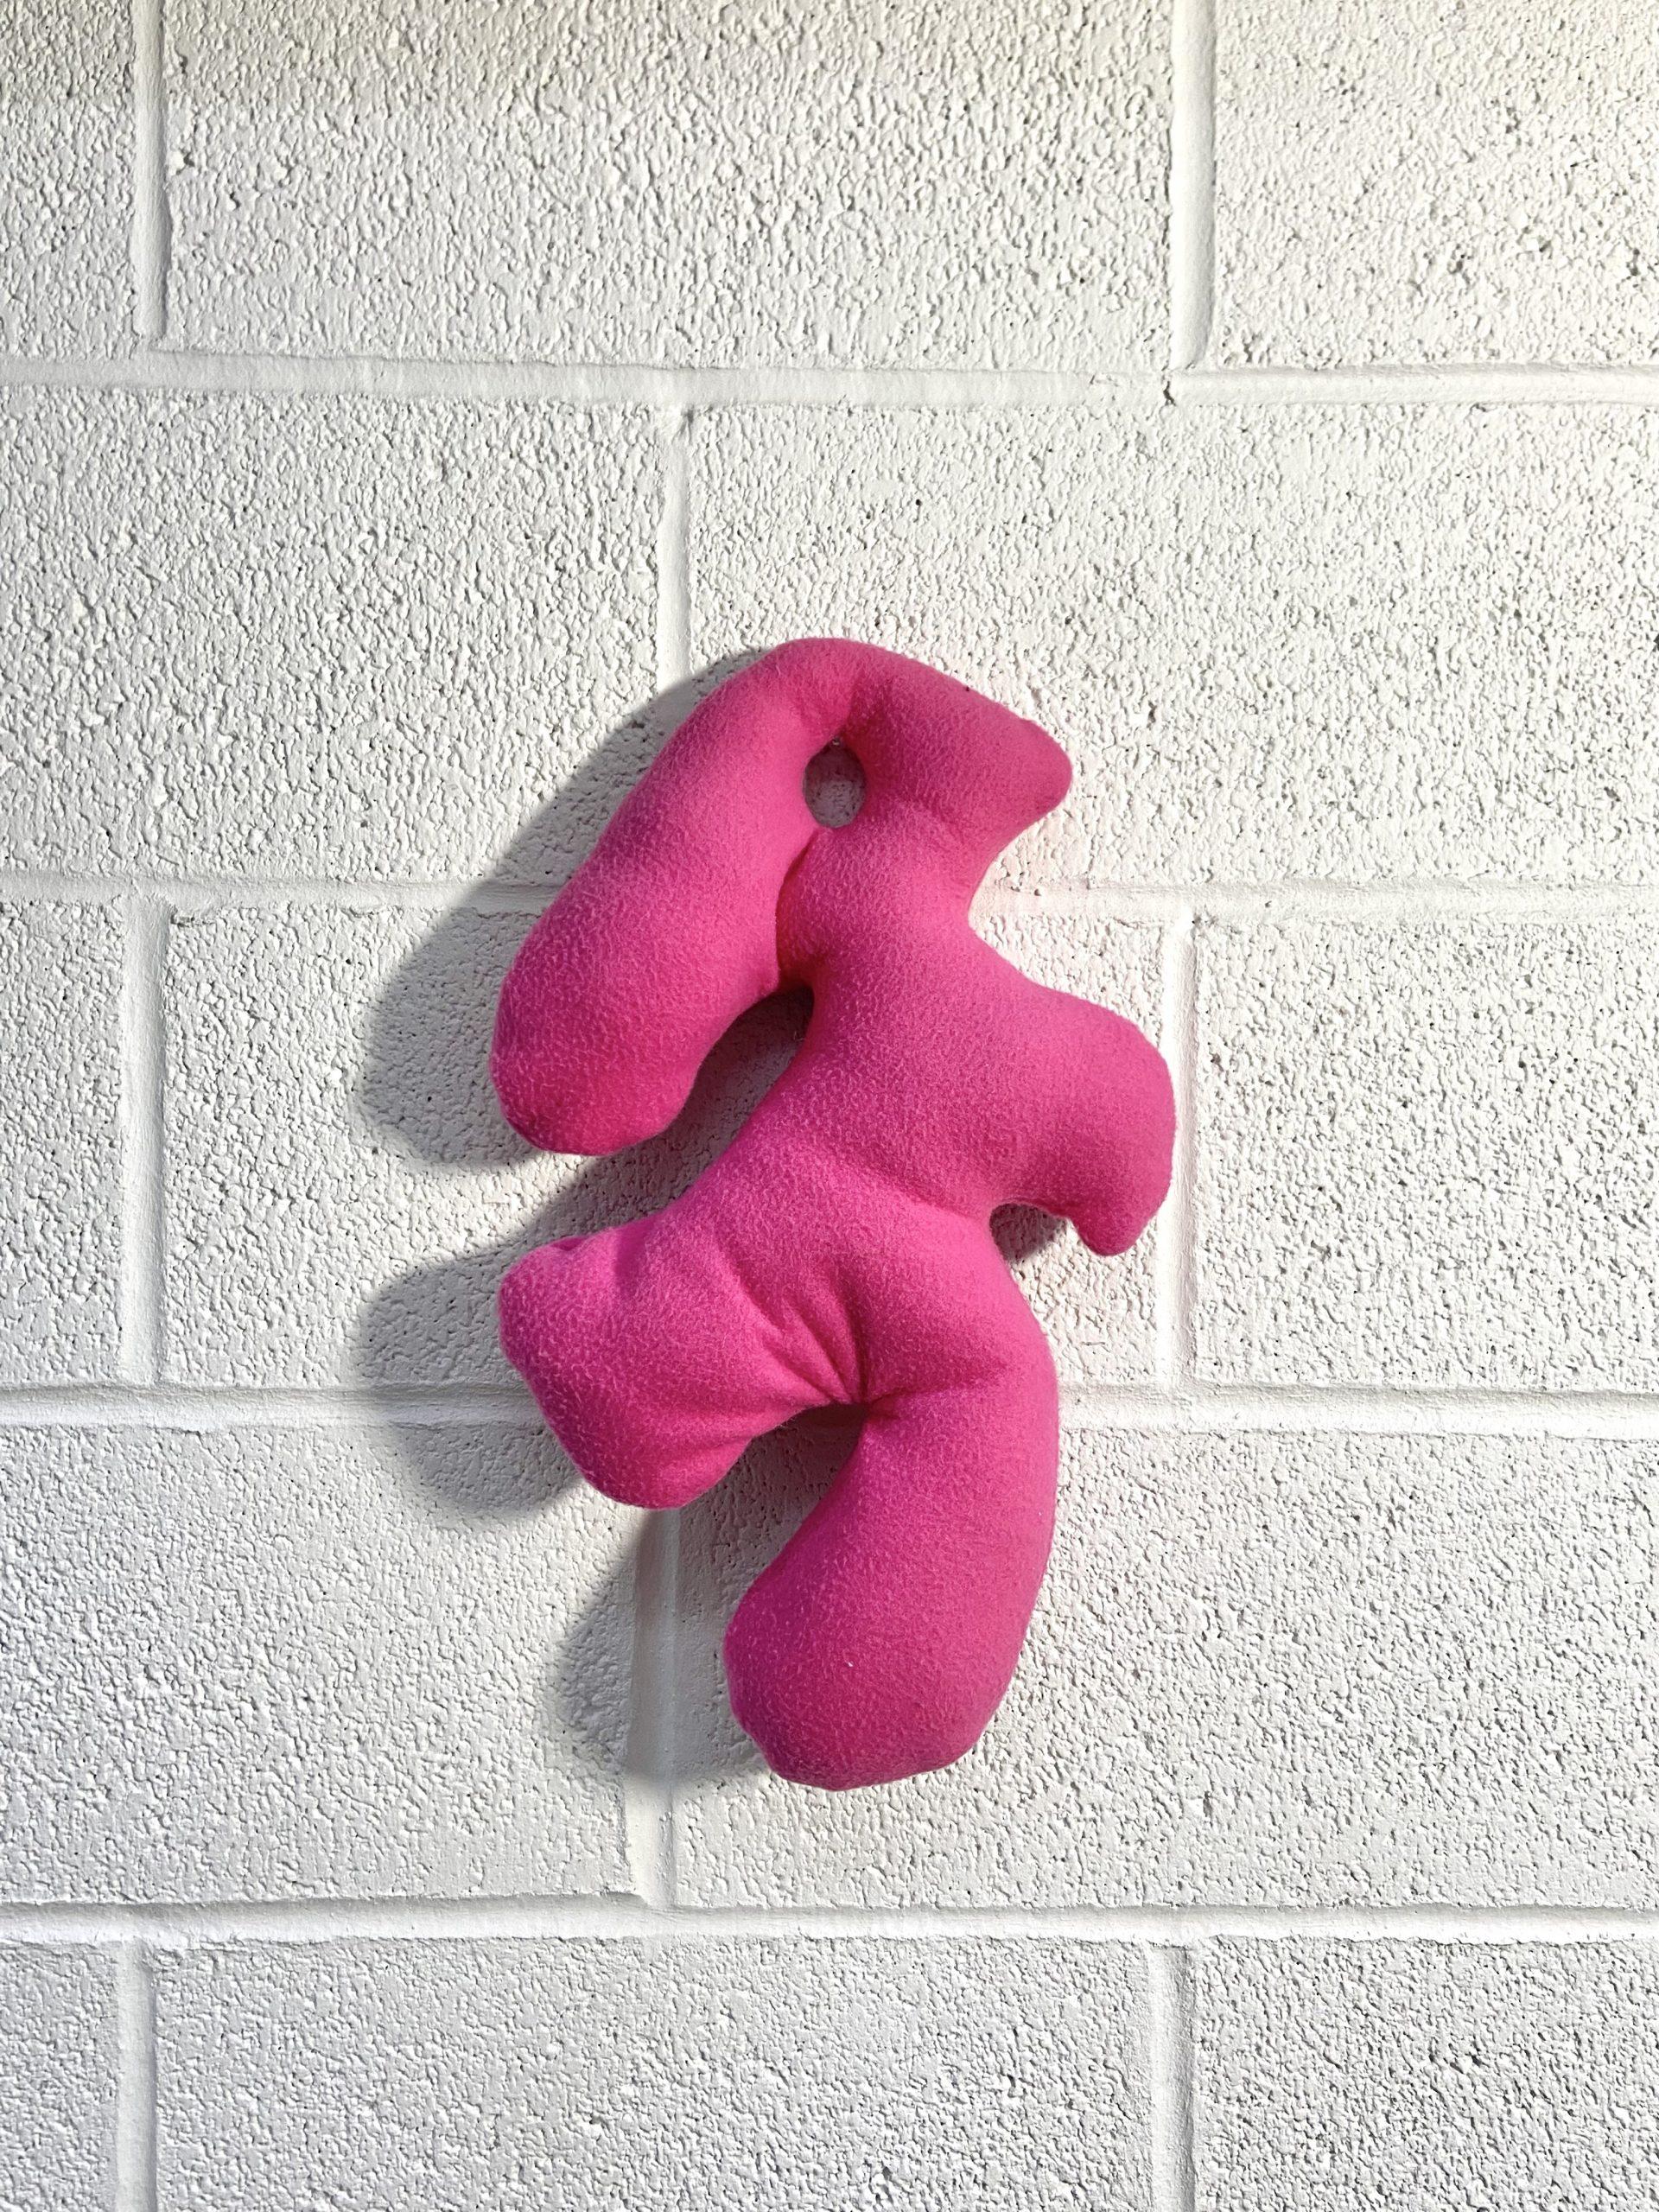
This is the second one I made. I spent time trying to make the donut a donut and then didn’t know where to go, so I figured I would go with a more improvisational approach on this one. I started with the cylinder pattern and tried some darts and cone additions which ended up being more difficult than I thought it would be. It was especially hard to make sure the darts were evenly spaced but I also refused to get out a measuring tape or anything so I might try that next time. It was quicker and more fun to just see what it turned into rather than being frustrated when something doesn’t go according to plan.
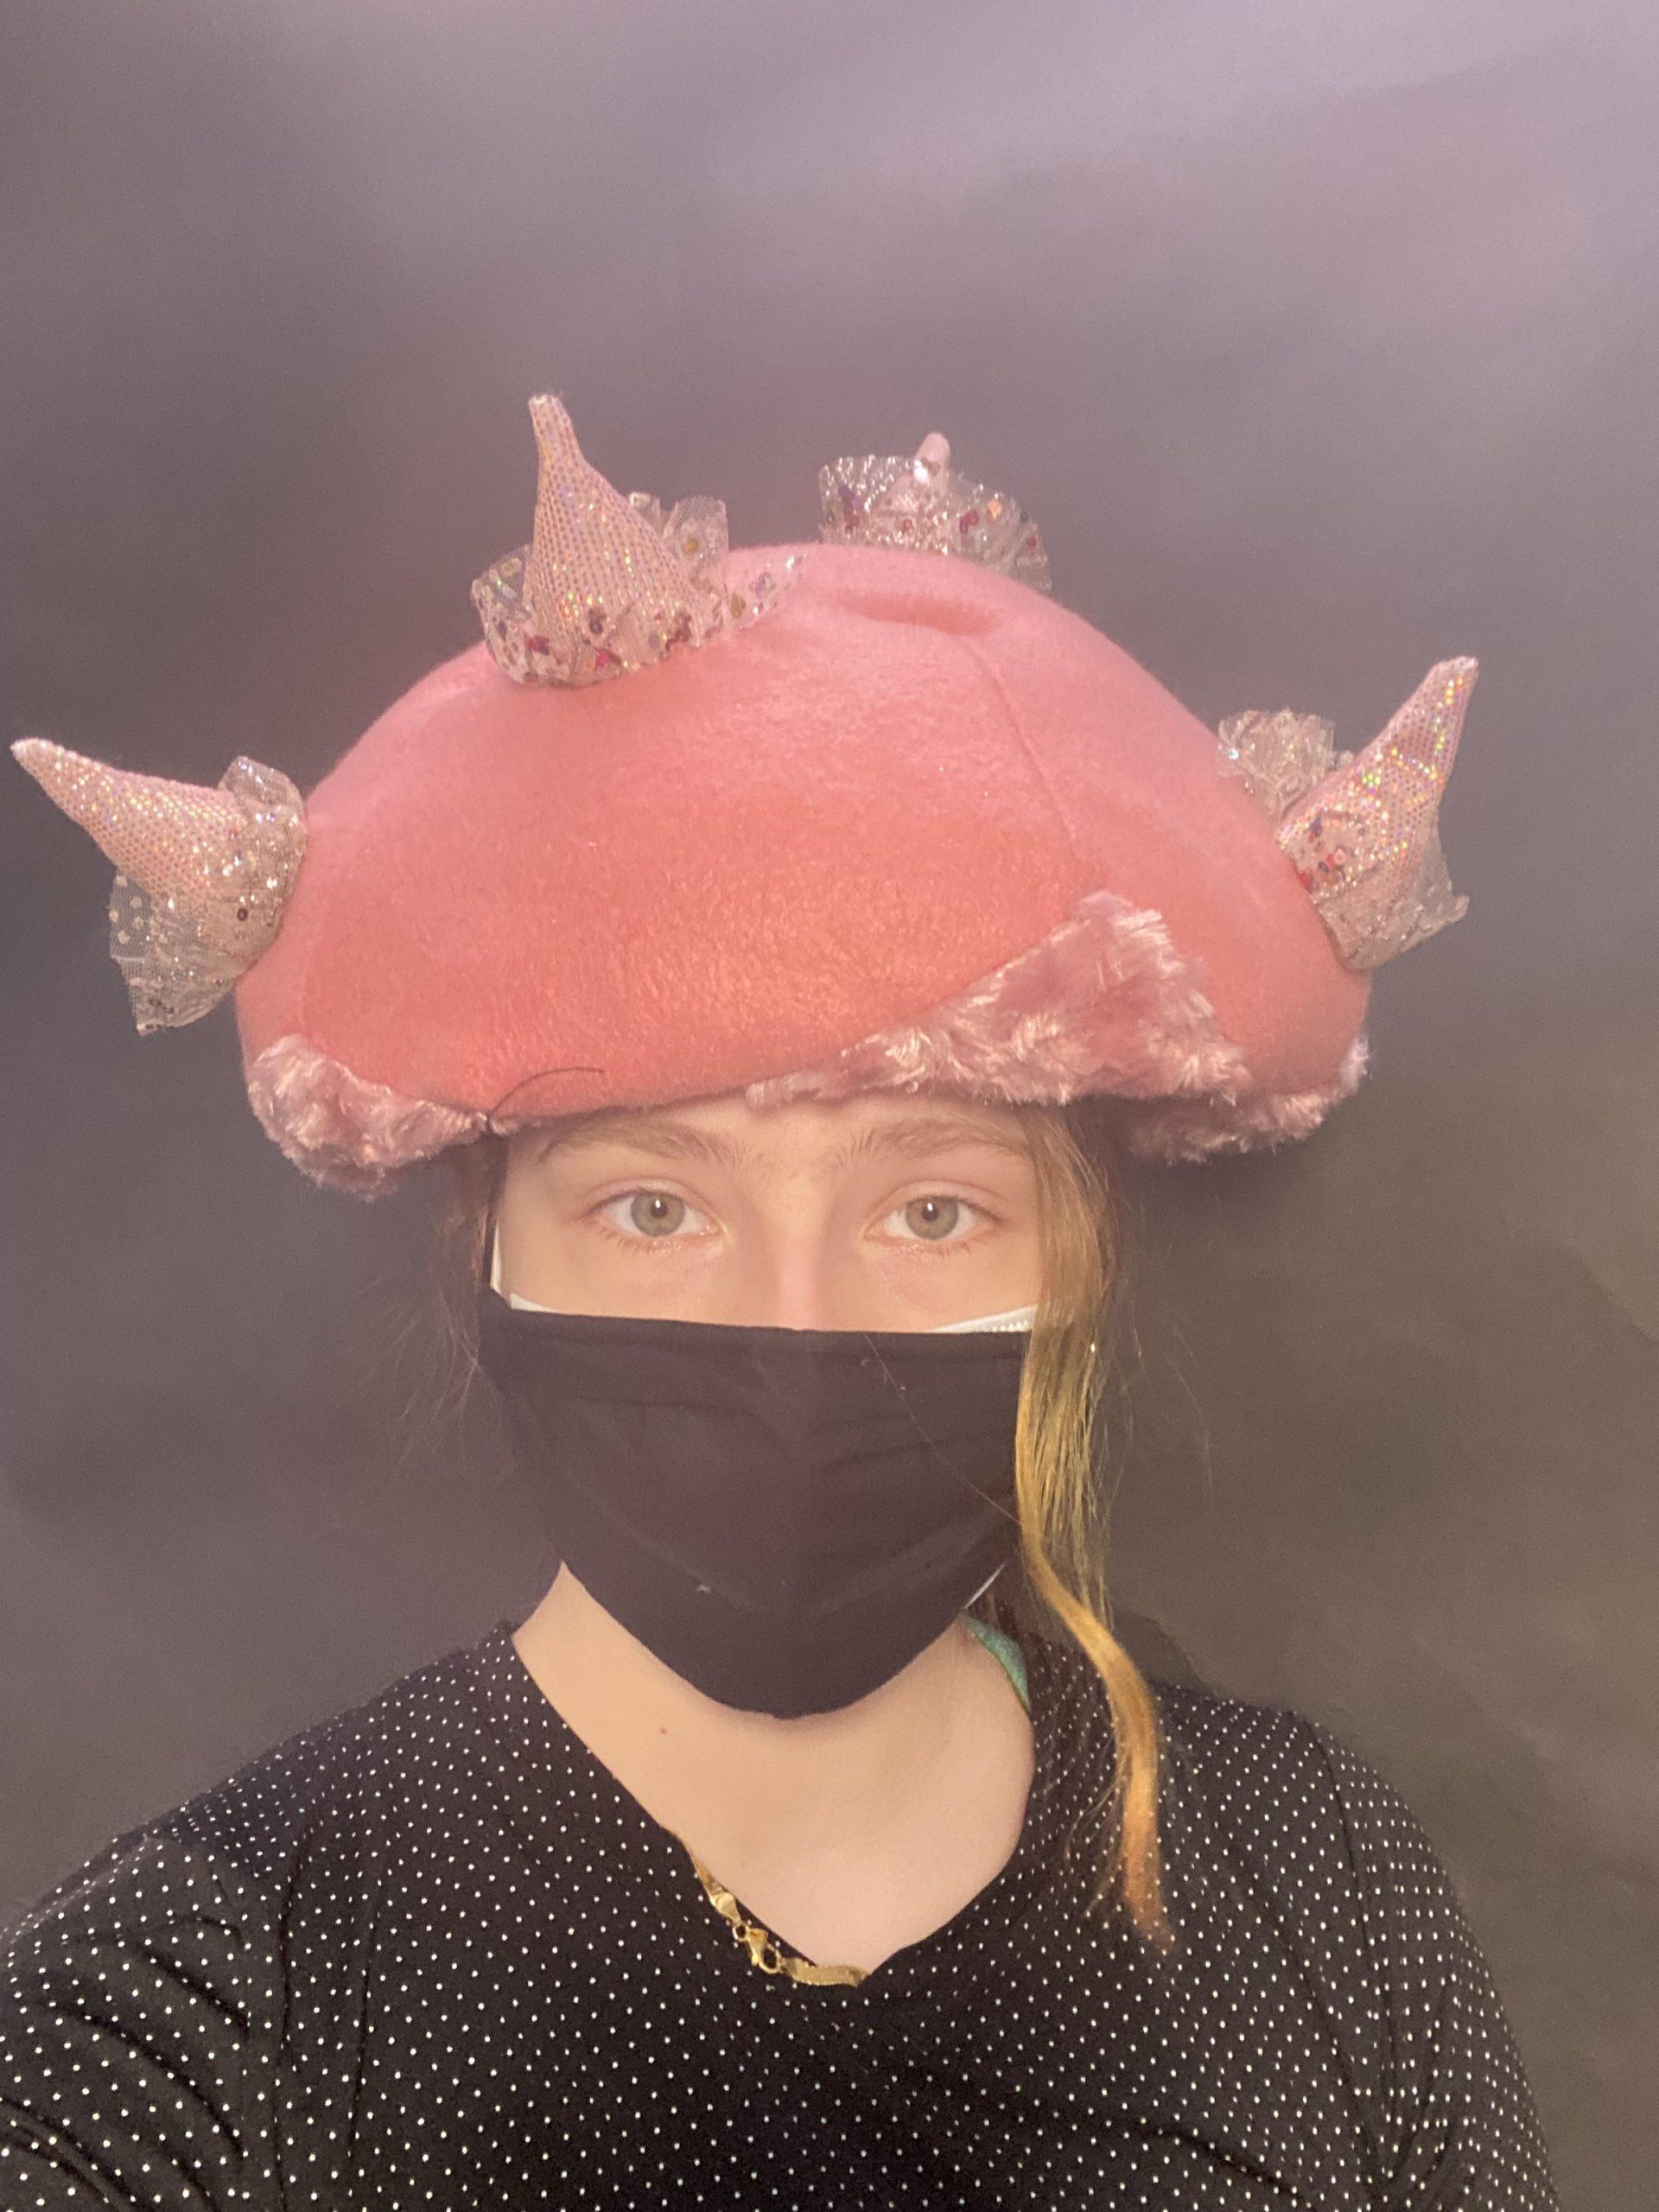
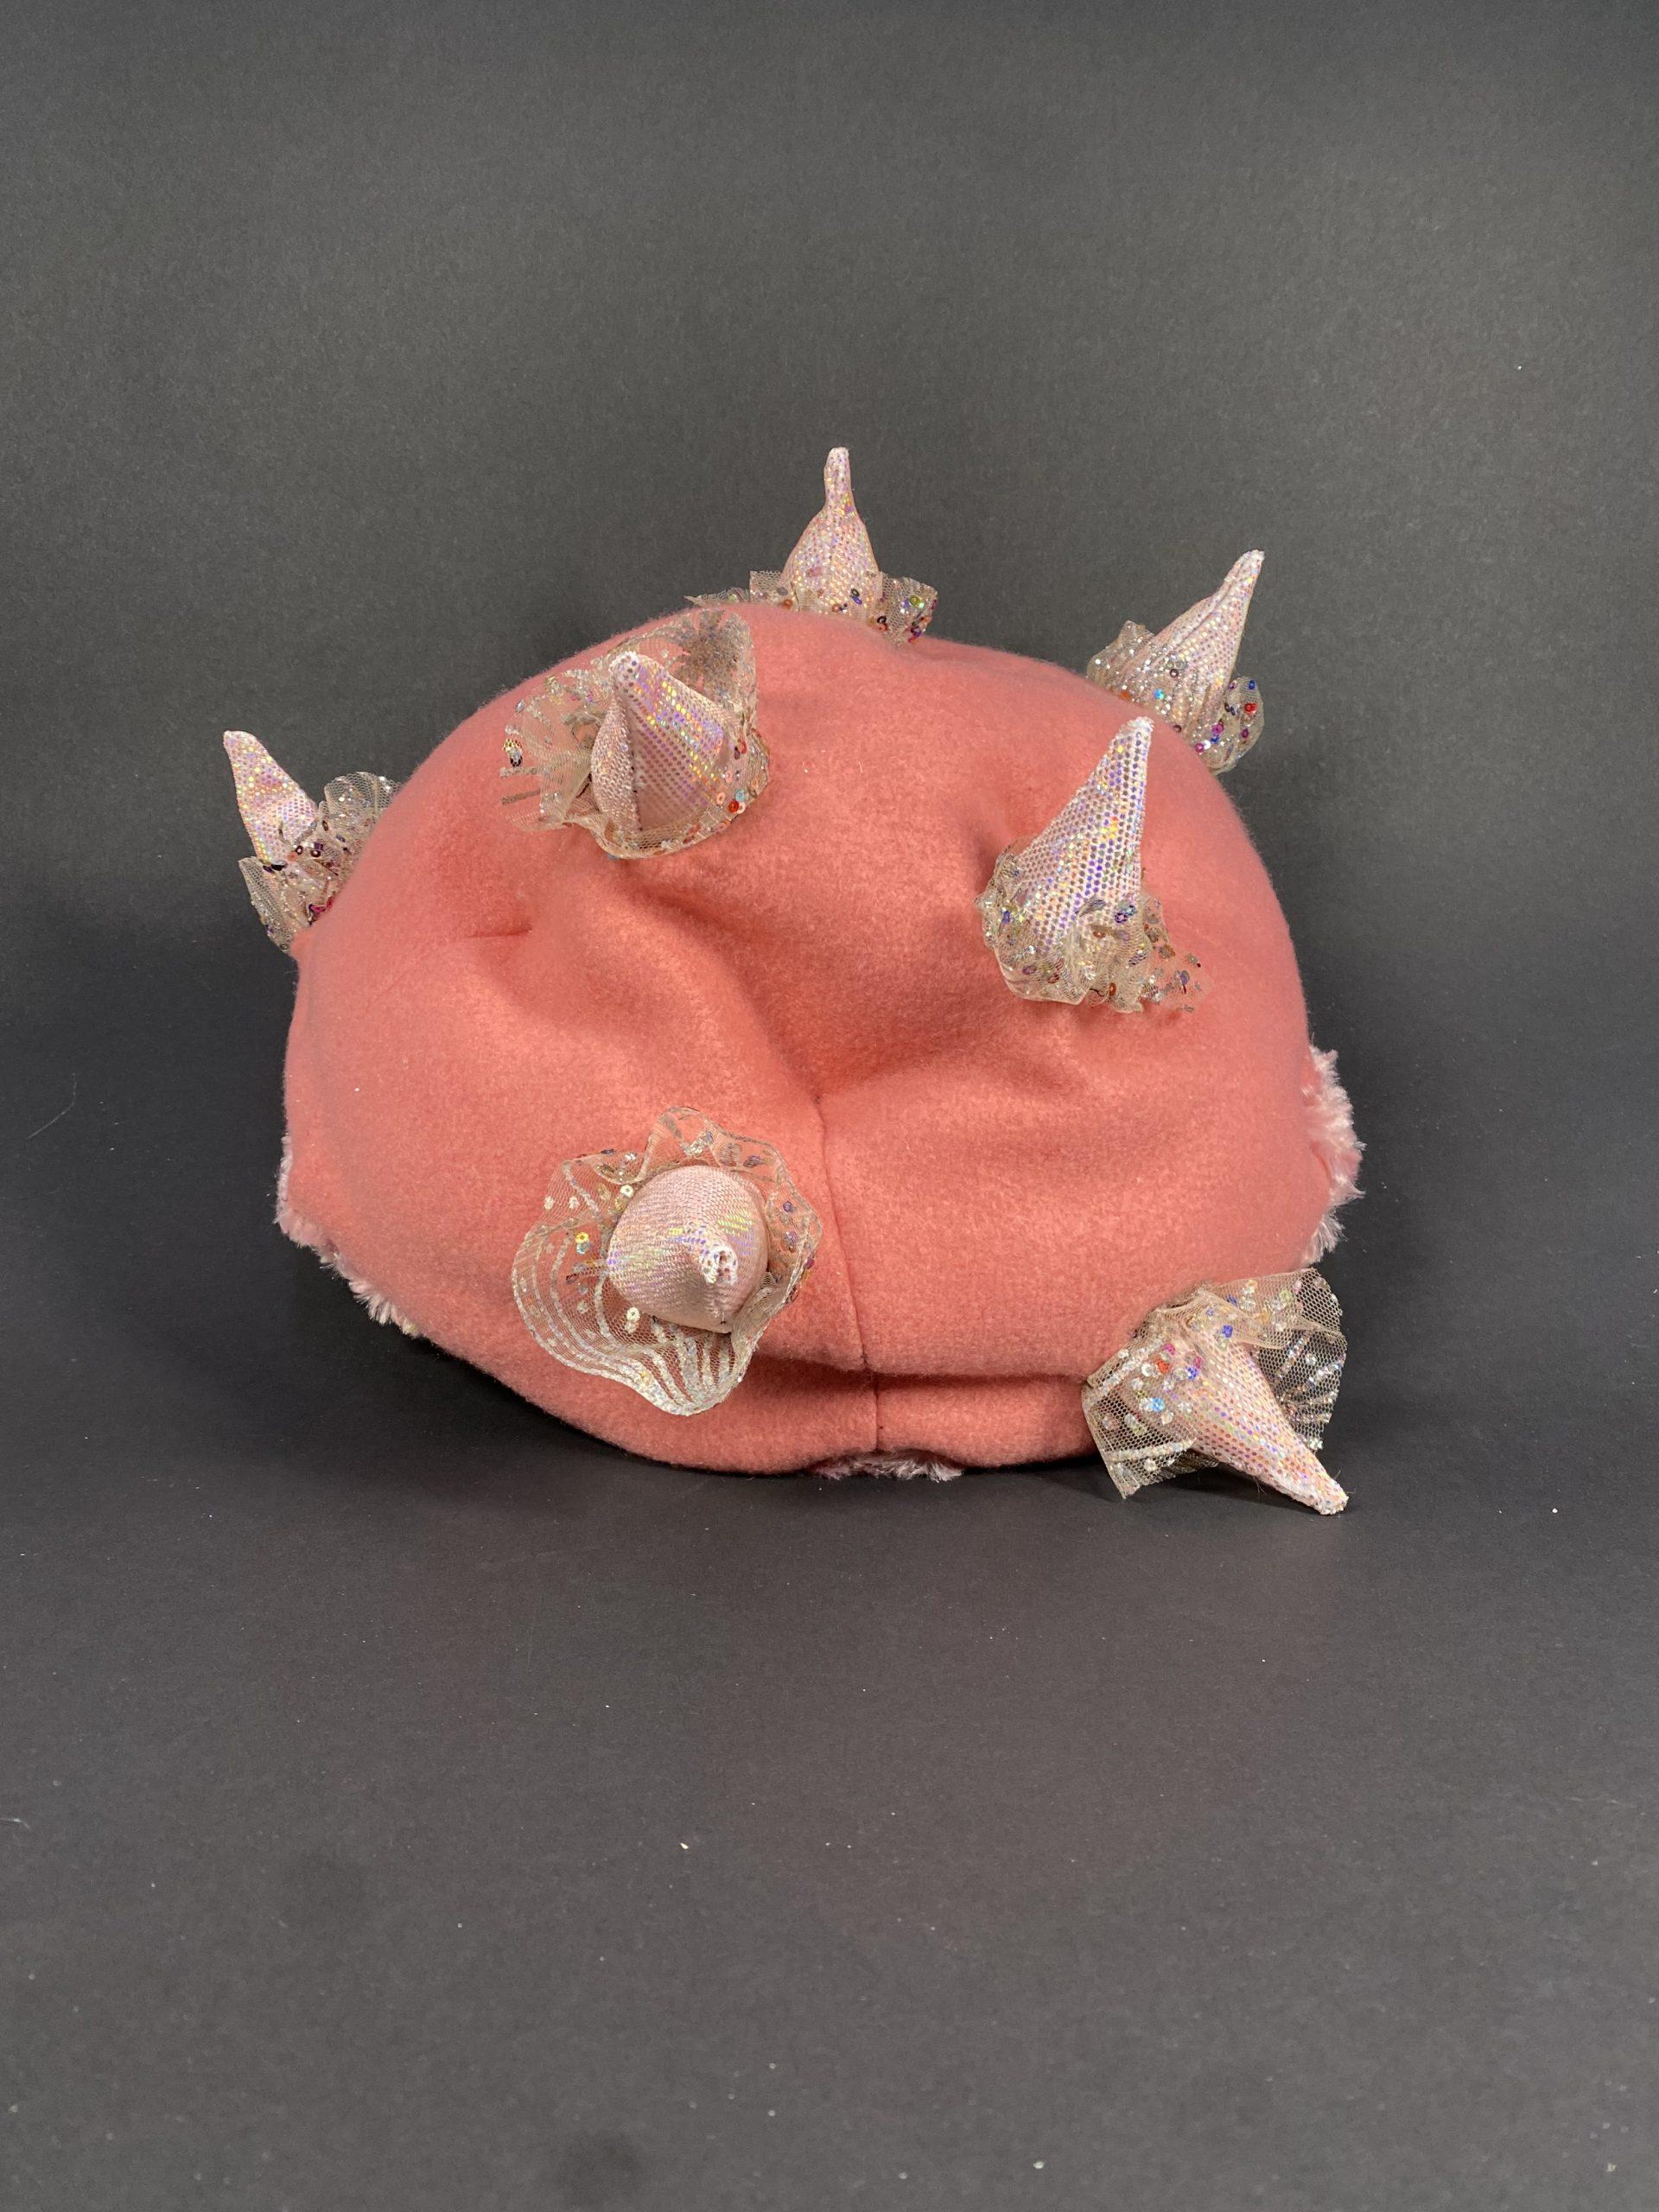
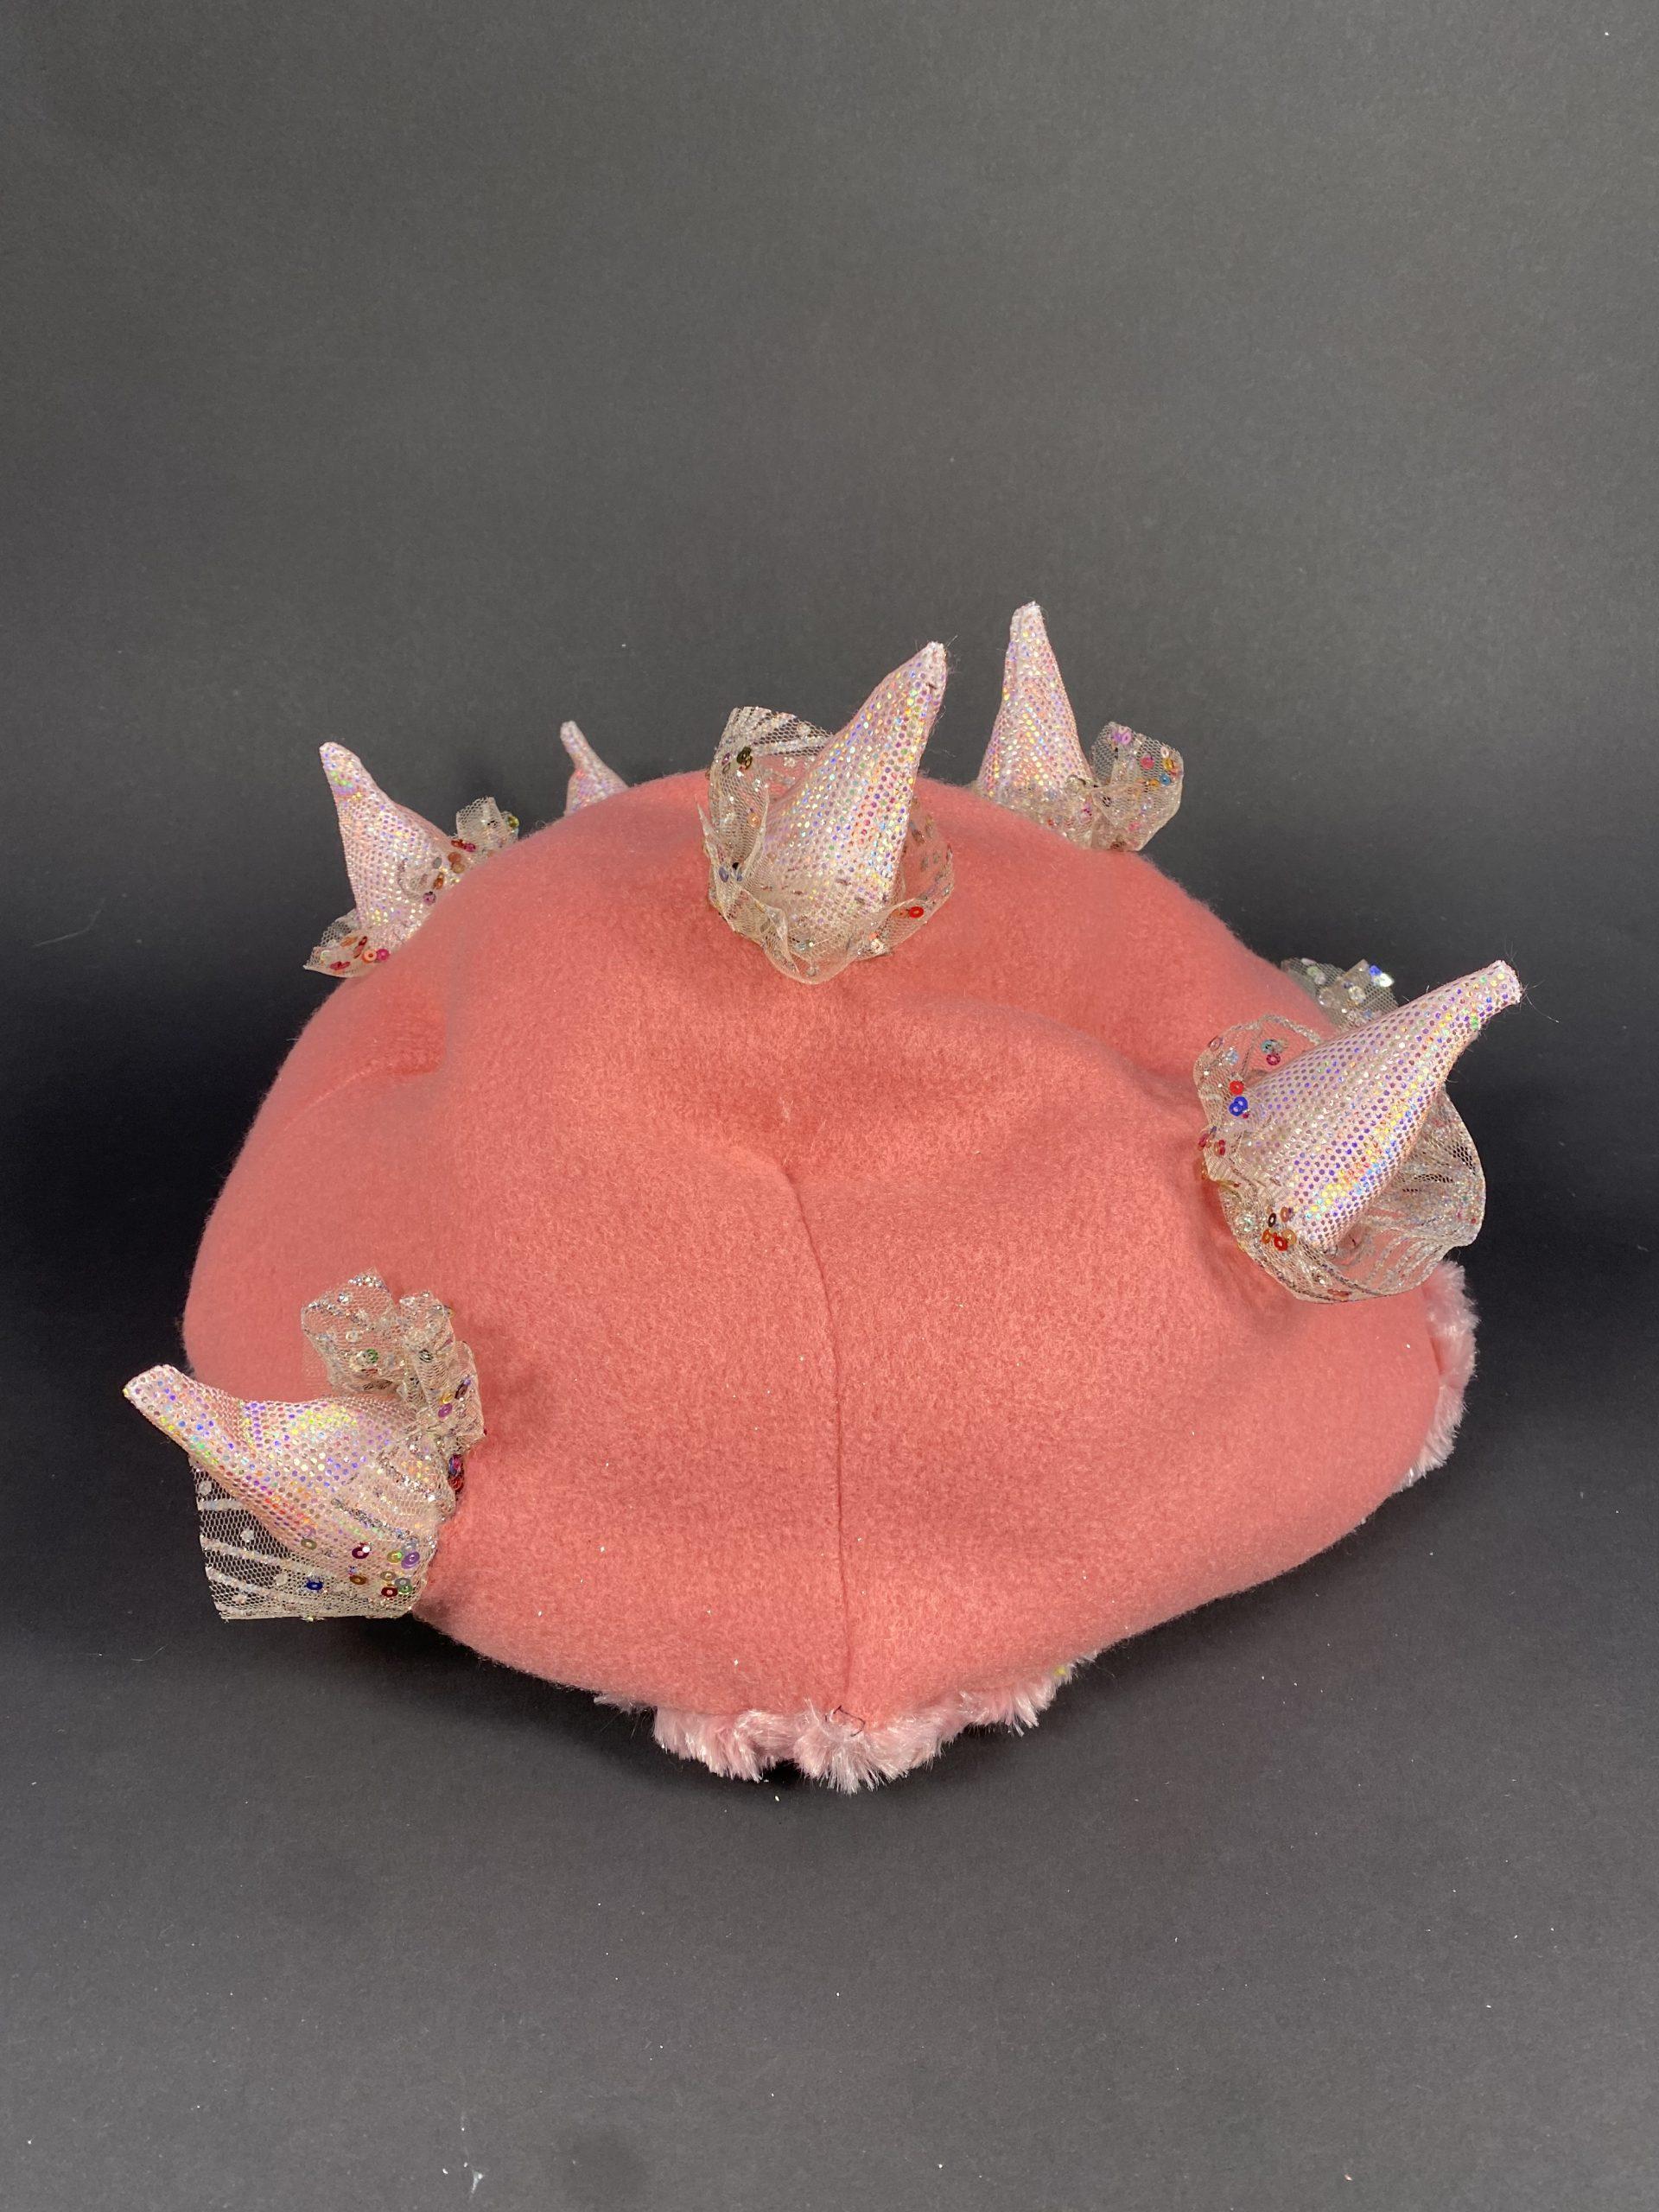
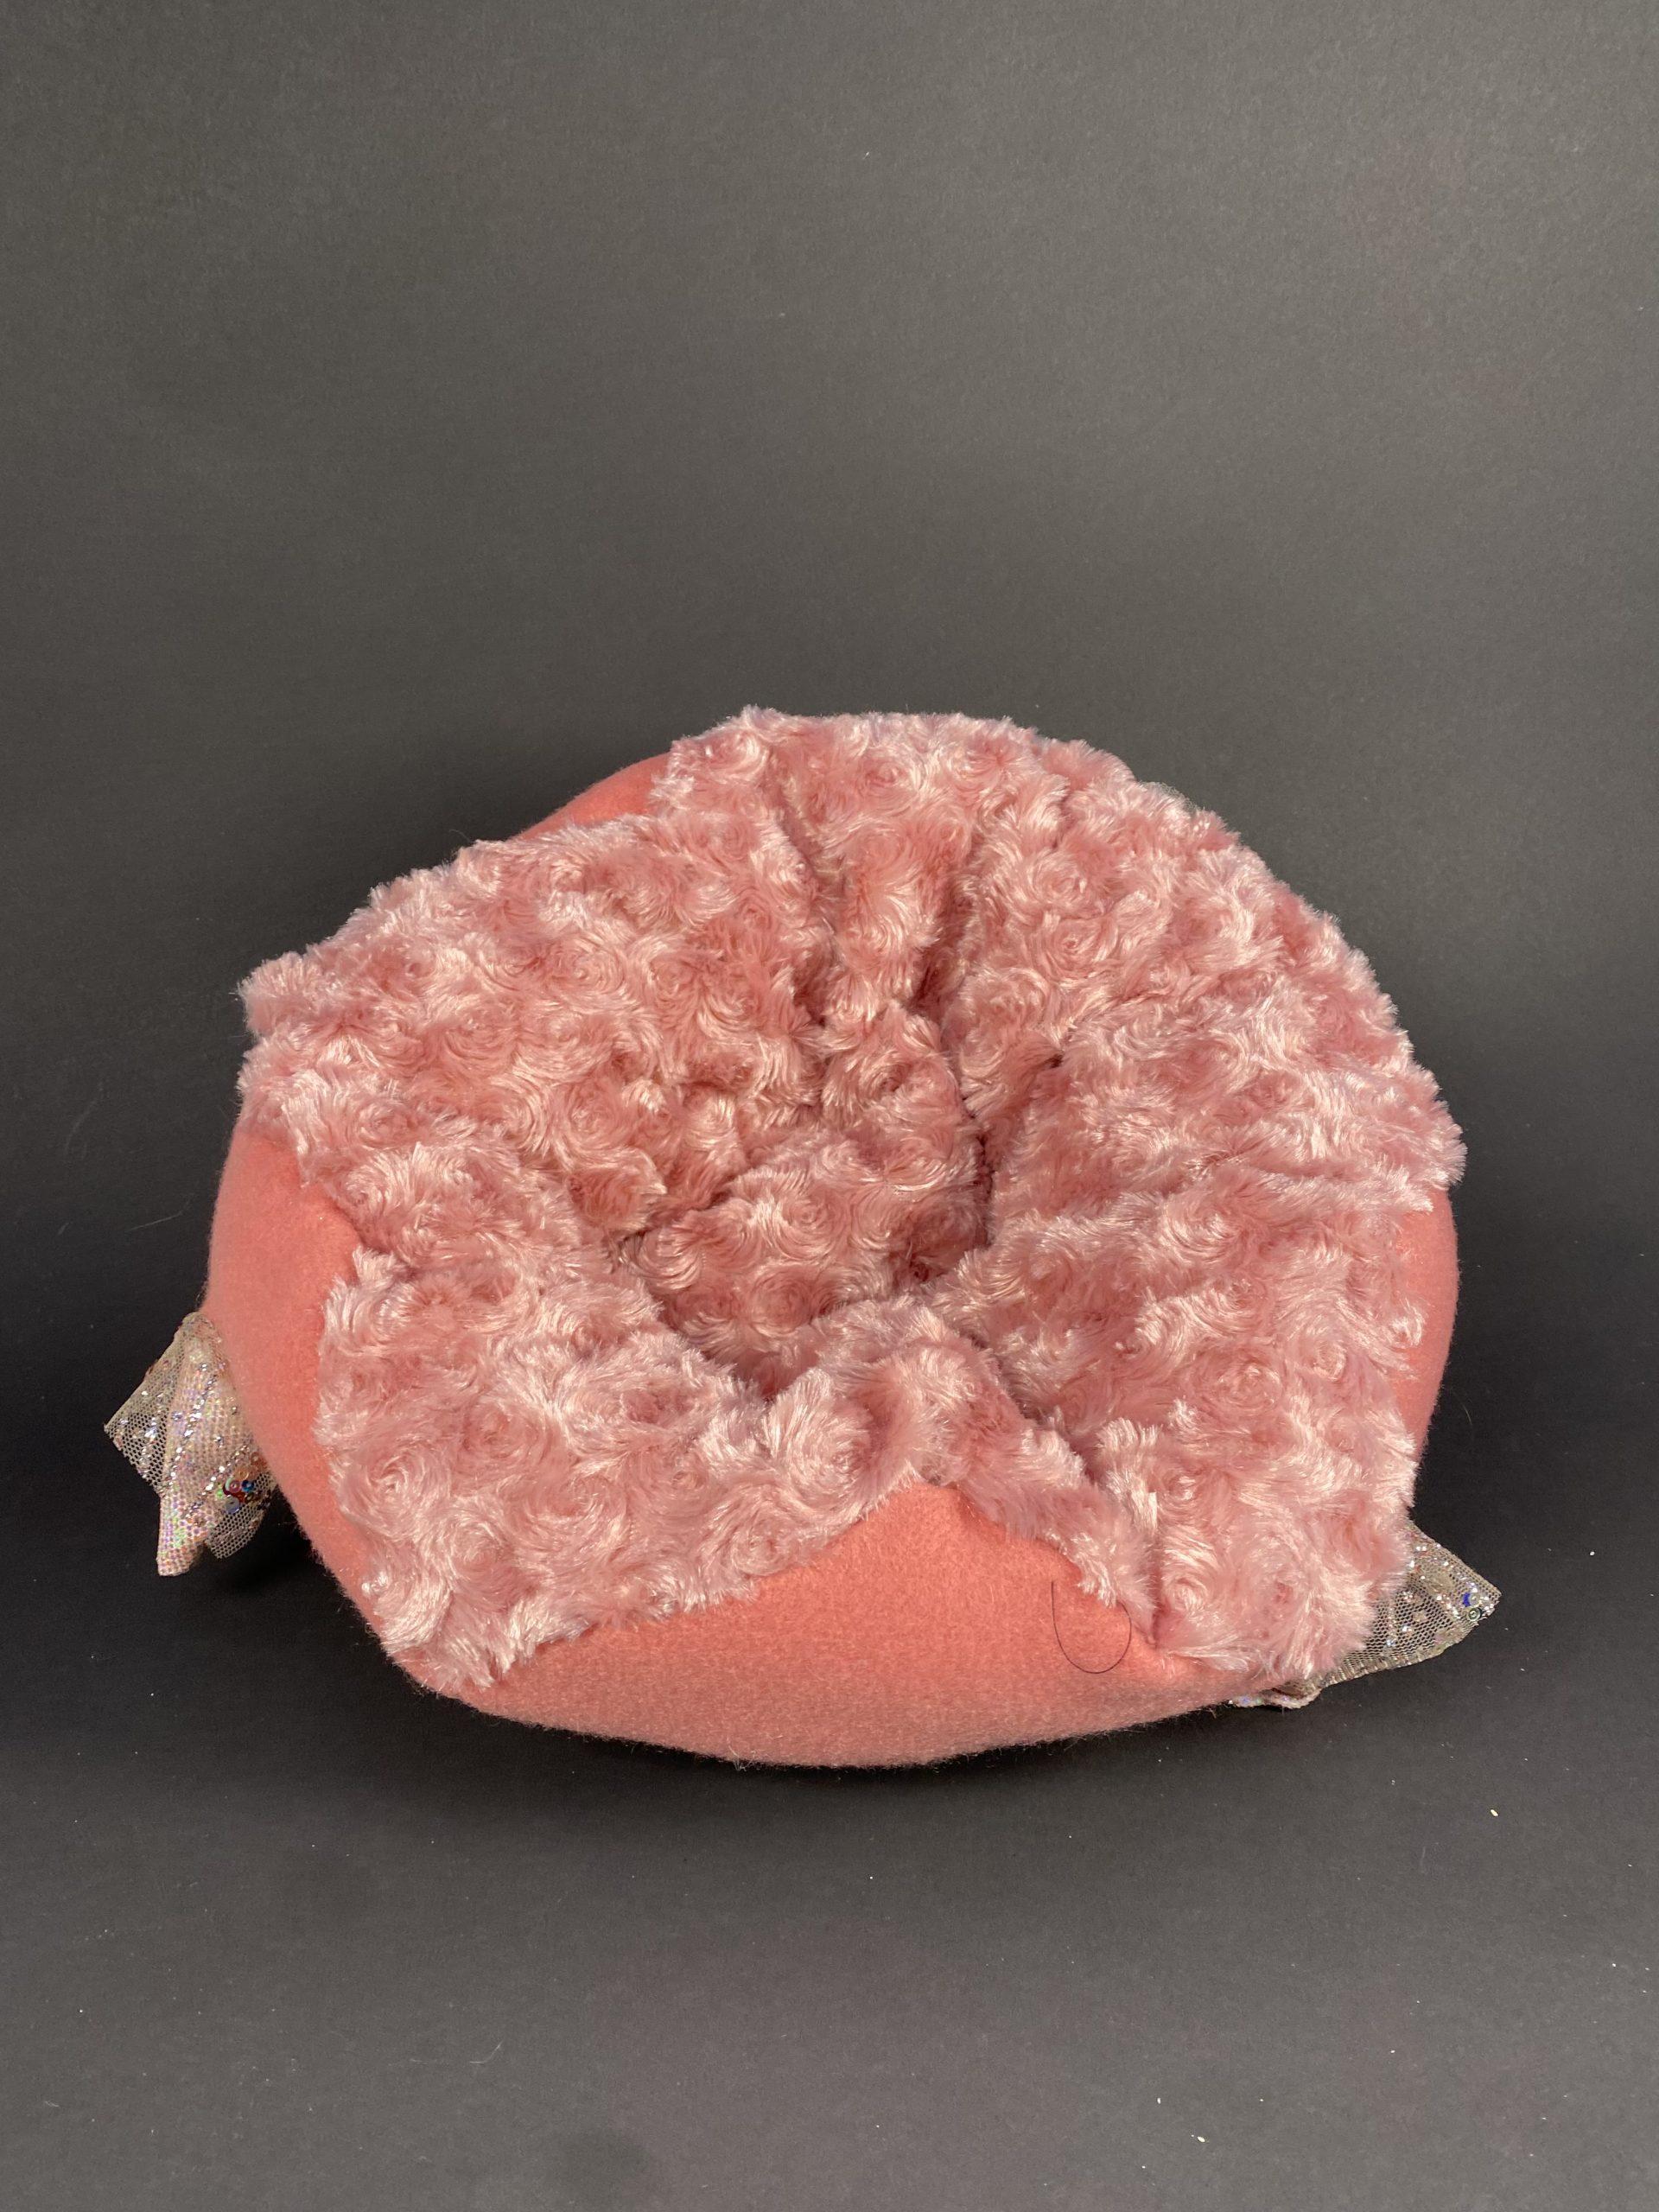
This is the third one I made. I really wanted to try out some of the fun fabrics so I finally got to here. I modified half of the sphere pattern when making it so that the inside sphere would be smaller than the outside one, which kind of worked but it was hard to keep it symmetrical and to stuff it evenly. I like that it is a soft hat though. I put a lot of thought into how I was going to create this and I was able to follow the process I thought of pretty well, so that was nice, but it also took a longgggg time, especially because the cones were so small.
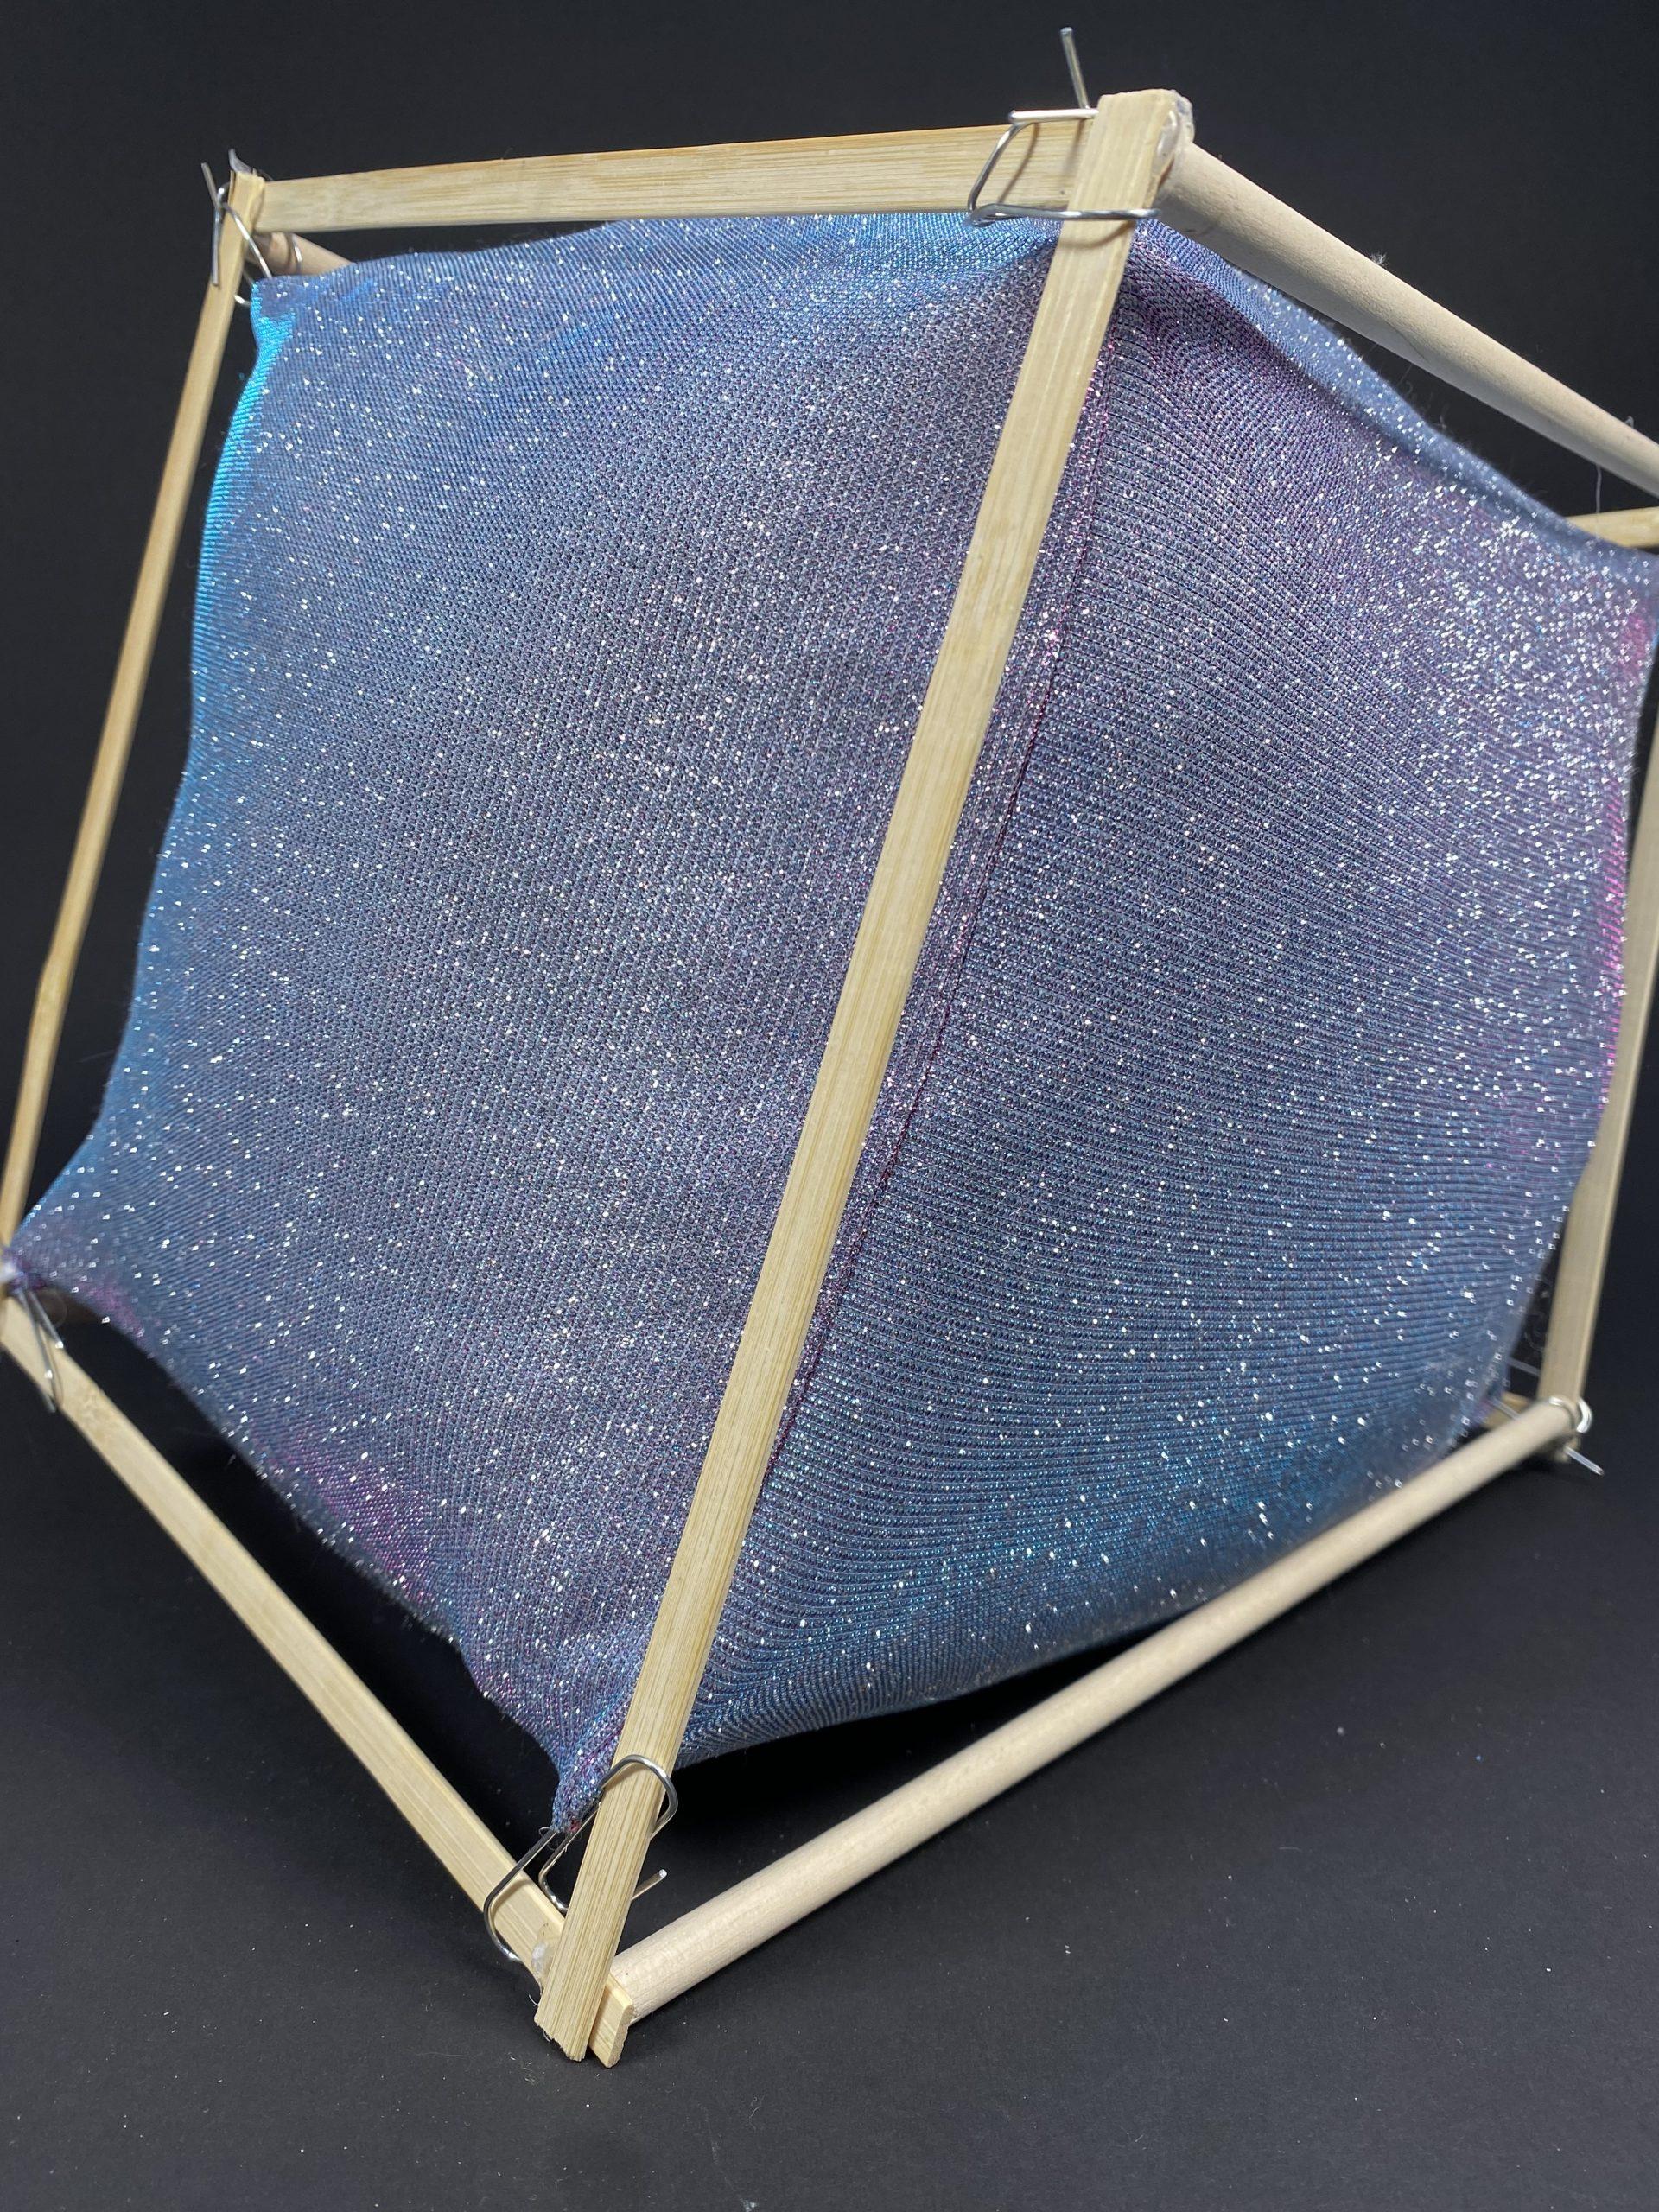
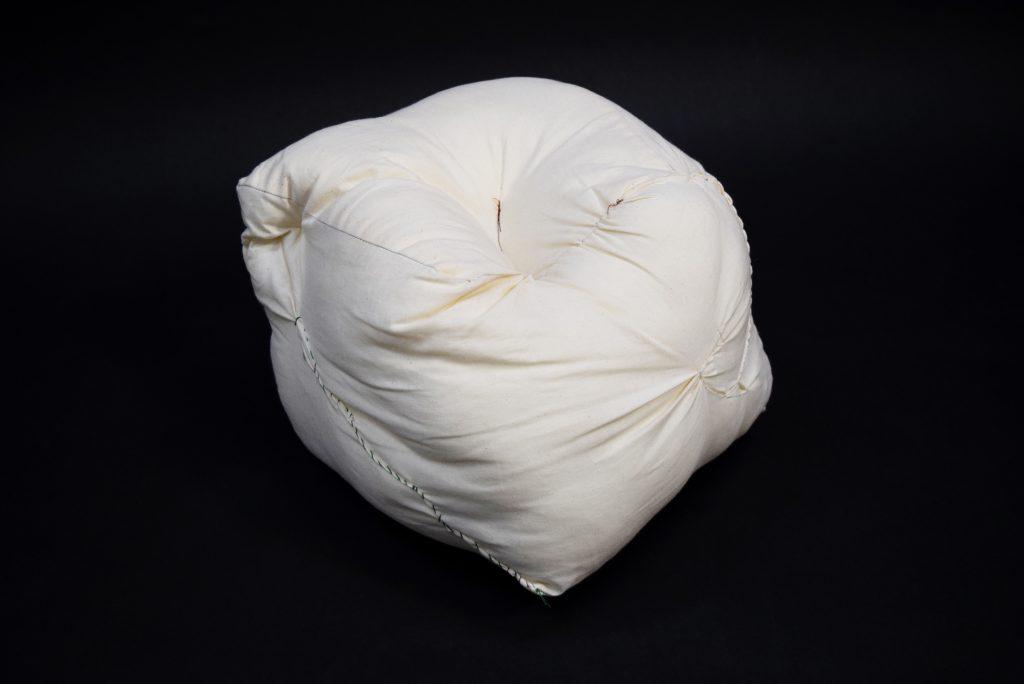
This is the last one I made. I also liked the fabric and I wanted to start with a cube this time since I had used a lot of more circular patterns for the other one. I also noticed that the cube was very un cube like after stuffing it, especially because the fabric was so stretchy, so I tried to experiment with putting a skeleton inside, but there was nothing to hold it together. So, I moved it to the outside. I wish the structure I hot glued had held its rectangular shape a bit better, as it kind of twisted, but overall I still had fun exploring the stretching of the soft shape to a more rigid body. I also liked the stitching I did on the outside – it kept breaking so I had to do it several times, but I got to try out different textures. I think it would have been fun to do it to the whole shape.
Overall, I really liked the assignment and would gladly keep doing assignments about sewing small stuffed things if that were what the class was about. 🙂 But I am excited to translate what I learned and practiced to inflatables!
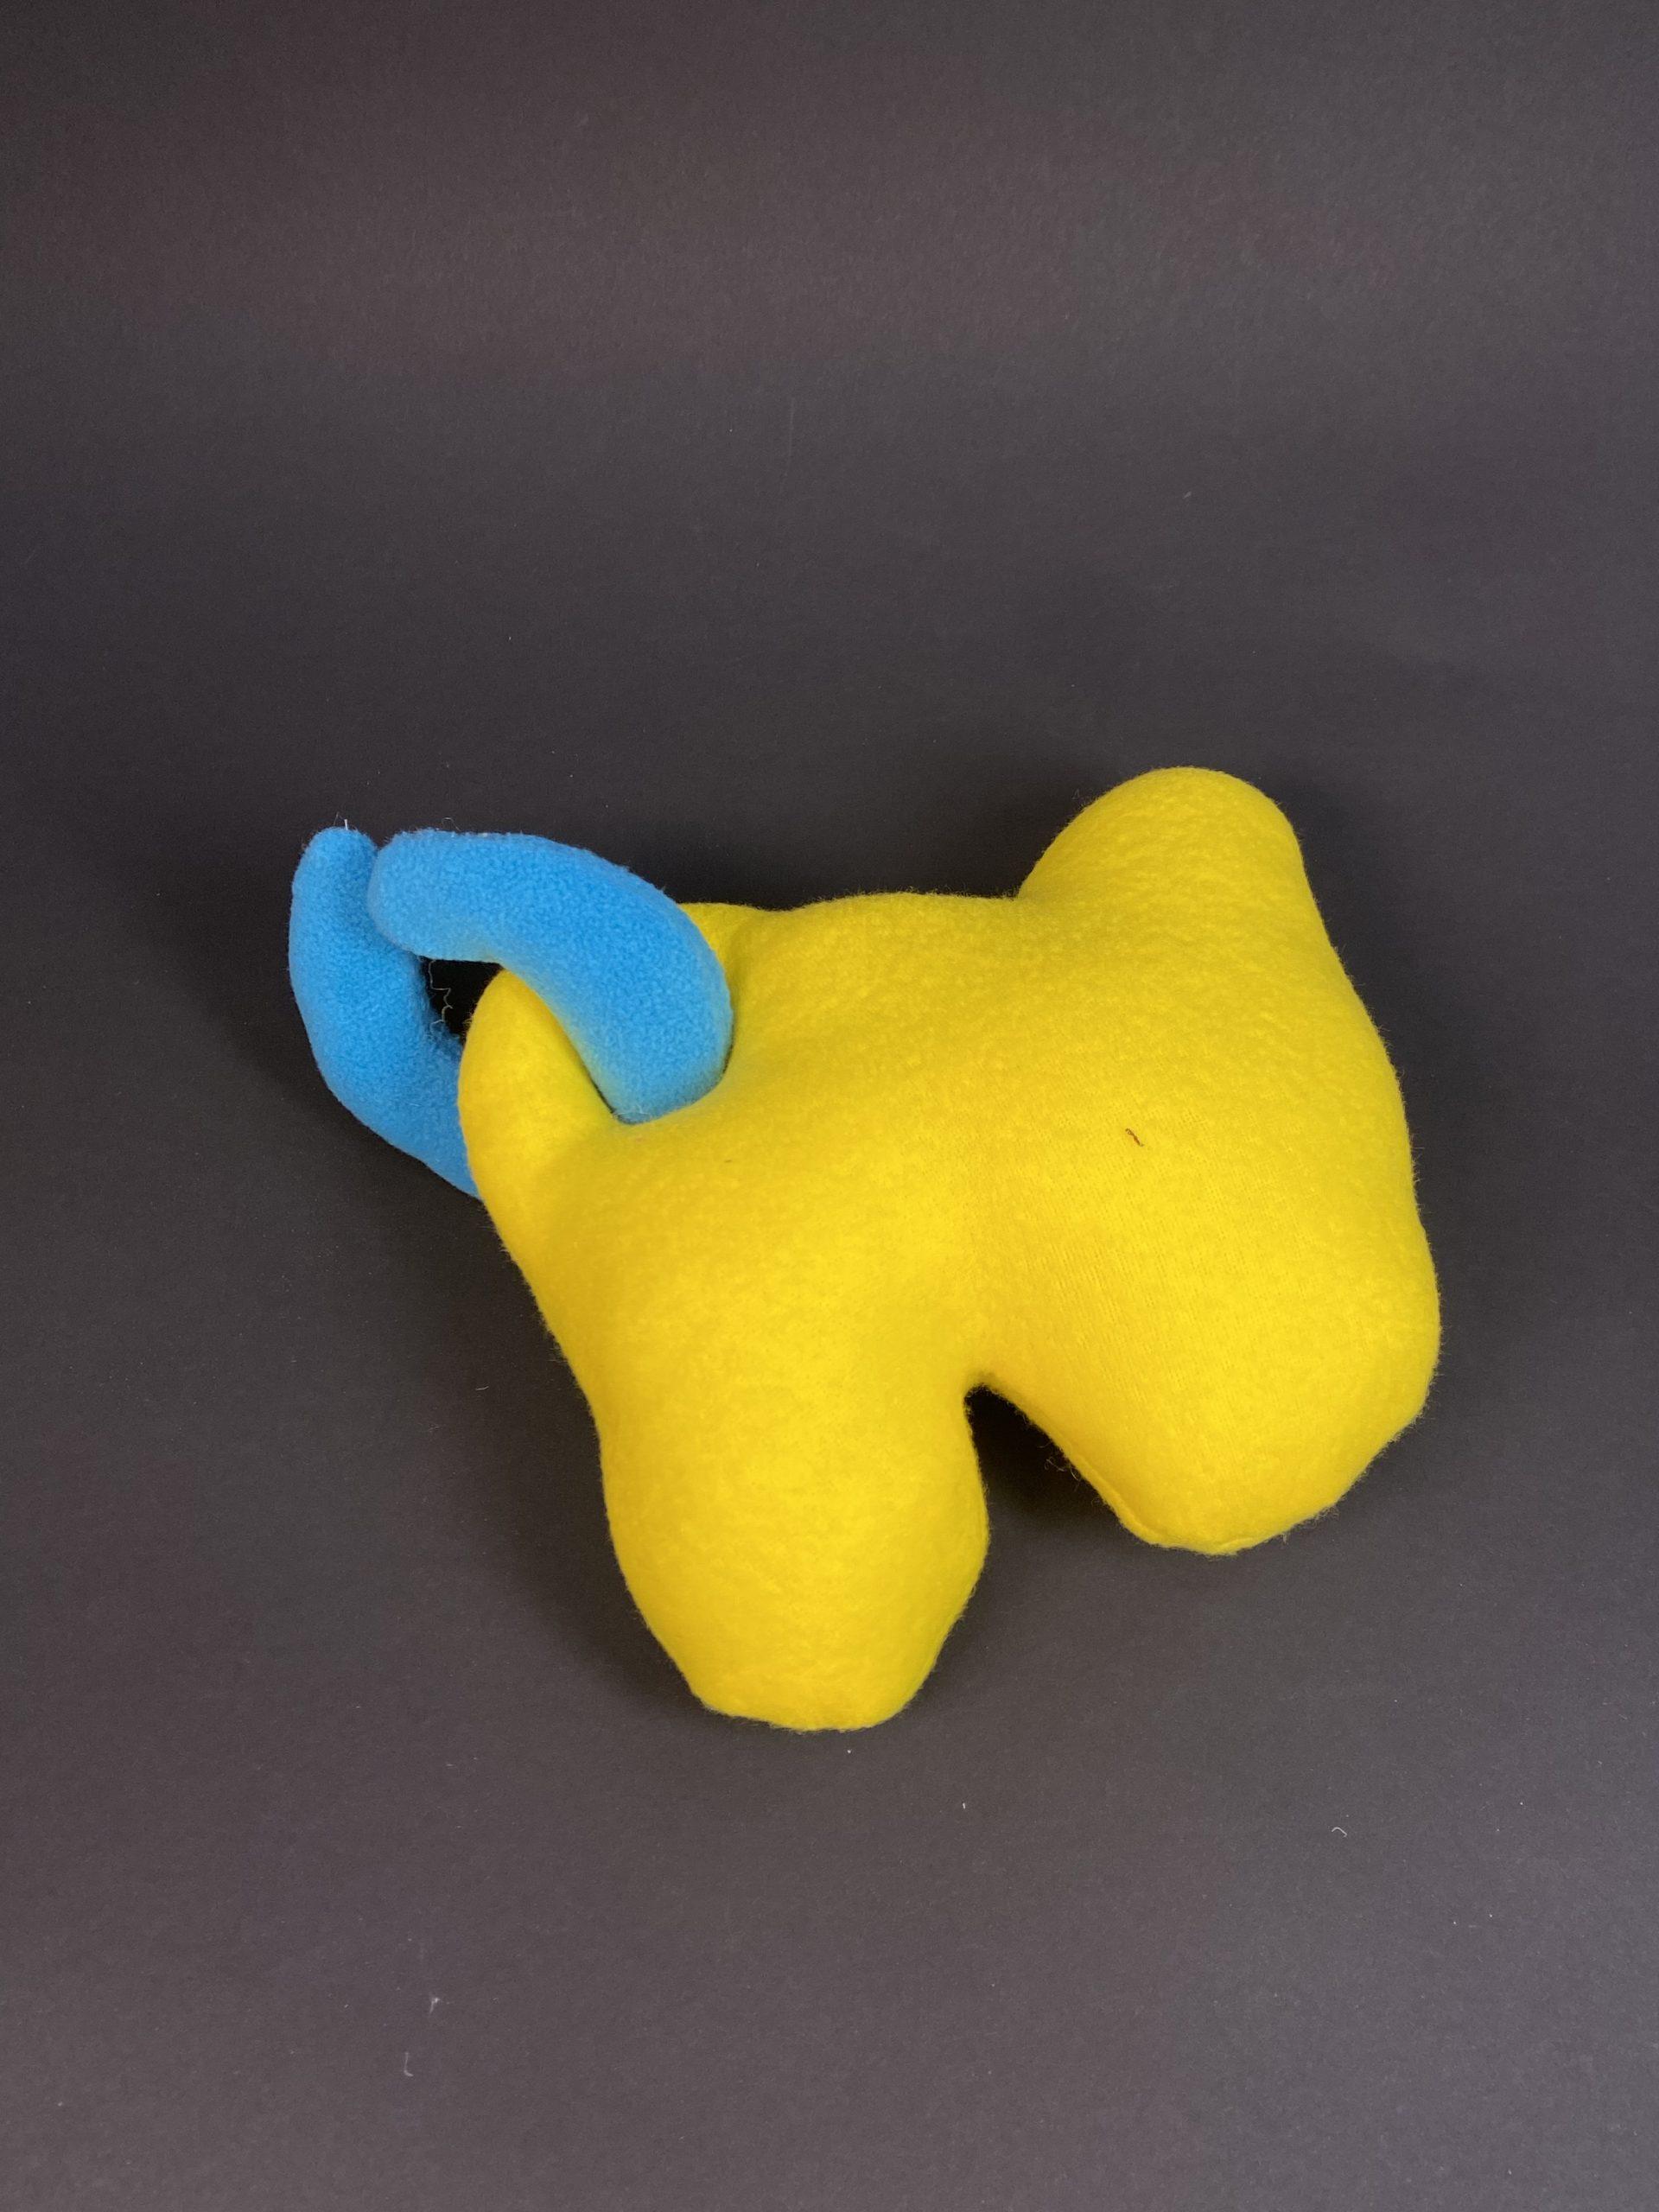
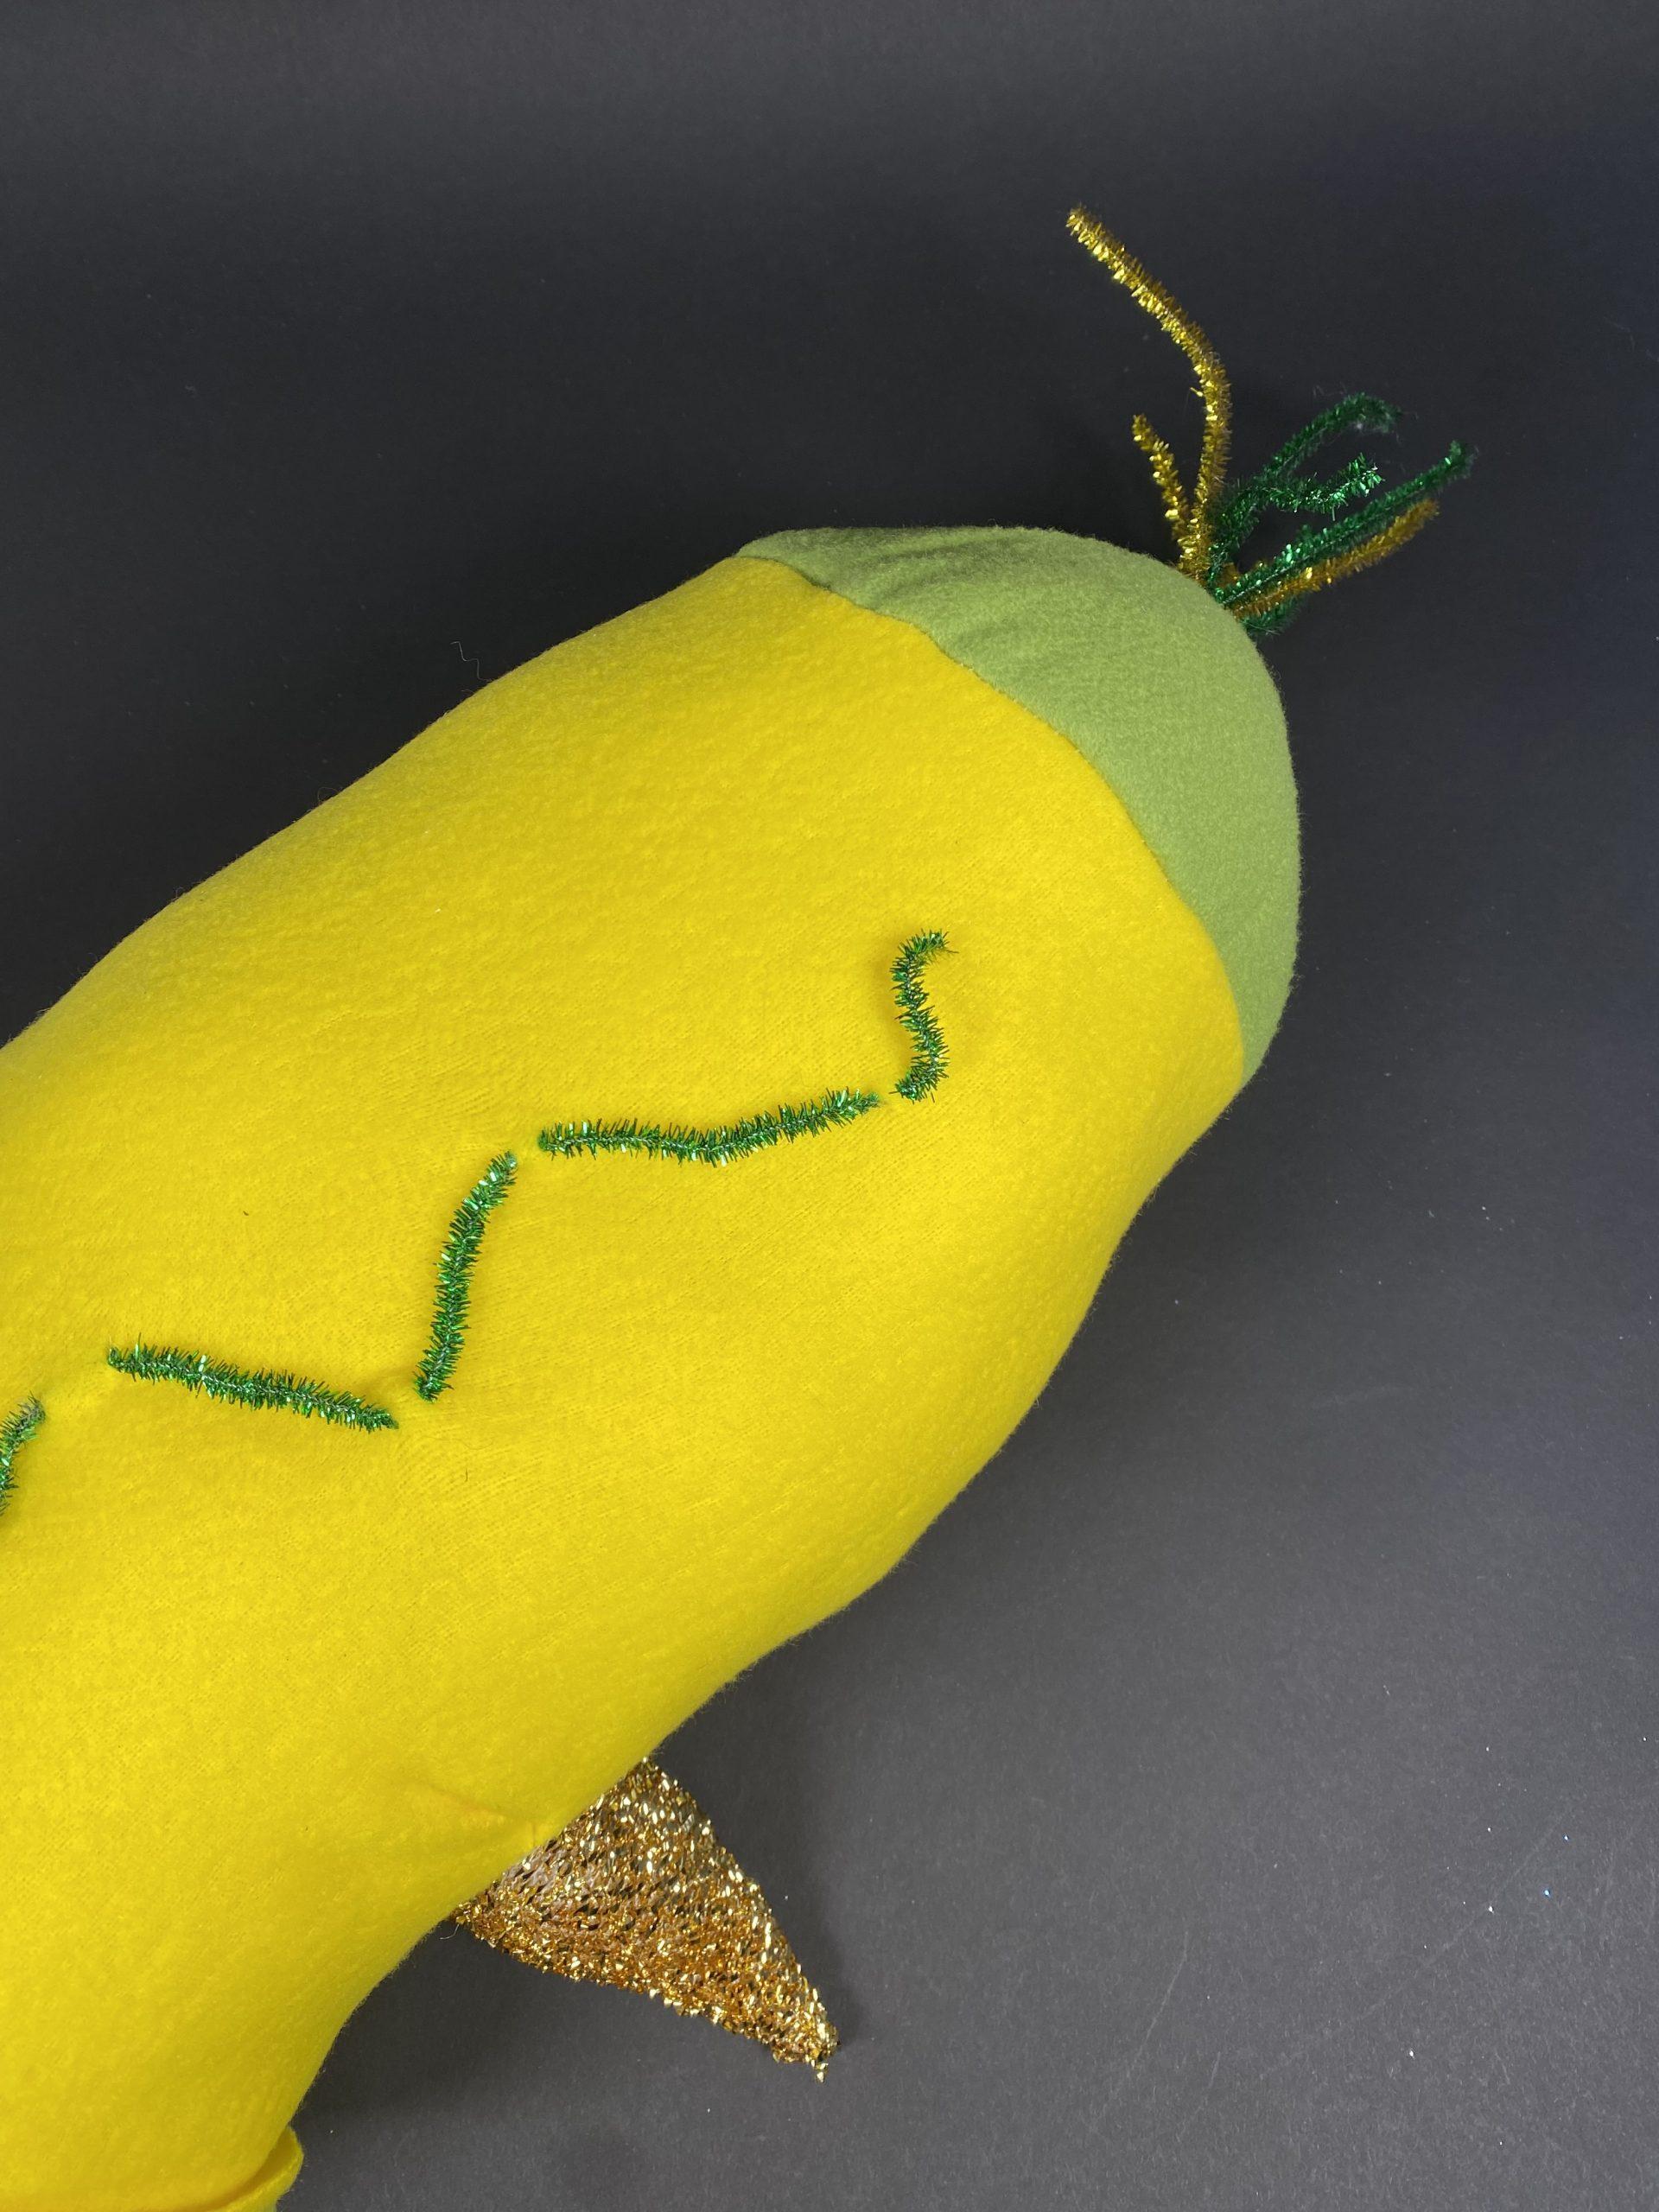
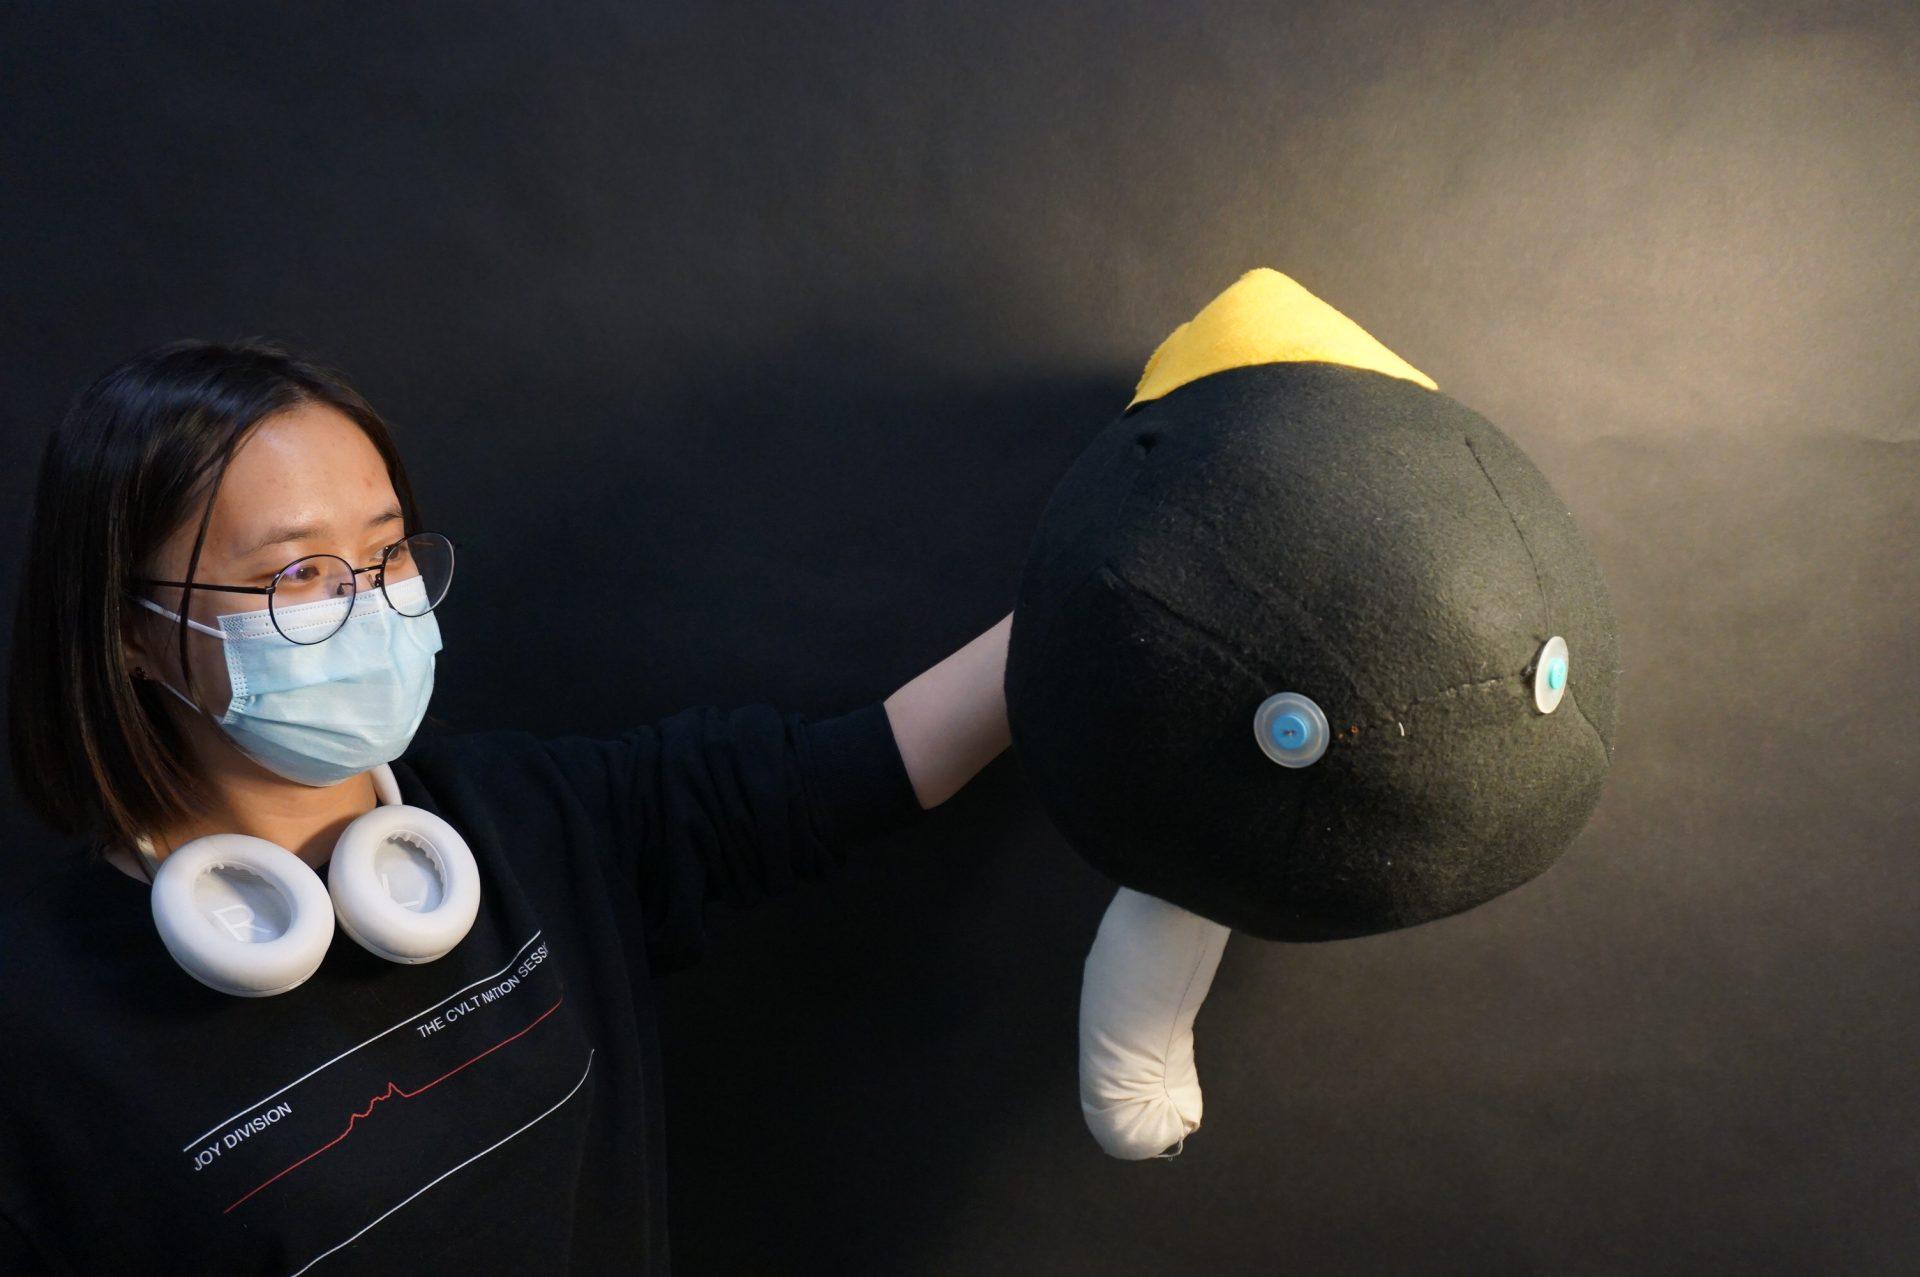
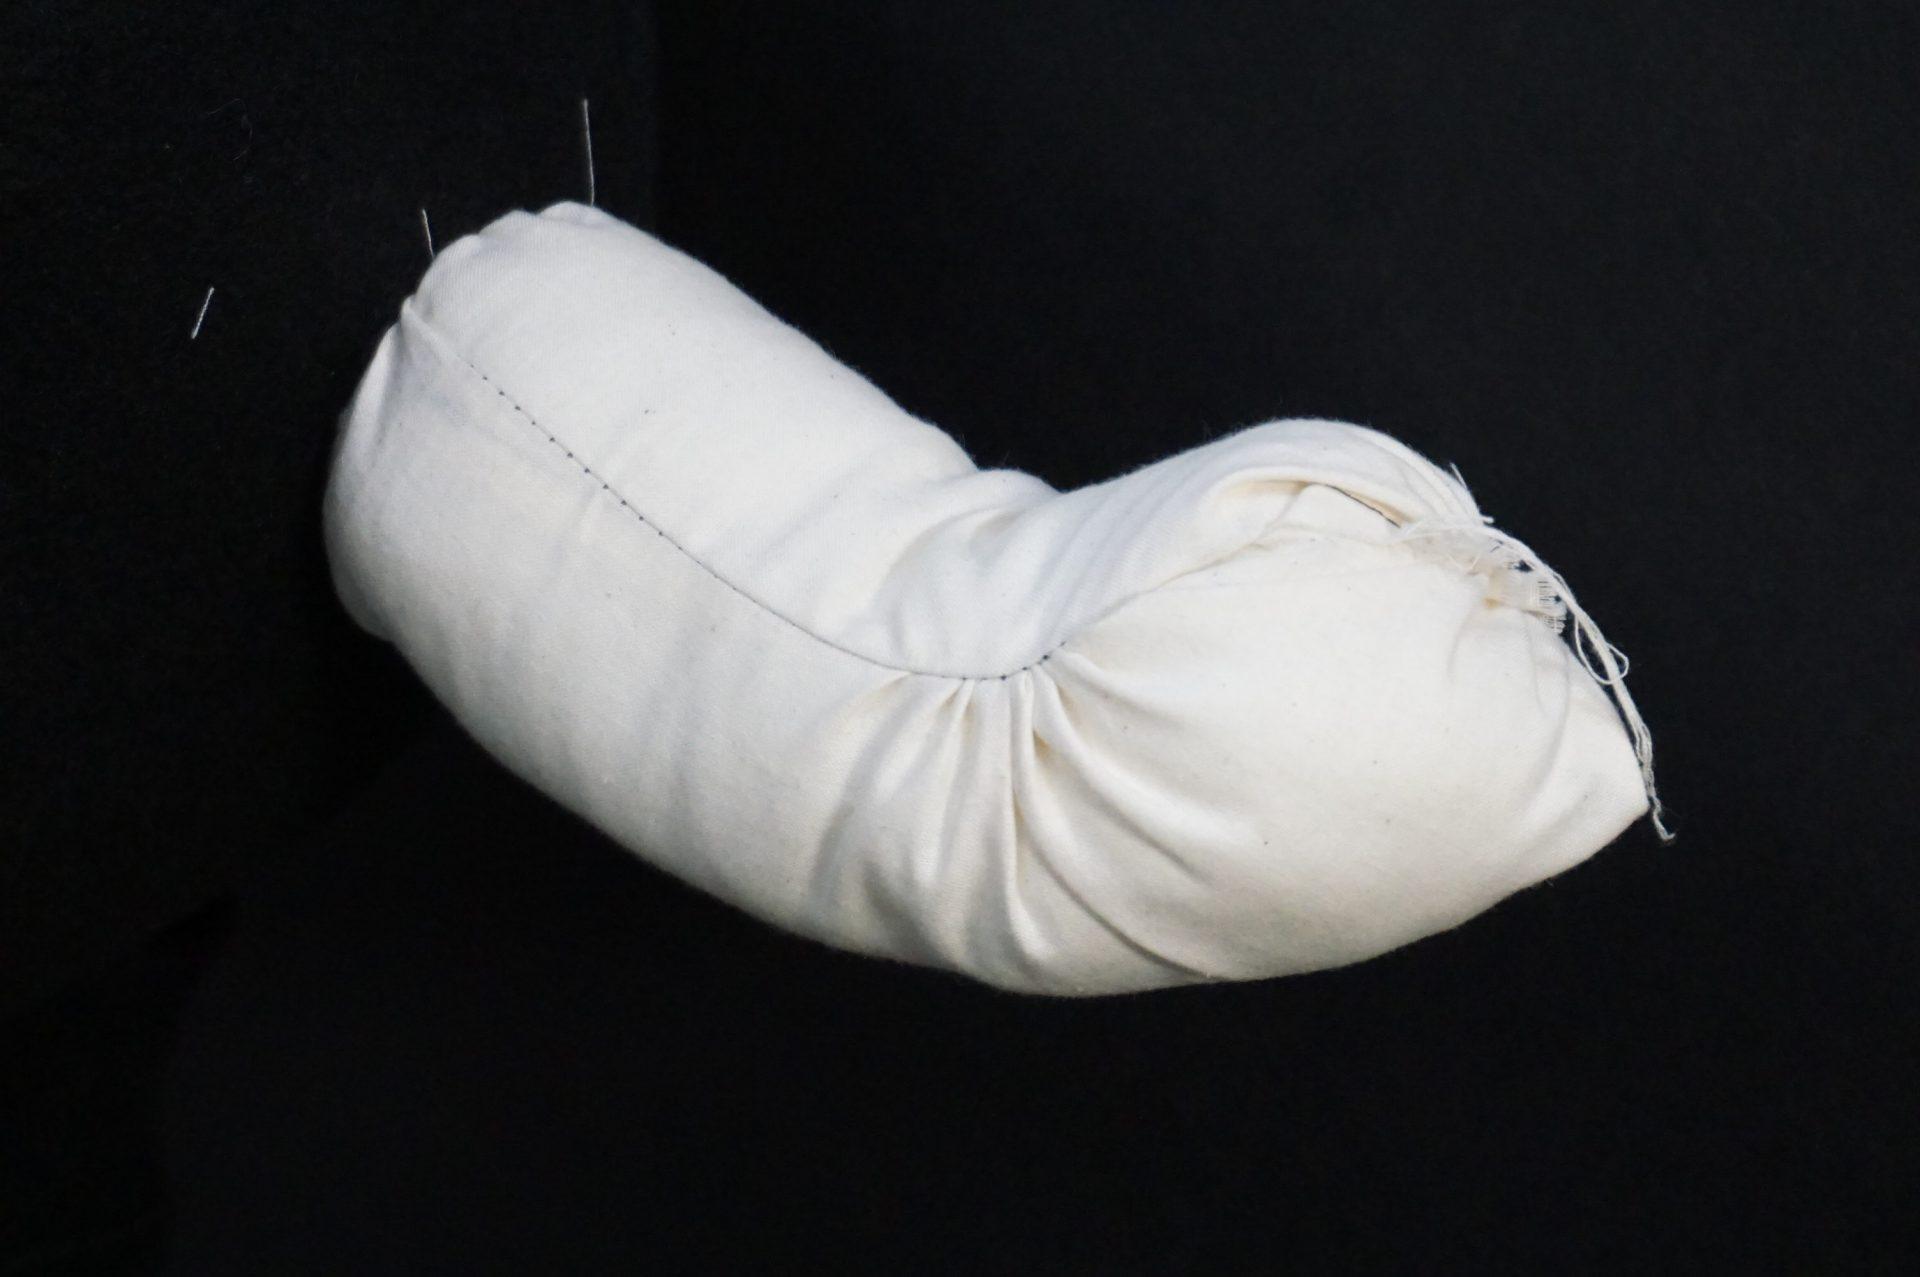
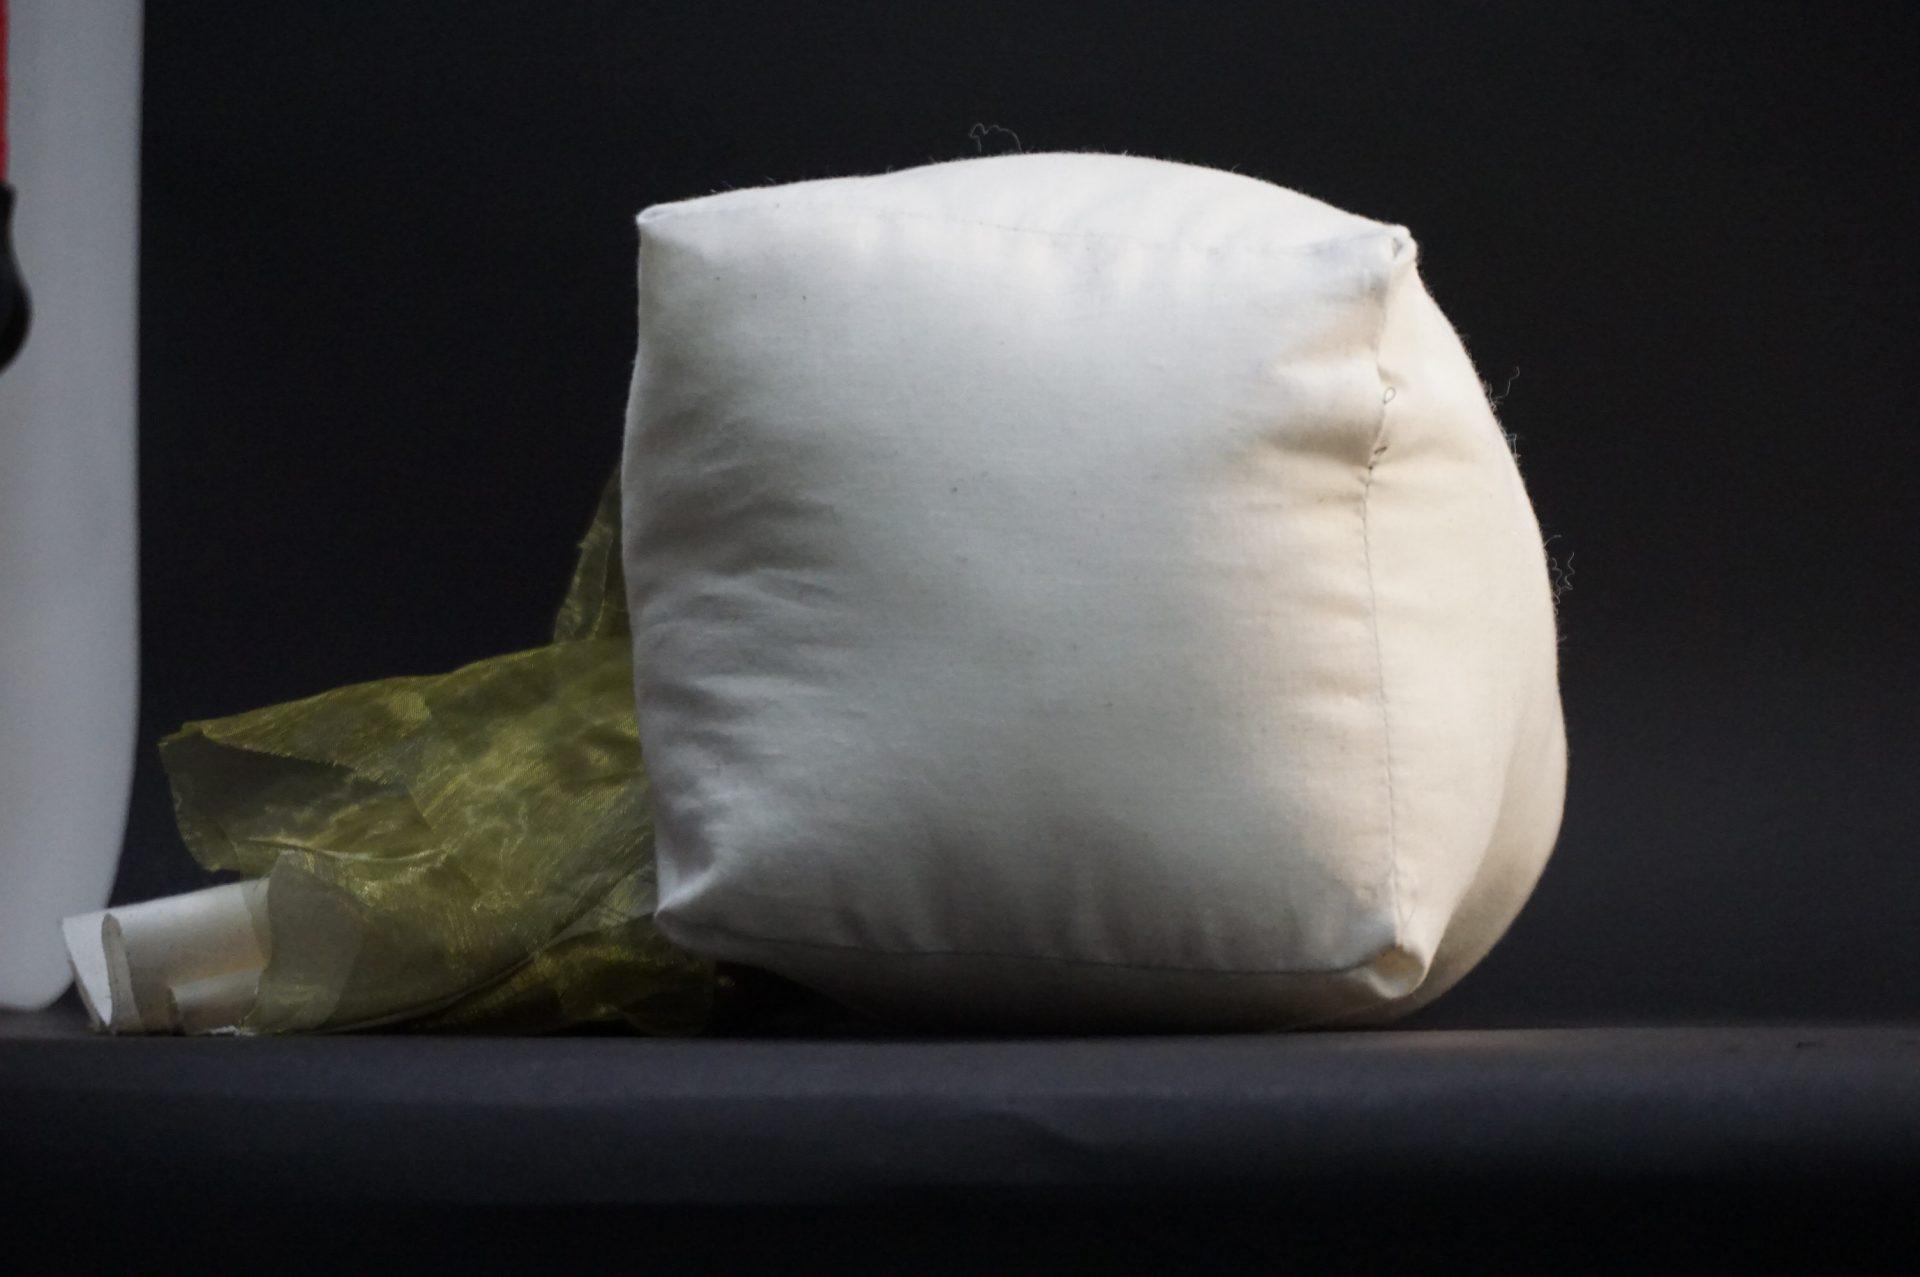
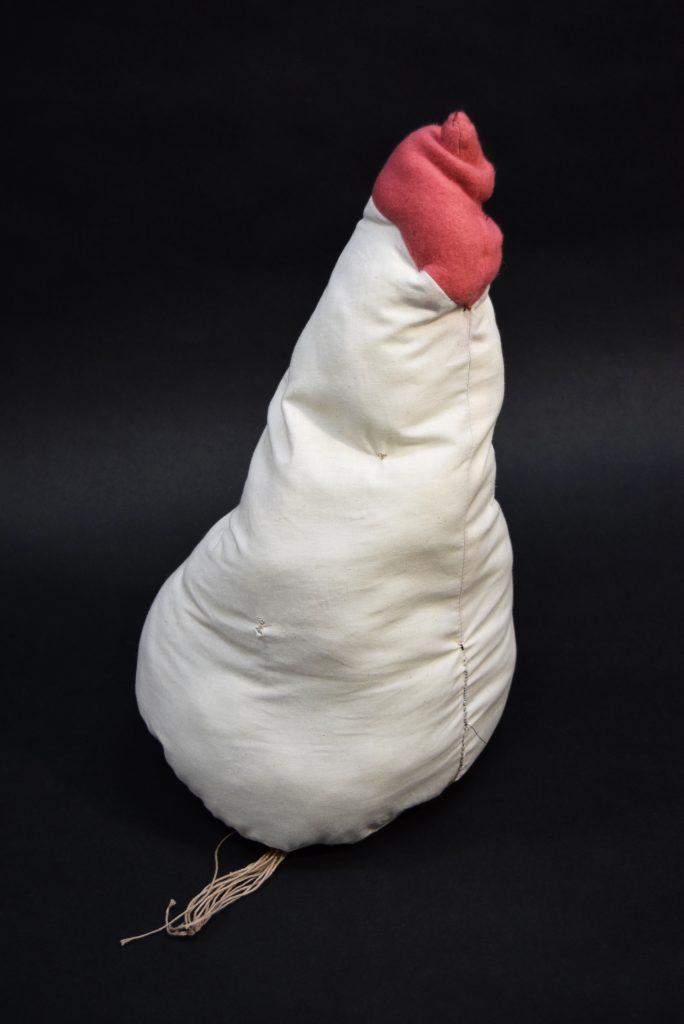
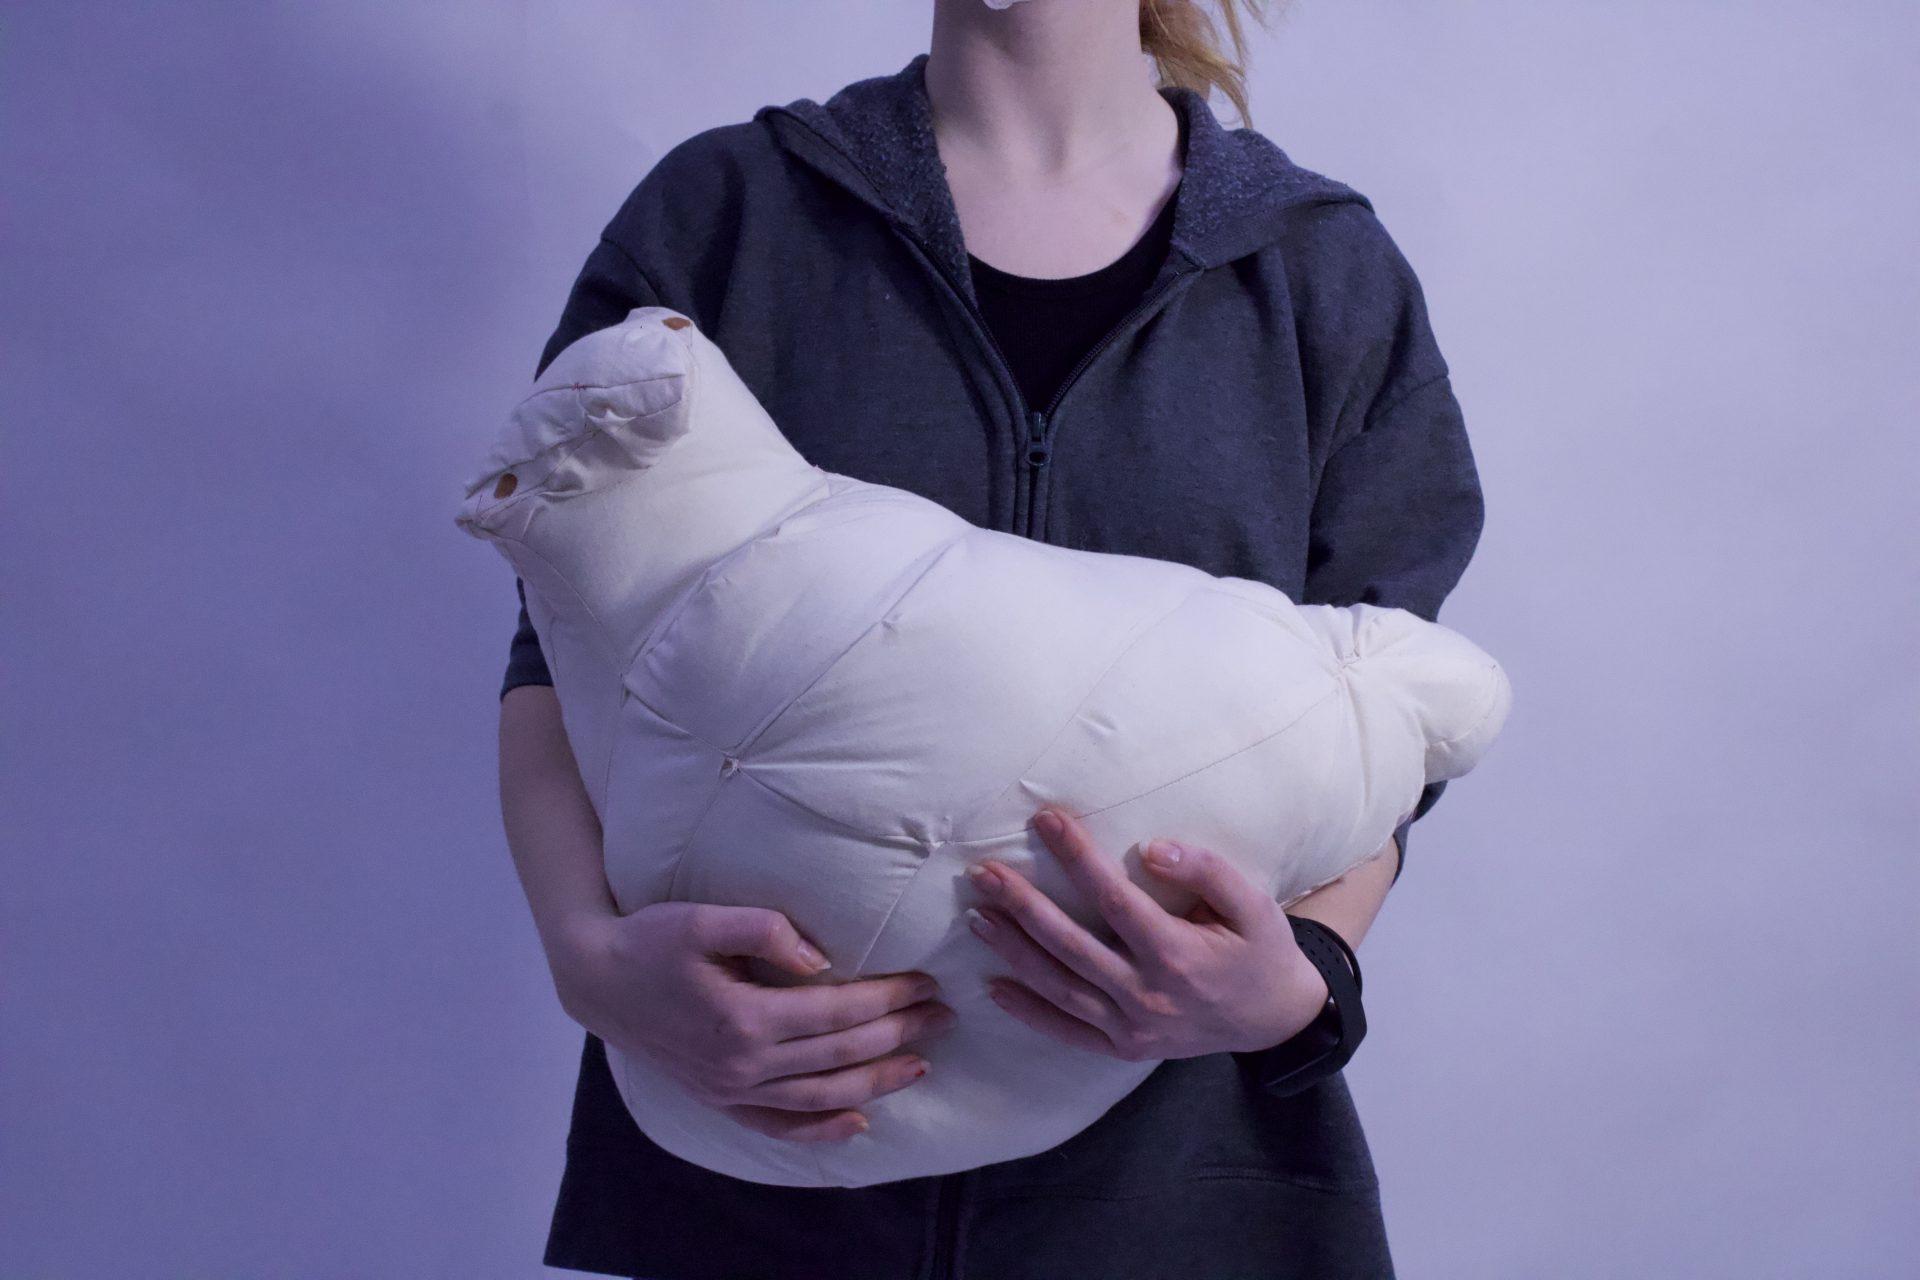
This first object takes a primary form of a sphere. I added a yellow ‘hat’ at the very top and a white ‘tail’ at the bottom. The white ‘tail’ is supposed to have some curvature in itself to make it look more interesting. I put two pieces of rectangular shape fabric together, with one piece much shorter then the other one. It turns out to have some curvature when the object is set on a table. When lifting in the air, however, the curvature is not as obvious. A possible improvement can be made by putting wires inside the white ‘tail’ part so it stays rigid and the audience could interact with the ‘tail’ by bending it. Two ‘eyes’ are sewed on to the black sphere. That is where I closed the whole object. It is interesting because I was not thinking to have them look like ‘eyes’. Lots of people commented that this object looks like a penguin. I might work towards that direction in the future.
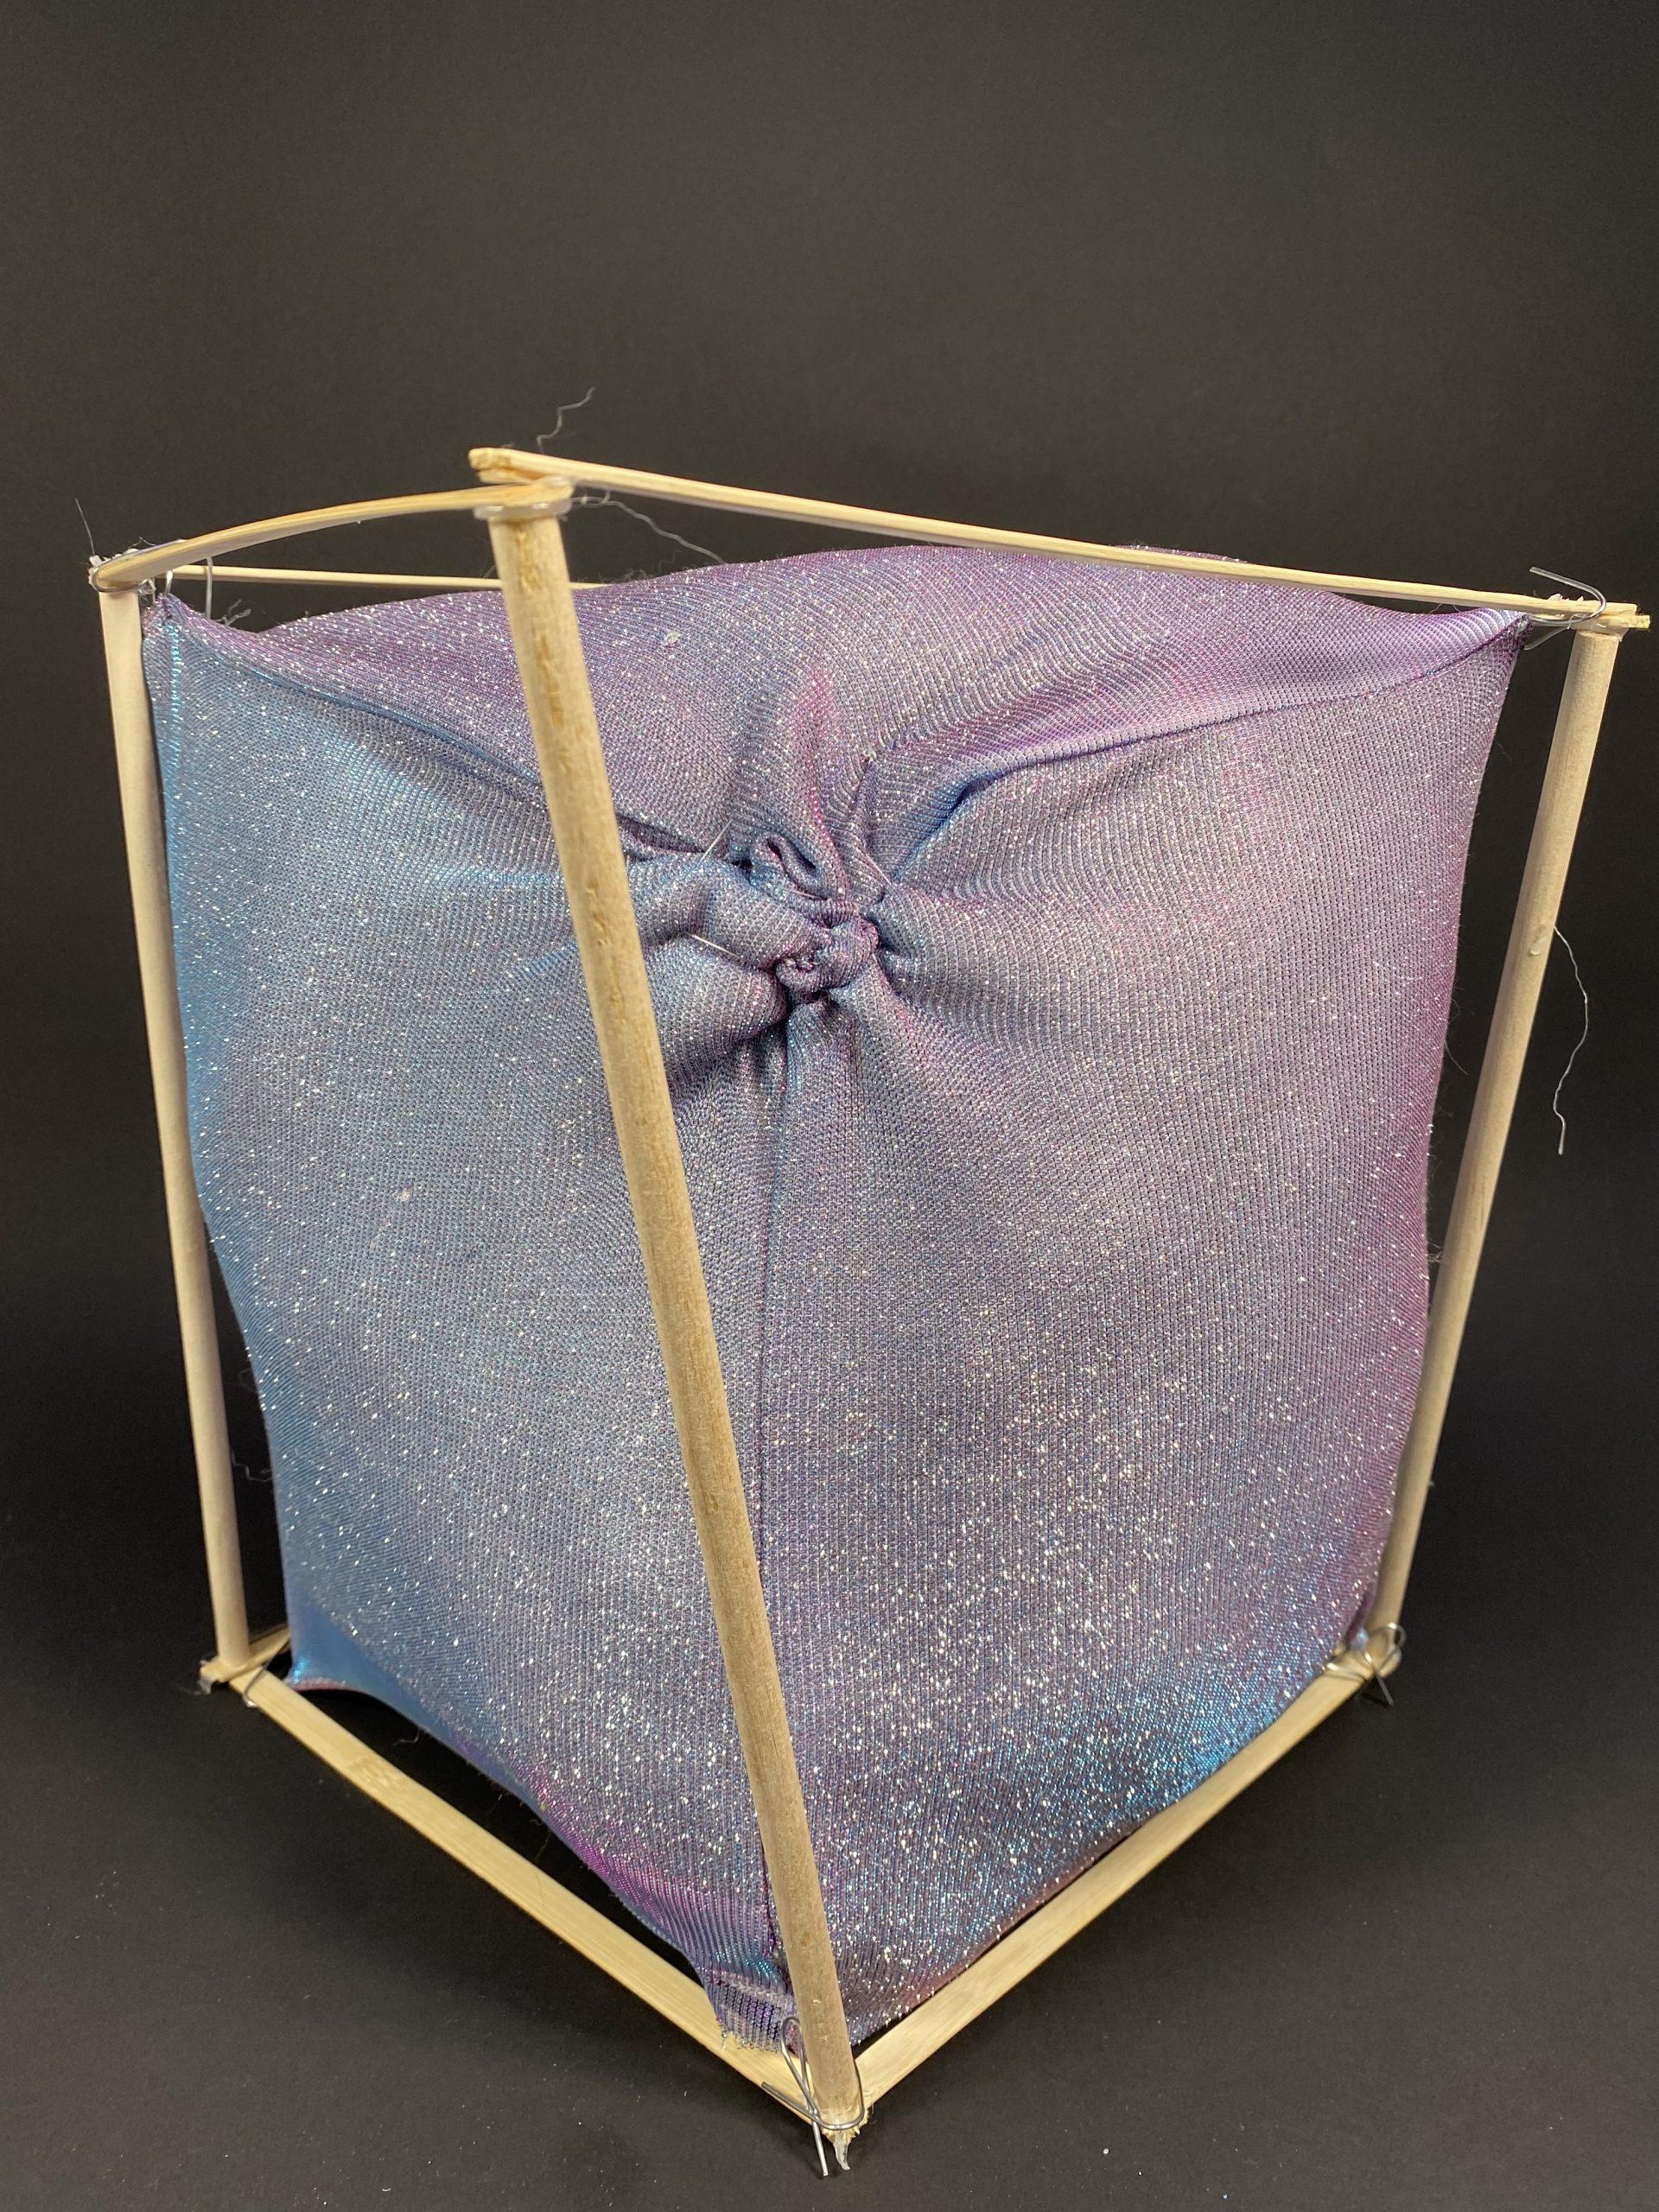
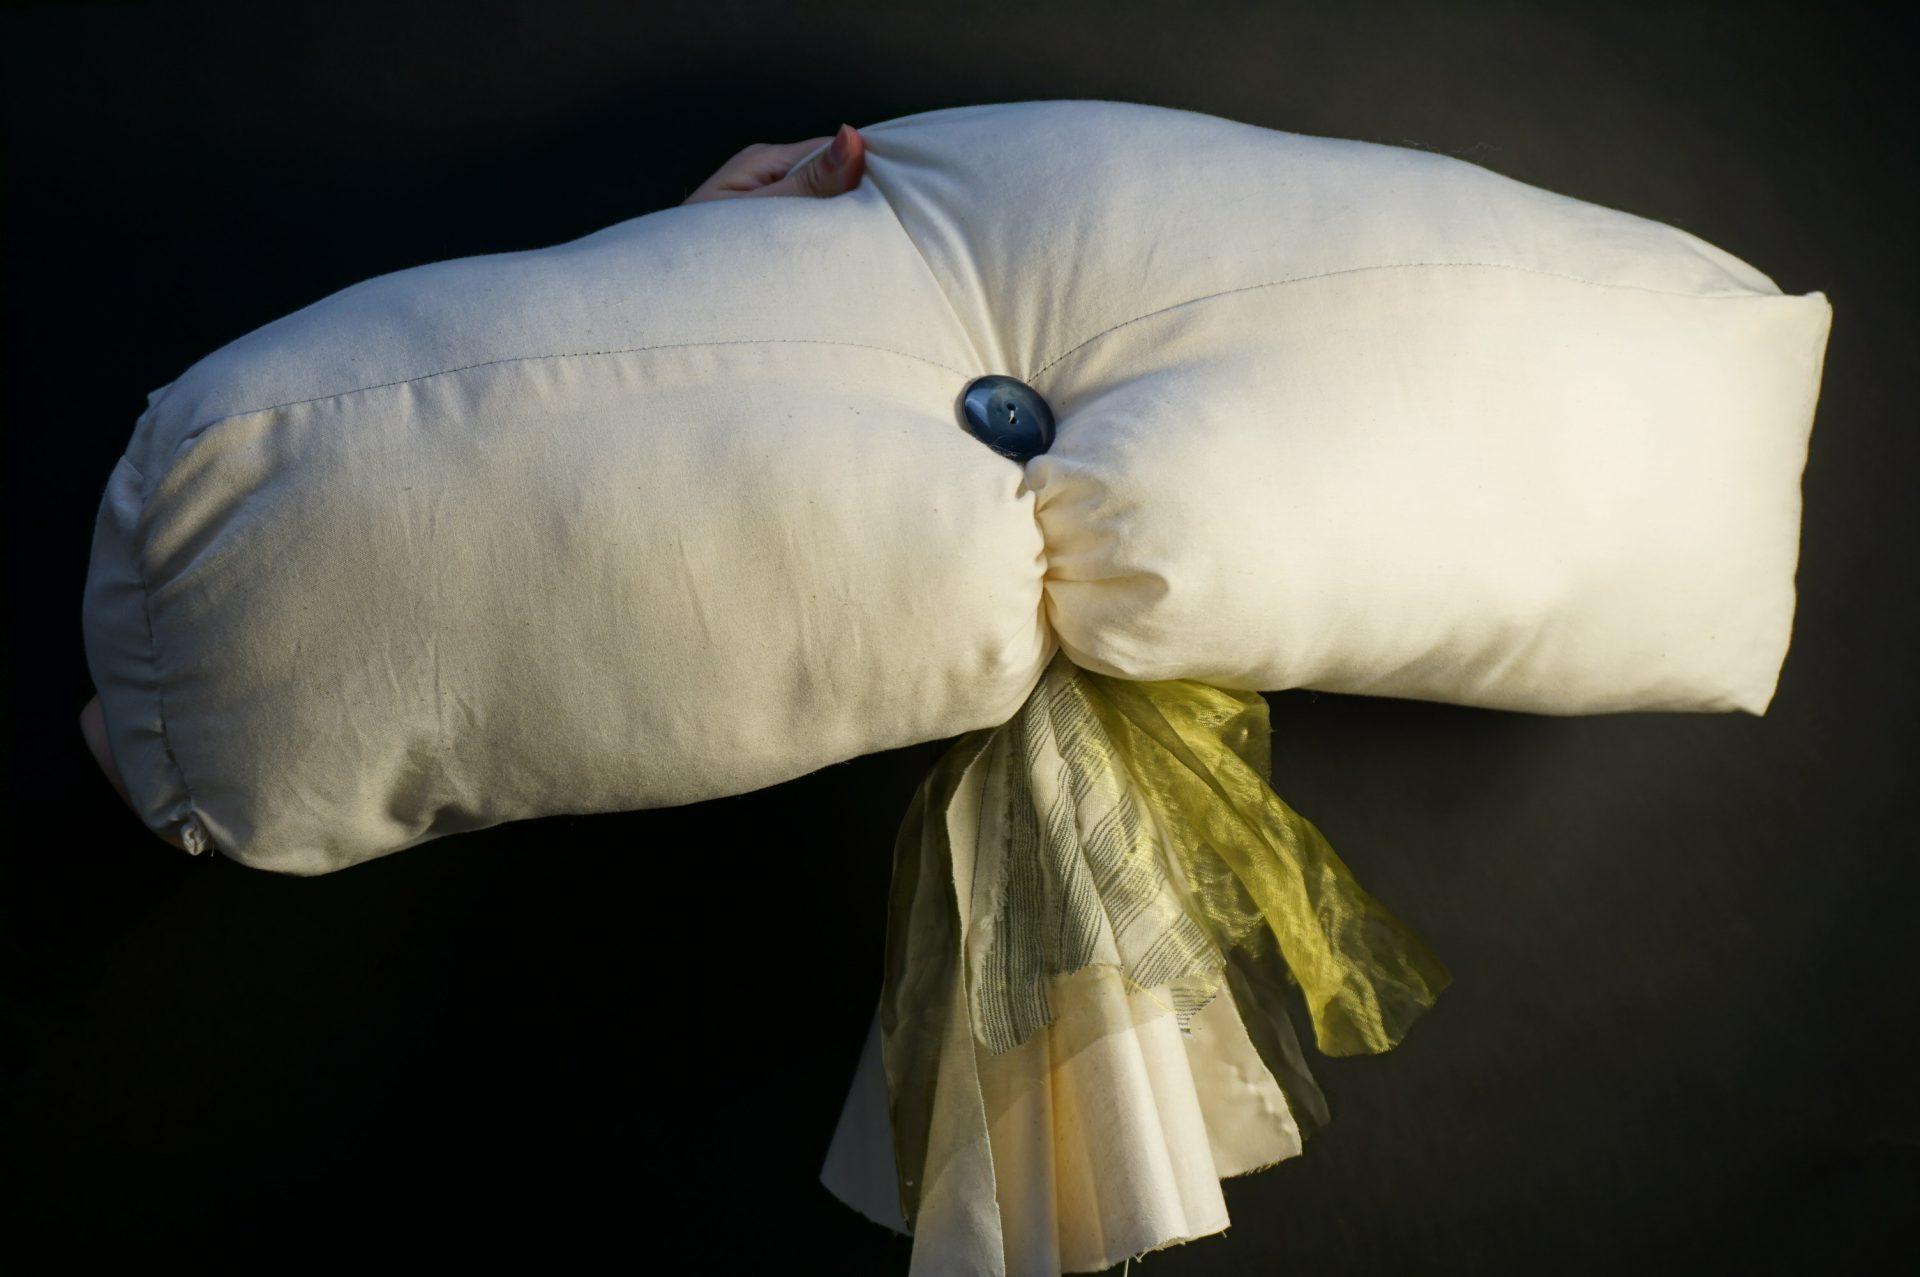
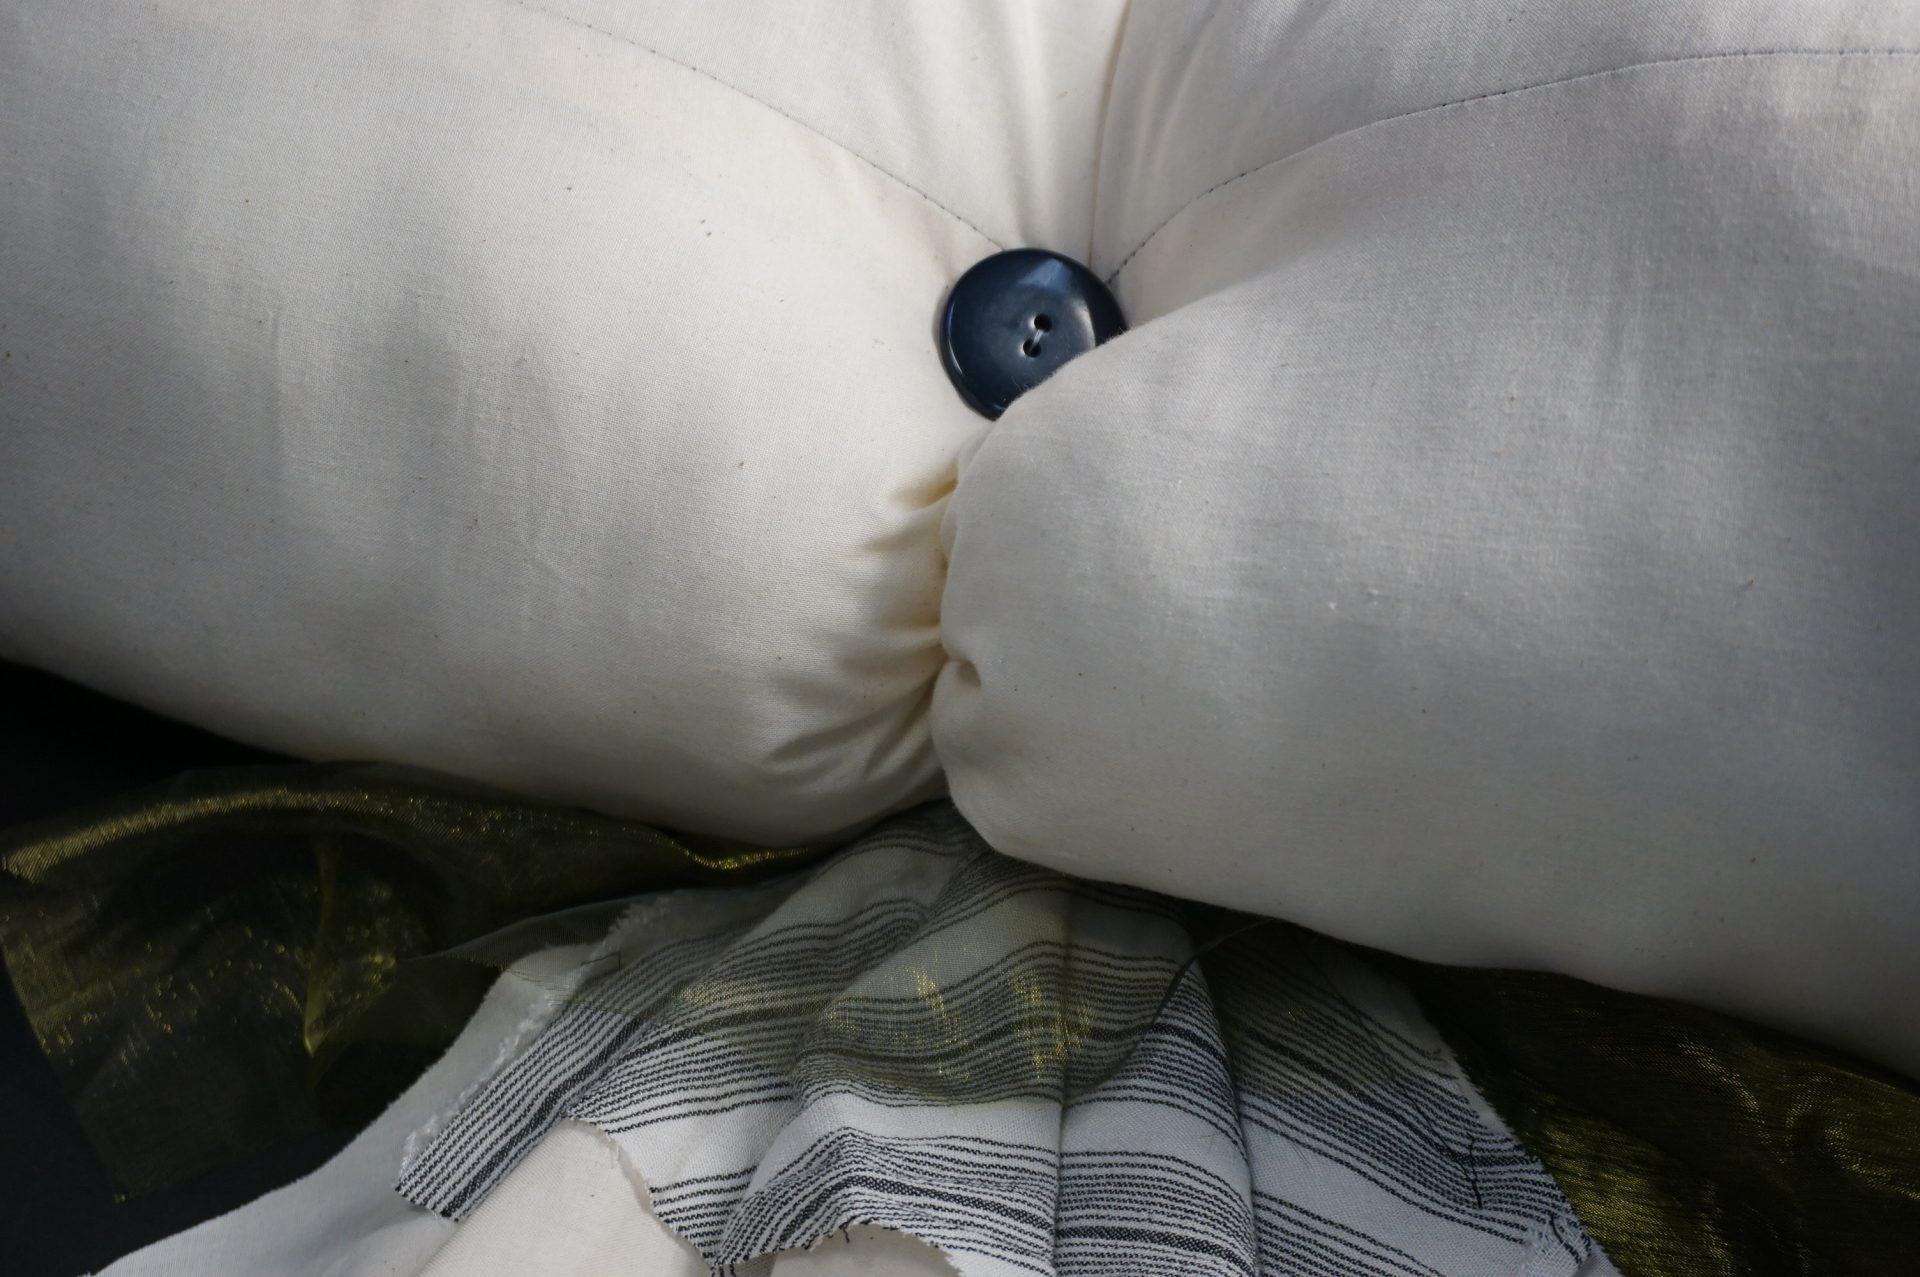
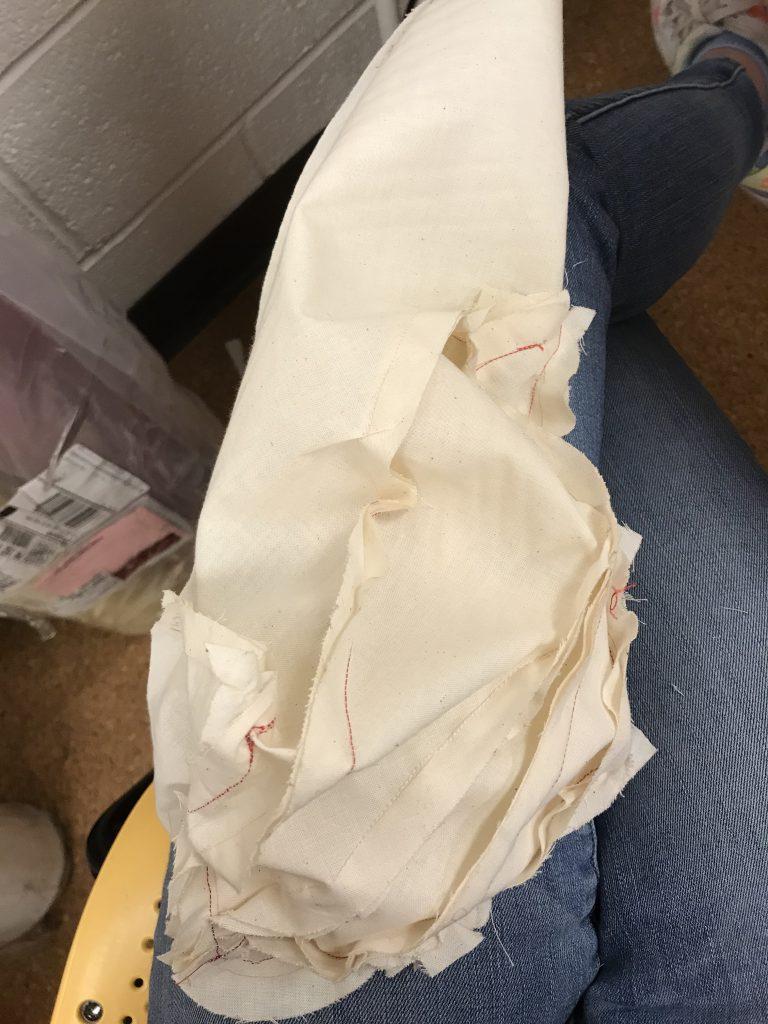
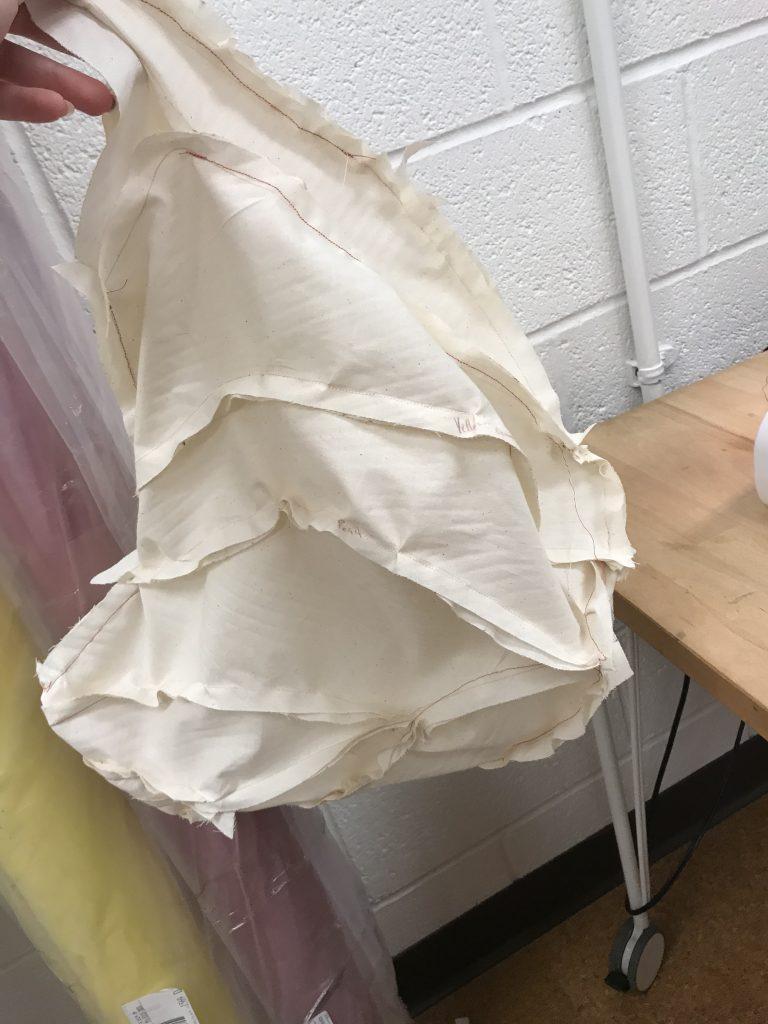
The second object is my favorite. It takes a rectangular shape as its primary shape. I put three layer of different fabrics together to make two wrinkling pieces. It probably does not turn out well because the wrinkling effect I want to have is not very obvious. For further improvement, I could iron those fabrics first and sew them afterwards. I then attach these two pieces on to the primary shape and pulled it with a strong string. The button was attached later on to the knot where that strong string came through. My favorite part about this object is that two attached pieces. I appreciate how the light shines through the green web-like fabric and how its texture differs from the rest. I also like the detail of this one. The wrinkles near the button (picture 3) and the tension at the side (picture 4) show how the fabric deforms under pushing and pulling.
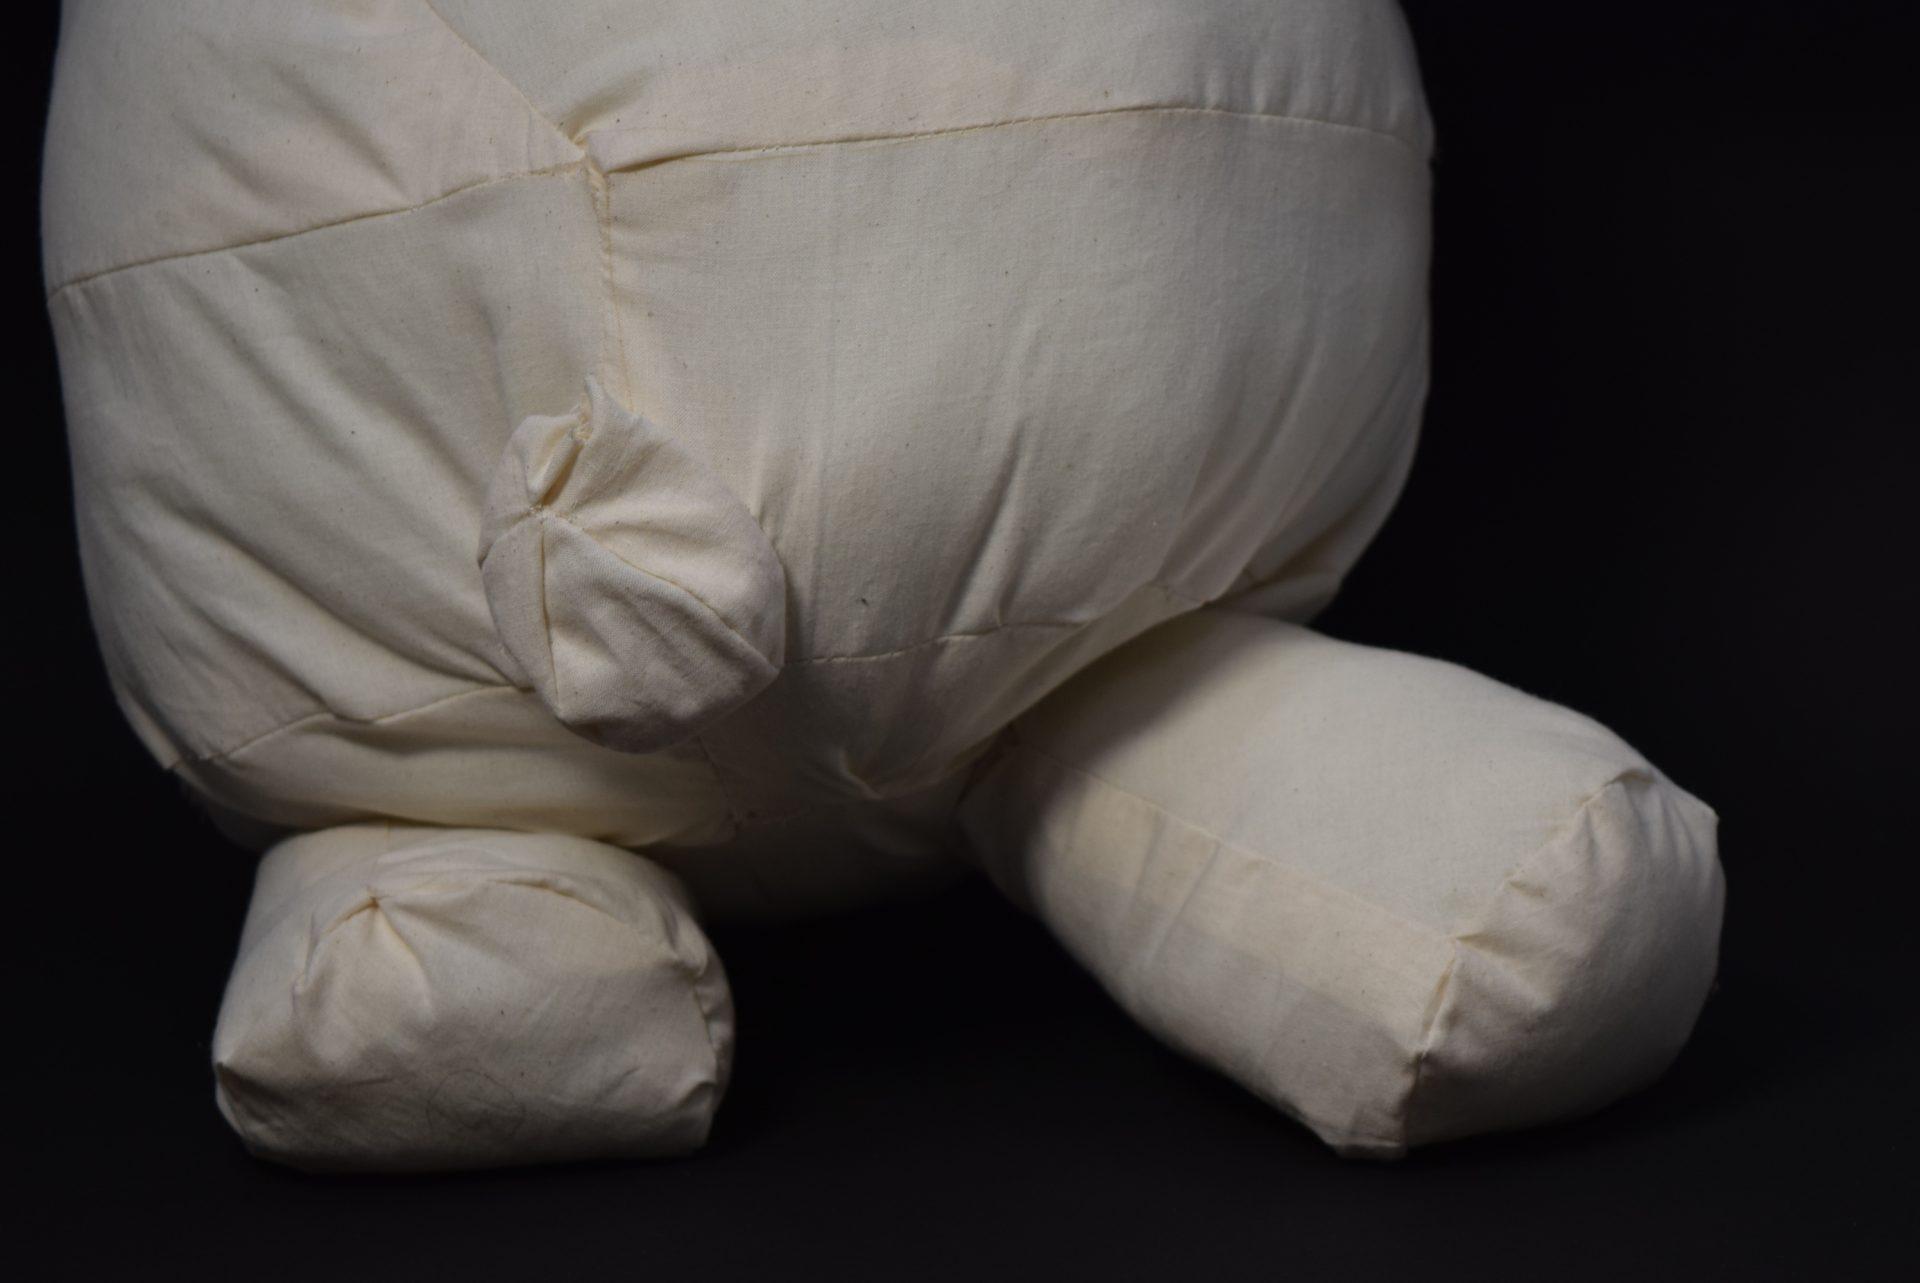
The third one is my Rhino piece. I made a mistake when assembled the bear’s head and body together. Lots of people told me that this mistake was actually interesting and had its own artistic value. Probably it’s because I am an engineer, I find it super hard to convince myself this mistake is not just a mistake. I am so used to build or solve problems with steps and try my best to avoid mistakes. And I definitely should try to work with some randomness and enjoy that. I spent around 7 hours on this object since it had so many pieces. I also lost several pieces so I had to laser cut again to make up for that loss. Some possible improvements can be done in the future: better and more patient sewing, colorfulness, take care of my pieces and so on.
I used my first inflatable as an opportunity to get situated with some of the basic techniques. Object 1 is just a cube with a few added features – baffling using thread once the form was stuffed, a plane of fabric inside the cube also acting as a baffle, and some stitching on the outside to cinch the fabric and add texture. I liked the secrecy of the plane inside the cube, and the thoughtfulness it required when assembling the form.
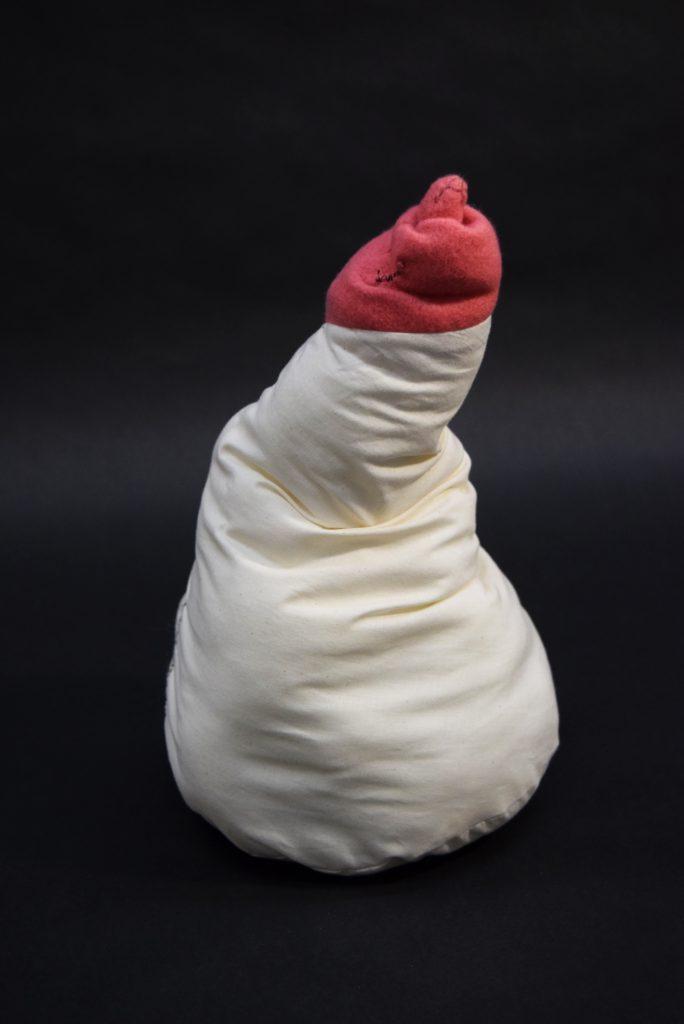
Object 2: Cone Breast
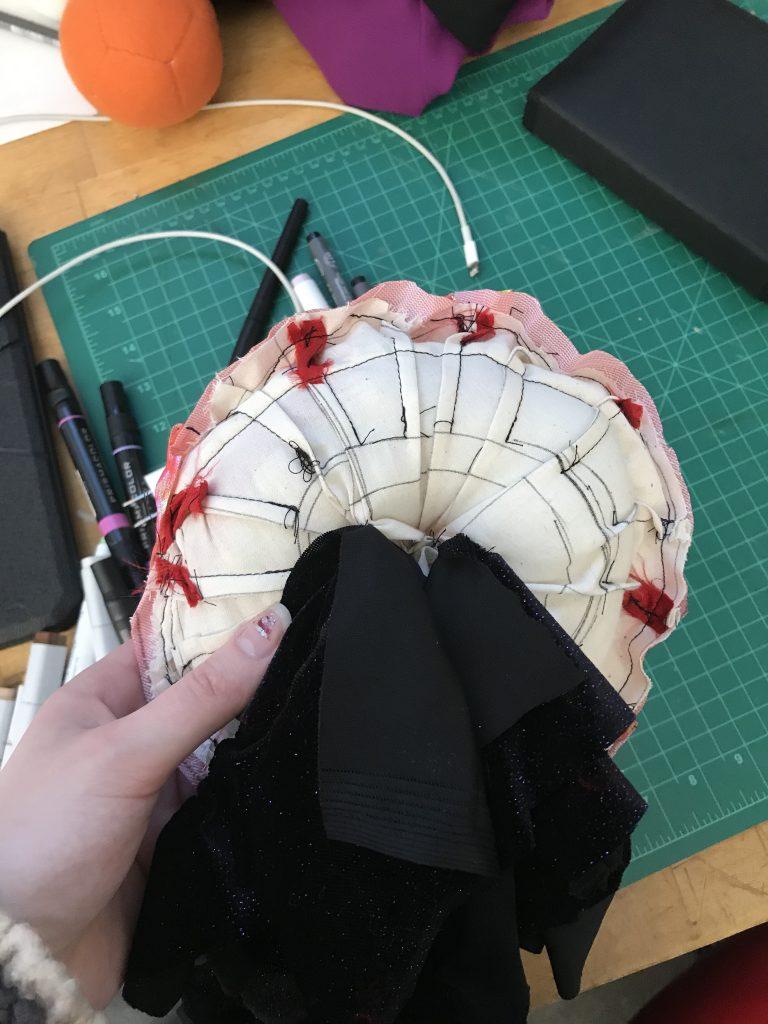
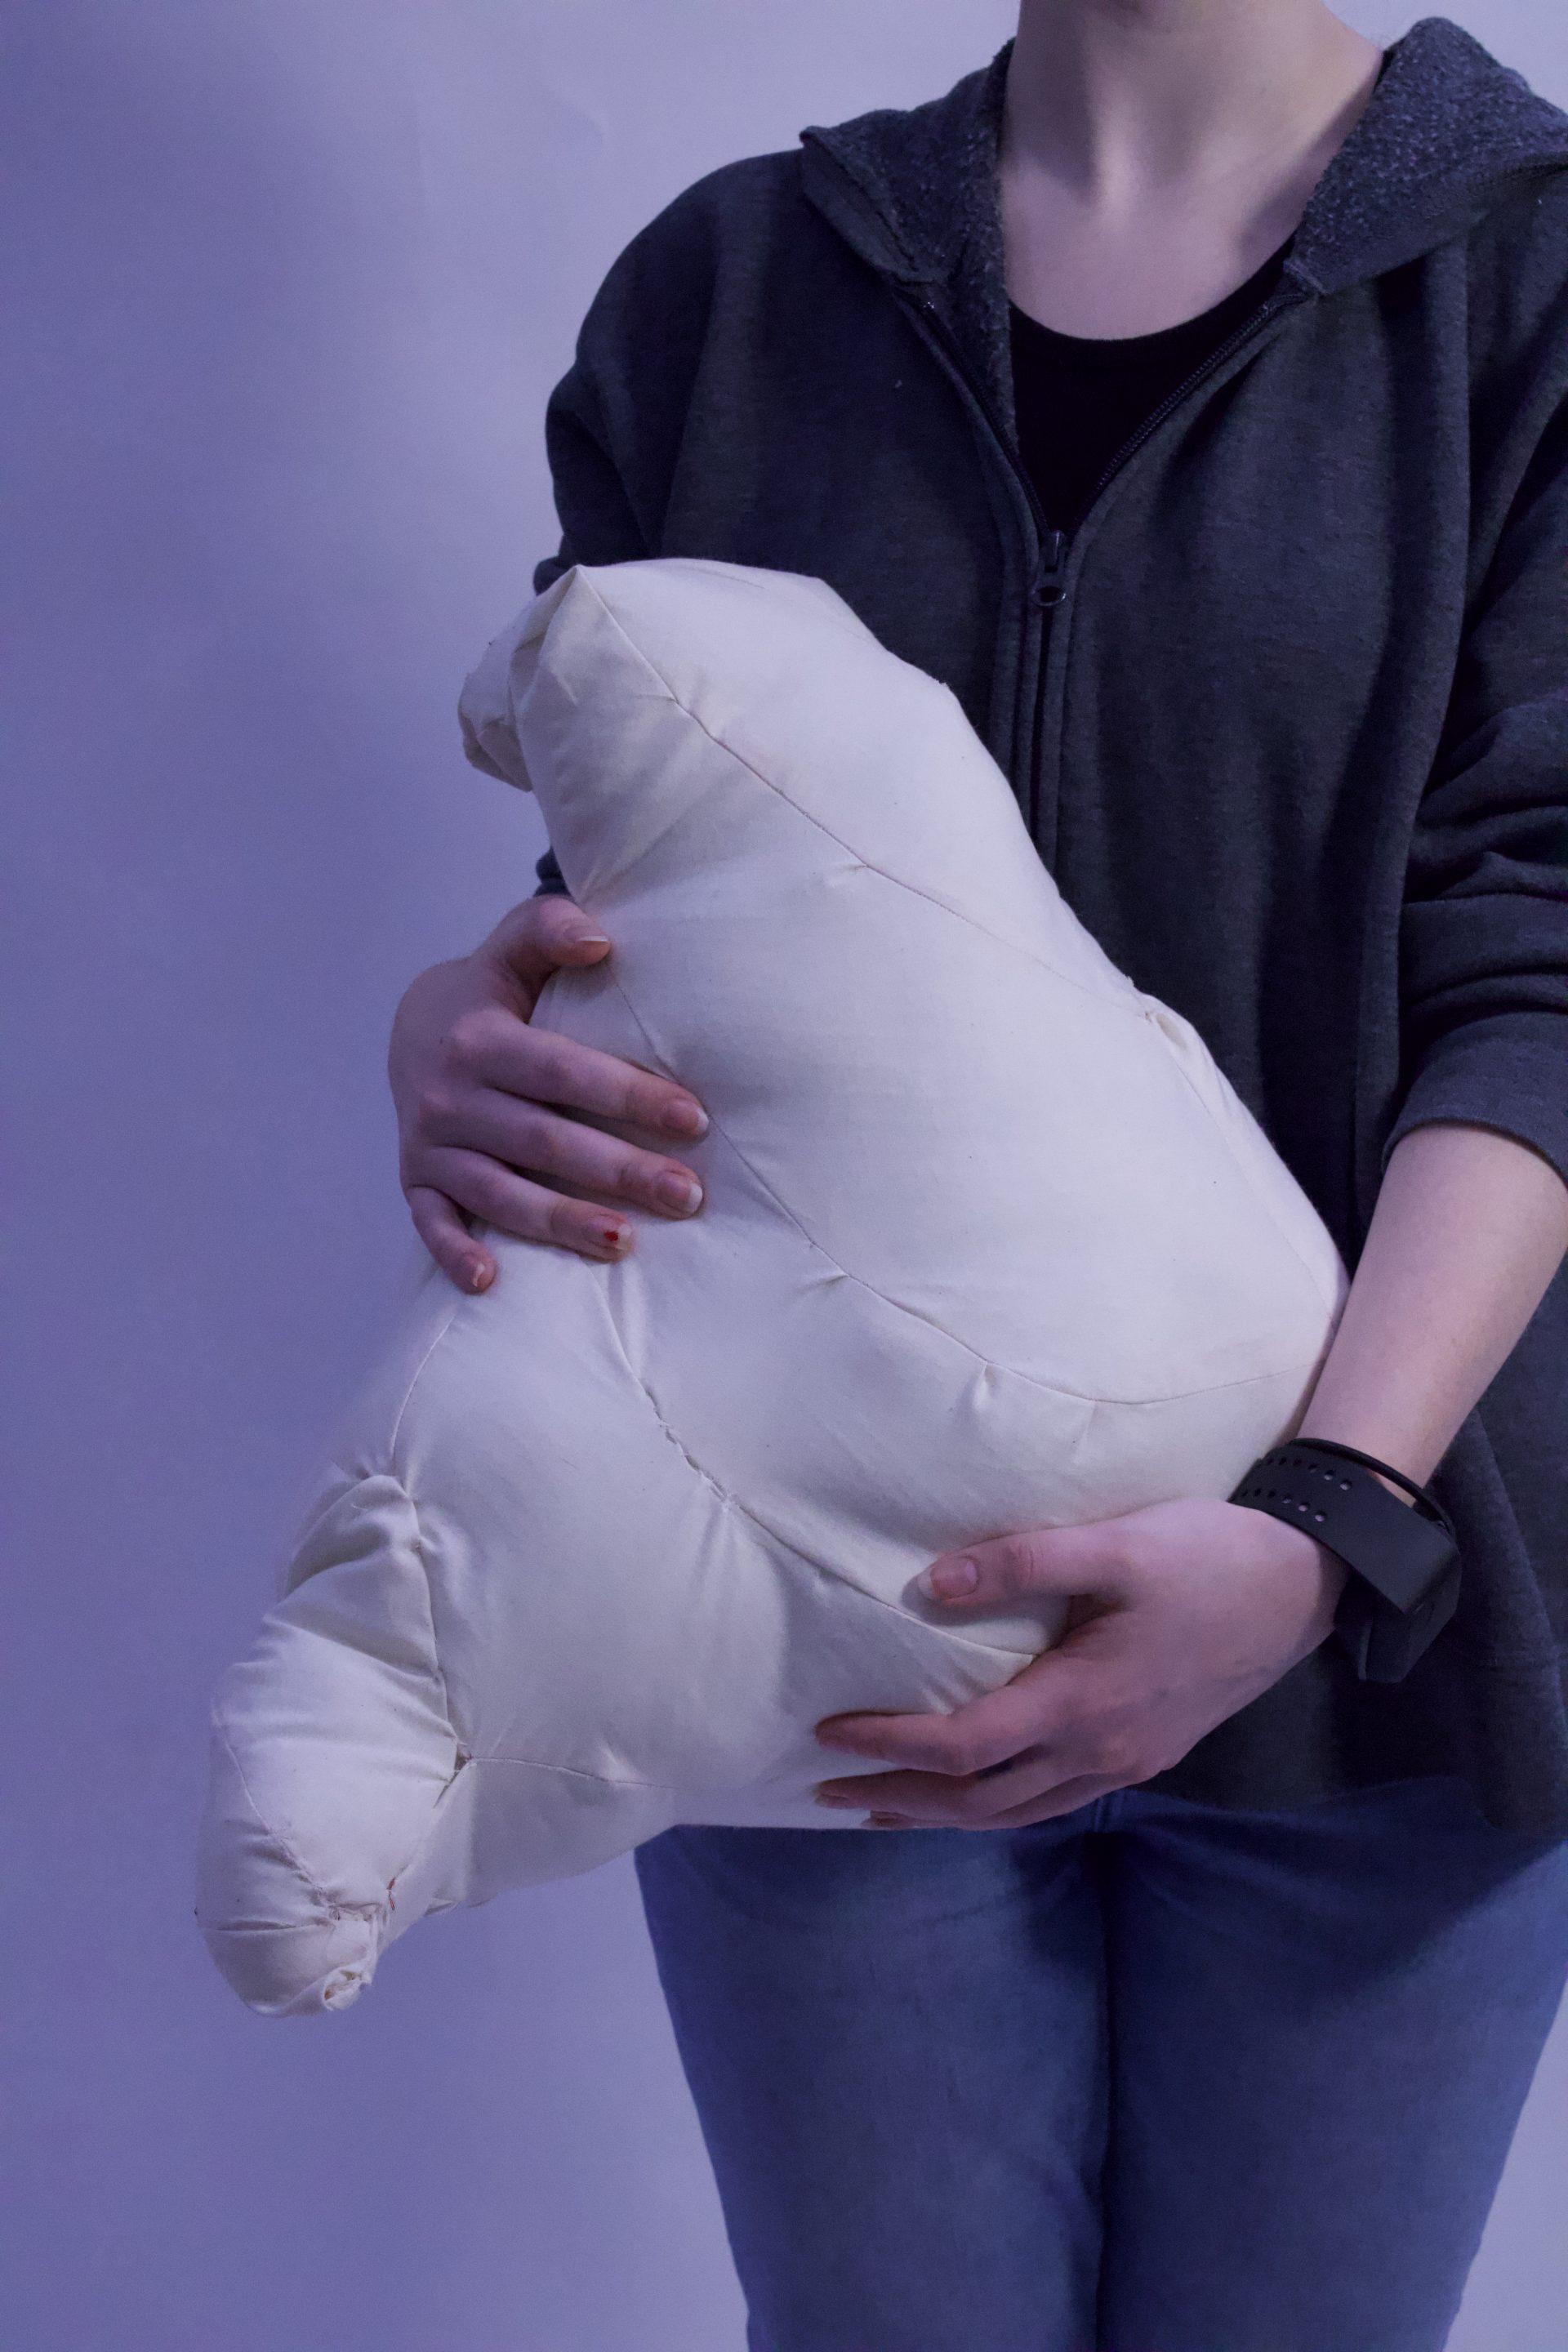
I wanted to construct my second object with a little more intention, so I created a manipulatable cone-shaped breast. My inspiration came from women’s style in the ’50s, when cone-shaped breasts were popular. I was also thinking about how women are constantly manipulating their bodies in order to meet society’s beauty standards. First, I constructed the basic cone shape. Then, I partially filled it, and attached strings to the wall of the cone. I cut holes in the wall so I could tie the string around the fabric (sewing the string in seemed too challenging). Then, I routed the threat out of the inflatable via a hole in the bottom of the cone. When you hold the cone from the bottom and pull on the strings, the cone collapses. Thinking technically about this piece, I enjoyed the interactive feature but also the idea of having elements that are both inside and outside of the object.
Object 3 – Sphere in a sphere
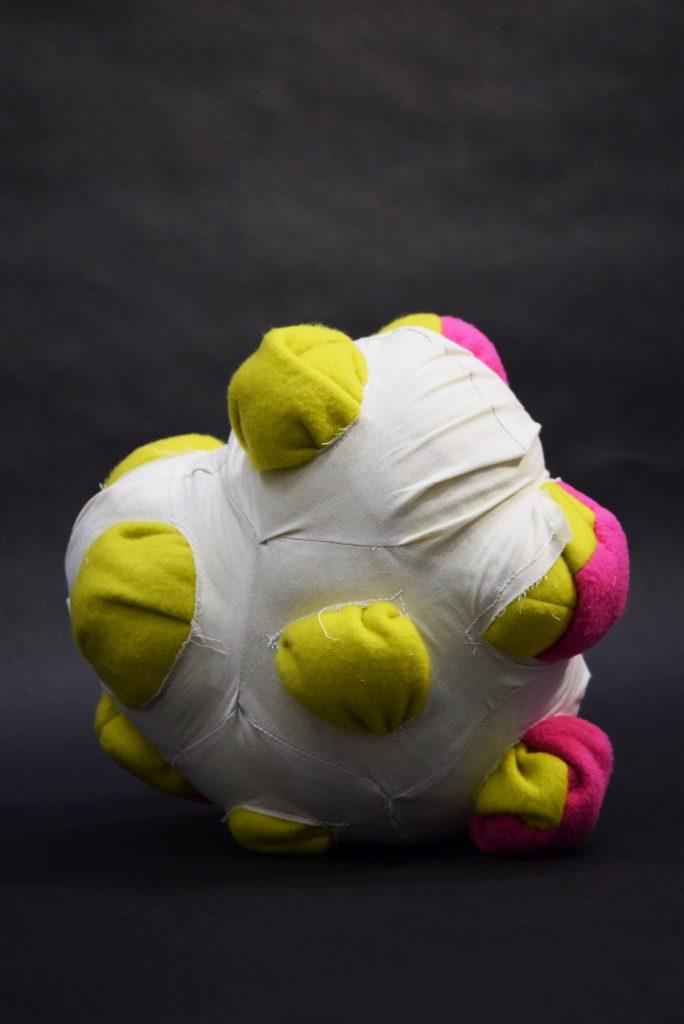
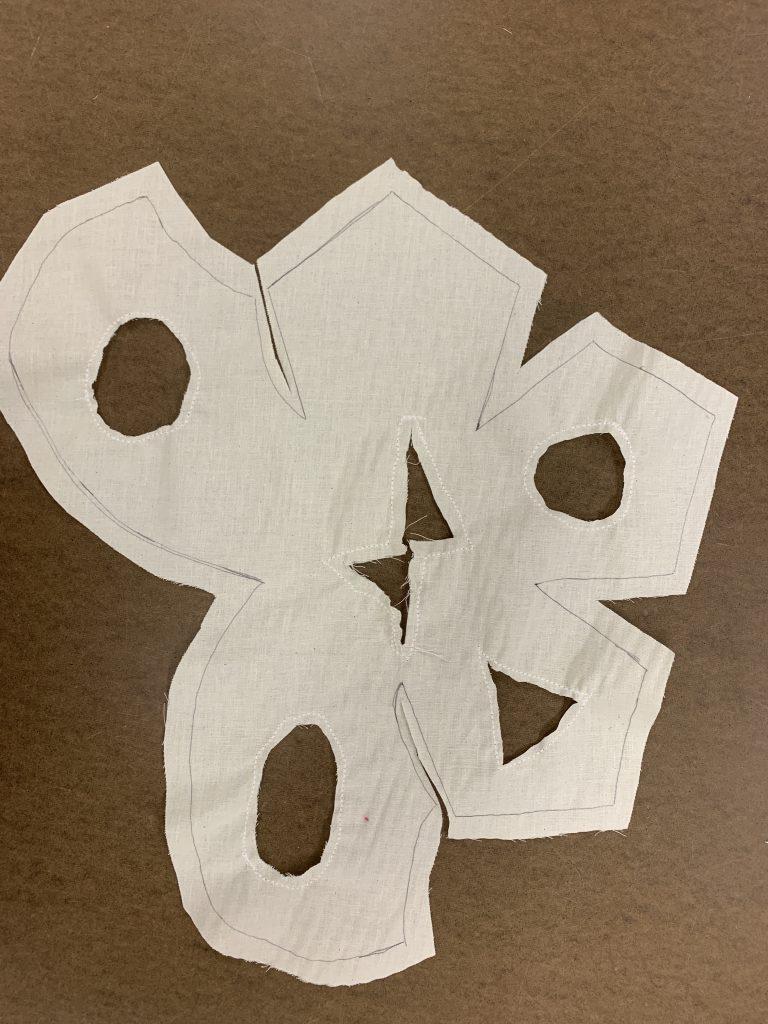
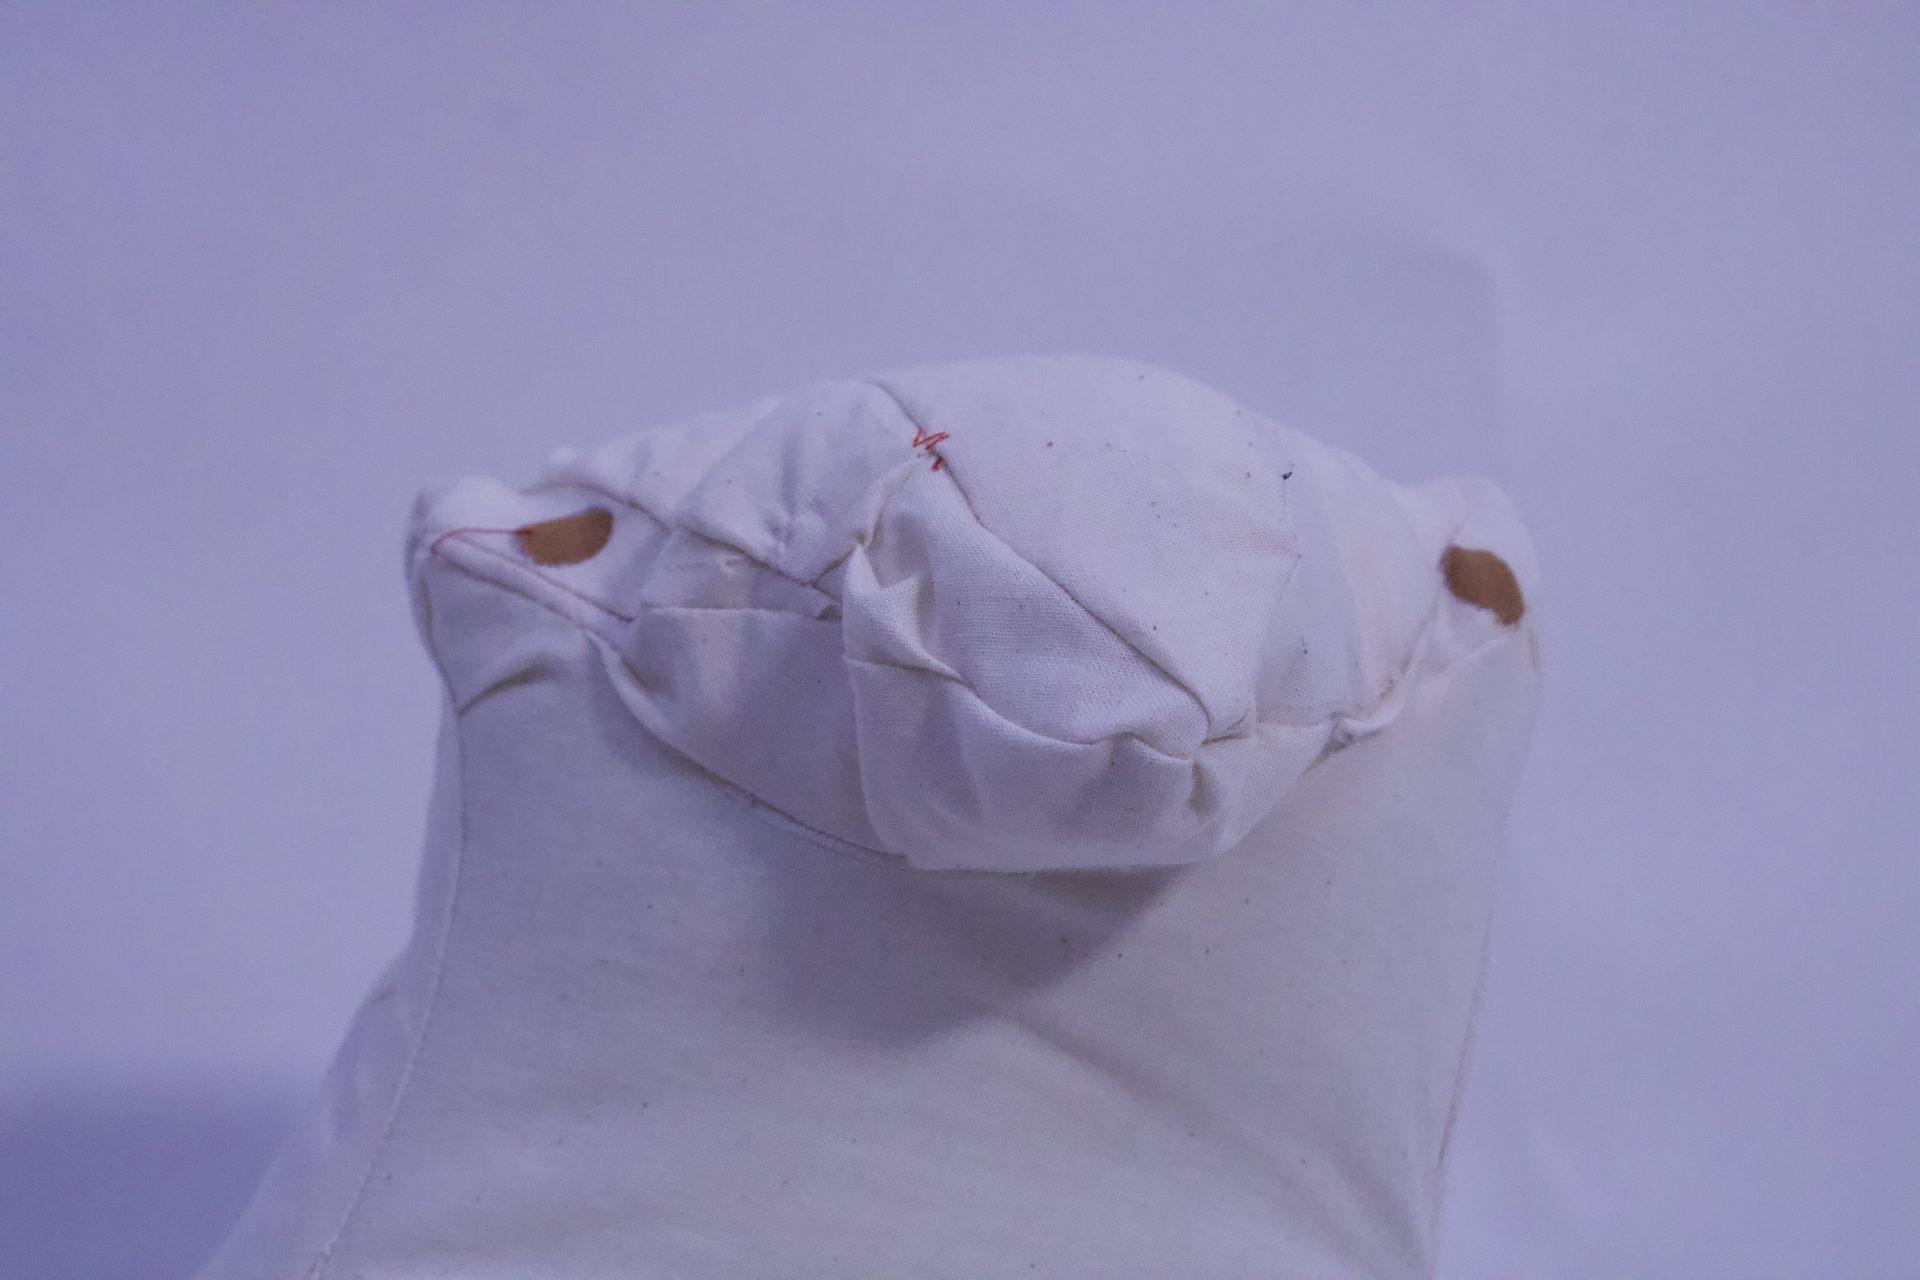
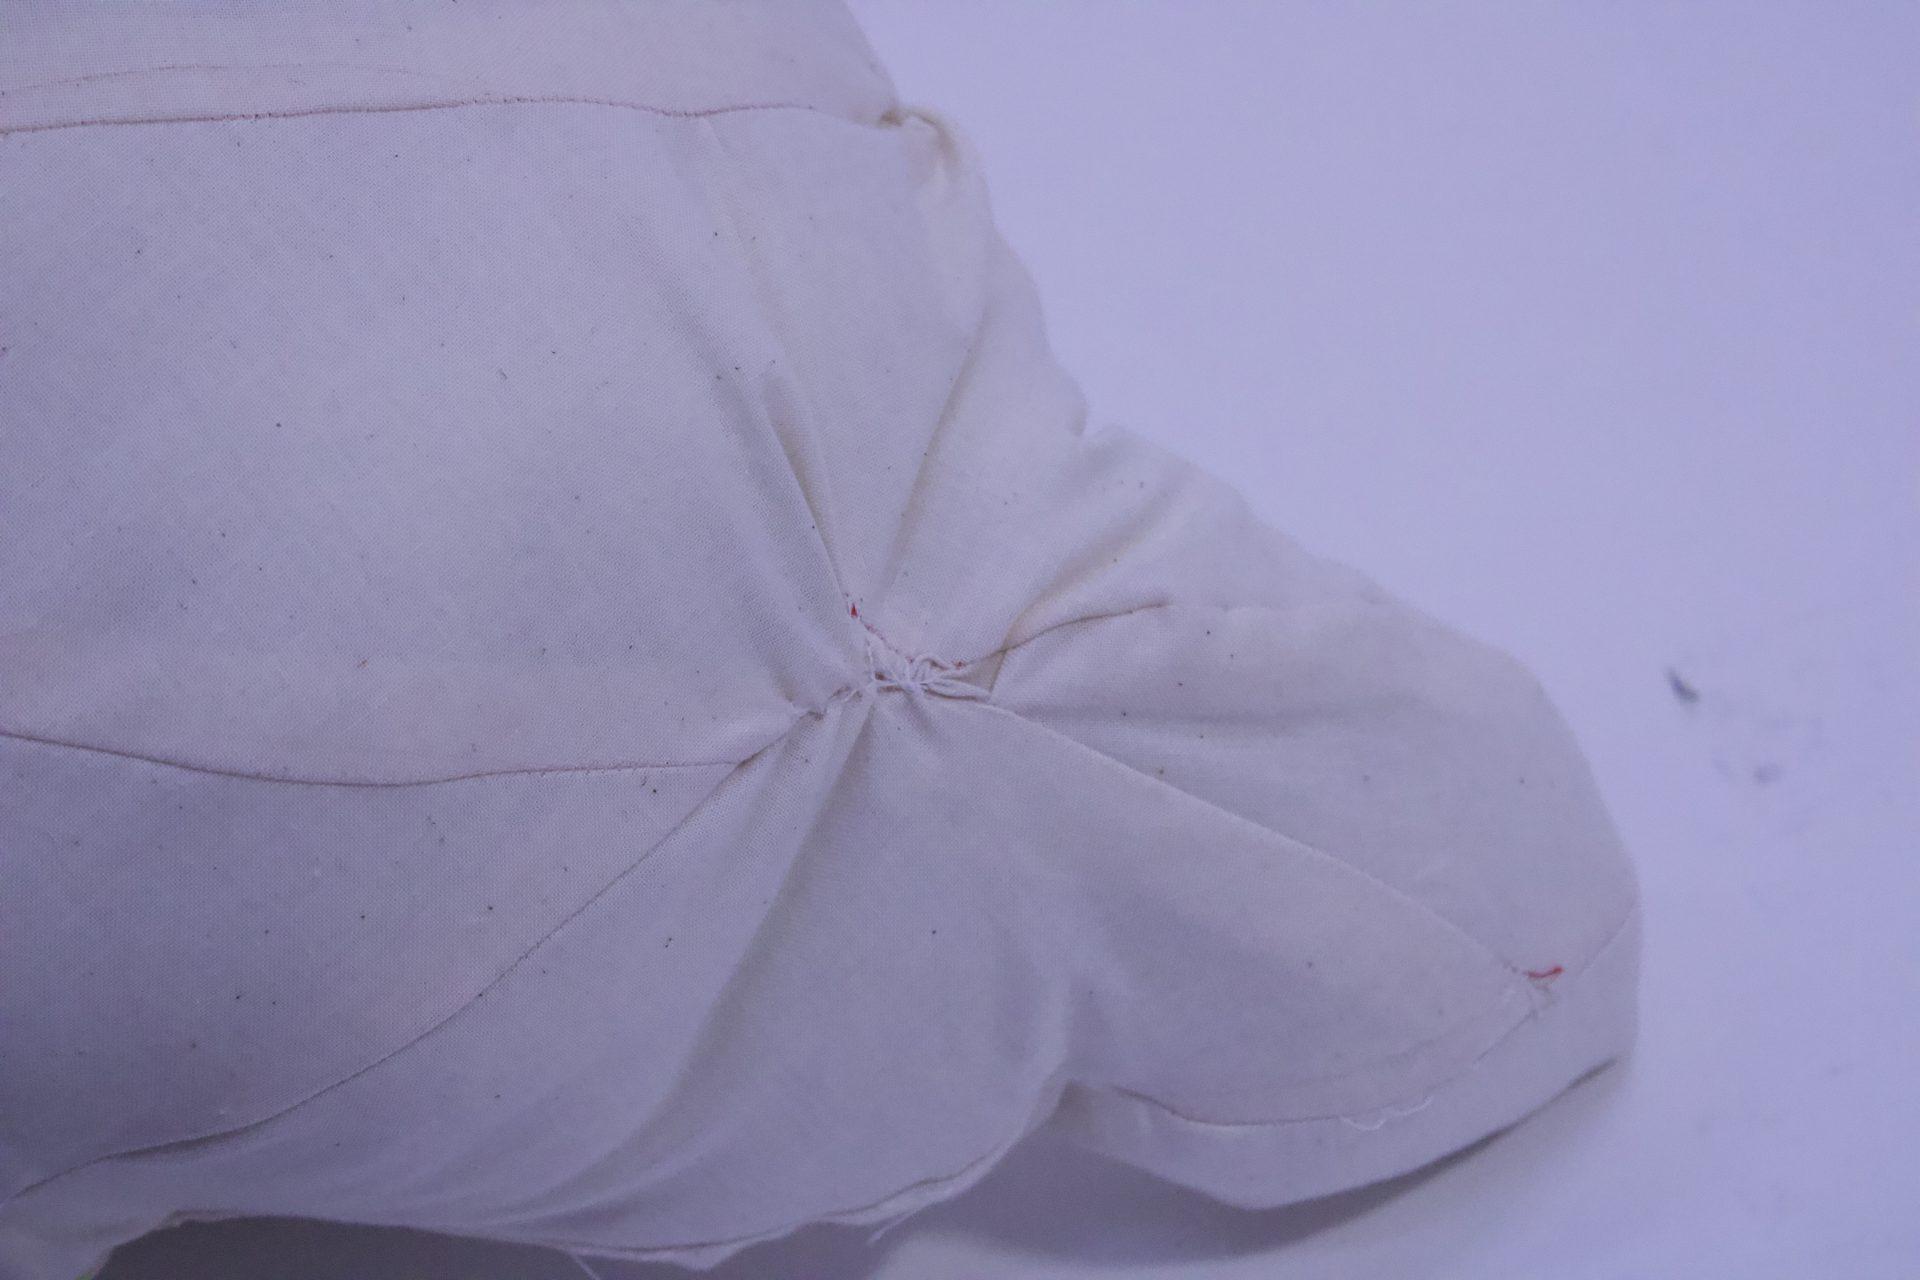
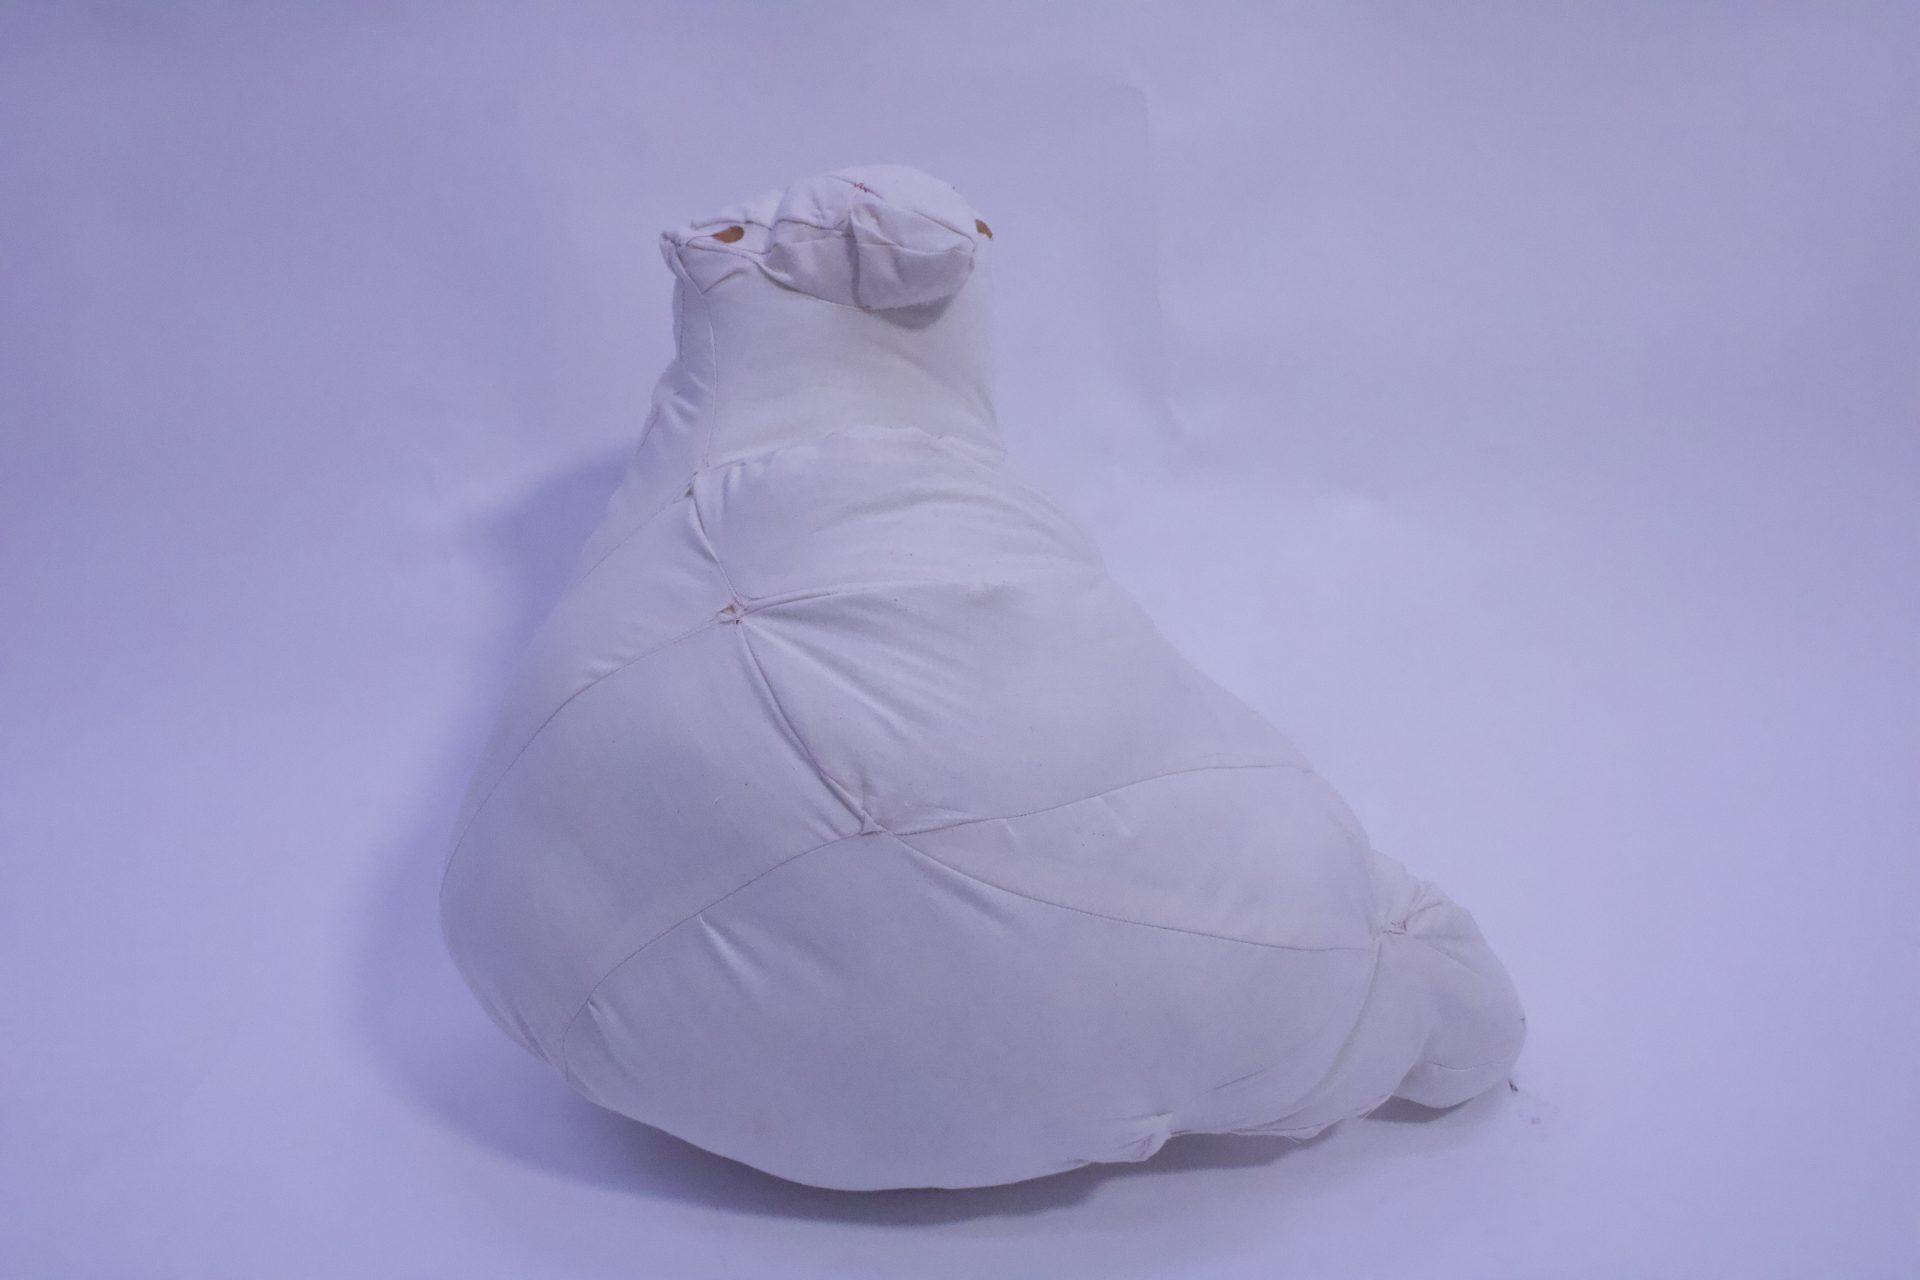
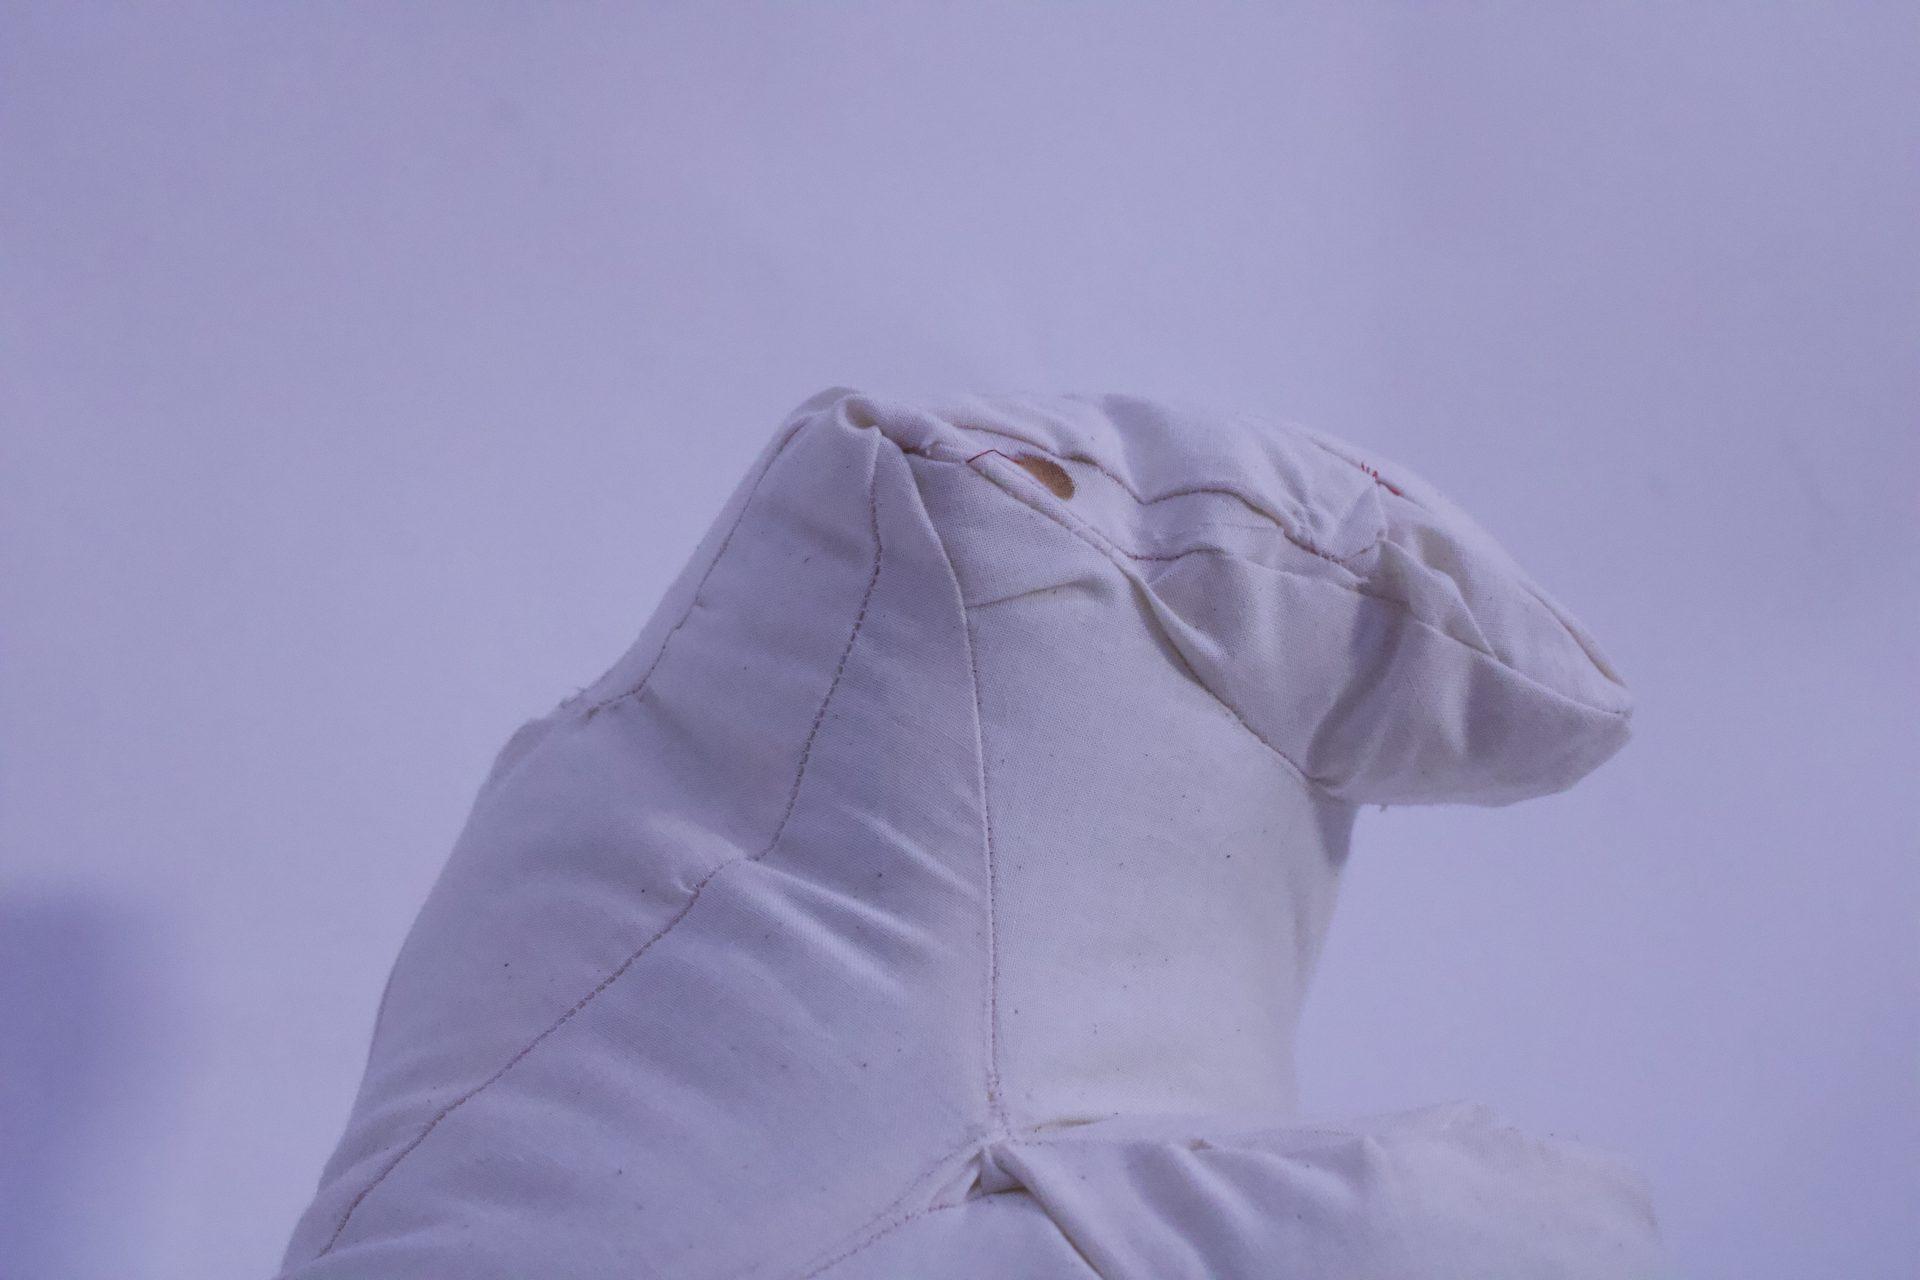
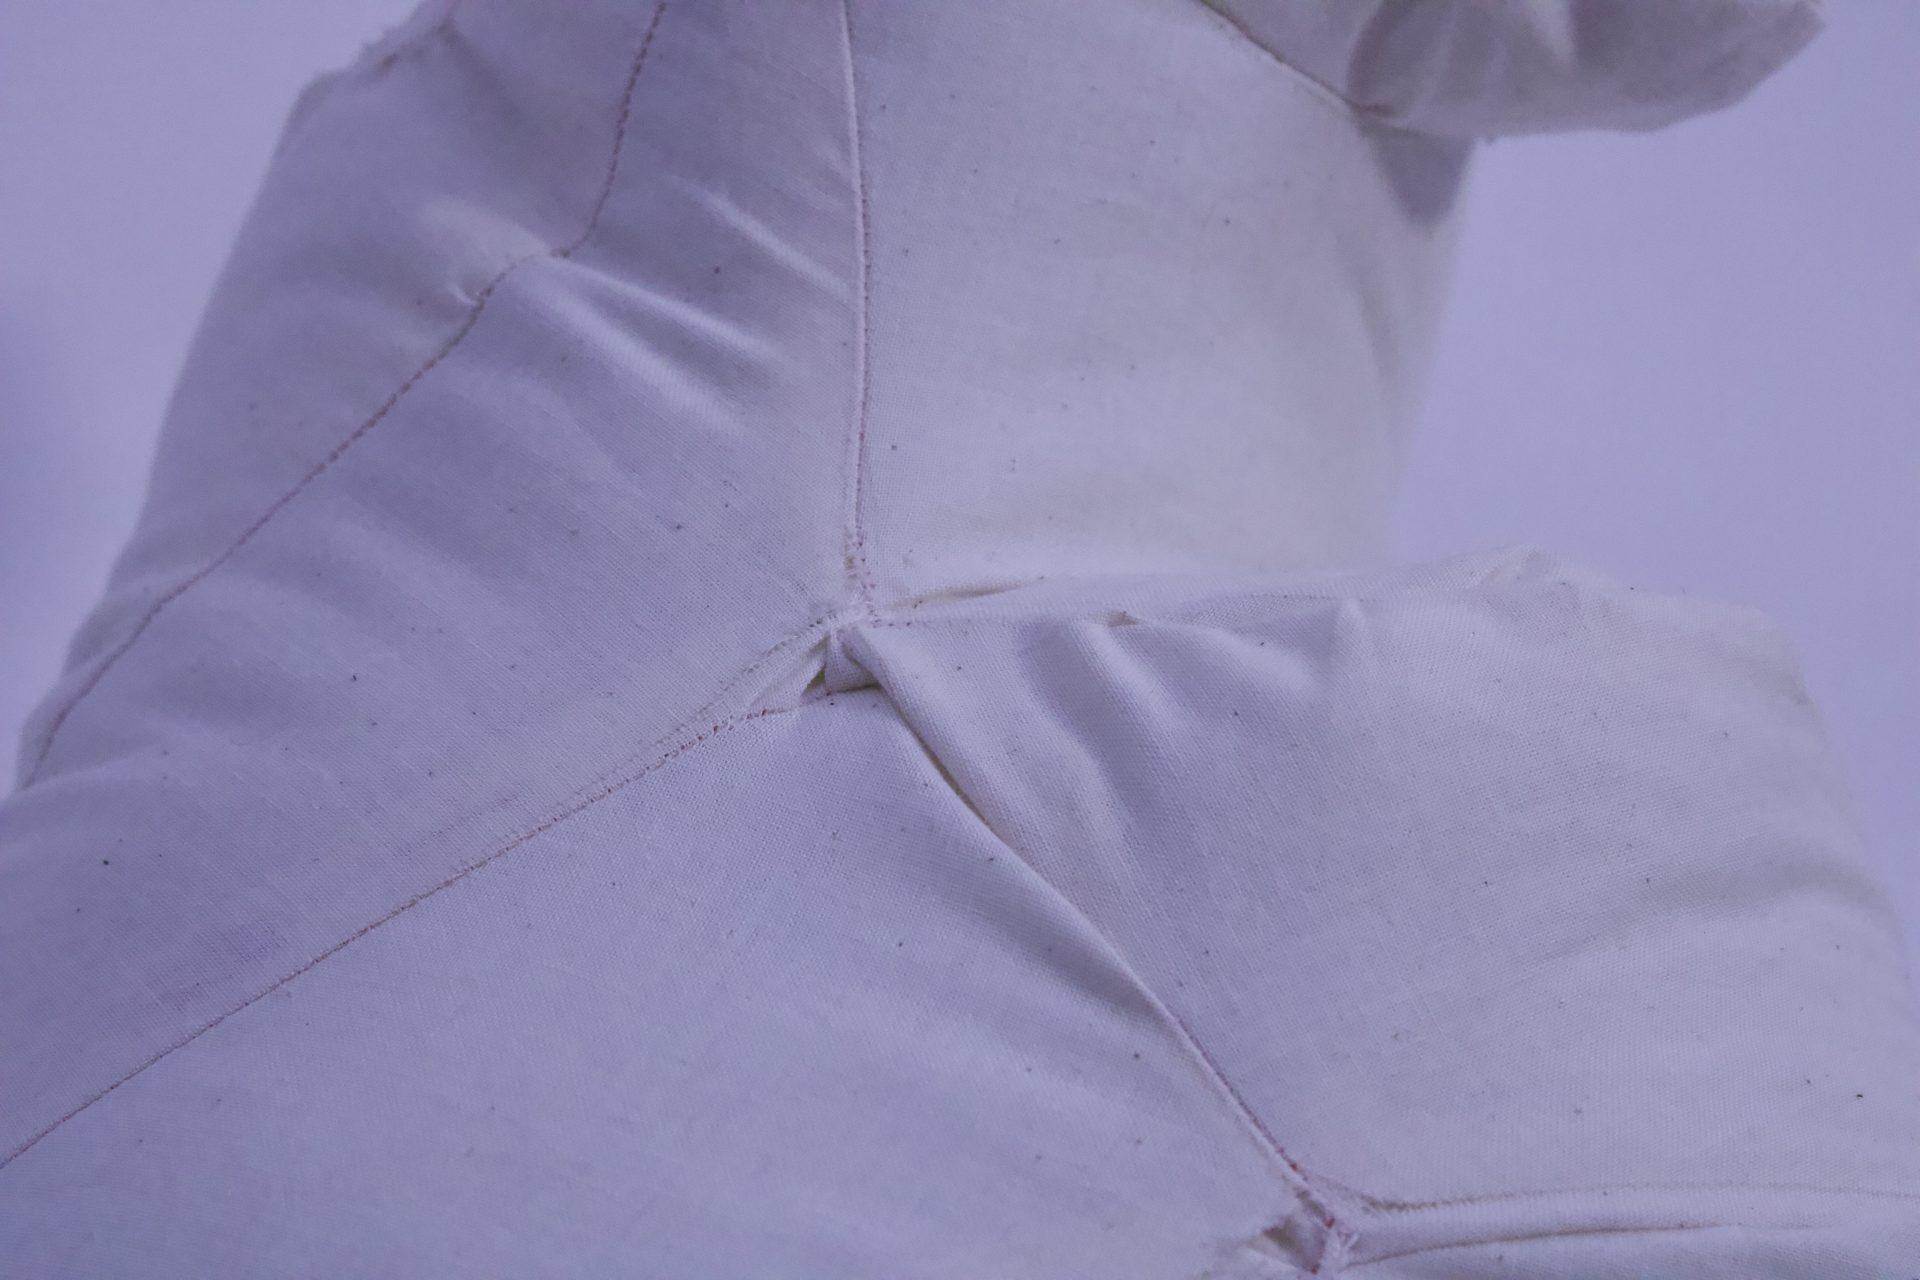
For this object, I wanted to try out the slash and spread technique and also think about how one form can constrict another. I had recently rewatched Vihart’s spherical snowflake video and wanted to expand on the idea. First, I made the pattern for the outer sphere. I made this one out of muslin, because it is a more rigid fabric that I thought would be able to nicely constrict whatever was inside. I then sewed a hole into each of the “pentagons”, and mostly assembled the distorted sphere. Then, I constructed a felt sphere with a larger pattern, stuffed the felt into the muslin sphere, and then stuffed the inner sphere. I chose to use felt for the inner sphere because it would stretch and then bulge out of the holes. I had to do some manual manipulating of the felt and poly-fil to make sure that the inner sphere bulged out of the outer sphere, but once everything was filled and sewn I was happy to observe that the object retained its lumpy shape.
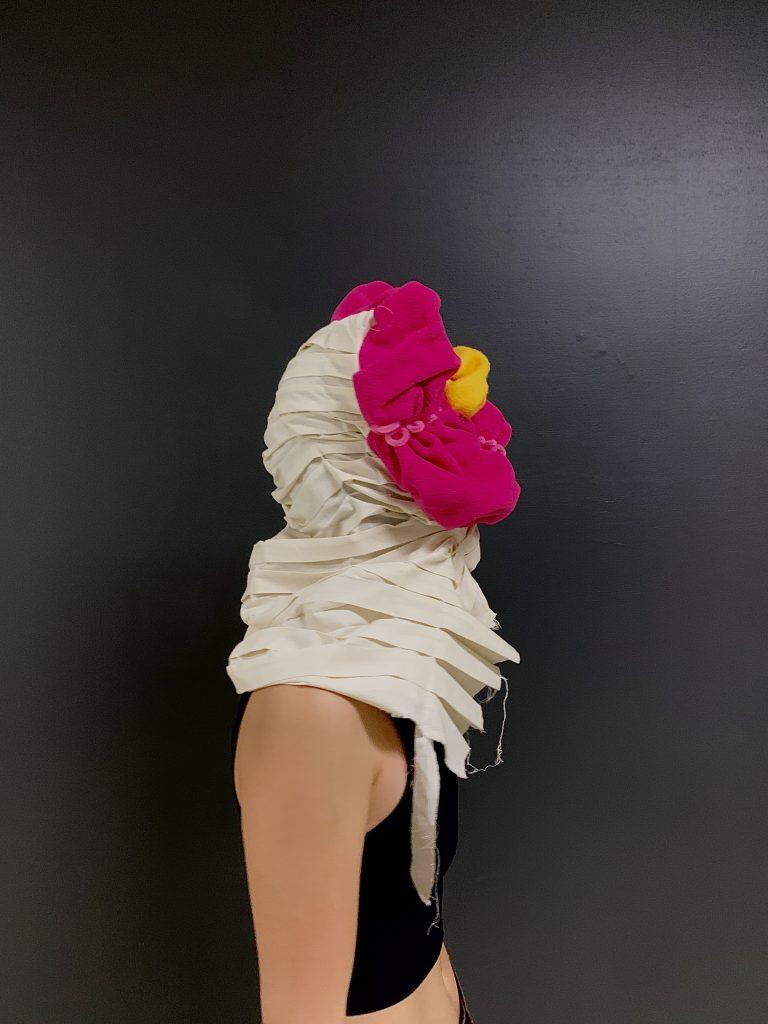
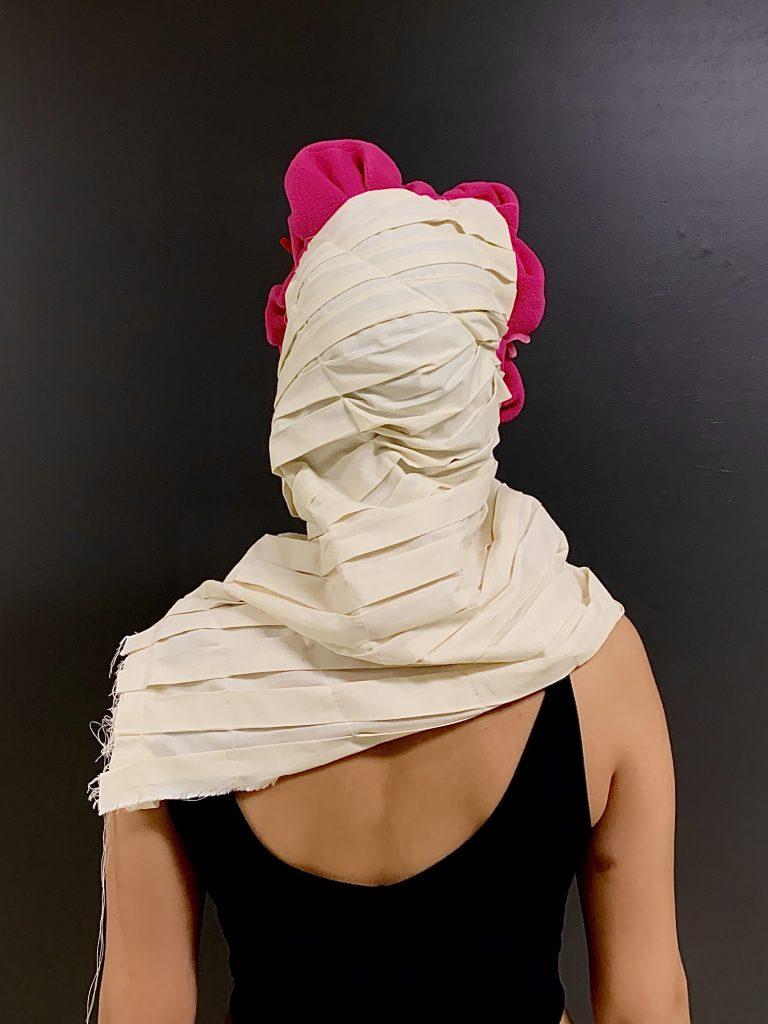
Object 4 – Flower headpiece
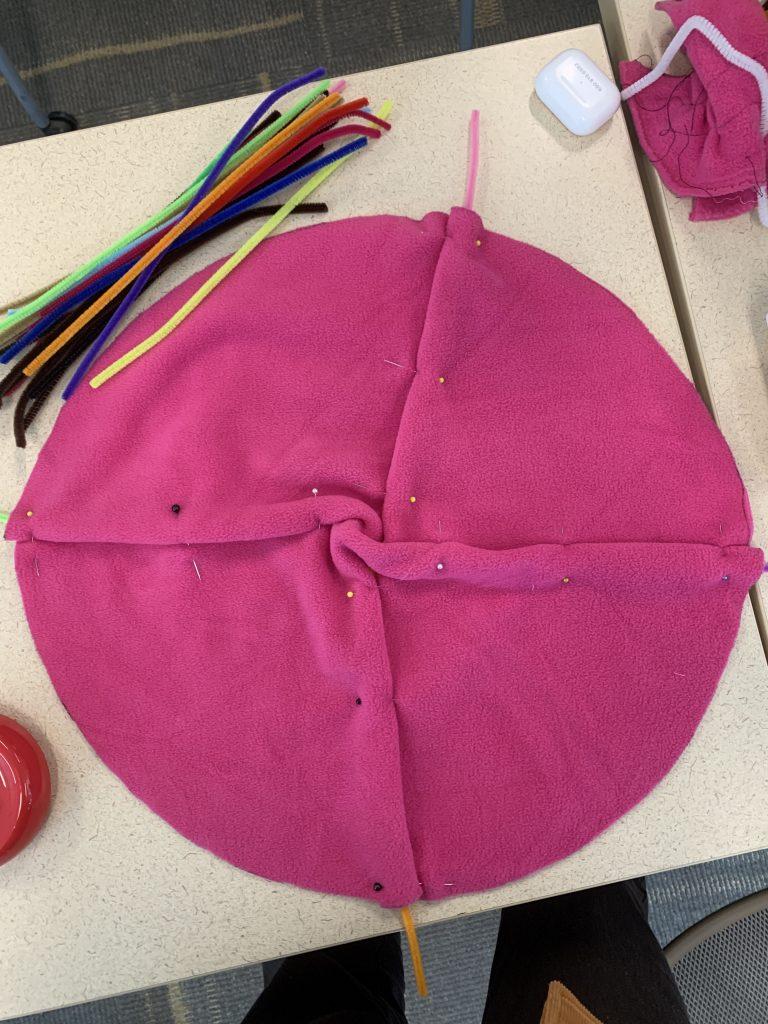
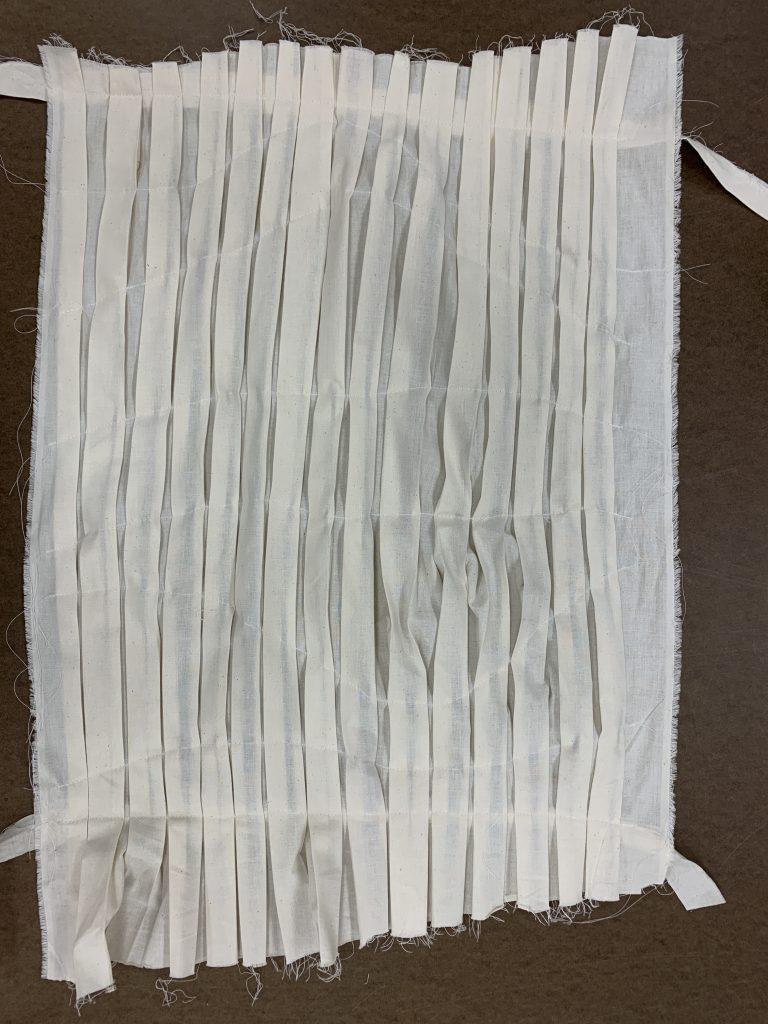
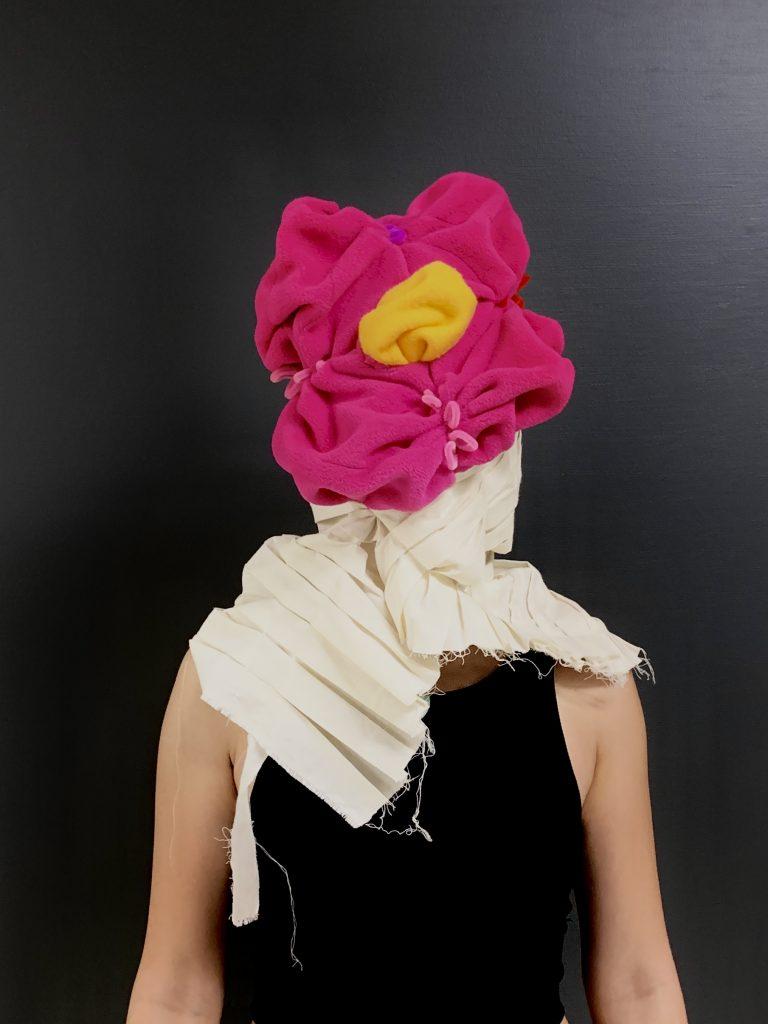
My final object replaced the CAD assignment, so I wanted to create something that reflected my choice not to use CAD. This object was entirely improvisational. I started by sewing pipe cleaners into a felt circle so I could pull the loose parts to cinch the fabric together. When I did so, it looked sort of flower-ish so I added a yellow circle to the center. I knew I wanted to try out box pleating, so I made a sheet of box pleated muslin. I sewed curving lines across the pleats to pin them down in places so the whole sheet wouldn’t just unfold. I found that these curving lines result in the pleats inflating in unusual and unexpected ways – this is something I’d love to explore more in future projects. Once this sheet was completed, I sewed the flower onto the pleated muslin and it just happened to create something that looked like it would fit great on my head. It did fit on my head, so I decided this object would not be stuffed with polyfil. It didn’t much need it anyways – the flower sort of self-inflated because of all the cinching and pleating. I pleated the yellow circle so it would fit in the hole I cut in the pink felt, and I also pleated the pink felt when I sewed it to the muslin. All of this constriction ended up giving the felt some structure. Felt also seems to retain its shape semi-nicely anyways, so that was a nice feature of the fabric that I enjoyed with this project.
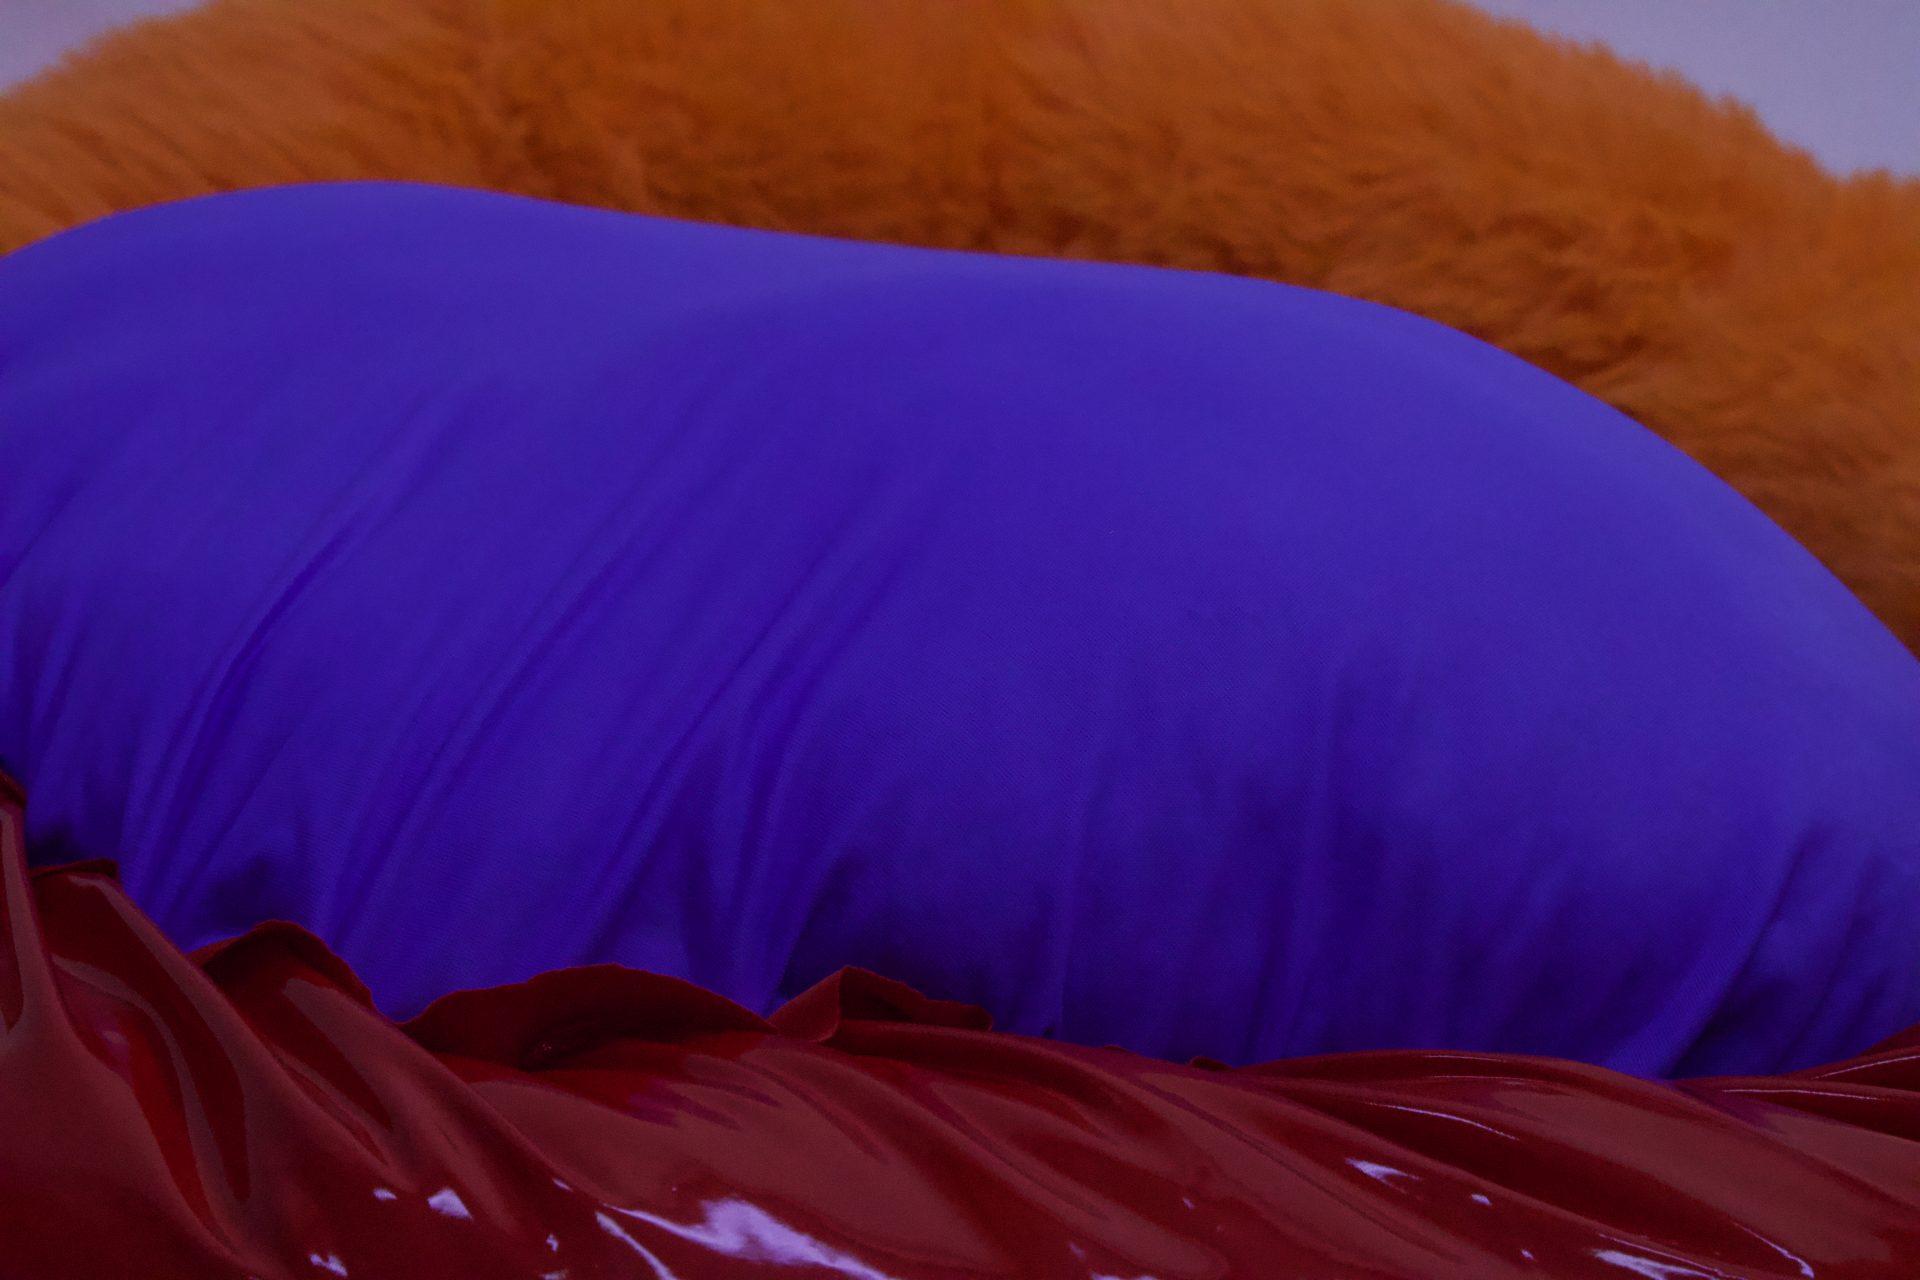
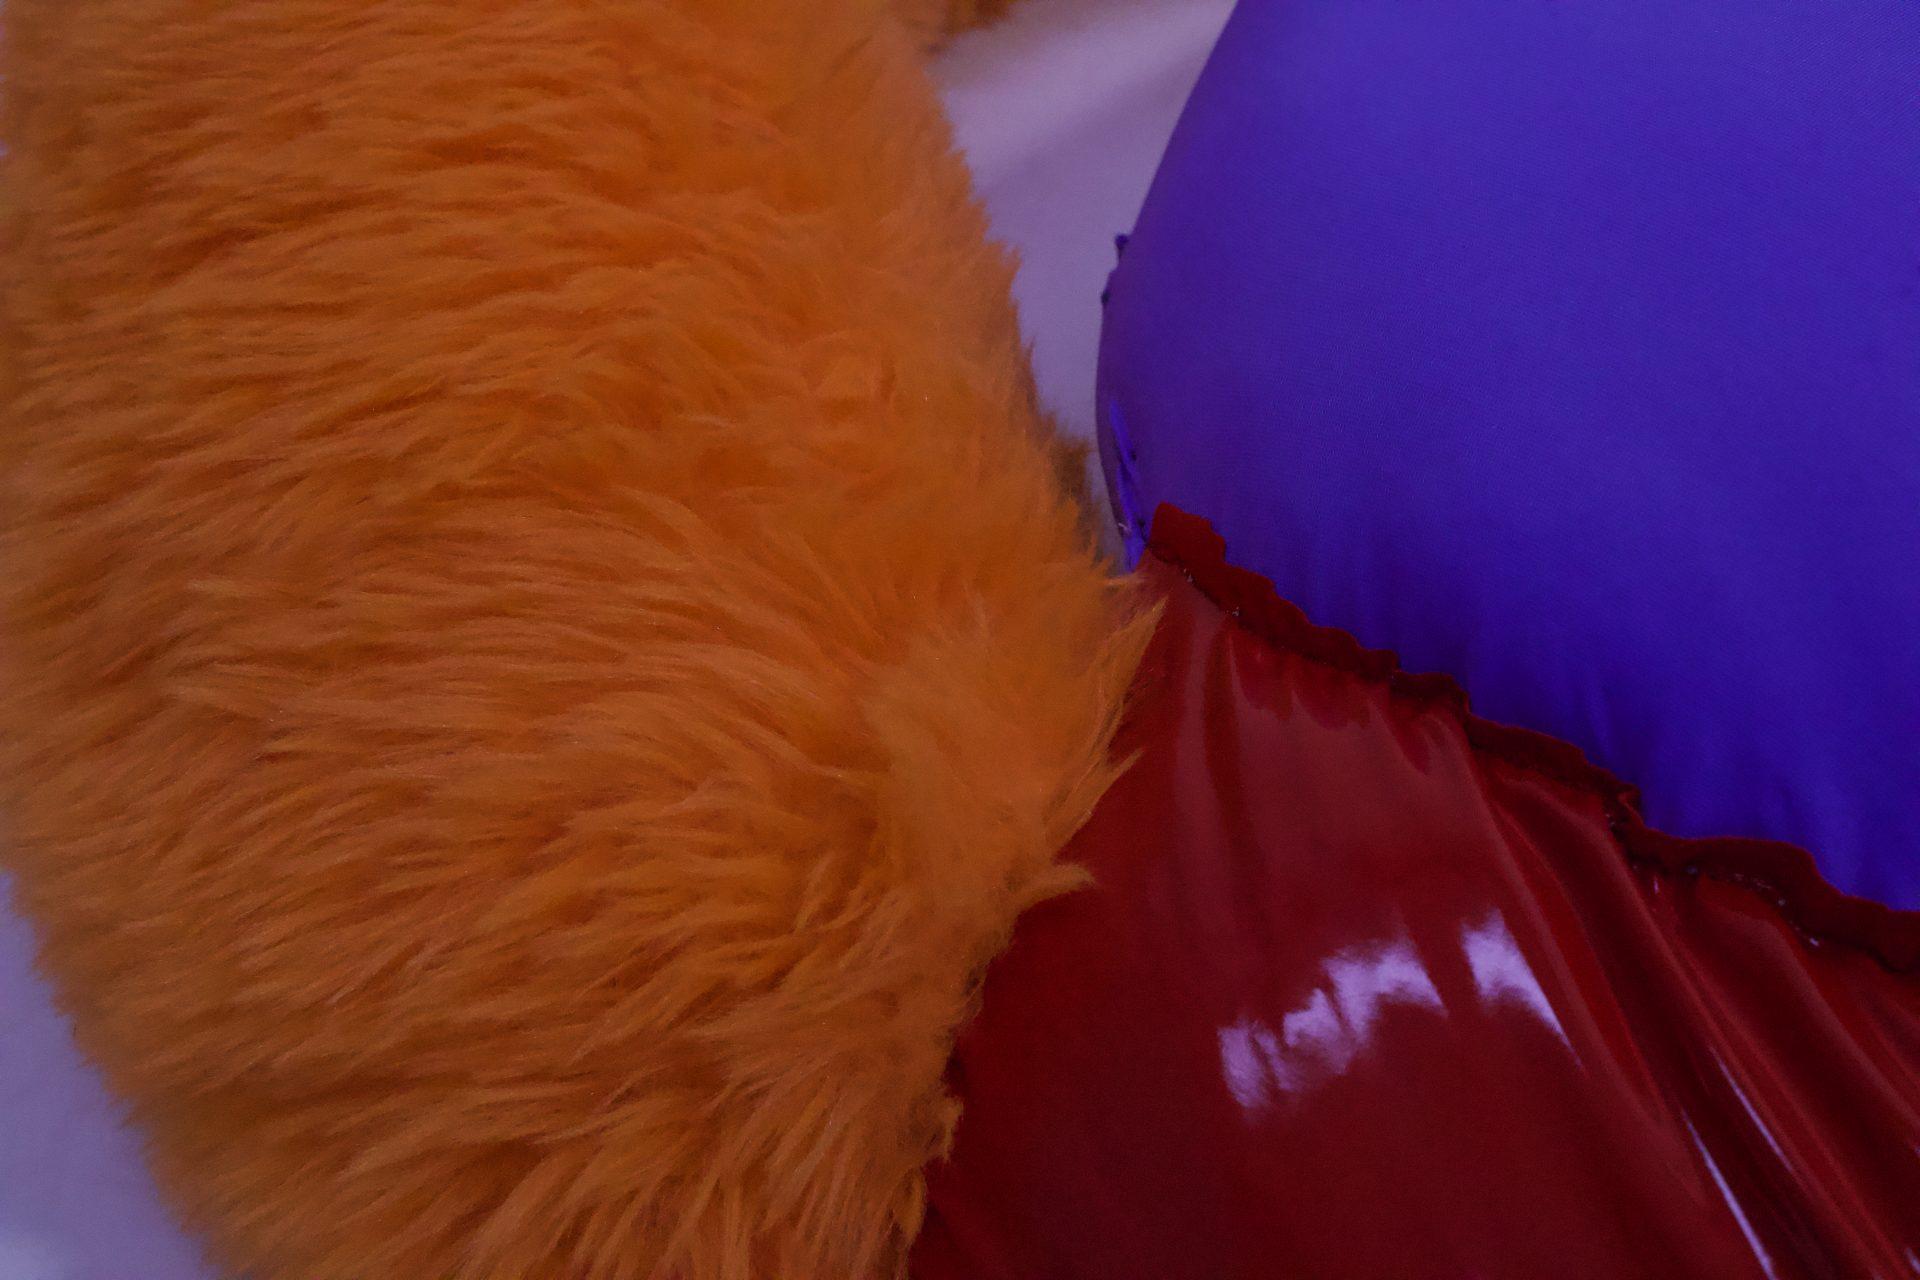
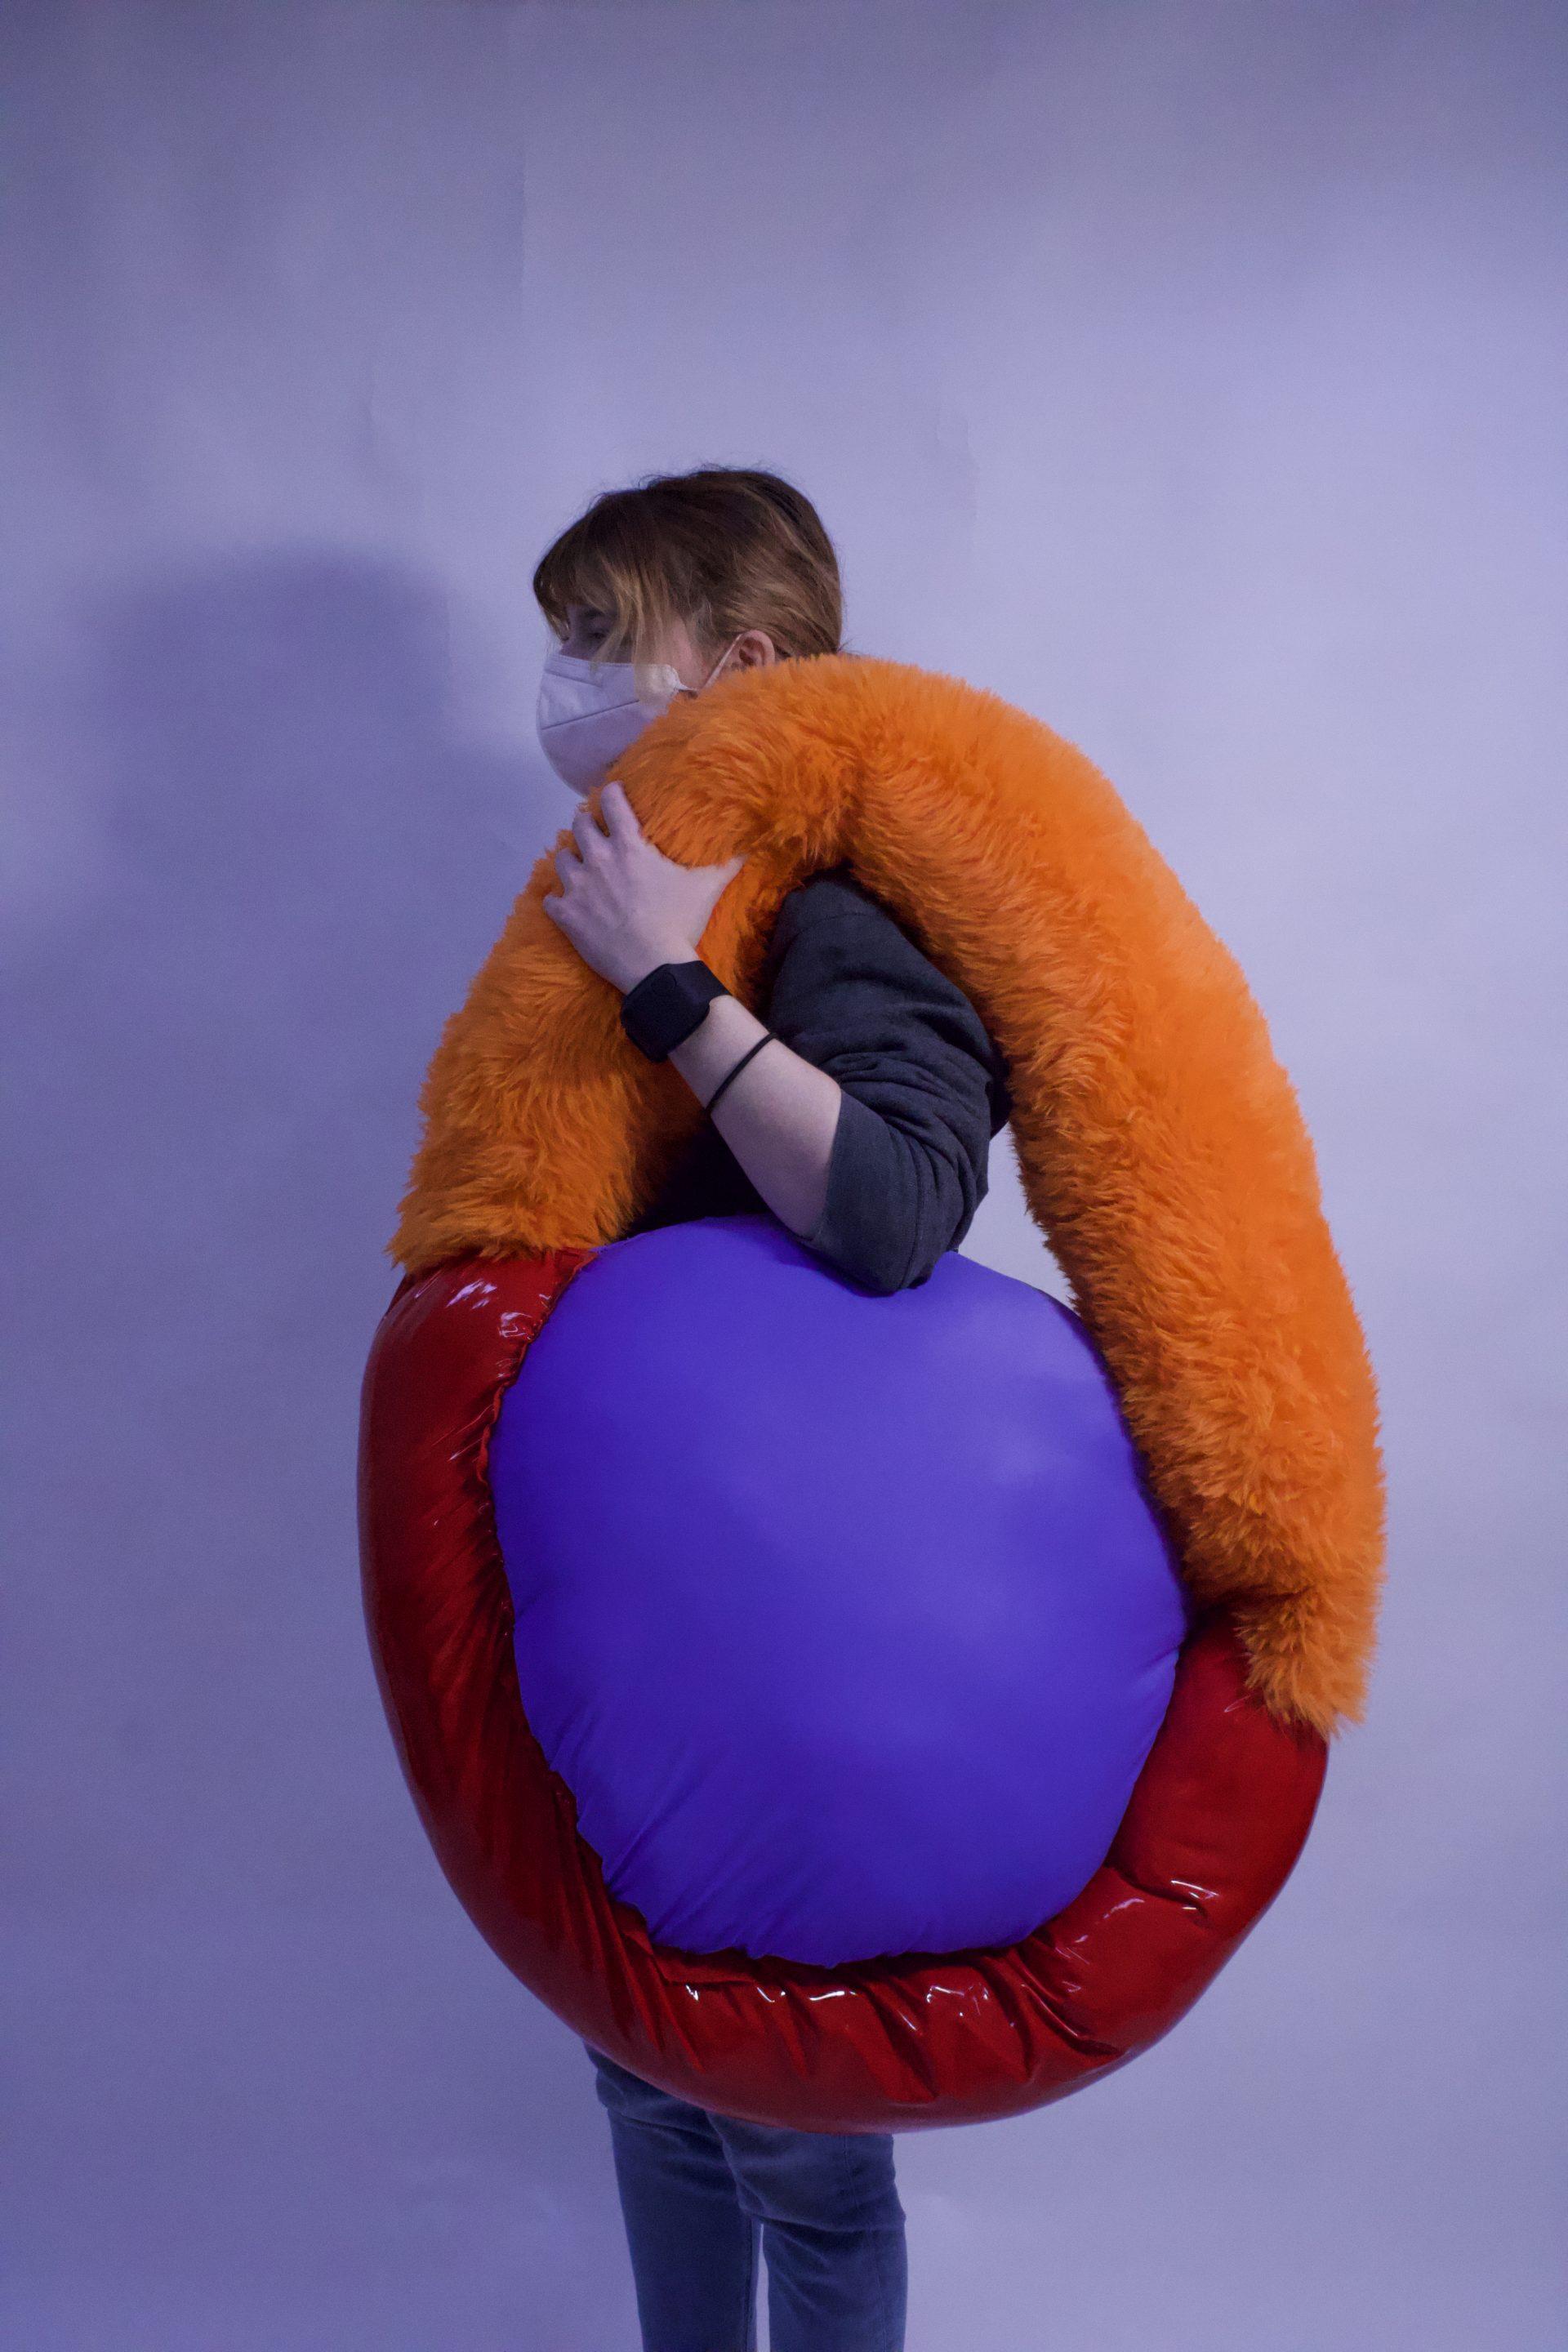
I had originally had drawn this design out to be more of a connected tube to the big circle in the middle. I put together to circle shapes out of fabric to make the big center circle and then made a very long skinny rectangle of the two other fabrics to make the rest of the shape. I had other things I wanted to add to this piece, but this one took me much more time than I thought it would. I had wanted the model to be colorful and different textures, but with my new sewing knowledge using these materials was a give and take and process so it probably took me much longer to do than it should have.
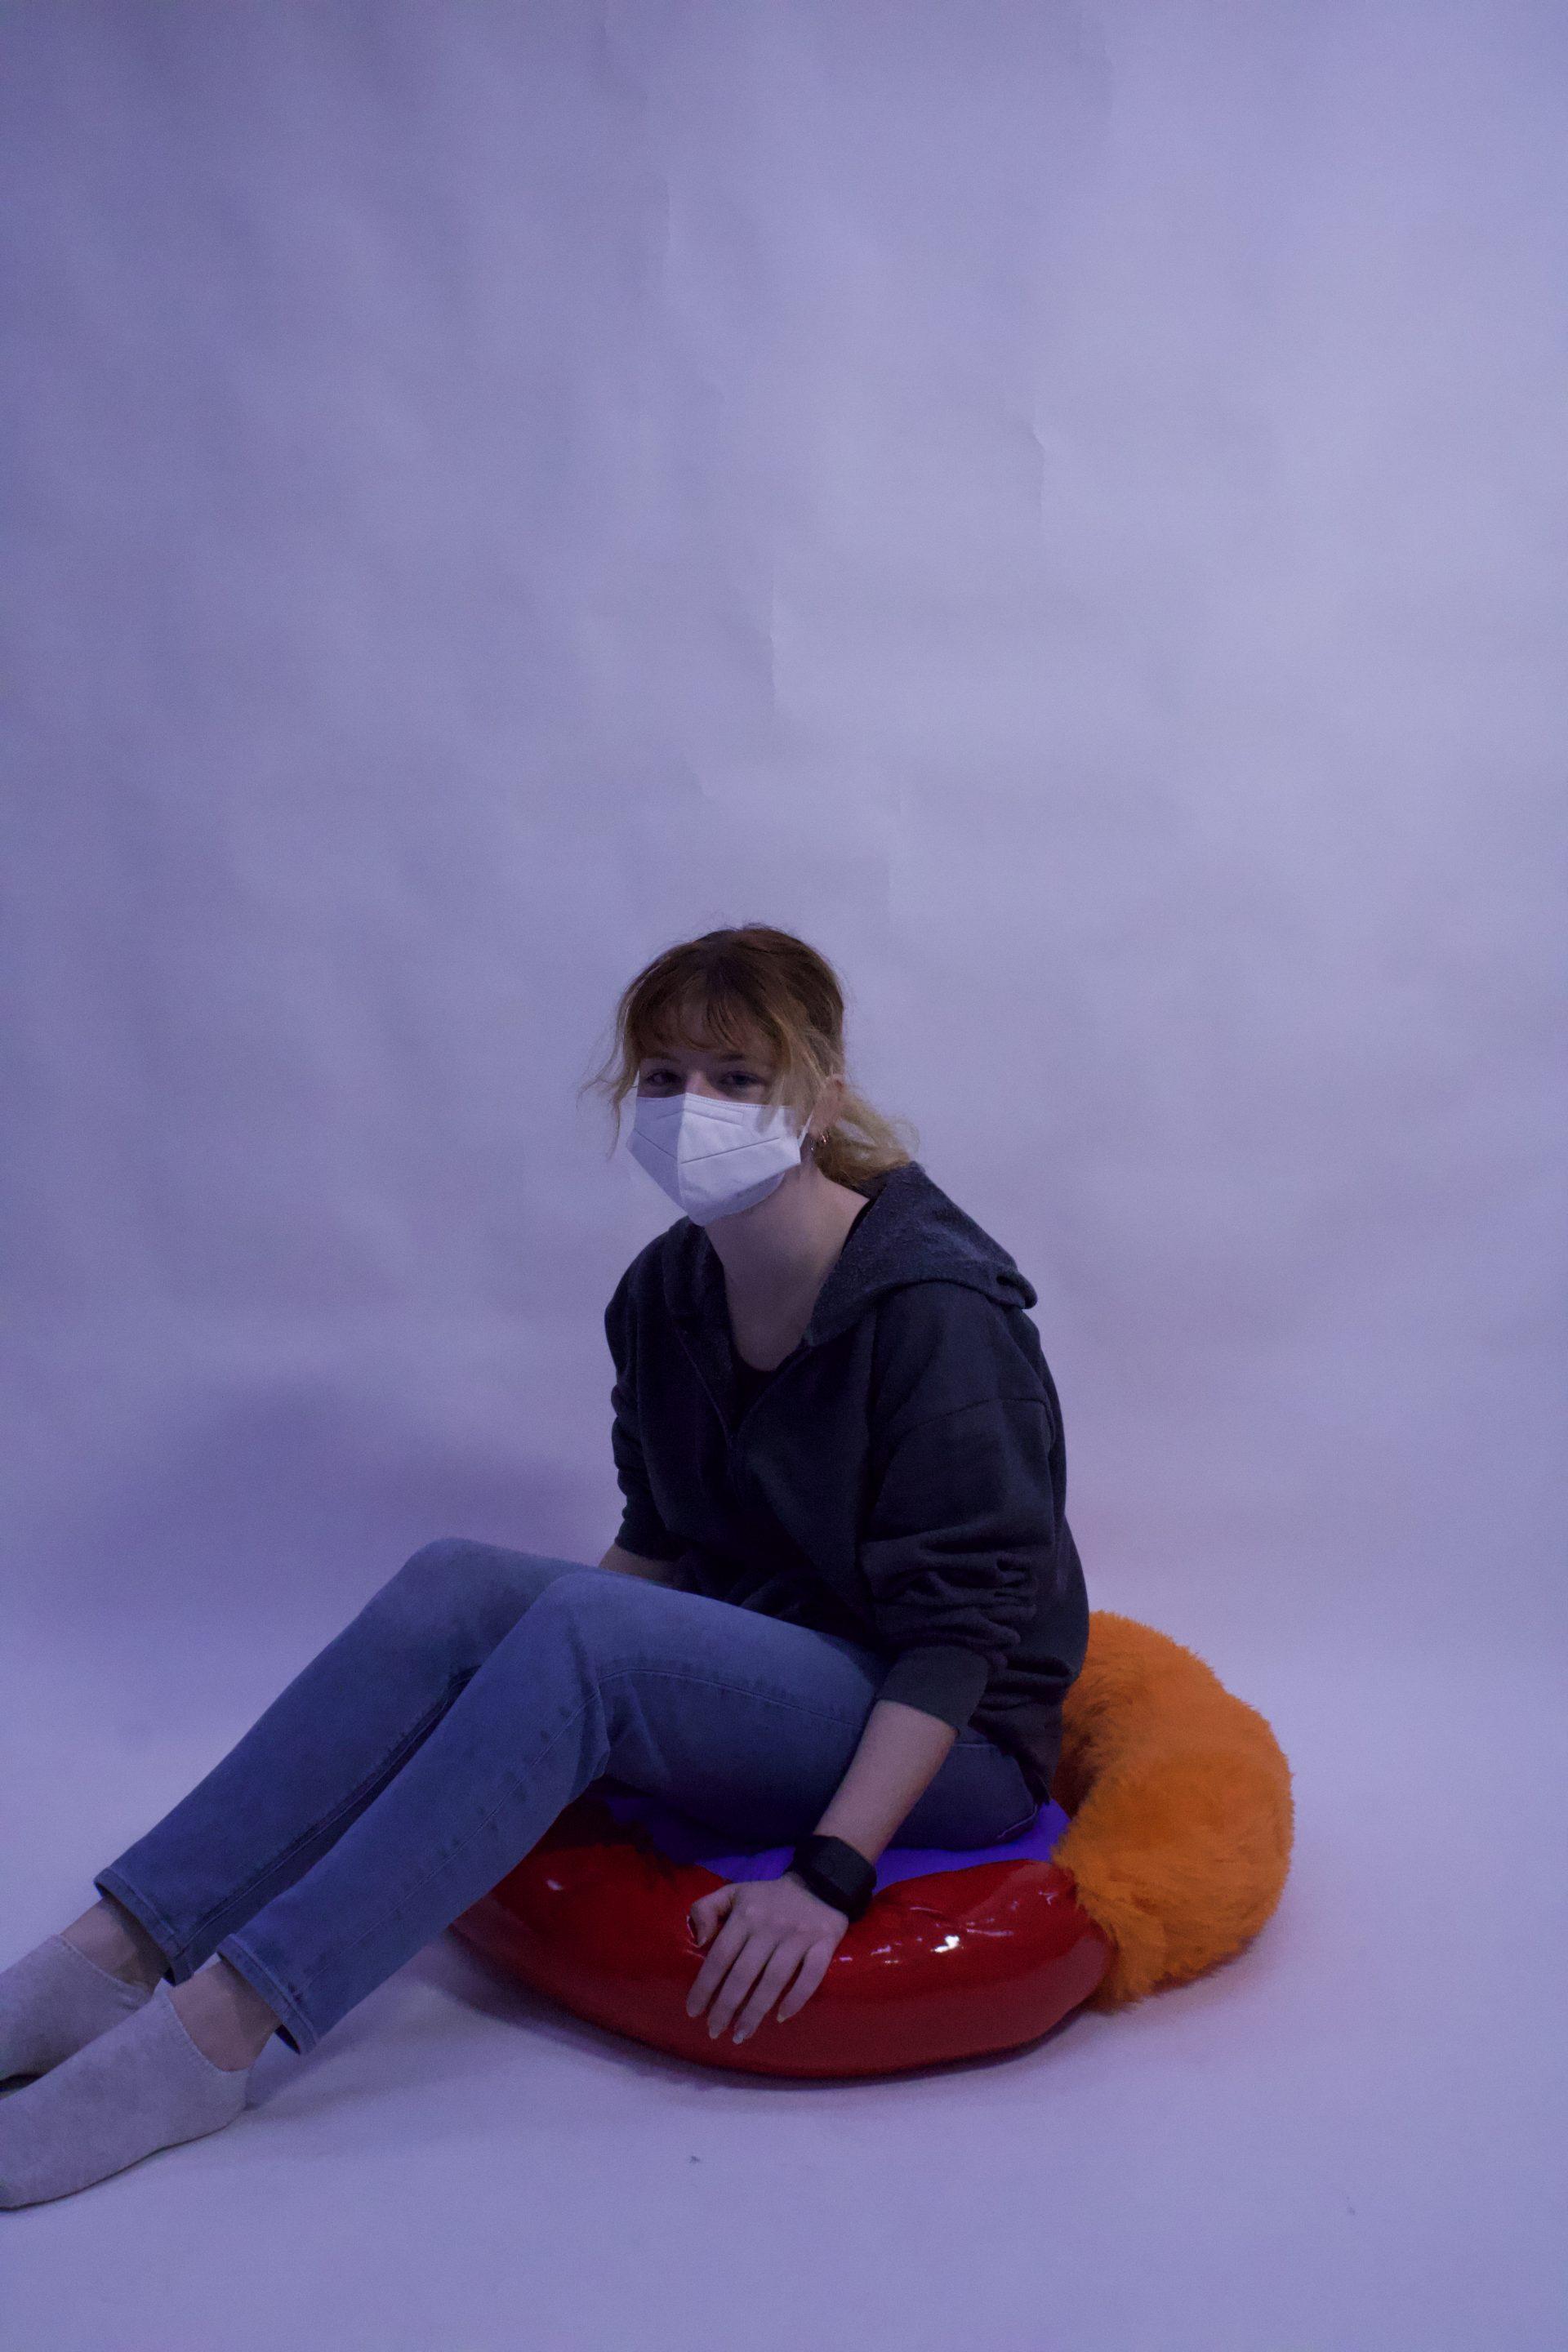
I do really enjoy the relationship between the red and blue fabrics. There is this push and pull dynamic and this stretch of fabric which I find really adds to the form and texture and extenuates the light off the latex red. I tried to learn from this piece and sew better for my next one and develop beyond the basic shapes.
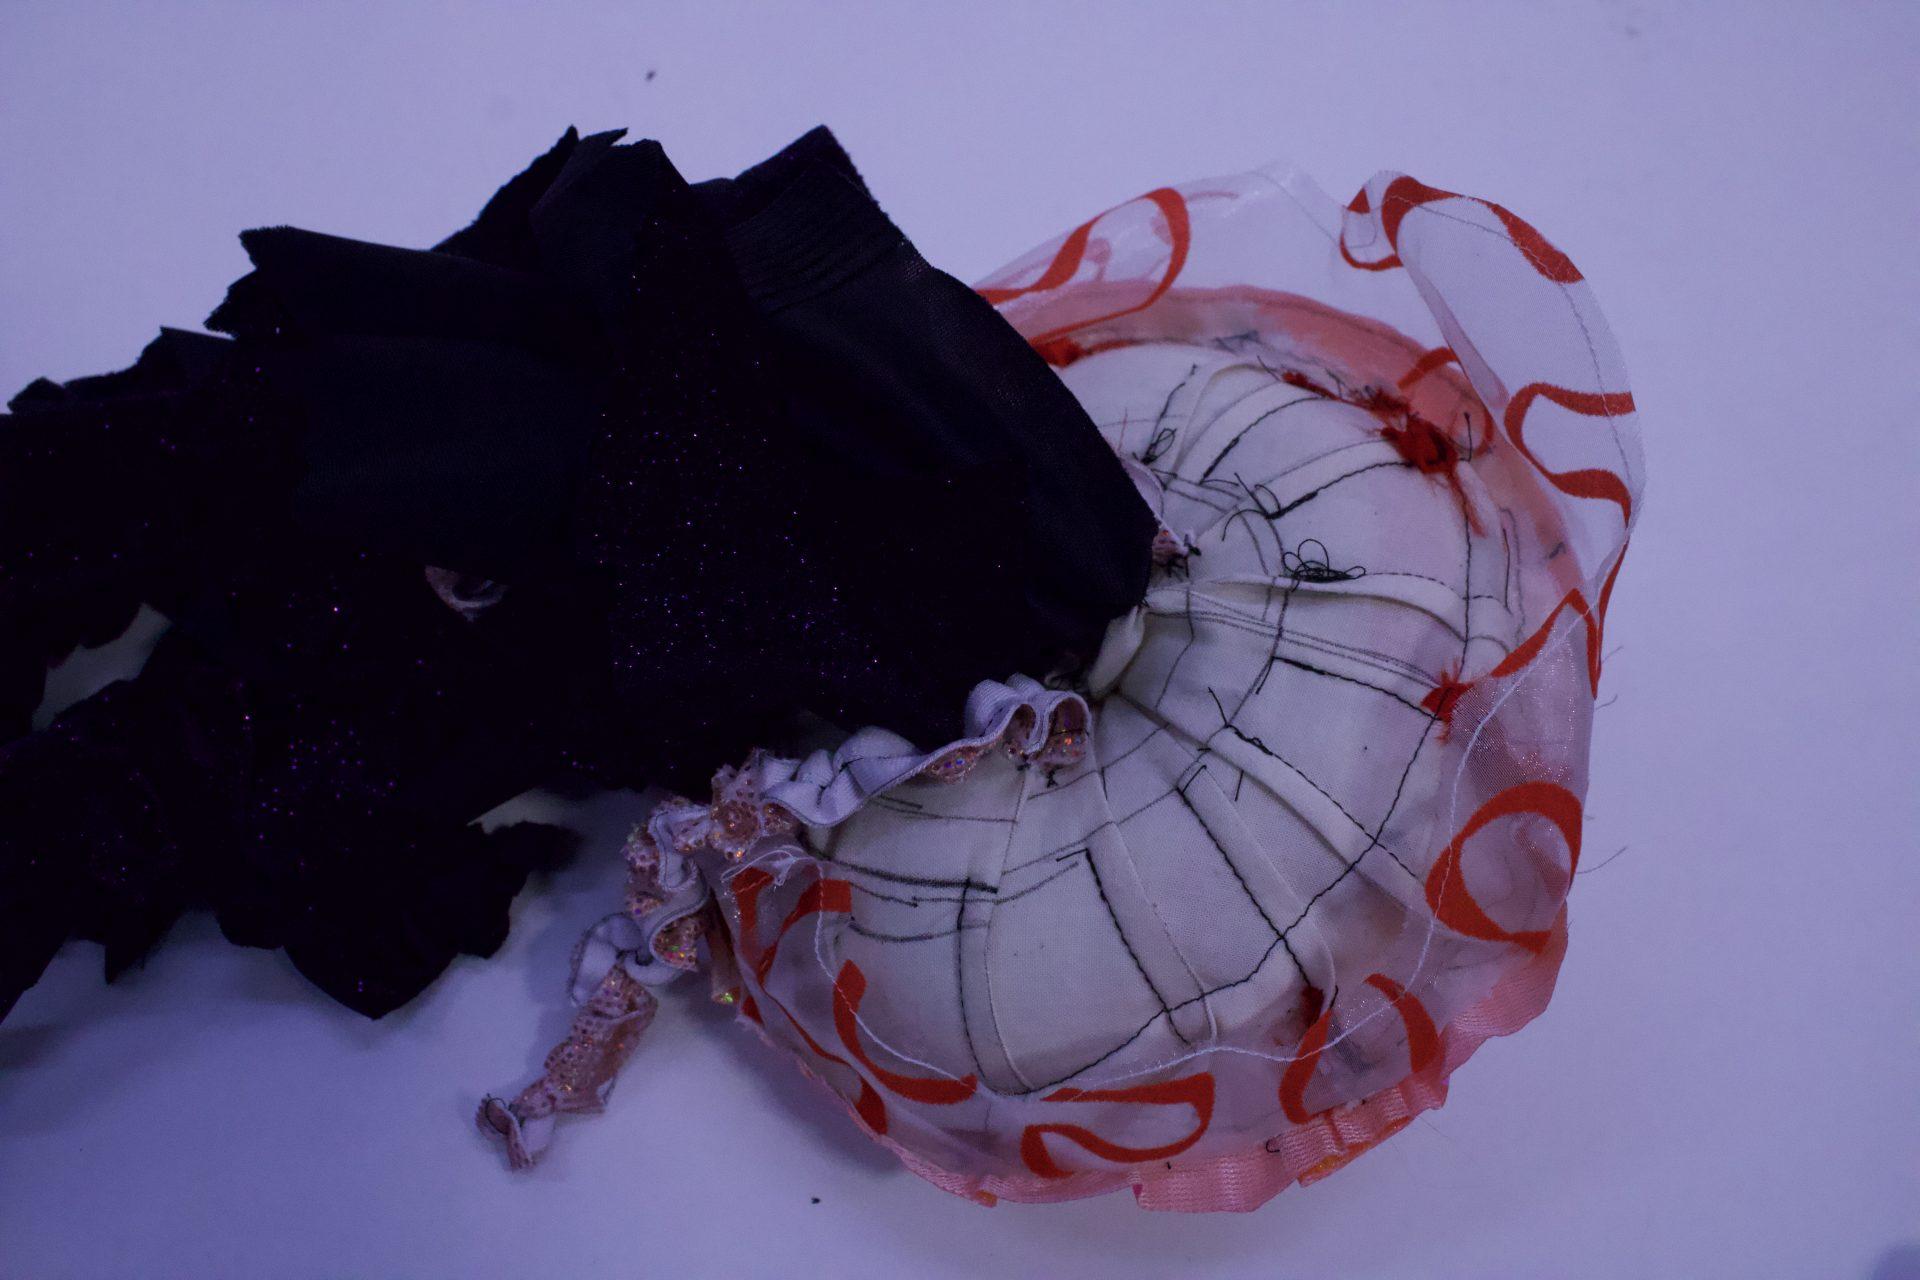
Once again I continued to try to use different materials. I ended up making more mistakes in this and ended up ripping a lot of material off either because it was too fragile with the thin strips or just did not look right. For this one I tried to go in a different direction and try different methods of sewing. I made pleats on the circle to try to bring in the shape and I ended up leaving it exposed. The top where it is the pink material I actually have 3 fabrics below it. What happened was when I was doing the pleats on the same fabric as the lower one it ended up looking really weird. I tried to add a sheer piece that I had sewen on tip to help but it still was not right so I sewed the pink on top and attached it and stuffed the circular shape. I think my fix worked well, but it was definitely a learning experience for me to figure out what worked best.
I had cut some thin red fabric pieces next and hung them from the outside. I cut them very thin and when cutting them I realized I should have used a felt fabric because they were falling apart in my hands. I attached them anyways hoping that the problem would go away, but when I looked at the strips after it was not working so I removed them after I spent a ton of time individually hand sewing them on.
You can see here where I ripped off the red strips.
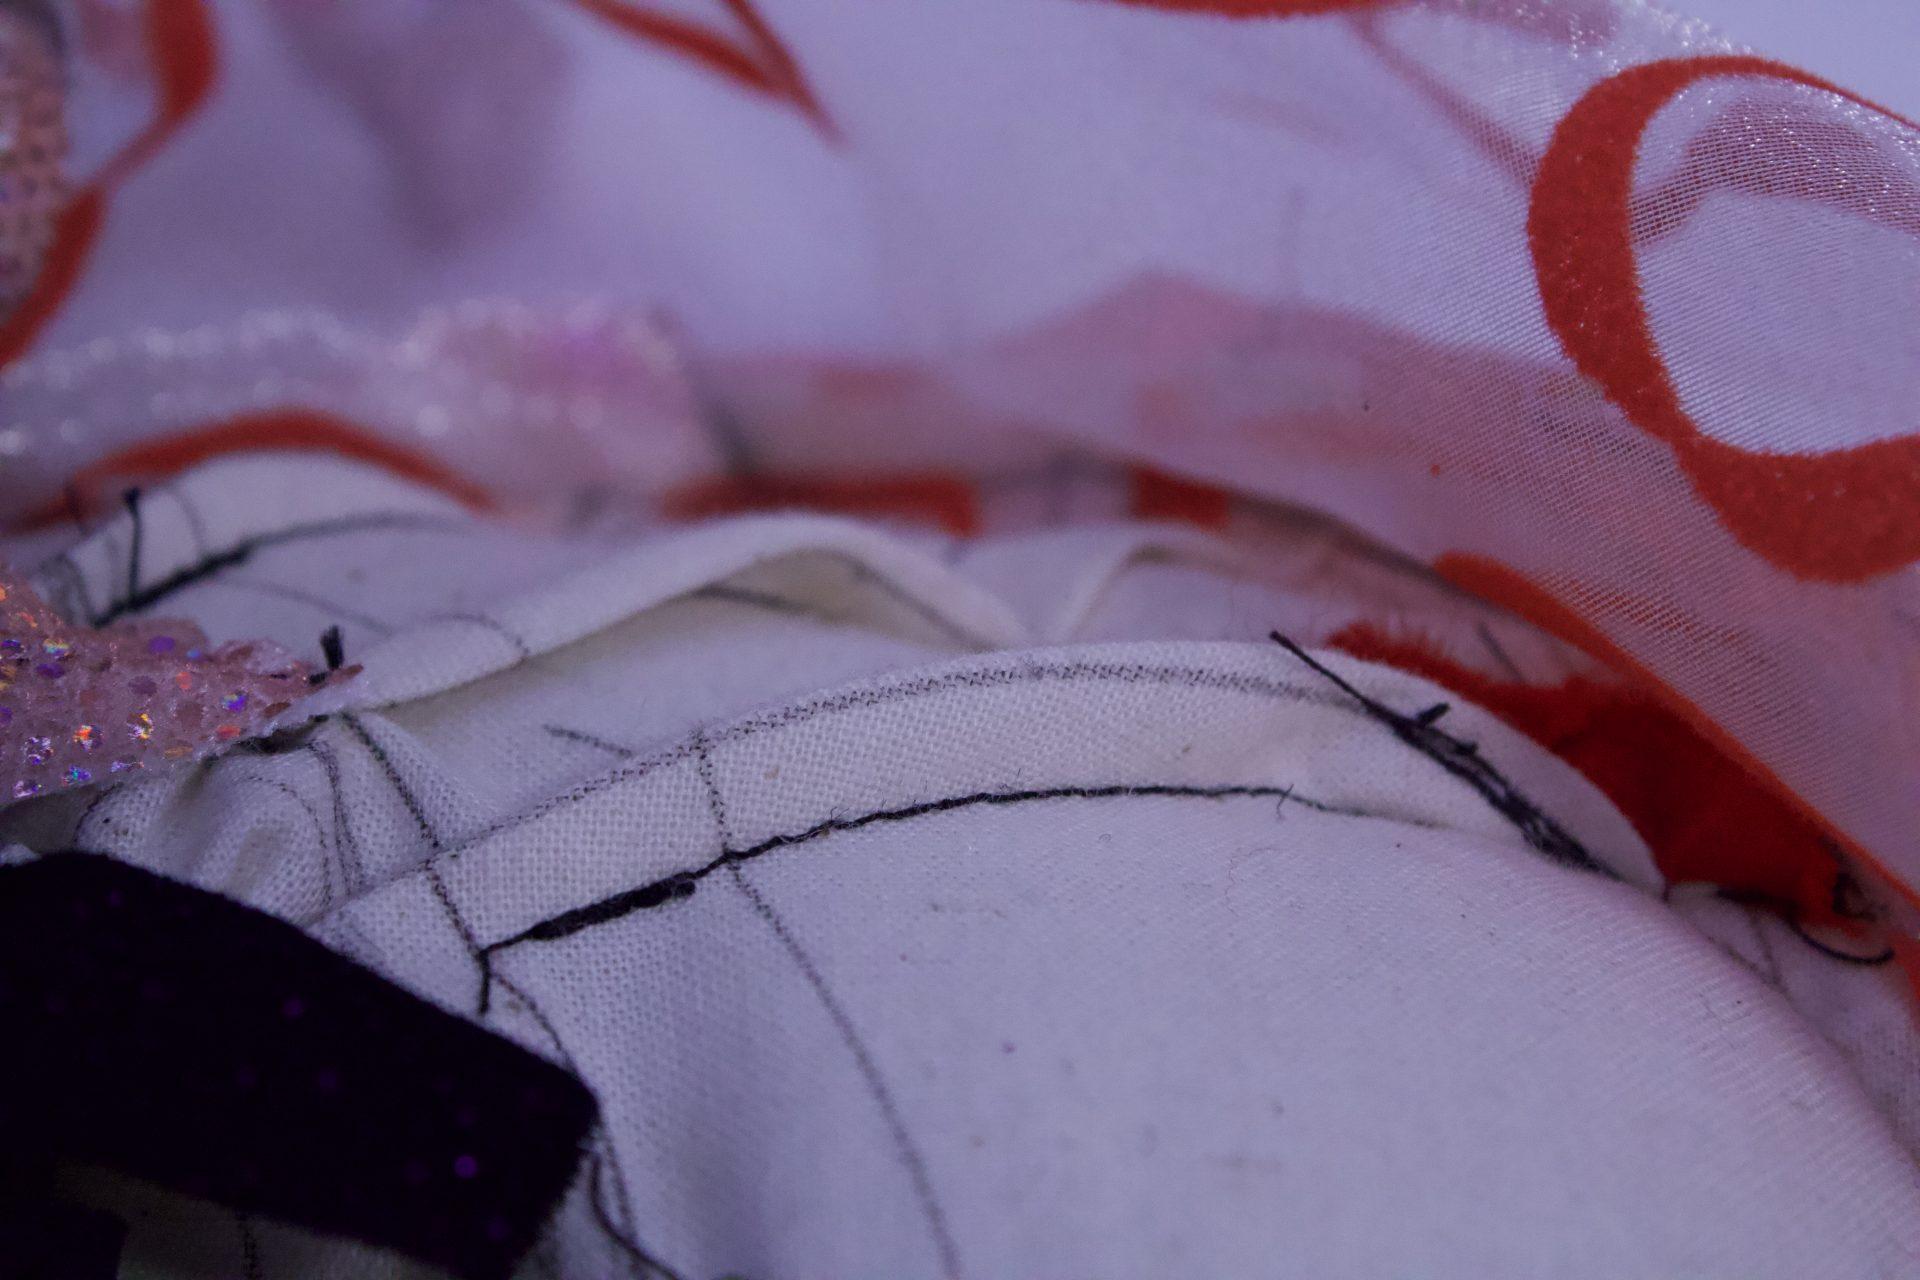
Next I went on to make the black and pink pieces that come from the bottom of the jellyfish. I sewed the middle of some cut rectangular strips on the sewing machine not closing them and then pulled the string to make the fabric bunch together. There was also a learning curve on this because sometimes I would pull too hard and the string would snap. All these pieces had to be sewen on I think I sewed on 7 total. After I had done this, it still looked incomplete. So this is where I grabbed the mesh piece and cut it in this wavy pattern to put on the top. I learned from my messed up red strips to sew the fabric at the end of my cut so that it would not fall apart. I am really happy that I did this and I think following my curvy cut helped me be more precise with sewing on the sewing machine. At this point in time I also realized that I had been sewing with my lines being quite separated and making them closer really helped me when I moved on to attaching all my laser cut pieces.
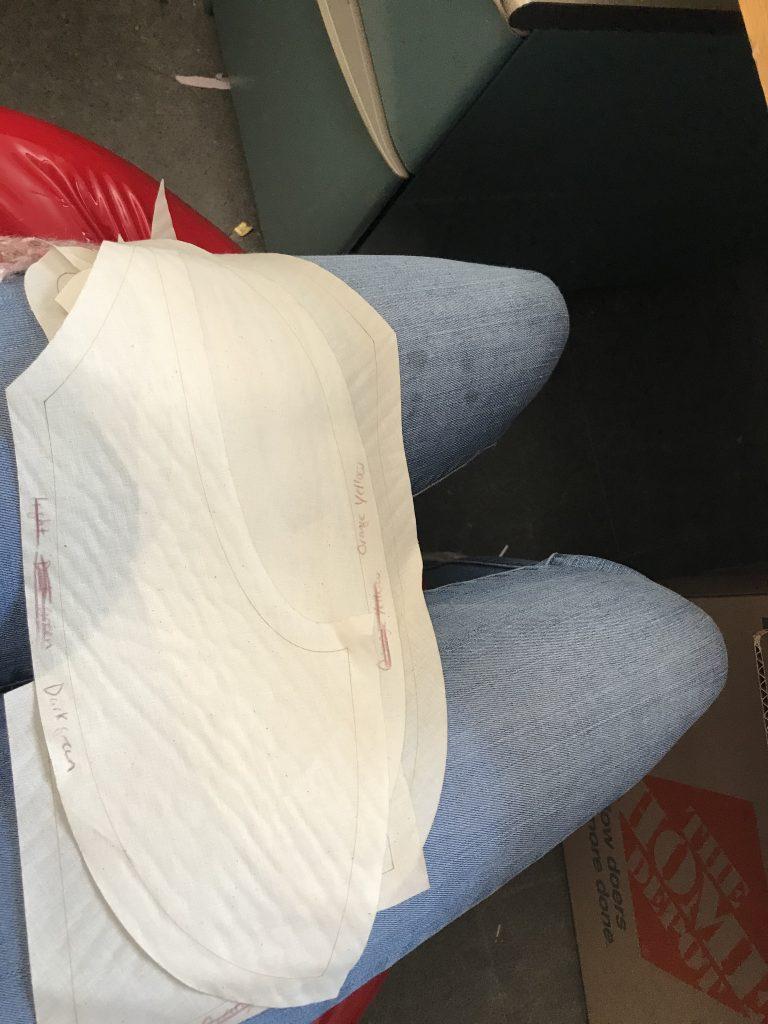
This was the piece I did on Rhino. I had probably around 30 cut pieces of the laser cutter. What I first started with was matching my pieces up to the colors I gave them in rhino and marking that on the fabric so I would know what went where. I then started to put them together and sew them piece by piece. I think this is where I made my mistake sewing. The shape ended up getting weird in a few spots and I think I can contribute it to me sewing it on piece by piece instead of sewing the pieces that went linearly down my shape together and then piece strips of them together to mack the complete shape. I think my other mistake was in choosing this material instead of felt. This material is much more movable, and when laser cutting my guide lines for sewing the corners got burnt out so I ended up sewing rips up everywhere. I think in the future I would be interested in trying this again with a new sewing idea with attaching pieces differently and using felt.
I think rhino will also be more helpful with pieces a bit more simplistic than what I did. My piece was a weird shape so to scrunch it down in rhino I had to make so many separate pieces and I think that was unrealistic of me to have so many components. I did enjoy taking the time to better my sewing with this piece, but I definitely want to try to do something in rhino again. I would much rather take hours pinning together laser cut pieces rather than cutting out the shapes by fabric and maybe not knowing what the outcome will be even if you want something specific.