Author: eaviles@andrew.cmu.edu
Final Project Details & Timeline – Mukundh, Graana, Adrienne, Edison
Timeline
April 3:
- Rhino model / Hand-drawn design
- Prototype
April 5:
- Completed unrolled patterns
- Finish testing to make sure inner wall tension plan works
April 10:
- Delegate tube sewers + main frame sewers
- Pieces cut
- Start dyeing
April 12:
- Individual pieces sewn
- Noodle arms
- Main cube structure
- Dyeing finished
April 17:
- Sew pieces together (as much as possible)
- Sew together the majority of the arms to the main structure
April 19:
- ¾ Sewn together
- Sew together all the noodle arms to the main structure
April 24:
- Sew entire inflatable together
April 26:
- Exhibition day
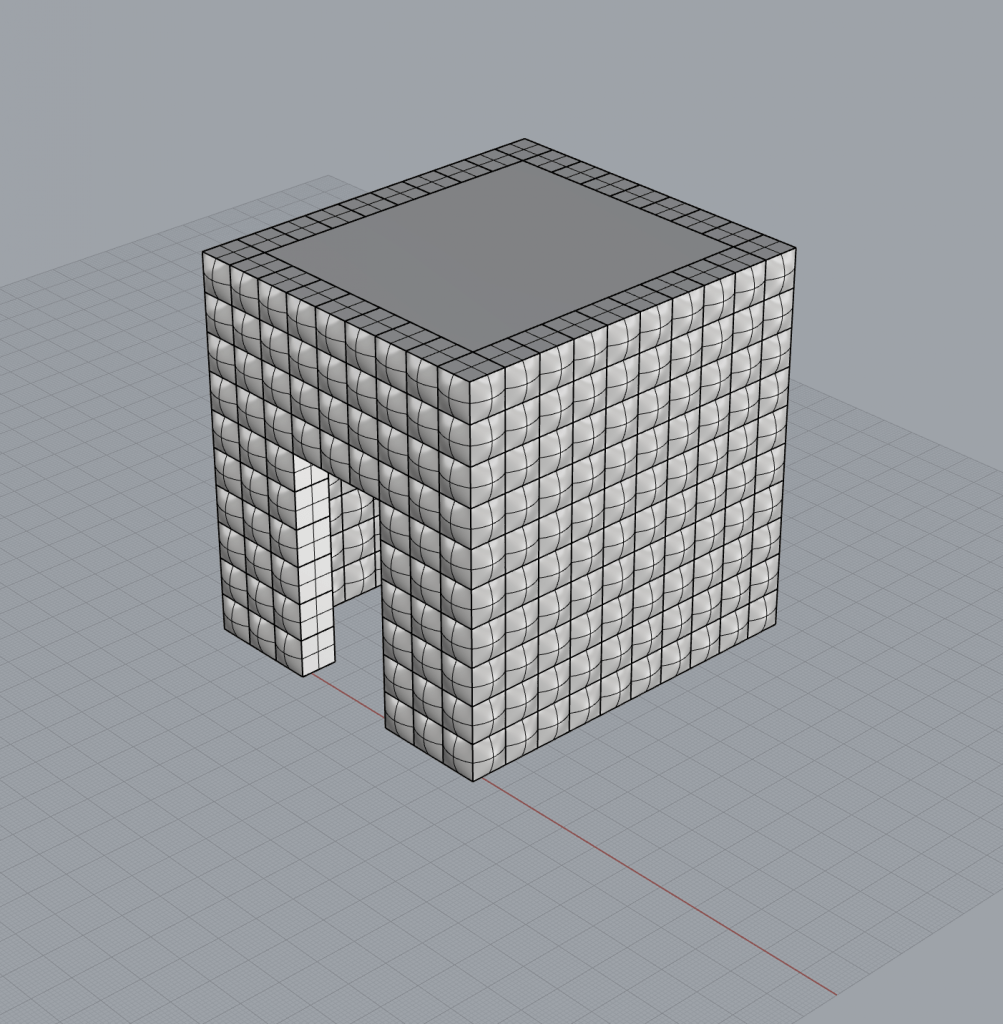
Materials & Tools needed:
Number of Fans
- 1
Colors of dye
- Black
- White
- Red
Materials
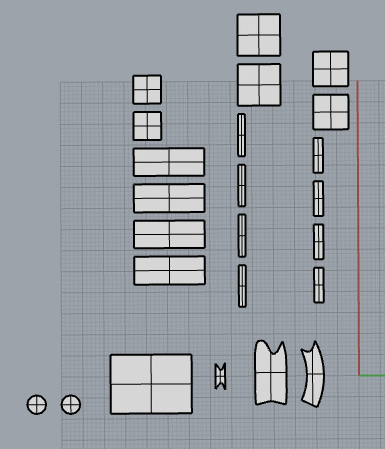
- Ripstop ½ ft of separation between walls
- 376 ft^2 of ripstop for the outside layer
- 50 ft^2 for connecting inside to outside walls
- 300 ft^2 of ripstop for inside layer
- 100 ft^2 of ripstop for roof
- 81 ft^2 of ripstop for ceiling
- 9.5 ft^2 outside layer + ~9 ft^2 inside layer (x6 noodle arms)
- 3 ft^2 for outside hand layer + ~2.5 ft^2 for inside hand layer (x6 noodle arms)
Musical Towers
Tower 1
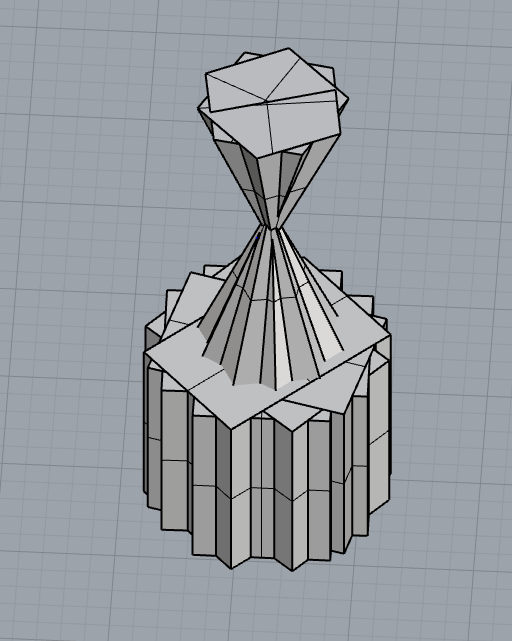

For my first tower, I chose to take inspiration from the song “When The Sun Goes Down” by Arctic Monkeys. I used basic geometric shapes, mostly cubes and pyramids to create my tower. I wanted to combine the shapes to create overlapping edges in order to highlight the song’s musical changes. The song starts of slow and then quickly pick ups and becomes more upbeat. With the stable square base I wanted to portray the slow start to the more upbeat vertically stacked pyramids.
Tower 2
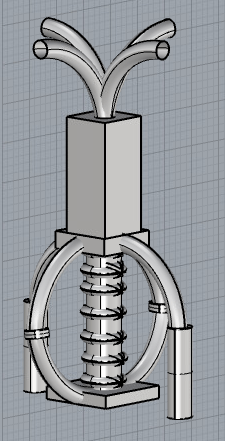
For my final tower I took inspiration from a song titled “Te amé” by Enyel C. The tune is very groovy and catchy and the music video is filmed at the beach so I wanted to keep that same vibe with my tower. The top ideally would be moving around in the case of an inflatable to add a sort of wave feel to the tower and the curved objects surrounding the cylinder of the tower would be colored like those donut looking floaties you see at the beach to give the tower some color.
Push & Pull
Object 1 – Avocado
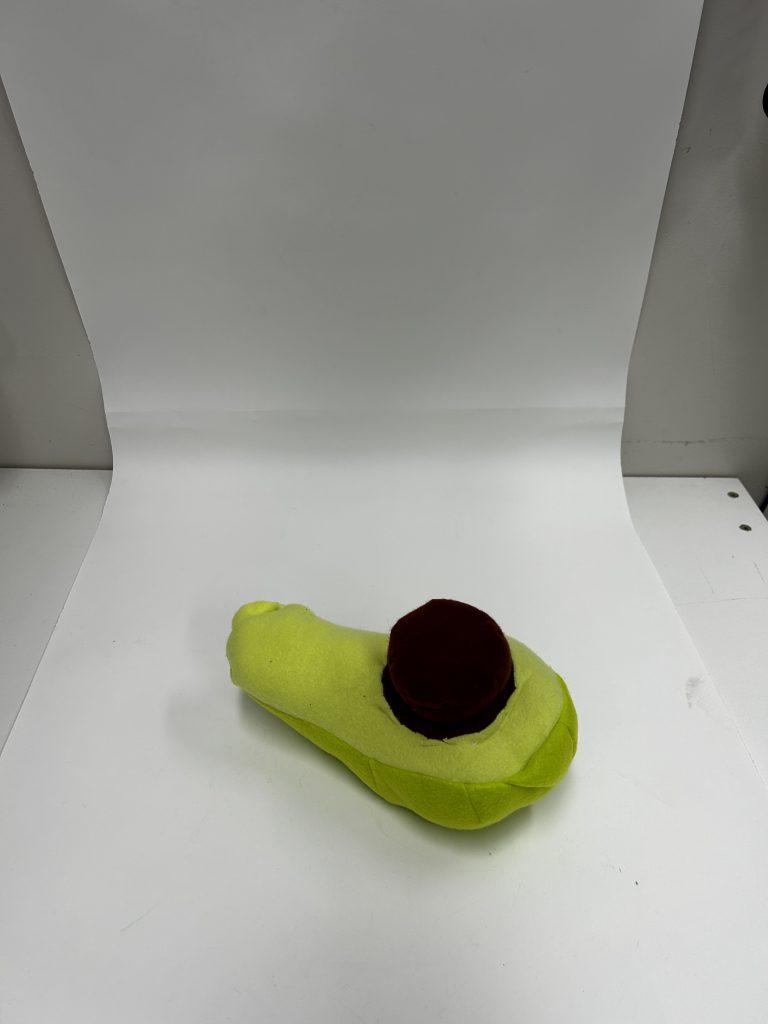
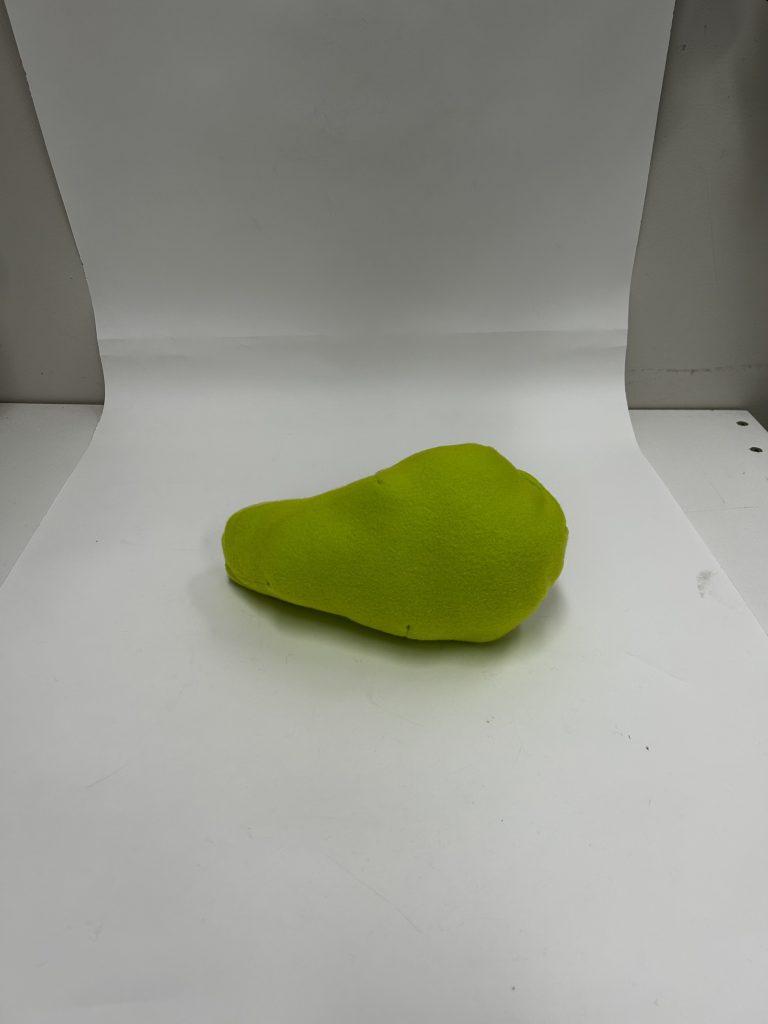
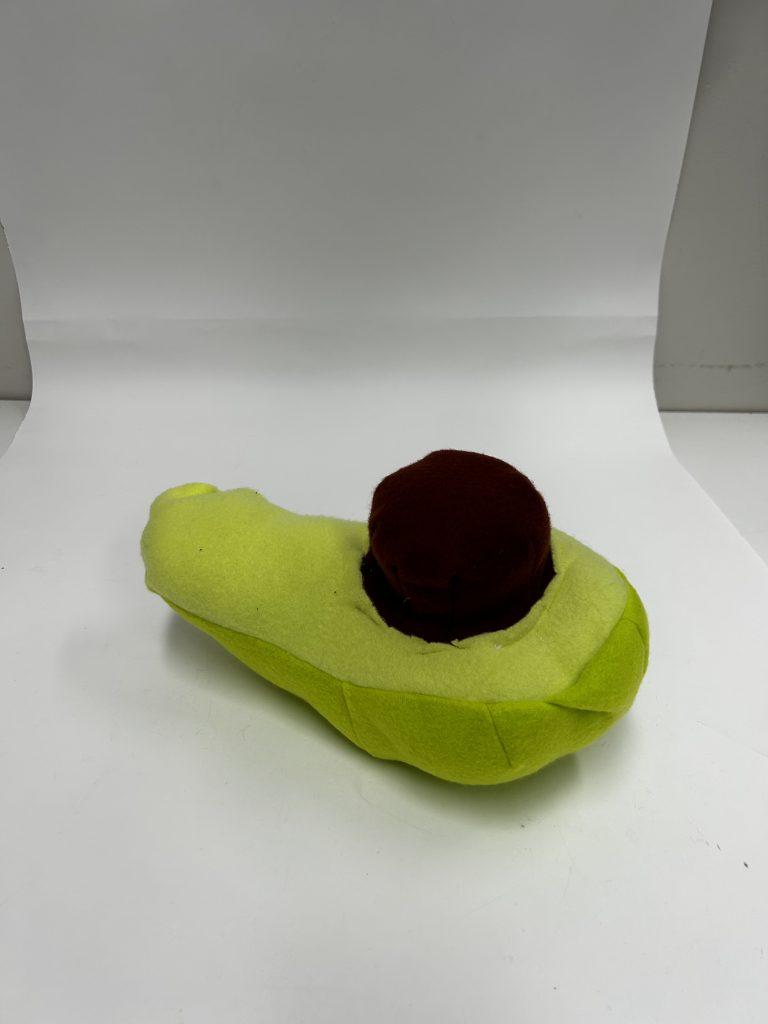
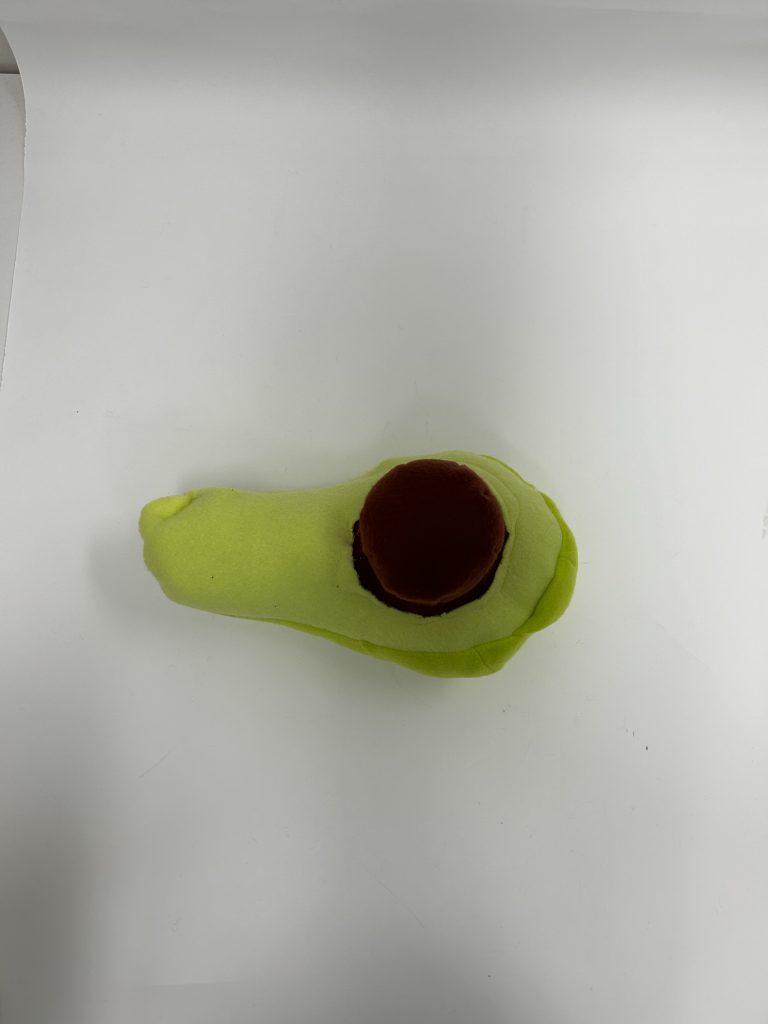
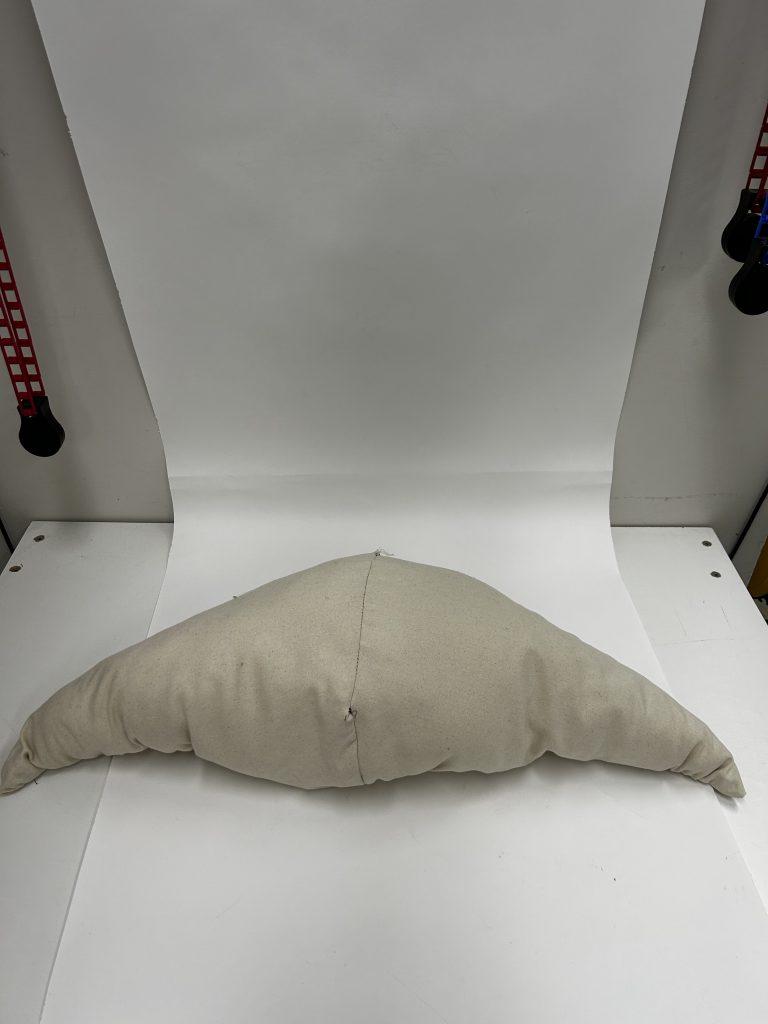
For my first object, I decided to recreate a pretty recognizable object. I chose the avocado, since it was composed of irregular shapes and would allow me to experiment with some darting in certain areas. My first version of the avocado, originally, did not use any darting techniques and had a really odd – not avocado looking shape. For my second iteration, which is the one displayed above, I focused on using darting for the seed, as well as for the shell of the avocado. By doing this, I could create more pronounced shapes after stuffing the inflatable, since in my first iteration the lack of darts made the inflatable take a rounder shape. It was challenging using darting techniques on the odd shape of the avocado – however I do like how it came out and think it creates a very nice shell looking shape. In the case of the seed, I think I added way too many darts which led to the seed having a very tall size and not very round as I intended. Overall, this was a great learning experience since I was able to experiment with different techniques and learn from my mistakes.
Object 2 – Gathering
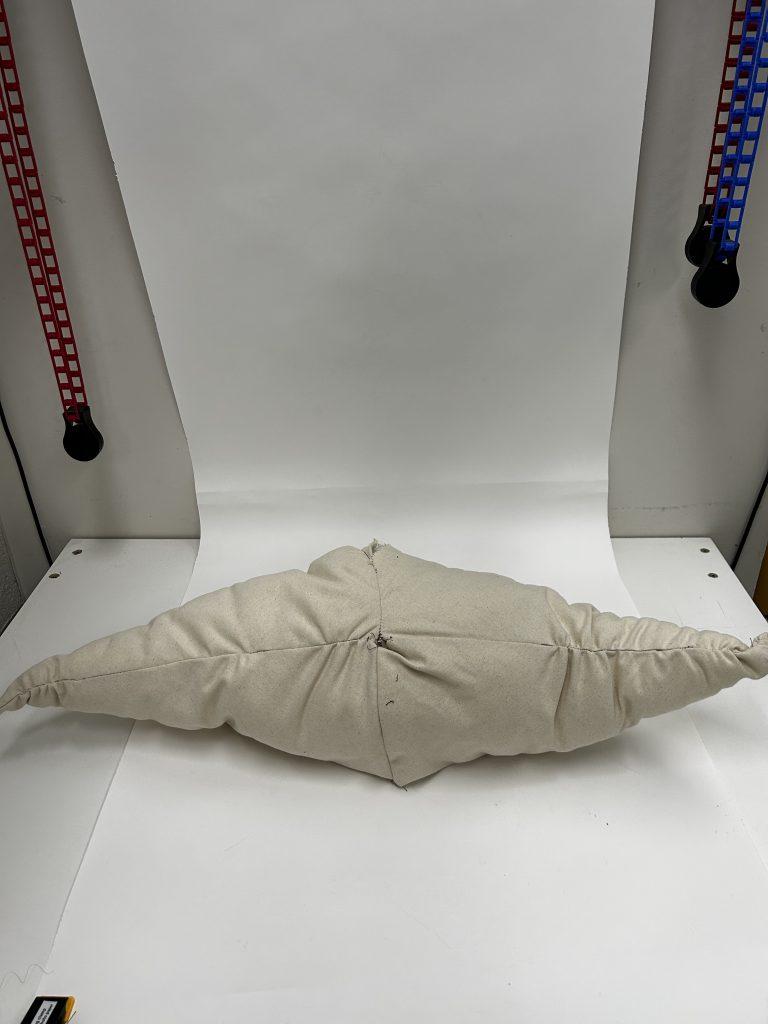
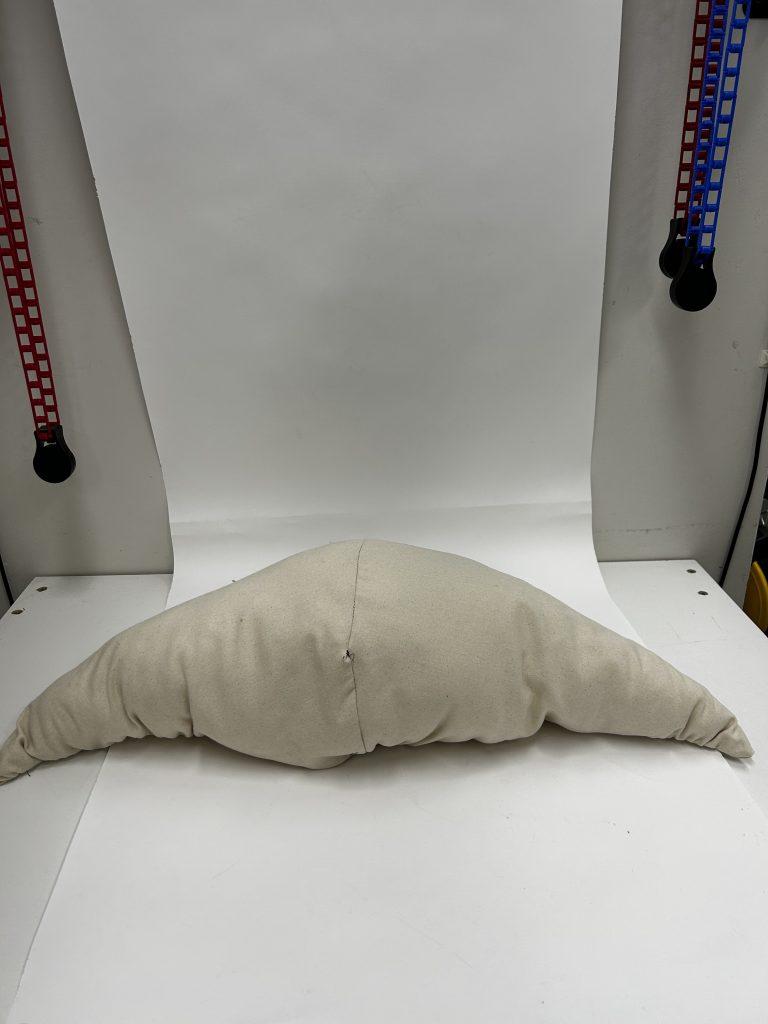
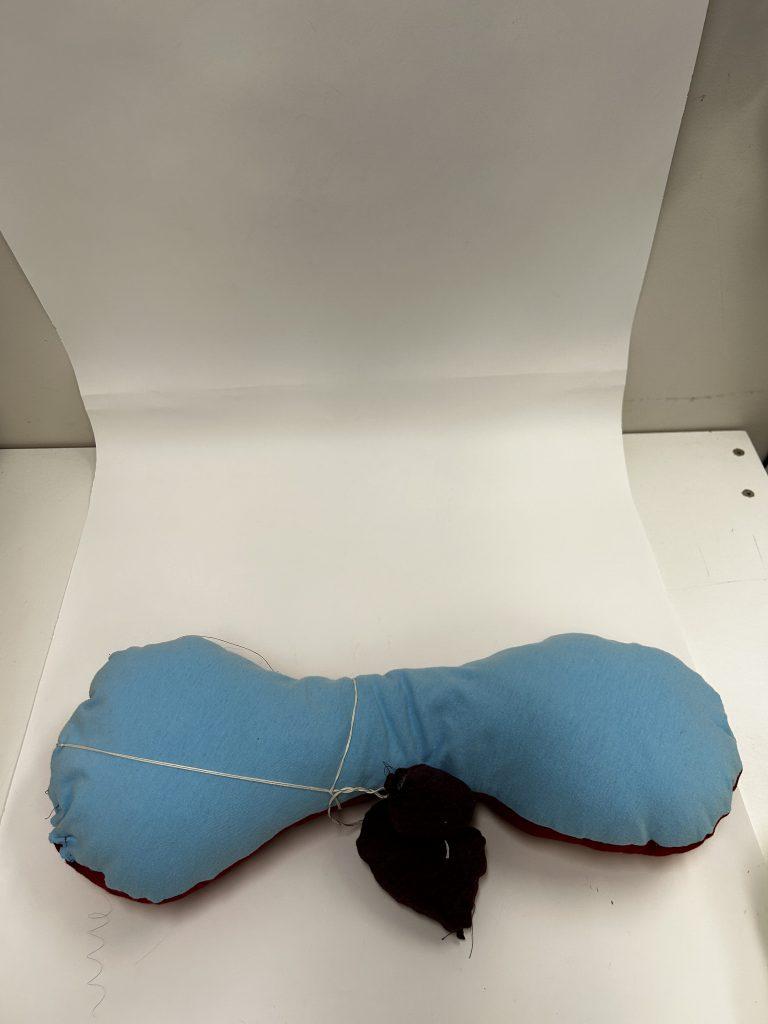
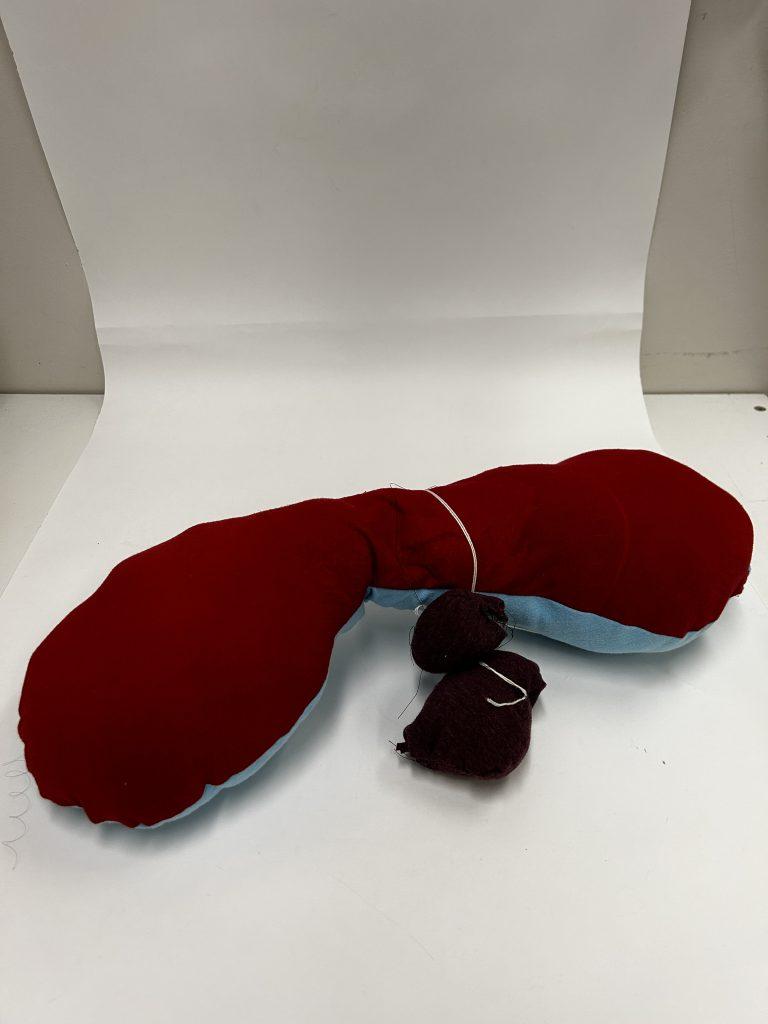
For my second object, I chose to focus on using gathering techniques while using two basic shapes in order to create a unique object. I chose to use two cones and use gathering in order to create a type of crescent shape from the two basic shapes. Gathering proved to be a difficult task, since in the process a ended up breaking the string I was using several times and had to start over. Because of this, I chose to divide my gathering into three sections in order to gather the fabric along more spots while also minimizing how much gathering I would have to redo in case the string broke. I also used a technique I found online which used two straight lines of string which were both used to gather the fabric by pulling on them. At the end, I sewed both tilted cones together to create this new, almost croissant looking shape. Although this was not what I had intended initially, it ended up being one of my favorite pieces since the shape is somewhat mysterious and originates from two very simple shapes being put together. I think it’s also really cool how it looks like two completely different objects whenever its flipped over – since on one side the gathering can be seen while on the other only he general shape.
Object 3 –

For my third object, I decided to experiment with user interaction and how that could be incorporated to change the inflatables shape. I also wanted to experiment with different fabrics and materials so for this object, the only fabric I used was old t-shirts that I had in my closet. This provided vibrant colors as well as different textures on both sides of the object. As for the interactive part, I passed a string through the object and tied two little balls at both of the ends of the string. Pulling on the string would cause the inflatable to sort of shrink and take on a completely different shape. However, the string was not very strong and would continue to break if pulled on a little too hard. This inflatable was a lot of fun to make since I was able to consider human interaction with my object. It was also pretty cool to consider how different t-shirts and the materials they were made out of would affect the way my inflatable felt and looked.
Improvised Inflatables
Inflatable 1

I approached my first inflatable with a general idea or concept. Initially, I wanted to create an object composed of multiple corners of plastic bags in order to create a “spiky” effect. However, I quickly realized how hard it was to tape several corners together at one point. In order to maintain my initial idea, I decided to heat seal several of the corners together to allow for more air to stay within the object itself. This led to some pieces of plastic being sealed entirely and sort of having a dangling effect on the inflatable. Although this wasn’t in my original plan, these strips gave a little more life to the inflatable and complemented the spikes that ended up inflating.
Inflatable 2
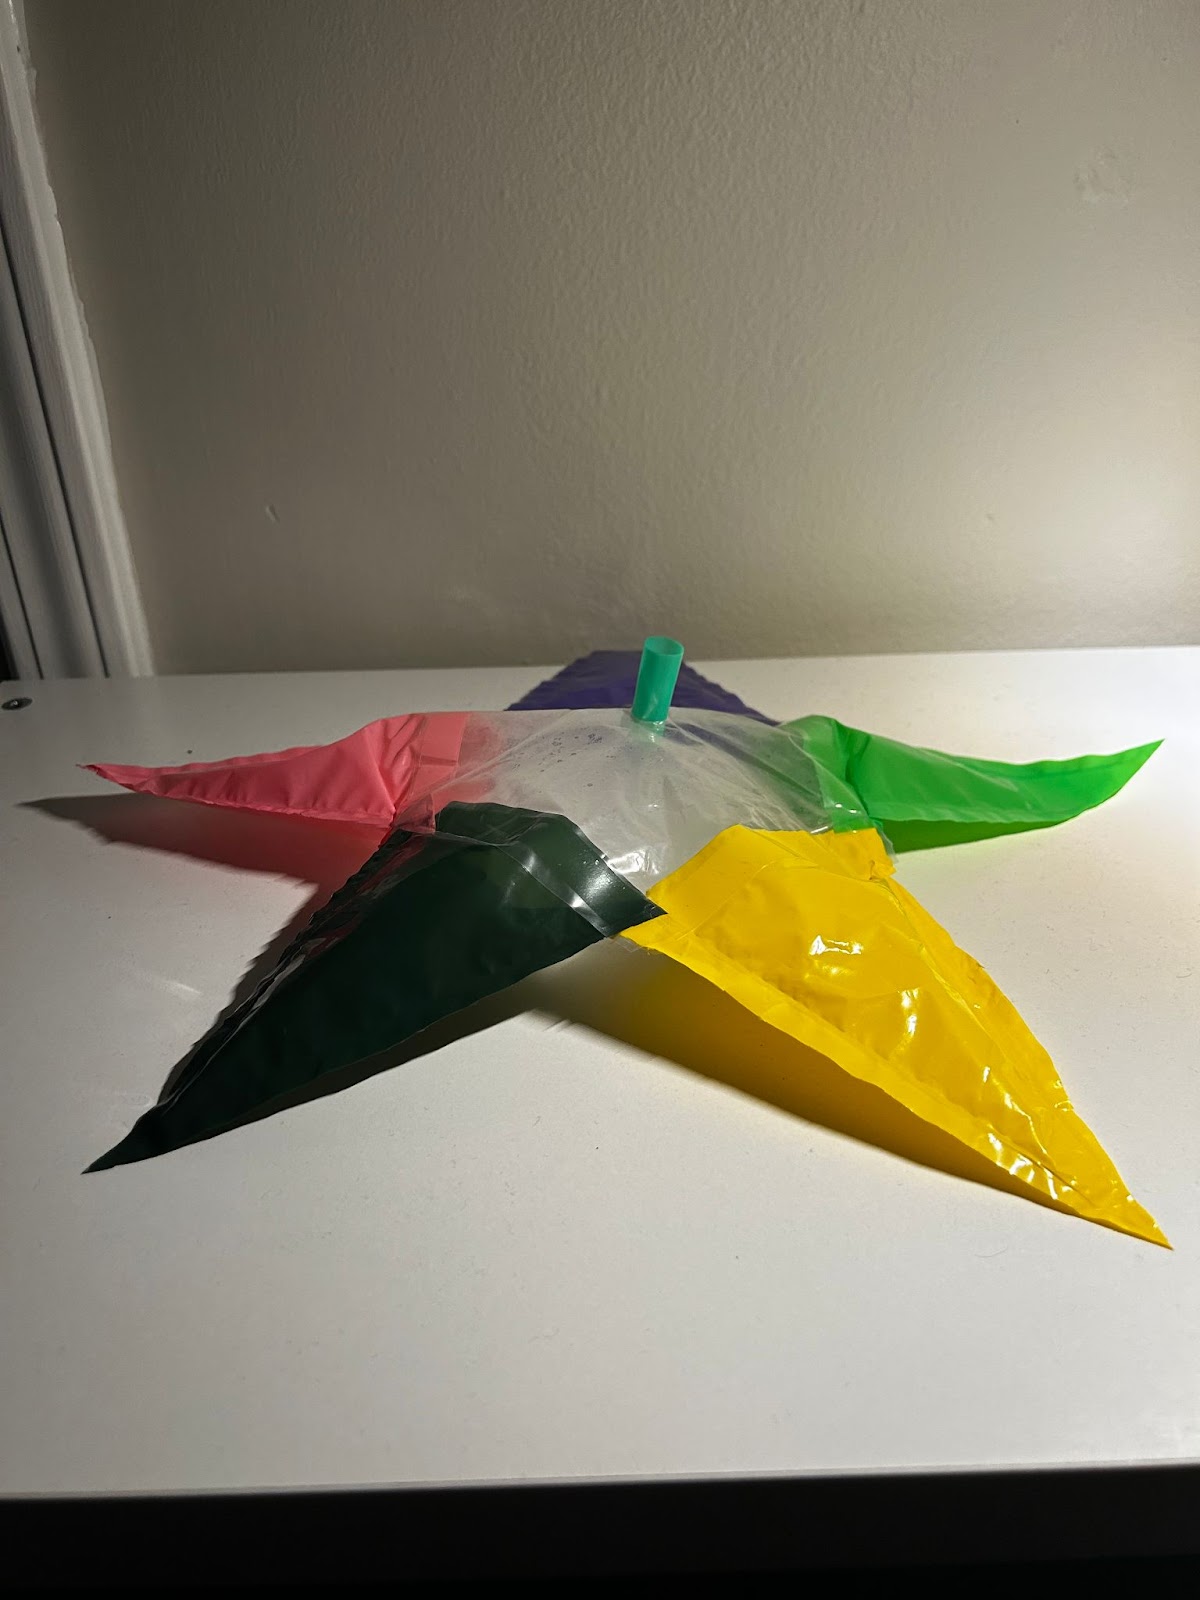

In order to explore some more geometrically oriented objects, I decided my next inflatable would have the shape of a star. In order to add complexity I broke the star into two shapes. The center – which is composed of a pentagon, and all the corners which were made using the corners of the plastic bags. The center of the star was made transparent on purpose to allow people to view inside the star and compare the inflated versus the not inflated object. It also added a perspective aspect – since spectators could directly observe the person manually inflating the star through the transparent portion.
Inflatable 3


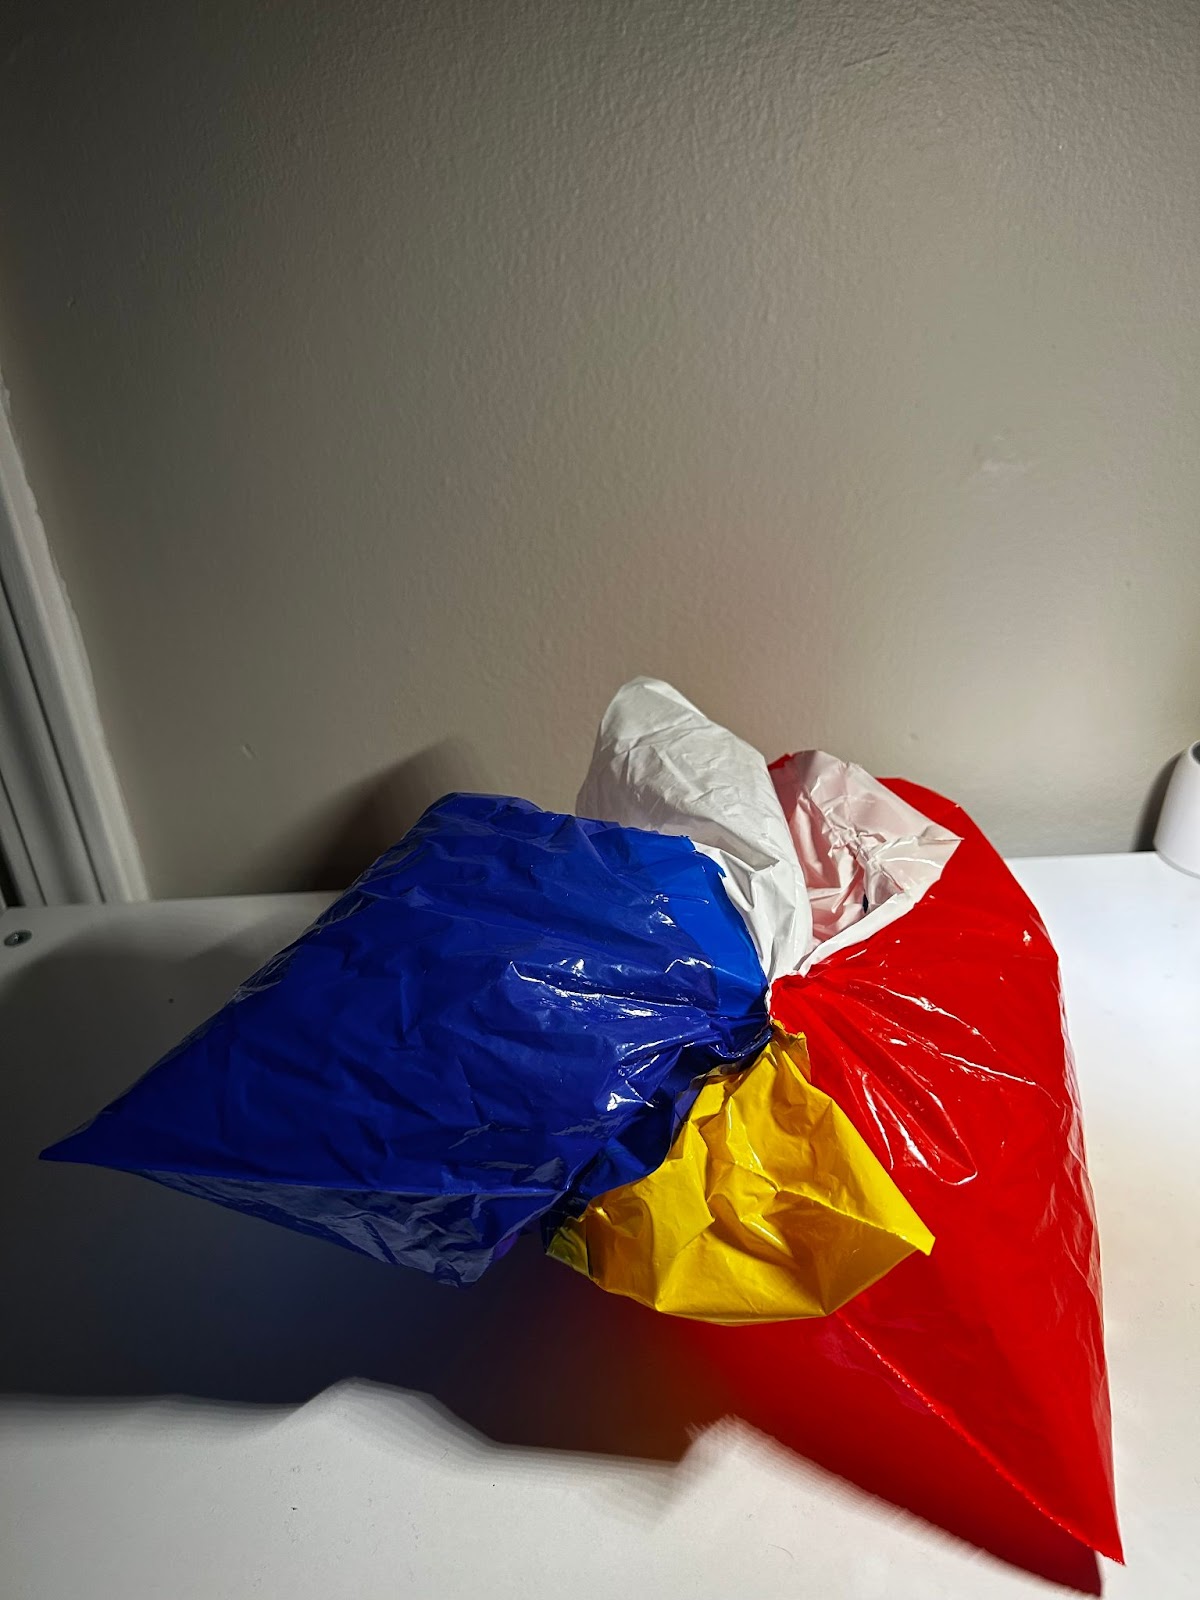
For my third inflatable I chose to have a more “freestyle” approach. I decided on a color palette beforehand and cut different shapes of these colors. I wanted the base of the object to be transparent and use the pink and green colors to create a patching effect throughout the entire inflatable. The base was made transparent intentionally to allow for different perspectives of the inside and outside of the object as well as to highlight the contrasting colors of the neon green and bright pink patches.
Sewing Samples & Ball

I used the basic pattern for the ball and forgot to take stuffing with me and ended up deciding to improvise and stuff it using feathers from a pillow I had laying around. I also misplaced the sample with my initials 🙁