Final Project Proposal – Mukundh, Edison, Graana, Adrienne

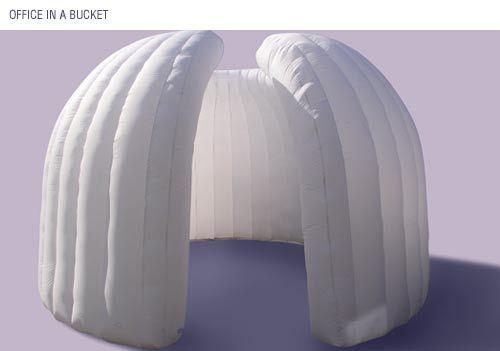
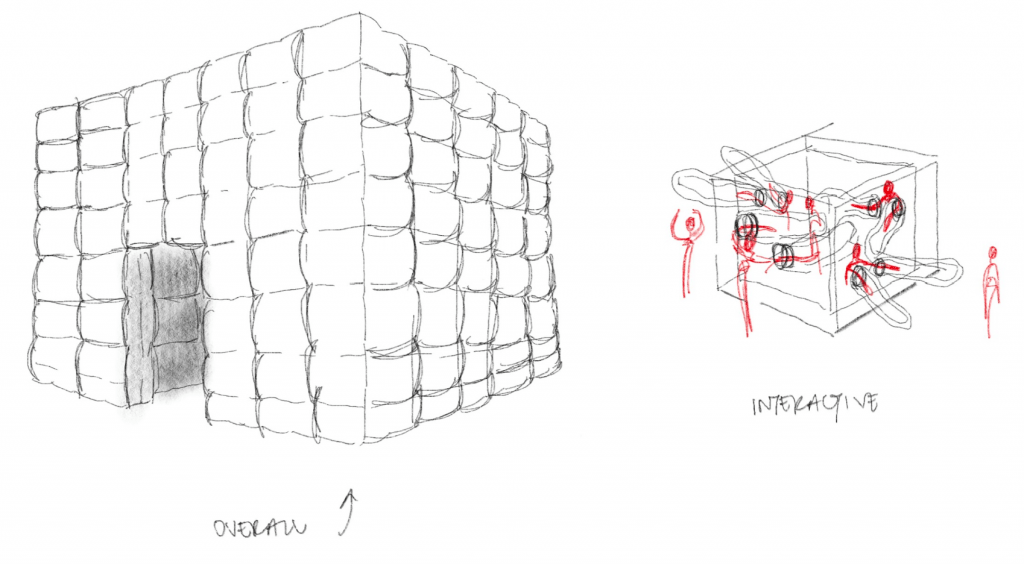
For our inflatable, we chose to make a double-walled cube, with two layers of interactivity. Our inflatable structure will have exterior and interior features with which people will be able to interact with. On the outside, people will be able to use glove-like inflatables that enter the inflatable through the walls in order to interact with people inside the inflatable. The same experience will be available for people on the interior. In order to enter and exit the interior portion of the inflatable, people will be able to enter the space through a main entry point and walk around interacting with the gloves, which are being moved by the people outside the inflatable. They will also be able to move the interior gloves in order to interact with the people in the exterior. The overall feeling is to exhibit the “Death of Isolation” with landscape images projected/dyed on fabric and through a feeling of distance and separation created by the exterior and interior layers of the structure.

Ideally, we would like people to be able to have sudden interactions with people on the outside, or when they’re outside, to have interactions with people on the inside, to mimic social interactions, but at the same time have a large enough space for everyone to lounge, while being 6 feet away from each other. This concept is motivated by the theme “Death of Isolation”, and to showcase social interactions in a new world. Our choice of landscape is a post-COVID world, when people are trying to have more social interactions, while still highlighting the struggles of the socially limited society we experience during COVID.

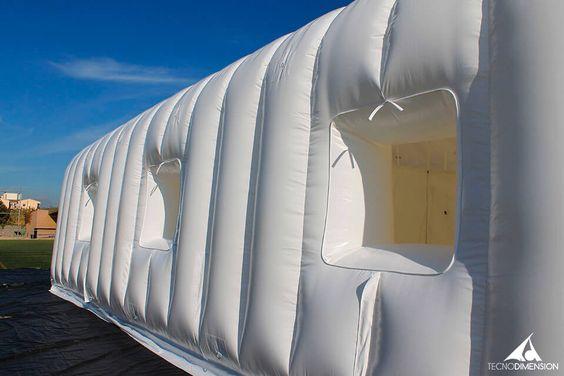
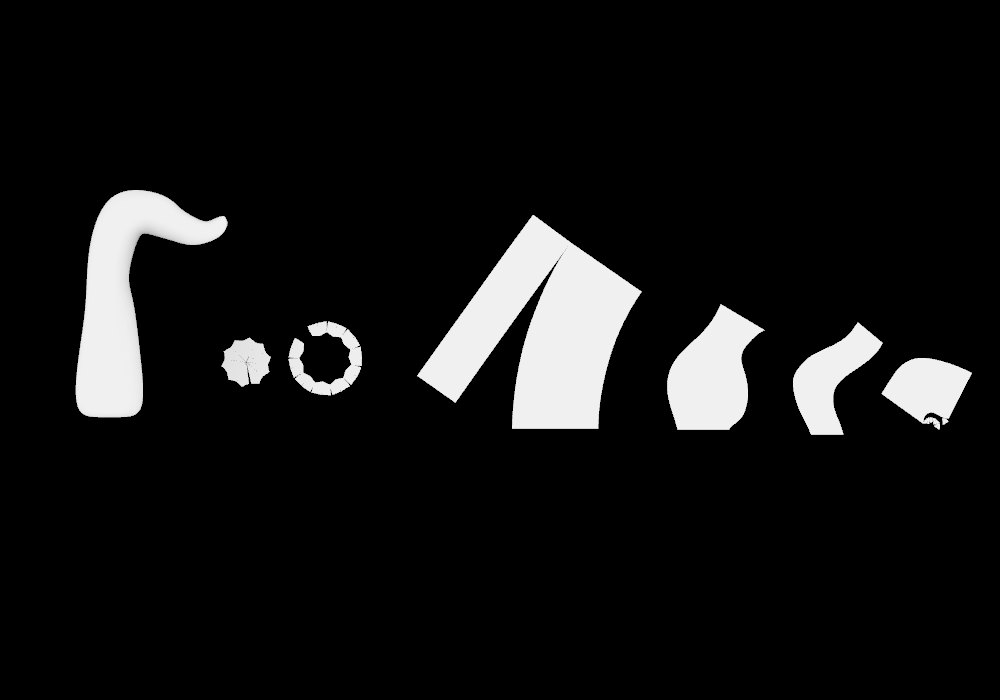
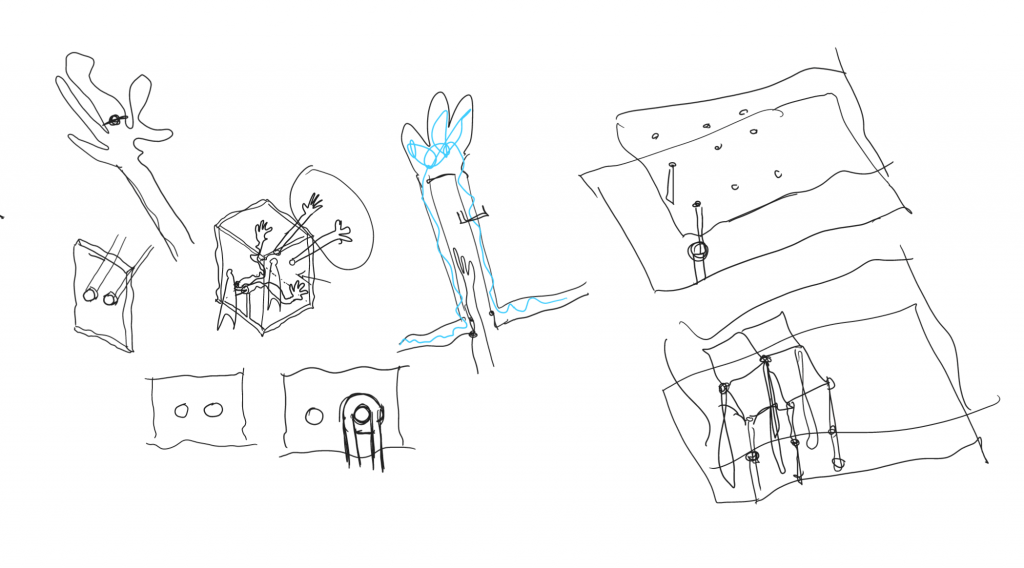
There will be one fan on the outside corner, which will inflate the entire structure. We are also thinking about maybe having the fan on the inside to give it a more clean exterior appearance. In terms of the structure, we chose to use a double walled cube as our main structure. The walls will be brought together across different points within the inside of the wall in order to create different textures on the exterior and interior of the structure. We will be adding different openings for our glove-like feature at different points across the interior and exterior surfaces. The gloves will also be double layered in order for them to remain inflated at all times.

Push and Pull Objects

This inflatable was the most impromptu because I had no plan for it, I just knew I wanted a mesh of shapes to create an abstract form. I assembled the 3 main sphere using a mixture of exposed and closed seams, as well as pleats. I sewed the main spheres shut, and then cut out a circle to attach the other sphere to it (hence the impromptu attitude). I added some appendages using a variety of cone shapes and techniques as well. Overall, I really like the way this turned out! I feel like just using grey helped it read as a single monolith. The size is also really satisfying to hold and cuddle with.

This is a giant jewelry clasp that is interactive. I started by sketching the mechanics of a real jewelry clasp, and then made a large pattern out of it by sketching on kraft paper. By having a separate tube in the center connecting all the pieces, the hot pink middle piece is able to move like a jewelry clasp and “open and close”. This one took a long time just because of the patterning aspect. It also has about 5 pieces that compose it, so it was a lot of individual piece to assemble. I also had a learning curve with learning how to sew inftatables with cutouts in the center. I hand sewed all the pieces with the cutouts in the center using a hidden hem stitch. Overall though, this one came out the cleanest because of the patterning and planning that went into it.

This piece was inspired by the Pigeon Bagel (in squirrel hill) logo on a T-shirt I have by them. I freehanded this one, but had a clear idea on my end goal unlike the abstract grey one. I used darts to make the shape of the bagel, and then attached them via zipper. Because I didn’t preplan, the zipper was really hard to attach and I had to do a lot of fabric maneuvering on the sewing machine. I then sewed the cream cheese as a separate part, and finally at the end cut out holes for the arms and legs. The arms and legs can be pulled to elongate one side versus the other. I also wanted to put a spin on the design so I made all the shoes and gloves different colors. I think this piece did a good job achieving the interactivity that I wanted it to have as a playful piece.

Music Tower

My music tower was inspired by this song. It just feels mystical and free so I wanted the tower to have lots of round shapes and cylinders to it. I also wanted all the curves to have a kinetic feeling to them, as if they were dancing to the song. Overall, my focus was on the fluidity and organic representation of the song. Here is a link to my rhino file as well.

Improvised Inflatables

Graana Khan

Inflatable 1

This first inflatable was made only from rounded and curved pieces, and taped together. My first challenge was getting the pieces to match because of the different tangents of the curves, as well as getting enough coverage from the tape along those curves. I liked the color palette in this one and the lightness of it. Although not my original intention, the overlaps of certain curves look interesting with the translucency of the plastic material.

Inflatable 2

This was my second inflatable and I wanted to make a form that had all the seams facing outwards. I used only rectangle shaped pieces and double sided tape. I think this one had nice contrast to the first one in the way the seams added a sense of “sharpness” and edgy-ness to inflatables which typically are associated with being soft. This one also unintentionally ended up looking a bit like an animal.

Inflatable 3

This was my third inflatable which used polygons and a mix of outward facing seams and inner seams. I also wanted to try attaching different forms together that were made separately. I made each form individually and then attached them together. Since there wasn’t a plan for any of my forms, I found it difficult to secure the pieces together without any gaps. I hadn’t planned for the connections of the 3 pieces so it was a challenge trying to get them stuck together. Still, I think the outcome is interesting and goes well with the balance of the 3 different colors.

Sphere

I used the zig zag pattern for the sphere. It was pretty intuitive once I looked at the instructions! My roommate’s dog also loved it.