Yumeng Zhuang
Existing example taken from Aeromorph
https://tangible.media.mit.edu/project/aeromorph/
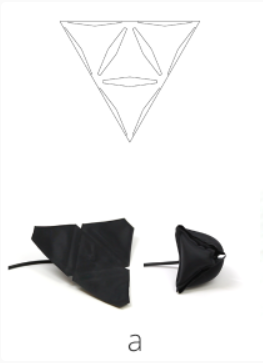
It’s noticeable that the hinges don’t have directions, so I need to manually bend it to the proper end shape.
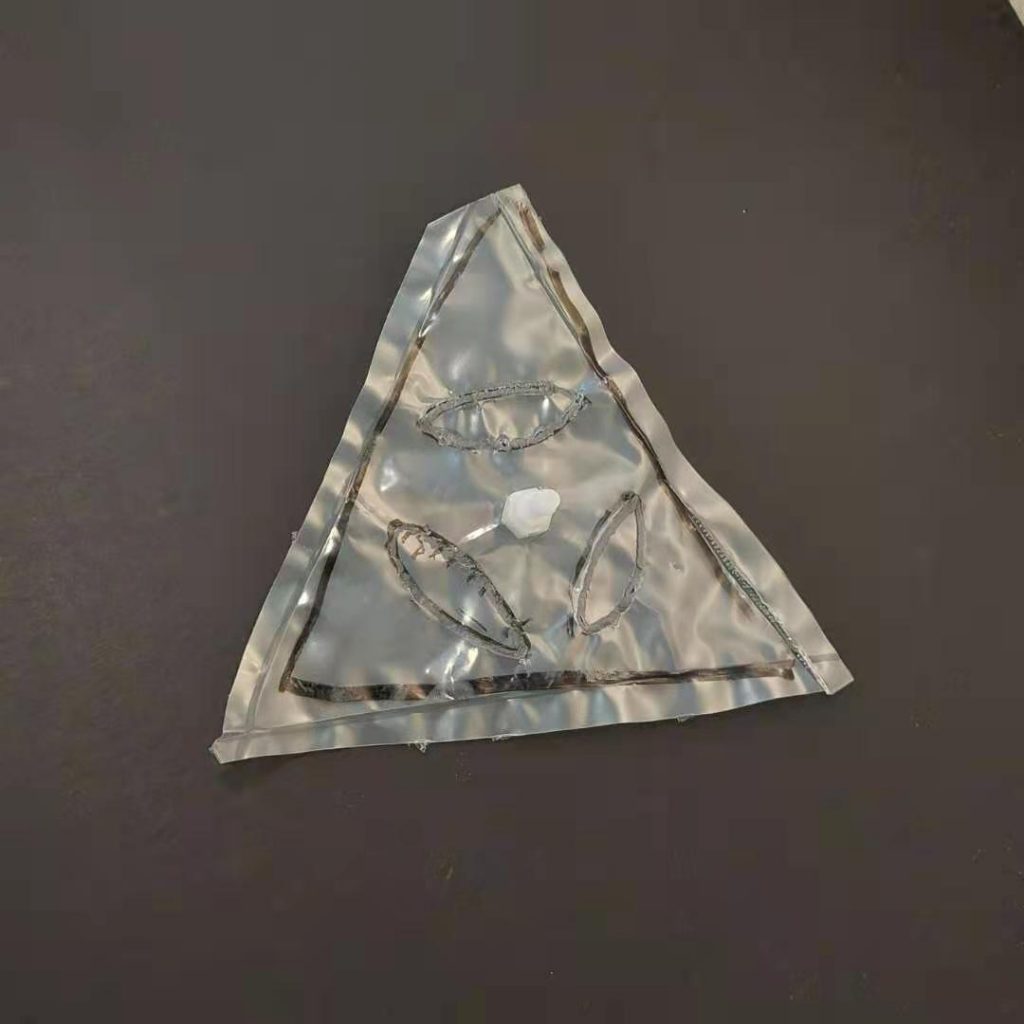
Example Adapted from Aeromorph
I would like to give the hinges some preferred direction so I taped the dashed lines on one side with packaging tape.
However, I ended up having to twist the end as well.
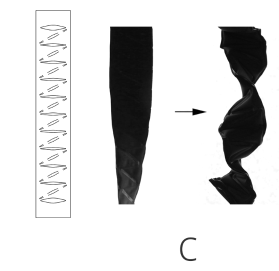
My Example Hinge
I was drawing random lines and found the following pattern working very well for a hinge that folds all the way to 90 degrees.
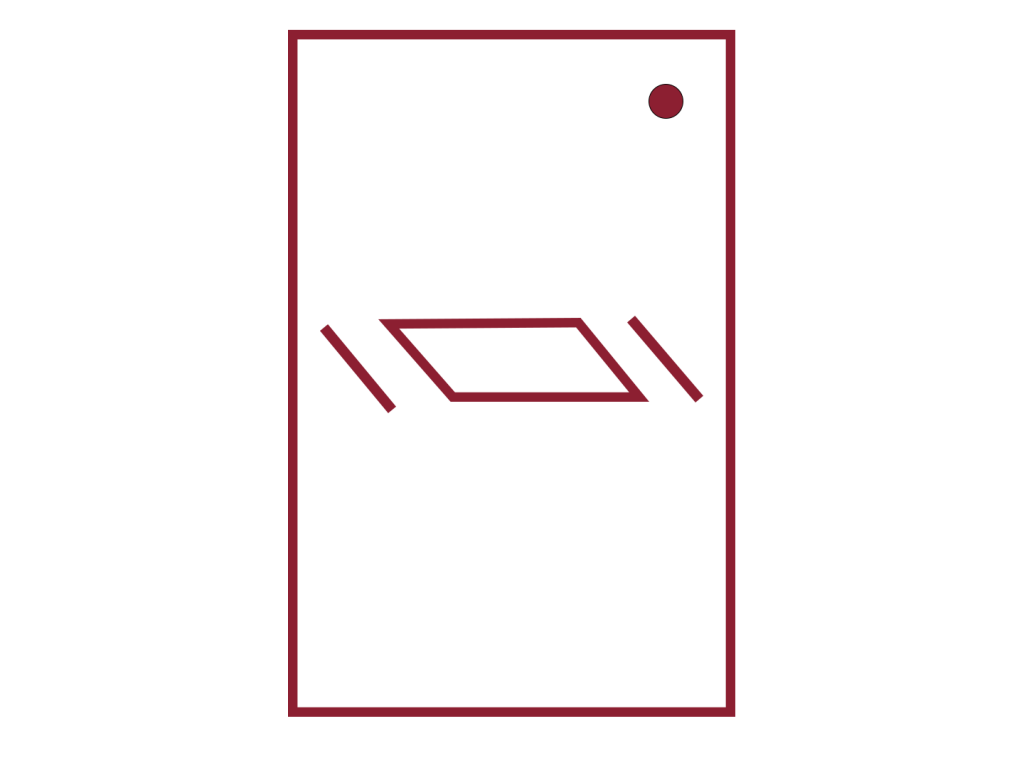
Instructions
First find a sheet of thermal plastic and fold it in half so that you have two layers. Draw the pattern above with a marker on the top layer.
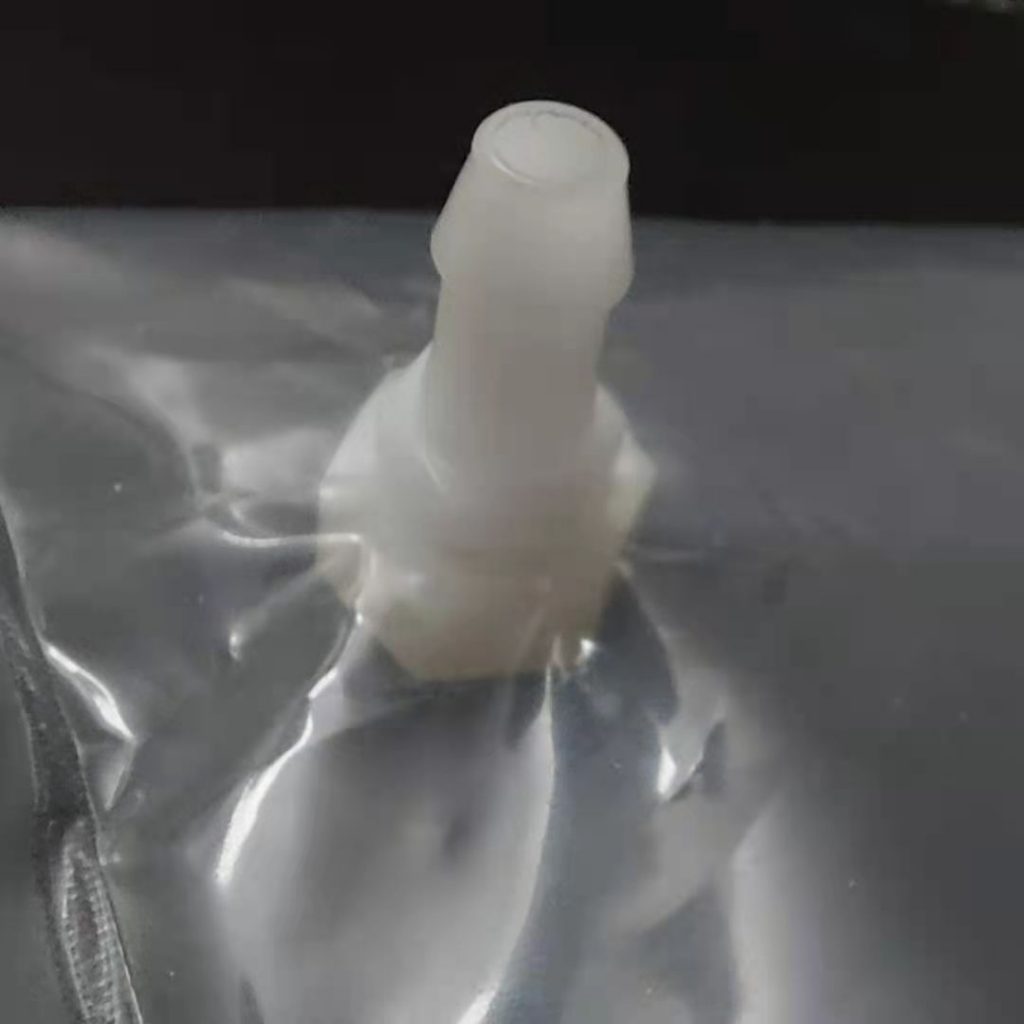
Puncture a small hole on the top layer of the plastic where the red dot is and put the barb fitting through the hole and tighten the nut beneath the layer.
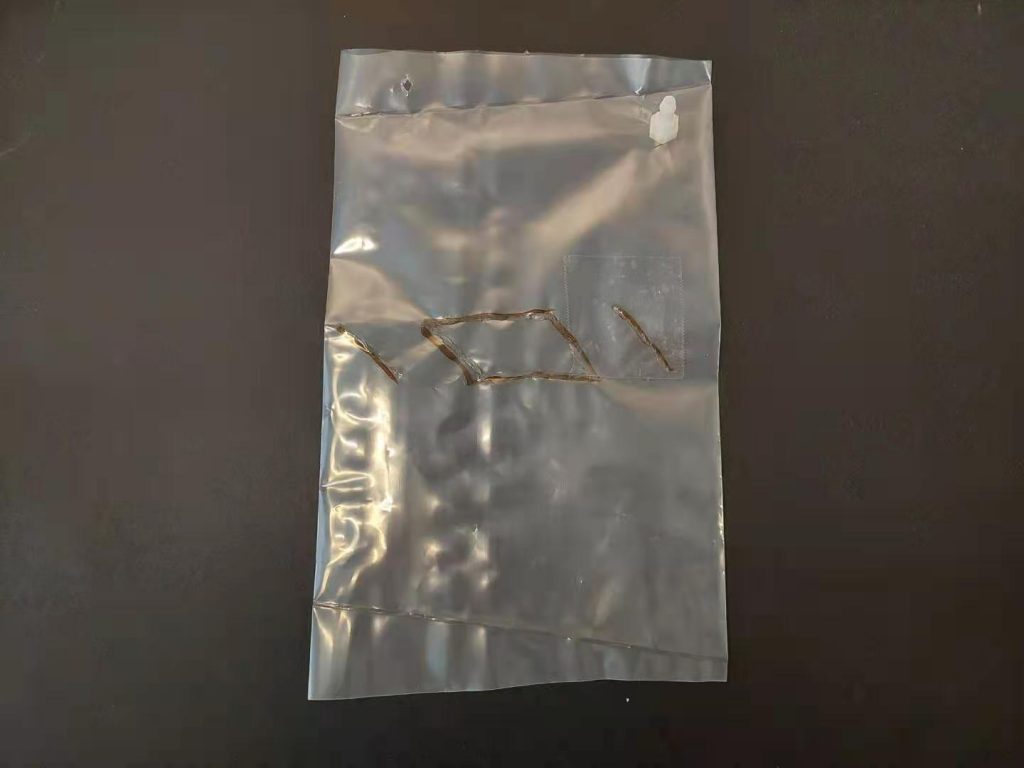
I used a soldering iron to seal the parallelogram and the two lines in the middle. The steps are as follows:
First, heat up a soldering iron with a flat tip to 330 degrees C. Make sure the tip is not touching anything while heating up.
Second, find a piece of cardboard as the working surface.
Third, find a sheet of parchment paper so that it can fold and wrap around the shape you drew on the plastic sheet.
Forth, put the bottom piece of the parchment paper on the cardboard, then the bottom layer of the plastic sheets on top of that, then the top plastic sheet, then the top half the parchment paper on the very top.
Carefully trace the marker lines with the flat tip of the soldering iron, applying some pressure. What I found helpful was to do it in segments of 1 inch, tracing lightly back and forth for a count of 5, and then move on to the next segment. This will prevent the tip from scraping the melted plastic away.
Seal the parallelogram and the two lines with this method, and check that the center parallelogram is sealed off so that no air can get it.
Then for the four outer sides I used an impulse sealer at level 3 (depends on the model)
Align the marker lines with the sealer and press down until the light goes off.
Then the pouch is done.
I used a blood pressure cuff pump and a PVC tube to pump the air into the pouch.
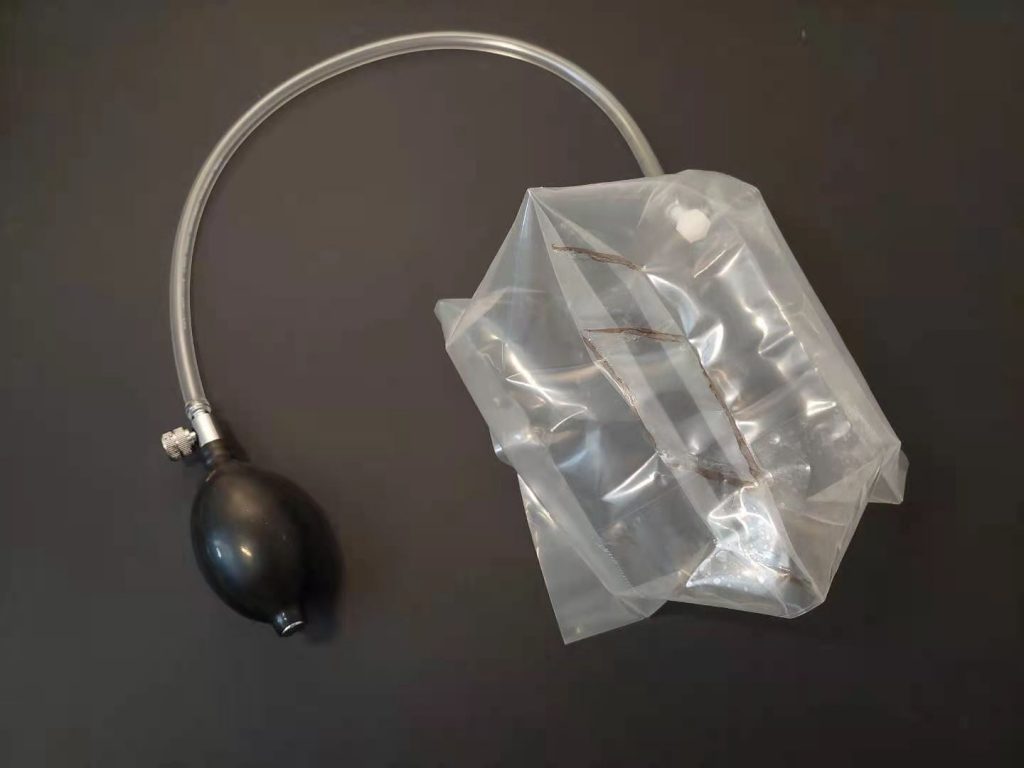
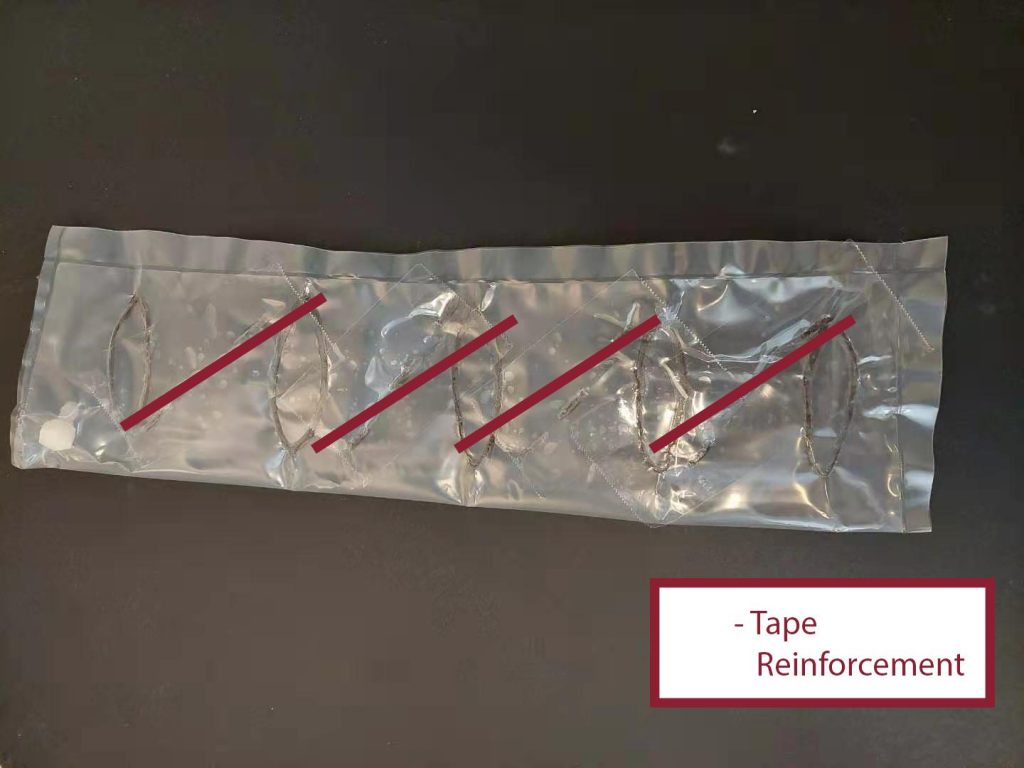
The major drawback of this design is that the two straight seams are under a lot of stress and both of them tear holes on the bag before reinforced by tape. This hinge also does not have a preferred direction.
Leave a Reply
You must be logged in to post a comment.