By: Natalia Santiago
- Existing Example taken from aeroMorph – Pyramid Actuator
I decided to recreate the pyramid design created by aeroMorph. Originally I wanted to make the whole shape with the impulse sealer but the hinges were too small to make the impulse sealer seal the plastic around the paper I used to make clear small lines. Therefore, I had to solder the hinges.
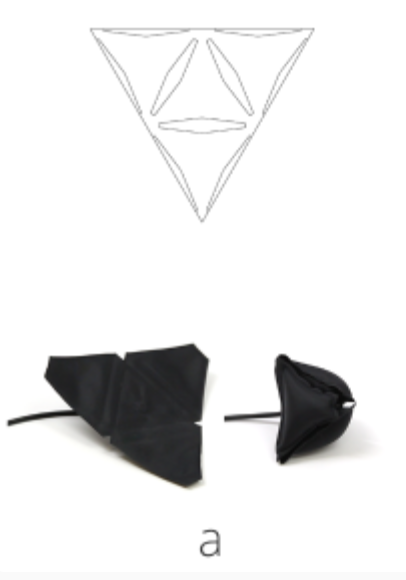
aeroMorph Pyramid Actuator 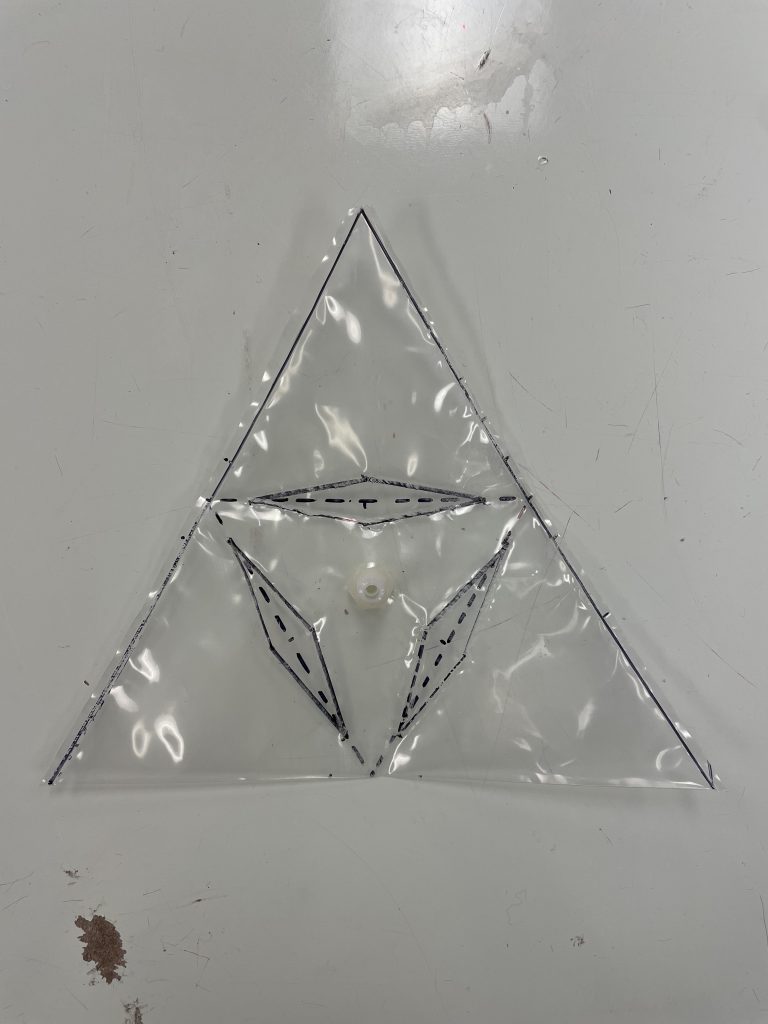
My rendition of the Pyramid Actuator
2. Extended Example – Hinges used in aeroMorph Pyramid
I found the hinges used in the aeroMorph pyramid very interesting and wanted to see what would happen if I put them in a zig-zag pattern and varied their width. I thought this would make the rectangle spiral but instead, it just shrunk.
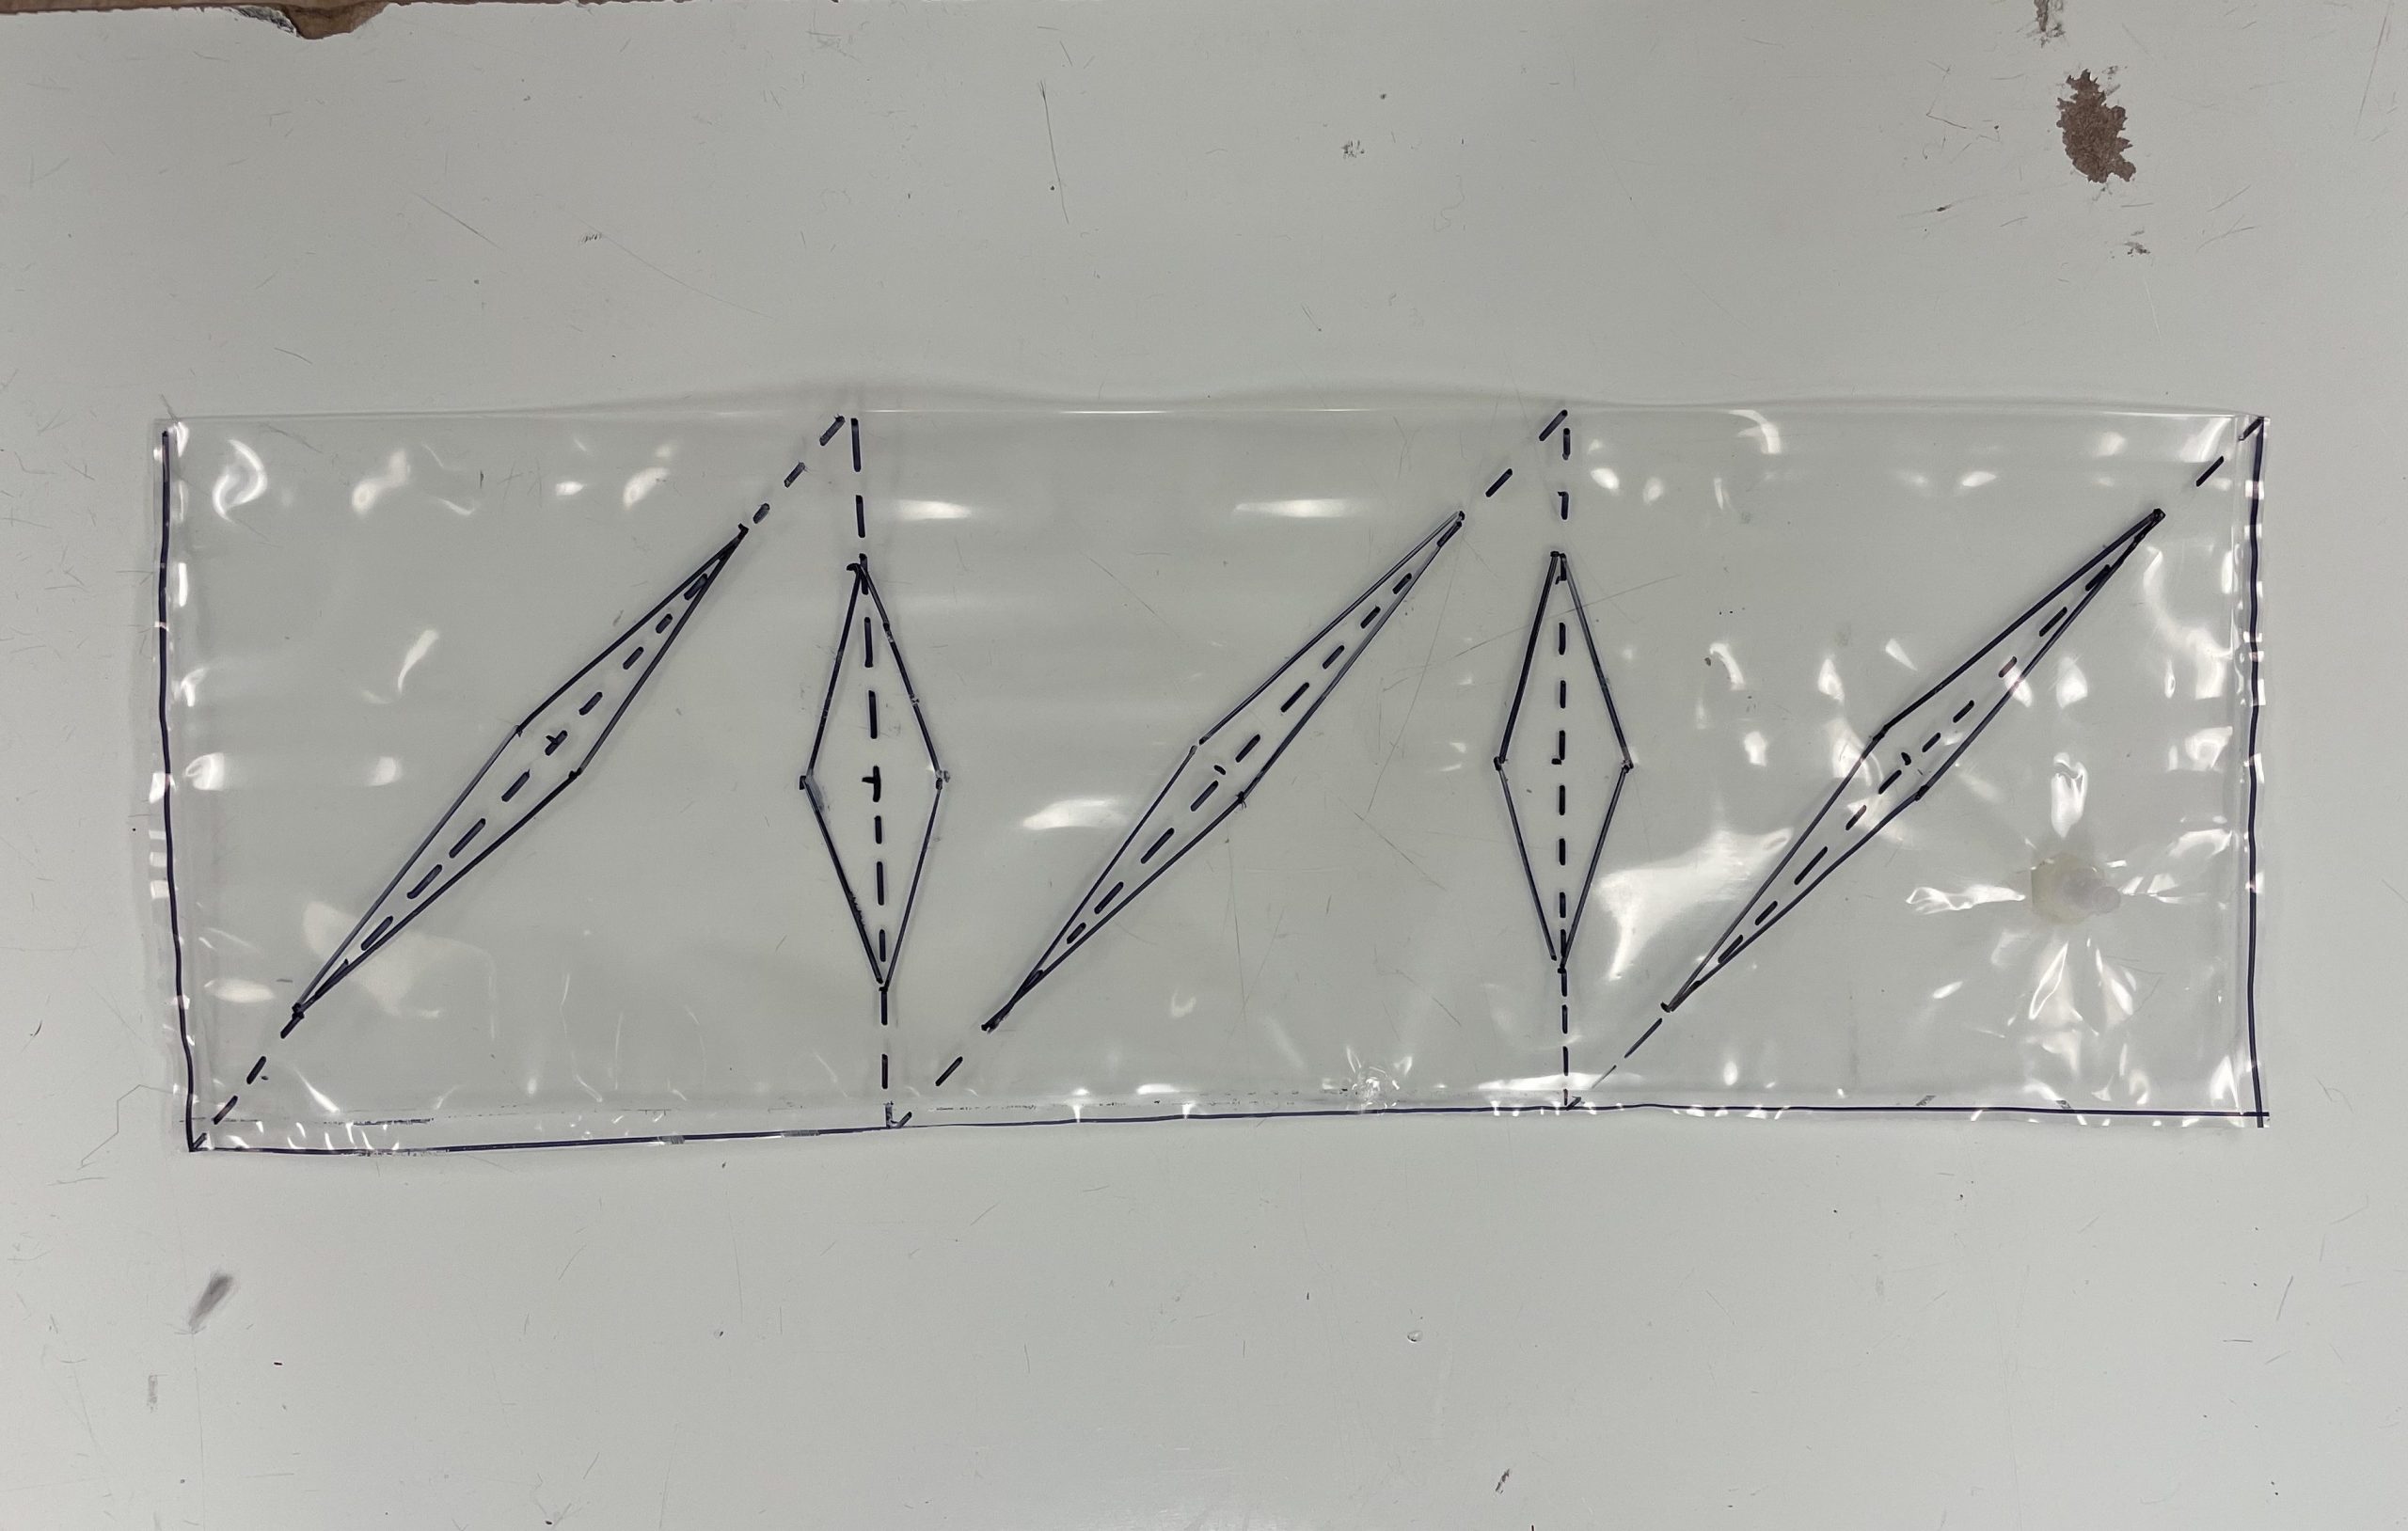
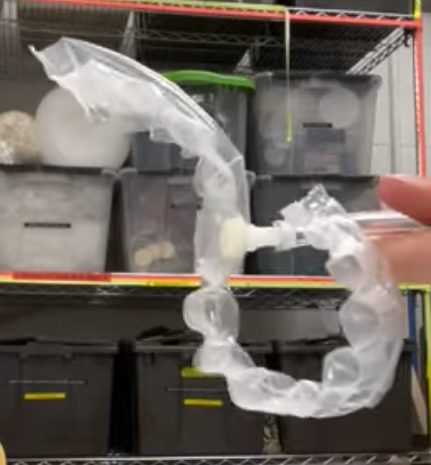
3. My Own Hinge
I was very interested in the curvy actuator that Professor Robinson made in class by sealing 4 pieces of plastic to one side of the actuator. I wanted to extend the example and create a piece that would curve in an S-shape. However, I was unable to make one of the sides equally as long as the other because one of the sealed edges popped. Even with the difference in length, I was still able to achieve some of the effects that I wanted.
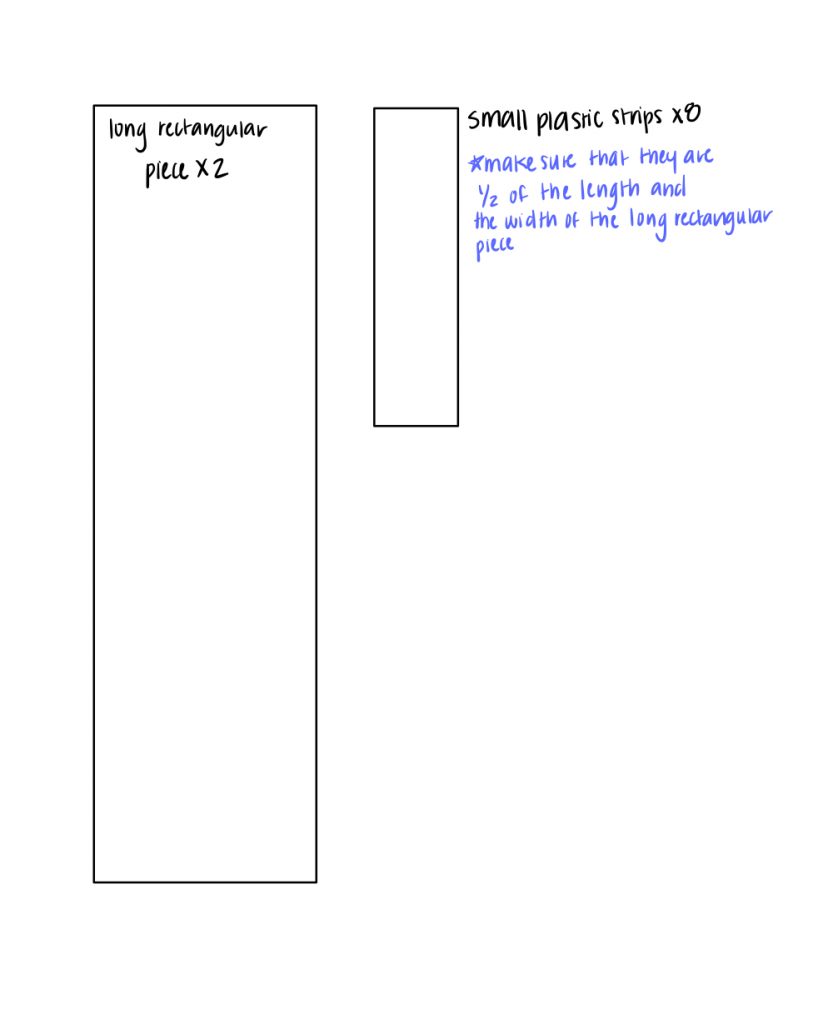
Pneumatic Recipe
- Cut out your pieces: In order to recreate this S-shaped pneumatic actuator you will first need to cut our your pieces. These include two long rectangular piece of plastic, which will be used as the main piece that fills with air, and 8 other smaller strips of plastic that will be used to create tension on one side of the plastic. This tension is was causes the plastic to bend in either direction. The plastic will bend in the opposite direction of where the strips of plastic are adhered.
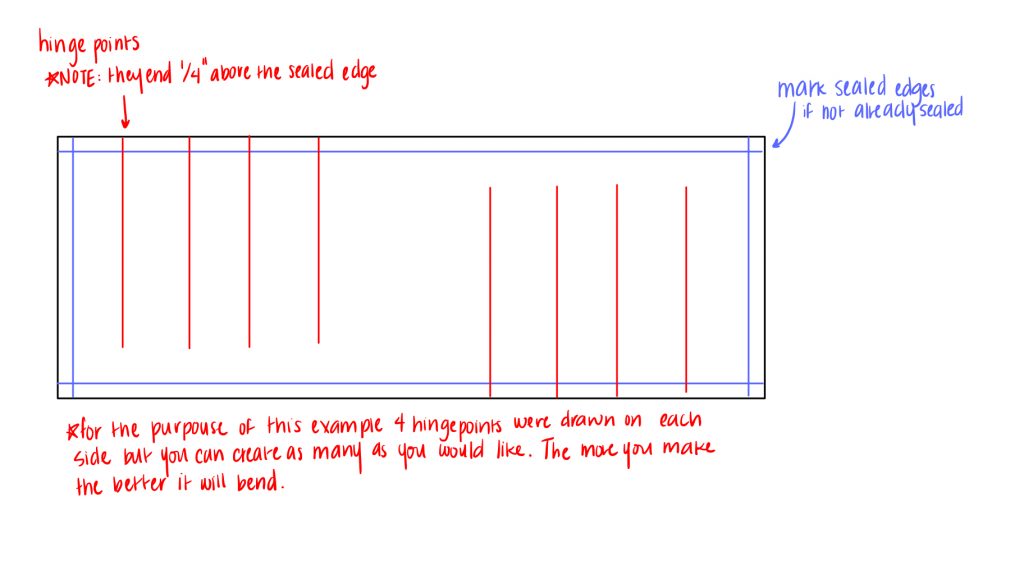
2. Sketch your design: Make lines across the main rectangular piece which will become the hinge points for the actuator. Draw an equal number of lines on the left of the rectangular piece and on the right. REMEMBER to leave a large space in the middle (in between the sets of lines on either end of the rectangle) to place the valve. The more lines you create and the closer you draw them the more the actuator will move.
3. Insert Valve: In the space, you created in the middle of the rectangle you will place the valve to allow air to flow into the actuator. First, draw a circle to indicate where in the space you want to place the valve. Once you have that figured out you want to grab one of the sides of the plastic (the one that has the dot marking). MAKE SURE THAT you are not grabbing both sides of the plastic (if not your actuator will have a hole and it will not inflate). Then you will fold the plastic where the dot is in half (so the dot is in the corner), and then fold it over again to create a peak. Cut the very top part of that peak (make sure the hole is not too big) and then insert your valve in that hole and screw on the bolt on the other side.

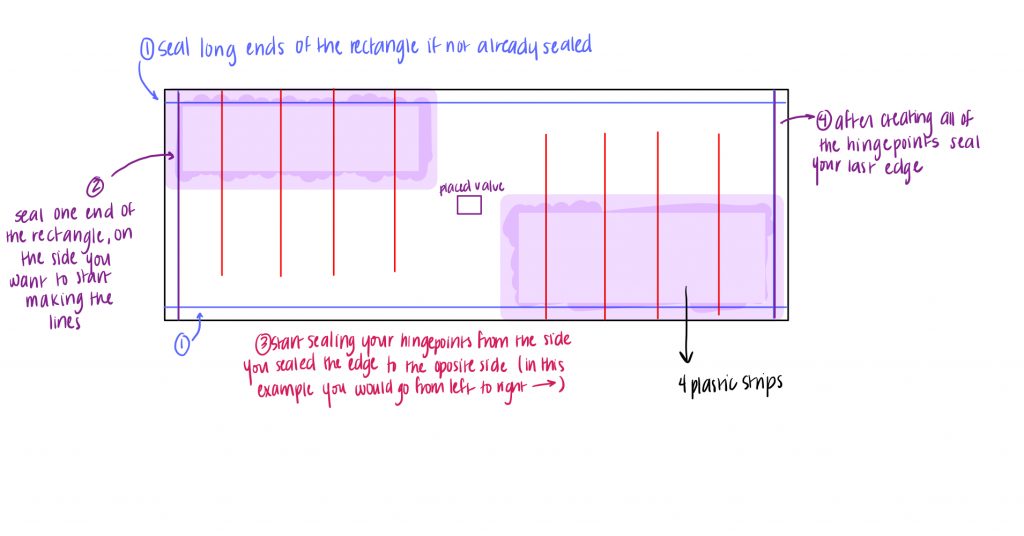
4. Impulse sealing: Once your valve is placed in the plastic make sure to seal the long ends of the rectangle if they are not already sealed (1 on figure). Then will seal one of the ends of your rectangle (2 on figure) making sure to catch the 4 strips of plastic on that first seal. You might need to seal the plastic more than once to get it to adhere to the main plastic rectangle. To create the hinge points you will just continue sealing lines starting from that sealed edge working your way to the middle of the rectangle towards the valve. Make sure to end the lines for the hinge points 1/4 in before the edge to let the air through (3 on figure). Once you finish one set of the lines you will flip over the plastic so now the valve is pointing down and once again seal the 4 strips of plastic on that first seal on that side. Now you will be working your way away from the valve towards the other end of the rectangle. Once you have finished creating the hinge points seal the last open edge of the rectangle.
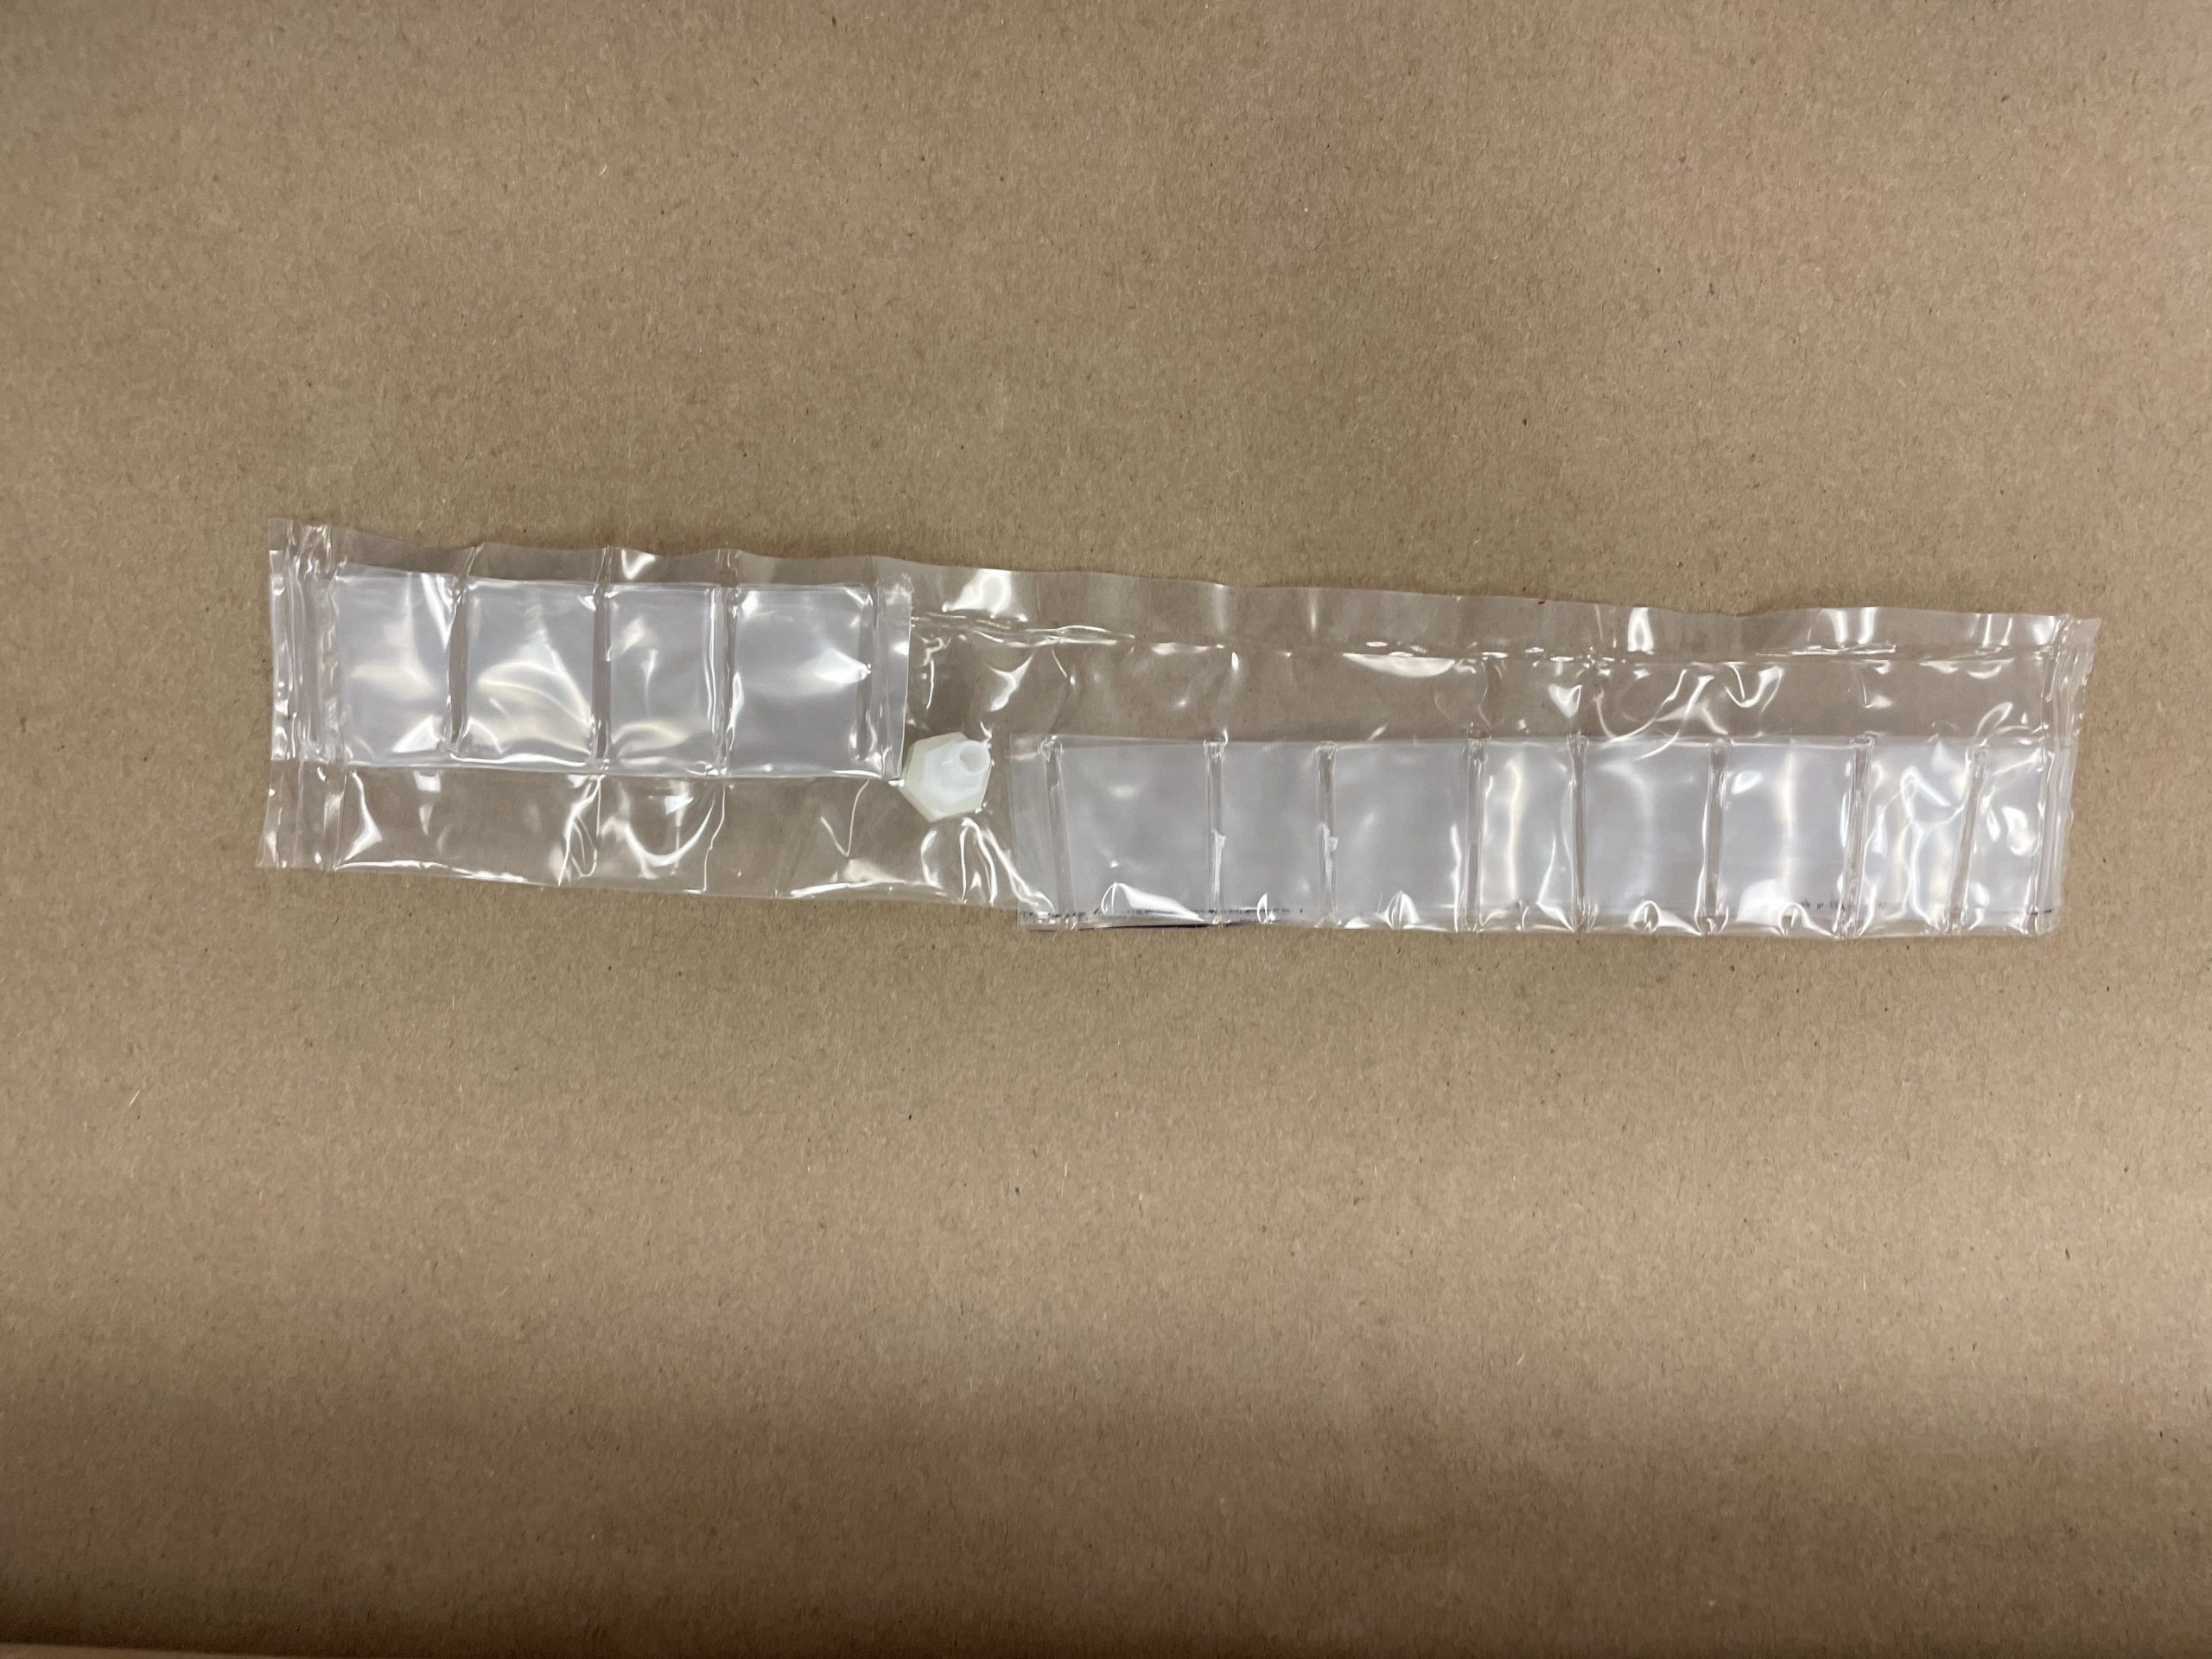
5. Enjoy your pneumatic actuator! 🙂
Leave a Reply
You must be logged in to post a comment.