Sample 1
For my first sample I recreated the pyramid shaped inflatable from aeroMorph.
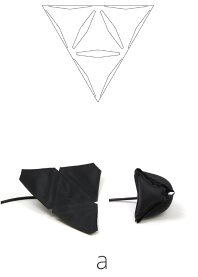
One of the seams near the base of the pyramid popped, so one side didn’t fold as well as the others.
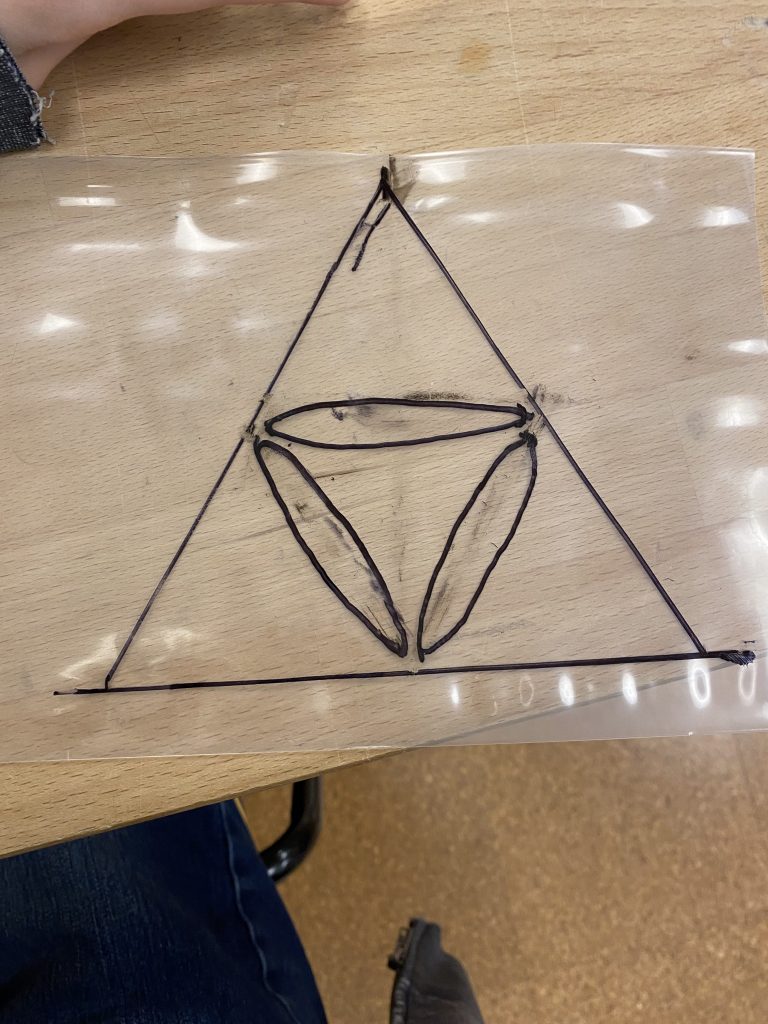
Sample 2
For my second sample, I changed the orientation of the seams to see how it would affect how the inflatable folded.
The resulting inflatable made more of a contracting motion, pulling inward instead of folding like the aeroMorph pyramid.
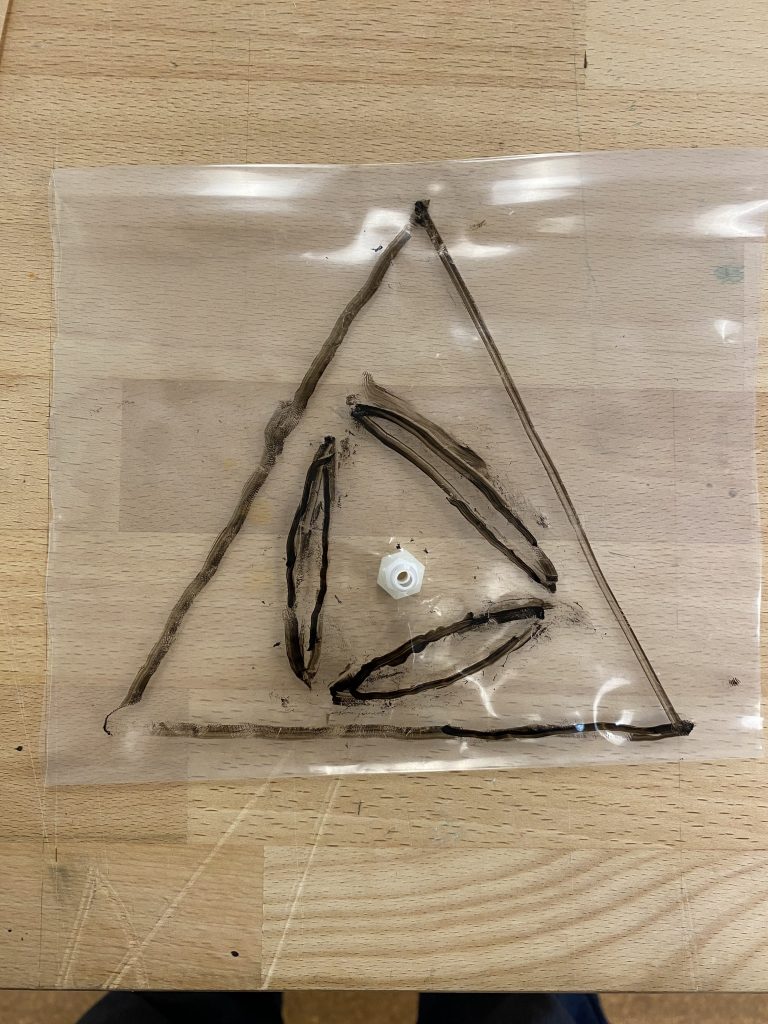
Sample 3
For my final example, I decided to see what happens when I made a few seams in a pouch that were at different angles.
The resulting pneumatic curled up and toward the side.
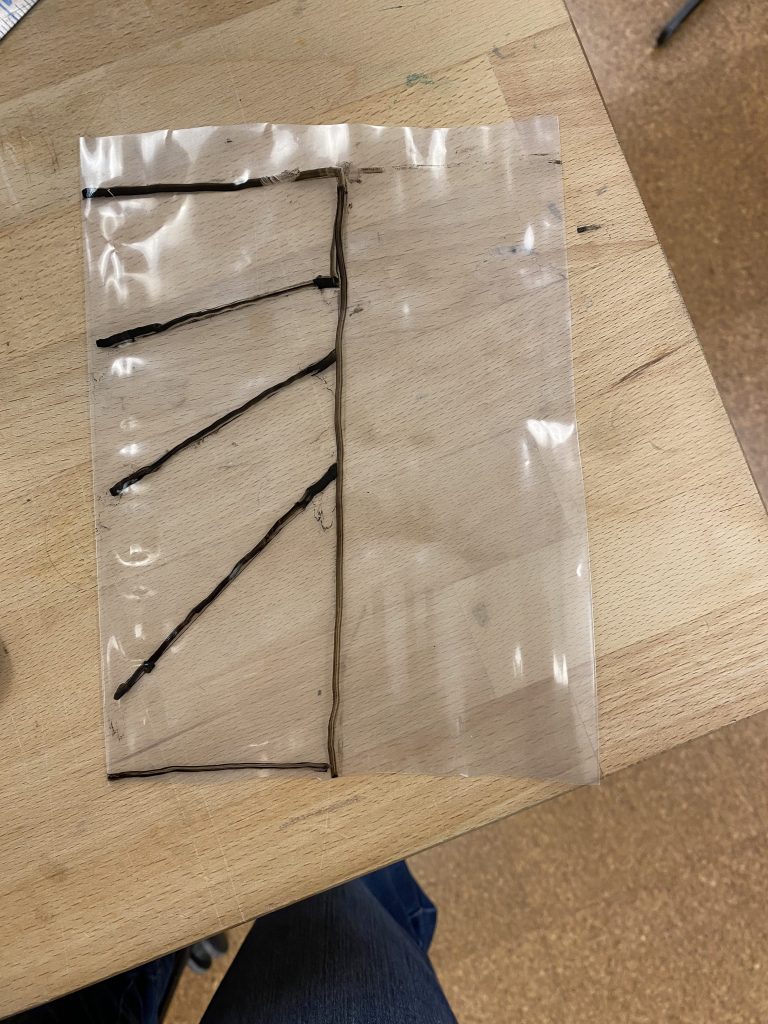
Intstructions for the third sample:
- On a double sided piece of plastic, trace a rectangle. Make it whatever size you wish but one side should be longer than the other.
- Make lines from one long side of the rectangle to the other. The lines should get progressively less parallel to the shorter side. Above is a picture of my drawing on the plastic. Note that on one side, the lines should be near the edge and not touch as to allow air to flow between the pockets.
- Cut a small hold in the top layer of the plastic near one of the short ends of the rectangle. Insert the valve and screw it into place.
- Use an impulse sealers to seal the lines inside the rectangle. Use a heat resistant paper to make sure the line doesn’t touch one side of the rectangle. Then seal the four sides of the rectangle.
- Cut the excess plastic from the outside of the rectangle, add a tube with an air pump to the nozzle and pump to inflate!
Leave a Reply
You must be logged in to post a comment.