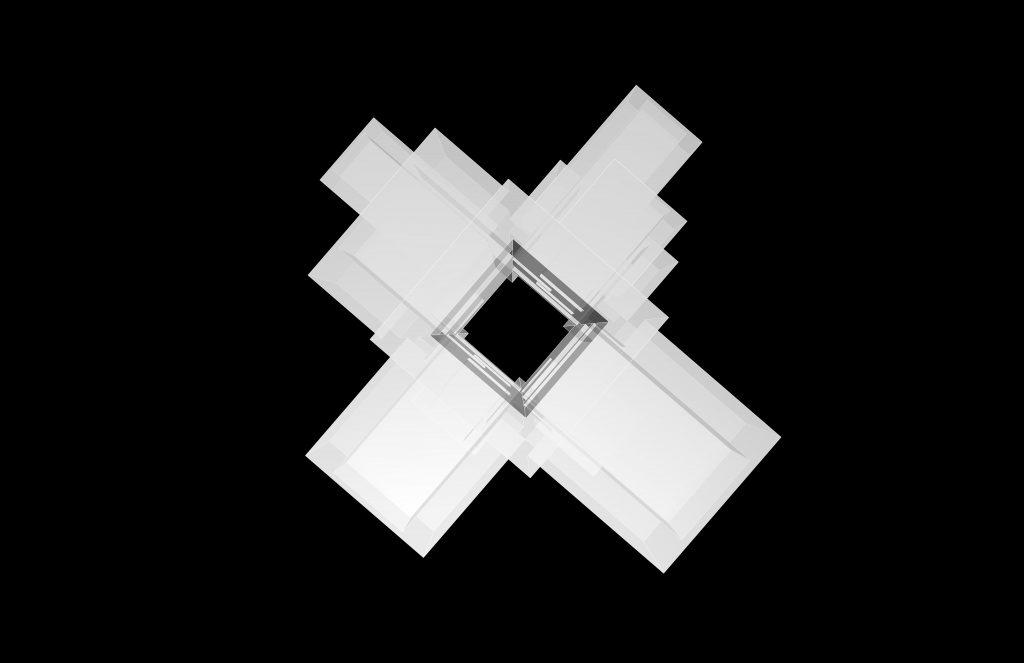
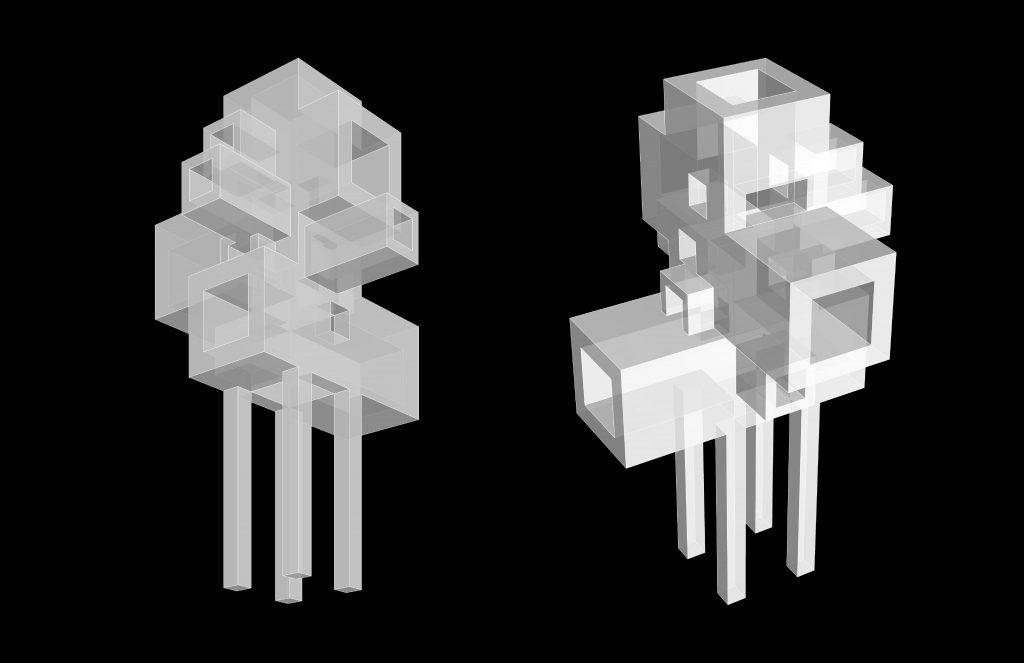
I was inspired by how sound would travel through for an event happening under the music tower. I wanted the tower to physically juxtapose how sound would look or feel like, but still be efficient in spreading sound throughout. To construct this, I constructed a tall, rectangular tower with an open ground and ceiling, capped by all four sides. rectangular prisms make up the four sides as they cross and connect to create holes on an higher altitude.
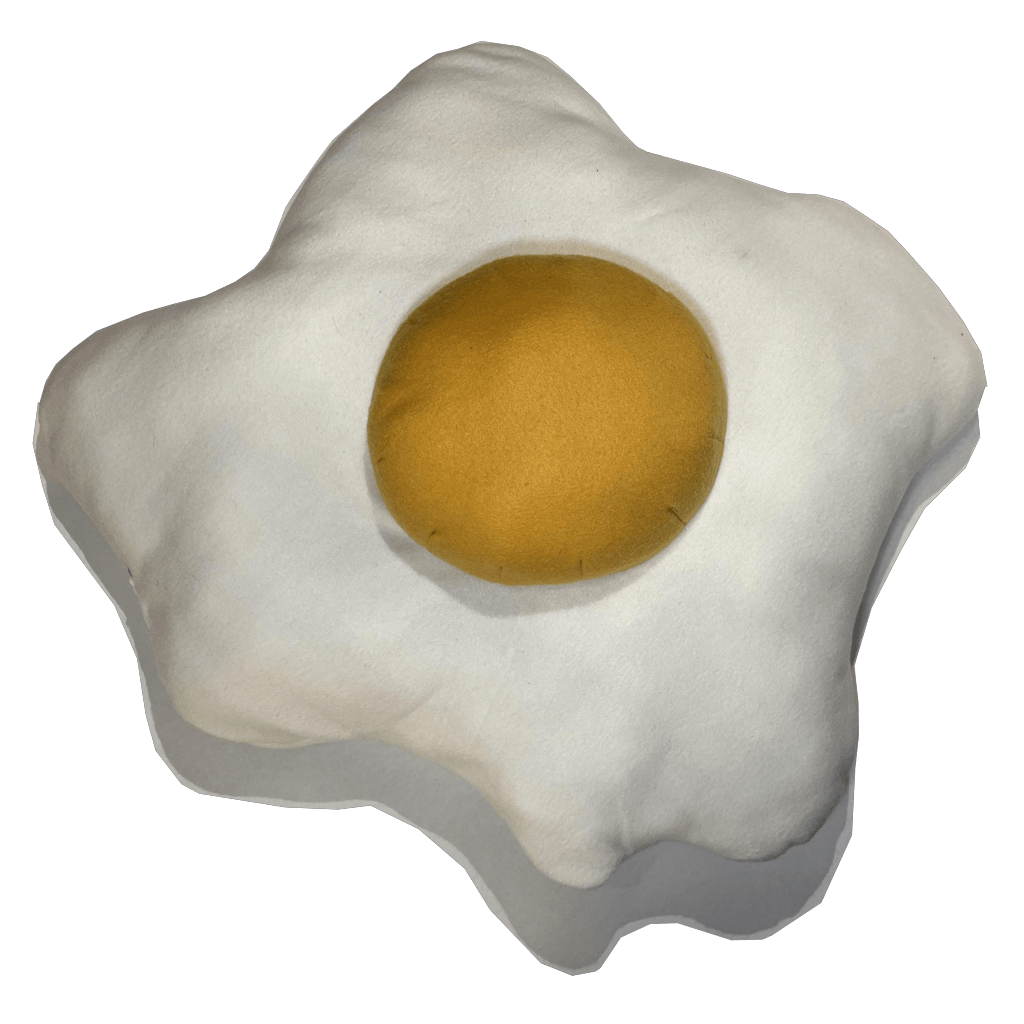
For these three objects, I aimed to create large scale versions of everyday objects such as an egg, peas in a pod, and a button. My focus in making these objects were to try out various techniques and to improve my hand sewing skills.
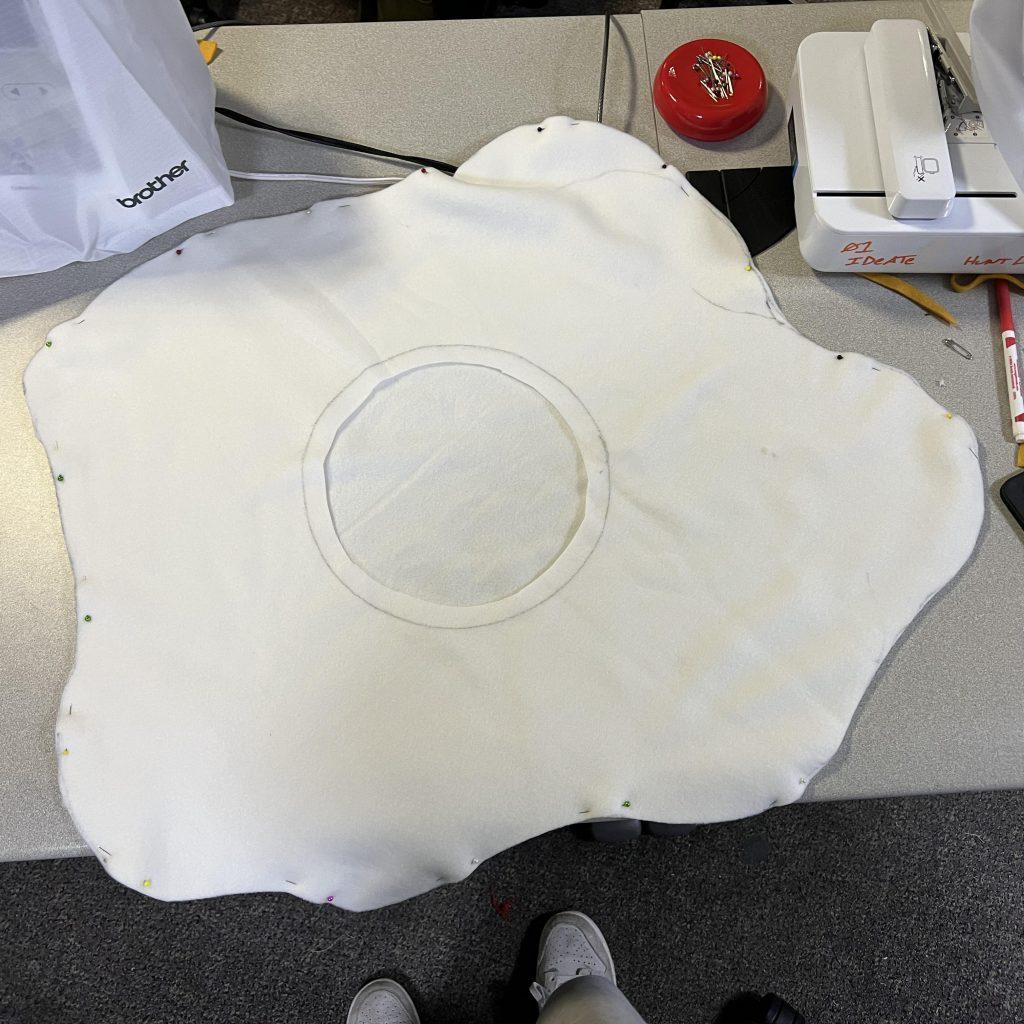
egg
I started the egg by drawing and cutting the white and yolk of the egg separately. I stacked two layers of white acrylic fabric on top of each other and drew a fried egg shape and pinned them together. I sewed the two white fabrics shut with a five inch opening for the last step of filling the egg.
yolk flat
yolk cylinder
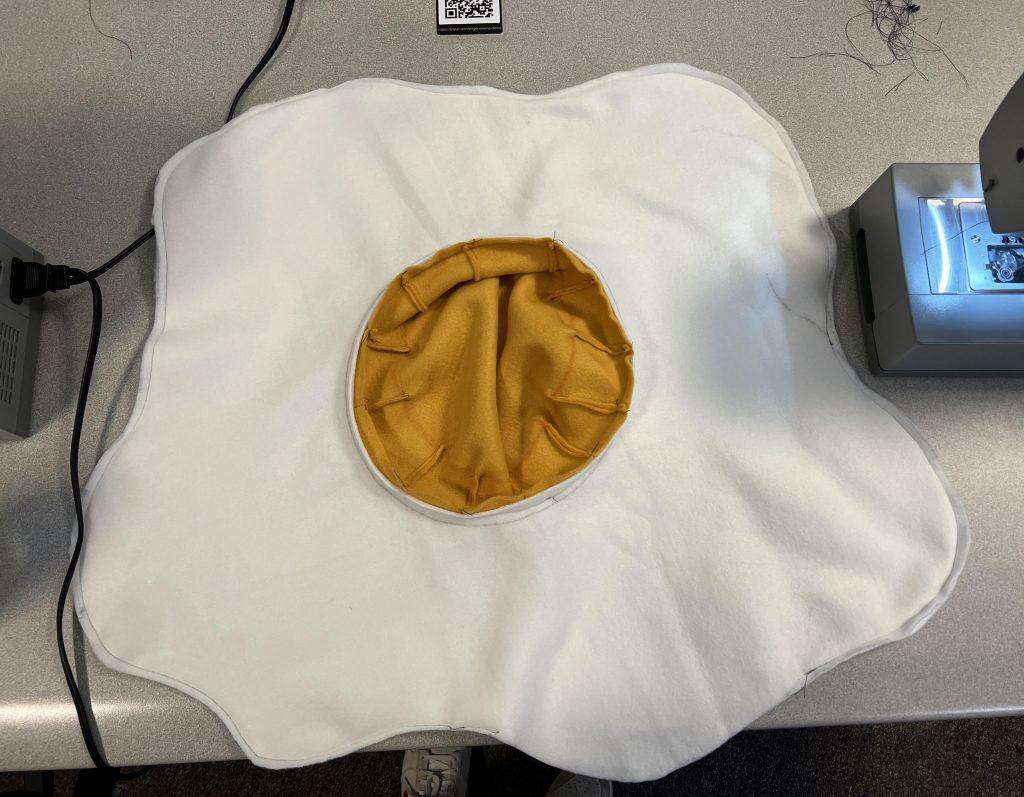
egg white + hole
Next, I cut a circle on the top layer for the yolk to go on top. I drew two concentric circles on the yellow yolk fabric: the outer as the sew line onto the top white layer and the inner circle as the circumference of the protruding yolk. To make the protrusion of the yolk, I folded the fabric and sewed on the inside 12 times to create a cylinder-like shape. To attach the yolk to the white, I flipped the white fabric inside out and attached the bottom of the yolk to the circle hole on the top white fabric.
yolk pre-cap
yolk cap
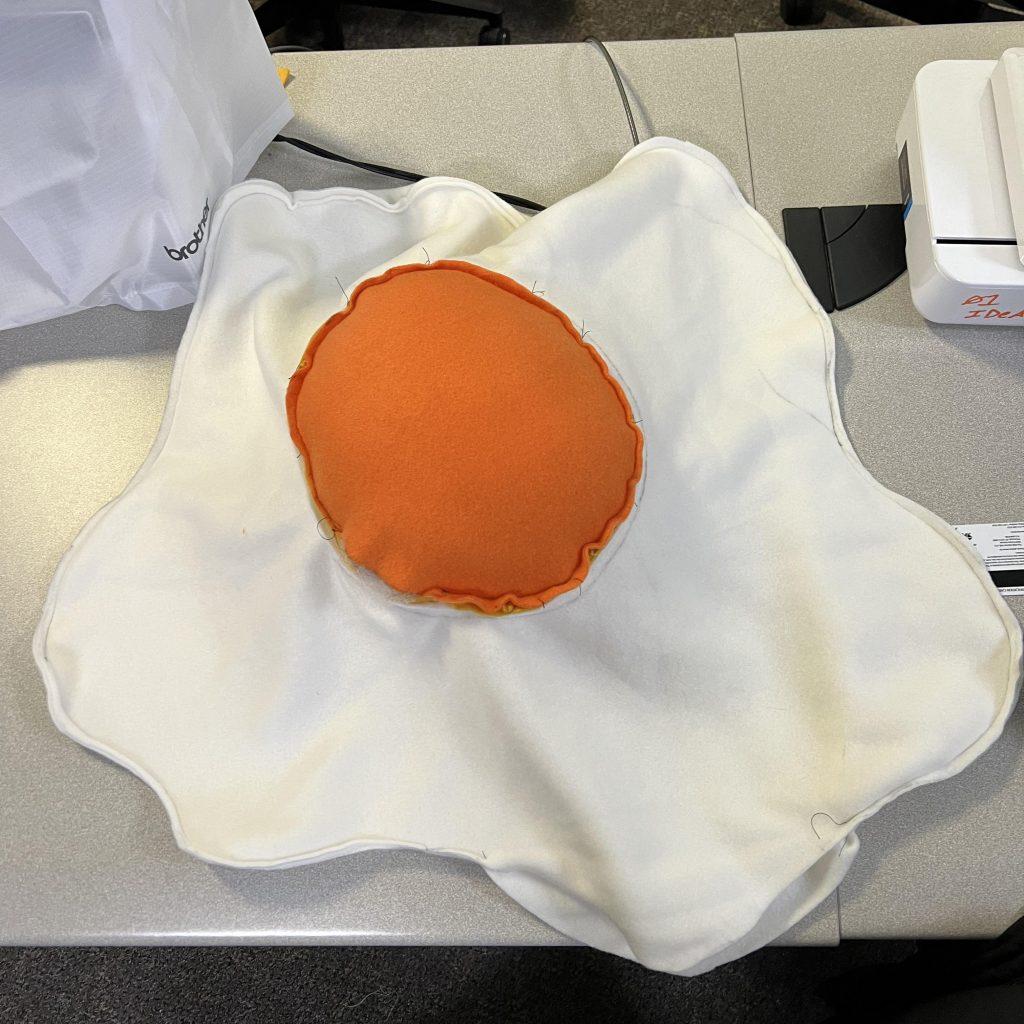
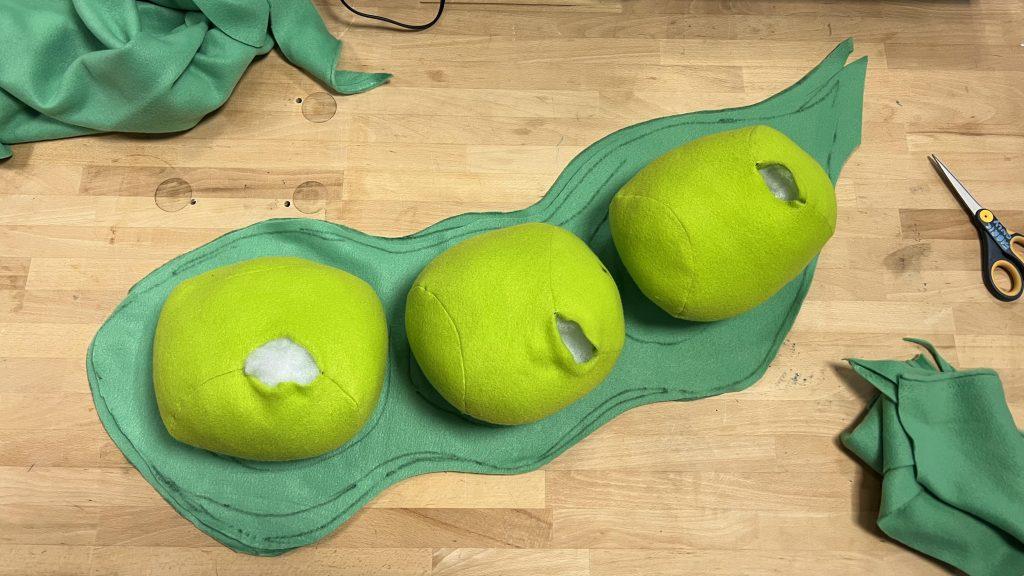
After flipping the egg inside out and imagining the next steps of filling, I realized that I did not want to fill the egg white portion as much as the yolk. To achieve a more filled yolk, I cut another circle from an orange fabric that would separate the yolk filling from the white filling. I sewed on the circle and filled the yolk very tightly. Then, I turned the egg inside out and filled the white until it was enough cushioning, but still quite loose and hand sewed the egg white shut.
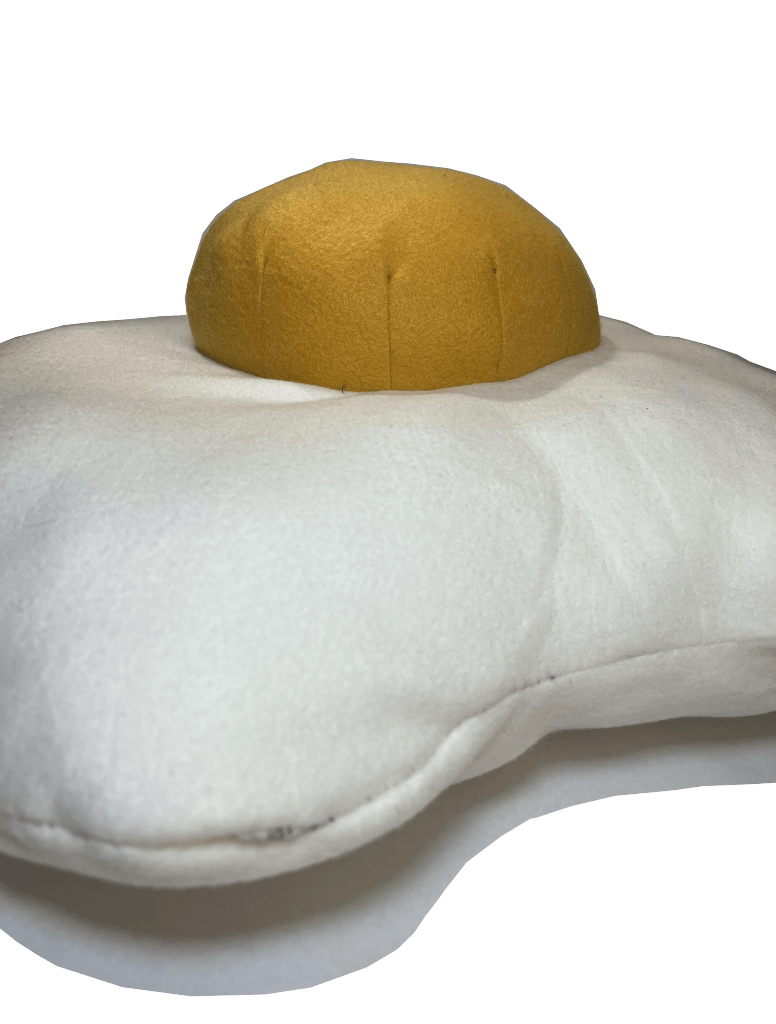
egg side profile
peas in a pod
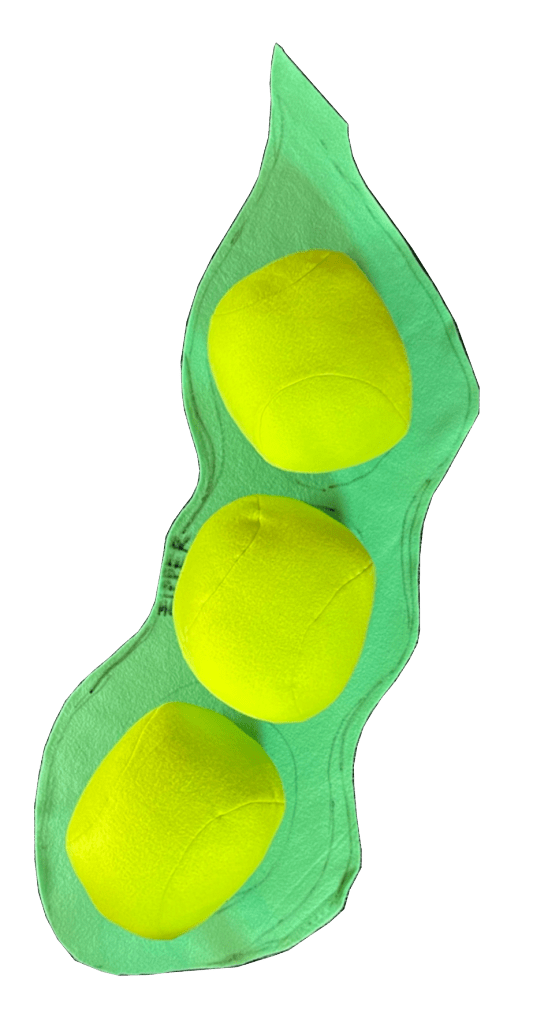
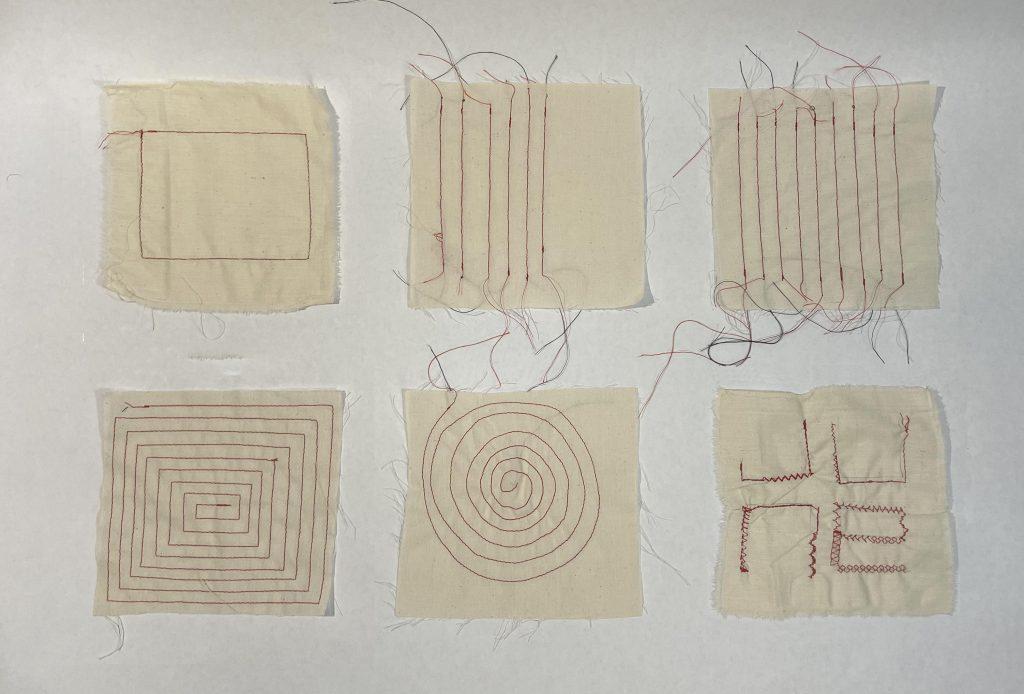
For my peas, I first started with two colors of green fabric. The lighter green, I cut into the tennis ball stencils. In our first sewing samples, we had to make two balls with different methods. From this, I learned that I could force the sewn shape to be not a circle, but an oval through different tension and speed on the sewing machine. I sewed all three peas and used polyfill to make them 3D peas.
peas on top of pod
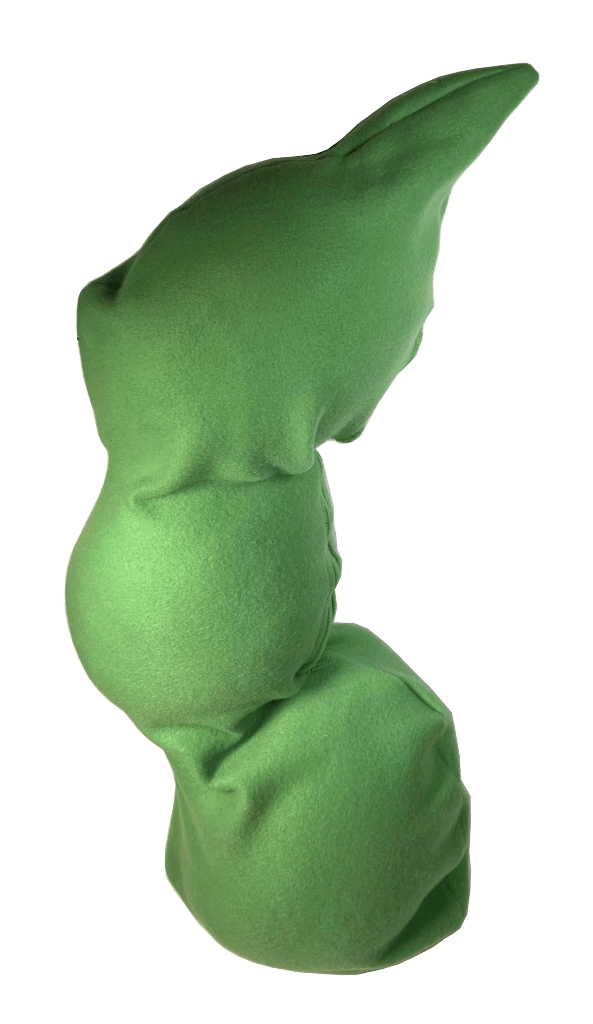
The next step was making the pod for the peas to lay in. I planned this step of the pods by drawing out a 2D shape on the darker green fabric, and estimated where the pockets for the peas to lie in would be by drawing three circles on the pod as well as a zipper for the pod to close and open to reveal the peas. After sewing one long edge of the two pod fabrics together, I flipped it inside out so the seams would be on the inside. Then I lined up each side of the zipper on the markings on the inside edge and sewed it on.
peas on pod
peas in pod
The challenge in this process was estimating how much fabric I would need to sew a pod that would fit the peas comfortably. After fitting the three peas into the pod and zippering it close, I found that the pod did not lay flat in areas I would have wanted it to. If I were to make another iteration of the pod for the peas, I would try to account for the bulge of the peas onto the pod and reinforce the edges of the pod to make the shape hold.
peas in open pod
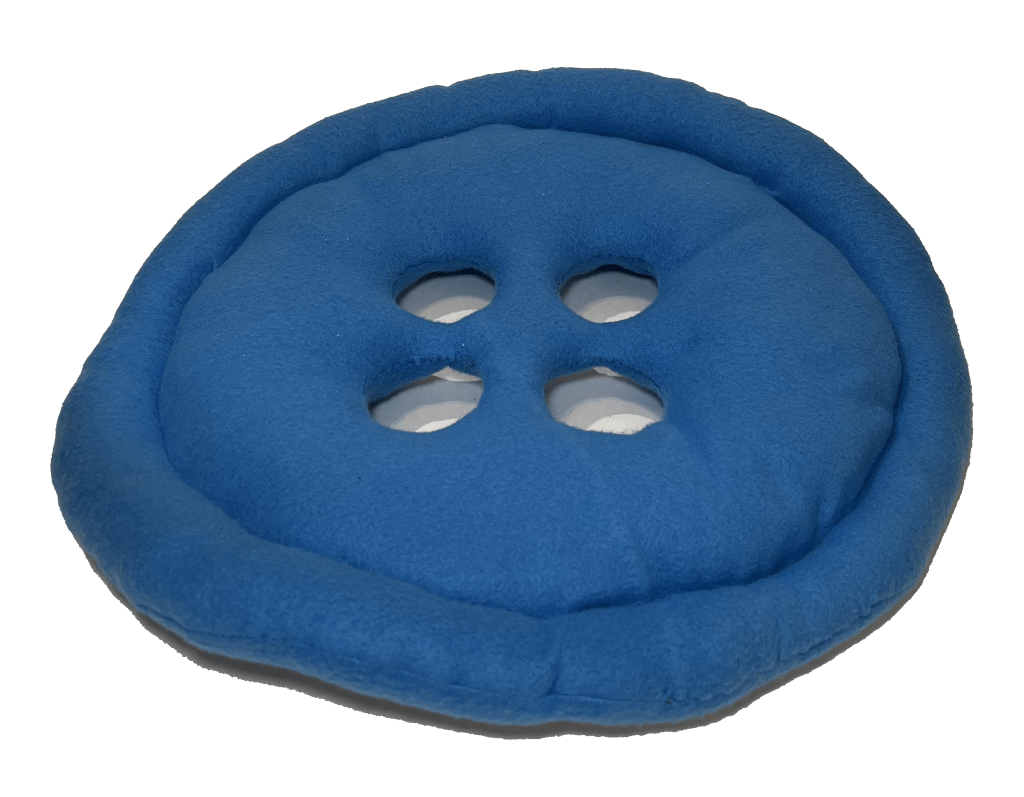
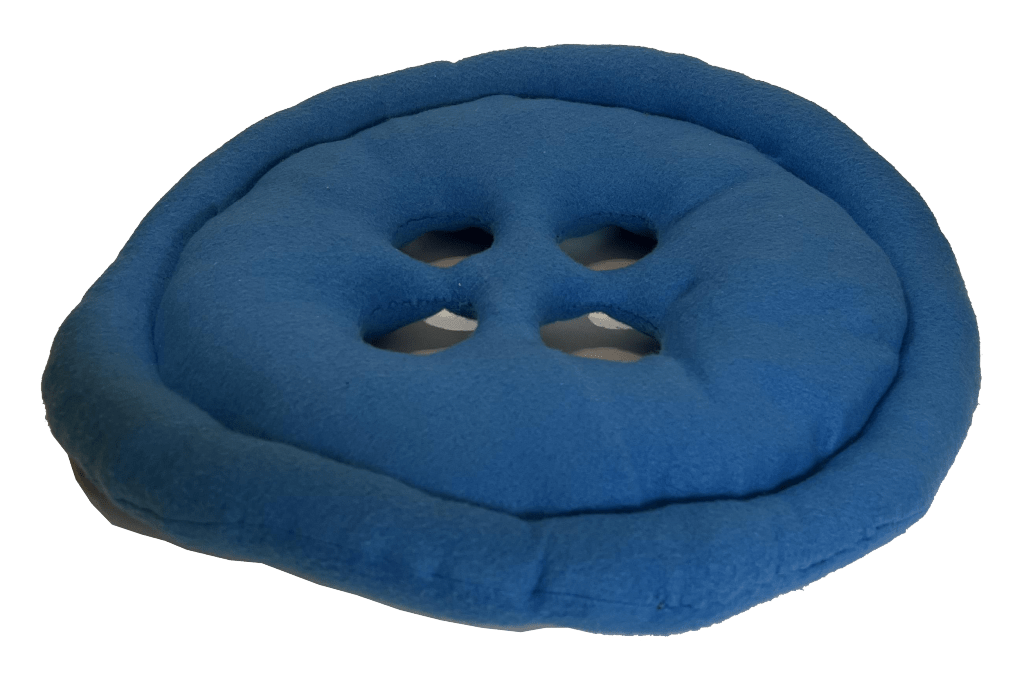
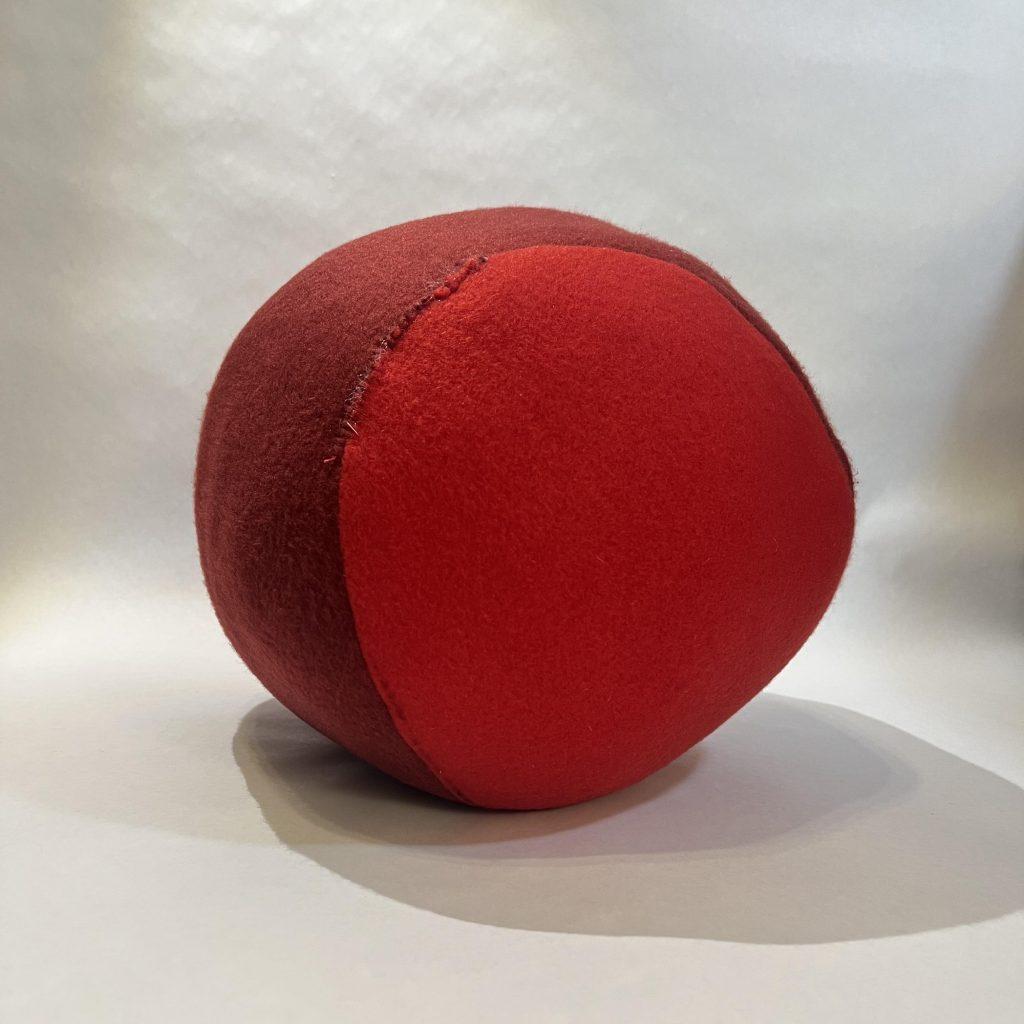
button
In planning my third object, I found that there were not a lot of fabric color choices. I had originally wanted three foods that I could construct to be large-scale as well as incorporate different techniques that I had not used before.
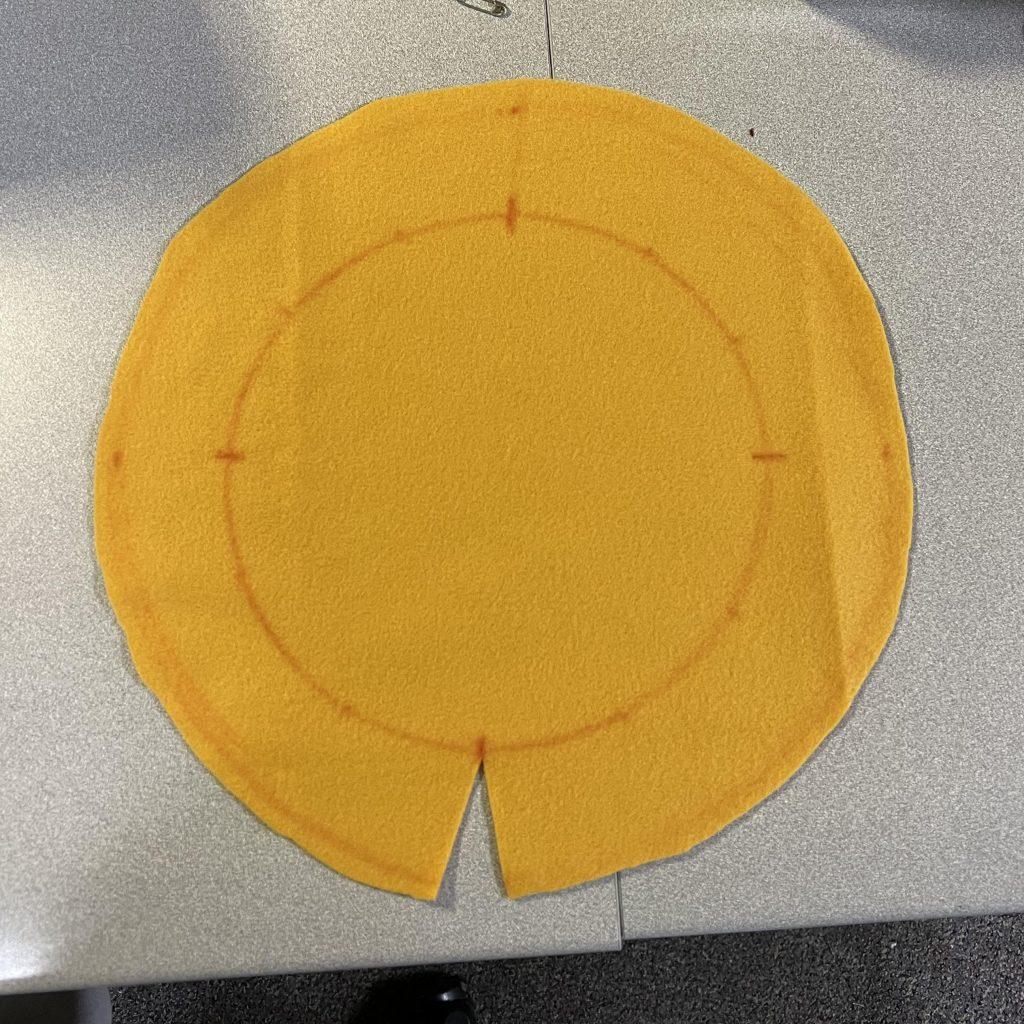
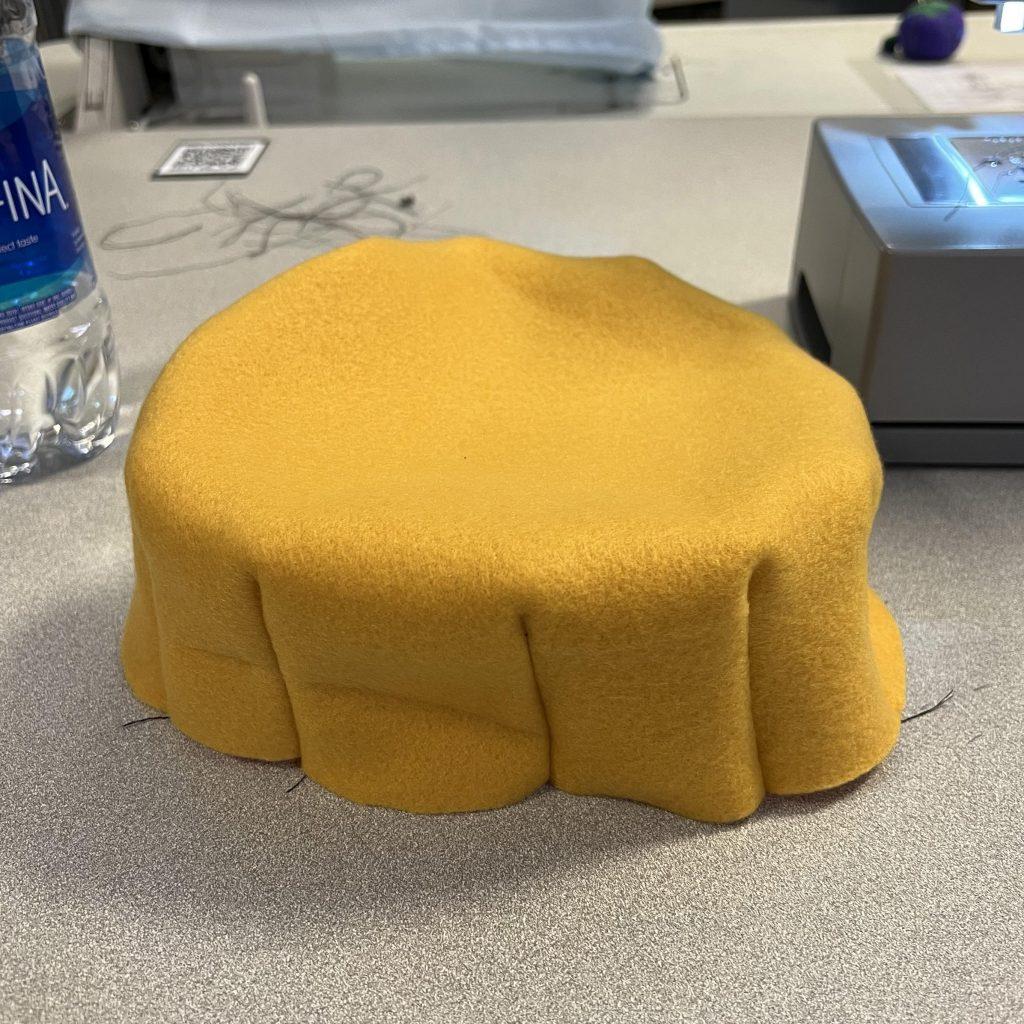
The button was a decision that came after thinking about donuts and bagels, foods that had holes. I spotted a button in my room and came to the conclusion that I would challenge myself with sewing four holes, not just one. My first iteration of the button started with two circle pieces of red fabric. I drew what I imagined would be the sewing lines and cut out the four holes for the buttons. I started by deciding to sew the small inner circles first, and then the outer circles. However, after completing hand-sewing the first inner circle, I realized that the button could not be flipped inside out- exposing all the sketches I had done on the fabric. I quickly started on my second iteration by preparing the fabric in the same method as I had done in the previous iteration. This time, I sewed the outside seam first with a small opening and then started hand sewing the small inner holes. Despite sewing the outside seam first, I still made the mistake of sewing the inner circles on the inside, making the button not able to flip inside out.
iteration one
iteration three
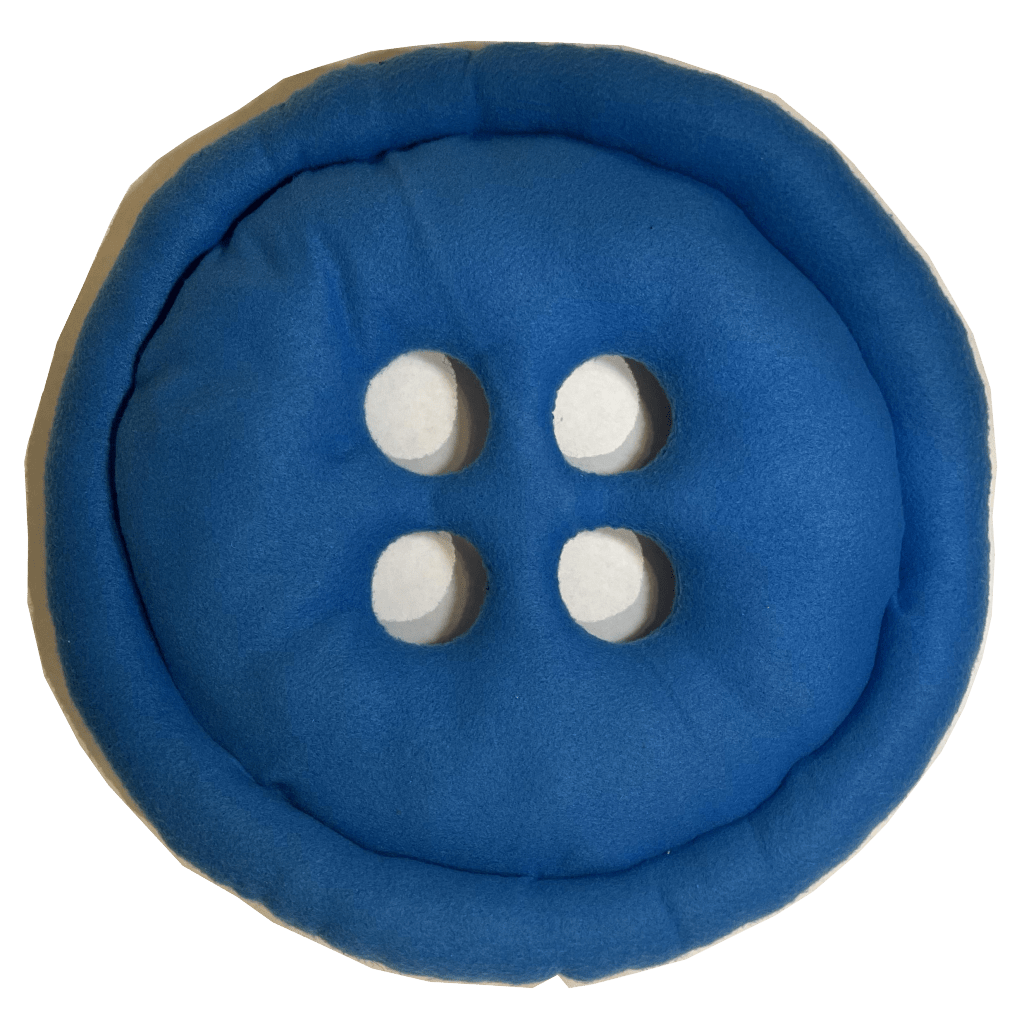
My third and final iteration of the button began with the same steps. But this time, I sewed the most outer portion of the button with an opening, then flipped it inside out so the seams would be on the inside. I decided to hand stitch to connect the two layers of fabric together and create the small holes in the button. Because I did not want my seams to have flaps on the outside, I learned how to do an invisible seam with a ladder stitch to close the fabric on the inner circles. While this was a tedious and time consuming process, I was very happy about the result and my newly learned skills.
After all four inner holes were sewn together, I stuffed the button with polyfill to reach the inner corners. Doing so, I found that the button puffed up more than I wanted due the edge of the button to the center having lots of space to fill. To make my button flatter, I removed some polyfill around the ends of the button and sewed a concentric circle 1.5 inches smaller than the edge. After most of the circle was complete I filled the insides loosely but tighter in the tubes around the inner four holes, then finished sewing the inner circle on the machine. This created a circular tube around the outer edge that I then bunched up to fill more easily. After filling it tightly, I used a ladder-stitch to close off the button.
button side view
reflection on objects + process
Making the egg was less challenging than I had imagined, but a great first attempt at sewing without planning all the steps beforehand. I was able to find a solution for any problems I ran into, quickly and efficiently. Problem solving for the egg made thinking about a solution for my button much easier because I had to innovate from what I already had. The button was easily the most challenging object, but having so many iterations allowed me to think about sewing objects in a more detailed and orderly method. I will try this when I make another iteration of the pod for my peas.
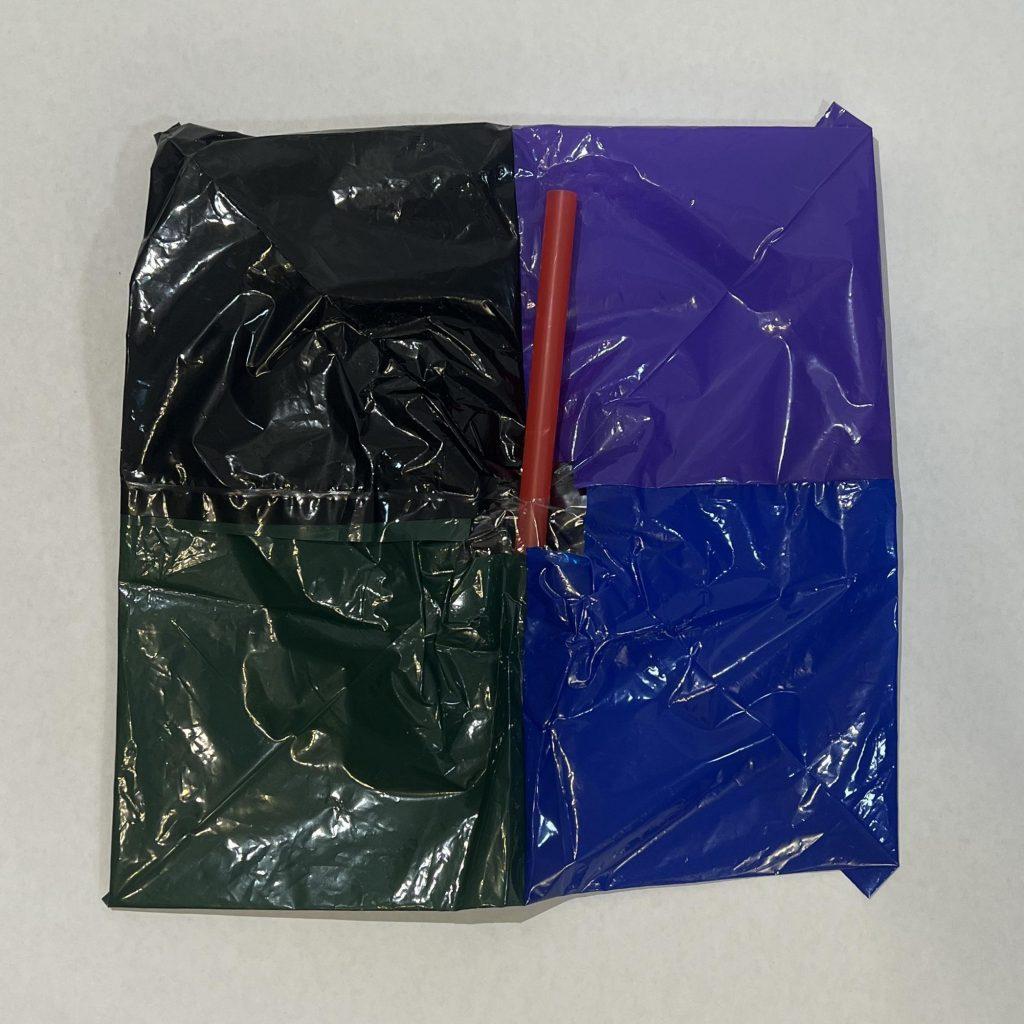
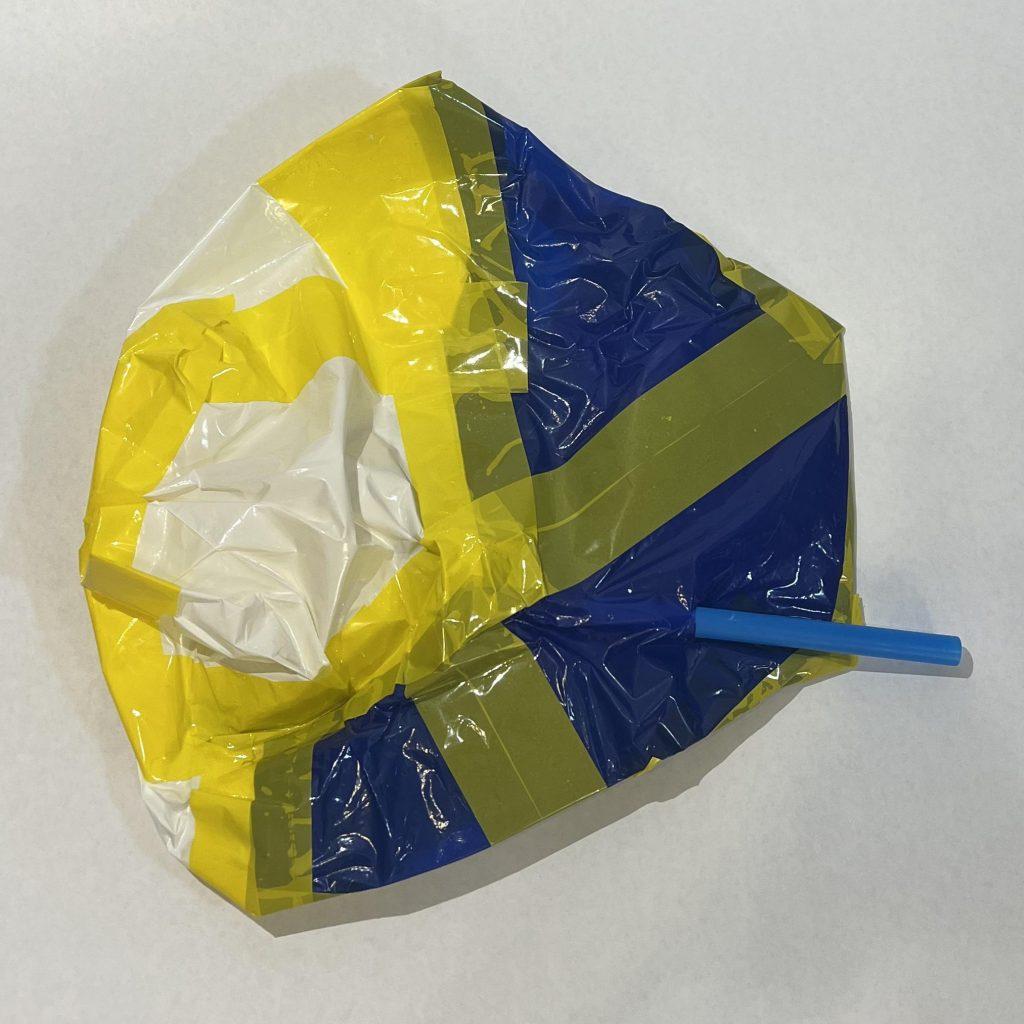
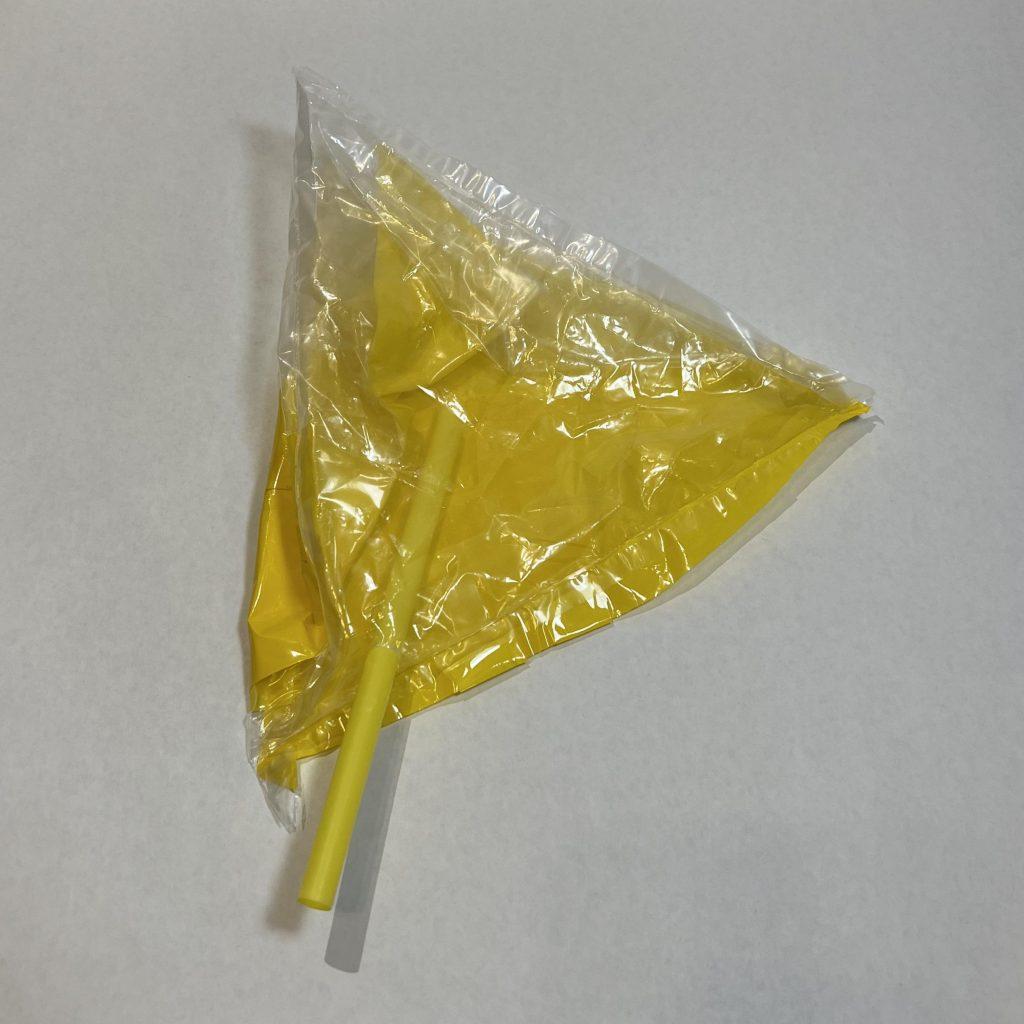
I wanted to focus on creating regular and abstract shapes with explorations on connection methods using the vinyl heat press. The first inflatable is a square pillow, the second is an abstract blob, and the third is a triangular prism.
improv one
improv two
improv three
improv one
For my first one, I chose to use four corners of the given plastic vinyl bags and connect them together to create a 2D square. For three out of the four connections, I used the vinyl heat press to create hems on the inside, and for the last connection I used the same method for an outside seam. After connecting all four, I realized that there was a square shaped hole in the center due to how I cut the corners off the plastic bags. I cut a small square piece in clear and black to close the top and bottom with double sided tape on the inside of the inflatable.
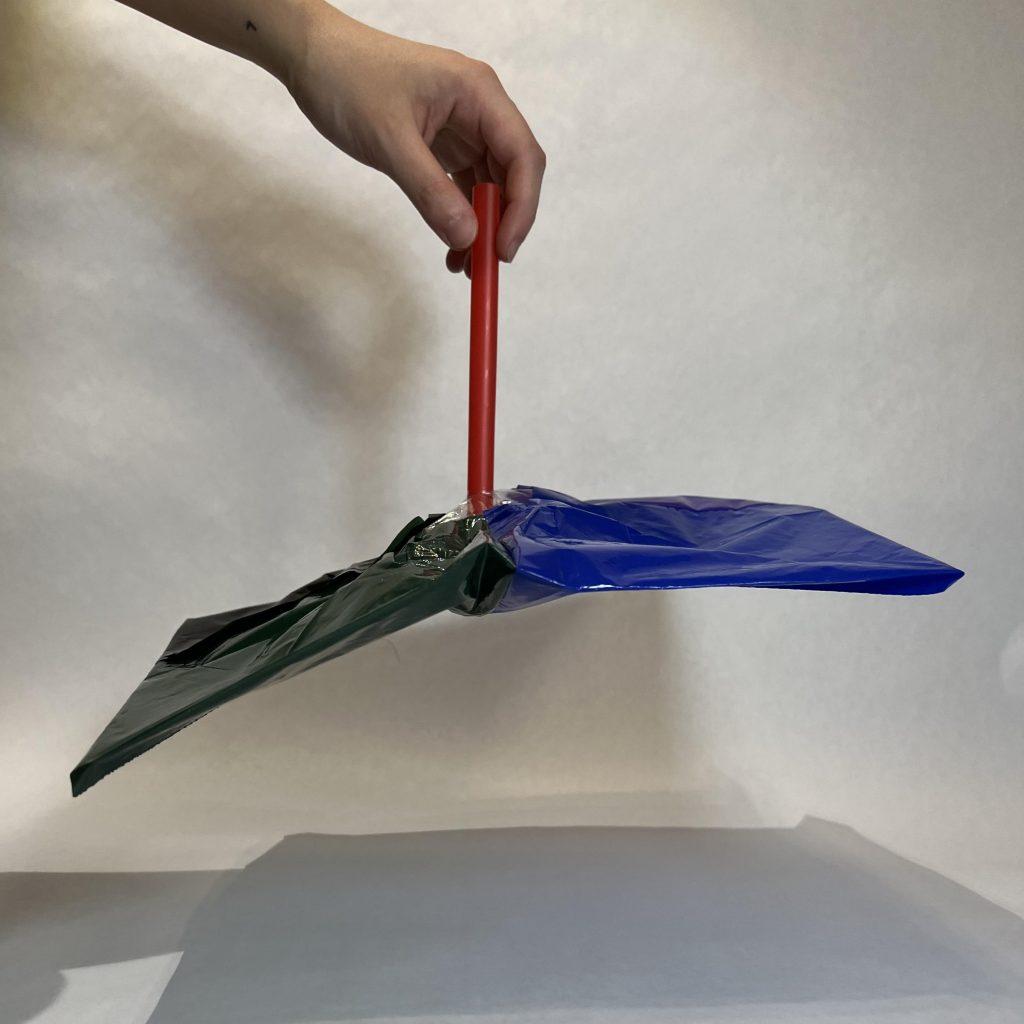
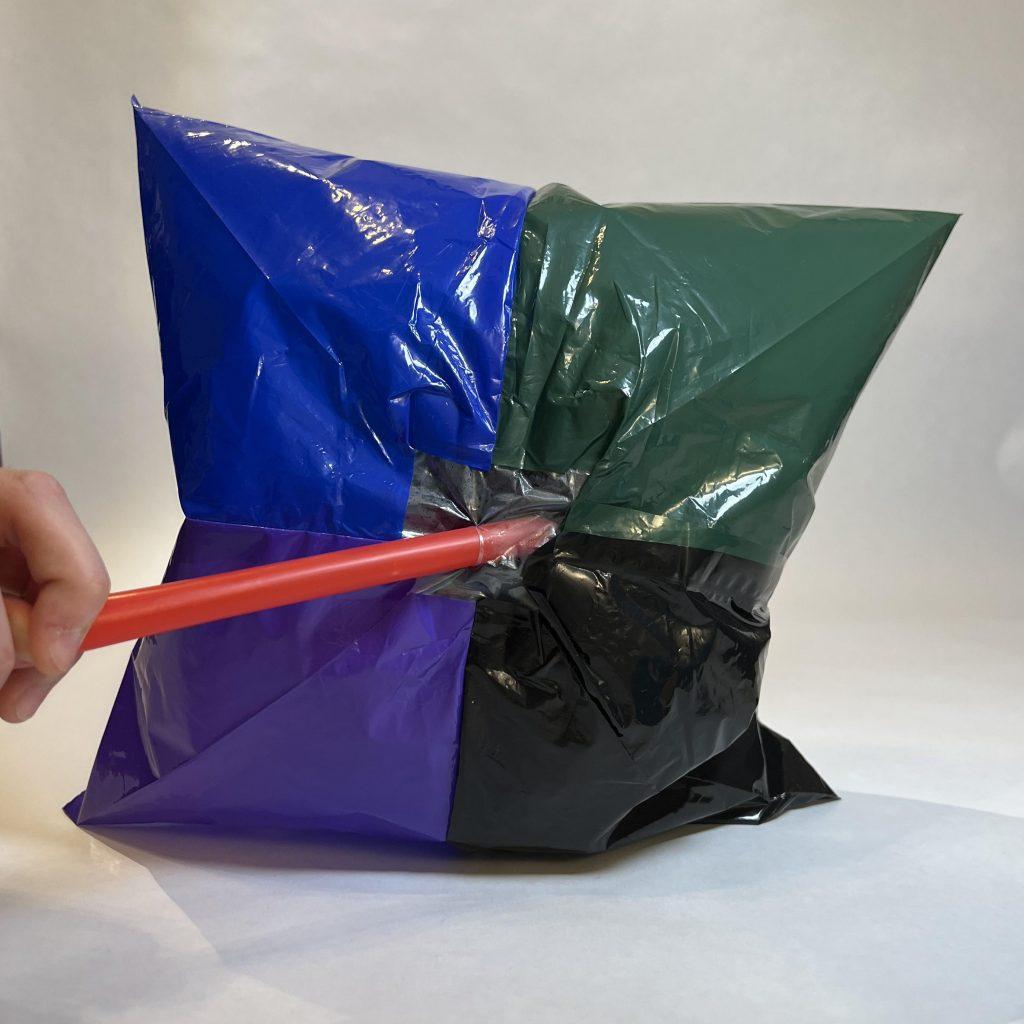
improv two
In my second inflatable, I found scraps from my classmate’s inflatable. I used pieces that were big enough and cut sides that were straight to match to another scrap. Choosing not to pay attention to the overall shape, I connected sides that were similar length with wide yellow tape. When the connected piece was big enough, I folded the piece to align the seams in a way that would create sharp edges in the inflated structure.
side profile
front profile
The challenge of this inflatable was closing the structure with edges that were angled in a way that could be attached without much excess. Because I did not want to manipulate the scraps much except some refined cutting, I had to keep improvising on where to connect the seams.
In this second improv work, I learned from those who were working near me. My classmate who was working beside me was finding many holes in her taped inflatable and I decided to make my third inflatable with the vinyl heat press, like the first one.
improv three
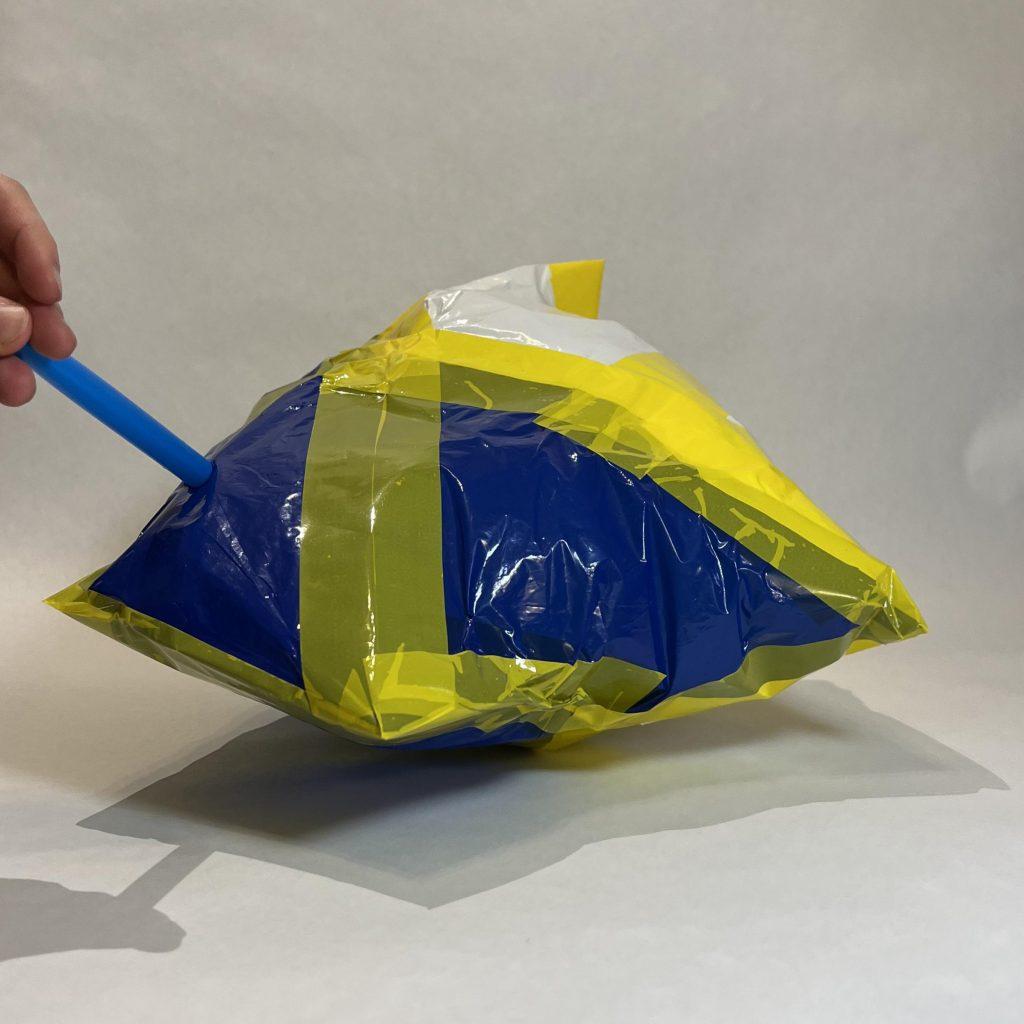
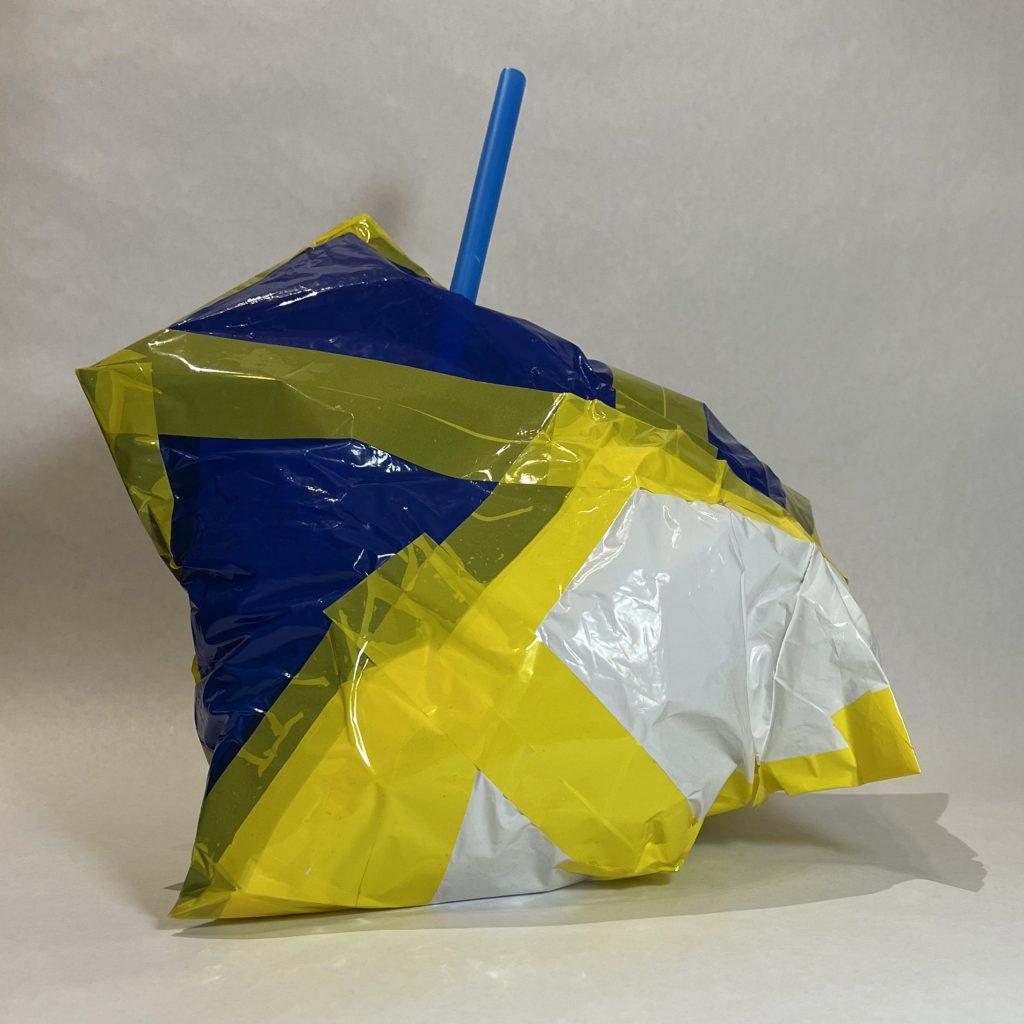
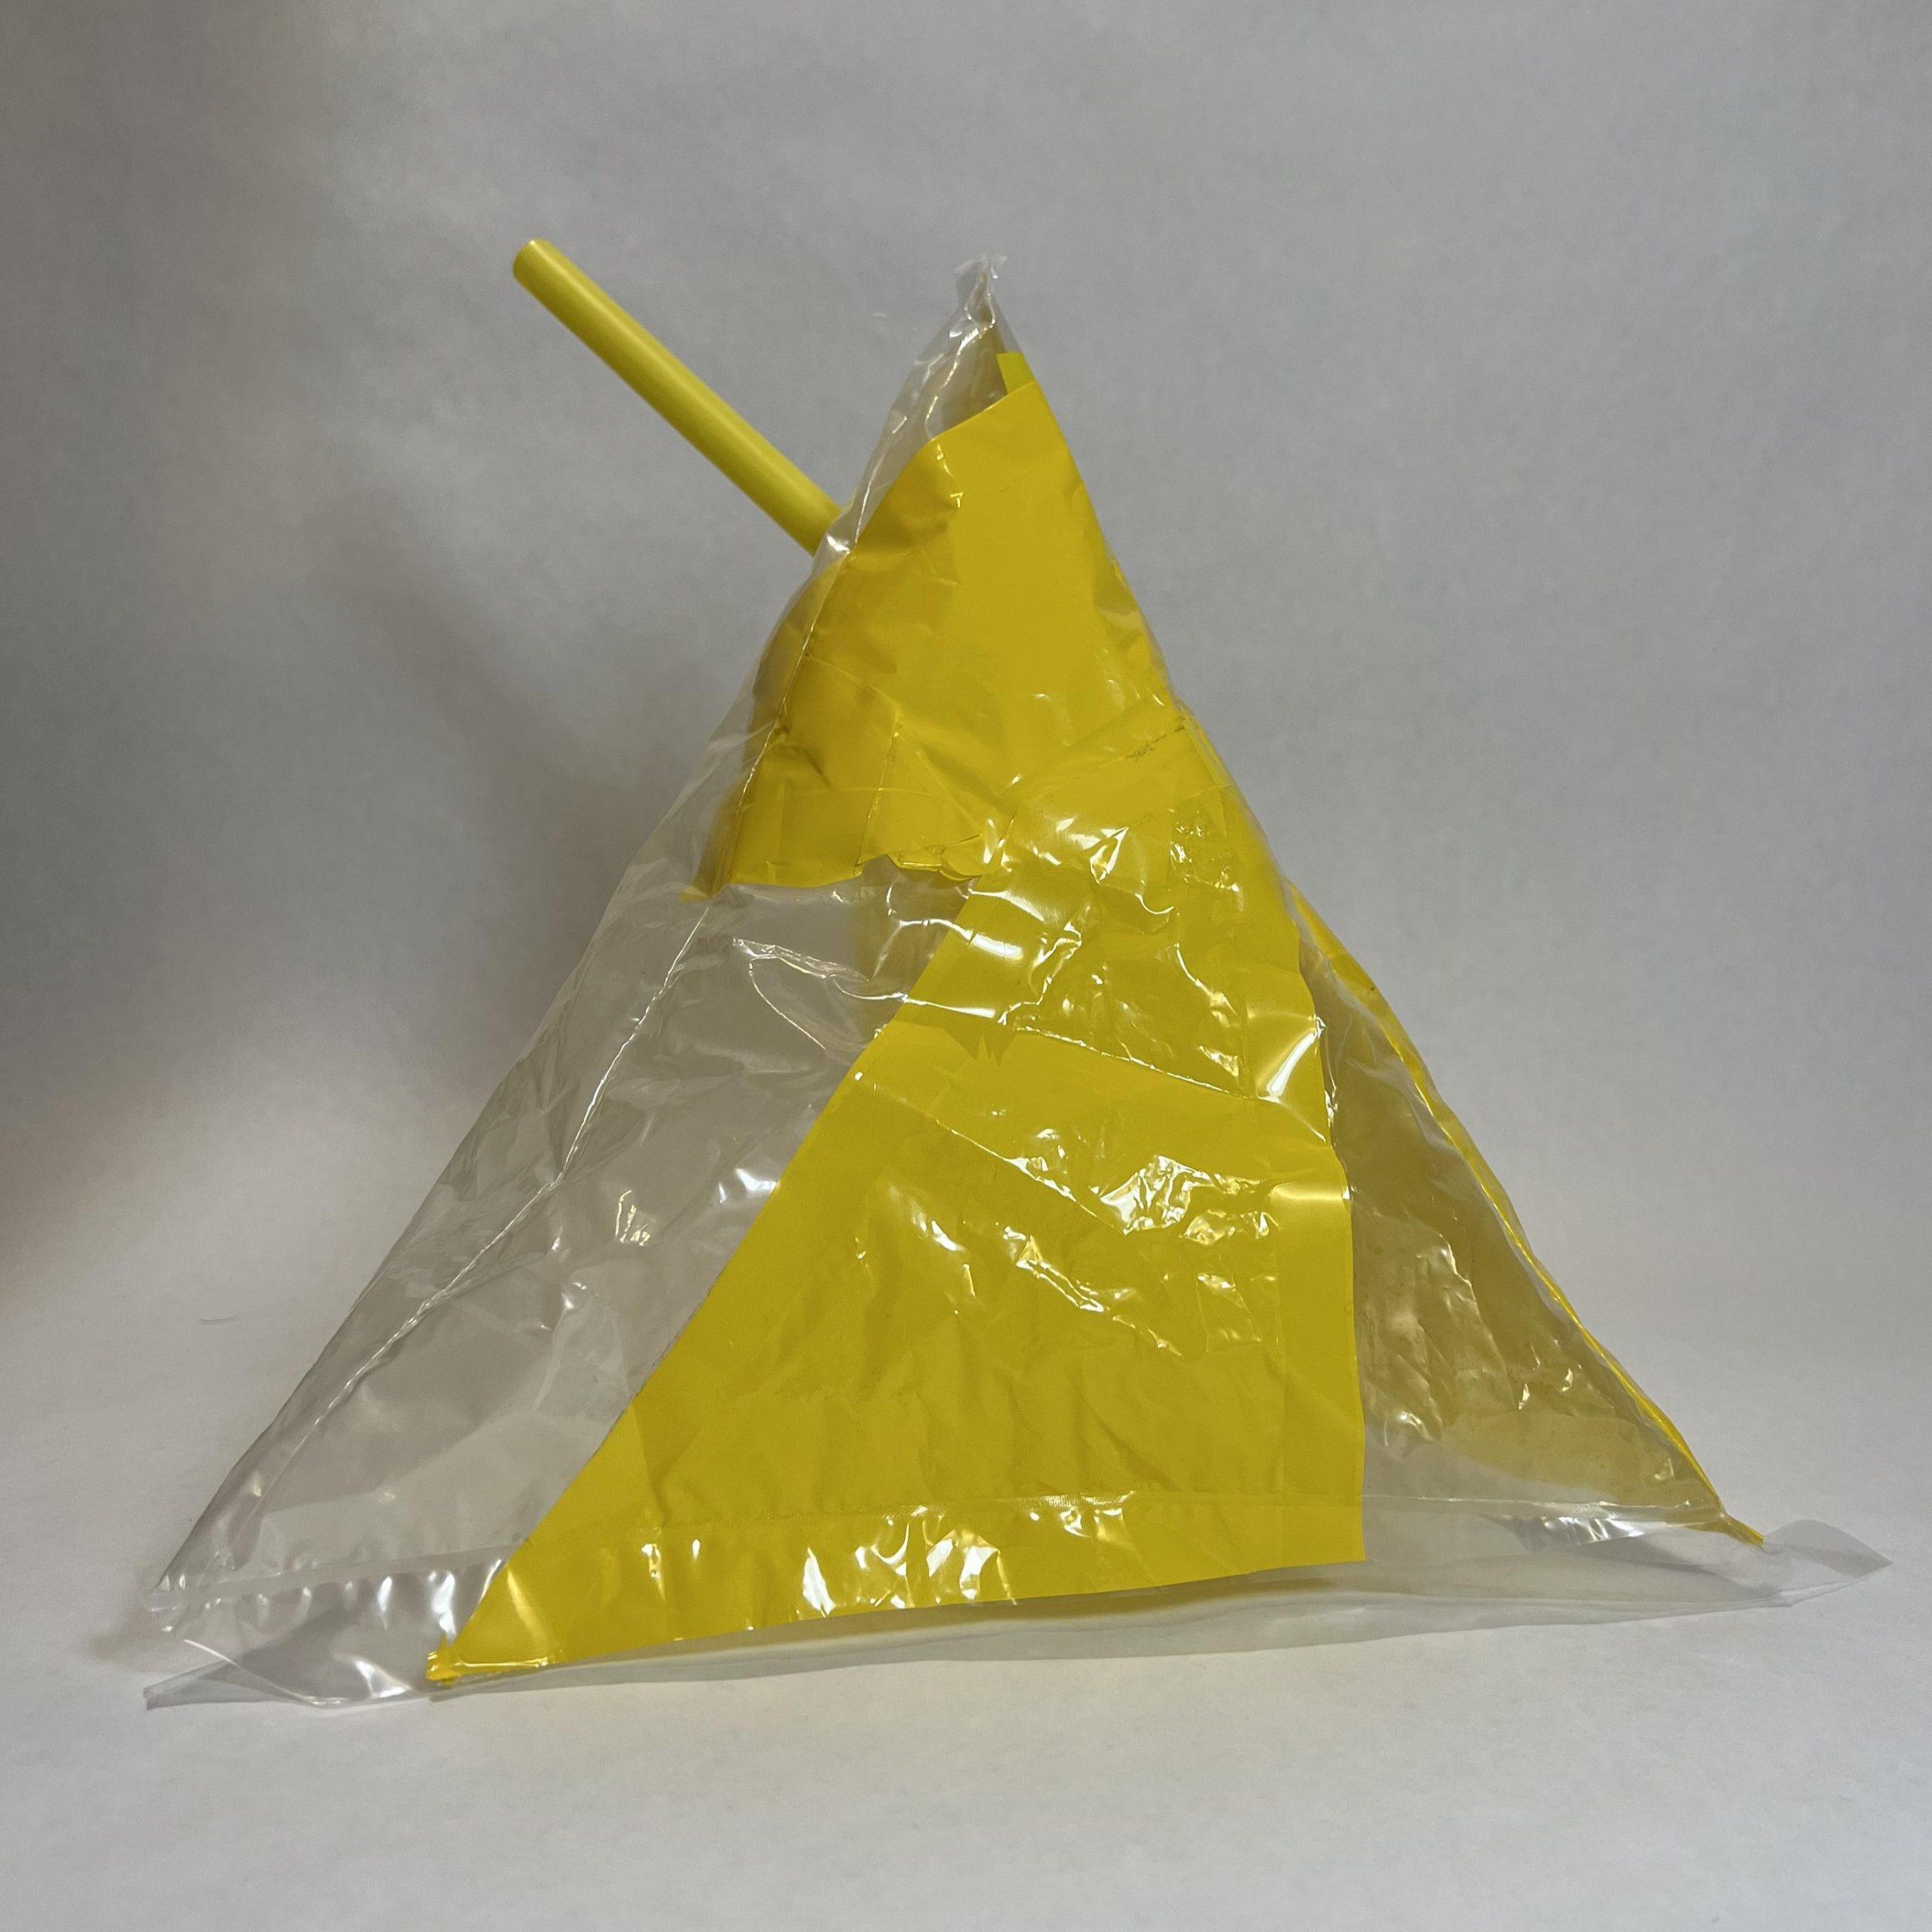
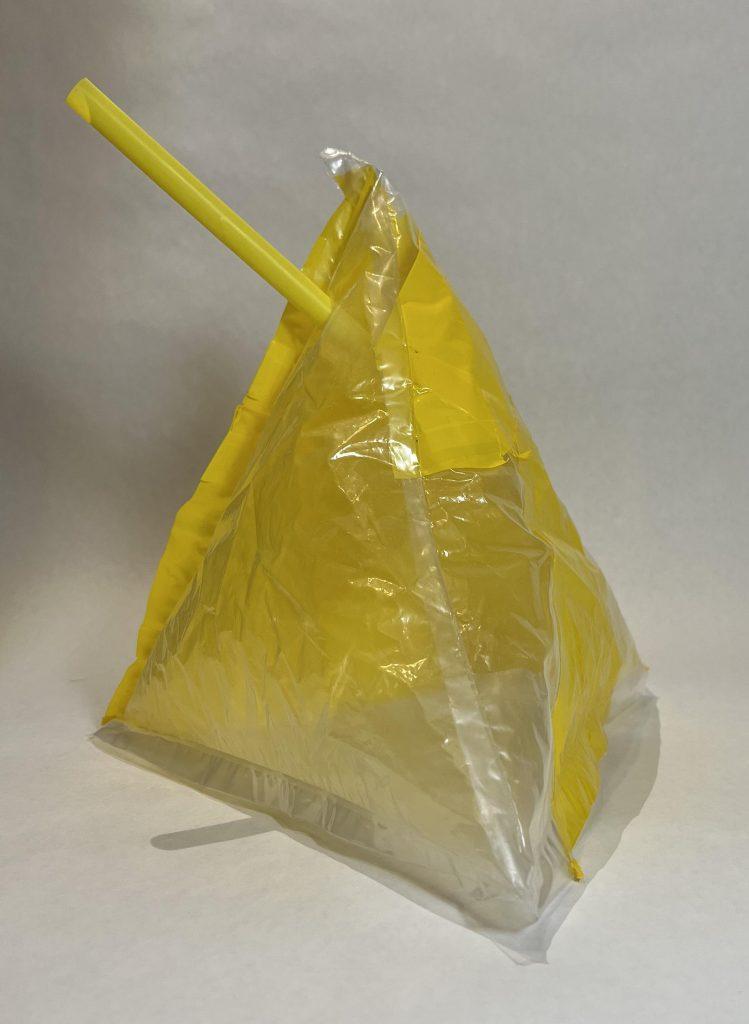
My last inflatable was made using clear and yellow vinyl plastic sheets that were heat sealed together. I wanted to create a triangular inflated structure as further exploration on geometric shapes, like my first one. To start, I cut one piece of triangle from a yellow sheet and two sheets from a clear plastic bag. I used a heat clamp to connect the three triangles with seams on the inside.
After standing it up in a triangular shape, I decided that I wanted the last triangle to be a bleed of both colors so I cut pieces from the scraps of the big triangles. I used wide yellow tape to join the clear and yellow pieces and create a bigger triangle. Using the heat clamp, I sealed the triangles together with inside seams except for the last.
side profile
outer seam
For me, this was the most successful improvised inflatable out of the three. It went according to my expectations and inflated to the triangular shape perfectly. I also found the inside and outside seams to blow up in different ways and found this to be something I want to further explore.