![[OLD FALL 2020] 15-104 • Introduction to Computing for Creative Practice](../../../../wp-content/uploads/2021/09/stop-banner.png)
sketch
let sec = 0; //initial seconds value
let min = 0; // initial minutes value
let hour = 0; // initial hour value
let R = 236; // starting red value for starting color
let G = 84; // starting green value for starting color
let B = 76; // starting blue value for starting color
let fph = 1296000; // frames per 6 hours, for color gradient
let mode = 1; // different colors changing
let dx = 0; //speed of clouds
let dcar = 0; //speed of car
function setup() {
background(R, G, B)
createCanvas(400,400);
background(220);
text("p5.js vers 0.9.0 test.", 10, 15);
frameRate(60);
count = 0;
}
function draw() {
count += 1
background(R, G, B);
fill(255);
cloud1();
cloud2();
cloud3();
cloud4();
dx += 0.5;
dcar += 0.5;
//initial rectangle
fill(0,0,128);
noStroke();
rect(50, 380, 100, hour); //hour box, far left
rect( 150, 380, 100, min); //min bos, middle
rect (250, 380, 100, sec); //sec box, far right
sec -= 0.1
if(sec <= -360){
sec = 0;
min -= 6;
if(min <= -360){
min = 0;
hour -= 30;
if(hour <= -360){
hour = 0;
}
}
}
if(count == fph){
if(mode < 4){
mode += 1;
} else {
mode = 1;
}
count = 0;
}
//color changing
if(mode == 1){
R += 9/fph;
G += 33/fph;
B += 60/fph;
}
if(mode == 2){
R -= 153/fph;
G -= 89/fph;
B -= 84/fph;
}
if(mode == 3){
R -= 30/fph;
G += 19/fph;
B += 47/fph;
}
if(mode == 4){
R += 174/fph;
G += 37/fph;
B -= 23/fph;
}
for(i = 350;i > 25; i = i - 25){
fill(255,255,0);
if(i > 380+sec){
rect(260,i,11,15);
rect(282.5,i, 11, 15);
rect(305,i,11,15);
rect(327.5, i, 11, 15);
}
if(i > 380+min){
rect(160,i,11,15);
rect(182.5,i, 11, 15);
rect(205,i,11,15);
rect(227.5, i, 11, 15);
}
if(i > 380+hour){
rect(60,i,11,15);
rect(82.5,i, 11, 15);
rect(105,i,11,15);
rect(127.5, i, 11, 15);
}
}
car();
if(dx == 600){
dx = 0;
}
}
function cloud1(){
ellipse(((0 + dx) % 600) - 100,50,50); //first cloud on left
ellipse(((30 + dx) % 600) - 100,50,50); //first cloud on left
ellipse(((55 + dx) % 600) - 100,50,50); //first cloud on left
}
function cloud2(){
ellipse(((275 + dx) % 600) - 100,50,50); //second cloud on the right
ellipse(((305 + dx) % 600) - 100,50,50); //second cloud on the right
ellipse(((340 + dx) % 600) - 100,50,50); //second cloud on the right
}
function cloud3(){
ellipse(((150 + dx) % 600) - 100,150,50); //middle cloud
ellipse(((185 + dx) % 600) - 100,150,50); //middle cloud
ellipse(((215 + dx) % 600) - 100,150,50); //middle cloud
}
function cloud4(){
ellipse(((375 + dx) % 600) - 100, 150, 50);
ellipse(((410 + dx) % 600) - 100, 150, 50);
ellipse(((445 + dx) % 600) - 100, 150, 50);
}
function car(){
fill(255,255,0);
rect(50 + dcar,365,20,15);
triangle(70 + dcar,365,70 + dcar,380,80 + dcar,380);
fill(178,178,255);
triangle(70 + dcar,365,70 + dcar,375,77 + dcar,375)
fill(100);
ellipse(57 + dcar,380,7);
ellipse(70 + dcar,380,7);
fill(76.1, 76.1, 100);
rect(50 + dcar,365,5);
if(dcar > 375){
dcar = -75
}
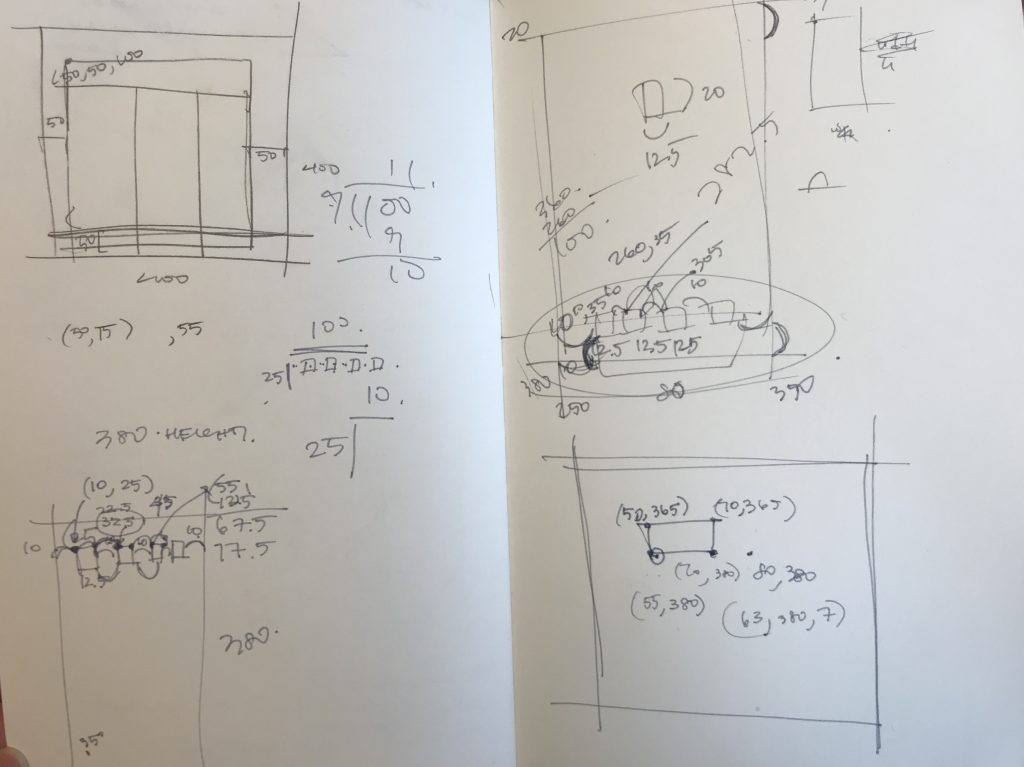
}The basic idea of this project was to represent time with three buildings each representing seconds, minutes, and hour. Once the building that represents seconds is fully revealed, one increment of the minute building will show up. Once all of the 60 minutes are “filled” up, the hour building will increase by one. For all three buildings to show up, it would take hours, however, the background will slowly change colors from orange to pink, pink to purple, and purple to blue, to distinguish AM and PM. The hour building only represents 12 hours but the background color changing from warm to cool colors will separate the 24 hours into day and night.