Introduction
In this lab, you will:
- Learn how to post your blog text and a program on to the WordPress course website.
- Practice programming with mouse location and canvas width and height.
Log in to WordPress
On the course website, you should see Log In in the right column menu. You should be able to authenticate using your CMU credentials (ID name, password).
Create a Blog Post
At the top of WordPress page, you should see a menu. Select New, then Post, to create a new Blog post. You will create a blog post with the blog you wrote for last week’s assignment.
- Give your post a title, such as “LO: My Inspiration”. You will see a section below where you can enter your blog text. You can simply cut and paste your blog text rather than type it all in again.
- For future LO deliverables, you will be asked to include a link to the online source and possibly a video or picture that showcases what you are discussing.
For this practice, add a link to your blog to reference the original online source and an image that supports your blog.- Follow the instructions on the Authoring on this Site for embedding links.
- Follow the instructions on the Authoring on this Site for embedding uploaded images. Note that when you embed an image, you should always write a caption that explains what the reader is seeing; never just post an image without a short explanation.
- Although not required for this lab, you can also learn how to add video to your post by following the instructions for Authoring on this Site for embedding external media.
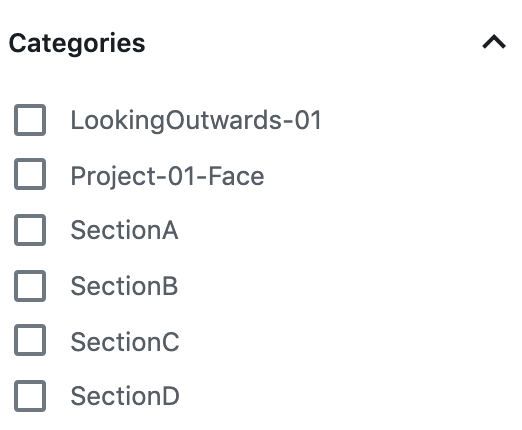
- When you are done editing your post, you must select categories in order to make your posts easy to find. On the right side of your edit page, you should see a section called Categories with various options available:

Select LookingOutwards-01 and your section (e.g. SectionA). - Once you have entered your blog post with a link and image, go to the upper-right to click on Publish to display your blog entry publicly.
Create a Project Post
You will also be asked to publish your open-ended project code (NOT THE TECHNICAL ASSIGNMENT). You will create a post with the self-portrait program you created for last week’s assignment.
- Give your post a title, such as “Project 1: My Self Portrait”.
- For future deliverables, you will be asked to submit your open-ended project to Autolab, and post an entry to show your program publicly for all of us to try out.
- Follow the instructions on the Authoring on this Site for embedding p5.js code in order to post your self-portrait program on your page. NOTE: You only post the sketch.js file; do not post the index.html file. Add a sentence that states what you found the most challenging or interesting about your project.
- Select categories for your post: Project-01-Face and your section (e.g. SectionA).
- Once you have entered your post with a link and image, go to the upper-right to click on Publish to display your blog entry publicly.
Programming Problems
Now let’s try a few programming problems. Don’t worry if you don’t get all of them done. Try as many as you can. In your course folder on your computer, create a folder named lab-02. Download a copy of the zipped template-p5only.zip file. For each problem, unzip the template and move the template-p5only folder into lab-02 and rename it, e.g. andrewID-02-A. (Use the letter of the problem.)
Problem A
Make a circle with radius 50 that follows the mouse as you move it around the canvas. What happens if you repaint the background in your draw function? What happens if you don’t? Update the program once you have it running so that the diameter tracks the horizontal position of the mouse (the farther to the left, the smaller the diameter; the farther to the right, the larger the diameter).
Problem B
Put a 20 X 20 square in each corner of a canvas (assuming the canvas is at least 40 X 40). Remember to use the environment variables width and height so that your program will work no matter what the canvas size is. Try out a few canvas sizes to make sure your program works as specified.
Problem C
Make the background of the canvas turn red if the mouse is in the top left quadrant, green if the mouse is in the bottom left quadrant, blue if the mouse is in the top right quadrant, and black if the mouse is in the bottom right quadrant. (HINT: You can do this by layering if-else instructions.)
Handin
At the end of the lab, zip the lab-02 folder and submit it to Autolab. Do not worry if you did not complete all of the programming problems but you should have made reasonable attempts at problems A and B at least.
![[OLD FALL 2020] 15-104 • Introduction to Computing for Creative Practice](wp-content/uploads/2021/09/stop-banner.png)