![[OLD FALL 2020] 15-104 • Introduction to Computing for Creative Practice](../wp-content/uploads/2021/09/stop-banner.png)
The readings, assignments, and projects below constitute the Week 4 Deliverables and are due by 11:59pm EDT on Saturday, September 26th:
- Technical Readings
- Looking Outwards 04 [Autolab and Blog]
- Assignment-04-A (Spinning Colors) [Autolab]
- Assignment-04-B (Abstract Calendar) [Autolab]
- Project-04: (String Art) [Autolab and Blog]
- Handin and Post your Work
1. Technical Readings
- Basics of sound, and a nice introduction to the sound in the world of Media. The first two topics provide a good intuitive understanding – http://www.yamahaproaudio.com/global/en/training_support/better_sound/part1/
- A step-by-step explanation of using sound – http://coursescript.com/notes/interactivecomputing/sound/
- A step-by-step explanation of using loops – https://www.kirupa.com/html5/loops_in_javascript.htm
2. Looking Outwards 04: Sound Art
Our Looking Outwards topic for this week is sound and is specifically concerned with how artists use computation to work with sound and music. You might consider how digital storage and networks change the way we think about sound; how sound is generated digitally or processed digitally; how sound data is transformed to physical sound through conventional means (loudspeakers, headphones) and unconventional means; and how sound has been visualized. Computation creates the possibility of sophisticated generative music, including automated emulations of musical style, as well as provocative new instruments for human expression.
Identify a particular project or work in the area of sound and computation which you find interesting. In a blog post of about 100-200 words,
- Please discuss the project. What do you admire about it, and why do you admire these aspects of it?
- What do you know (or what do you suppose) about the algorithms that generated the work?
- It what ways are the creator’s artistic sensibilities manifest in the final form?
- Link (if possible) to the work. To the best of your abilities, be sure to provide the creator’s name, title of the work, and year of creation.
- Embed an image, sound, and/or a YouTube/Vimeo video of the project.
- Label your blog post with the Categories LookingOutwards-04 and your section, e.g. SectionA.
Some additional good places to find projects include:
- http://www.creativeapplications.net/tag/sound/
- https://vimeo.com/search?q=maxmsp
- https://www.youtube.com/user/MediaArtTube/videos
- The work of artists/composer/musicians including Christian Marclay, Christina Kubisch, Don Ritter, Ikue Mori, Janet Cardiff, Keiko Uenishi (o.blaat), Laetitia Sonami, Luke Du Bois, Pamela Z, Pauline Oliveros, Robert Henke, Ryoji Ikeda, Trimpin, Zimoun… (Search for their works on Google, YouTube etc.!)
3. Assignment 04-A: Spinning Colors
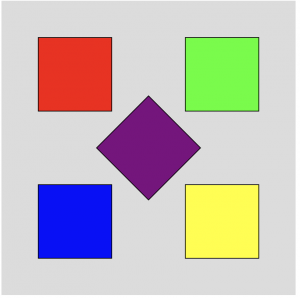
In this Assignment, you will implement five rotating squares, each of a different color to create an interesting visual effect using translation and rotation. The initial configuration when the program draws the squares for the first time is this:
The following link provides a short movie of what the canvas looks like as the squares rotate: color-rotations
Requirements:
- Name your project folder andrewID-04-A.
- Inside this folder, create a p5.js program that draws five spinning squares in the five indicated colors (green, red, yellow, blue and purple) as shown in the movie, starting in the configuration and alignment shown in the picture above.
- The rectangles are drawn on a 400 x 400 canvas with centers at
(100,100), (100, 300), (300, 100), (300, 300) and (200, 200). The rectangle in the center starts at a 45 degree angle. - You should draw all five rectangles using the same function call in p5.js:
rect(0, 0, 100, 100); - In order to draw all five rectangles using the same command above, you will need to use translation and rotation to get all five rectangles to appear in their correct positions.
- To create the spinning effect, you should rotate each shape an extra 2 degrees for each frame drawn by the draw function. (Remember to repaint the background at the start of the draw function or you will have lots of rectangles being drawn.)
- Review the notes on transformations since there is a problem that is very similar to this assignment that we discussed in class. (HINT: Use rectMode(CENTER) in your setUp() function to make it easier to draw the rectangles since you know their center rotation points.)
- Don’t forget to comment your code, and please give attention to code style.
4. Assignment 04-B: Abstract calendar
In this Assignment, you will use a nested set of
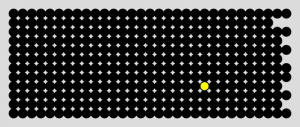
for()loops to display the calendar for a leap year. It will consist of 12 rows of black circles, where the number of circles for each row corresponds to the number of days in that month. For example, the first row of circles will represent January and will have 31 circles. Each circle should be 10 pixels wide, and the canvas should be 330 X 140 which will allow a space of 10 pixels around the entire set of circles.Since you have to draw 366 circles, you should NOT write 366 circle commands. Instead, you should use loops and have just one circle command to draw all of the black circles. Once you draw the 366 circles, you should redraw the one circle representing today in yellow. In order to find out the current month and day, you can use the month() and day() functions in p5.js.
Here is an example of the calendar for September 22:
Requirements:
- Name your project folder AndrewID-04-B.
- Inside this folder, create a p5.js program that displays a gray canvas whose dimensions are precisely 330 X 140 pixels. Every circle should be exactly 10 pixels in diameter.
- To draw all of the black circles, set up a for loop with a variable m that takes on the values from 1 to 12 (inclusive), representing the month number. Inside this for loop, first set up a variable that stores the number of days in the month number given by the loop (see hint below) and then set up another for loop inside the first one with a variable d that counts from 1 to the number of days in the month number given by the outside loop. (HINT: To set the variable to the number of days in the month, you could write 12 if statements, but you can simplify it down to three possibilities.)
- You should now have an “outer” loop for the month number and an “inner” loop for the day number. Inside the inner loop, draw a black circle at a location on the canvas based on the current values of the month loop and the day loop.
- Once you’re done displaying the 12 rows of circles, draw one final yellow circle at the location of the current date. Call the month() function to get today’s month and the day() function to get today’s day number. (To test your program further, you should artificially set today’s month and day to a different date rather than call these functions to see if the yellow circle appears in the correct location.)
- Don’t forget to comment your code, and please give attention to code style.
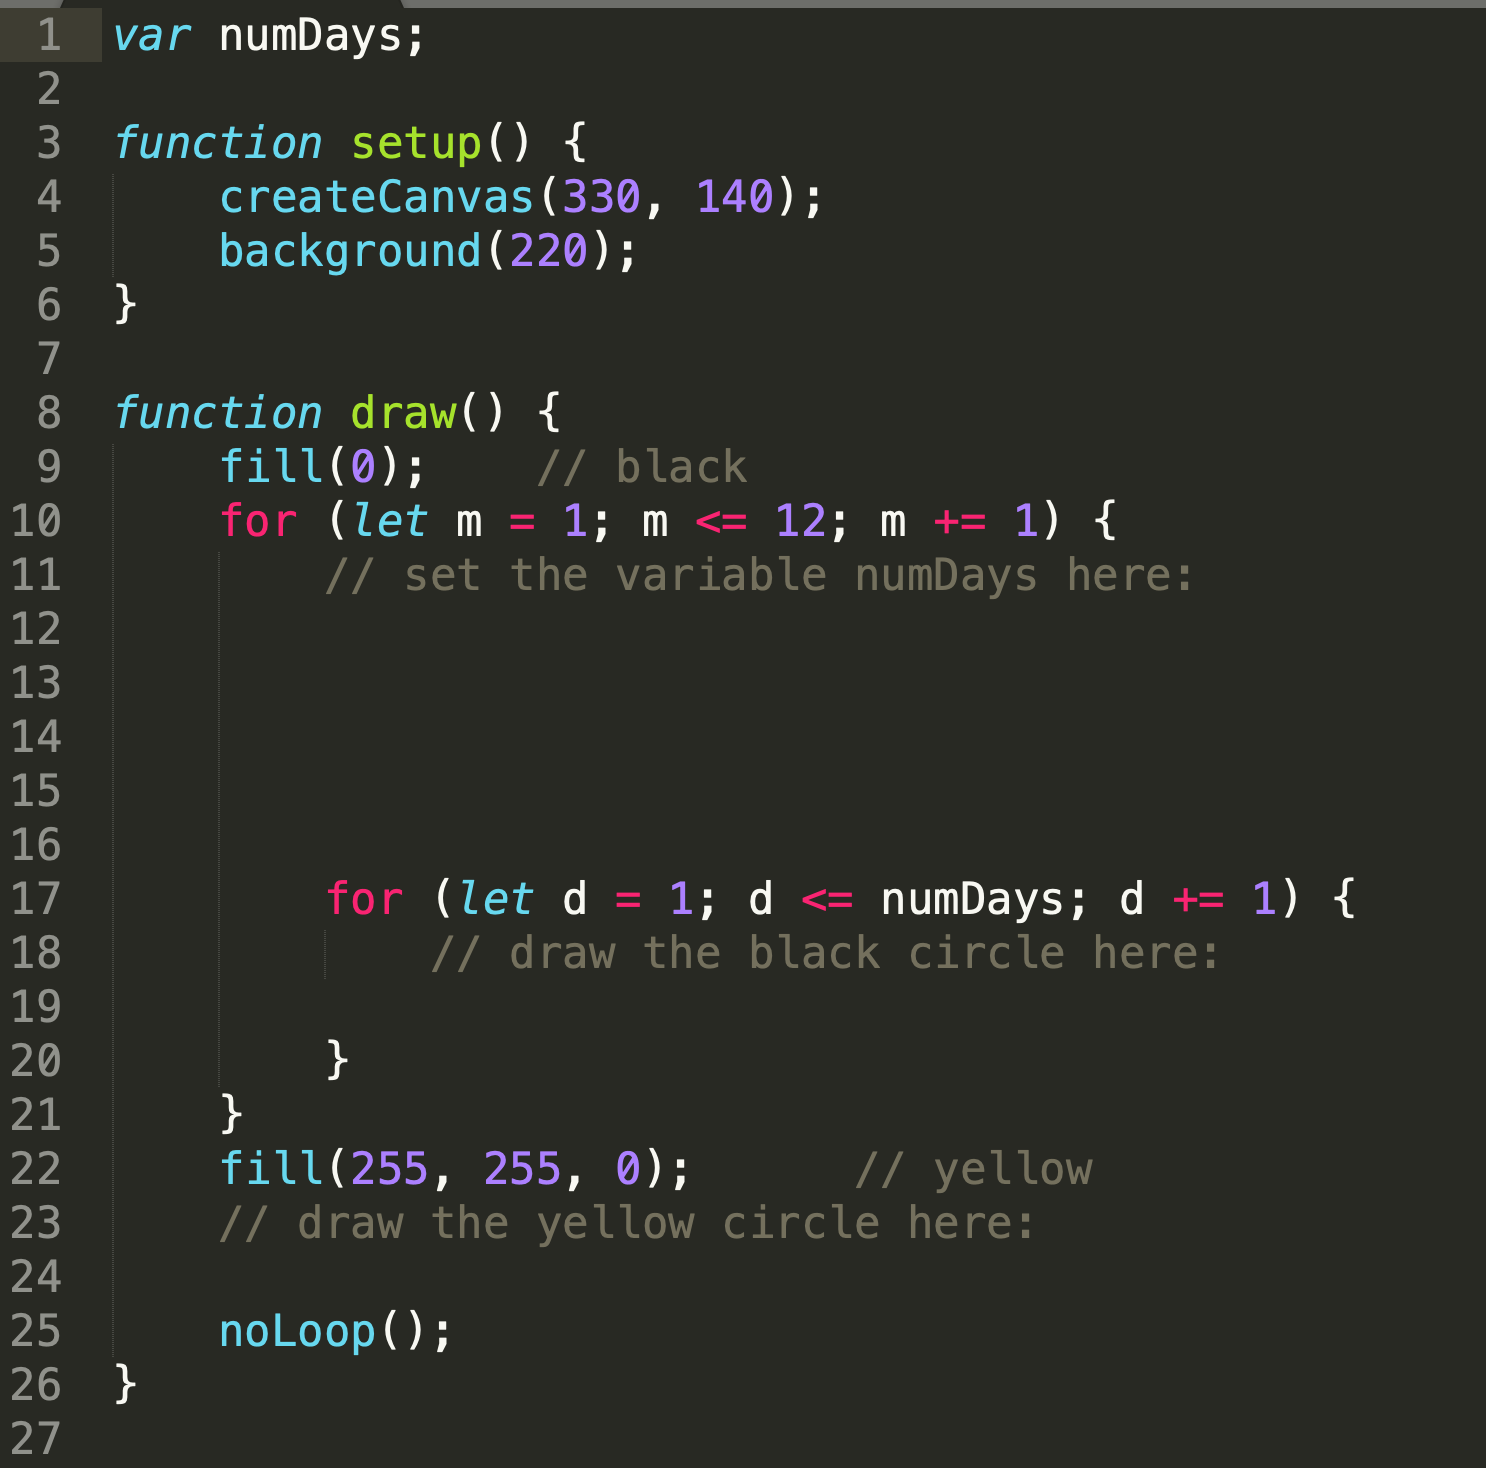
Here is a sample program to get you started:
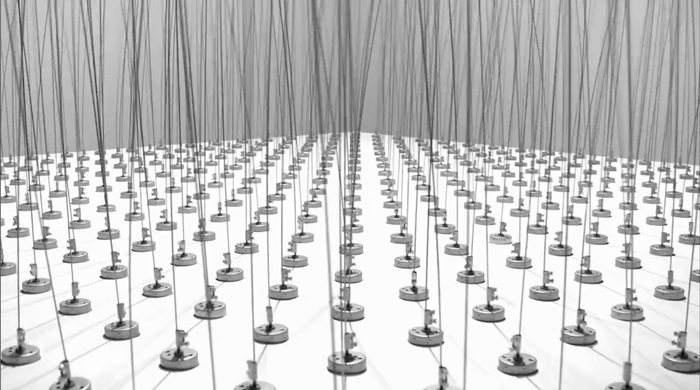
5. Project-04: String Art
In this Project, you will create a drawing using “string art” techniques. These images convey some of the vast possibilities:
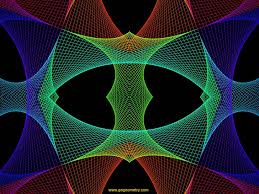
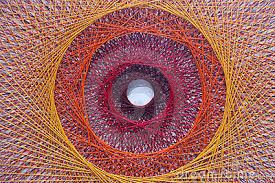
from Google Images: gogeometry.com from Google Images: bestpatterns.ludug.com 
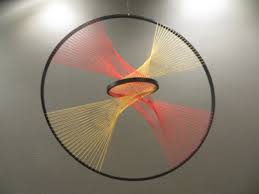
from Google Images: youtube.com from Google Images: momath.com How to make “string art”. One basic idea of string art is that you draw lines (stretch string) where the line end-points lie along a progression of points, often in a straight line. If you don’t have a good intuition for this, check out Holly Hatfield’s blog on “7th Grade String Art”.
The basic idea is illustrated in the following program. In this simple example, there are two reference lines that are connected with 50 lines. The basic algorithm is to draw a line between one point on each of the initial lines. Then advance 1/50th of the way along each of the initial reference lines and draw the next line, and repeat this until you reach the other end of the two reference lines.
var dx1;
var dy1;
var dx2;
var dy2;
var numLines = 50;

function setup() {
    createCanvas(400, 400);
    background(200);
    line(50, 50, 150, 300);
    line(300, 300, 350, 100);
    dx1 = (150-50)/numLines;
    dy1 = (300-50)/numLines;
    dx2 = (350-300)/numLines;
    dy2 = (100-300)/numLines;
}

function draw() {
    var x1 = 50;
    var y1 = 50;
    var x2 = 300;
    var y2 = 300;
    for (var i = 0; i <= numLines; i += 1) {
        line(x1, y1, x2, y2);
        x1 += dx1;
        y1 += dy1;
        x2 += dx2;
        y2 += dy2;
    }
    noLoop();
}
Since we need to draw 50 lines, we don’t want to do this with 50 line commands. Instead, we can use a loop whose variable (i) acts as a counter. By computing the deltas (dx1, dy1, dx2, dy2) for 1/50th of a step along the reference lines, we can add i deltas to move along the reference lines and connect the opposing points to create string art.
Here are the Project-04 Requirements:
- Name your project folder AndrewID-04-Project. For example, if your Andrew ID is
acarnegie, then your directory name should beacarnegie-04-Project, and this directory should containsketch.jsandindex.html. - Using a canvas size whose dimensions are 400×300 (or 300×400, whichever you prefer), create a program in p5.js that generates a “string art” drawing.
- You must draw at least 3 string art “shapes” where each shape consists of lines between two sequences of points. Be creative!
- Comment your code – it should be easy to tell how the code works, e.g. explain coordinate calculations and describe what parts of the drawing are drawn by different parts of your code. (Note: adding comments while you are programming to document your thought process is a good idea.)
- In addition to your program code that you will hand in to Autolab, embed your p5.js sketch in a blog post on this site, using the (usual) instructions here. Make sure that your p5.js code is visible and attractively formatted in the post.
- In your blog post, write a sentence or two reflecting on your process and product. In discussing your process, it would be nice to see any of your paper sketches from your notebook; these could be as simple as photos captured with your phone.
- Label your project’s blog post with the Categories Project-04-String-Art and your section, e.g. SectionD.
6. Handin and Post Your Work
- Zip (compress) your handin-04 folder, which should contain folders containing your blog essay, assignment and project, and upload your zip file to Autolab, using the provided instructions..
- Remember to post your blog and your project in two separate posts on the WordPress course website with appropriate category labels so we (and students) can find your work easily.
Your zip file handin on Autolab must be submitted by Saturday, September 26th by 11:59PM EDT to be considered on time. Your blog and project posted on WordPress should be the same or similar to what you submitted in Autolab and should also be posted by the due date. (You may make minor corrections on WordPress for formatting issues.)