Looking Outwards-03

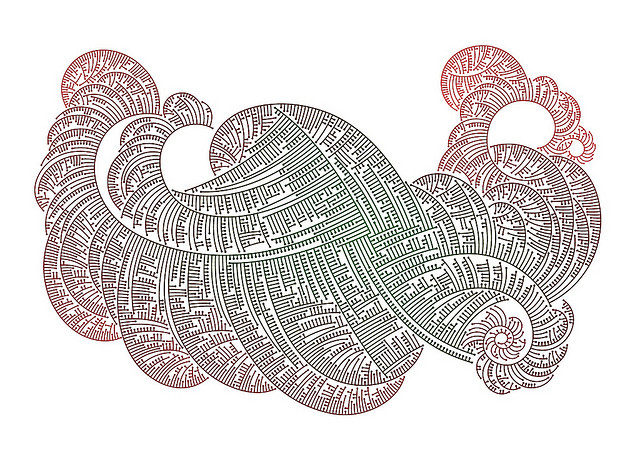
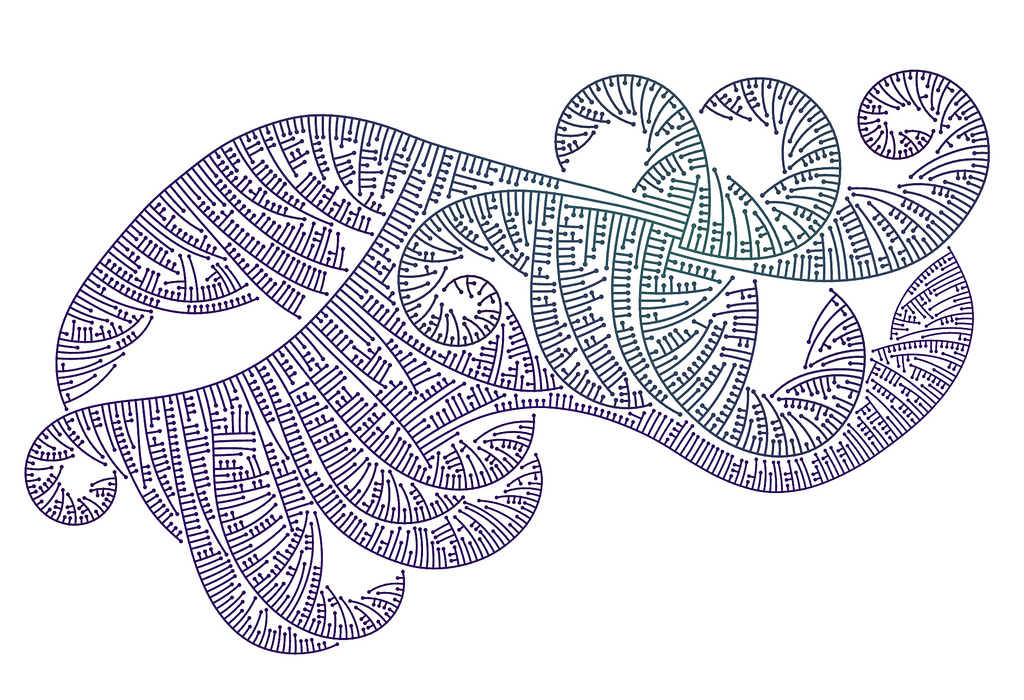
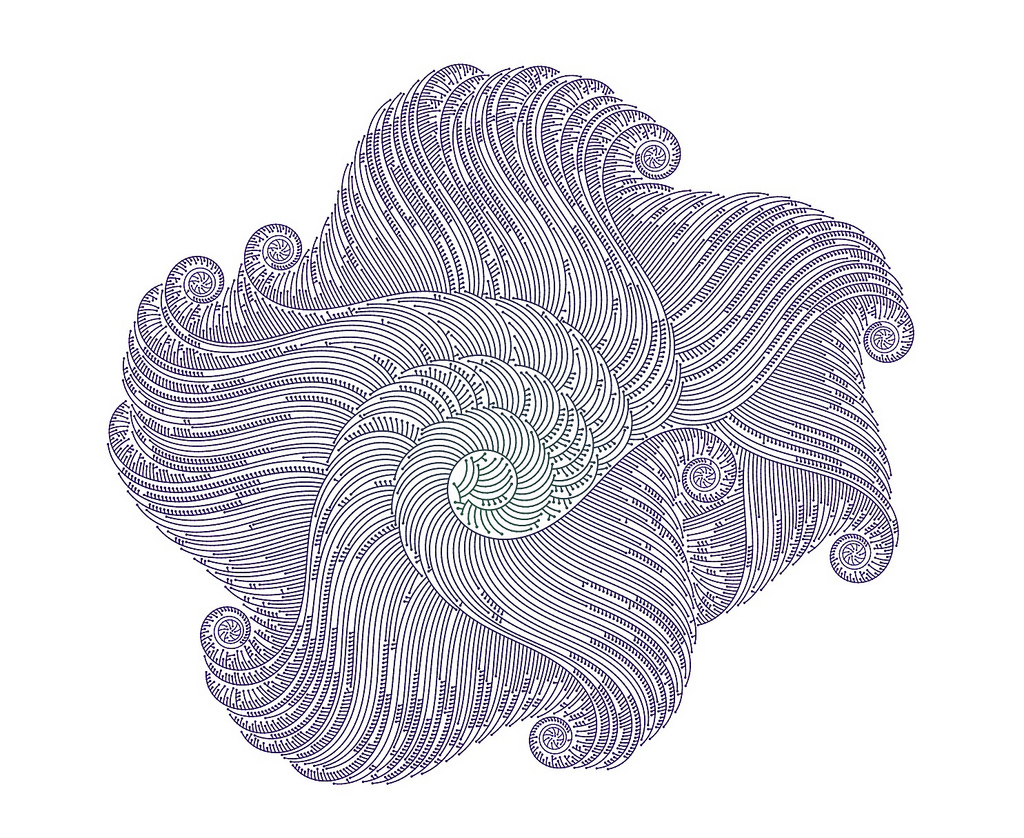
The project I choose is “Rocailles” by Benjamin Dillenburger. It’s a digital fabrication model made by 3D printing. The general shape is a curvature dynamic surface, and by bending and delicate arrangement, the model presents a circular flower shape. I’m attracted by the flower shape, the curve flows have a sense of fluidity and coherence, and the trend of the shape leads the audience’s eye to the hole, trying to explore more things about the project.
The advanced production methods highly increase the development of these high-resolution forms, specifically in this project, spaces between every curve are filled with some X shape. I think the algorithm and fabrication parameters are more integrated with the initial design stage, and then the database served as an information exchange platform.
The way they use digital fabrication explores a new paradigm in architecture, also in a more open manner, which is a good inspiration for future building development.

and here is a link: https://benjamin-dillenburger.com/rocaille/

Project 3- Dynamic Drawing

Graham Murtha, Section A

This is a dance routine of some complimentary color orbs.

sketch
// GRAHAM MURTHA
// Section A

let opacity = 100;

var dir = 1
var fill = 50
var angle = 0


function setup() {
    createCanvas(600, 450);
    background(0);
    text("p5.js vers 0.9.0 test.", 10, 15);

}


function draw() {
let x = mouseX;
let y = mouseY;
let ix = width - mouseX;  // Inverted X
let iy = height - mouseY; // Inverted Y
background(0,0,50) // dark blue

//ellipse SET 1
    fill(255,0,255, opacity); //purple
    ellipse(x, height/2, y/2, y/2);

    fill(255,255,0, opacity); //yellow
    ellipse(ix, height/2, iy/2, iy/2);
    
    
    translate(width/2,height/2) //moving origin of rotating orbs to center
    push() ;


//ellipse SET 2
    rotate(radians(angle)+45)
    fill(255,0,255, opacity); //purple
    ellipse(x, height/2, y/2, y/2);
    fill(255,255,0, opacity); //yellow
    ellipse(ix, height/2, iy/2, iy/2);
    pop();
    angle -=.2
    

//ellipse SET 3
    rotate(radians(angle)+90)
    fill(255,0,255, -opacity); //purple
   ellipse(x/2, height/4, y/4, y/4);
    fill(255,255,0, opacity); //yellow
    ellipse(ix/2, height/4, iy/4, iy/4);
    pop();
    angle +=.2


//ellipse SET 4
    rotate(radians(angle)+135)
    fill(255,0,255, opacity); //purple
    ellipse(x/2, height/4, y/2, y/2);
    fill(255,255,0, opacity); //yellow
    ellipse(ix/2, height/4, iy/2, iy/2);
    pop();
    angle -=.2

    
//ellipse SET 5
    rotate(radians(angle)+180)
    fill(255,0,255, opacity); //purple
    ellipse(x/2, height/4, y/4, y/4);
    fill(255,255,0, opacity); //yellow
    ellipse(ix/2, height/4, iy/4, iy/4);
    pop();
    angle +=.2

//ellipse SET 6
    rotate(radians(angle)+225)

    fill(255,0,255, opacity); //purple
    ellipse(x/2, height/4, y/2, y/2);

    fill(255,255,0, opacity); //yellow
    ellipse(ix/2, height/4, iy/2, iy/2);

    pop();
    angle -=.2


//ellipse SET 6
    rotate(radians(angle)+225)
    fill(255,0,255, opacity); //purple
    ellipse(x/2, height/4, y/4, y/4);
    fill(255,255,0, opacity); //yellow
    ellipse(ix/2, height/4, iy/4, iy/4);
    pop();
    angle +=.2


    //ellipse SET 7
    rotate(radians(angle)+360)
    fill(255,0,255, opacity); //purple
    ellipse(x/2, height/4, y/2, y/2);
    fill(255,255,0, opacity); //yellow
    ellipse(ix/2, height/4, iy/2, iy/2);
    pop();
    angle -=.2
}


//change in the opacity of the circles
function mouseMoved() {
    opacity = map(mouseX, 0, 300, 600, 50, 255, 50) 
    opacity = map(mouseY, 0, 225, 450, 50, 255, 50) 
}

//As the mouse moves further right and further downwards, the opacity of ALL of the spheres will change


Looking Outwards – 03

I’ll be reviewing a series of kaleidoscope, high-speed camera photos by photographer Linden Glenhill. The series of photos capture water droplets reflecting against an LED Ring light, as they react to the vibration of faraday waves. What I know about the project is that the droplets create complicated oscillating patterns at half the frequency of the oscillating faraday wave, and that the higher the frequency, the more complicated the pattern, this makes sense as the droplets can be seen as a visual representation of the frequency. I really enjoys these kinds of projects as they create literal visualizers for audio, a more abstract sense for humans to comprehend opposed to visuals.

Looking Outwards – 02

The series of pieces I’m writing about is Mitchell Whitelaw’s ‘Limits to Growth’, a series of visual patterns made with a generative AI demonstrating a growth’s ability to limit itself through creating patterns that create a final piece that visually looks ‘whole’. While I know very little on how the artwork was made, I can hypothesize that a draw function creates a mass of lines that curve in certain patterns, with a constraint that if a line is too close to intercepting another line, the line will stop expanding. I enjoy how artistically, it doesn’t have to be known that AI generated this artwork, it could be a print that simply looks visually appealing, and mysteriously calculated.

https://mtchl.net/limits-to-growth/

Looking Outwards – 01

The piece of artwork I’ll be evaluating is an audio-reative visualizer called “Red and Blue” from Max MSP Youtuber, AmazingMaxStuff. It’s a device you can import into an audio project, in my case music, and edit parameters to make visuals that react to the audio project. I’m not sure how long it took to create, though looking into the projects code, it must have taken at least a few days of work (after years of learning Max MSP). Prior works the creator could be inspired by include visuals for sound waves, as the the project itself is very representative of how many audio devices depict sound in motion. ‘Red and Blue’ opens a lot of possibilities for Max MSP audio-reative visualizers, as it’s a complex, but easily understandable device that allows for plenty of customization for music artists to create visuals to all their audio’s work. The device itself requires a purchase, but here is a link to the Youtube video showcasing the device.

Project 3 – Dynamic Drawing

For this dynamic drawing, drag your mouse across the screen. The more left you drag the mouse, the color diagrams will expand inwards. Dragging your mouse downwards will expand the circles vertically, creating an overlap of both colors and alpha values. This will mean when you drag your mouse to the bottom right corner, there will be a large pink-white shape taking up most of the screen.

csavitzv_03
//Cole Savitz-Vogel
//csavitzv
//Section A


    function setup() {
     createCanvas(600, 600);
     pixelDensity(2);
     rectMode(RADIUS);
     var morph = (dist(mouseX, mouseX, width / 2, 0))
     var span = (dist(mouseY, mouseY, height / 2, 0))
}

    function draw() {
     background(0);
     strokeWeight(3);
     stroke(255, 255, 255, 25);
     strokeJoin(ROUND);
     noSmooth();
     if (mouseIsPressed){
     push();
     blendMode(ADD);
     fill(150, 20, 110, 50);
     ellipse(300 + (morph, span, 100, 300), 75, (5 * mouseX), mouseY);
     ellipse(300 - (morph, span, 100, 300), 100, (5 * mouseX), mouseY);
     fill(150, 20, 30, 50);
     ellipse(300 + (morph, span, 150, 300), 125, (5 * mouseX), mouseY);
     ellipse(300 - (morph, span, 150, 300), 150, (5 * mouseX), mouseY);
     fill(100, 50, 10, 50);
     ellipse(300 + (morph, span, 200, 300), 175, (5 * mouseX), mouseY);
     ellipse(300 - (morph, span, 200, 300), 200, (5 * mouseX), mouseY);
     fill(100, 100, 0, 50);
     ellipse(300 + (morph, span, 250, 300), 225, (5 * mouseX), mouseY);
     ellipse(300 - (morph, span, 250, 300), 250, (5 * mouseX), mouseY);
     fill(50, 150, 50, 50);
     ellipse(300 + (morph, span, 300, 300), 275, (5 * mouseX), mouseY);
     ellipse(300 - (morph, span, 300, 300), 300, (5 * mouseX), mouseY);
     fill(20, 100, 150, 50);
     ellipse(300 + (morph, span, 250, 300), 325, (5 * mouseX), mouseY);
     ellipse(300 - (morph, span, 250, 300), 350, (5 * mouseX), mouseY);
     fill(70, 50, 150, 50);
     ellipse(300 + (morph, span, 200, 300), 375, (5 * mouseX), mouseY);
     ellipse(300 - (morph, span, 200, 300), 400, (5 * mouseX), mouseY);
     fill(110, 20, 150, 50);
     ellipse(300 + (morph, span, 150, 300), 425, (5 * mouseX), mouseY);
     ellipse(300 - (morph, span, 150, 300), 450, (5 * mouseX), mouseY);
     fill(150, 20, 110, 50);
     ellipse(300 + (morph, span, 100, 300), 475, (5 * mouseX), mouseY);
     ellipse(300 - (morph, span, 100, 300), 500, (5 * mouseX), mouseY);
     pop();
  }
}

Project 2 – Portrait Variables

For my project, I chose to make very cartoonish but expression filled “blumans”. These little characters are portraits that change face shape, expression, and proportions based on the code below.

csavitzv_02
    //Cole Savitz-Vogel
    //Section A

    //Variability includes, Face Hight and Width, Eye Size, Eye Seperation, Eyebrow Position, Pupil Proportions, Mouth Size, Mouth Position, Smile Ratio, Skin Tone 

var eyeSize = 20;
var faceWidth = 100;
var faceHeight = 100;
var eyeWidth = .25
var mouthSize = 50;
var mouthDrop = 0;
var smile = 5;
var inBrow = 0;
var outBrow = 0;
var skinR = 200;
var skinG = 200;
var skinB = 250;

 
function setup() {
    createCanvas(640, 480);
}
 

function draw() {
    background(255);
    fill(skinR,skinG,skinB)
    strokeWeight(0);
    ellipse(width / 2, height / 2, faceWidth,  faceHeight);
    fill(0);
    var mouth = width / 2 + faceWidth;
    arc(width / 2, (height / 2)+mouthDrop, mouthSize, mouthSize, 0, PI, OPEN);
    fill(skinR,skinG,skinB)
    arc(width / 2, (height / 2) + mouthDrop - 1, mouthSize - 1, mouthSize - smile, 0, PI, OPEN);
    var eyeLX = width / 2 - faceWidth * eyeWidth;
    var eyeRX = width / 2 + faceWidth * eyeWidth;
    fill(250);
    ellipse(eyeLX, height / 2, eyeSize + 4);
    ellipse(eyeRX, height / 2, eyeSize + 4);
    fill(0);
    ellipse(eyeLX, height / 2, eyeSize - 2);
    ellipse(eyeRX, height / 2, eyeSize - 2);
    strokeWeight(10);
    line(eyeLX - inBrow, (height / 2) - 20, eyeLX + 20,(height / 2)- outBrow);
    line(eyeRX + inBrow, (height / 2) - 20, eyeRX - 20,(height / 2)- outBrow);
}
 
function mousePressed() {
    faceWidth = random(100, 150);
    faceHeight = random(100, 160);
    eyeSize = random(10, 30);
    eyeWidth = random(.2,.6);
    mouthSize = random(30,70);
    mouthDrop = random(0,40);
    smile = random(.1,50);
    inBrow = random(10,25);
    outBrow = random(10,25);
    skinR = random(100, 200);
    skinG = random(100, 200);
    skinB = random(200, 250);
    
}

Project 1 – Portrait Project

For this project, I used different shapes to make a self-portrait.

csavitzv – 1
 function setup() {
}
 function setup() {
  createCanvas(300, 300);
   background(253);
}
//Background
  function draw() {
    background(206, 193, 232);
    strokeWeight(0)
    fill(153, 134, 191,150);
    circle(50,150,200);
    fill(182, 139, 214,150);
    circle(150,190,200);
    fill(163, 116, 158,100);
    circle(220,90,200);
    fill(224, 112, 212,90);
    circle(60,20,200);
    fill(224, 112, 212,90);
    circle(300,220,200);
    fill(153, 134, 191,50);
    circle(100,250,200);
    
//Face Outline
    fill(242, 196, 177);
    stroke(103,74,43);
    strokeWeight(4);
    beginShape();
    vertex(95, 95);
    vertex(77, 140);
    vertex(80, 146); 
    vertex(77, 158);   
    vertex(95, 246);
    vertex(120, 270); 
    vertex(155, 265);
    vertex(185, 225);  
    vertex(197, 168);
    vertex(195, 148); 
    vertex(175, 92); 
    endShape(CLOSE);

//Nose
    stroke(103,74,43);
    strokeWeight(4);  
    line(130, 160, 115, 155);
    line(123, 200, 130, 160);
    line(123, 200, 131, 202);
    
//Mouth
    bezier(150, 232, 145, 235, 125, 225, 108, 234);

//Eye Sockets
    stroke(255,255,255);
    fill(255,255,255);
    arc(107, 170, 20, 13, 0, PI + QUARTER_PI, CHORD);
    fill(255,255,255);
    arc(151, 164, 24, 25, 0, HALF_PI + QUARTER_PI, CHORD);
 
//Iris
    stroke(185,143,61);
    fill(185,143,61);
    arc(110, 169, 8, 8, 0, PI + QUARTER_PI, CHORD);
    stroke(185,143,61);
    fill(185,143,61);
    arc(151, 166, 9, 13, 0, HALF_PI + QUARTER_PI, CHORD);

//Eyebrows
    noFill();
    stroke(90,48,11);
    strokeWeight(8);
    curve(140, 126, 180, 136, 145, 155, 193, 121);
    stroke(90,48,11);
    curve(110, 136, 115, 156, 80, 140, 120, 150);
    
//Hair
    strokeWeight(5);
    fill(105, 88, 44);
    stroke(79, 54, 36);
    quad(195,176,185,155,162,123,190,128)
    beginShape();
    vertex(182,106);
    vertex(190,108);
    vertex(192,110);
    vertex(193,112);
    vertex(196,118);
    vertex(197,123);
    vertex(198,130);
    vertex(199,135);
    vertex(200,136);
    vertex(201,138);
    vertex(202,140);
    vertex(201,140);
    vertex(199,139);
    vertex(190,138);
    endShape();
    triangle(164,101,178,119,180,75)
    beginShape();
    vertex(150, 113);
    vertex(159, 114);
    vertex(170, 108);
    vertex(165, 98);
    vertex(163, 94);
    vertex(160, 90);
    vertex(150, 85);
    vertex(145, 80);
    vertex(135, 76);
    vertex(125, 74);
    vertex(115, 70);
    vertex(110, 65);
    vertex(111, 70);
    vertex(115, 76);
    vertex(120, 84);
    endShape();
    beginShape();
    vertex(74, 78);
    quadraticVertex(180, 90, 160, 110);  
    quadraticVertex(180, 110, 160, 130);
    endShape();
    line(75,79,90,90)
    beginShape();
    vertex(100, 90);
    quadraticVertex(180, 100, 120, 130);
    quadraticVertex(20, 180, 80, 180);
    vertex(80, 180);
    vertex(100, 90);
    quadraticVertex(10, 100, 50, 130);
    quadraticVertex(20, 180, 80, 180);
    vertex(80, 180);
    endShape();
    arc(188, 115, 45, 20, 20, PI + QUARTER_PI);
    arc(165, 115, 45, 10, 160, 300, HALF_PI + QUARTER_PI);
    stroke(105, 88, 44);
    strokeWeight(7);
    line(99,95,88,141)


}

Project 03

This project shows somebody ducking their head instinctively upon hearing the firing of a spitball. As the mouse is moved from left to right, the spitball fires, and the head goes from facing the viewer to facing and shifting downward. The facial features also move with the mouse’s movement to achieve the illusion of perspective. The hair size increases and the eyes and mouth widen and disappear. The background changes color to provide a sense of impact and display a transition of the person’s emotion from unaware to alarmed, dark to bright.

sketch
// Jerry Xu (jwx)
// Section A
// Project 3: Spitball

let rSky = 153
let gSky = 153
let bSky = 0

function setup() {
  createCanvas(400, 400);
}

function draw() {
  background(rSky, gSky, bSky);
  fromSky = color(0, 0, 0);
  toSky = color(252, 242, 197);
  backgroundColor = lerpColor(fromSky, toSky, mouseX/width);
  background(backgroundColor);


  //meteor color constraints
  rMeteor = constrain(123, 169, 220);
  gMeteor = constrain(123, 169, 220);
  bMeteor = constrain(123, 169, 220);
  
  //trail color constraints
  
  rTrail = 255
  gTrail = 255
  bTrail = random(51, 204);

  
  var mConX = constrain(mouseX, 25, 500);
  var mConY = constrain(mouseY, 100, 100);

//projectile
  strokeWeight(0.1);
  fill(rTrail,bTrail,gTrail);
  fromTrail = color(255, 255, 51);
  toTrail = color(255, 255, 204);
  fillTrail = lerpColor(fromTrail, toTrail, mouseX/width);
  fill(fillTrail);
  triangle(mConX-60,mConY-25, mConX-10,mConY-5, mConX-10, mConY-26);
  triangle(mConX-130,mConY-10, mConX-10,mConY-5, mConX-10, mConY-26);
  triangle(mConX-60,mConY+25, mConX+10,mConY+5, mConX+10, mConY+26);
  triangle(mConX-130,mConY+10, mConX+10,mConY+5, mConX+10, mConY+26);
  triangle(mConX-150,mConY, mConX-5,mConY+20, mConX-10, mConY-20);
  stroke(255);
  fill(rMeteor,bMeteor,gMeteor);
  fromMeteor = color(253, 197, 94);
  toMeteor = color(255, 240, 173);
  fillMeteor = lerpColor(fromMeteor, toMeteor, mouseX/width);
  fill(fillMeteor);
  ellipse(mConX,mConY,55,55);
  ellipse(mConX,mConY,45,45);

//straw  
  stroke(0);
  strokeWeight(0.5);
  fill(0, 112, 74);
  circle(65, 99.5, 57.52);
  noStroke();
  rect(0, 71, 70, 57);
  stroke(0);
  strokeWeight(0.5);
  line(0, 71, 72.5, 71);
  line(0, 128, 72.5, 128);
  
//constrain ducking height
var hConX = constrain(mouseX, 180, 300);

//head, neck, body
  fill(fillMeteor);
  quad(250, 300, 180, 330, 500, 330, 400, 300);
  quad(160, 500, 180, 330, 500, 330, 400, 500);
  stroke(255, 216, 194);
  strokeWeight(80);
  line(7/8 * width, 3/4 * height, 7/8 * width, hConX);
  fill(12);
        fill(255, 216, 194);
        stroke(0);
        strokeWeight(0.2);
        circle(7/8 * width, hConX+51, 200);
  
//hair size change to create perspective when head goes down
  fill(0);
  if (mouseX > 200){
    ellipse(7/8*width, hConX+30, 180, 170);
    translate(300,400); 
  } else 
      ellipse(7/8*width, hConX, 180, 100);

//facial features
  if (mouseX > 150 & mouseX < 200){
    fill(255);
    ellipse(7/8*width+40, hConX+100, 40, 20);
    ellipse(7/8*width-30, hConX+100, 40, 20);
    fill(0);
    circle(7/8*width + 40, hConX+100, 20);
    circle(7/8*width - 30, hConX+100, 20);
    fill(255,0,0);
    ellipse(7/8*width+5, hConX+130, 20, 30);
  } else if (mouseX < 150){
    fill(255);
    ellipse(7/8*width+40, hConX+100, 30, 10);
    ellipse(7/8*width-30, hConX+100, 30, 10);
    fill(0);
    circle(7/8*width + 40, hConX+100, 10);
    circle(7/8*width - 30, hConX+100, 10);
    line(340, 300, 370, 300);
  }
}

Looking Outwards-03, Section A

I thought the piece by David Bizer was particularly inspirational. He used the timeline of an audiofile and then 3D printed it to create a jewelry piece for someone saying, “I love you.” I thought this piece was really cool because of how Bizer captures something that is typically thought to not be tangible. I just think it is a neat way to convey a message.

The algorithms must be able to pick up sound and then return different lengths of lines based on the sound.

The creator’s artisitic vision is shown in this piece because of the materials he chooses to make. Even though the shape of the piece is determined by the sound file, he chooses the material used.

Here is the link to the piece by David Bizer (2015).