Scooby Doo Project – Sarika Bajaj

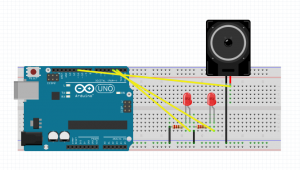
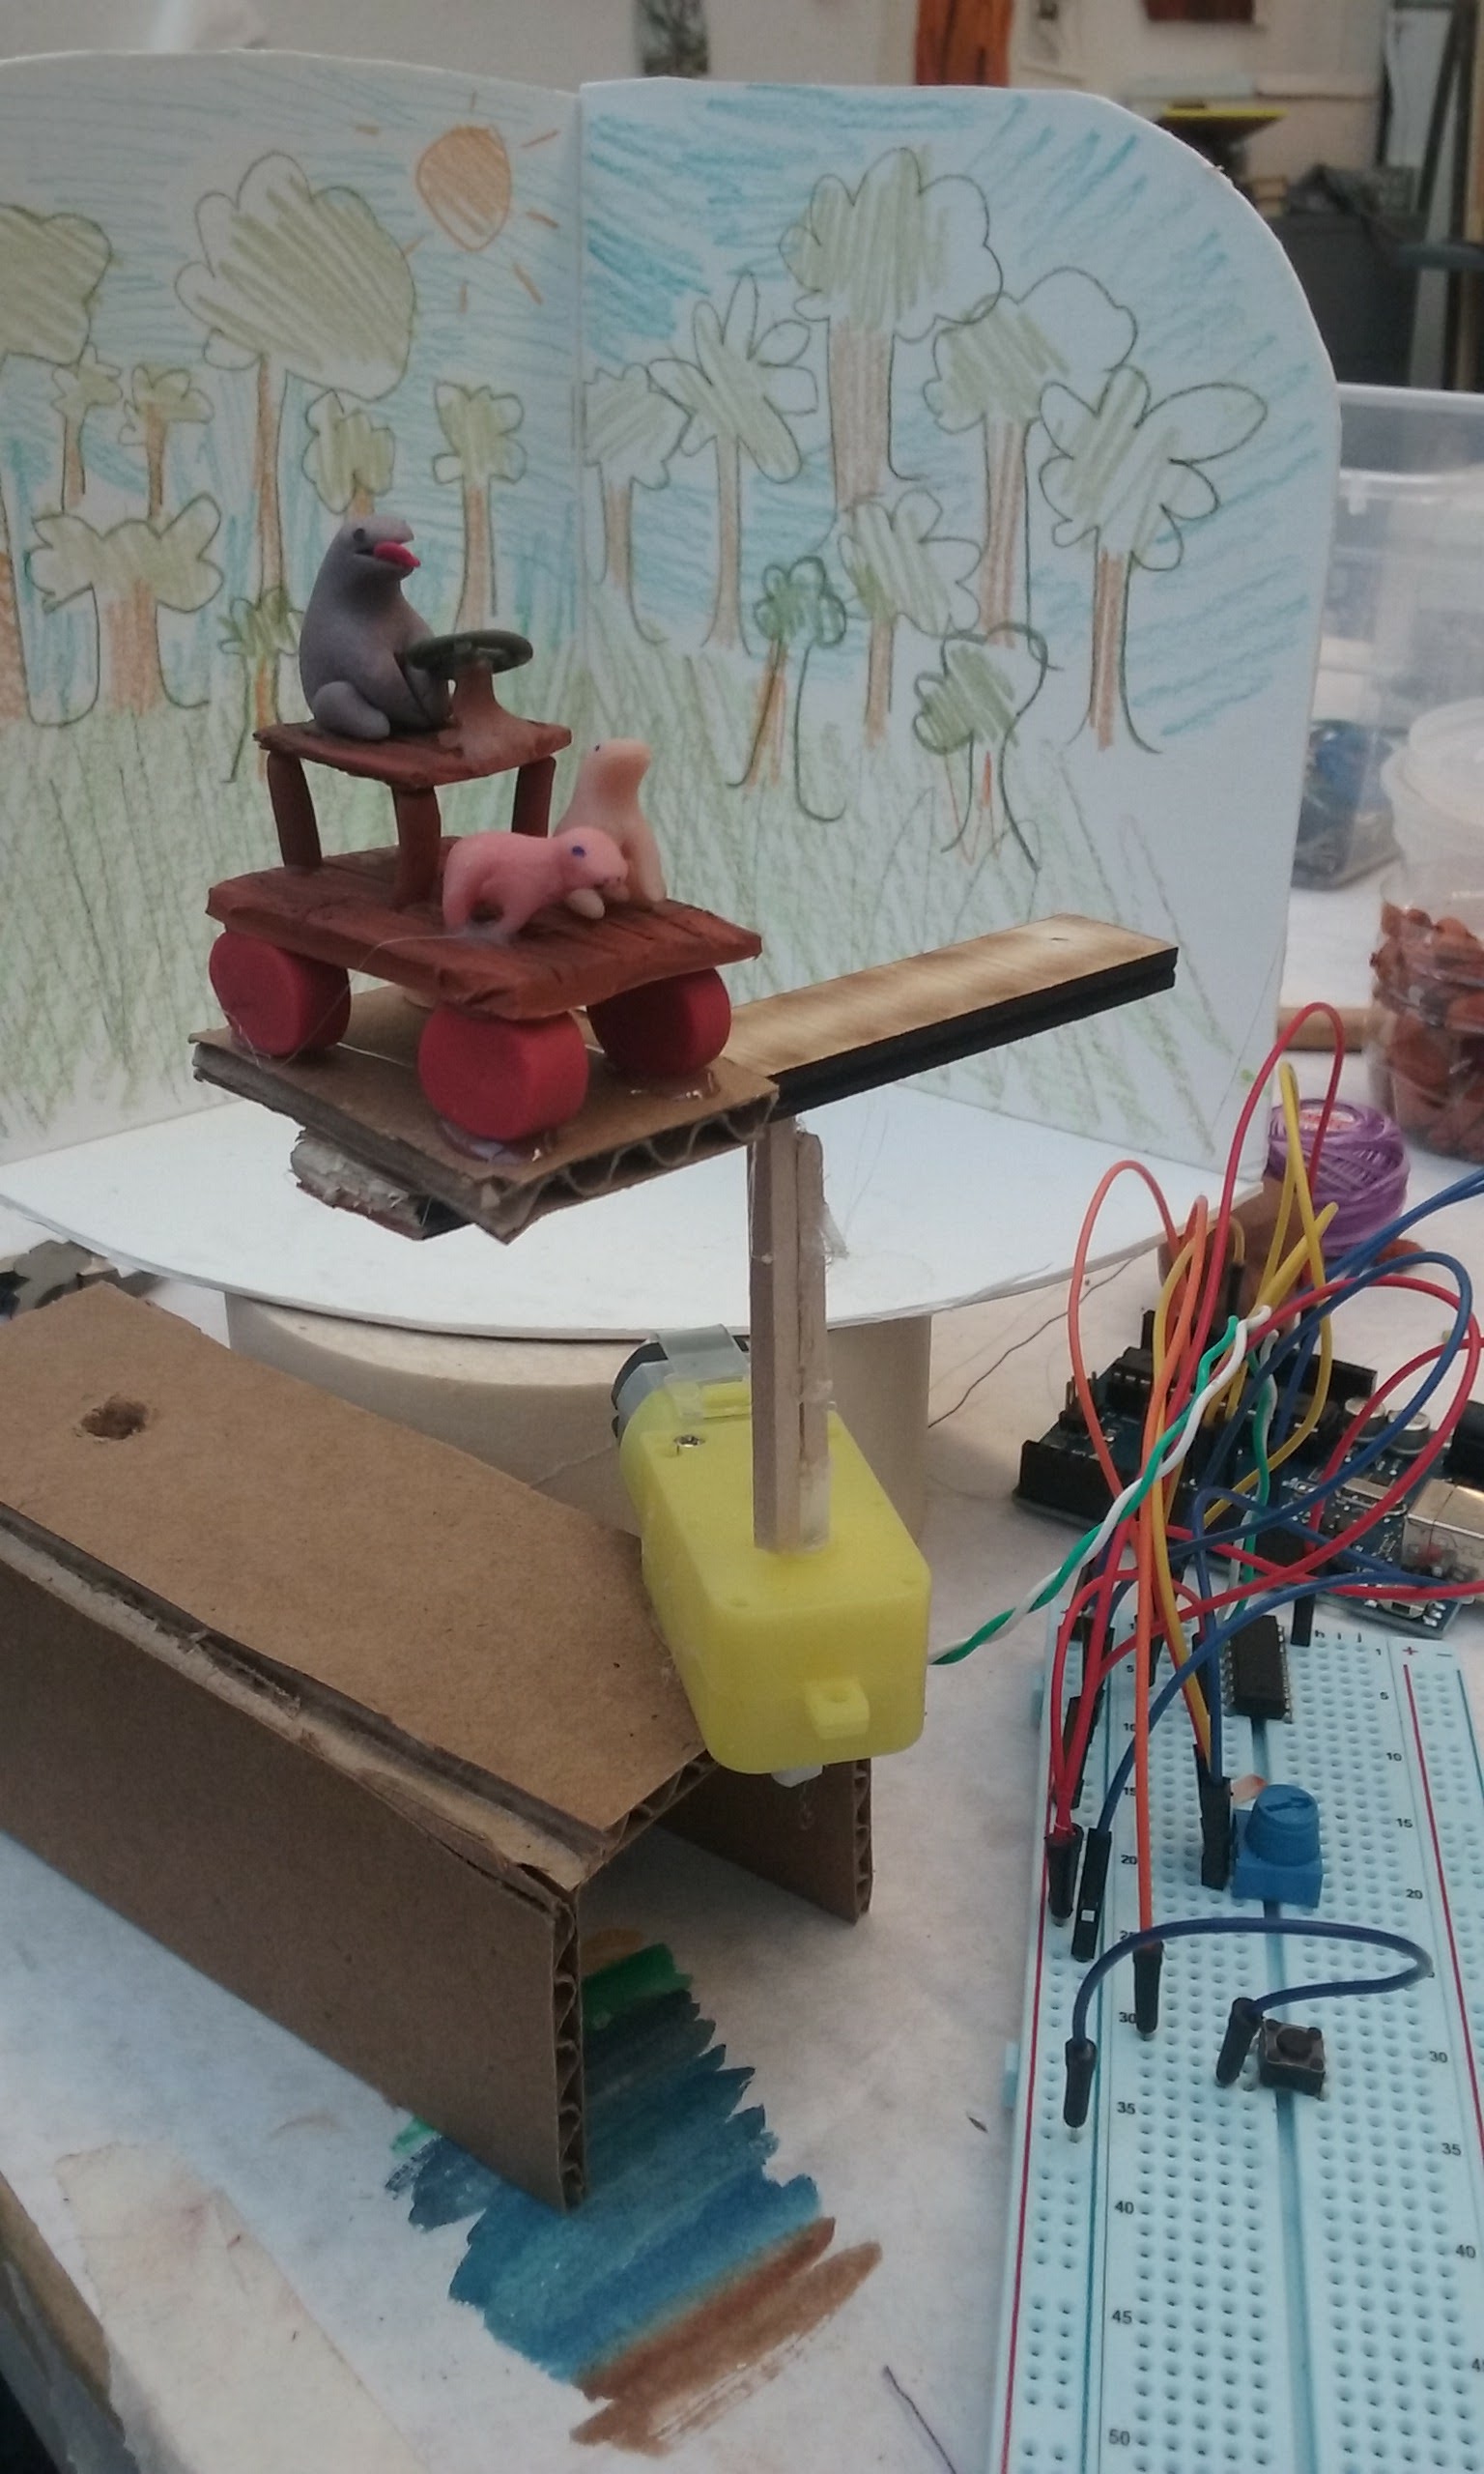
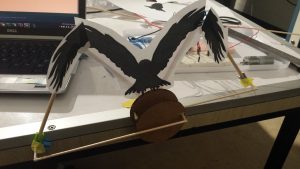
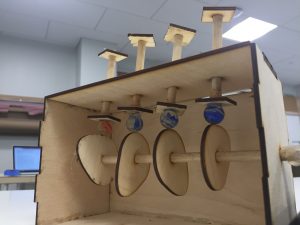
For my Halloween project, I wanted to do something that involved playing the Scooby Doo theme song (as illustrated in my prototype) and some type of motor/sensor action that involved the gang and maybe some monsters. I was not really pleased with the quality or length of the sound that I achieved in my prototype, so I decided to pursue using the Music Maker Adafruit shield which uses an SD card to play songs (which would give me longer music length and better quality as I would no longer be using the Arduino as my storage device). After a lot of struggling, I got the full theme song playing such that when it got to be “nighttime” (based off my photoresistor) the song would play in its entirety. However, I think this Music Maker shield + the photoresistor got to be too much for my Arduino (and I think some pins might have been fried in the process), so I had originally connected the wheels of the Mystery Machine straight to power and ground so I could get some motor action.

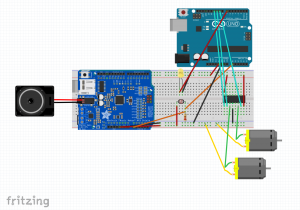
I then spent a decent amount of time trying to make some workaround to get some motor and LED interaction from the light sensor. I realized that an easy solution without messing too much with the Music Maker set up would just to use a second Arduino that gets the same input from the photoresistor that connects to the Music Maker and instead just runs the data to an h-bridge and an LED. After some simple issues of downloading code to the wrong board, I was able to get this system up and working.

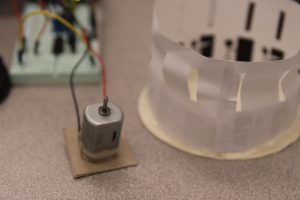
My final project now works such that when it gets to be “nighttime,” the wheels of the Mystery Machine start spinning, its headlights turn on, and the Scooby Doo theme song plays. The whole system is completely functional!

Final Video:

Arduino Code for the Music Shield:  HalloweenProject
Arduino Code for the H-Bridge and LED: Halloweenpt2

Reference Material Used: http://digitalmedia.risd.edu/pbadger/physcomp/index.php?n=Devices.ArrayOfMP3sOnAdafruitVS1053

Assignment 5 : Gaurav Balakrishnan

For this assignment I decided to use capacitive touch sensors to respond to different kinds of physical interactions. I envision the project to allow the user experience physical interactions like a game with different kinds of physical interactions getting different levels of responses. The response will be in the form of a sound or specific tune. For instance, the sound played when the user hugs someone compared to the one after a handshake contains more excitement. I think this project would be a small easy way to spread happiness.

To prototype this project, I created a capacitive touch sensor using aluminum foil. I also use the CapacitiveSensor library available on the Arduino website to make this sensor. I play a certain frequency when the sensor is not engaged and a different one when it is. This proof of concept can be extended to have more number of sensors and different tunes to create the project imagined.

It will be interesting to find ways to incorporate this into the clothing of the user. I also think I will enjoy coming up with the different tunes that play in response to different stimuli.


Prototype Project – Sarika Bajaj

For the Halloween centered project, I wanted to make a project that was an homage to Scooby Doo: I wanted a monster (with flashing red LED eyes) to “run” towards the gang (using two servos) while the gang all while the gang “runs” away (using two servos and a mechanical mechanism to connect their legs together), all underscored with the Scooby Doo theme song playing from a speaker. Therefore, for my prototype, I wanted to make sure that I was able to run electronics for the sound system, LEDs, and servos together.

As we were already well versed in getting LEDs and servos to work properly, I wanted to start off with the sound system, which turned out to be a lot more work than I thought. As it turns out, the most common way to play actual audio from the Arduino is to use an SD card and an SD card Arduino board to play audio. However, I wanted to see if there was a way to play audio straight from the Arduino, which was a surprisingly difficult task. After some searching, I found this instruction guide, http://highlowtech.org/?p=1963, which I followed to get the audio working. However, this system clipped the length of the audio much more than I wanted, but I figured this might be something I could work with. I then tried to also add basic LED and servo testing to make sure there were no clashes. Unfortunately, while the LEDs worked fine, the new library I had to add for audio actually conflicts with the inbuilt servo library.

After executing this prototype, I realize my options are 1) try using the SD card, SD card reader method for playing audio and having LEDs and servos working for my project
2) keep this audio method and do something only with LEDs, which is still a viable possibility for a good project

I’m leaning towards trying to see how hard the SD card method is; otherwise, just committing to LEDs and audio.

Video of Prototype Working:

Arduino Code: https://www.youtube.com/watch?v=PDpSdZlpHu0&feature=youtu.be

Assignment 4 – Going for a drive

Assignment 4


For this Project, I made a car that drives in a circle, the story behind this is that the people are going for a drive and, so they are driving in a circle,… forever…,

They can drive at varying speeds

In this version, they drive badly and crash the car (no one is harmed)

Assignment 4: Nina Prakash

My project is the story of a bird that responds to environmental changes. When you “plant trees” (turn on green LEDs), the bird starts flying. When you “cut trees down” (turn off the green LEDs), the bird stops flying. The motion of the wings is created by spinning wheels back and forth.

I came across a few problems with my project, mainly in construction. The first motor I used wasn’t strong enough so the motion was very minimal. I switched to a stronger motor, and switched material from plastic to cardboard and wood, which was lighter. I also had some challenges with trying to hot glue the bearings into the wheels, and figuring out how much to spin in either direction so the the bars didn’t mash into one another.

Video: https://youtu.be/nyTpDJqq0ow

Fritzing and sketch: assignment4_nina_prakash

Assignment 4 – Renewal

For this assignment, I created the narrative of a turbine worker constantly repairing a turbine that keeps falling down. The turbine reacts unpredictably relaying the fight against nature in order to harness and tame its power.

To improve in the future, i really think that a timing system would be super useful for telling a narrative.

Link is found below:

https://drive.google.com/open?id=0BxAGrufmmWthdkJ6NEFrdHZfUTQ

Automaton – Sarika Bajaj

For my assignment, I wanted to tell a story through a simple automaton that would run off of CAMs. I worked on CADing the system up first to create a simple visual story; for my story, I wanted the watcher to visually see the CAMs turning moving with the motors and simply pushing wooden pegs up in a wave like motion.

Wanting to keep the circuit as simple as possible, I used a TIP20 motor and a DC wall plug to simply just power the motor and the Arduino code to just toggle the motor from being on and off.

I got the CAMs moving pretty successfully (in the video below).

However, when attaching my whole system together, unfortunately, there was a little bit too much friction and the top blocks would not line straight which led to problems. Trying to remedy this situation, with Ian’s advice, I hot glued marbles to the bottom of each block, but the issue of non straight blocks prevailed. Ultimately, if I were to do this project again, I would probably double up on my CAM thicknesses and maybe cut the system out of acrylic for a smoother system.

Arduino Code: Automaton

Assignment 4: Zoetrope

For this assignment, I made a zoetrope. A zoetrope is one of the most primitive forms of animation, and it uses static images and optical illusion to create the impression that an image is animated. You can change the scene being animated by switching out the paper strips, as well as reverse direction and speed up/slow down the spinning.

I originally wanted to an inverse zoetrope, which features 2D cut outs that go around the rim of the spinning platform and projects the image onto the inside of the backdrop with slits. However, my original animated scene (opening a fridge door) was too fragile to be cut out.

I ran into a lot of issues with this project, actually, even though it looks pretty simple. The minimum number of frames you can have to satisfactorily achieve the illusion of motion is 12, and it was difficult to get find stills with just the right amount of change between them to look animated. Another issue was the size constraint. Since the motor I’m using can be powered solely by an Arduino, I ran into issues with the lack of torque from the motor, so I had to stick to a small platform. I also wasted a lot of time trying to figure out what was wrong with my circuit, when it turned out that I just had a bad wire connecting the motor to the voltage supply.

If I were to do this over, I think I would give another try to the inverse zoetrope, and make a design more well-suited to it.

Demo video:

https://drive.google.com/file/d/0B0yMpI_ZOcoYaGZjRUppUnRFMU0/view?usp=sharing

*Circuit and code directly from class example