Project 6 – Abstract Clock

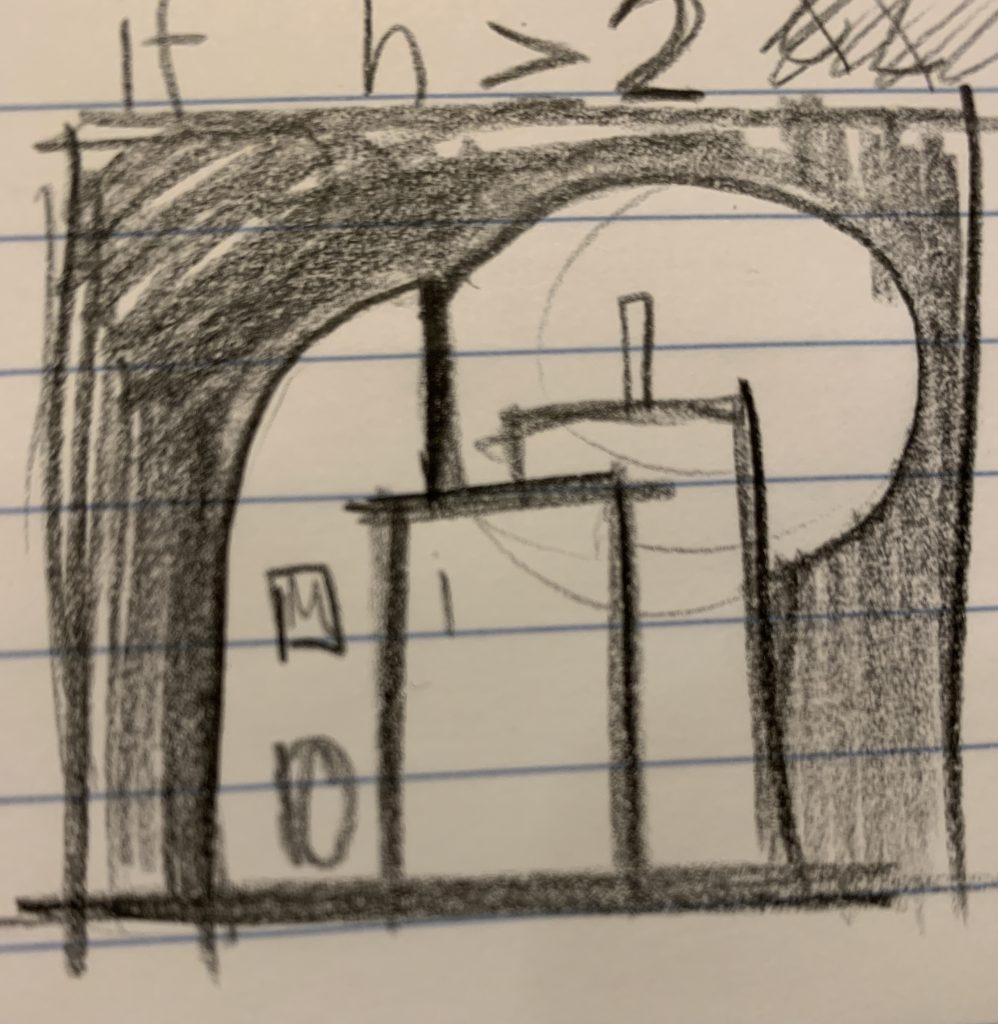
I began this project in a very different place than where I ended up – after exploring many different ways of how I could potentially represent the CMU fence as a clock, I ditched that idea and went with creating a binary clock.

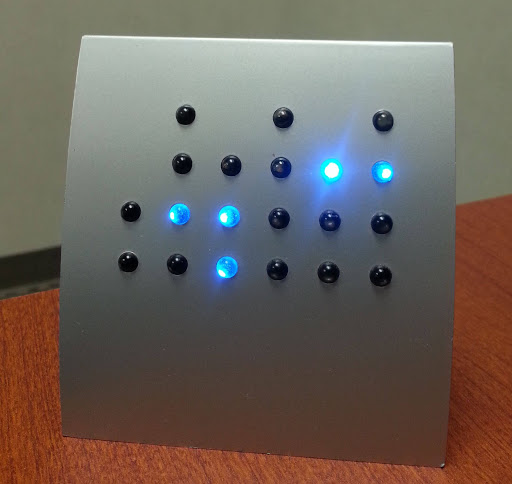
When I was a kid, my dad had a clock like this. Although I could never read it, it looked fancy and important to me and made me feel like maybe one day I would deserve to know what it all meant. It wasn’t until this project that I found out how to read it!

I think this graphic captures it well

My dad told me that the clock always looked like a cityscape to him. I agreed, so naturally that is what I chose to code for this project.

sketchDownload
// Assignment 06 - PROJECT – ABSTRACT CLOCK
// Name: Jubbies Steinweh-Adler
// Email: jsteinwe@andrew.cmu.edu
// Class: Section D


var lightOn;
var lightOff;
var column = [2, 4, 3, 4, 3, 4];
var canvasMargin = 100;
var innerMargins = 10;

function setup() {
  createCanvas(480, 480);

  //WINDOW COLORS
  lightOn = color(180, 180, 0);
  lightOff = color(70, 70, 40);
}

function draw() {
  background(27, 27, 128); //Blue


  var timeString = whatTime(); // run whatTime function once and rename output 
  var cLength = column.length;
  rWidth = (width - 2 * canvasMargin) / cLength;


  //- BACKGROUND- 
      //moon 
      fill(248, 243, 200);
      circle(width * (2 / 3), height * (1 / 3), 250);

      //buildings
      //back
      fill(5);
      rect(0, height / 2, width, height);
      rect(60, height / 2 - 40, 100, 200);
      rect(width - 100, height / 2 - 40, 80, 200);
      //front
      fill(20);
      rect(105, 130, 145, 235, 0, 80, 0);
      rect(262, 173, 127, 190);
      fill(50);
      rect(202, 220, 132, 146);
      rect(248, 173, 44, 61);
      rect(264, 148, 12, 28);

      //reflected buildings
      push();
      translate(0, 200);
      fill(20);
      rect(105, 165, 145, 235);
      rect(262, 165, 127, 190);
      fill(50);
      rect(202, 165, 132, 146);
      pop();

  //- TIME FORMATTING -
      //CONVERT TIME STRING TO BINARY STRING
      for (var i = 0; i < cLength; i++) { //run 6 times
        var rx = canvasMargin + rWidth * (i + 0.5);
        var binary = floor(timeString[i]).toString(2); //converts time to binary string

        //test proper binary conversion
        print("a = " + binary.toString());

        //REVERSING BINARY DATA 
        //positional data for drawing depends on reversal
        binary = binary.split("");
        binary = reverse(binary);
        binary = binary.join("");

        //test proper binary reversal
        print("b = " + binary.toString());


    //-DRAWING CLOCK ELEMENTS -
    for (var p = 0; p < column[i]; p++) {
      var ry = (height - 50) - ((rWidth * p) + canvasMargin);
      var reflectY = height - canvasMargin + (p * rWidth);
      var rectWidth = rWidth - (1.8 * innerMargins);

      //FILL WINDOW WITH CORRECT COLOR 
      //if character in pth position is 1, turn on
      if (binary.charAt(p) === '1') {
        fill(lightOn);
        //if not, turn off
      } else {
        fill(lightOff);
      }

      //WINDOW SHAPE
      rect(rx, ry, rectWidth / 2, rectWidth * (3 / 4));

      // - FOREGROUND - 
      //Water reflection

      rect(rx, reflectY, rectWidth / 2, rectWidth * (3 / 4));
      fill(40, 40, 120, 30);
      noStroke();
      rect(0, height - 115, width, height);
    }
  }

}

function whatTime() {
  //creates live time string with no spaces

  var h = hour();
  if (h > 9) { // if hour value greater than 9, return as is
    hrs = h.toString();
  } else { //if less than 9, add zero as spacer digit
    hrs = "0" + h.toString();
  }

  var m = minute();
  if (m > 9) {
    mins = m.toString();
  } else {
    mins = "0" + m.toString();
  }

  var s = second();
  if (s > 9) {
    secs = s.toString();
  } else {
    secs = "0" + s.toString();
  }


  //FUNCTION OUTPUT - (hhmmss)
  return hrs + mins + secs;

}
a quick sketch to capture my idea

LO – 3D Rendered Project

A 3D rendered project I admire is Nike’s 2017 campaign for their Air Max shoes. Nike created a promotional video that uses 3D rendered simulations to give the viewer an impression of how their new Air Max shoes feel and perform. I admire how this project takes advantage of the limitless creative possibilities of 3D rendering to not just show the product, but to leave the viewer with a visceral impression of the product. The gravity simulations of the varied materials definitely rely on different algorithms that calculate the effect of things like tension, gravity, torsion, etc. according to material-specific parameters.

I believe the use of sound, timing, and color are very important in further illustrating the specific qualities of each material presented. The combination of the creative direction of the ad and the suburb rendering quality results in a convincing, persuasive, and practically tangible experience that challenges what 2D advertisement can mean.

Project 5 – Groovy Wallpaper

It seems in my experience, wallpaper gets a bad reputation. One quick search of “interior design” on Pinterest will reveal the modern day obsession with sleek and minimal aesthetic choices. In the face of this, I chose to design a wallpaper that riffs off of aesthetic choices perhaps equally as brawny – inspired by the loud colors of post modernism.

sketchDownload
// JUBBIES STEINWEH-ADLER
// PROJECT 05 - GROOVY WALLPAPER
// SECTION D

//GLOBAL VALUES
x = 0;
y = -150;// initial y value off canvas to create seamless pattern
d = 0; // arrow direction ( 1 = left 0 = right )

function setup() {
  createCanvas(500, 400);
  background(250, 240, 220);
  blendMode(MULTIPLY); // color blend mode multiplies rgb value of overlapping colors
}

function draw() {
    //ROW PROPERTIES
  for(var loop = 0; loop < 5; loop +=1) { // number of total rows limited to 5
     if (d == 0) { //switching direction for each loop
     d = 1; //left arrows
    } else {
     d = 0; //right arrows
 }
        //TRIANGLE PROPERTIES
         for(var row = 0; row < 1; row +=1) {  // triangle x-offset and tracking
               x = -120; // initial x value for the first triangle
               y += 110; // vertical spacing, tracking
       
            for(var rep = 0; rep < 7; rep +=1) { 
            x += 120; // distance between each module (width)
            stack(d, x, y); 
       }
     }
  }
  noLoop(); //disables automatic looping from draw function
}

// TRIANGLE PACKAGE - Grouped for single 'anchor point'
function stack(d, x, y) { 
  push();
  translate(x, y);  // translate by determined x and y value
  module(d); // draw a single triangle module
  pop();
}

//TRIANGLE MODULE DRAW COMMAND
function module(d) {
  noStroke();
  var r = 180; //red value
  var g = 40;  //green value
  var b = 190; //blue value


    //RIGHT ARROW MODULE
        if (d == 0){ 
         px = 0; //linked X coordinate
         py = 0; //linked y coordinate
  
        //vertical leg
        fill(r, g, b);
        push();
        translate(px, py);
        rect(0, 0, 50, 170, 70);
        pop();

        //top angled leg
        fill(g, b, r);
        push();
        translate(px-10, py+35);
        rotate(radians(300));
        rect(0, 0, 50, 170, 70);
        pop();


        //bottom angled leg
        fill(b, r, g);
        push();
        translate(px+15, py+180);
        rotate(radians(240));
        rect(0, 0, 50, 170, 70);
        pop();
  
    //LEFT ARROW MODULE
    } else if (d == 1) { 
        
        fill(r, g, b);
        ptO = 60; // OFFSET VALUE TO ALTERNATE ROW START POSITION 
        ptT = 0;
  
        //vertical leg
        push();
        translate(ptO, ptT);
        rect(0, 0, 50, 170, 70);
        pop();
  
        //top leg
        fill(g, b, r);
        push();
        translate(ptO +35, ptT - 10);
        rotate(radians(60));
        rect(0, 0, 50, 170, 70);
        pop();
  
        //bottom leg
        fill(b, r, g);
        push();
        translate(ptO + 60, ptT + 135);
        rotate(radians(120));
        rect(0, 0, 50, 170, 70);
        pop();
  }    

}

For the actual pattern shape, I was inspired by this pattern I found on the internet. I really enjoyed how the colors interacted where the shapes overlapped. This pushed me to discover that p5.js has blending modes. Using multiply blending mode and adjusting the opacity is how I got my final result.

LO 4 – Sound Art

As a student who works in the IDEATE space at CMU, I have really come to appreciate some of the creativity around our own University. A sonic art piece that comes to mind is in the stairwell of the Hunt library. A search on the Internet renders not much more than the name of this installation – “Acrylic plastic Ambient auditory experience”, but this product is cooler than it sounds. Using hanging light fixtures that extends from the top of the stairwell to the bottom, it responds to the sound of footsteps on the stairs and lights up the piece of the fixture closest to the sound. I really enjoy this interaction, and I think it’s a creative way to make such a boring space feel exciting and alive. It was created to emphasize the area of the library where you are allowed to make sound. In the publishing of this blog post, I have found more information about the piece – it was created by Jaime Chu and Robert Rudolph. Using clear acrylic, the designers were able to achieve and interesting floating lightbulb effect. See here:

Project 04 – String Art

I chose to create a responsive string art project, since I still haven’t had my fill of mouseX and mouseY data use. I also used a mousePressed function to spice things up as well, ultimately changing the location of the pivot points of the string as well as the color.

sketchDownload
//PROJECT 04 STRING ART
//Julia Steinweh-Adler
//jsteinwe


var dx1;
var dy1;
var dx2;
var dy2;
var numLines = 1;
var mode = 0;

function setup() {
    createCanvas(400, 400);
    background(0);
    
  
    //line initial variables
    dx1 = (width/1) / numLines;
    dy1 = (width/2) / numLines;
    dx2 = (width/3) / numLines;
    dy2 = (width/4) / numLines;
}

function draw() {
    
    var x1 = mouseX;
    var y1 = mouseY;
    var ptOne = 400; // yarn pivot point, y value
    var ptTwo = 180; // yarn pivot point, x value
    
    stroke(0);
    strokeWeight(2);
   
     // Red and Blue Yarn
       if(mode == 0) {
          for (var i = 0; i < numLines; i += 1) {
       
             stroke(mouseX, 0, mouseY); // red blue color
             line(x1, y1, ptOne, ptTwo); //line 1
        
             stroke(mouseY, 0, mouseX); // red blue color
             line(y1, x1, ptTwo, ptOne); //line 2, inverted from line 1
        
             line(x1, y1, y1, x1); // line 3: connecting 1 and 2
          
            
            // incremental addition to coordinates
             x1 += dx1;
             y1 += dy1;
             ptOne += dx2;
             ptTwo += dy2;  
            
          }  
     
       
       } else {
          // Blue and Green Yarn
         
         
         // changing yarn pivot point
         let ptOne = 0 // yarn pivot point, x value
         let  ptTwo = 200 // yarn pivot point, y value
         
          for (i = 0; i < numLines; i += 1) {
         
          //change yarn color
             stroke(0, mouseX, mouseY); // green blue color
             line(y1, x1, ptTwo, ptOne); //line 1
  
      
             stroke(mouseY, 0, mouseX); //green blue color
             line(x1, y1, ptOne, ptTwo); //line 2, inverted line 1
        
             line(y1, x1, x1, y1) //line 3; connector line
       
            
              // incremental addition to coordinates 
             x1 += dx1;
             y1 += dy1;
             ptOne += dx2;
             ptTwo += dy2;  
             }  
       }
  }
  function mousePressed() {
    if (mode == 0) {
      mode = 1;
    } else {
      mode = 0;
    }
  }

The color, repetitive nature, string-like-ness, and “stretchy” behavior of this interaction remind me of the rainbow loom. Therefore, I have titled this piece “Rainbow Loom”.

Colorful Rainbow Loom Bracelet Rubber Bands Stock Photo, Picture And  Royalty Free Image. Image 32648073.

03 Generative Art

sketchDownload
//Julia Steinweh-Adler
//Section D


var value = 0;
var bg = 0;

function setup(){
    createCanvas(600, 450);
    rectMode(CENTER);

}

function draw() {
    background(value/2, value/4, value*2);
    noStroke();
    fill(value * 1.3, value * 0.7, value * 0.5); // fill color uses mouse position
    let size = dist(mouseX, mouseY, width/2, height);
    let sizeI = dist(mouseY, mouseX, width/2, height);
    strokeWeight(10);
    stroke(value-80, 0, 0);    //stroke color uses mouse position in red value
  
  //CAMERA BODY
  rect(width/2, height/2, sizeI, sizeI, 20);    //rounded cornered square
  rect(width/2, height/2, sizeI, value);    //widest rectangle
  fill(200, 100, 100);    //color red
  rect(width/2, height/2, size, value);   //inner rectangle
  fill(value * 1.3, value * 0.7, value * 0.5);    //mouse position influenced orange
  ellipse(width/2, height/2, size, size);  //outer circle
  fill(200, 100, 100);   //red
  ellipse(width/2, height/2, size*0.7, size*0.7);  //inner circle
  fill(value/2, value/4, value*2) 
  ellipse(width/2, height/2, size/2.5, size/2.5); //cut center hole

  //FLASH - mouse pressed "flash" green square that rotates with mouse coordinates
  if (mouseIsPressed) {
    fill(100, 200, 150);  //green
    push();
    translate(width/2, height/2);    //change origin to center
    rotate(radians(mouseY));    //mouse Y coordinates value for degrees of rotation
    rect(0, 0, size/6, size/6);     //rectangle that is size responsive
    pop();  
    
  } else {    //when mouse not clicked, use constant ellipse
    ellipse(width/2, height/2, 50, 50);
  }
  
}
  // Fade in and Out Background
    function mouseMoved() {
      if (bg == 0) {    
       value += 0.5;   //value increase
      } if (value == 255) {    //value can only increase to 255 before decreasing 
        bg = 1
      } if (bg == 1) { 
        value -= 0.5;    // value decrease
      } if (value == 140) {    //value can only decrease to 140 before increasing
        bg =0
     }
}

LO 03: Computational Fabrication

Interestingly, I already selected a piece of generative art producing a physical counterpart in last weeks Looking Outward assignment. As I mentioned before, generative art seems to be most interesting to me when it can be applied in a practical function. To widen my appreciation for such creations, I chose this week to look at another of Joris Laarman’s works, this one with that is may be be even further from practical application, but it looks cool – the Strange Attractor Lamp (2016). This lamp used randomly generated three dimensional curves using attractors. As Joris Laarman says it, the chaotic lines developed in a digital three dimensional space are “transformed into functional volumes”. The digital information is 3-D printed in aluminum, finished by hand, and fitted with LED lights. This lighting fixture demonstrates Joris Laarman’s sensibilities because he seems to be drawn towards digitally developed organic looking shapes and has used several different algorithmic approaches to reach this end. I happen to also really enjoy the blend of digital and organic, so I greatly appreciate these explorations of his.

02 Project Variable Face – Whack-A-Frog

I seem to have toads and frogs on my mind a lot lately. A lot of people say I embody the same spirit as one, so I am trying to embrace that in a positive way. For this project, I wanted to depict a frog poking its head out of water.

As I progressed with the code, I wanted to add some additional environmental elements. With the help of some online searches, I found a project on p5js.org with randomized dots. I tried using them to show movement of water. I am not sure how effective it was, but I think it makes the scene a bit more interesting.

Again this week, I really took advantage of the power of arcs in p5.js. With so many parameters, you can do so much curvature so easily. I used arcs for the eyeball and pupil, which are very different shapes, but by adjusting the mode of arc from CHORD to PIE, you can get a lot of variety. Hot tip: switch the degree mode of the project from RADIANS to DEGREES if you don’t explicitly process the world in immediate relation to Pi. Or don’t, if you like pain.

sketchDownload

//Julia Steinweh-Adler
//Section D

//Global Variables

var eyesSize = 20
var headWidth = 150;
var eyeWidth= 40;
var mouthSize = 30;
var mouthWidth = 30;
var pupil=20;
var smallX = 600/2    //canvas width divided by 2  
var smallY = 480/2    //canvas height divided by 2
var largeX = 600/3.5   //canvas width divided by 3.5  
var largeY = 480/3.5   //canvas height divided by 3.5
var pupilAngle = 300
var nostrilWidth = 5
var nostrilHeight = 6

    //Water Ripple Dot Background values
var spot = {    //coordinates
    x:100,
    y: 50,
};

var col = {    //color values
    r:0,
    g:0,
    b:255,
};

function setup() {
    createCanvas(600, 480);
    angleMode(DEGREES);    //Change angle mode to degrees to make arcs easier
    frameRate(2)    //Change framerate to 2 frames per second
  
}
  function draw() {
    noStroke();

//BACKGROUND
    background(49, 30, 220); //Light Blue
    
    
    //Water Ripple Dot Pattern Background
    spot.x= random (0, width);
    spot.y= random (0, height);

    noStroke();
    col.r = random (0);
    col.g = (0);
    col.b = random (100, 200);
    
    fill (col.r, col.g, col.b, 120);
    ellipse (spot.x, spot.y, 1600, 400);    //Change dot dimensions and coordinates
    
    //Water Ripple
    stroke(60, 30, 220);
    strokeWeight(4);
    noFill();
    ellipse(smallX, smallY-90, 200, 100)
    ellipse(smallX, smallY-90, 250, 120)

    
//FROG
    //Face
    noStroke();
    fill(44, 94, 76); // Face Color, Green
    arc(smallX, smallY - 90, headWidth, 80, 0, 180, PIE);    //Head top arc
    arc(smallX, smallY - 89, headWidth, 100, 180, 0, PIE);   //Head bottom arc
    circle(smallX+50, smallY-125, eyesSize+10);    //right eyelid
    circle(smallX-50, smallY-125, eyesSize+10);    //left eyelid
      
    //Eyeball
    fill(124, 84, 30);     //Brown eyeball color
    arc(smallX + 50, smallY-125, eyesSize, eyesSize, 210, 120, CHORD);    //right eye arc
    arc(smallX - 50, smallY-125, eyesSize, eyesSize, 60, 330, CHORD);    //left eye arc
    
    //Eye Pupil   
    fill(0);     //Black pupil
    stroke(204, 168, 18);    //Change stroke to yellow
    strokeWeight(2);
    arc(smallX + 50, smallY-125, eyesSize, eyesSize, pupilAngle, pupilAngle-255, PIE);    // right eye pupil
    arc(smallX - 50, smallY-125, eyesSize, eyesSize, (-pupilAngle)+435,(-pupilAngle)+540, PIE);    //left eye pupil
    
    //Nostril
    noStroke();
    ellipse(smallX + 10, smallY - 90, nostrilWidth, nostrilHeight)    //Right Nostril
    ellipse(smallX - 10, smallY - 90, nostrilWidth, nostrilHeight)    //Left Nostril   
    
    
    //Mouth
    noStroke();
    fill(109, 165, 144); //top lip color, Green (same as face to integrate shape)
    arc(smallX, smallY-70, mouthWidth, mouthSize, 0, 180, PIE);    //top lip arc 
    fill(44, 94, 76);    //mouth color, light green
    arc(smallX, (smallY)-75, mouthWidth, mouthSize, 0, 180, PIE);    //mouth arc
    
    
//Foreground Grass
    beginShape();
    fill(10,60,4);
    vertex(0,height);
    vertex(width*1/24,height*3/4);//peak 1
    vertex(width*2/24,height*1/2);
    vertex(width*3/24,height*5/9);//peak 2
    vertex(width*4/24,height*27/32);
    vertex(width*5/24,height*3/4);//peak 3
    vertex(width*6/24,height*29/32);
    vertex(width*7/24,height*2/3);//peak 4
    vertex(width*8/24,height);
    vertex(width*9/24,height*1/2);//peak 5
    vertex(width*10/24,height*30/32);
    vertex(width*11/24,height*5/9);//peak 6
    vertex(width*12/24,height*27/32);
    vertex(width*13/24,height*3/4);//peak 7
    vertex(width*14/24,height*29/32);
    vertex(width*15/24,height*2/3);//peak 8
    vertex(width*16/24,height);
    vertex(width*17/24,height*2/3);//peak 9
    vertex(width*18/24,height*29/32);
    vertex(width*19/24,height*3/4);//peak 10
    vertex(width*20/24,height*30/32);
    vertex(width*21/24,height*5/9);//peak 11
    vertex(width*22/24,height*27/32);
    vertex(width*23/24,height*3/4);//peak 12
    vertex(width,height);
  endShape();
}


function mousePressed() {
    smallX = random(100,500);
    smallY = random(280,310);
    largeX = random(190, 200);
    largeY = random(140,150);
    headWidth = random(130, 170);
    pupilAngle = random(250,350);
    mouthWidth = random(60, 100)
    eyesSize = random(30, 50);
    mouth = random(2,5);
    nostrilWidth = random(4,15);
    nostrilHeight = random(4,15)
}
Frog poking its head out of the water Stock Photo: 180696071 - Alamy

LO 2 – Generative Art; Bone Chair

At its surface, generative art doesn’t mean much to me. As a design-oriented person, I appreciate beautiful things, yet they are most meaningful to me when they are rooted in some practical function. However, I have found an example of generative art that provides enough practical use to satisfy me – Joris Laarman’s ‘Bone Chair’.

Joris Laarman. Bone Chair. 2006 | MoMA

This chair is a piece of furniture resulting from a specially designed computer algorithm, used to structure supports in a way that mimics the natural growth of bones and trees. Starting with a chunk of material and virtually applied forces, the algorithm slowly removes material where it is not structurally significant, leaving behind only the most essential material for the given position of the furniture. As you might imagine, the final product feels machine-made in its precision and finish. However, this sculpting technique effectively captures the innate beauty of natural, irregular structures while simultaneously ensuring comfort and strong support. This algorithm draws me to the world of algorithmic art, since it shows me how digitally crafted art does not have to feel unnatural or impractical – if anything, it can streamline the integration of biomimicry into common objects around us in unexpected ways. And that, I find very exciting. 

Profile

#Selfie

PortraitDownload
function setup() {
  createCanvas(500, 500);
  background(224, 212, 189);
  strokeWeight(4)
}
 
 function draw() {

 	 
//Back Bangs
   fill(94, 62, 44); //brown
   arc(316, 100, 142, 142, PI + QUARTER_PI, TWO_PI + QUARTER_PI, OPEN);
   arc(306, 110, 142, 142, PI + QUARTER_PI, TWO_PI + QUARTER_PI, CHORD);

  
//Face (Skin)  
    fill(244, 202, 189); //skin color
    quad(331, 148, 375, 196, 323, 250, 288, 160)
    quad(366, 218, 366, 250, 331, 313, 323, 218)
    ellipse(245, 128, 180, 142);
    ellipse(350, 300, 45, 45);
    ellipse(363, 246, 18, 18);
    ellipse(371, 207, 22, 22);
    rect(158, 150, 173, 175);
    arc(260, 246, 160, 160,  PI + HALF_PI, HALF_PI, CHORD);
  
//Back of Hair
    fill(94, 62, 44); //brown
 	rect(90, 110, 115, 400);
   
   
//Eye
   fill(255,255,255);          //white
   triangle(284, 178, 308, 166, 308, 181);
   fill(0);          //black
   ellipse(308, 173, 5, 15);
   arc(309, 160, 16, 14, TWO_PI, HALF_PI, OPEN);
 
//Nose
   fill(255,255,255); //white
   arc(355, 218, 33, 33,  PI, TWO_PI, CHORD);
   fill(244, 202, 189);
   ellipse(345, 220, 14, 14);
   
//Lips
   fill(226, 102, 107);          //coral
   triangle(341, 268, 365, 255, 367, 249);
   triangle(340, 270, 358, 260, 359, 278);
   ellipse(361, 268, 15, 15);
 
// Shirt
   fill(18);
   ellipse(220, 495, 400, 240);
   ellipse(80, 490, 200, 200);
   
//HAIR
    
  //Behind Top Of Head
      fill(94, 62, 44); //brown
      ellipse(172, 110, 244, 154);
   
   // Quad below lower hair (aka extensions)
       quad(164, 316, 128, 412, 210, 443, 260,322);
   
  
    //Ringlet 1 (right center)
        arc(200, 200, 142, 142, PI + HALF_PI, HALF_PI, OPEN);
        arc(190, 200, 142, 142, PI + HALF_PI, HALF_PI, OPEN);
        arc(180, 200, 142, 142, PI + HALF_PI, HALF_PI, OPEN);


    //Ringlet 2 (bottom left)
       arc(100, 350, 142, 142, HALF_PI, PI + HALF_PI, OPEN);
       arc(110, 350, 142, 142, HALF_PI, PI + HALF_PI, OPEN);
       arc(120, 350, 142, 142, HALF_PI, PI + HALF_PI, OPEN);

    //Ringlet 3 (bottom left right side)
       arc(130, 440, 142, 142, HALF_PI, PI + HALF_PI, OPEN);
       arc(140, 440, 142, 142, HALF_PI, PI + HALF_PI, OPEN);
       arc(150, 440, 142, 142, HALF_PI, PI + HALF_PI, OPEN);

    //Ringlet 4 (right middle)
       arc(220, 350, 142, 142, PI + HALF_PI, HALF_PI, OPEN);
       arc(210, 350, 142, 142, PI + HALF_PI, HALF_PI, OPEN);
       arc(200, 350, 142, 142, PI + HALF_PI, HALF_PI, OPEN);

    //Ringlet 5 (right upper)
        arc(140, 290, 142, 142, PI + HALF_PI, HALF_PI, OPEN);
        arc(130, 290, 142, 142, PI + HALF_PI, HALF_PI, OPEN);
        arc(120, 290, 142, 142, PI + HALF_PI, HALF_PI, OPEN);

    //Ringlet 6 (lowest)
       arc(170, 480, 142, 142, PI + HALF_PI, HALF_PI, OPEN);
       arc(160, 480, 142, 142, PI + HALF_PI, HALF_PI, OPEN);
       arc(150, 480, 142, 142, PI + HALF_PI, HALF_PI, OPEN);


    //Ringlet 7 (bottom left up one)
       arc(90, 220, 142, 142, HALF_PI, PI + HALF_PI, OPEN);
       arc(100, 220, 142, 142, HALF_PI, PI + HALF_PI, OPEN);
       arc(110, 220, 142, 142, HALF_PI, PI + HALF_PI, OPEN);

    //Ringlet 8 (top crown left)
       arc(100, 100, 142, 110, HALF_PI, PI + HALF_PI, OPEN);
       arc(110, 100, 142, 110, HALF_PI, PI + HALF_PI, OPEN);
       arc(120, 100, 142, 110, HALF_PI, PI + HALF_PI, OPEN);


    //Ringlet 9 (right)
       arc(140, 140, 142, 142, PI + HALF_PI, HALF_PI, OPEN);
       arc(130, 140, 142, 142, PI + HALF_PI, HALF_PI, OPEN);
       arc(120, 140, 142, 142, PI + HALF_PI, HALF_PI, OPEN);

    //Ringlet 10 (center)
       arc(140, 240, 142, 142, HALF_PI, PI + HALF_PI, OPEN);
       arc(150, 240, 142, 142, HALF_PI, PI + HALF_PI, OPEN);
       arc(160, 240, 142, 142, HALF_PI, PI + HALF_PI, OPEN);

    //Ringlet 11 (top right)
       arc(140, 140, 142, 142, PI + HALF_PI, HALF_PI, OPEN);
       arc(130, 140, 142, 142, PI + HALF_PI, HALF_PI, OPEN);
       arc(120, 140, 142, 142, PI + HALF_PI, HALF_PI, OPEN);


             //BANGS
               arc(280, 100, 142, 142, PI + QUARTER_PI, TWO_PI + QUARTER_PI, OPEN);
               arc(270, 110, 142, 142, PI + QUARTER_PI, TWO_PI + QUARTER_PI, CHORD);
 
  
 }