Grace Cha – 05 – Wallpaper

sketch

// Grace Cha
//Section C
//heajinc@andrew.cmu.edu
//Project 5: Wallpaper

var y = 0;//the pattern starts at the top of canvas
function setup() {
    createCanvas(640, 480);
    noStroke();
}
function draw() {
    background("#D9D4C8");
    //background("#47505A");
    for(y; y < height + 90; y += 50){
    myTriangles();//the blue triangle
    myTriangles1();//the orange outlined triangles
    }
    noLoop(); // save computation -- no animation
}

function myTriangles(){
    for (var x = - 90; x < width; x += 30){
    fill(82,100,129,110);
    beginShape(TRIANGLES);  //This draws 2 blue triangles
    vertex(x + 10, y);
    vertex(x + 30 , y-55);
    vertex(x + 50, y);
    vertex(x + 70, y-55);
    vertex(x + 90, y);
    vertex(x + 110, y-55);
    endShape();
 }
}

function myTriangles1(){
    for (var x = -90; x < width ; x += 20){
    noFill();
    stroke("#F0A321");
    strokeWeight(1);
    beginShape(TRIANGLES); //This draws 2 outlined orange traingles
    vertex(x + 10, y);
    vertex(x + 30 , y-55);
    vertex(x + 50, y);
    vertex(x + 70, y-55);
    vertex(x + 90, y);
    vertex(x + 110, y-55);
    endShape(); 
 }
}


Process

Wow!  the for loop and nested for loop really eliminate the need for long code.   I was inspired by the traditional “Cradle Quit” color scene/pointy star pattern and the modern plaid sweater(finally sweater weather!) to design my wallpaper. To add a geometric vibe to it, I tried using triangles and overlapping lines to create visual balance.

screen-shot-2016-09-30-at-12-56-29-pm
“Cradle Quit” In exhibit at National Museum of American History, Smithsonian Institution. Date of Production: 1836
screen-shot-2016-09-30-at-12-59-04-pm
Source: Pinterest. tartan- plaid pattern.

Project 5 Alison Hoffman

Alison Hoffman


var petalD = 65; // petal depth
var petalW= 60; // petal width
var rotation = 60; // standard rotation
var xspacing = 380; // space between flowers
var yspacing = 270;
function setup() {
    createCanvas(800, 400);
    background(0);
}

function draw() {
    // draw white stripes
    for(var i = 40; i <height; i +=100){
        stroke(255);
        strokeWeight(50);
        line(0,i,width,i);
    }

    //draw the flowers
    for(var y = 0; y < height; y+= yspacing){
        for(var x = 0; x < width; x+= xspacing){
            flower(x,y);
        }
    }

    noLoop();
}

function flower(x,y){     // function to make flower
    noStroke();

    push();
    translate(x,y);
    
    // leaves           
    fill(179,253,181);
    ellipse(petalD,0,120,20);
    rotate(radians(143));
    ellipse(petalD,0,120,20);
    rotate(radians(230));
    ellipse(petalD,0,120,20);
    rotate(radians(195));
    ellipse(petalD,0,120,20);
    
    rotate(radians(0));  // reset to no rotation
    for (var i=0; i<9; i++){     // makes up to nine petals
        if(i%2==0){
            fill(255,191-i,229-i);  // make every other petal darker 
            petalW = 90;  // vary petal width 
            petalD = 80; //vary petal depth
        }else{
            fill(255,200+i,230+i); // make every other petal lighter
            petalD = 75;  // vary petal depth
            petalW = 90; // vary petal width
        }
        rotate(radians(rotation));
        ellipse(petalD/2,0,petalD,petalW); // makes a petal
        rotation += i;   // makes rotations less uniform and circular
        fill(0);
        ellipse(10,0,15); // center circles 
    }

    pop();

}

For this project I wanted to try to create a wallpaper that combined geometric elements and more organic one. I have been seeing a lot of designs that have been combining stripes with florals, so I decided to try to recreate that in this project.

Kyle Lee Project 5 Duck Wallpaper

kdlee-project-05

//Kyle Lee
//Section C

var x = 100;
var y = 100;
var h = 4;
var rowStart = 0;
var columnStart = 60;
var xSpace = 200;
var ySpace = 100;

function setup() {
    createCanvas(600, 600);
    background("#EBF8FF");//light blue
    noStroke();
}

function draw(){
    for (var y = 0; y < 6; y++) {
        var evenOdd = y%2;//creates even or odd rows
        if(evenOdd == 0) {//if row is even make 4 per row
            rowStart = 0;
            h = 4;
        } else if(evenOdd == 1) {//if row is odd make 3 per row
            h = 3;
            rowStart = ySpace;
        }//closes if else
        for (var x = 0; x < h; x++) {
            px = rowStart + x * xSpace;
            py = columnStart + y * ySpace;
            duck(px, py);
        }//closes forloop
    }//closes complete nested forloop
}//closes draw

function duck(x, y) {
    push();
    translate(x, y);

    var headW = 50;
    var headH = 40;
    var headY = -30;
    var bodyW = 40;
    var bodyH = 30;
    var wingW = 30;
    var wingH = 10;
    var mouthY = -20;
    var mouthW = 13;
    var mouthH = 8;
    var eyeX = 10;
    var eyeY = -35;
    var eyeD = 7;
    var footX = 7;
    var footY = 16;
    var footW = 8;
    var footH = 4;

    fill("#FAD438");//yellow
    ellipse(0, headY, headW, headH);//head
    ellipse(0, 0, bodyW, bodyH);//body

    push();//right wing
        rotate(radians(20));
        ellipse(bodyH/2, 0, wingW, wingH);
    pop();
    push();//left wing
        rotate(radians(-20));
        ellipse(-bodyH/2, 0, wingW, wingH);
    pop();

    fill("#FF9D14");//orange
    ellipse(0, mouthY, mouthW, mouthH);

    fill("#534C45");//brown
    ellipse(eyeX, eyeY, eyeD, eyeD);
    ellipse(-eyeX, eyeY, eyeD, eyeD);
    ellipse(footX, footY, footW, footH);
    ellipse(-footX, footY, footW, footH);

    pop();
    noLoop();
}

img_4095
Planning

For my project, I made a repeating pattern of ducks. I could definitely see this pattern on a pair of fun socks, or pj pants, or a short sleeve button up. I created a duck function in which I drew all the individual shapes. I then called upon that function in a for loop to repeat the pattern in a simple pattern.


GarrettRauck-Project-5

sketch

//Garrett Rauck
//Section C
//grauck@andrew.cmu.edu
//Assignment-05-project

/////////////////////////////////
// INIT VARIABLES
/////////////////////////////////
var canvasWidth, canvasHeight, margin;
//grid vars
var nRows, nCols, cellSize, ellipseSize, gridLeft, gridTop, cx, cy;
//color
var colorYellow, colorBrown, colorGreen;

/////////////////////////////////
// HELPER FNS
/////////////////////////////////
function drawBanana(x, y) {
		drawLeftCurve(x,y);
		drawRightCurve(x,y);
		drawLowerCap(x,y);
		drawUpperCap(x,y);
}

function drawLeftCurve(x,y) {
	//set shape pts...pts determined using guess-and-check
	var ax = x + 20;  var ay = y + 40;
	var bx = x - 20;  var by = y + 20;
	var cx = x - 25;  var cy = y - 20;
	var dx = x - 10;  var dy = y - 40;
	//draw curve
	noFill();
	stroke(colorBrown);
	bezier(ax, ay, bx, by, cx, cy, dx, dy);

	// //vis pts
	// noStroke();
	// fill(0,255,0);
	// ellipse(x, y, 10);
	// fill(255,0,0);
	// ellipse(ax, ay, 5);
	// ellipse(bx, by, 5);
	// ellipse(cx, cy, 5);
	// ellipse(dx, dy, 5);
}

function drawRightCurve(x,y) {
	//get bezier pts...pts determined using guess-and-check
	var ax = x + 25;  var ay = y + 35;
	var bx = x;  var by = y + 15;
	var cx = x - 7;  var cy = y - 20;
	var dx = x - 5;   var dy = y - 40;
	//draw curve
	noFill();
	stroke(colorBrown);
	bezier(ax, ay, bx, by, cx, cy, dx, dy);

	// //vis pts
	// noStroke();
	// fill(0,255,0);
	// ellipse(x, y, 10);
	// fill(255,0,0);
	// ellipse(ax, ay, 5);
	// ellipse(bx, by, 5);
	// ellipse(cx, cy, 5);
	// ellipse(dx, dy, 5);
}

function drawLowerCap(x,y) {
	//set shape pts...pts determined using guess-and-check
	var ax = x + 20;  var ay = y + 40;
	var bx = x + 25;  var by = y + 35;
	var cx = x + 27;  var cy = y + 37;
	var dx = x + 22;  var dy = y + 42;
	//draw shape
	fill(colorBrown);
	stroke(colorBrown);
	quad(ax, ay, bx, by, cx, cy, dx, dy);

}

function drawUpperCap(x,y) {
	//set shape pts...pts determined using guess-and-check
	var ax = x - 10;  var ay = y - 40;
	var bx = x - 5;   var by = y - 40;
	var cx = x - 1;   var cy = y - 49;
	var dx = x - 7;   var dy = y - 51;
	//draw shape
	fill(colorBrown);
	stroke(colorBrown);
	quad(ax, ay, bx, by, cx, cy, dx, dy);
}

function drawVine(x, y) {
	//set curve pts...pts determined using guess-and-check
	var ax = x - 4;  var ay = y - 50;
	var bx = x +10;   var by = y - 150;
	var cx = x + 50;   var cy = y - 170;
	var dx = x + 60;   var dy = y - 155;
	//draw curve
	noFill();
	stroke(colorGreen);
	bezier(ax, ay, bx, by, cx, cy, dx, dy);
}

/////////////////////////////////
// RUN!
/////////////////////////////////
function setup() {
	// INIT VARS
	//canvas
	canvasWidth = 800;
	canvasHeight = 800;
	margin = 25;
	//grid vars
	nRows = 6;
	nCols = 7;
	cellSize = (canvasHeight-margin*2)/nRows;
	ellipseSize = 35;
	gridLeft = margin + ellipseSize/2;
	gridTop  = (canvasHeight - ((nRows-1)*sqrt(3)/2*cellSize))/2;
	//color
	colorYellow = color(255, 211, 0);
	colorBrown = color(51, 34, 9);
	colorGreen = color(0, 82, 1);
	
	// CANVAS SETUP
    createCanvas(canvasWidth, canvasHeight);
    background(colorYellow);

    noLoop();
}

function draw() {
	//generate hex grid
	for (row = 0; row < nRows; row++) {
		for (col = 0; col < nCols; col++) {
			//get x,y center for pattern cells
			if (row % 2 == 0) { cx = gridLeft + col*cellSize; } //x alignment for even rows
			else { cx = gridLeft + col*cellSize + cellSize/2; } //x alignment for odd rows
			cy = gridTop + row*(sqrt(3)/2)*cellSize; //y alignment for all rows

			//draw pattern, with subtle randomness
			if ((row == 2) & (col == 4)) { continue; }
			else if ((row == 3) & (col == 3)) { drawBanana(cx, cy);}
			else {
				drawBanana(cx, cy); //draw banana
				drawVine(cx, cy); //draw arc
			}
		}
	}
	
}

I wanted to spin off of the historic catalog of wallpapers and create a pattern that was more fun and cheesy. A banana became my basic element. Most of the time was spent creating a set of helper functions to draw the banana. No fun. Then I simply applied the banana graphic to a version of the hexagonal grid from assignment 5b, and used a couple conditional statements add some visual interest by removing a single cell in the pattern.

img_2042
Sketches to help determine coordinates for the banana element.

Project 5: Wallpaper

My original idea for this project was to make a fabric pattern using florals (groundbreaking, I know!). For inspiration, I began by looking at prints from Lilly Pulitzer and Andy Warhol’s floral pop art.  However, as I began playing around with the code, the simple flower I started out with turned into an abstract “centerpiece” surrounded by ellipses that made rectangles around the sides. I ended up with a completely different deliverable, as you can see below.

sketch

/*Emma Shi
Section B
eyshi@andrew.cmu.edu
Project 5
*/
var petalL = 100;
var petalW = 40;
var rot = 45;

function setup() {
    createCanvas(600, 600);
    background("navy");
}

function draw() {

    for (var x = 0; x < 12; x++) {
        for (var y = 0; y < 12; y++) {

            var Petal = petalL * x;
            var innerL = petalL/x;
            var innerW = petalW*y;

            stroke("white");
            strokeWeight(2);
            noFill();

            push();
            translate(width/2, height/2);

            ellipse(0, 0, 25, 25);//center circle

            ellipse(Petal, 0, petalL, petalW);//petals of the right half of the inner "diamond"
            ellipse(Petal, 0, innerL, innerW);//inner petals of the right half of the inner "diamond"

            rotate(radians(rot));
            ellipse(Petal, 0, petalL, petalW);//petals of the upper right half 
            ellipse(Petal, 0, innerL, innerW);//inner petals of the upper right half

            rotate(radians(rot));
            ellipse(Petal, 0, petalL, petalW);//petals of the outer upper right half 
            ellipse(Petal, 0, innerL, innerW);//inner petals of the outer upper right half

            rotate(radians(rot));
            ellipse(Petal, 0, petalL, petalW);//petals of the upper right corner
            ellipse(Petal, 0, innerL, innerW);//inner petals of the upper right corner

            rotate(radians(rot));
            ellipse(Petal, 0, petalL, petalW);//petals of upper mid right
            ellipse(Petal, 0, innerL, innerW);//inner petals of upper mid right

            rotate(radians(rot));
            ellipse(Petal, 0, petalL, petalW);//petals of the upper left
            ellipse(Petal, 0, innerL, innerW);//inner petals of the upper left

            rotate(radians(rot));
            ellipse(Petal, 0, petalL, petalW);//petals of the mid left
            ellipse(Petal, 0, innerL, innerW);//inner petals of the mid left

            rotate(radians(rot));
            ellipse(Petal, 0, petalL, petalW);//petals of the lower left
            ellipse(Petal, 0, innerL, innerW);//inner petals of the lower left
            pop();
    }
        }
        noLoop();

}

Looking Outwards 5- Digital Emily


“Digital Emily” Introducing Image Metrics

A 3D computer graphic image of Emily by Image Metrics
Emily under 156 LED lights at USC Institute for Creative Technologies Graphics Lab
slide03
The fifteen photographs of the face under different lighting conditions by Image Metrics

The Digital Emily Project was done by Paul Debevec and his team from Image Metrics in 2008. They built a 3d digital puppet of the actress Emily O’Brien that they could manipulate. Viewers could not tell whether they were watching the real person or the computer graphic animation. Countless rays of light produced by 156 bulbs bounced off the surface of Emily’s skin and into the camera, which allowed people to “scan” her face. Different from putting trackers on her face, this process can capture more details like pores and fine wrinkles. The team used hybrid normal map rendering in Maya 8.0.

sm_slide36
Specular (high-res) geometry image of Emily O’Brien by Image Metrics

The use of hybrid normal maps created better effects than diffuse map rendering because it made the surface more like skin. Emily’s eyelashes were often covering her eyelids and pupils so they had to build the model of her eyes from scratch. A program that could move each part of Emily’s face like her brows and teeth allowed the team to create whatever expression the real Emily could make. Using this program, they made a Computer Graphic animation by replicating each frame from a video of the real Emily in less than two weeks. It is surprising how the actual animation process only took so little time. It gives us a sense of how powerful this tool is once the process of generating the system is finished. I admire this project because it can be applied easily in the film industry. One of the intentional decisions that Debevec made was determining the extent to which Emily’s facial expressions could be exaggerated and what kind of expression would be considered realistic. This whole project gave me an appreciation of the complexity of the human face.

Links:

The Digital Emily Project: Achieving a Photoreal Digital Actor

Acquiring the Reflectance Field of a Human Face

Check out the TED talk given by Paul Debevec on The Digital Emily Project:


Wallpaper-05-sehenry

sketch

//Seth Henry

//Tuesday at 10:30

//sehenry@andrew.cmu.edu

//Assignment-05 Wallpaper


function setup() {
    createCanvas(660, 340);
    }

function draw() {
	  background(128, 0, 32); //Burgundy
	  blackDot(); 
	  fill('orange'); //Color of Ball
	  Bball();
	  fill(240, 248, 255); //Color of Diamonds
	  diamond();

	 }


function Bball(){ //Basketball Layout
	var x = 90;
	var y = 50;
	for(x = 90; x < 660; x += 120){
	
	for(y = 50; y < 340; y += 80){
		ellipse(x, y, 60, 60)
		
	  beginShape(); // left curve on basketball
	  
	  curveVertex(x - 19.5, y - 22.5);
	  curveVertex(x - 19.5, y - 22.5);
	  curveVertex(x - 12.5, y - 10);
	  curveVertex(x - 12.5, y + 10);
	  curveVertex(x - 19.5, y + 22.5);
	  curveVertex(x - 19.5, y + 22.5);
	  endShape();
   	  beginShape(); // right curve on basketball
	  
	  curveVertex(x + 19.5, y - 22.5);
	  curveVertex(x + 19.5, y - 22.5);
	  curveVertex(x + 12.5, y - 10);
	  curveVertex(x + 12.5, y + 10);
	  curveVertex(x + 19.5, y + 22.5);
	  curveVertex(x + 19.5, y + 22.5);
	  endShape();
		line(x, y + 30, x, y-30); //vertical line on basketball
		line(x - 30, y, x + 30, y); //horizontal line on basketball
}

}
noLoop();
}


function diamond(){ //Diamond Layout Plus Number 4 Text

var a = 0; //starter variables
var b = 0;


for(a = 0; a < 650; a += 120){ //moves over the diamonds/4 in rows
for(b = 0; b < 340; b += 50){ //moves over the diamonds/4 in columns
quad(a + 30, b + 5, a + 45, b + 20, a + 30, b + 35, a + 15, b + 20);
textAlign(CENTER);

text("#4", a + 30, b + 50); //#4
}	
} 
noLoop(); //end loop
}

function blackDot(){ //Makes black dots behind the balls, numbers, and diamonds
	var v = 0;
	var w = 0;

	for(v=0; v<660; v+=5){ //moves over the dots in rows
		for(w=0; w<340; w+=5){ //moves over the dots in columns
		ellipse(v,w,1,1);
		}
		
	}
	noLoop();
}


I decided to cut off one row of the basketballs because when I embed the wallpaper into my post, it cannot capture all of the extra row. So I decided to just remove it from the preview even though it is in my code.

Making this project would have actually been finished relatively fast if I didn’t have a hard time with the curves on the basketball and getting the diamonds to move over by certain amounts without distorting their shape. I drew a sketch to begin with and toyed with the idea of having basketballs all over the picture. I later added the number 4 to the wallpaper because it is my current number on the basketball team and I decided to add the black dots because I thought it would make the wallpaper pop out even more! I had fun with this project and it showed me that I am actually getting better at coding.

wallpaper-sketch

JihoonPark_Project_05

sketch
I was inspired by islamic geometric patterns as well as oriental window seals that overlapped and intersected perpetually. There are three components in this pattern, a vertical line and two zigzag lines. I created my own functions, “vertStrip” and “zigzag” to reduce redundancy in coding the overlapping strips.

//Jihoon Park
//Section A
//jihoonp@andrew.cmu.edu
//project-05
var i; //horizontal loop value for vertical strips
var j; //vertical loop value for vertical strips
var k; //horizontal loop value for black zigzag
var l; //vertical loop value for black zigzag
var m; //horizontal loop value for gray zigzag
var n; //vertical loop value for gray zigzay

function setup() {
	createCanvas(800, 400);
	background(236, 245, 255); //lightblue
											//WHITE VERTICAL STRIPS
	for (j=0; j<height+20; j+=20) {
		strokeWeight(0.5);	
		fill(255, 142, 84); //orange red
		for (i=0; i<width+20; i+=20) {

			if ((i%40)==0) {					//odd number columns
				vertStrip(i, j);
			} else {							//even number columns
				vertStrip(i, j-10);
			}						
		}		
	}
	
											// HORIZONTAL ZIGZAG
	for (l=0; l<height+20; l+=20) {
		
											
		for(k=0; k<width+80; k+=80) {				
			
			if ((l%40)==0) {				//ODD ROWS
				fill(160, 255, 99);//green			//draws green zigzag strips
				zigzag(k, l);					
				
				fill(78, 232, 194);					//draws turquois zigzag strips	
				zigzag(k+20, l+10);					
			} else {						//EVEN ROWS
				fill(160, 255, 90);					//draws green zigzag strips
				zigzag(k-40, l);

				fill(78,232,194);
				zigzag(k+-20, l+10);			 	//draws turquois zigzag strips
			}
		}	
	}
	noLoop();
}

function vertStrip(i,j) {
	beginShape();						//function that draws vertical strips
	vertex(i, j+5);
	vertex(i+5, j+2.5);
	vertex(i+5, j+17.5);
	vertex(i, j+20);
	endShape(CLOSE);	
}

function zigzag(k, l) {					//function that draws zigzag strips
	beginShape();						//all vertex of shapes are listed clockwise
	vertex(k-15, l+2.5);
	vertex(k-10, l+5);
	vertex(k-15, l+7.5);
	endShape(CLOSE);

	beginShape();
	vertex(k-10, l+5);
	vertex(k+5, l-2.5);
	vertex(k+10, l);
	vertex(k-5, l+7.5);
	endShape(CLOSE);

	beginShape();
	vertex(k+10, l);
	vertex(k+15, l-2.5);
	vertex(k+20, l);
	vertex(k+20, l+5);
	endShape(CLOSE);

	beginShape();
	vertex(k+25, l+2.5);
	vertex(k+30, l+5);
	vertex(k+50, l-5);
	vertex(k+60, l);
	vertex(k+60, l+5);
	vertex(k+50, l);
	vertex(k+30, l+10);
	vertex(k+25, l+7.5);
	endShape();
}

Sarita Chen – Project 05 – Wallpaper

sketch

// Sarita Chen
// Section A
// slchen@andrew.cmu.edu
// Project: Wallpaper
function setup() {
    createCanvas(600, 600);
    noLoop();
}


function draw() {

	
	background(90,230,255); // Blue.
	
	for(var x = 0; x < width + 4; x +=60){  
		for(var y = 0; y < height; y += 80){
			luigi(x,y); // draws the function "luigi"
		}
	}	
}
	// luigi design
	function luigi(x,y) {   

		noStroke();
		var hairC = ('YellowGreen');
		var skintone = ('Orange');
		var clothes = (255);
		var buttons = ('Gold');
		var pixel = 2.5;


		// Note: the side comments refer to the number of squares each line
		// produces.

			// Line 1
				
			fill(clothes);
			rect(x+10*pixel,y,pixel*5,pixel); //
			

			// Line 2
			
			fill(clothes);
			rect(x+9*pixel,y+pixel,pixel*9,pixel); // 9 white
			

			//Line 3
			
			fill(hairC);
			rect(x+9*pixel,y+pixel*2,pixel*3,pixel); // 3 green 


			fill(skintone); 
			rect(x+12*pixel,y+pixel*2,pixel*2,pixel); //2 orange
	
			fill(hairC);
			rect(x+14*pixel,y+pixel*2,pixel,pixel); // 2 green
			
			fill(skintone);
			rect(x+15*pixel,y+pixel*2,pixel,pixel); // 1 orange
			

			//Line 4
			
			fill(hairC);
			rect(x+8*pixel,y+pixel*3,pixel,pixel);  // 1 green

			
			fill(skintone);
			rect(x+9*pixel,y+pixel*3,pixel,pixel); // 1 orange

			
			fill(hairC);
			rect(x+10*pixel,y+pixel*3,pixel,pixel); // 1 green

			
			fill(skintone);
			rect(x+11*pixel,y+pixel*3,pixel*3,pixel); // 3 orange


			fill(hairC);
			rect(x+14*pixel,y+pixel*3,pixel,pixel); // 1 green
		

			fill(skintone);
			rect(x+15*pixel,y+pixel*3,pixel*3,pixel); // 3 orange
				

			//Line 5

			fill(hairC);
			rect(x+8*pixel,y+pixel*4,pixel,pixel); // 1 green

			
			fill(skintone);
			rect(x+9*pixel,y+pixel*4,pixel,pixel); // 1 orange

			
			fill(hairC);
			rect(x+10*pixel,y+pixel*4,pixel*2,pixel); // 2 green

			
			fill(skintone);
			rect(x+12*pixel,y+pixel*4,pixel*3,pixel); // 3 orange
			
			fill(hairC);
			rect(x+15*pixel,y+pixel*4,pixel,pixel); // 1 green

			
			fill(skintone);
			rect(x+16*pixel,y+pixel*4,pixel*3,pixel); //3 orange

			
			// Line 6

			fill(hairC);
			rect(x+8*pixel,y+pixel*5,pixel*2,pixel);  // 2 green

			
			fill(skintone);
			rect(x+10*pixel,y+pixel*5,pixel*4,pixel); // 4 orange
			
			fill(hairC);
			rect(x+14*pixel,y+pixel*5,pixel*4,pixel);  // 4 green

		
			fill(skintone);
			rect(x+10*pixel,y+pixel*6,pixel*7,pixel);  // 7 orange
			
			//Line 8
			
			fill(hairC);
			rect(x+9*pixel,y+pixel*7,pixel*2,pixel); // 2 green
			
			
			fill(clothes);
			rect(x+11*pixel,y+pixel*7,pixel,pixel); // 1 white
			
			fill(hairC);
			rect(x+12*pixel,y+pixel*7,pixel*3,pixel); // 3 green
			
			//Line 9
			
			fill(hairC);
			rect(x+8*pixel,y+pixel*8,pixel*3,pixel); // 3 green
			
			fill(clothes);
			rect(x+11*pixel,y+pixel*8,pixel,pixel); // 1 white
			
			fill(hairC);
			rect(x+12*pixel,y+pixel*8,pixel*2,pixel); // 2 green
			
			fill(clothes);
			rect(x+14*pixel,y+pixel*8,pixel,pixel); // 1 white
			
			fill(hairC);
			rect(x+15*pixel,y+pixel*8,pixel*3,pixel); // 3 green
			
			//Line 10
			
			fill(hairC);
			rect(x+7*pixel,y+pixel*9,pixel*4,pixel); // 4 green
			
			fill(clothes);
			rect(x+11*pixel,y+pixel*9,pixel*4,pixel); // 4 white
			
			fill(hairC);
			rect(x+15*pixel,y+pixel*9,pixel*4,pixel); // 4 green
			

			// Line 11
			
			fill(skintone);
			rect(x+7*pixel,y+pixel*10,pixel*2,pixel); // 2 orange
			
			fill(hairC);
			rect(x+9*pixel,y+pixel*10,pixel,pixel); // 1 green
			
			fill(clothes);
			rect(x+10*pixel,y+pixel*10,pixel,pixel); // 1 white
			
			fill(buttons);
			rect(x+11*pixel,y+pixel*10,pixel,pixel); // 1 yellow
			
			fill(clothes);
			rect(x+12*pixel,y+pixel*10,pixel*2,pixel); // 2 white
			
			fill(buttons);
			rect(x+14*pixel,y+pixel*10,pixel,pixel); // 1 yellow
			
			fill(clothes);
			rect(x+15*pixel,y+pixel*10,pixel,pixel); // 1 white
			
			fill(hairC);
			rect(x+16*pixel,y+pixel*10,pixel,pixel); // 1 green
		
			fill(skintone);
			rect(x+17*pixel,y+pixel*10,pixel*2,pixel); // 2 orange
			

			//Line 12
		
			fill(skintone);
			rect(x+7*pixel,y+pixel*11,pixel*3,pixel); // 3 orange
		
			fill(clothes);
			rect(x+10*pixel,y+pixel*11,pixel*6,pixel); // 6 white
	
			fill(skintone);
			rect(x+16*pixel,y+pixel*11,pixel*3,pixel); // 3 orange
		
			// Line 13
			
			fill(skintone);
			rect(x+7*pixel,y+pixel*12,pixel*2,pixel); // 2 orange


			fill(clothes);
			rect(x+9*pixel,y+pixel*12,pixel*8,pixel); // 8 white
			
			
			fill(skintone);
			rect(x+17*pixel,y+pixel*12,pixel*2,pixel); // 2 orange
		
			// Line 14
			
			fill(clothes);
			rect(x+9*pixel,y+pixel*13,pixel*3,pixel); // 3 white
			
			fill(clothes);
			rect(x+14*pixel,y+pixel*13,pixel*3,pixel); // 3 white
			

			// Line 15
			
			fill(hairC);
			rect(x+8*pixel,y+pixel*14,pixel*3,pixel); // 3 green
		
			fill(hairC);
			rect(x+15*pixel,y+pixel*14,pixel*3,pixel); // 3 green
			
			// Line 16
			
			fill(hairC);
			rect(x+7*pixel,y+pixel*15,pixel*4,pixel); // 4 green
			
			fill(hairC);
			rect(x+15*pixel,y+pixel*15,pixel*4,pixel); // 4 green


			}


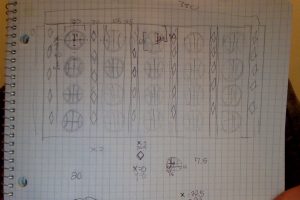
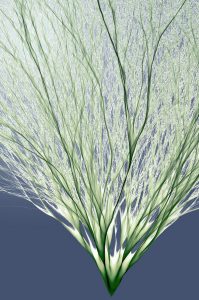
I wanted to make my wallpaper 8bit style, so I decided to recreate an 8bit version of Luigi from the older Super Mario games. I used an image I found here, which made it convenient as I could easily count the number of “pixels” used to create the image. Actually making the Luigi function took up the most time, because I had initially started off by having a for loop generate the squares for each line.That actually made it harder for me to put the function in a for loop to generate the wallpaper, because it was too many variables to handle so I had to go back and reedit everything… Anyways, I’m happy with the final result! I tried to make the colours as vibrant as possible, since Super Mario is a very bright, cheerful game.

James Katungyi – Looking outwards 05

transport_iv

Artist: Eric J. Heller

Title: Transport IV

Year: undated

A branching shrub-like image results from mapping the 2 dimensional path of each of 100,000 electrons released at a single source, using algorithms. While each electron’s launch angle is different, the paths overlap which increases pixel concentration resulting 3 dimensional texture and depth to the image. The electron paths are mapped in a colour of choice – green in this case.

Of interest to me is how mapping these random trajectories results in an uncanny resemblance to plant ‘geometry’.

In addition to being an artistic piece of work, the idea of recreating the flow of discrete particles to resemble natural organisms, promises to inspire design. Rather than copying by observing, artists – from painters to building designers – can recreate natural patterns using this technique.

The artist, Eric Heller, has produced similar works in the Transport series, all inspired by a team of Harvard scientists that measured electron trajectories.

Similar work – Banyan (below)

banyan