Kyle Lee Project 09

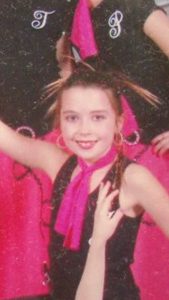
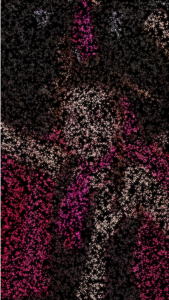
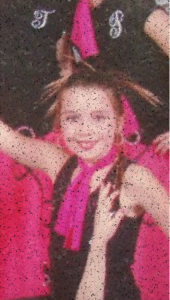
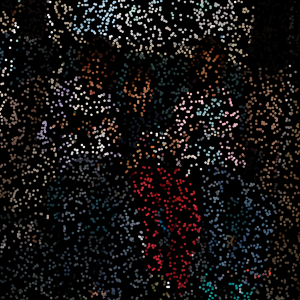
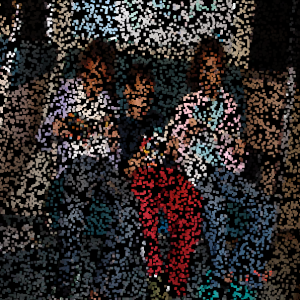
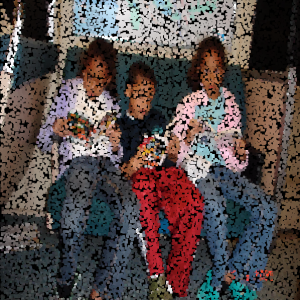
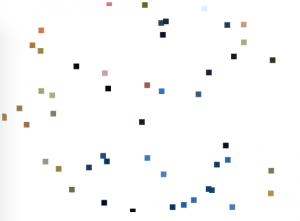
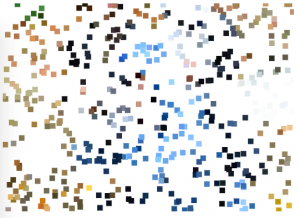
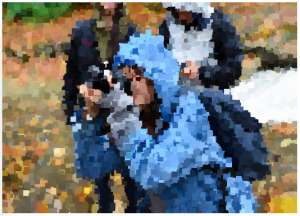
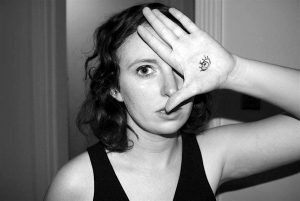
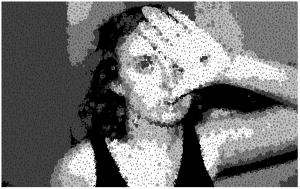
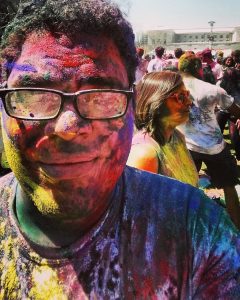
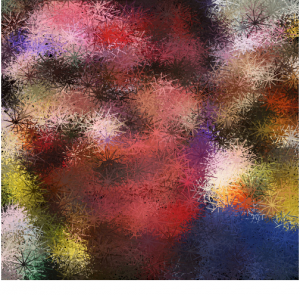
For my self portrait, I randomly spread particles across the canvas, and set each fill color to its corresponding location and color on the original image. I then cascaded each to move in random directions, creating streaks of color that distort the image the longer the code runs.


kdlee-09

var underImage;
var x = [];
var y = [];
var dx = [];//movement
var dy = [];//movement
var col = [];//color
var d = [];//diameter
var movement = .5;//speed of particles
var particles = 3000;//number of particles
var diameterS = 1;
var diameterL = 10;

function preload() {
    var url = "http://i.imgur.com/S9K9aFe.jpg";
    underImage = loadImage(url);
}

function setup() {
    createCanvas(400, 600);
    background(250);
    underImage.loadPixels();
    frameRate(30);
    noStroke();

    for (i = 0; i < particles; i++) { // for creating 2000 elements
        x[i] = random(width);
        y[i] = random(height);
        dx[i] = random(-movement, movement);
        dy[i] = random(-movement, movement);
        d[i] = random(diameterS, diameterL);
        col[i] = underImage.get(x[i], y[i]);//pulls color from coordinate
    }
}

function draw() {
    for (i = 0; i < particles; i++) {  // for drawing 2000 elements
        fill(col[i]);
        ellipse(x[i], y[i], d[i], d[i]);
        x[i] += dx[i]//builds movement
        y[i] += dy[i]//builds movement
        if (x[i] > width) x[i] = 0;        // wrap horizontally
        else if (x[i] < 0) x[i] = width;
        if (y[i] > height) y[i] = 0;       // wrap vertically
        else if (y[i] < 0) y[i] = height;
    }
}

Project 09 – Alison Hoffman

For this project I used an old photo of my roommate Julia. I would like to think this is Julia in her prime. I wanted to recreate the photo with an object that was also representative of the photo- that is why I decided to make this picture of my little star out of little stars. While accidental, I like how the stars in end give the picture a distressed look especially since this is an older photo.

Original:

juliaedited

Half-way:

screen-shot-2016-10-28-at-11-30-25-am

Final result:

screen-shot-2016-10-28-at-7-22-01-pm

sketch

//Alison Hoffman
//Section D
//achoffma@andrew.cmu.edu
//Project 9

var imgJulz;
var starSize;

function preload() {
    var myImageURL = "http://i.imgur.com/RhNrs1N.jpg";
    imgJulz = loadImage(myImageURL);
}

function setup() {
    createCanvas(487, 867);
    background(0);
    imgJulz.loadPixels();
    frameRate(100);
}

function makeStar(radSize) {
  var angle = TWO_PI/5;
  var x = 0;
  var y = 0;
  beginShape(); // I referenced p5js.org to learn how to draw a star
  for (var i = 0; i < TWO_PI; i += angle) { //this is a simplified version of their practice code
    var sx = x + cos(i) * radSize;
    var sy = y + sin(i) * radSize;
    vertex(sx, sy);  //makes point at sx,sy
    sx = x + cos(i+(angle/2) * radSize);
    sy = y + sin(i+(angle/2) * radSize);
    vertex(sx, sy);
  }
  endShape(CLOSE);
}

function draw() {
    var px = random(width); //pixel x val
    var py = random(height); //pixel y val 
    var ix = constrain(floor(px), 0, width-1);
    var iy = constrain(floor(py), 0, height-1);
    var locXYcolor = imgJulz.get(ix, iy); //gets color of pixel

    starSize = 5; 

    noStroke();
    fill(locXYcolor);
    push();
    translate(px,py); //moves star to the pixel location 
    rotate(frameCount/ 50); // makes stars in different directions
    makeStar(starSize);
    pop();

}

Sarita Chen – Project 9 – Portrait

sketch

var img;
var pixelSize = 5;
var pixelX;
var pixelY;
function preload(){
	img = loadImage("http://i.imgur.com/oTBE2k6.jpg");
	img.width = 600;
	img.height = 600;
	frameRate(200);

}

function setup() {
    createCanvas(600, 600);
    background(0);
    imageMode(CENTER);
    img.resize(600,600);
    img.loadPixels();

}

function draw() {

	noStroke();
	pixelX = floor(random(width));
	pixelY = floor(random(height));
	var pixelGET = img.get(pixelX,pixelY);

	fill(pixelGET,100);
	rect(pixelX,pixelY,5,5);


}

I used a photo of me, my twin sister and my younger brother from when we were younger. Here are some progress images:

screen-shot-2016-10-27-at-7-26-22-pm    screen-shot-2016-10-28-at-5-03-56-pm

Here is the final thing (or close to the final, there are still some gaps here and there):

screen-shot-2016-10-28-at-6-19-54-pm


Michal Luria – 09 – Portrait

mluria-09

/*  Submitted by: Michal Luria
    Section A: 9:00AM - 10:20AM
    mluria@andrew.cmu.edu
    Assignment-09-Project
*/

var originalImage;

function preload() {
    var myImageURL = "http://i.imgur.com/vUZZk6h.jpg"; //image link
    originalImage = loadImage(myImageURL); //load image
}

function setup() {
    createCanvas(500, 500); 
    background(0);
    originalImage.loadPixels(); //load pixels
    frameRate(20000);
}

function draw() {

    for (var i = 0; i < 500; i ++){ //draw 500 pixels each frame

        var px = random(width); //draw a line in a random x
        var py = random(height); //draw a line in a random y
        var ix = constrain(floor(px), -20, width-1); //constrain x
        var iy = constrain(floor(py), -20, height-1); //contrain y
        var theColorAtLocationXY = originalImage.get(ix, iy); //what is the color at a specific location

        var curveX1 = random(1,15); //start of curve (X)
        var curveX2 = curveX1 + random(1,15); //second point - same direction(X)
        var curveX3 = curveX2 + random(1,15); //third point - same direction (X)

        var curveY1 = random(1,15); //start of curve (Y)
        var curveY2 = curveY1 + random(1,15); //second point - same direction(Y)
        var curveY3 = curveY2 + random(1,15); //third point - same direcation(Y)

        var strokeSize = random(1,3); //stroke weight random

        strokeWeight(strokeSize);
        stroke(theColorAtLocationXY); //stroke in the color of pixel

        curve(px, py, px+curveX1, py+curveY1, px+curveX2, py+curveY2, px+curveX3, py+curveY3); //draw curve

    }

}

In this portrait I wanted to create a feeling of a drawn portrait. To do this, I created random sized curves, in different angles, but all drawn to the same direction to create an artistic style. This is inspired by artists in the impressionist movement. The different sized curves create a sense of brushstrokes, and end up in an image that is not completely clear, but gives a sense of the portrait mood.

Grace Cha – Project 09- Portrait

sketc

//Grace Cha
//Section C
//heajinc
//Project 9 

var underlyingImage;

function preload() {
    var myImageURL = "http://i.imgur.com/ntVrOBL.jpg?1";
    underlyingImage = loadImage(myImageURL);
}

function setup() {
    createCanvas(400, 410);
    background(252);
    underlyingImage.loadPixels();


    vertX = random(0, width); //Picks a point randomly on top
    vertY = 0; //at the top
    horizX = 0; //Starts randomly
    horizY = random(0, height);//at the left side
    
}

function draw() {

    verticalGrace();
    horizontalC();
}
function verticalGrace() {
  var ix = constrain(floor(vertX), 0, width + 100); //set max and min of ix
  var iy = constrain(floor(vertY), 0, height + 100); //set max and min of iy
  var theColorAtLocationXY = underlyingImage.get(ix, iy); //Obtains pixel


  fill(theColorAtLocationXY); //Fill with pixel color at ix, iy
  
  textSize(10);
  
  
  noStroke();
  text("CHA", vertX, vertY); 
  
  vertY += 10; // move at a rate of 10 
  
  	if (vertY > height) { //If the GRACE hit bottom of canvas
  		vertY = 0; 	//resets the image back to the top
  		vertX = random(0, width ); //Relocate the x-coordinate of the rect
  	}
}

function horizontalC() {
    var ix = constrain(floor(vertX), 0, width-1); //set max and min of ix
    var iy = constrain(floor(vertY), 0, height-1); //set max and min of iy
    var theColorAtLocationXY = underlyingImage.get(ix, iy); //Obtains pixel

  
    fill(theColorAtLocationXY); 
    textSize(10);
    textStyle(BOLD);
    text("C",horizX, horizY ); 
  
    horizX += 10;
    if (horizX > width) {
  	    horizX = 0;
  	    horizY = random(0, height);
  	}	   
}


I played around with the idea of spelling my name out to display my face.  I tried using “GRACE” but the word was too long that it distorted the image, so I used my last name “CHA”.  To add contrast to the longer word “CHA” I decided to use one letter “C” to represent the horizontal rows.

Isabella Hong – Project – 09

ijhong-09p

// Isabella Hong
// Section A
// ijhong@andrew.cmu.edu
// Project 09


var img; 

function preload() {
	//my image 
	var imgURL = "https://i.imgur.com/hdA7L6z.jpg";
	img = loadImage(imgURL); 
}

function setup() { 
	//create canvas and load image on to it 
	createCanvas(525, 375);
	img.resize(525, 375); 
	background(255); 
	//rate at which pixels appear  
	frameRate(500);  
	img.loadPixels(); 
}

function draw() {
	//randomize the x and y coordinates 
	var CpixelW = random(width); 
	var CpixelH = random(height); 
	//keep pixels within the canvas 
	var CpositionX = constrain(floor(CpixelW), 0, width - 20); 
	var CpositionY = constrain(floor(CpixelH), 0, height - 20); 
	//get colors from the image 
	var colorxy = img.get(CpositionX, CpositionY);

	//draw the rectangular pixels and have them fill in the colors
	//from the original image 
	noStroke();  
	fill(colorxy);  
	rectMode(CENTER); 
	rect(CpixelW, CpixelH, 10, 10); 
}


For my portrait, I chose a photo of myself that my friend took while we were hiking at Ohiopyle. I liked that the photo had several different colors and depths, which I thought would add to the pixelated version. This is my project at various stages.

Stage 1

screen-shot-2016-10-28-at-1-17-22-pm

Stage 2

stage 2

Stage 3

screen-shot-2016-10-28-at-1-13-40-pm

Jinhee Lee; Project-09

jinheel1_project-09

//Jinhee Lee
//Section C
//jinheel1@andrew.cmu.edu
//Project-09

var underlyingImage;

function preload() {
    var myImageURL = "http://i.imgur.com/EH0p0KK.png";
    underlyingImage = loadImage(myImageURL);
}

function setup() {
    createCanvas(600, 600);
    background(70); //dark grey background to contrast with black
    underlyingImage.loadPixels();
    frameRate(25); //fast frame rate to fill up canvas
}

function draw() {
    var px = random(width);
    var py = random(height);
    var ix = floor(px);
    var iy = floor(py);
    var theColorAtLocationXY = underlyingImage.get(ix, iy);

    var pixelSize = 10; //size of pixels spawning 

    var bright = brightness(theColorAtLocationXY); //extract brightness of pixel for greyscale effect
    var amt = map(bright, 0, 100, 0, 255); //map from 0 to 255 so overall image isn't too dark

    noStroke();
    fill(amt); //fills pixel with appropriate brightness value
    ellipse(px, py, pixelSize, pixelSize);
}

function mouseDragged() { //draws a line with mouse
    var theColorAtTheMouse = underlyingImage.get(mouseX, mouseY);
    stroke(theColorAtTheMouse); //while pixels are greyscaled, the line is colored
    strokeWeight(10); //thicker stroke so it can be seen

    line(pmouseX, pmouseY, mouseX, mouseY);
}

I made the generated pixels with a greyscale effect, along with a mouseDragged() function that adds color depending on the stroke of the mouse. Like breathing life into the photo, though if left alone too long, it would revert back to grey with the refreshing pixels.

Project-09 mdambruc

12138425_10208380661373960_4152276010133023646_o

Original picture

screen-shot-2016-10-28-at-10-37-55-am

Possible Outcome

sketch

//Mairead Dambruch
//mdambruc@andrew.cmu.edu
//Section C
//Project-09-A
var img;
var ImageW;
var ImageH;
function preload(){
  img = loadImage("http://i.imgur.com/Iram3uO.jpg")
}
function setup() {
  img.resize(800, 500);
  ImageW = img.width;
  ImageH = img.height;
   createCanvas(ImageW, ImageH);
   background(100);
   img.loadPixels();
   frameRate(10);
}

function draw() {
      var px = random(ImageW);
      var py = random(ImageH);
      var ix = constrain(floor(px), 0, ImageW -1);
      var iy = constrain(floor(py), 0, ImageH -1);
      var pixel = img.get(ix, iy);
      // image(img, 0, 0);

      var b = brightness(pixel);
      //layer 1 (brightest)
     if (b > 80){
      stroke(255);
      strokeWeight(6);
      textSize(6);
      text("A", ix, iy);
      frameRate(5000);
    }//layer 2
     if (b > 60 & b < 80){
       stroke(191);
       strokeWeight(6);
       textSize(6);
       text("G", ix, iy);
       frameRate(5000);
     }//layer 3
     if (b > 40 & b < 60){
       stroke(128);
       strokeWeight(6);
       textSize(6);
       text("C", ix, iy);
       frameRate(5000);
     }//layer 4
     if (b > 20 & b < 40){
       stroke(64);
       strokeWeight(6);
       textSize(6);
       text("T", ix, iy);
       frameRate(5000);
     }//layer 5 (darkest)
     if (b > 0 & b < 20){
       stroke(0);
       strokeWeight(3);
       textSize(3);
       text(".", ix, iy);
       frameRate(10000);
    }
    }

For this project I chose to use a picture of my sister. It is made up of 5 color tones to create a black to white gradient. In my code, I split up all the possible brightness values into just 5 categories resulting in a simplified gradient of value. My custom pixels were the letters A, C, G, and T. These letters represent the nucleotides that make up our DNA. Each value category corresponds to a specific letter and the darkest value (black) is just a square.

Project-09 Portrait

img_5712

This is the self-portrait image I used for this project. I had a lot of trouble with uploading the image, I tried to use Imgur but couldn’t get it to work properly, and so I tried to publish it on here instead. Below is the code and computed portrait, I modified it so that it would be created out of randomly placed triangles.

sketch

//Rebecca Enright
//Section A
//renright@andrew.cmu.edu
//Portrait assignment

var portrait;

function preload() {
    var myImage = "https://courses.ideate.cmu.edu/15-104/f2016/wp-content/uploads/2016/10/IMG_5712-225x300.jpg";
    portrait = loadImage(myImage);
}

function setup() {
    createCanvas(500, 500);
    background(0);
    portrait.loadPixels();
    frameRate(10);
}

function draw() {
    var px = random(width);
    var py = random(height);
    var ix = constrain(floor(px), 0, width-1);
    var iy = constrain(floor(py), 0, height-1);
    var theColorAtLocationXY = portrait.get(ix, iy);

    noStroke();
    fill(theColorAtLocationXY);
    triangle(px + 10, py + 10, px, py, px - 10, py - 10);

}

Project-09-Portrait

This project was very enjoyable. In my initial plans, I wanted to make the photo look like a pile of colorful sticks. I choose a photo with alot of colors and was just trying to figure out the best way to work in lines. I opted a program that allows the user to have a small level of control over the “dropping sticks.” As you can see below, the outcome is a bit of a blurred image.

12907126_998977410138771_1059456926_n1

proj-9-finished

sketch-100

//Victor Tavarez
//Section D
//vtavarez@andrew.cmu.edu
//Project-09

var myImage;

function preload() {
    var introduceImage = "http://i.imgur.com/UZISIgI.jpg";
    myImage = loadImage(introduceImage);
}

function setup() {
    createCanvas(500,500);
    background(0);
    myImage.loadPixels();
    frameRate(100);
}

function draw(){
    var px = random(width);
    var py = random (height);
    // accesses the color of each pixel as it is randomly selected 
    var ix = constrain(floor(px),0,width-1);
    var iy = constrain(floor(py),0,height-1);
    var theColorAtLoationXY = myImage.get(ix,iy);
    
    stroke(theColorAtLoationXY);
    for (var i=0; i<20;i++){
        push();
        // creating rotating lines
        var xmapping = map(mouseX, 0,width,0,20);
        var ymapping = map(mouseY, 0,height, 0, 20);
        translate(ix,iy);
        rotate(i*radians(36))
        line(i,i,random(xmapping),random(ymapping))
        pop();

    }

}