Mending – Jasmine Lee

For this part of the assignment, I continued my mending from last time.

Mending from Tuesday 10/6/20.

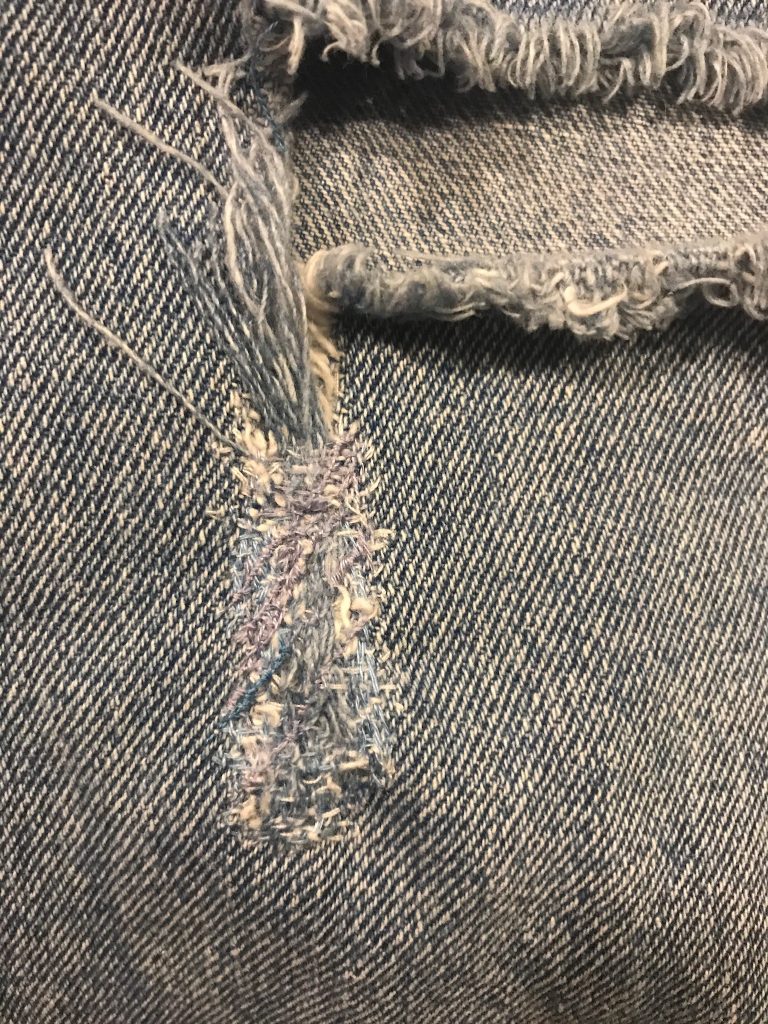
I continued to use the same techniques, fixing the rips in the fabric by creating more wefts, and then layering diagonal stitches on top to help it blend back into the denim. I experimented with using a thicker needle and blending the strands of thread together. Previously, I used one thread color at a time. This time, I twisted 2 strands of blue thread, and 1 strand of white thread together, creating a thread that is slightly thinner than embroidery floss. While the colors did seem to help the alterations blend into the original pants. it was a bit harder to match the weave of the fabric, due to the thickness of the tread.

Mending Progress 10/8/20

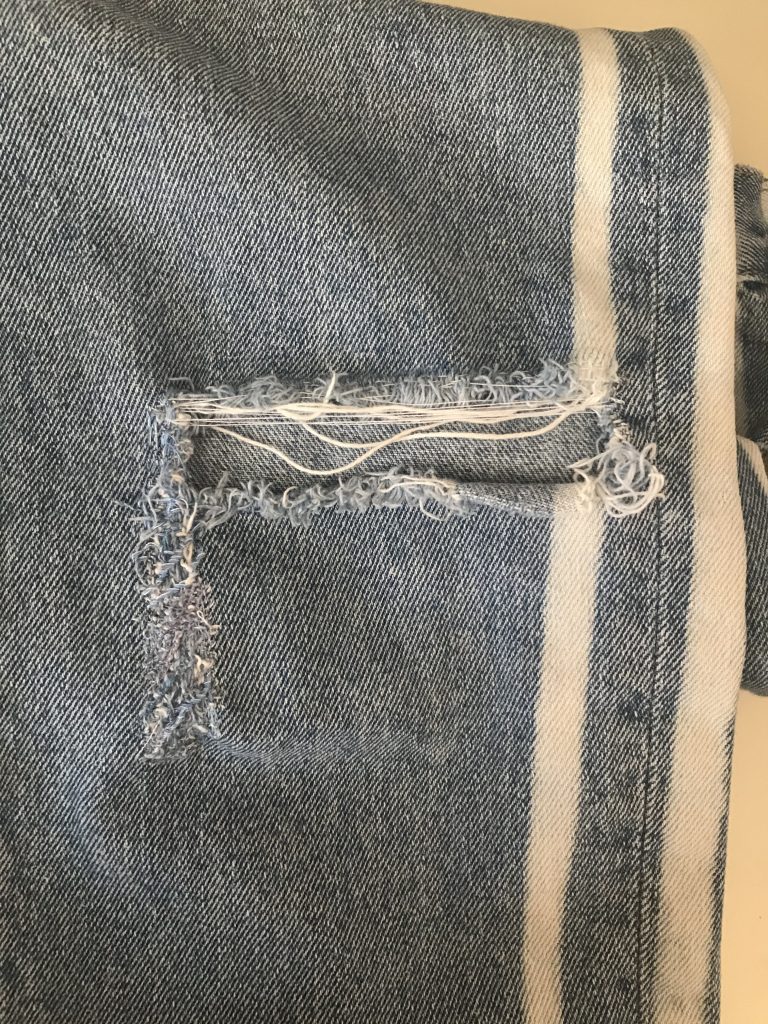
I also finished up by stitching around the perimeter of the rip. This allowed me to reinforce the sides, and prevent more of the weave from coming loose. I added more white weft threads in order to be able to hold up the original loose weft threads (coming from the right side). I also finished weaving in the original loose threads, so the loose-ends now look completely alike. Going up the left side of the rip with the new blended thread allowed me to make the mending look a little more cohesive.

Mended jeans when worn

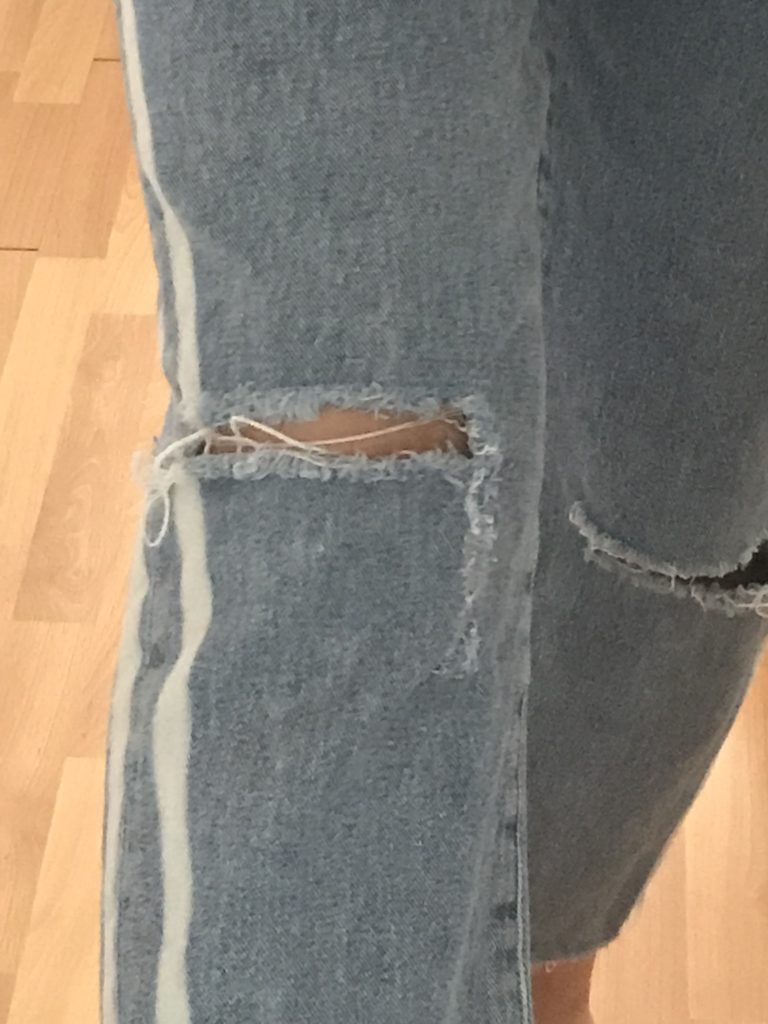
The mended area blends in pretty well from far away, and when worn. Up close, it is possible to see all the little threads and patterns that don’t match quite right, but I am pretty happy with the result. I do think that the strategy of using one thread at a time was slightly more successful than blending the colors, but it was very time-consuming. There is a bit of a trade-off between the two stratgies, but I think using them together, I was able to create a nice result.

Mending – Jasmine Lee

I chose a pair of ripped jeans as my item to mend for this assignment. It was a somewhat ironic choice, as they were meant to be ripped in their original form anyway.

The knee area of my ripped jeans

While the horizontal rip in the jeans were intentional, and were already there when I received them, the long gash on the left was unintentional and was created when I jammed my foot into the leg-hole. This caused a hanging corner on the knee of my jeans, unfolding and swinging around as I wore it. I decided to try and mend the rip using white and blue embroidery thread.

Mending process part 1

I sewed around the area of the gash to keep the loose threads in place, and then I created new weft threads with the white embroidery floss. I was able to weave these through the long hanging loose threads on the bottom of the gash, trying to blend the new thread with the old. I initially started with a plain vertical and horizontal weave, trying to just stabilize the fabric from ripping further.

Mending Process Part 2

After the denim felt stable enough, I decided to try pattern matching the mended area into the rest of the jeans. However, this wasn’t too successful due to not being able to match the mechanical lines of the jeans’ original weave, and due to the color differences in the threads that I had. I tried to lessen this by mixing two different types of blue, however it is still not quite successful. I do think it’s interesting to see the handsewn patch against the rigid order of the rest of the fabric. It almost seems like a whimsical patch of sky, with the interwoven white and blue strands. What’s also interesting to think about is that even if I mended the entirety of the hole in these jeans with this same method, I think they would still be called “ripped jeans.”

Tapestry Weaving – Jasmine Lee

This is my complete tapestry weaving after taking it off of the loom.

Full view of the tapestry weaving

When I first started this weaving, I focused on using learning the different techniques. I started out with creating horizontal lines, then a diagonal interlock, and vertical bars. I divided the three sections by leaving them separated by a slit. I also used rya knots to create the piling above the diagonal interlock.

Close-up of the weaving, showing the attached beads.

One of the biggest challenges in this weaving was the brown section with the braided/wrapped warp threads. Even though the piece was done on a cardboard loom, this technique made it hard to keep the warp threads even due to how tight the weft had to be wrapped. It was also challenging to keep the weft tight, because when pushed down it would pile up and create some bunching. I learned how to better overcome this in the wrapped section on the right (which is slightly neater) by always having the thread in my left hand, and doing the weaving completely with my right hand. This helped me keep an even tension.

While it did take an especially long amount of time, this section ended up being one of my favorite parts of the tapestry. I think the negative space it added really helped to balance out the more visually heavy parts on the top and bottom.

Close-up of tapestry showing gaps in the weaving.

I tried to echo the gaps by leaving some rows unfinished as I was near the top of the weaving. I was able to test out soumak knots and ghiordes knots (uncut) in this section. The red and the beads were also added for visual interest, as I thought the weaving was feeling a little too neutral and unbalanced due to the very visually heaving piling in the lower left.

Overall, I spent about 13 hours on this piece. I really like the asymmetry and how the colors came out. I am very happy that I was able to try so many techniques in one piece.

The Divide by Crossing Threads – Jasmine Lee

Shades of deep and stormy blue clash into a beige off-white in a large wall hanging overshadowing the woman standing next to it.
The Divide by Crossing Threads

found: https://crossingthreads.co/shop/thedivide-duality

Taken from the artist’s description, “The Divide” is an expression of the duality of light and dark, and how one cannot exist without the other. It is a manifestation of the artist’s self expectations for the future, and the burden of having self doubts. The piece also symbolizes the artists’ love for the ocean. While the irregular hand-knotted chains represent those that ground us and the interconnectedness of those relationships, the crack appears as an “opportunity to let the goodness of humanity shining through.”

The artist mentioned above is Kass Hernandez, who partners with her sister Lauren Hernandez. They are Australian-Filipinos whose parents raises them in the southwestern suburbs of Sydney. Crossing Threads is a business they started so they could create one-of-a-kind fiber art together. They aim to use only natural fibers in their art— including merino wool, alpaca, bamboo, silk, and linen in order to tread lighter on the environment. They also feature upcycled denim and upholstery. Much of Crossing Threads’ inspiration comes from the Australian landscape, especially the color palette inspired by beaches, gum trees, and the ocean.

The Divide close-up (1).
The Divide close-up (2).

I chose this piece because it changed my ideas of what weaving could be. It was almost the start of my realization of weaving as art. Before I saw this piece, my impression of weaving was that it was mostly functional, and fabric could be made out of it. This piece blew me away by how impressively textural it was. From far away, it seems like a pretty tame blend of blue into off-white, but as you look closer you can notice the details all blending together into one cohesive piece. For example, in the blue section alone you can find strips of blue plaid, denim, different yarns, and fabrics that aren’t even blue. I love the cohesiveness of the piece at first glance, before I am able to discover all the rich detail in it.

” The Divide” was created using the artist’s signature ‘interknot’ technique, made up of weaving hand-knotted chains of various texture and thicknesses which graduate to a relief.

Improvisational Weaving – Part 3 – Jasmine Lee

For my deeper dive, I chose to complete one large weaving. For part 2 of the assignment last week, I was able to explore using colors, different types of threads, and different types of looms. I decided to take it a step further this week in terms of color choices, fabric choices, texture, and composition.

A rectangular weaving of woven mint twine, white satin ribbon, cream cotton lace, and brown linen strips, interlocked within a warp of white and grey tulle on a wooden frame.
Full weaving.
Close-up of the previous weaving, with the different materials used shown layered vertically upon each other.
Close-up of an edge of the weaving.
A second close-up of the previous weaving, showing the materials tousled and entangled with one another.
Close-up of the center of the weaving.

In this weaving, I chose colors that would go well together. Since the frame was a light tan, I chose the cream lace to complement it. I also included the woven mint twine and linen ribbons to incorporate more texture. There was a nice contrast between the looser weave of the twine, and the tight weave of the linen ribbon. The white satin ribbon was also chosen to brighten up the colors of this piece, with the smooth, shiny texture of it intentionally contrasting against the rougher, natural materials. The satin helped marry the more natural strips of fabric with the synthetic tulle that was used as the underlying structure. Tulle, seeming delicate but deceivingly strong, was use to tie the ends of the strips with one another. The places where they were knotted were left uncut, to allow the viewer to see more of the process within the piece.

Opacity was also something I explored in this piece. In certain areas, I would use more tulle. On the other side, I would use rougher, opaque materials. As I switched this up, row by row, it created a nice pattern where light would shine through in different parts.

A white, green, beige, and brown weaving is propped up against a window. Ambient light shines through the horizontal ribbons of white, while shadow is created by the darker material in the weaving.
Same weaving, propped up against a window.
Vertical ribbons of light and shadow, created by actual ribbons of white, green, cream, and beige.
Close-up of the same weaving (propped against a window).

The materials used in this piece all have a backstory to them. I bought the tulle when I was first learning to sew, and it was used in the first thing I made. The lace was taken off a shirt passed down by my aunt, and the various ribbons were given by a friend of my mom’s who passed them on when she heard about my interests.

Something I would like to work on after this piece, is to better explore the different ways I can keep a warp on a loom. I would have loved for this piece to seem unattached to the frame on all four sides, with the only strands keeping it on in the four corners.

Materials: 20×16 canvas (wooden frame only), white tulle, gray tulle, white satin ribbon, mint woven twine, beige linen ribbon, cream cotton lace

Improvisational Weavings – Jasmine Lee

From my pile of found materials, I decided to choose three different kinds of looms. I ended up using a square box lid, a toilet paper tube, and a pringles can lid. For my warp, I ended up using white thread because my objects were pretty small in size. For my weft, I used found yarn, plastic string, polyester thread, and embroidery floss. I also attempted to use wire, but found that it kept bending undesirably because it had been curled into a spool for so long.

Materials: toilet paper tube, yellow and blue polyester thread, white cotton thread, tape

Intended Effects/Challenges: I wanted to have a grid of different colors overlaying each other, but it was extremely hard to keep the threads in place and perpendicular form each other.

Surprises: The smooth polyester thread refused to stay in place so I had to constantly keep pushing the weft down. When I let it stay loose and cut back on the tension, it created nice repetitive curving patterns.

Materials: pringles can lid, embroidery floss, white cotton thread

Intended Effects/Challenges: I had the idea of poking holes in the lid so the warp threads would stay where they were supposed to go. I had the intention of creating a mandala-like weaving.

Surprises: The embroidery floss piled up on each other as I wove and had thickness to it. I ended up with a thick weaving with a soft texture than the 2d pattern I expected.

Materials: box lid, yarn, plastic string, white cotton thread

Intended Effects/Challenges: The white thread was hard to keep in place, so spacings had to be fixed at the end (when the weaving was more stable). I intended to create a plaid pattern, but as the spaces become tighter, it became harder and harder to insert the weft.

Surprises: The colors worked together better than I expected.