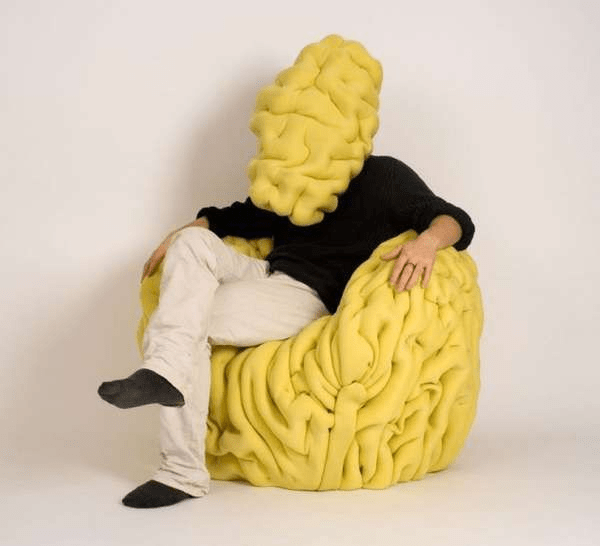
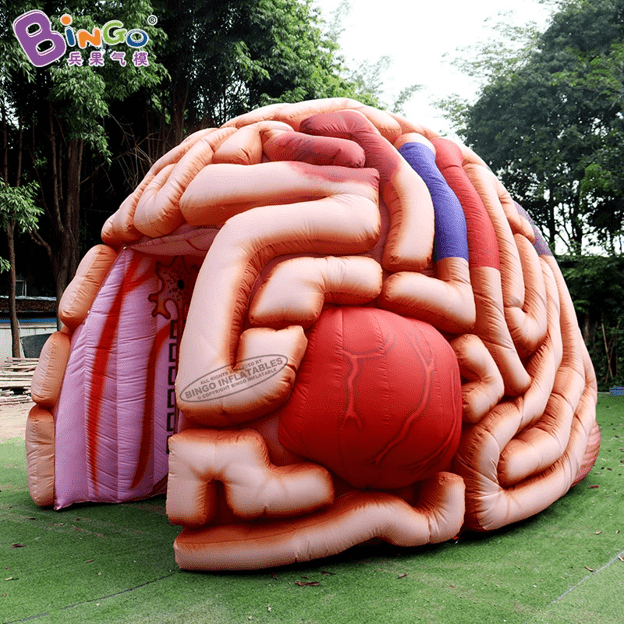
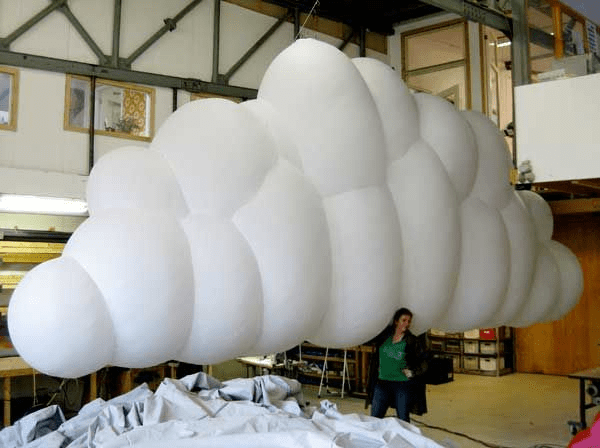
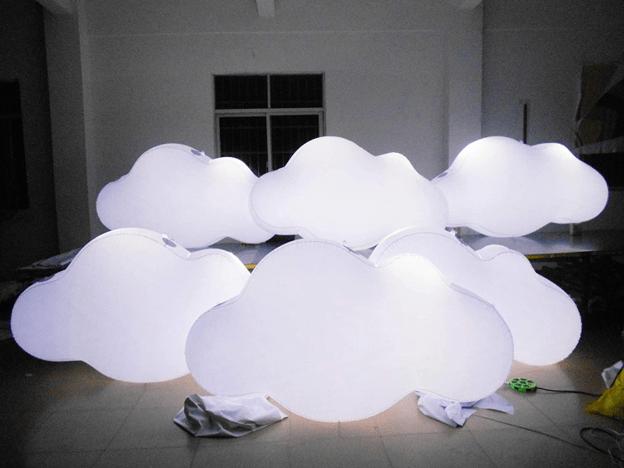
Something phantasmagoric may feel or appear to be the product of a crazy dream. Our ideation leads us to a peculiarly literal fit within this theme, attempting to create a larger than life consuming, interactive, nightmarish experience. Our inflatable would span from the floor to the ceiling, with a large brainlike inflatable reaching about eye level while a large dream cloud hangs ominously and massively above, suspended from the ceiling. We wish to illuminate the brain with LED light sources, giving the impression of engaged neurons or simply an artistic representation of the brain. The cloud(s) (there may be multiple) would be white or black depending on future discussions on effective creepiness, with the largest having a large flat section on which the animators can project their phantasmagoric animations.
Early ideation of the brain-cloud idea
A few challenges we see are the multiple inflatables that are being created and thus the need for multiple fan sources This will make installation very difficult, with the ceiling cloud a particular challenge since it is not safe for us to install this piece ourselves. We will have to work with the staff at WQED in designing this inflatable to make sure it will not only work as intended but also be safe to install. Also, we would like to make this an interactive experience, embedding a chair into the brain, or roughly achieve some seated arrangement such that it appears to be the individual’s dreams/nightmares being projected above while the viewers watch in awe. Ideally, we would like the inflatable to envelop the chair, with the structure inside the inflatable. However, more realistically, we may just place a chair or stool in front of the inflated brain to achieve a similar effect.
Our proposed layout/construction of the brain-cloud structure
Bird’s eye view of our proposed installation
To construct our project, we will need white and black nylon fabric, LED light sources (could be programmable) [1 or 2], fans [2], and a chair/stool [1].
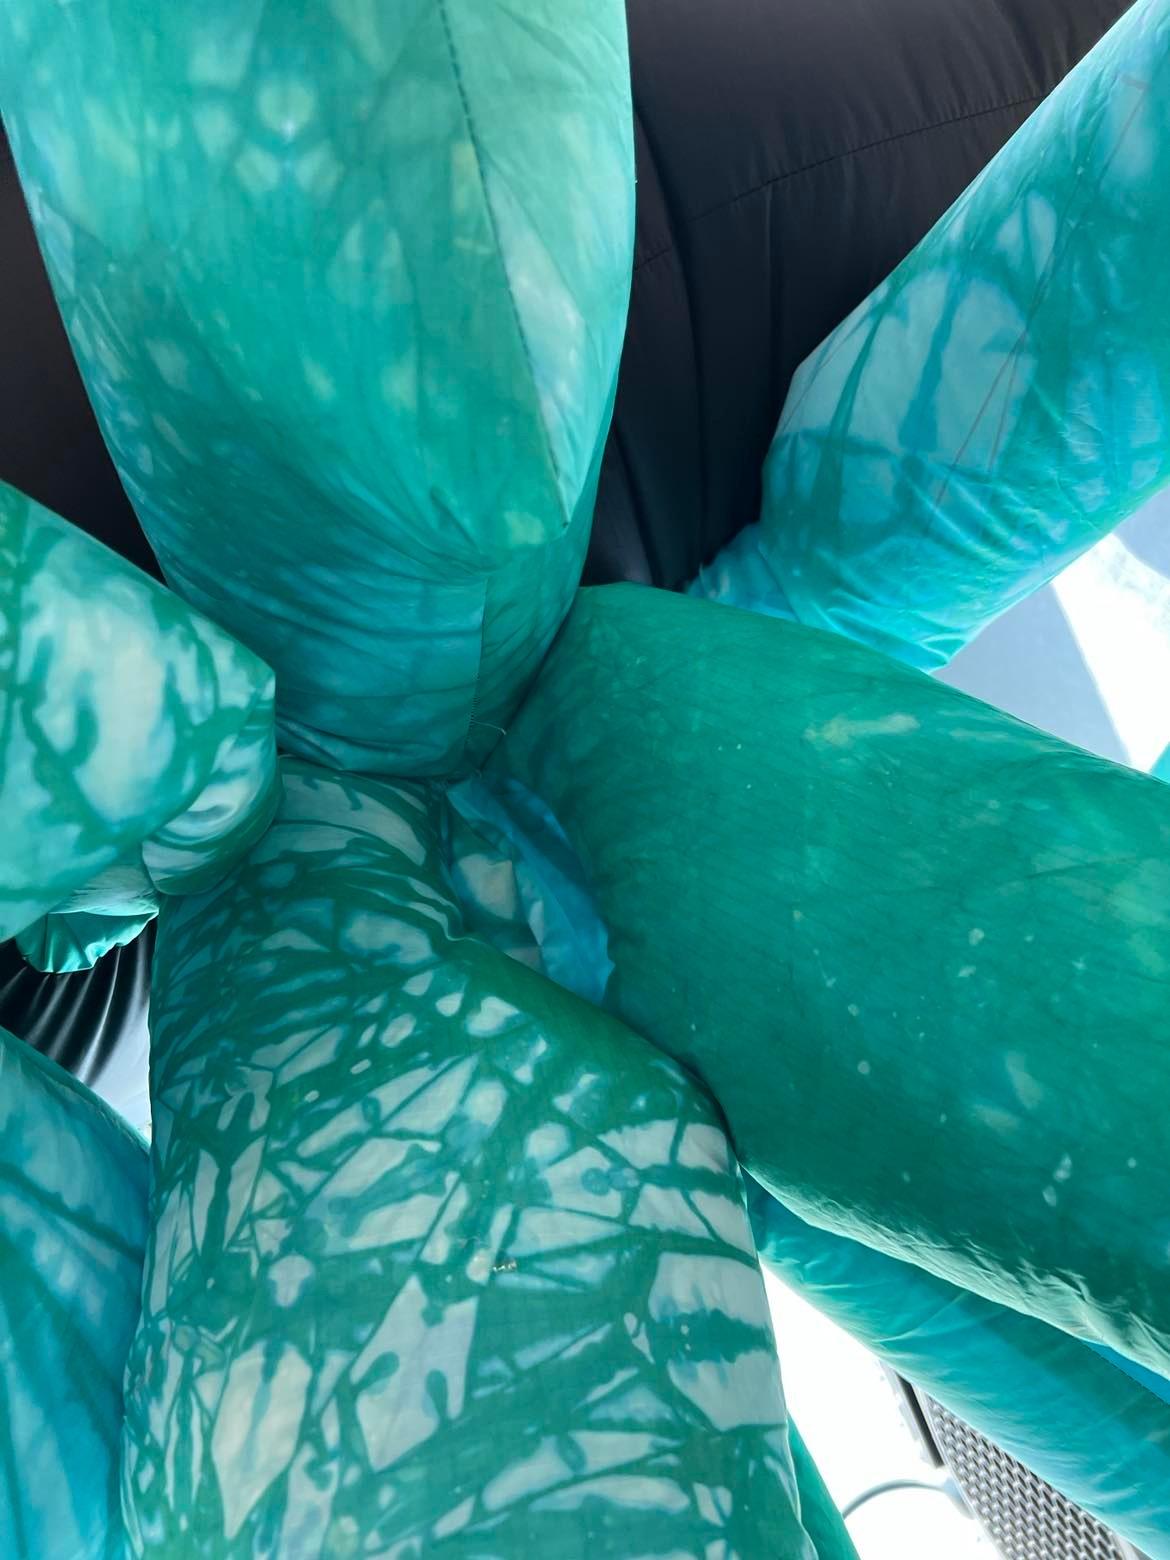
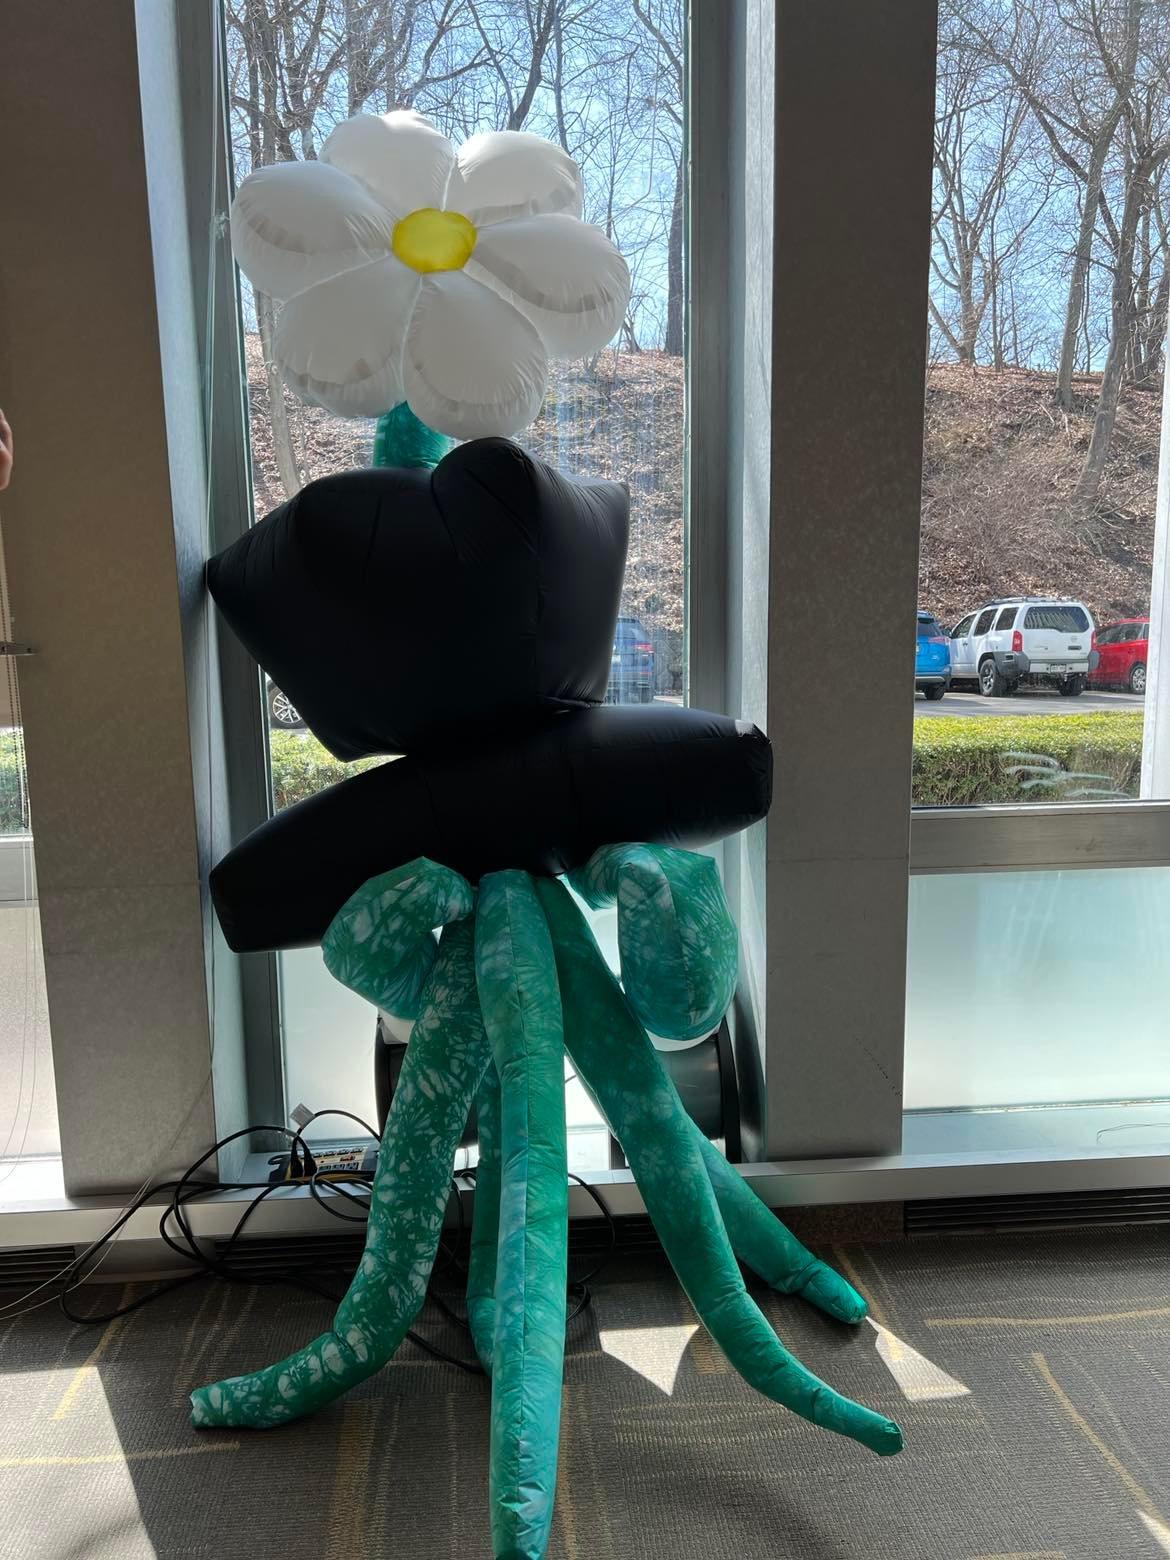
Our final piece consists of a flower, flower stem, flower pot, table, roots, and connection between roots to the fan. The flower & flower pot pieces are inspired by Sophia’s first Push/Pull assignment and the roots are inspired by Douglas’ first Push/Pull assignment. We split up the design and construction of these pieces based on whose original piece we were referring to and its location. We then both designed the pieces that are needed to build the different inflatable parts and checked in with each other to get each other’s opinions. We then constructed the pieces separately. Sophia mainly worked on the flower, flower stem, and flower pot. And Douglas mainly worked on the table, roots, and the connection between the roots and the fan. After we both completed our pieces, we met to connect them and inflated the final piece to test it out.
More specifically, for the flower piece, we chose yellow and white because we want to embody the innocence, beauty, simplicity, and joy of flowers found in the wild like daisies. We also wanted to make the daisy symmetrical and delicate. It was sewn 2/3 by hand and 1/3 by machine. Unlike the daisy, we want the roots to grow out more freely and each with unique shapes and sizes. The form of the roots is a mix of organic and free-hand drawings to create the long winding roots. The other parts: table, flower pot, and stem were constructed based on specific measurements so that it makes connecting each piece easier. After putting together the pieces, we added two places for airflow and attached them like roots.
Discoveries:
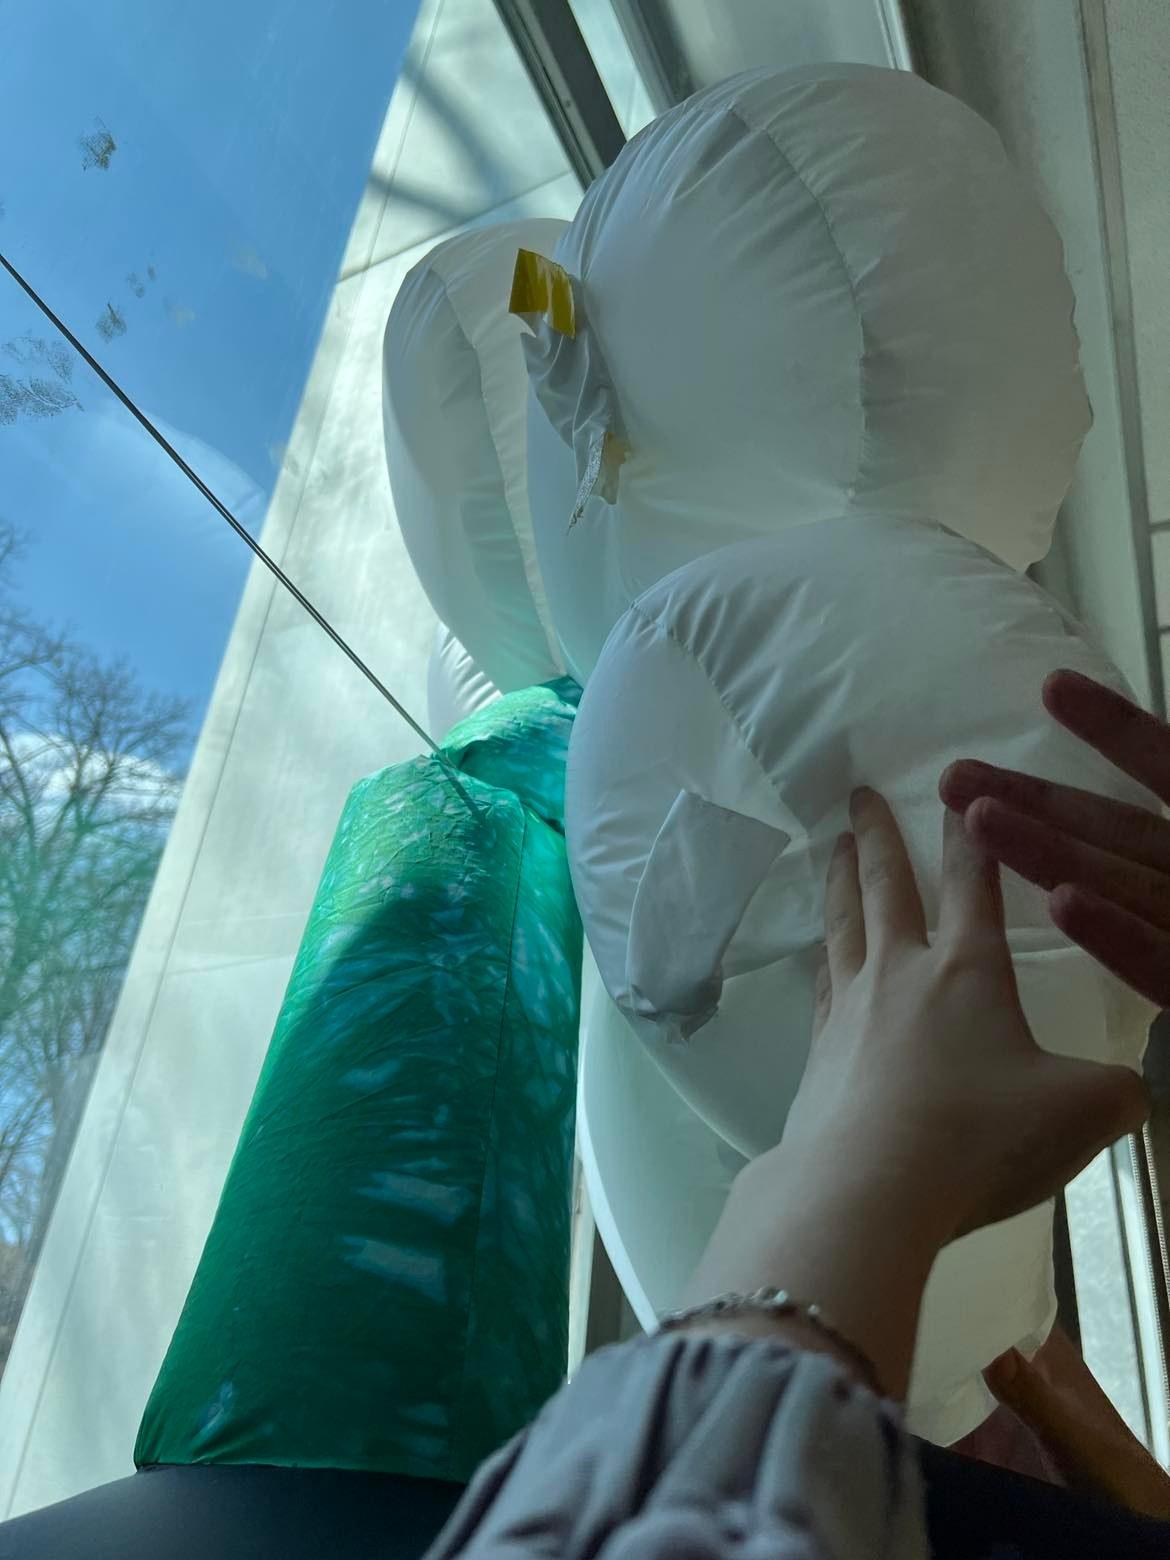
We realized that measurements are difficult because even if they are perfect, imperfect stitching can add tension that affects the true size when inflated. We had really specific measurements that we wanted to use to make the pieces. Because we know our piece would fit between the window area, we took the measurements of the window. We also noted how tall and how large we want the final inflatable to be. We used these measurements to make our pieces. Imperfect sewing and tension of the thread in high-density areas caused the final outcome to not be the originally intended size.
We also realized the importance of working in small pieces until we need to connect them to make bigger pieces. One of the guest speakers mentioned this and we used this strategy. It made the construction process easier. For example, for the flower piece. Sophia first made all the petals then connected them to each other. and then when she completed the flower, stem, and all the pot pieces, she put everything together. This was much easier than adding to one piece as it could get too big and hard to work with. Lastly, sometimes it might be easier to just hand sew instead of putting in too many pins, especially when working with material that is sticky on one side.
Successes:
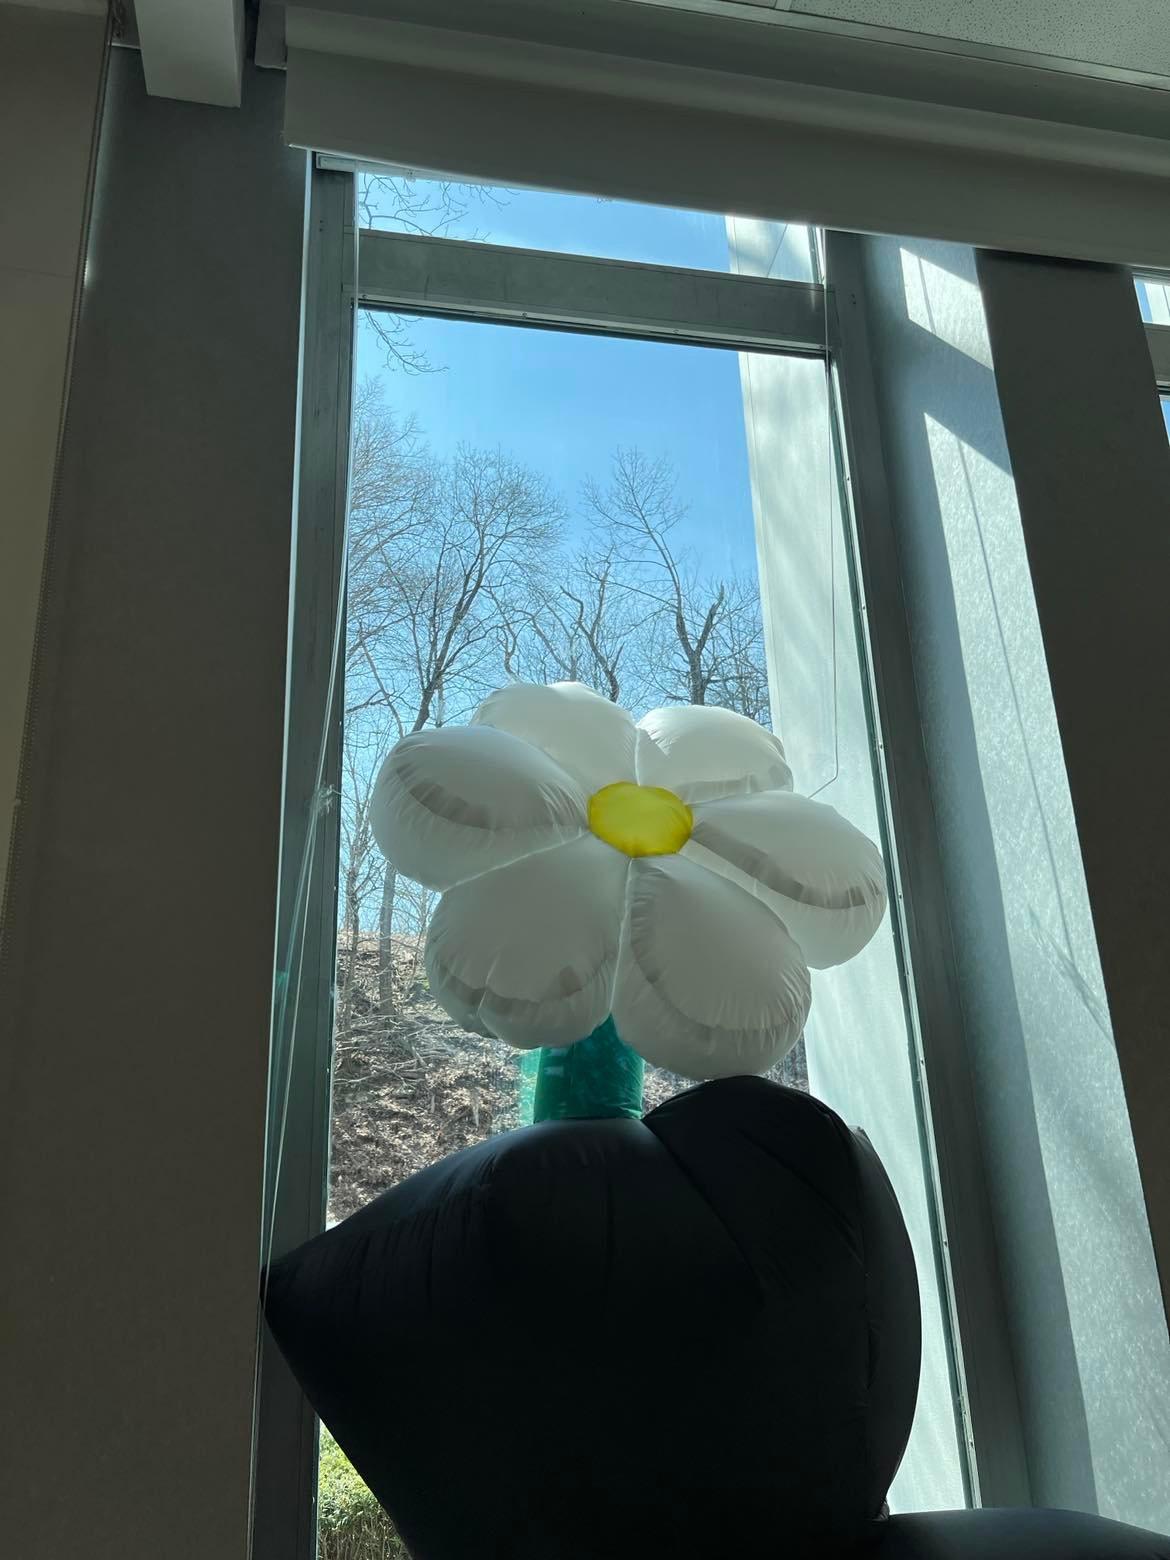
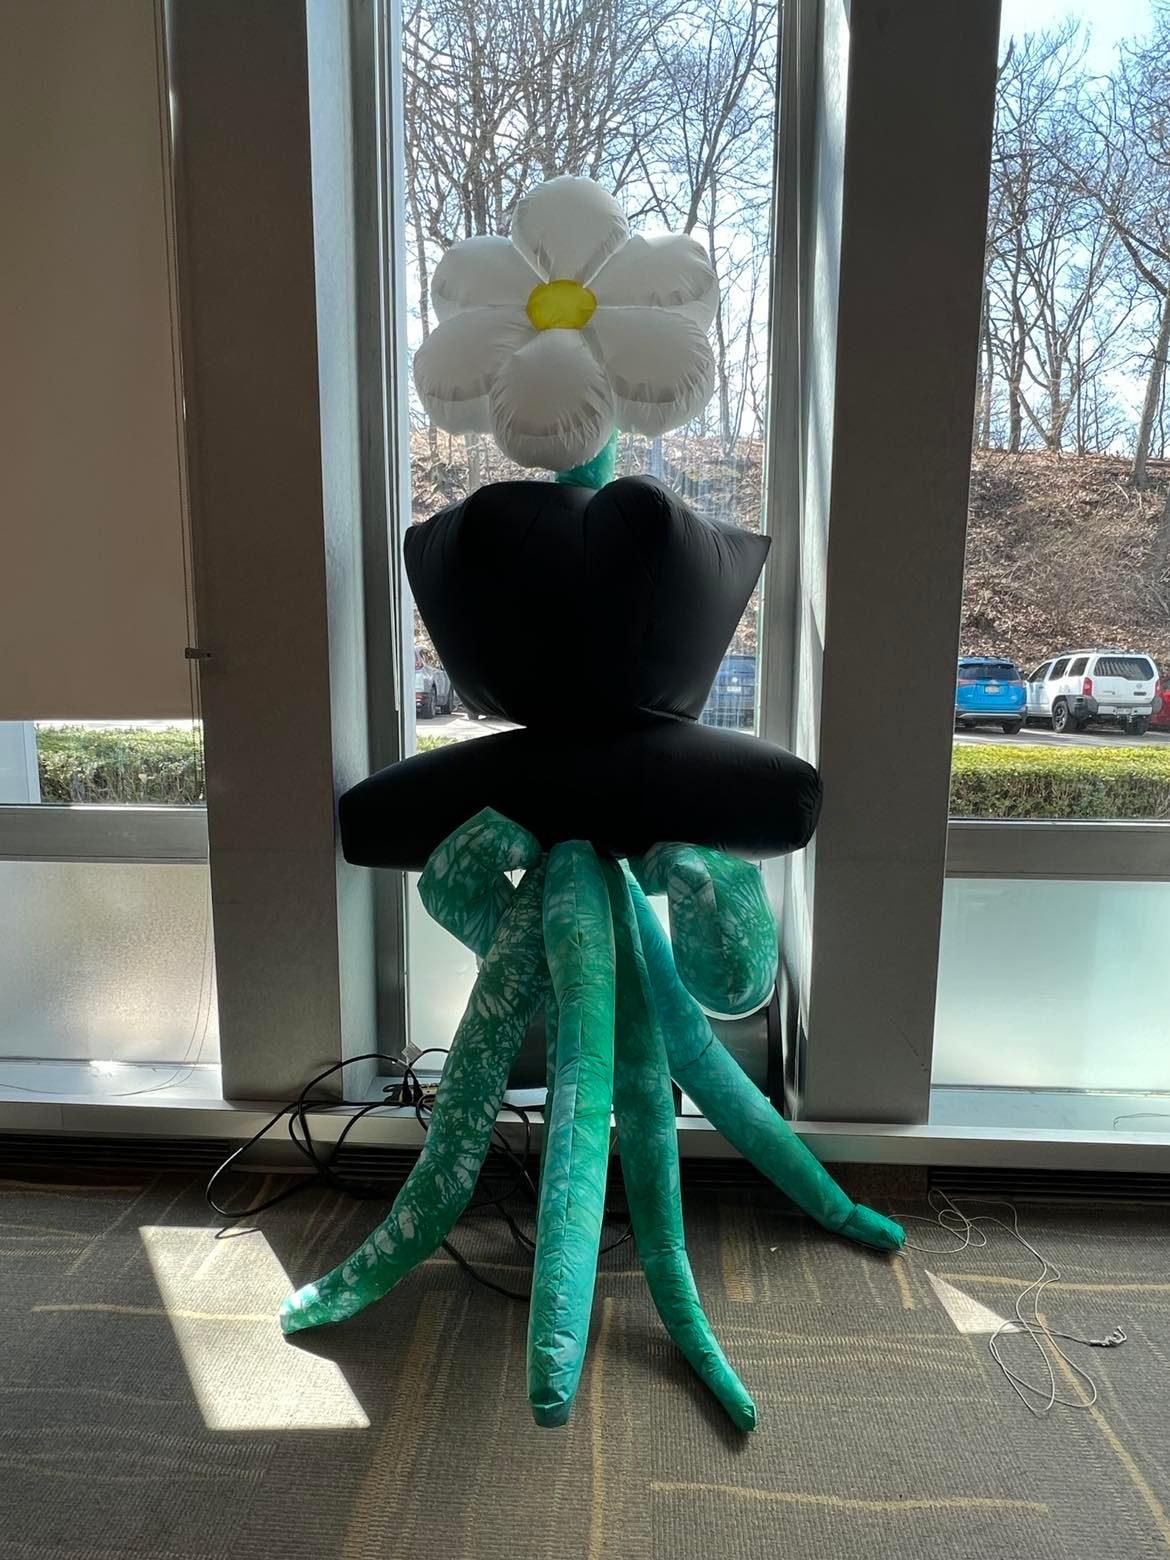
We think the piece was effective in eliciting a meaning of seeing the power and beauty of life not without the rough and expansive foundation upon which it grows. We also find it a success that with such a large piece, that had such tiny sewn connections, we managed to build a piece that retained air very well and inflated with the help of two fans. We also thought the overall placement of the inflatable really added to the project. It gave us natural sunlight which worked well for the flower. The glass window allowed us to see outside and the real plants outside added to the root design.
Challenges:
We had several challenges. One of them was being able to imagine the 3d piece being 2d and really thinking about what are the smaller pieces required to build it. Doing the measurements for the pot was also difficult because only two of the 6 sides are the same measurements, all the other pieces are different so each piece has a specific place it belongs. It was also difficult to install the pieces to each other. Because of the changes in weight, the connection of different pieces changes the overall design of the inflatable. Going forward we will try to practice understanding better where the support comes from during installation and how to design the inflatable in order to be durable and have a longer inflated life.
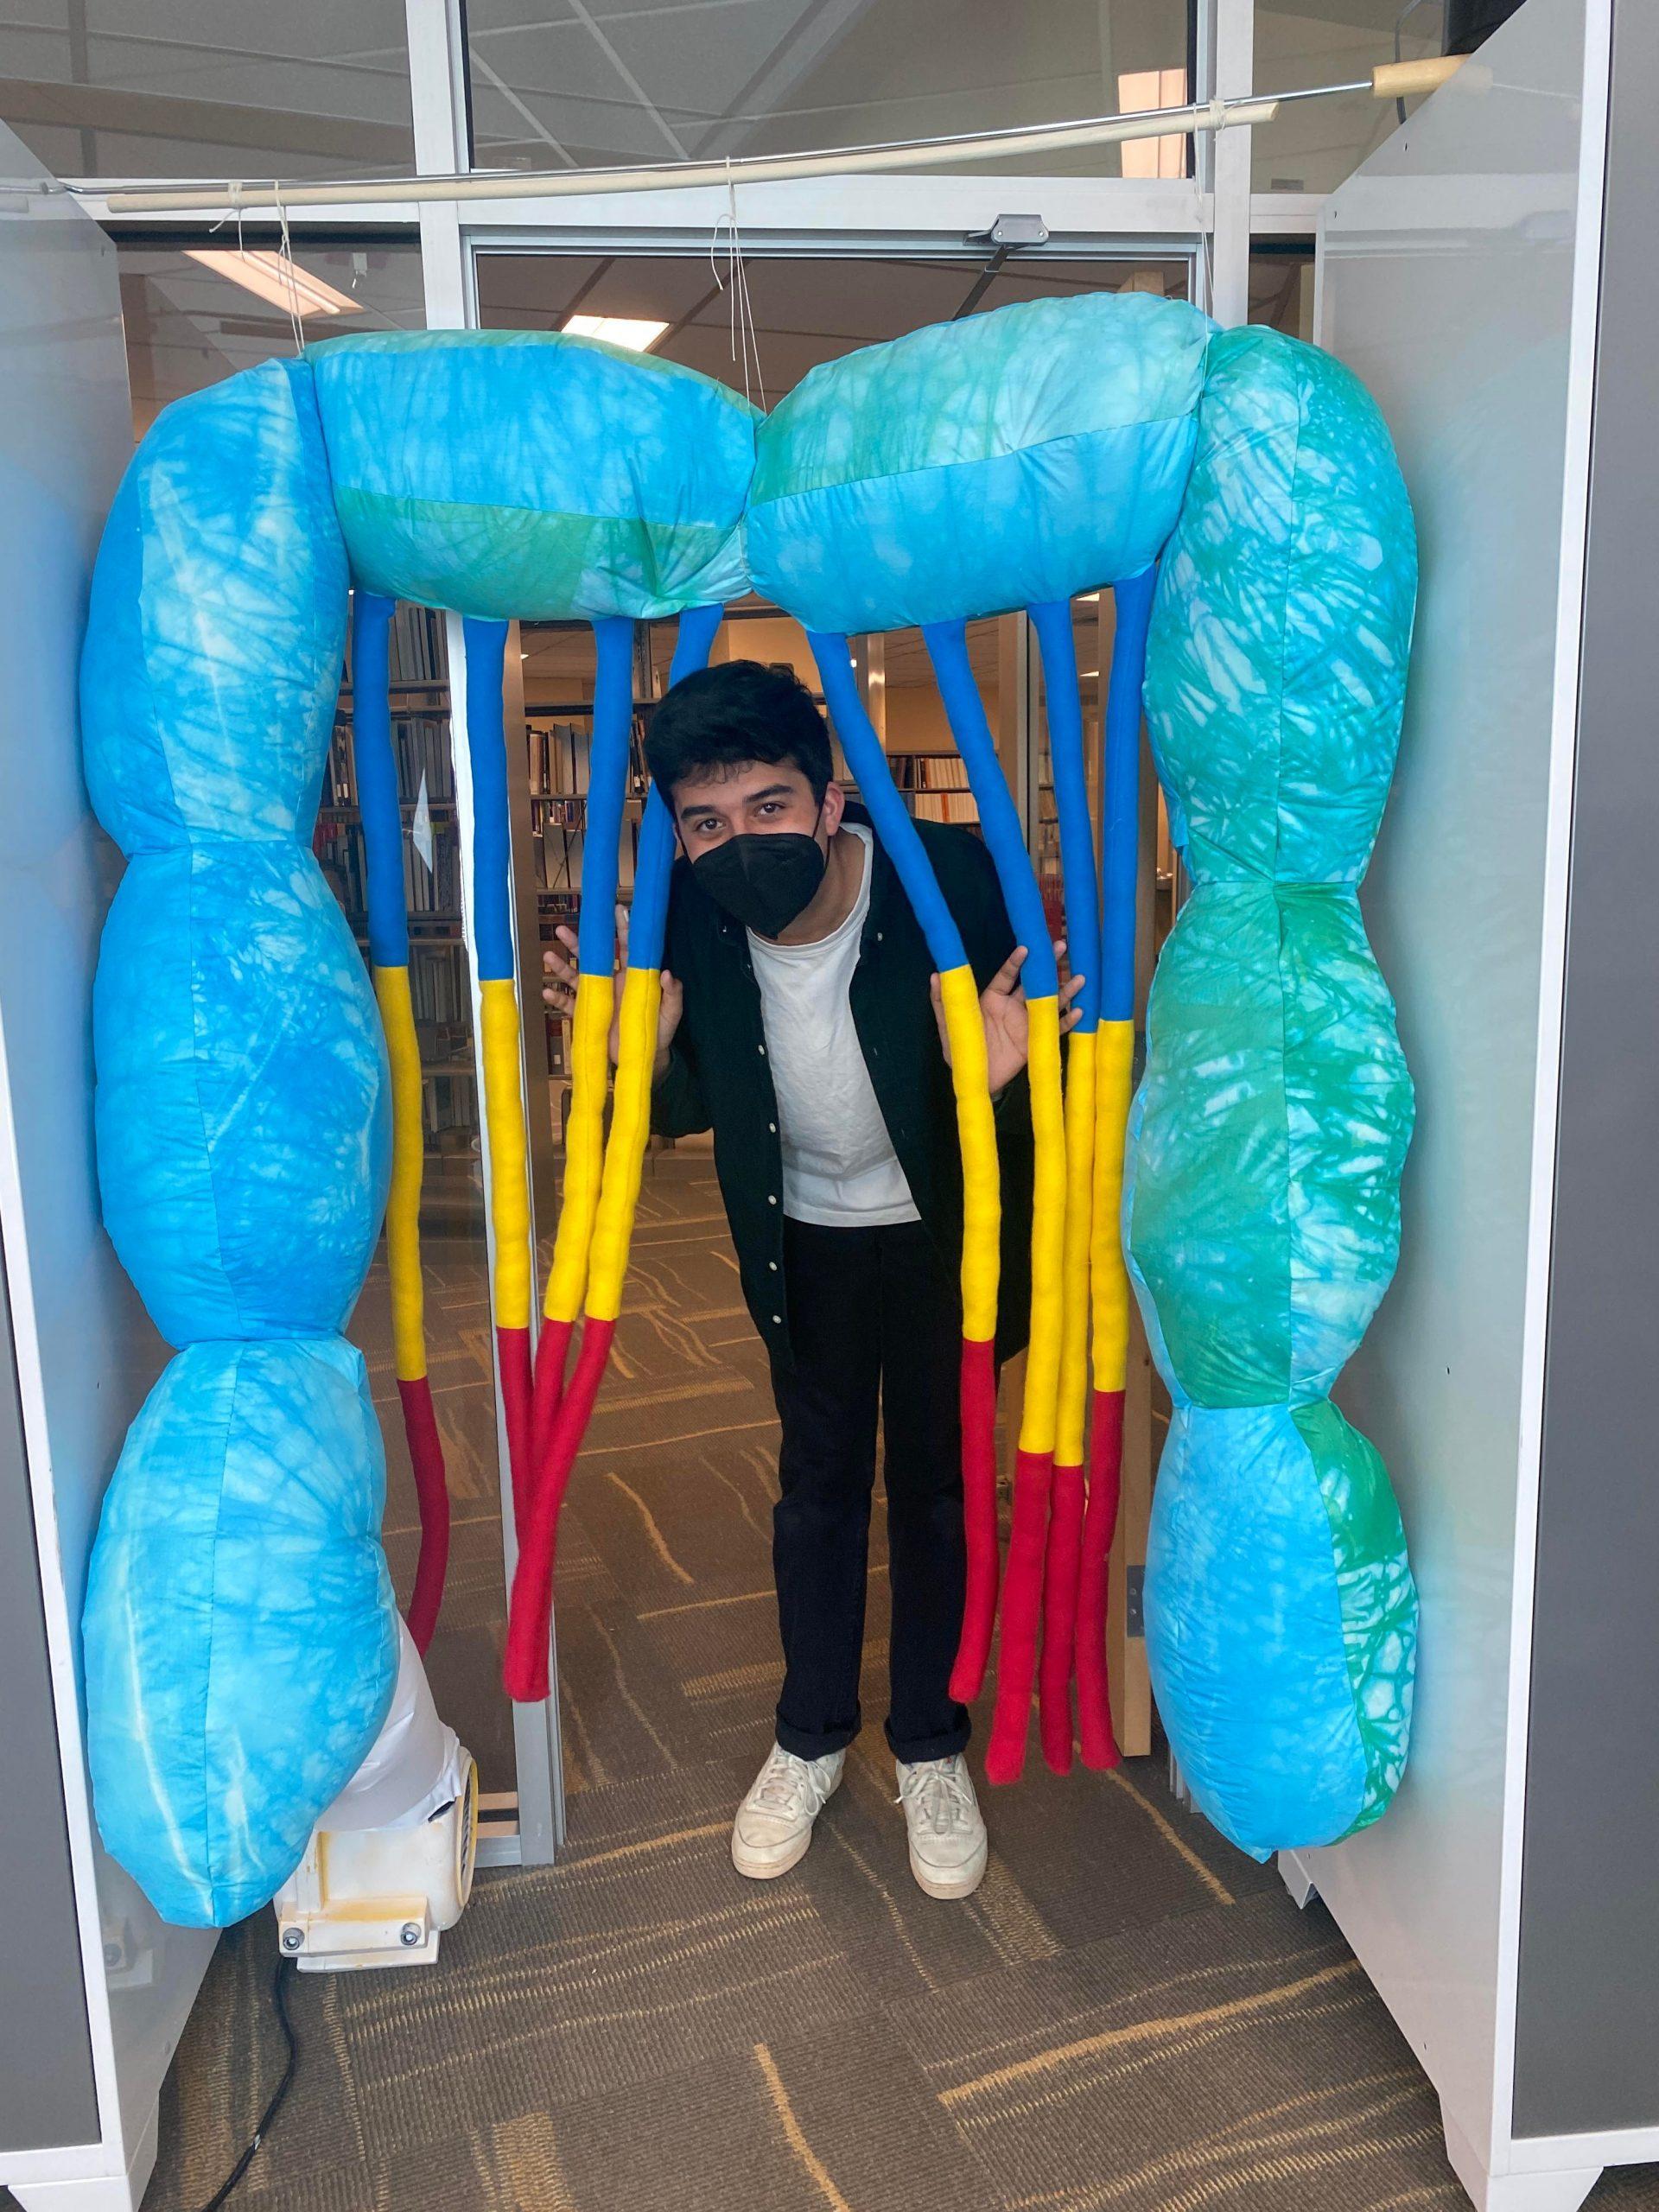
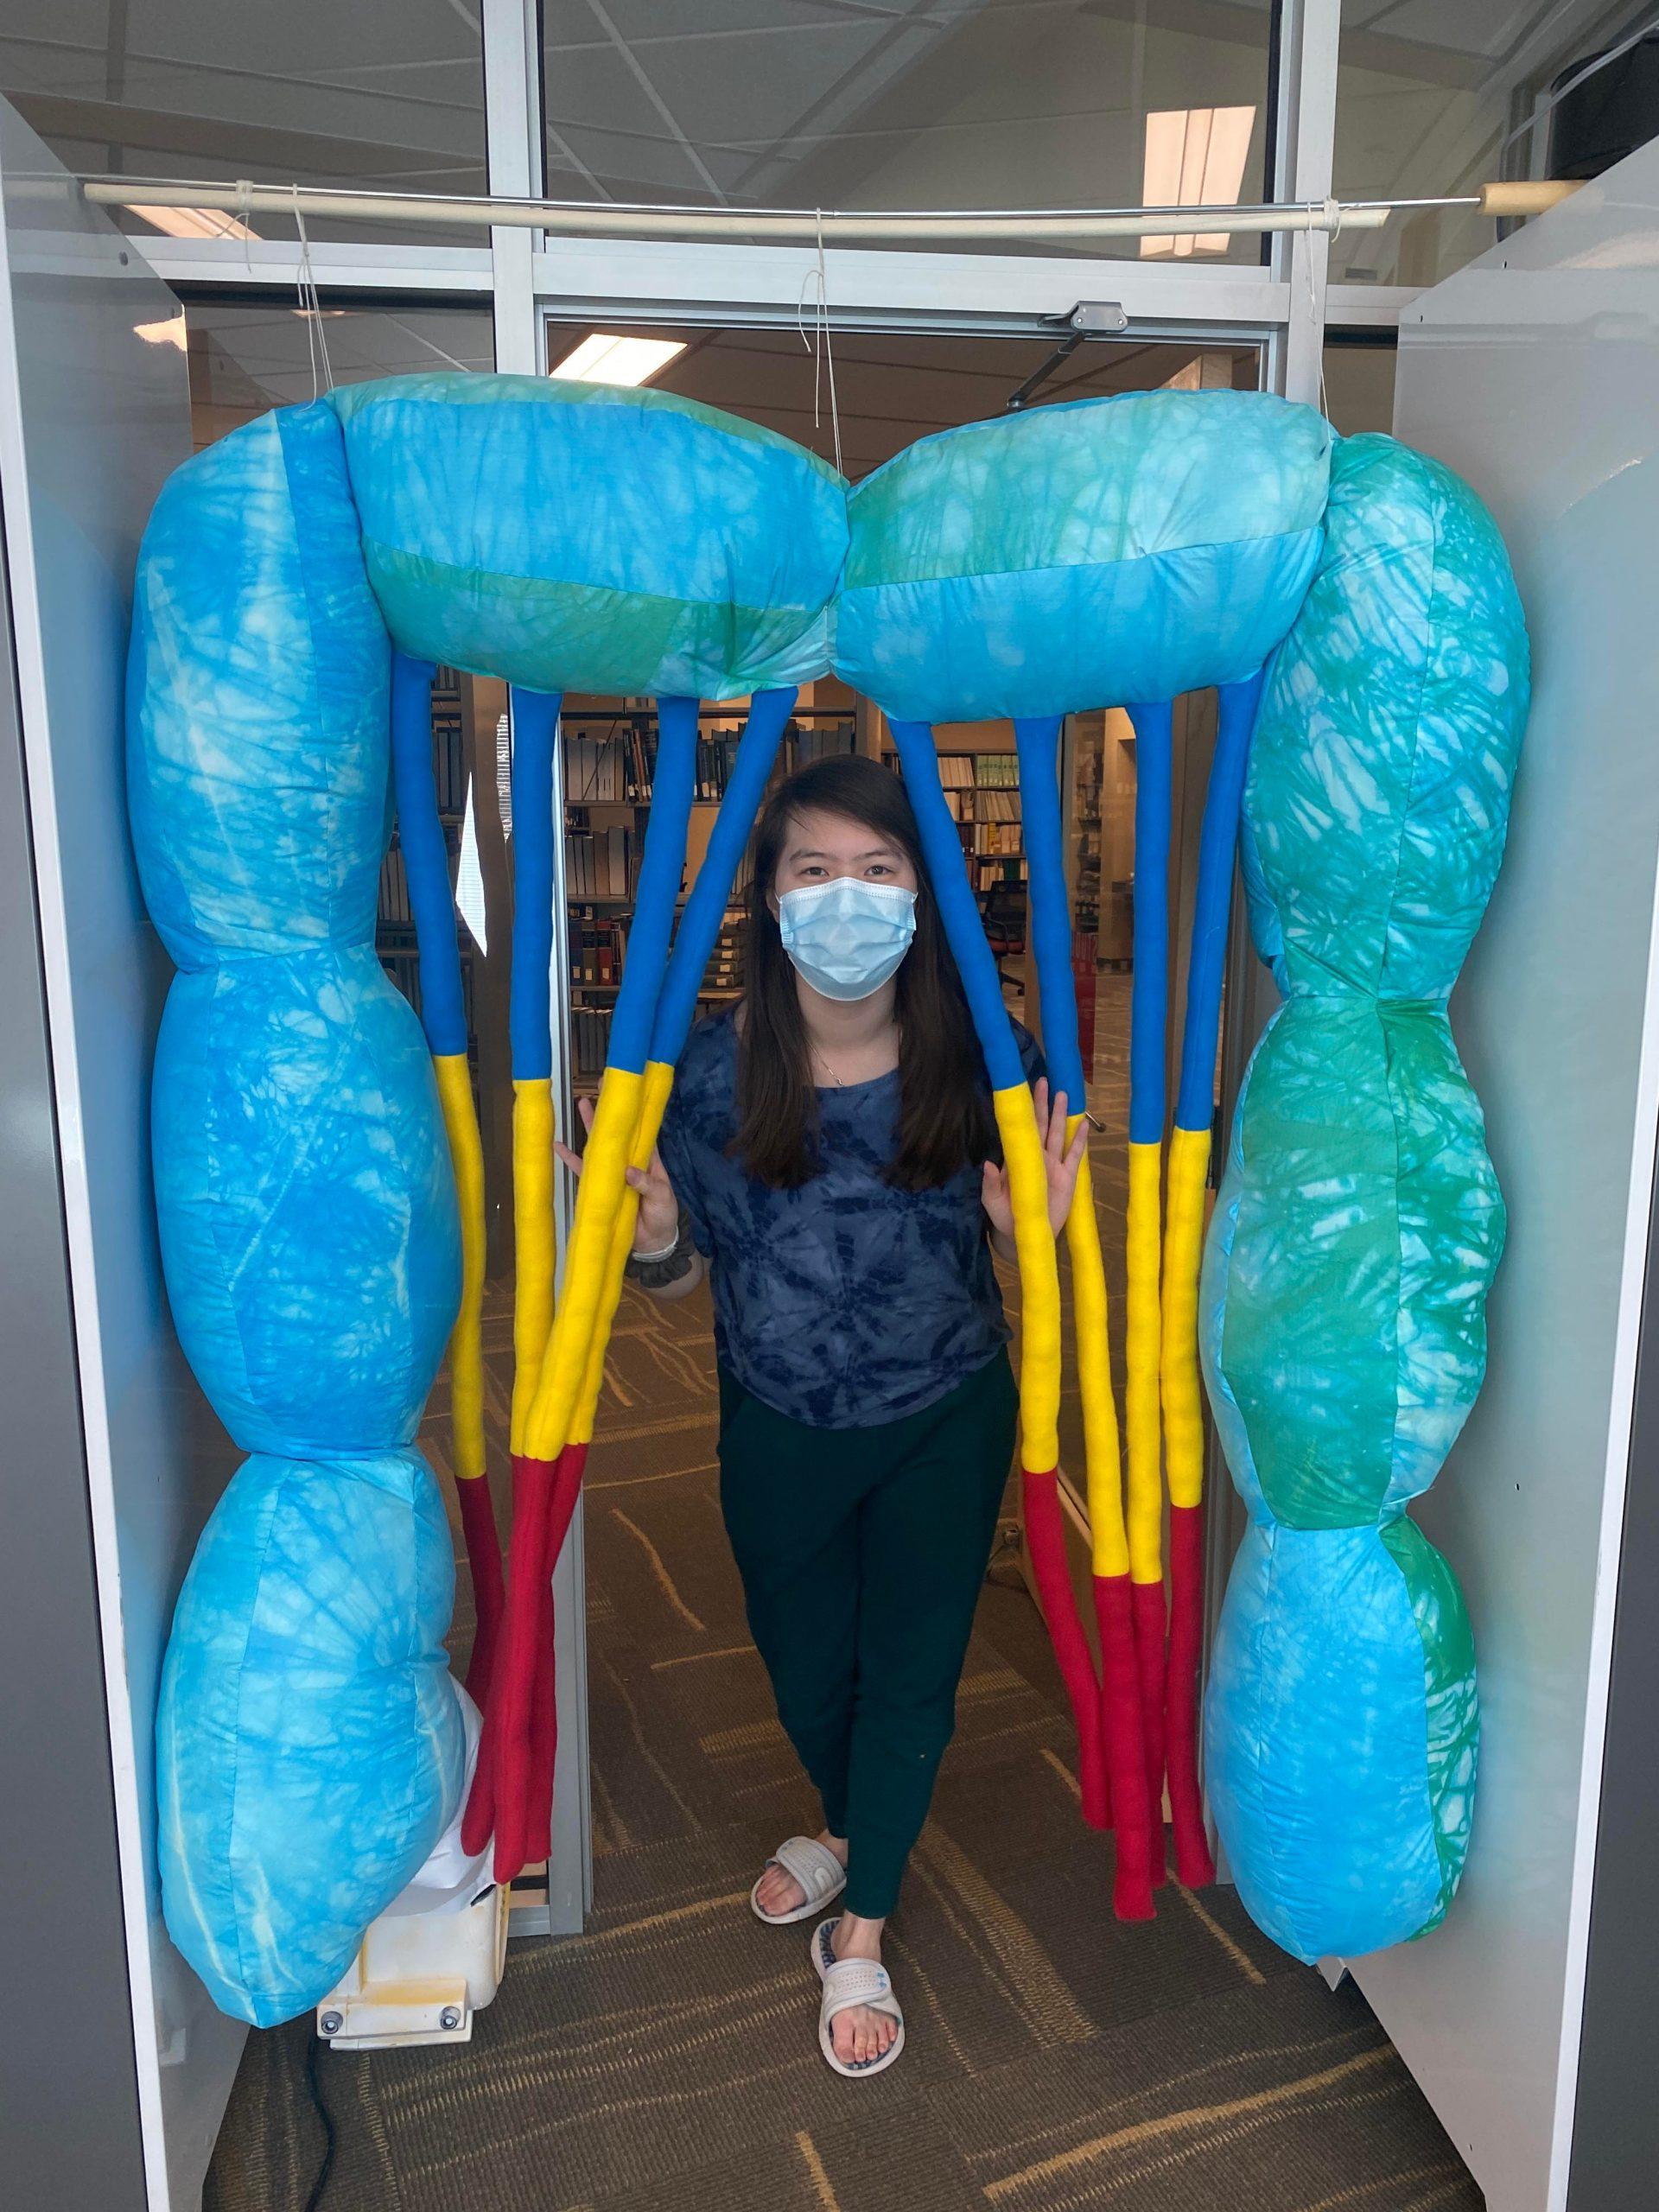
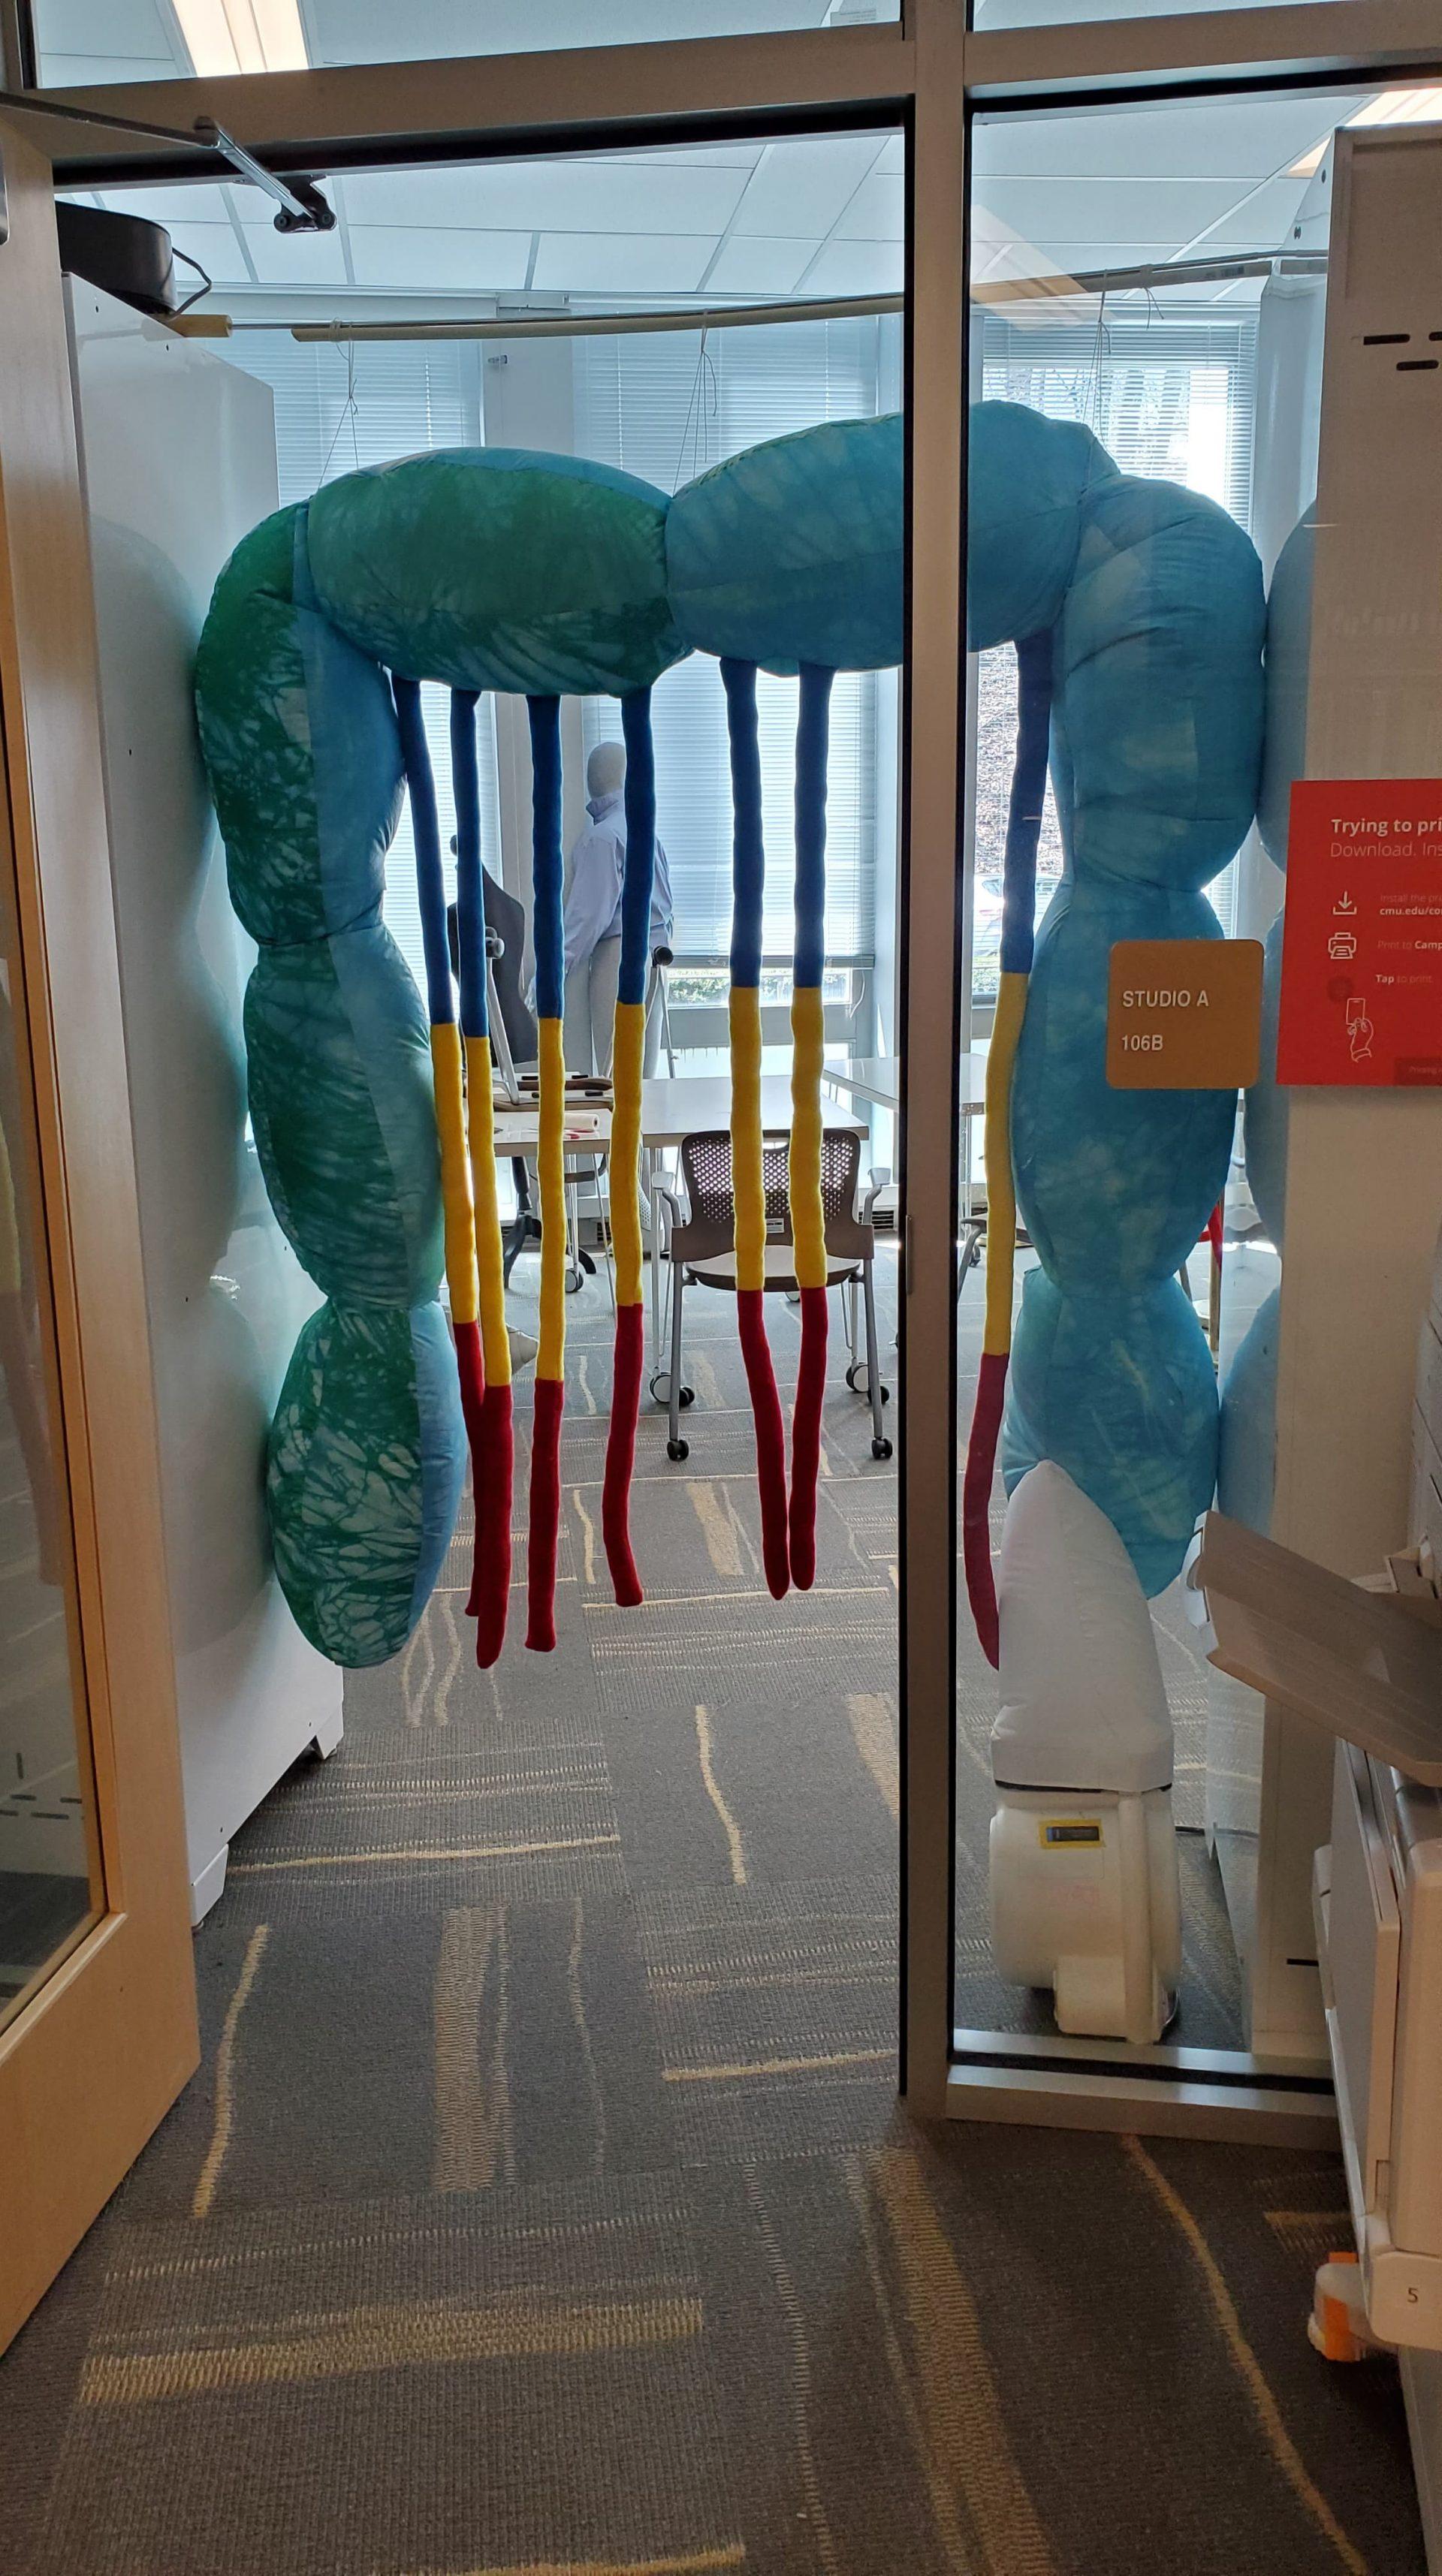
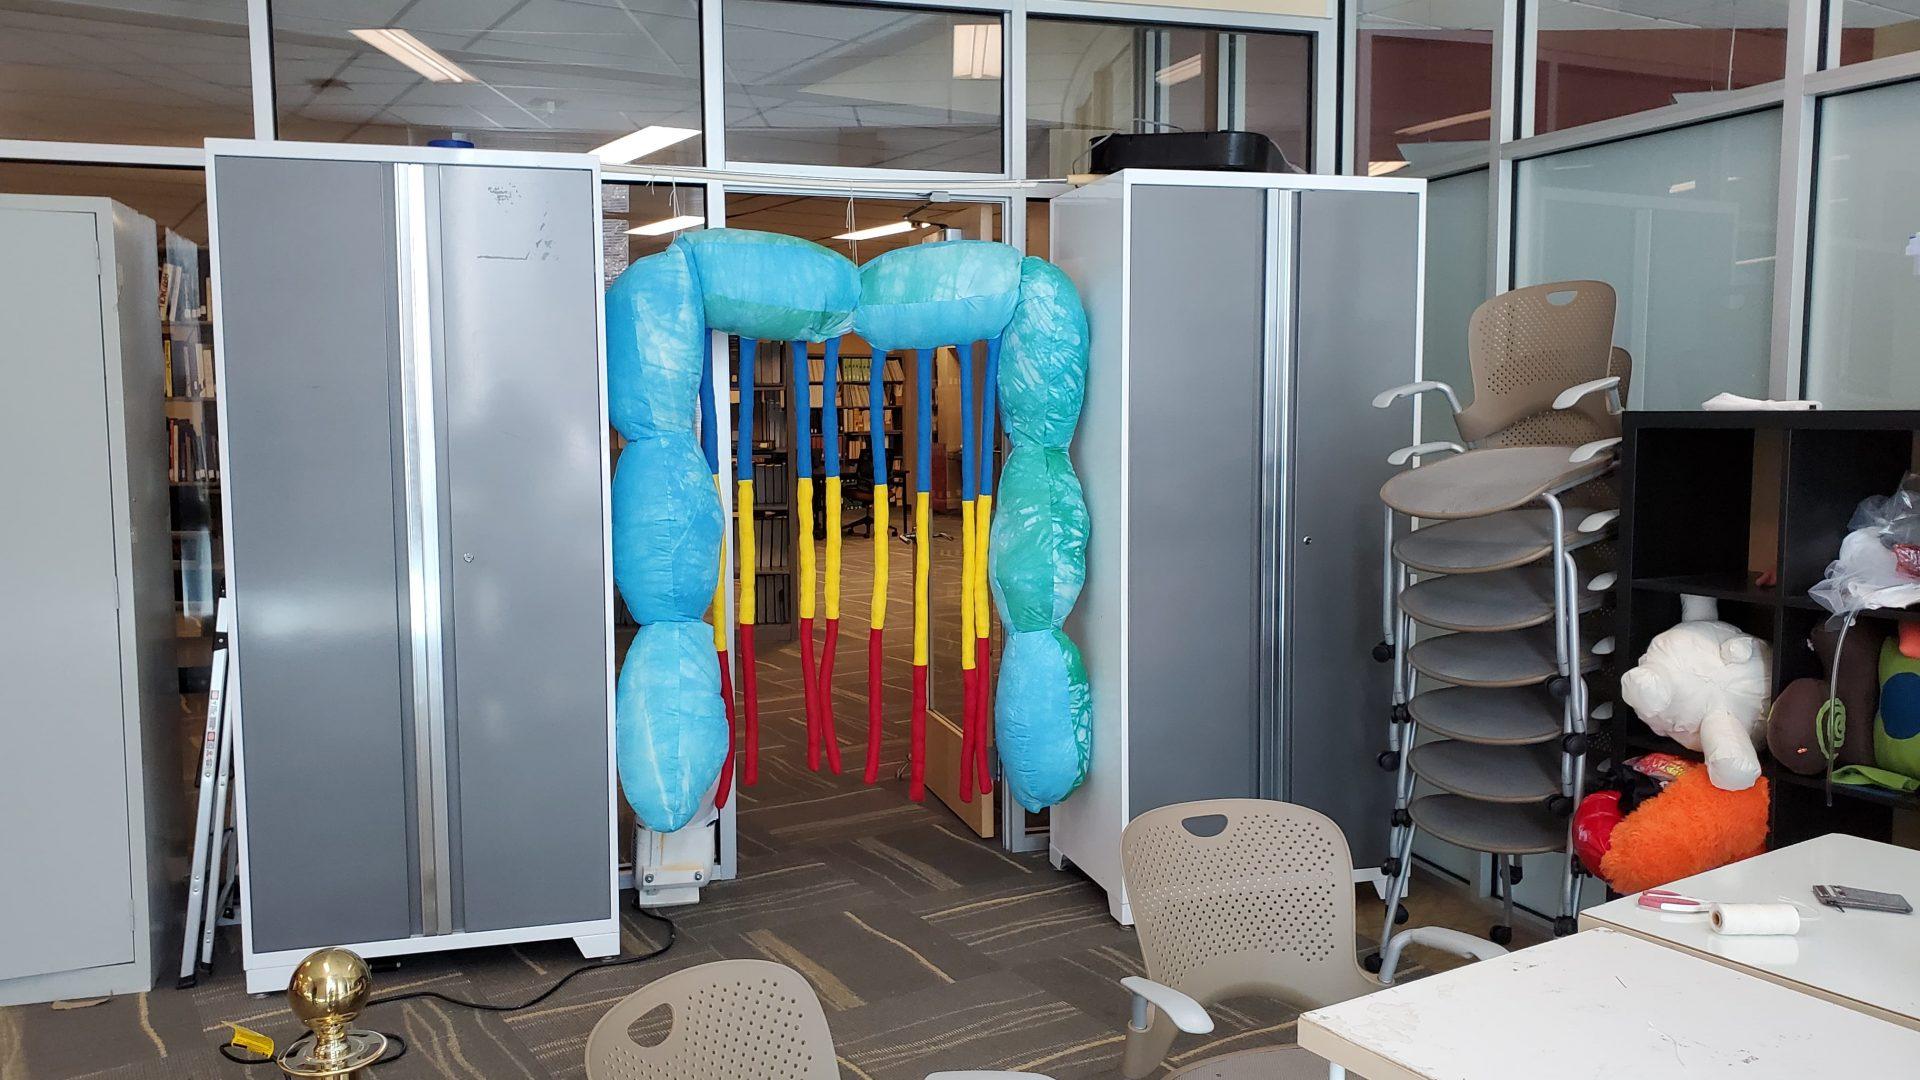
We began this project by ideating different elements of our designs of our push/pull part 1 objects and how we could combine them. For this design, we combined the arms of Lori’s fruits with a modified version of the twists from one of Asad’s objects. We knew we wanted to make a piece that was interactive in some way, and we decided that an archway with hanging, movable components was the best way to provide an interactive experience while still within scope. Once we decided to make an archway, we were looking for locations to put our object where people could walk through it but it wouldn’t interrupt traffic flow. We found the doorway in Studio A and figured that it was the perfect spot to put our inflatable.
Our project was completed entirely asynchronously due to both of our crazy schedules before, during, and after spring break due to other commitments. As we designed our inflatable, we were mindful of designing an object that could easily be split into components that each of us could work on.
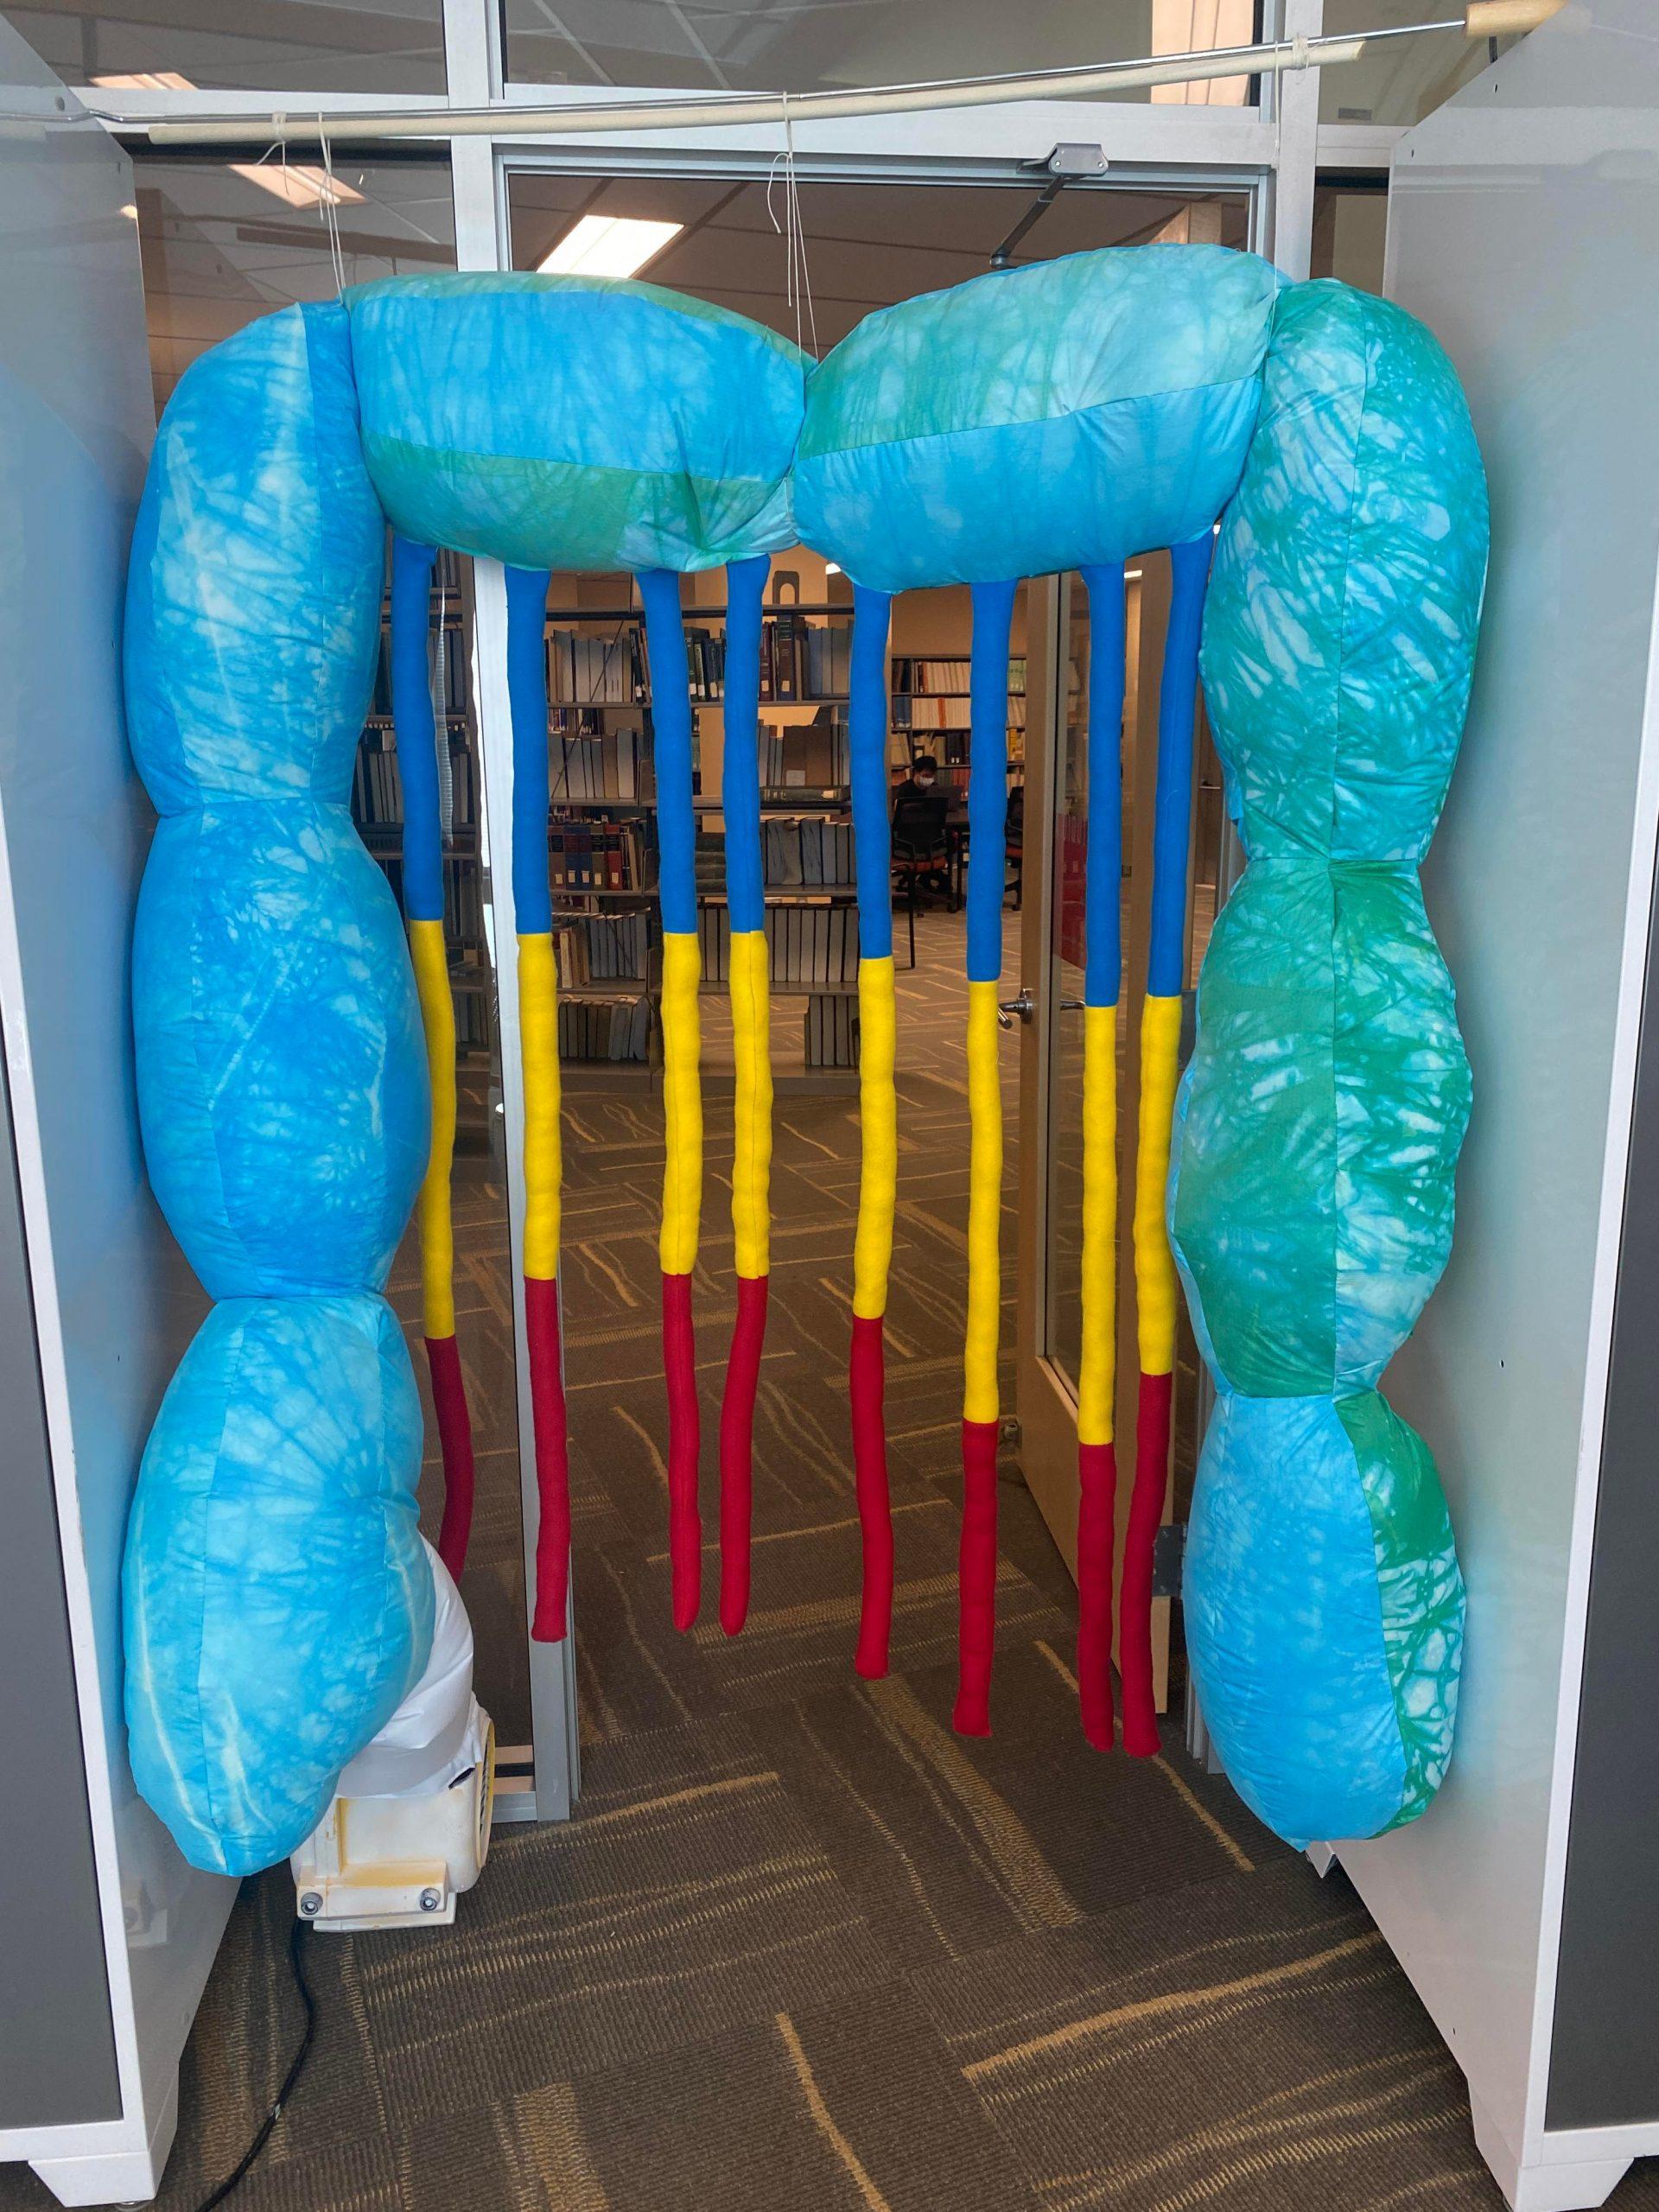
To create the archway, we first took the beach ball sphere pattern and enlarged it by extending the length of the pattern. After cutting out over 40 beach ball patterns, we then sewed the tops of one beach ball to the bottom of another beach ball with enough overlap so that there would be enough room in between each sphere to allow for airflow. After sewing vertical strips of connected spheres, we then sewed each vertical strip to create the bubbled effect of the elongated spheres when they finally came together.
To create the tendrils, we took inspiration from the arms of Lori’s fruits and created small cylinders of fleece. In the interest of using recycled or scrap materials, we cut rectangles from three different colors of fleece fabric – blue, yellow, and red, which were a bold contrast to the blue/green acid-dyed nylon. One of each of these rectangles were sewn together and flipped inside-out to form the long tendrils structures, and then stuffed with polyfil.
Because we were working asynchronously, the tendrils were added to the structure after the majority of the archway had been sewn. We learned that the tendrils were too heavy for the inflated arch to support alone, and so when we installed our piece in the final space, we used a rod and string to help carry some of the weight.
We found that people really enjoyed moving through the archway, and that the physical weight and softness of the fleece tendrils was particularly engaging for some. We are ultimately very happy with the interactivity and physicality of our final structure, and are proud of what we were able to accomplish working asynchronously.
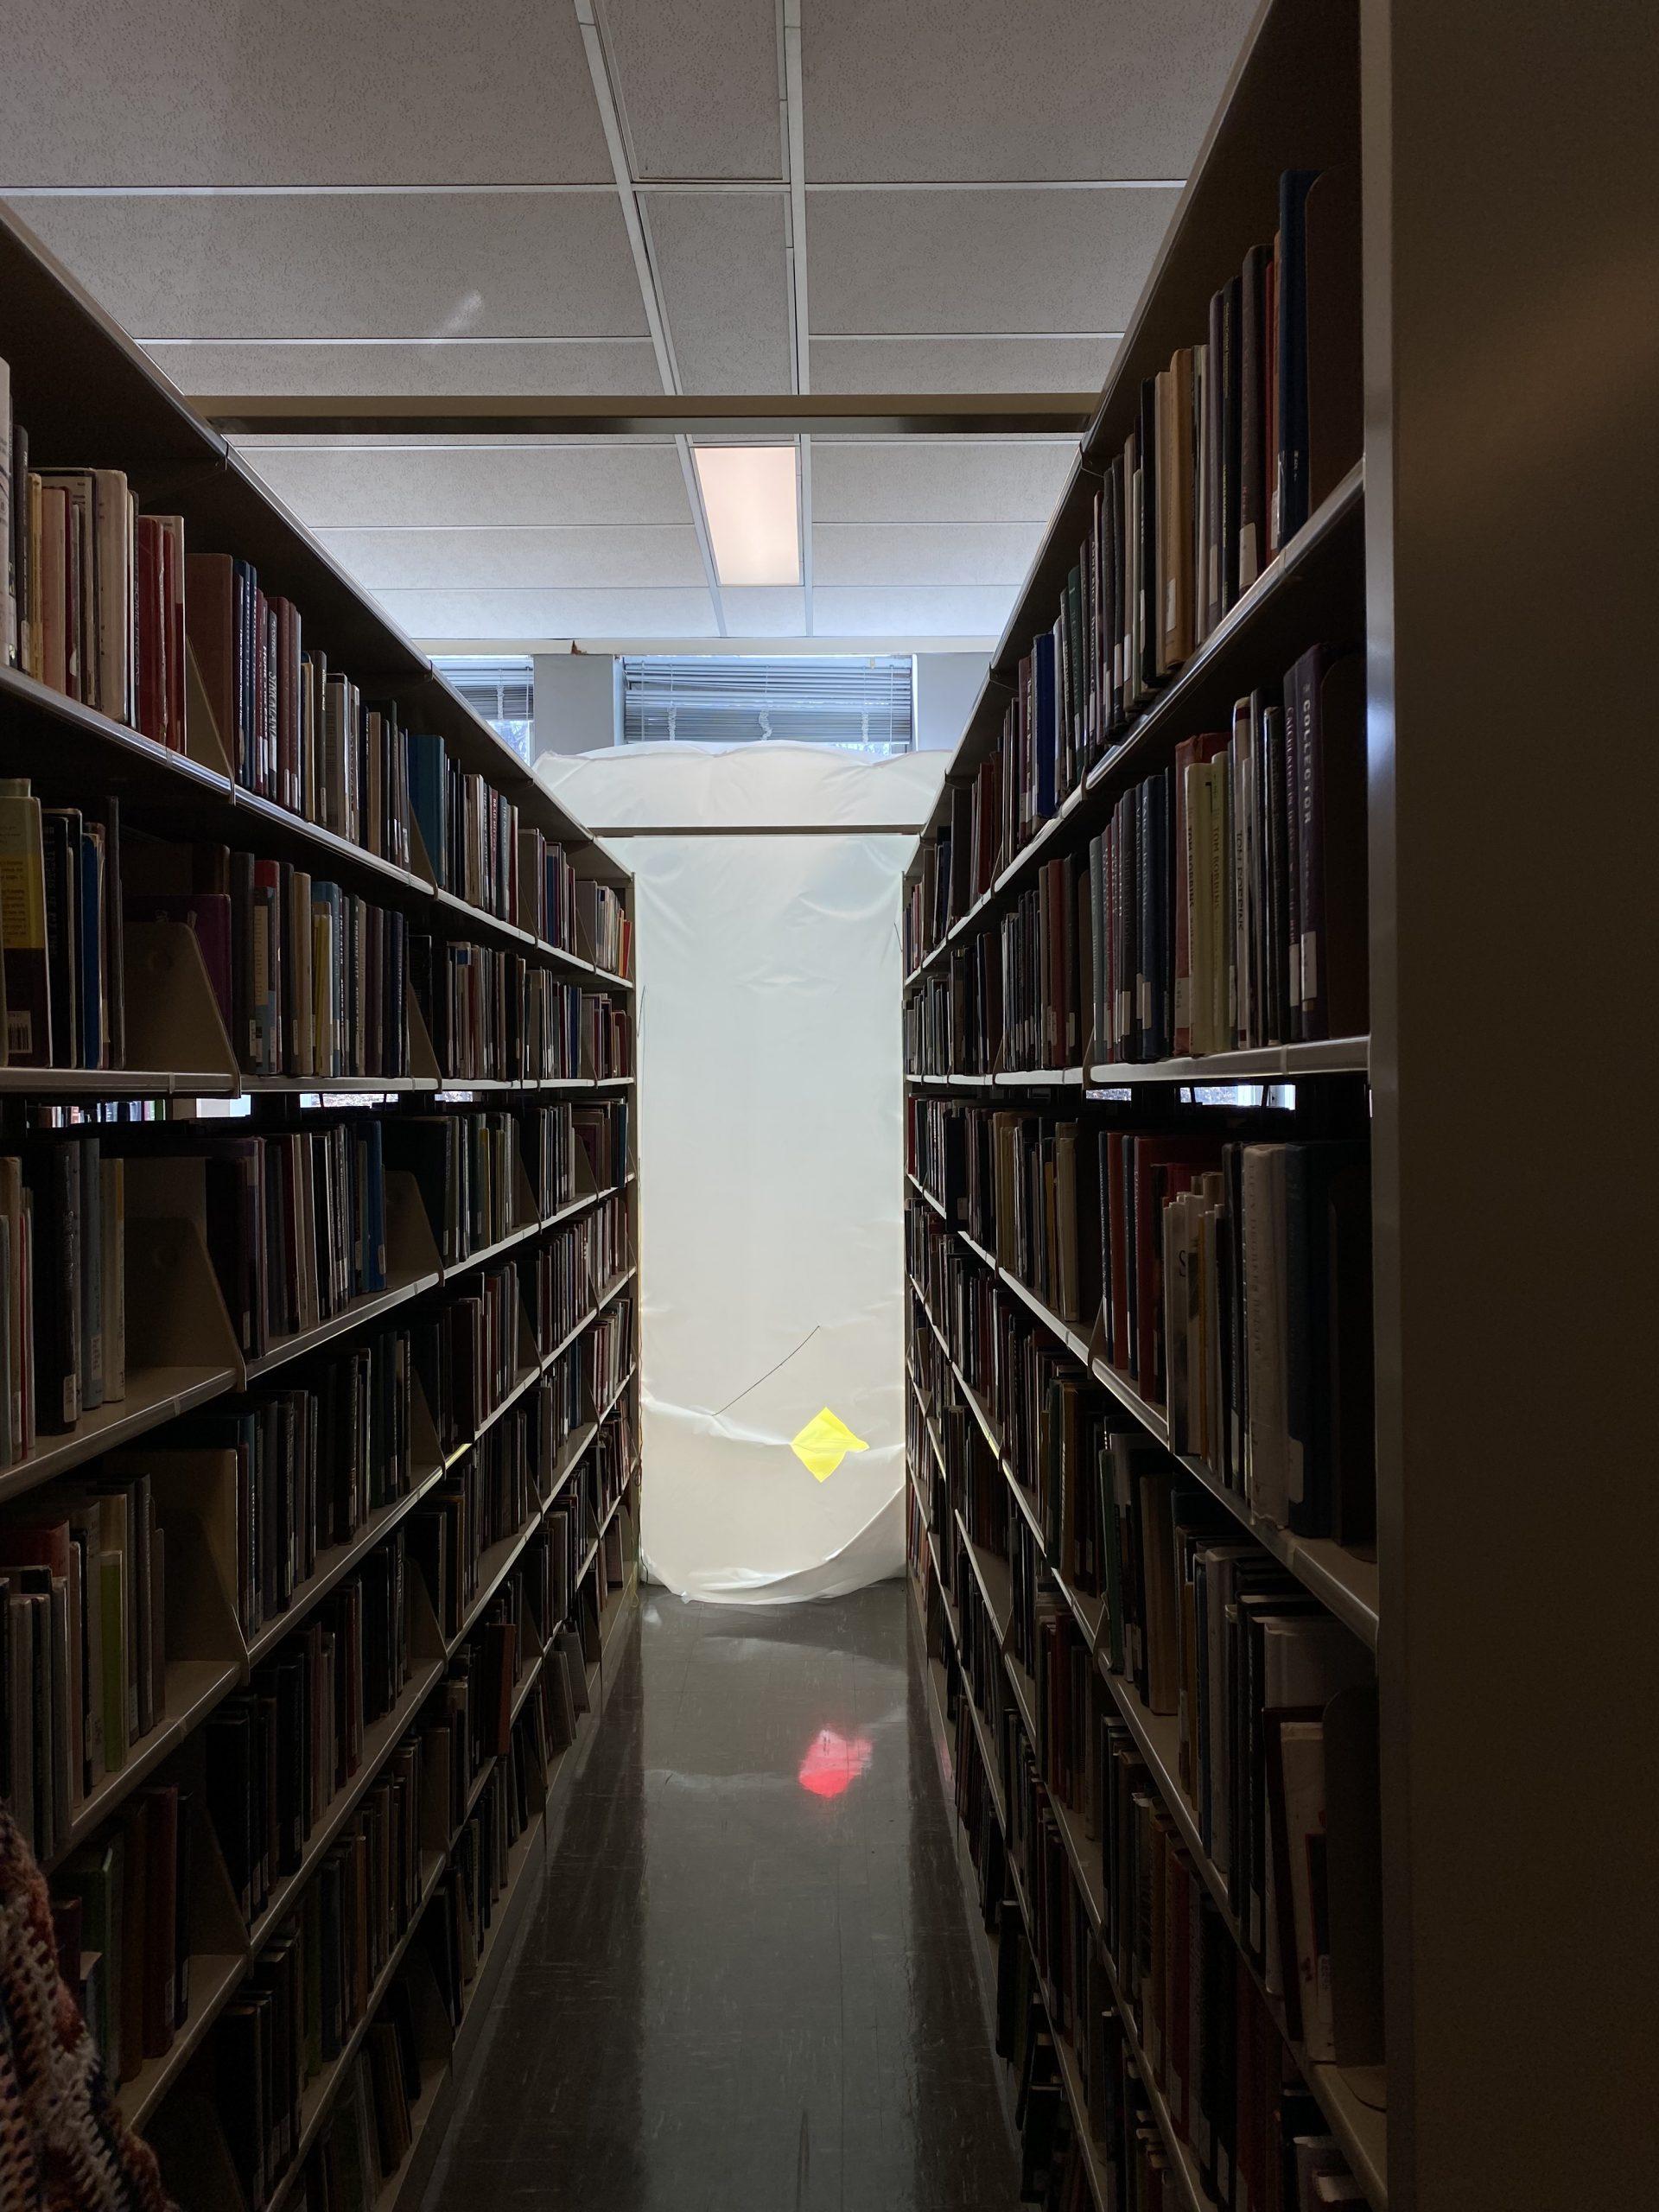
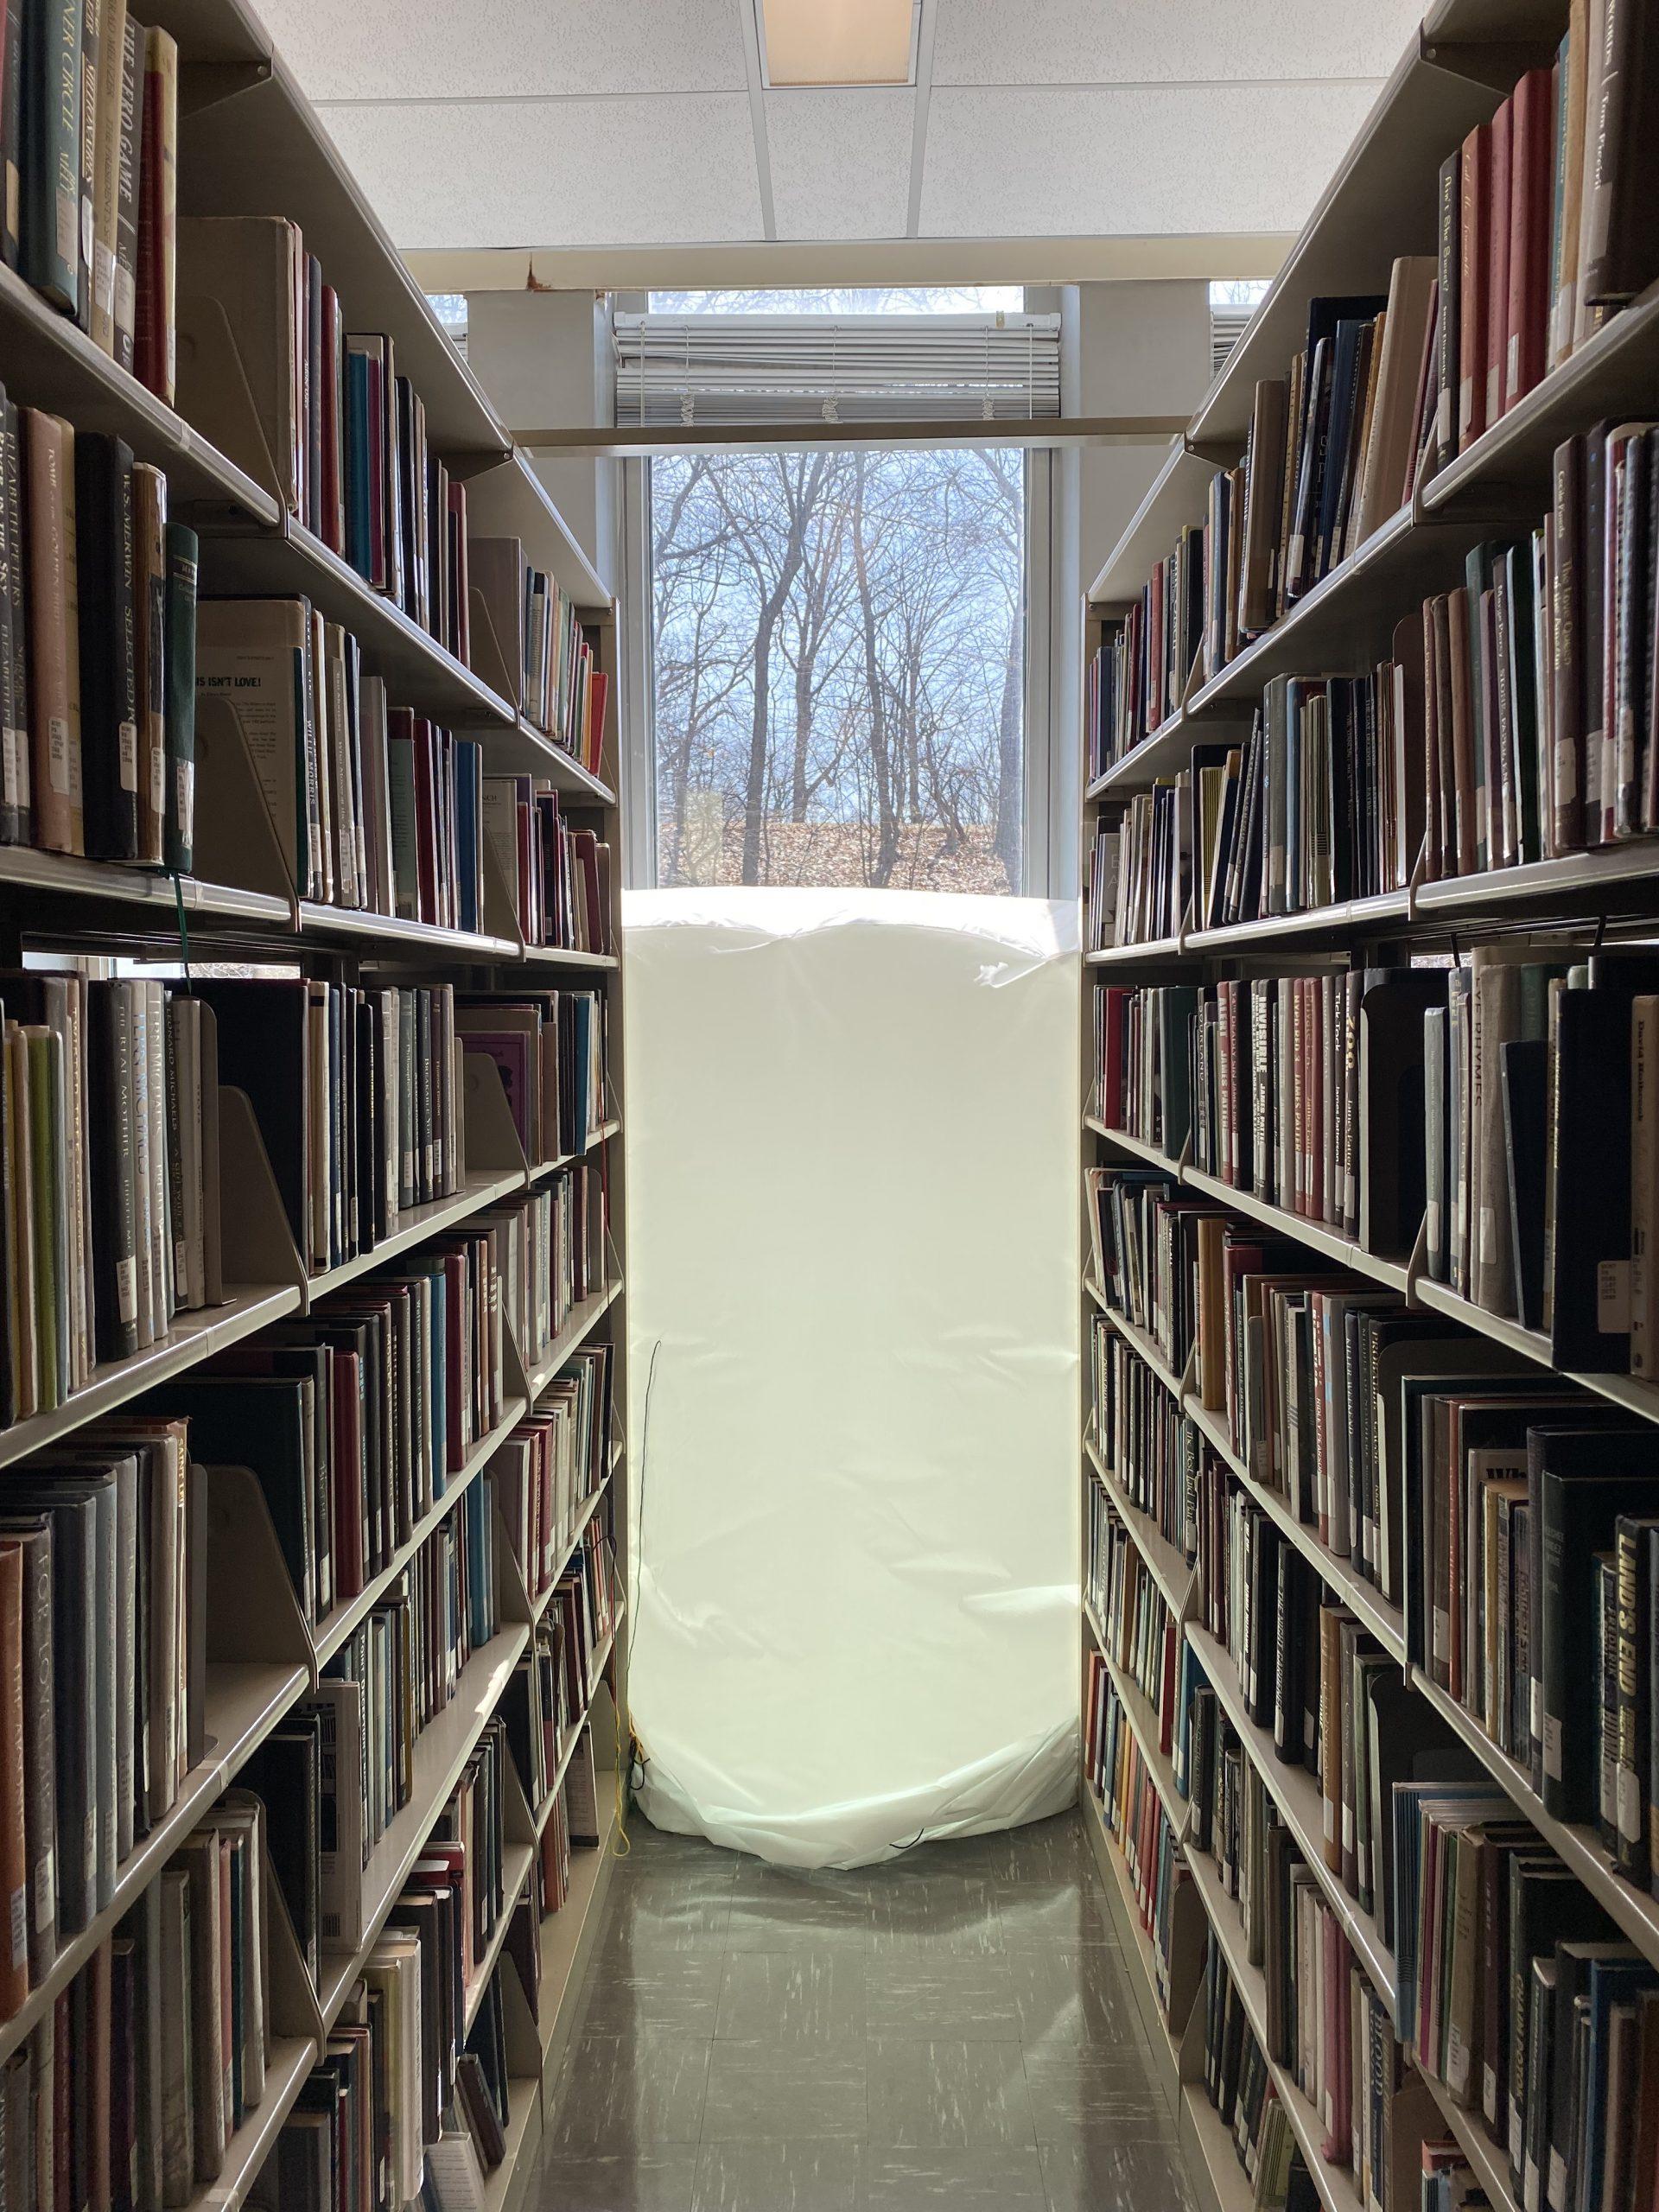
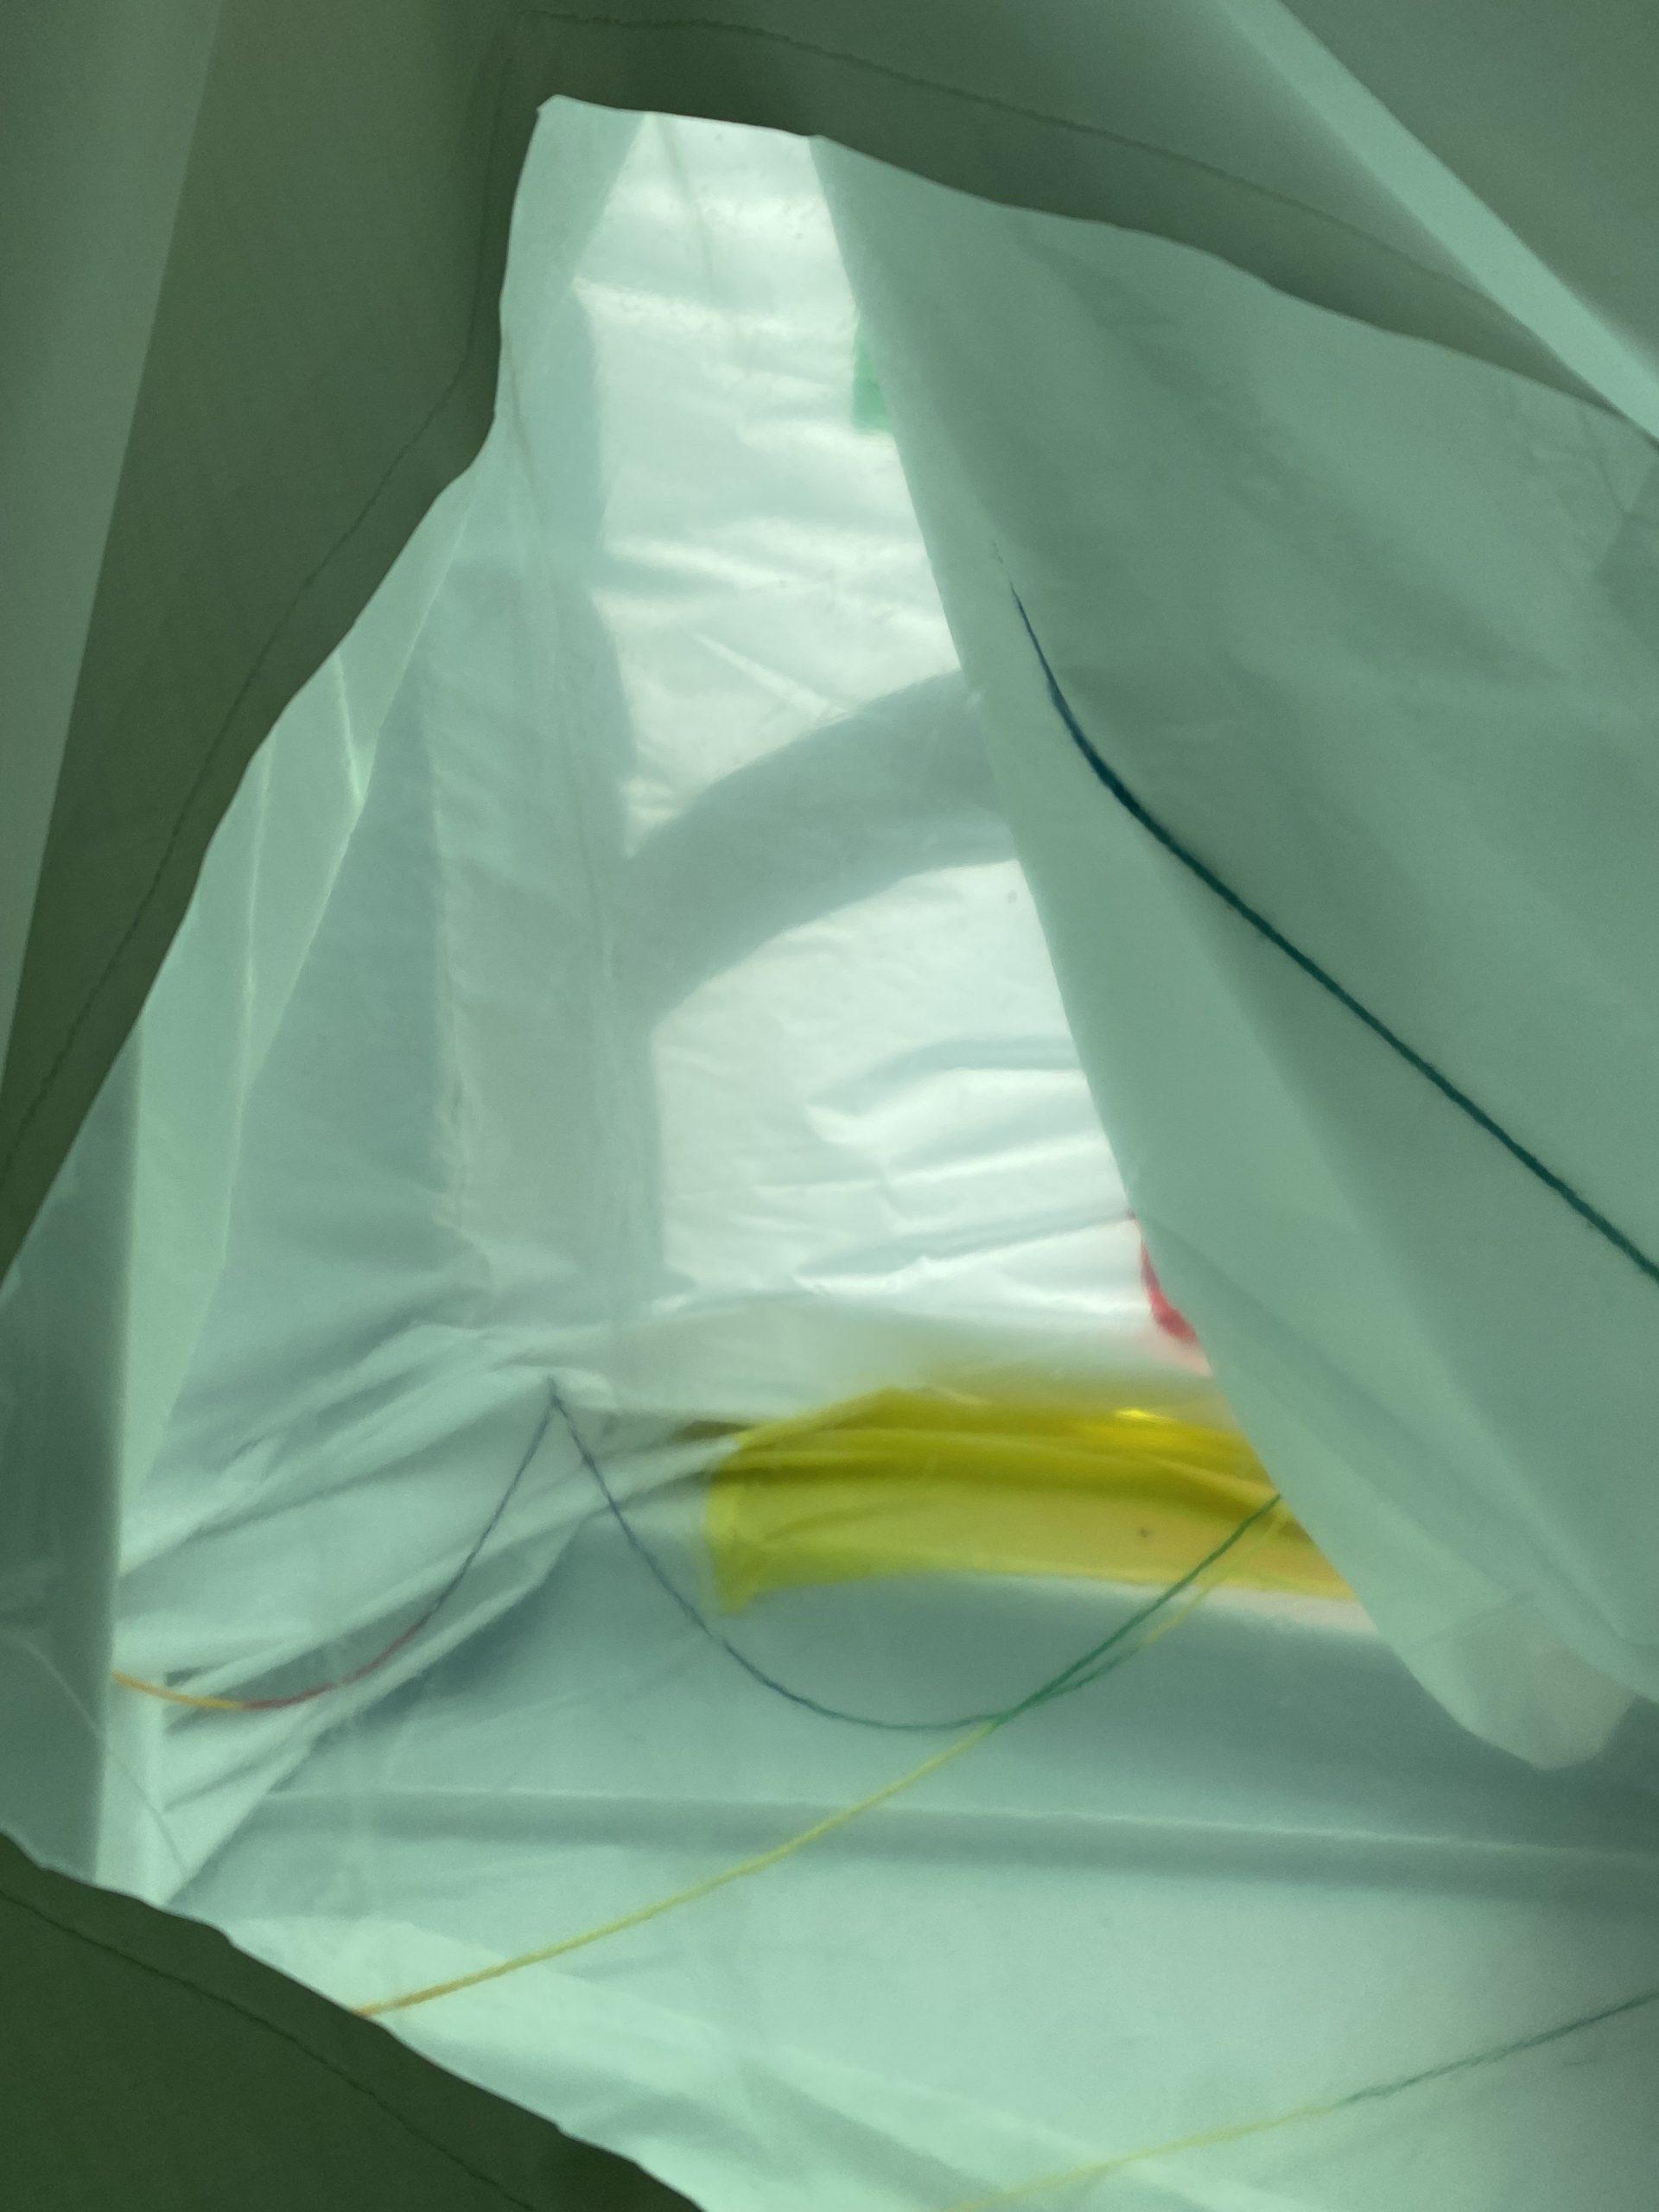
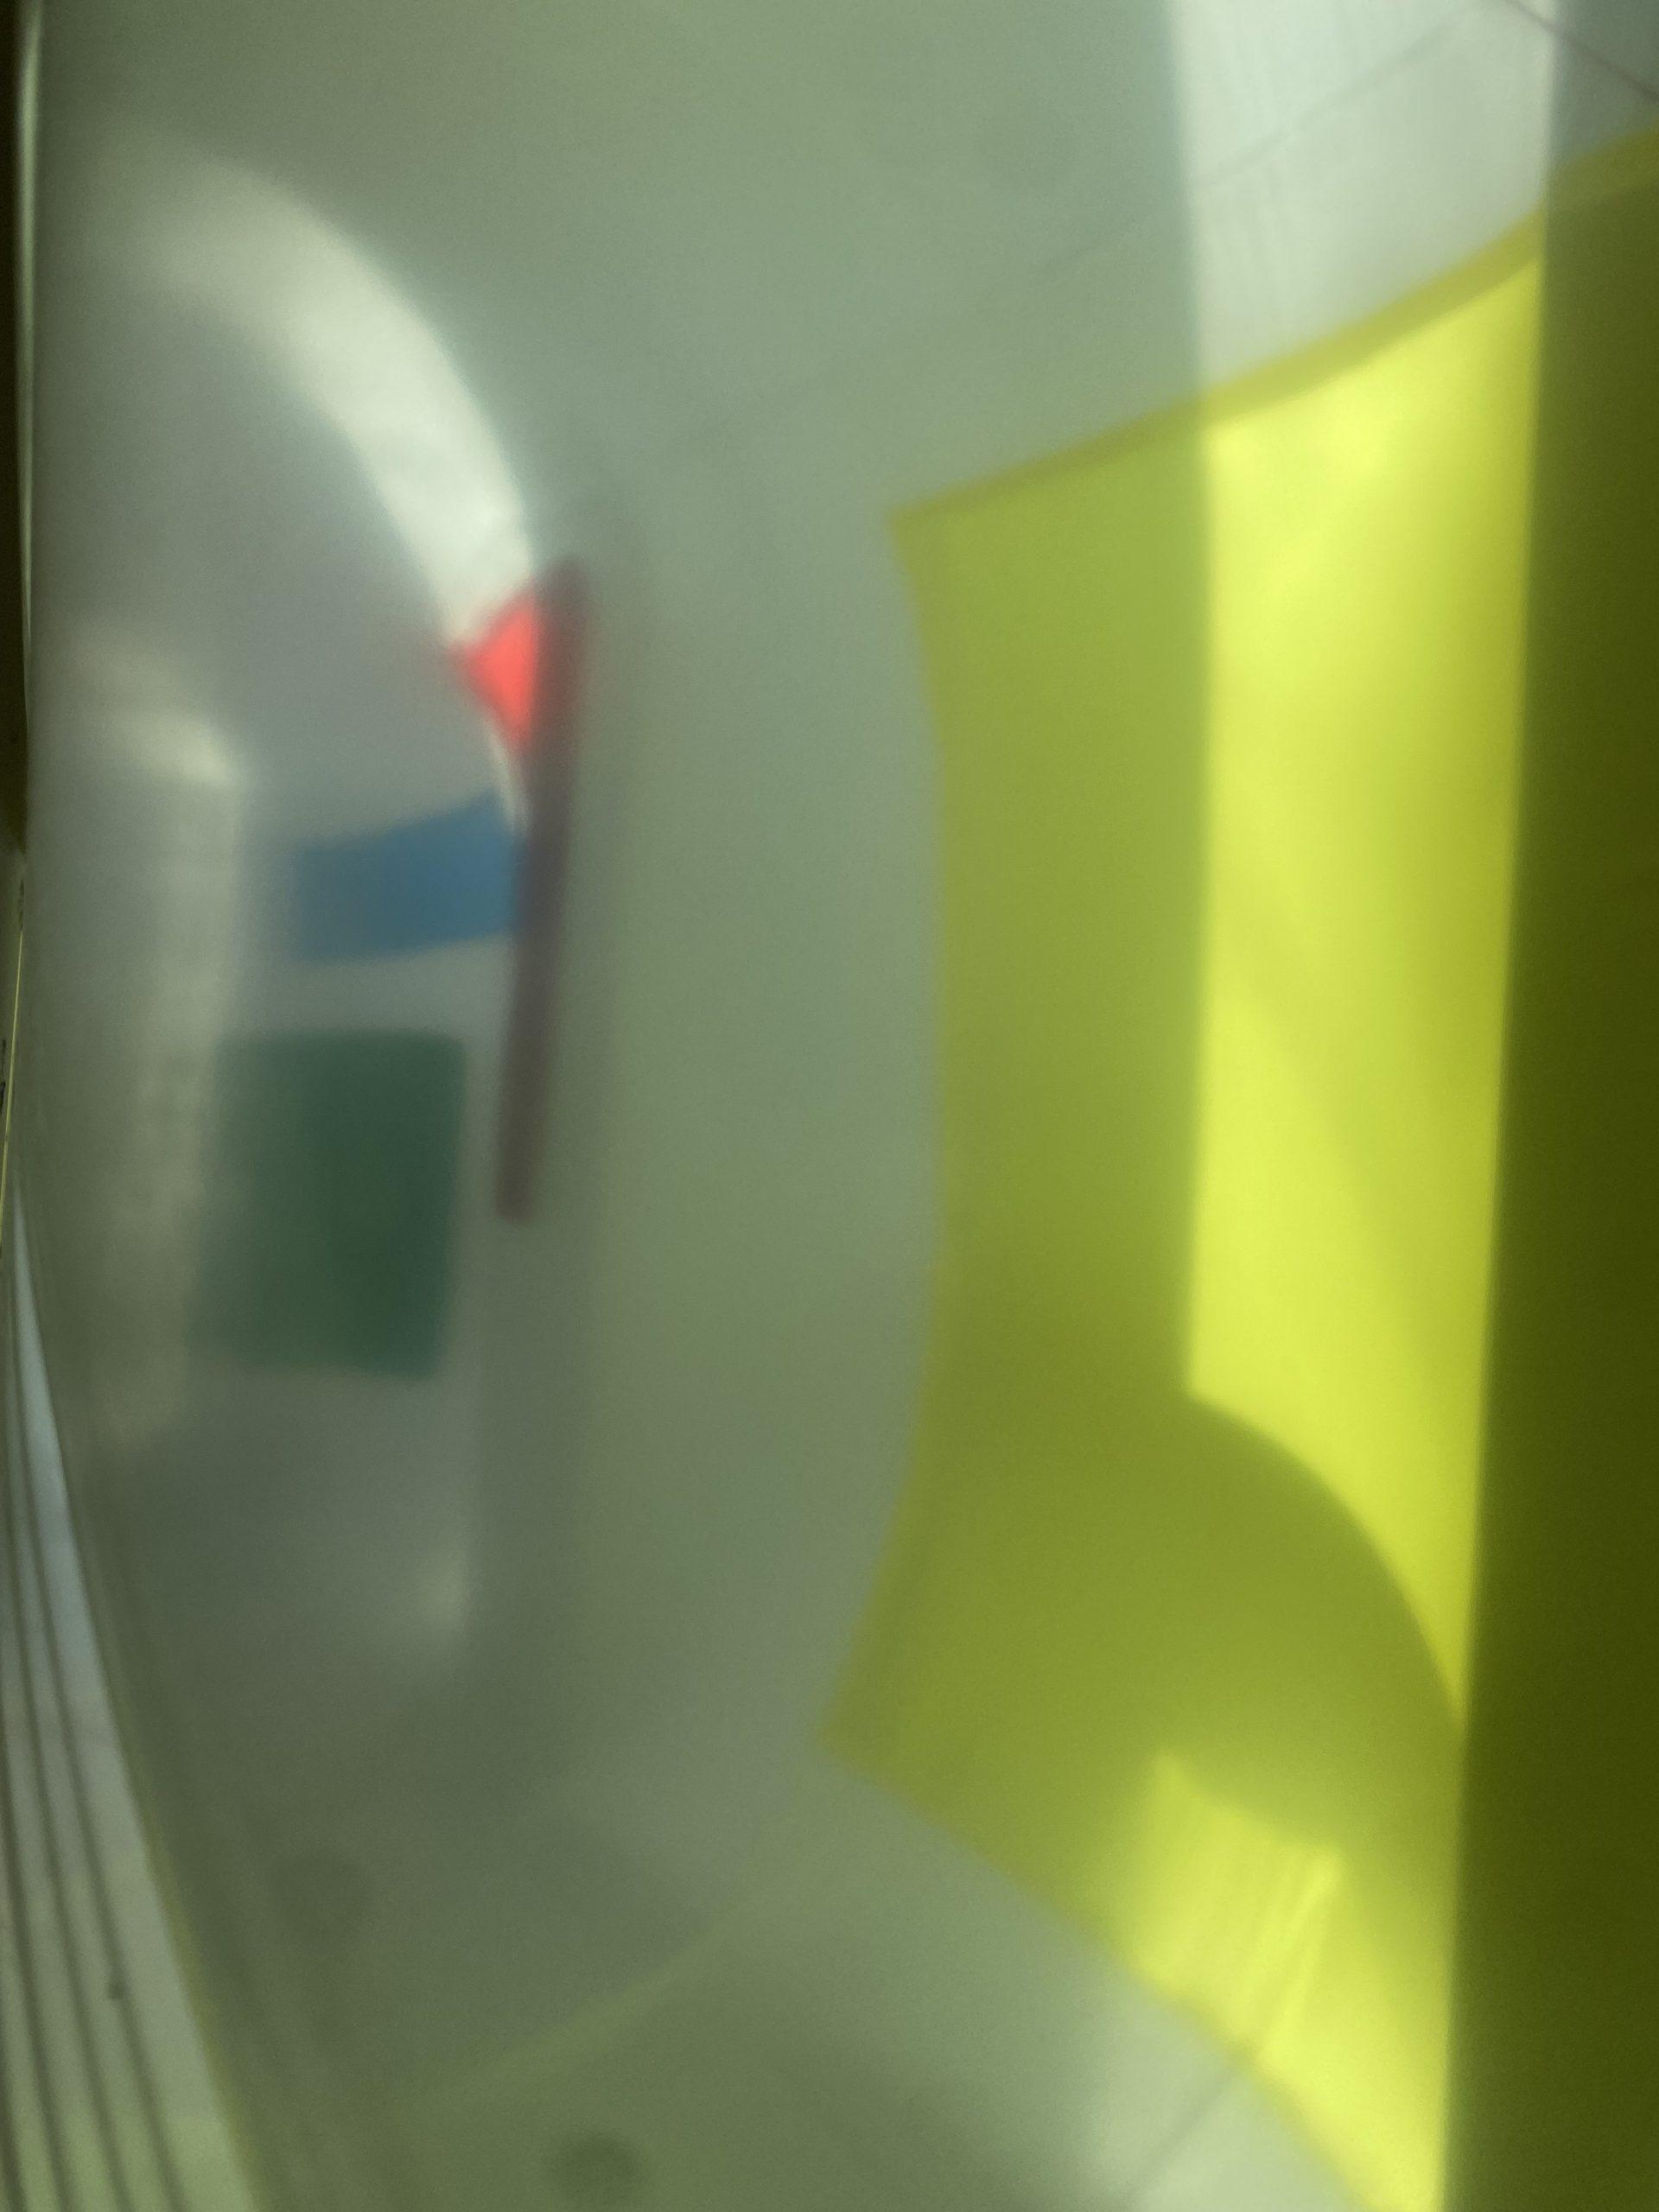
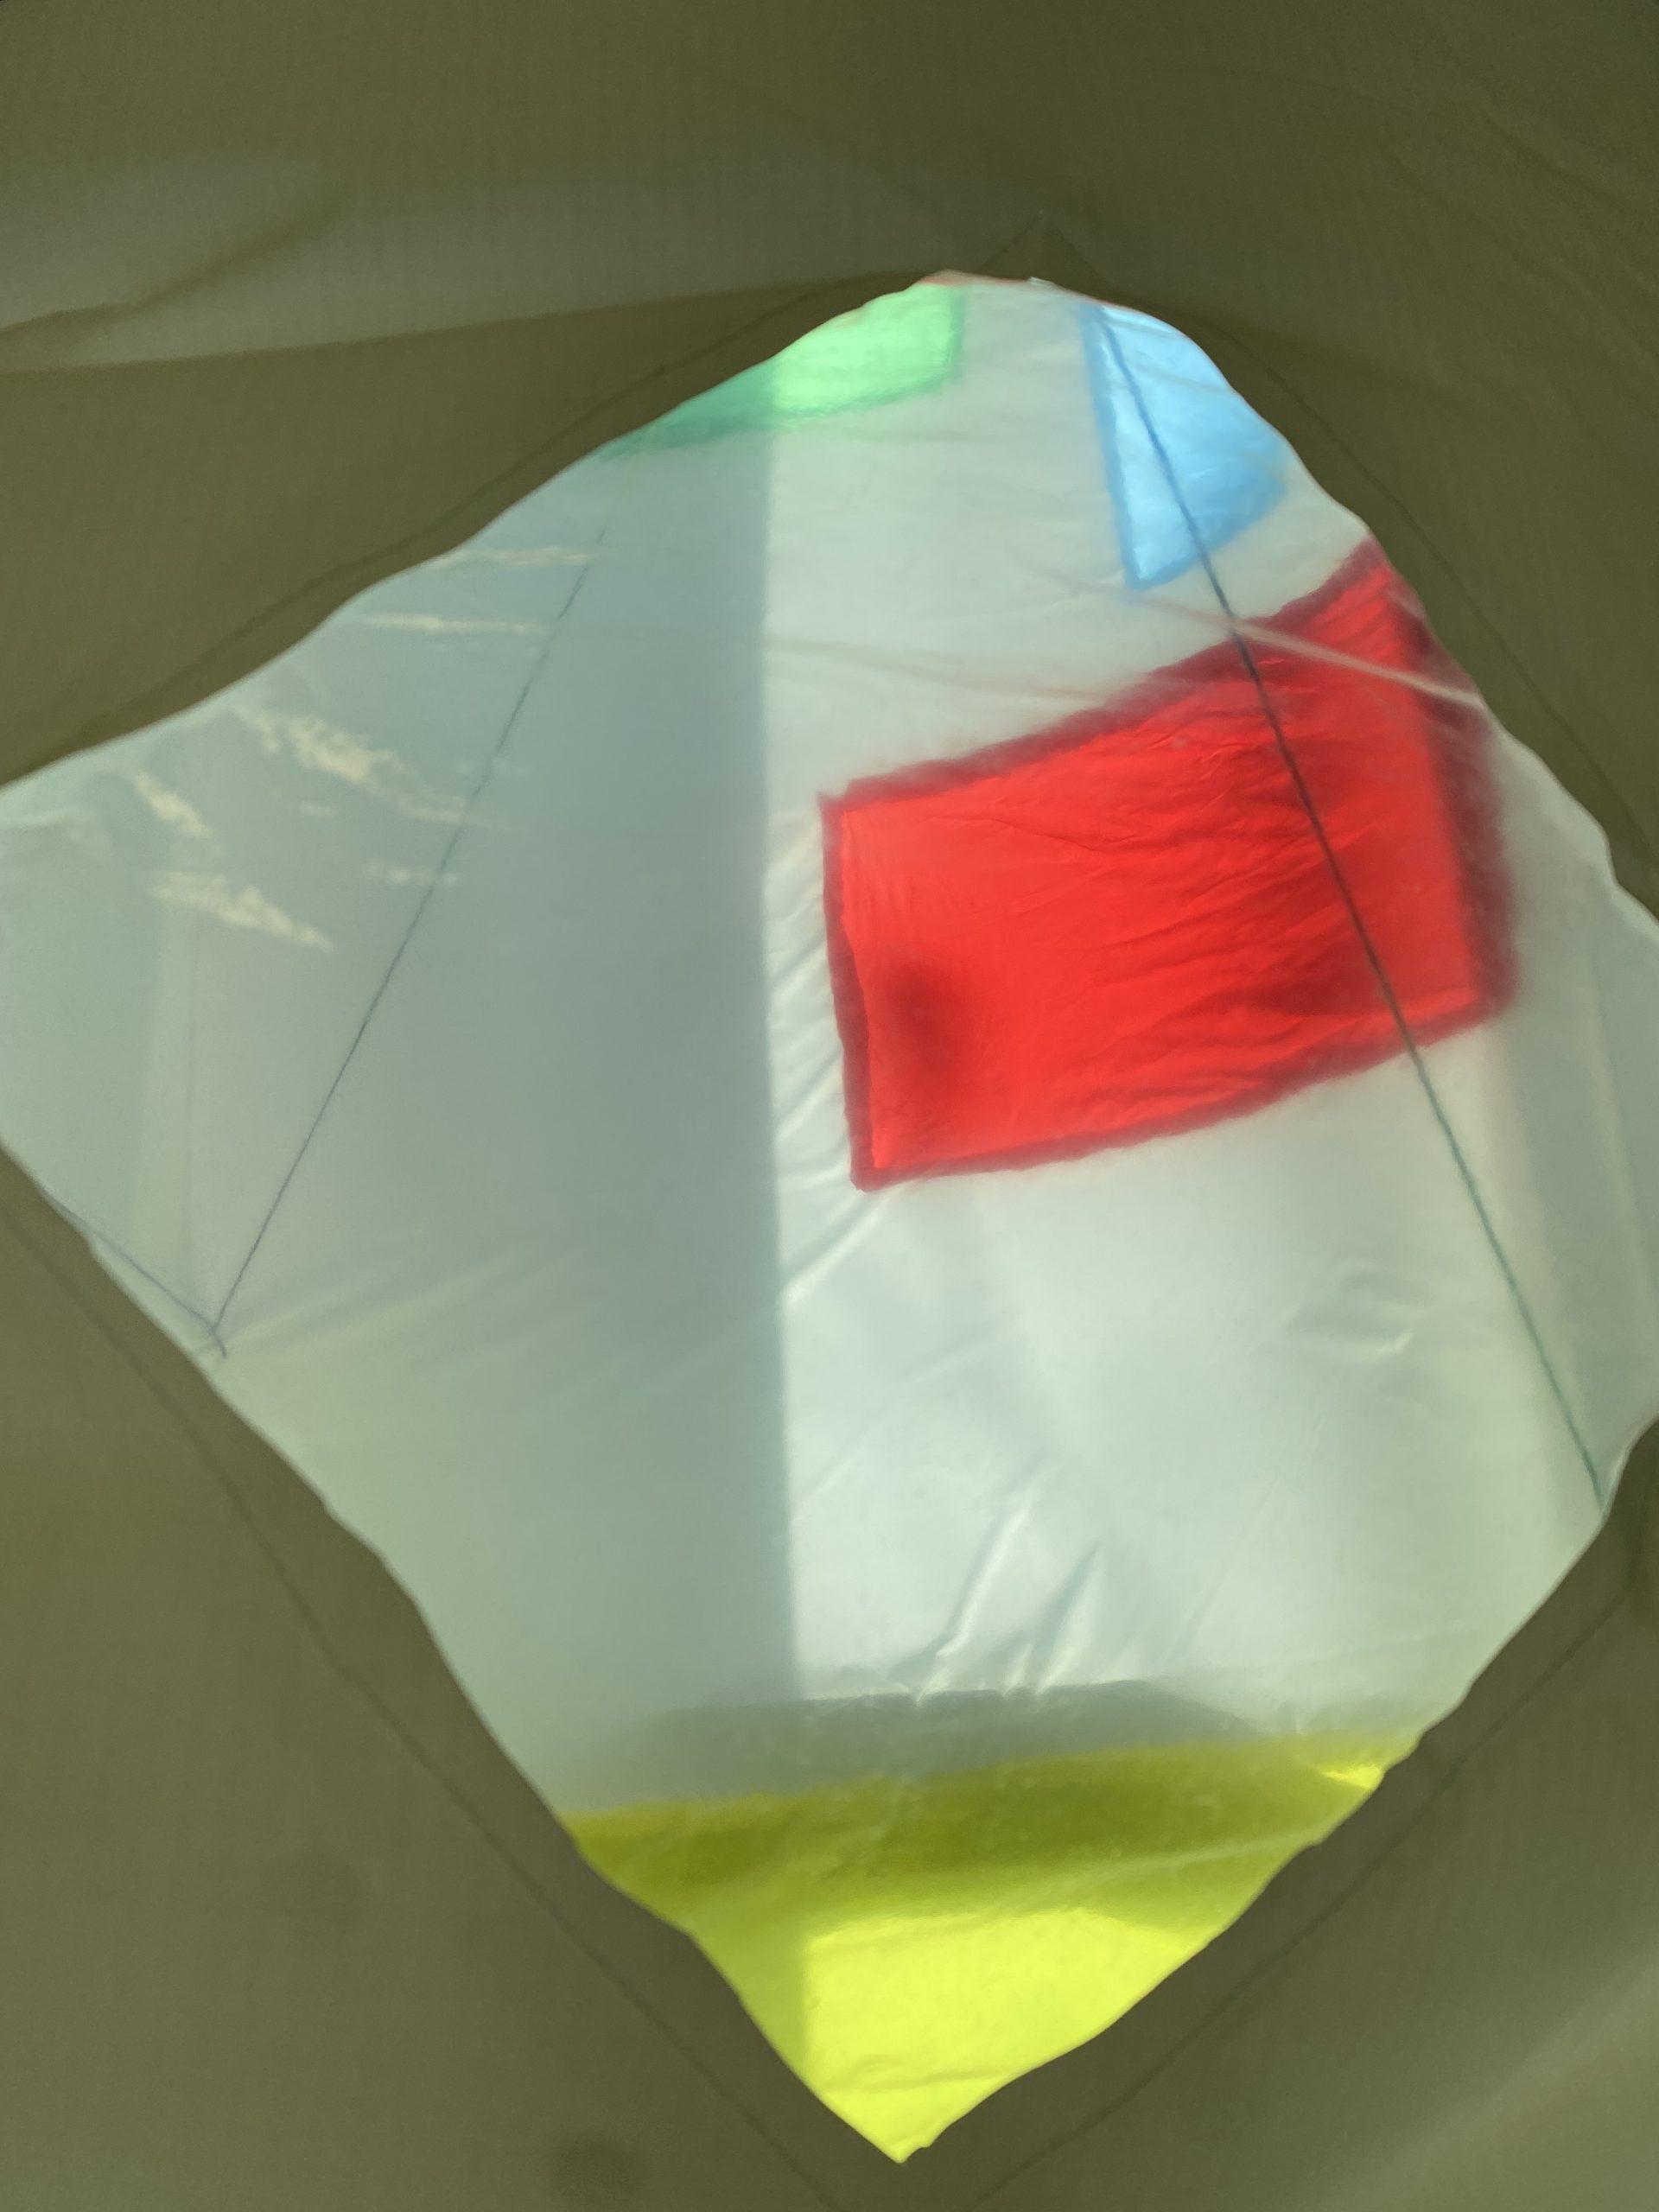
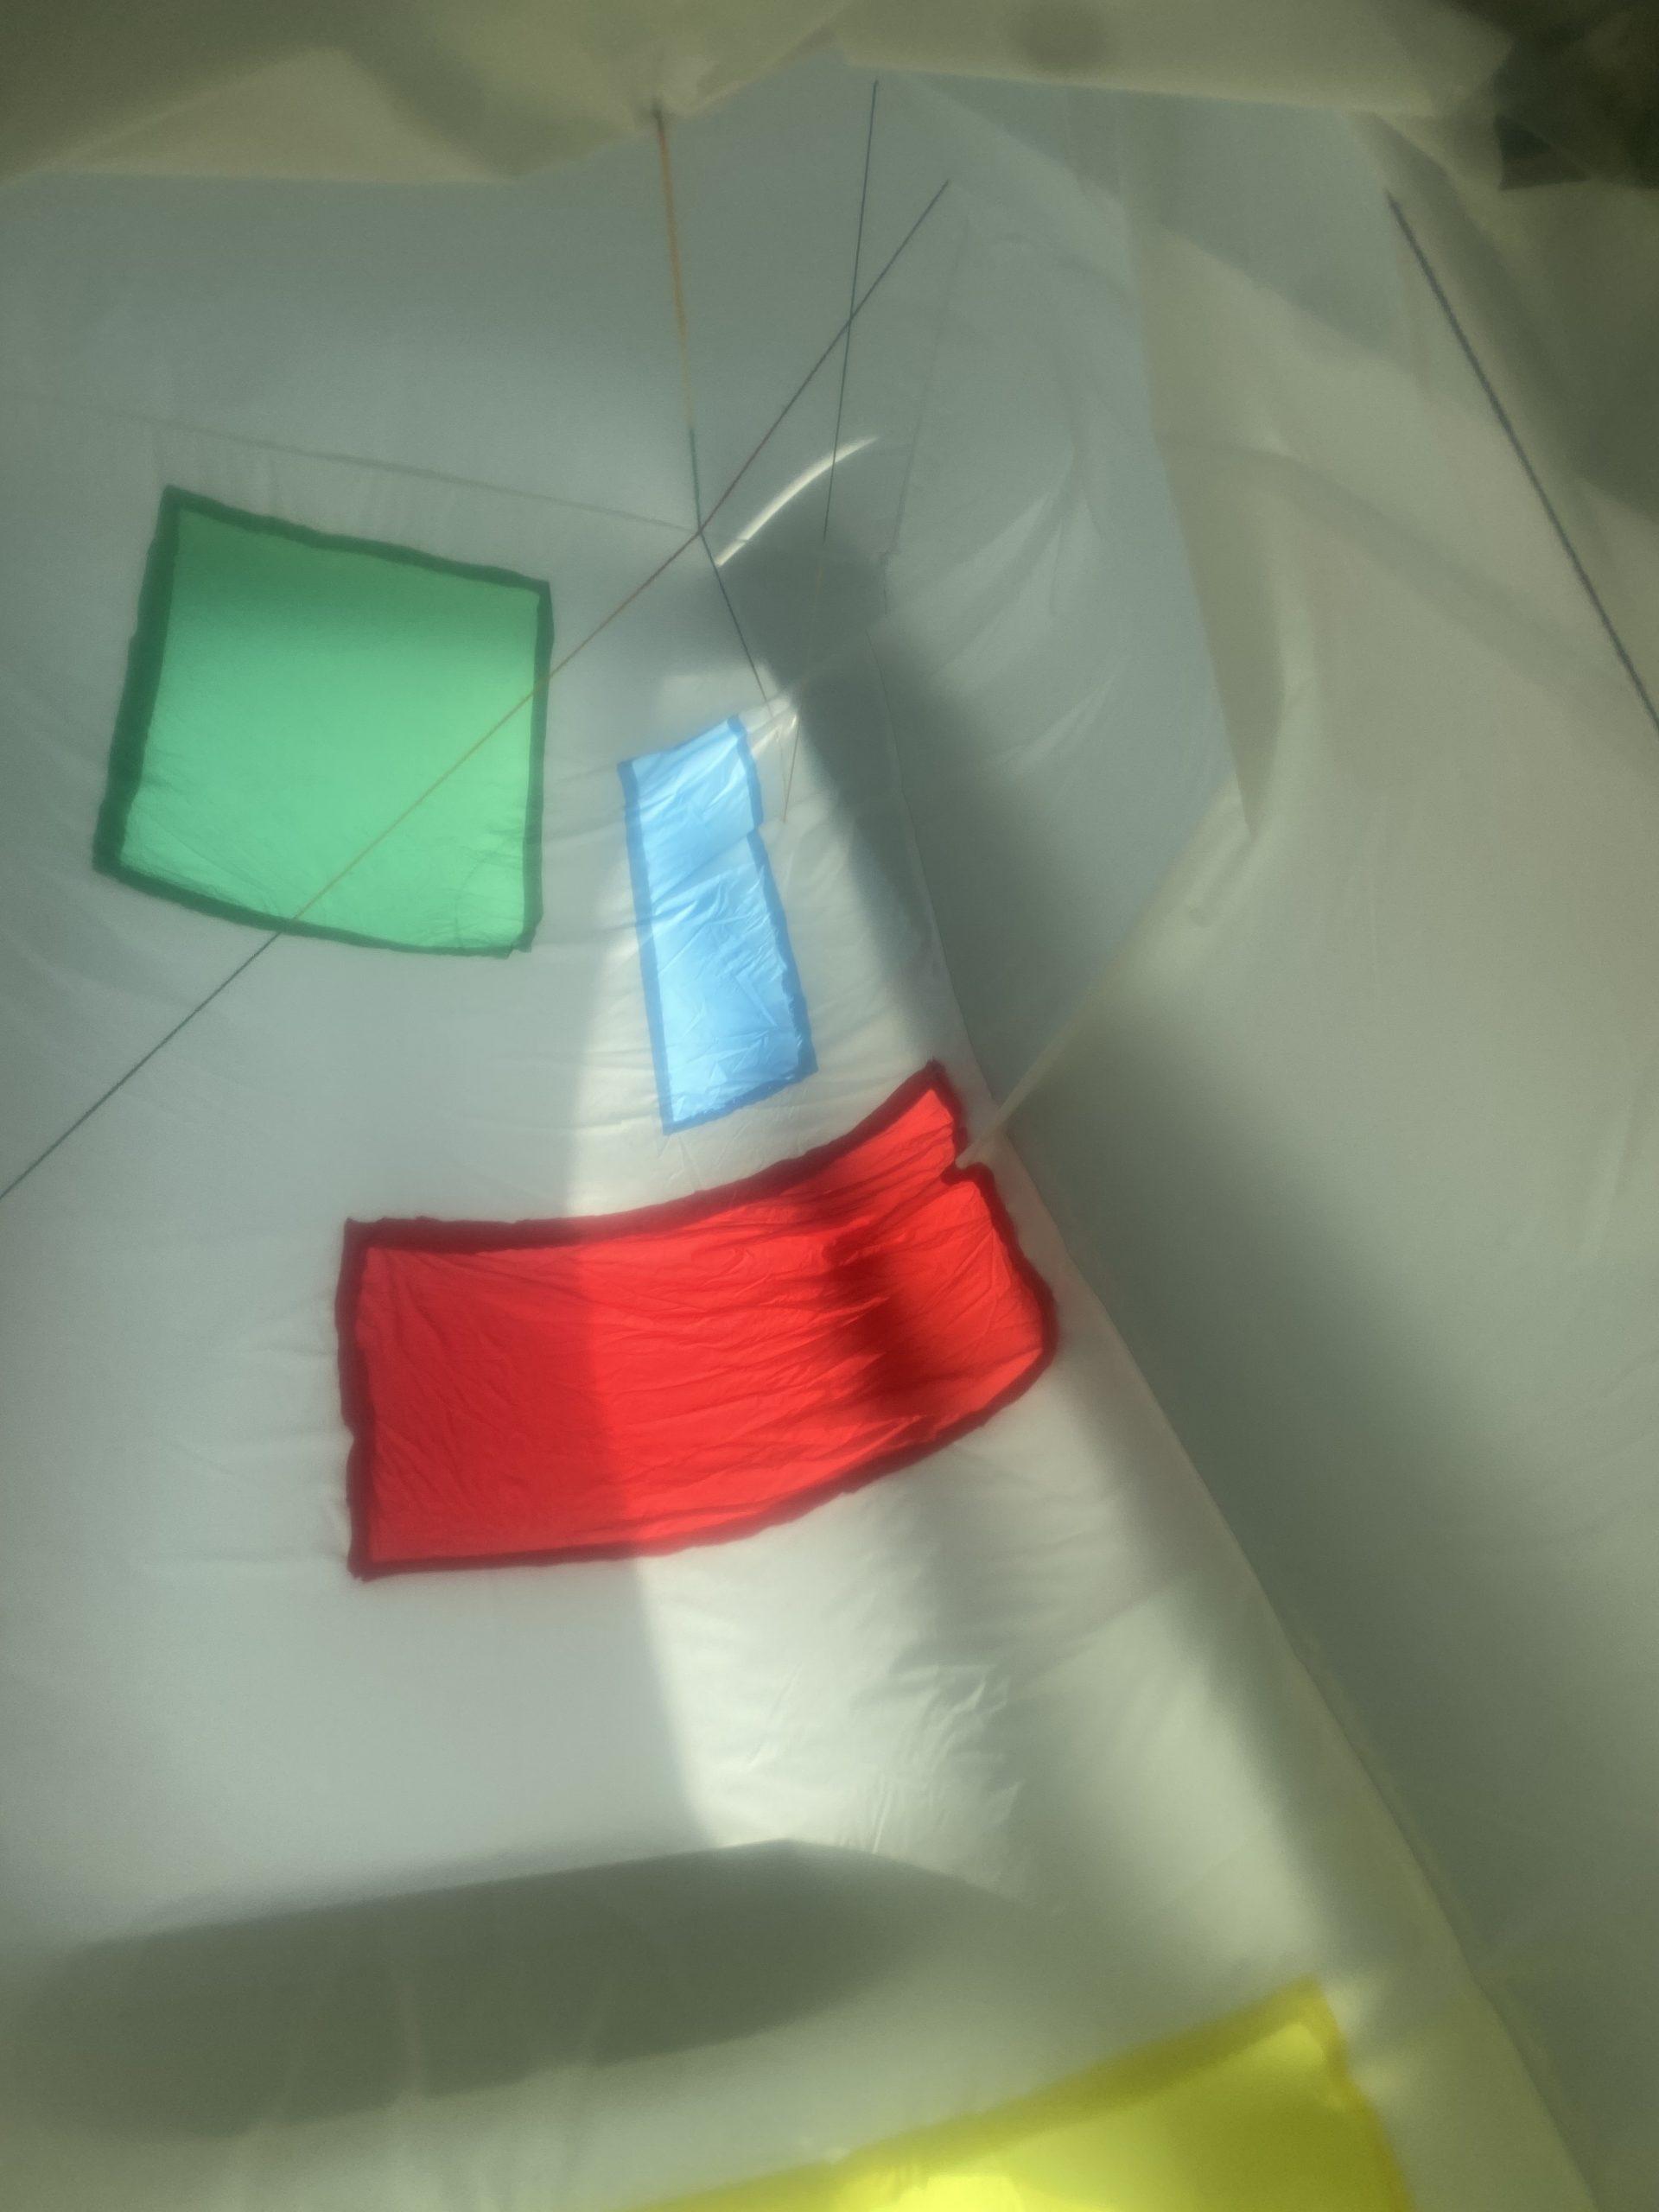
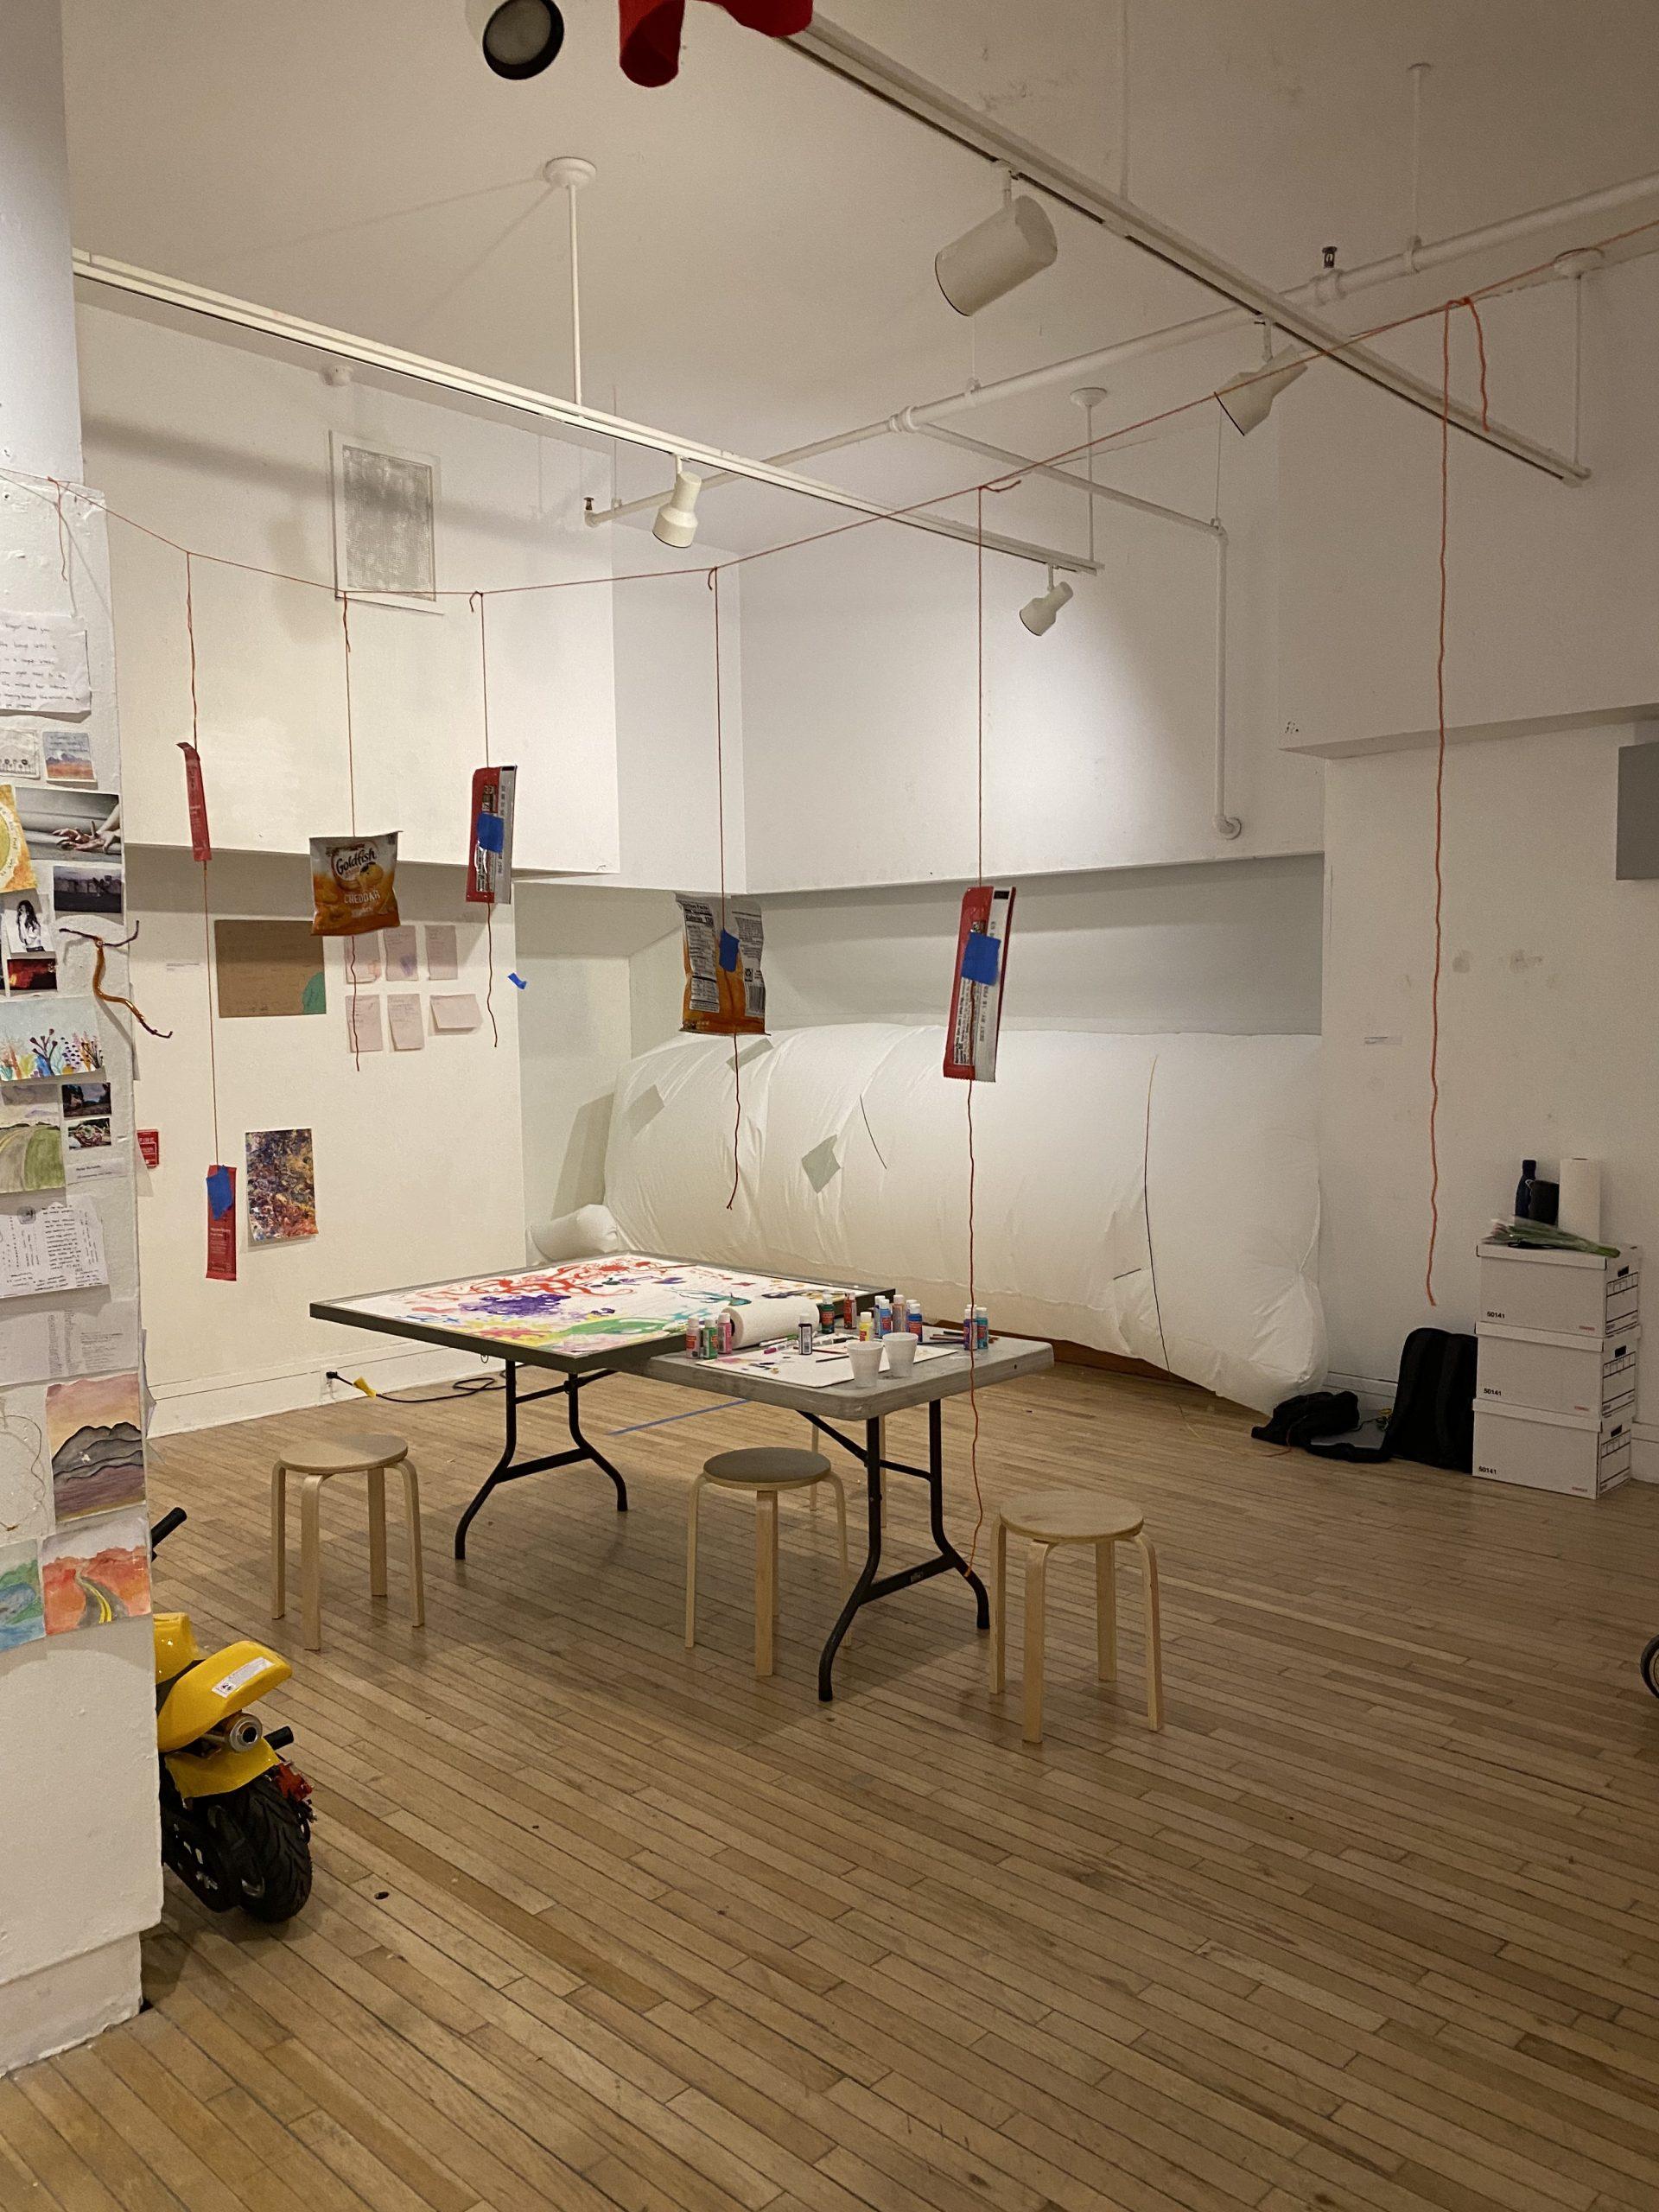
We decided to make a large rectangular form that would be constrained by the bookshelf/window space it was placed in and have hidden elements that interact with the light from the window. Here are some photos of our piece:
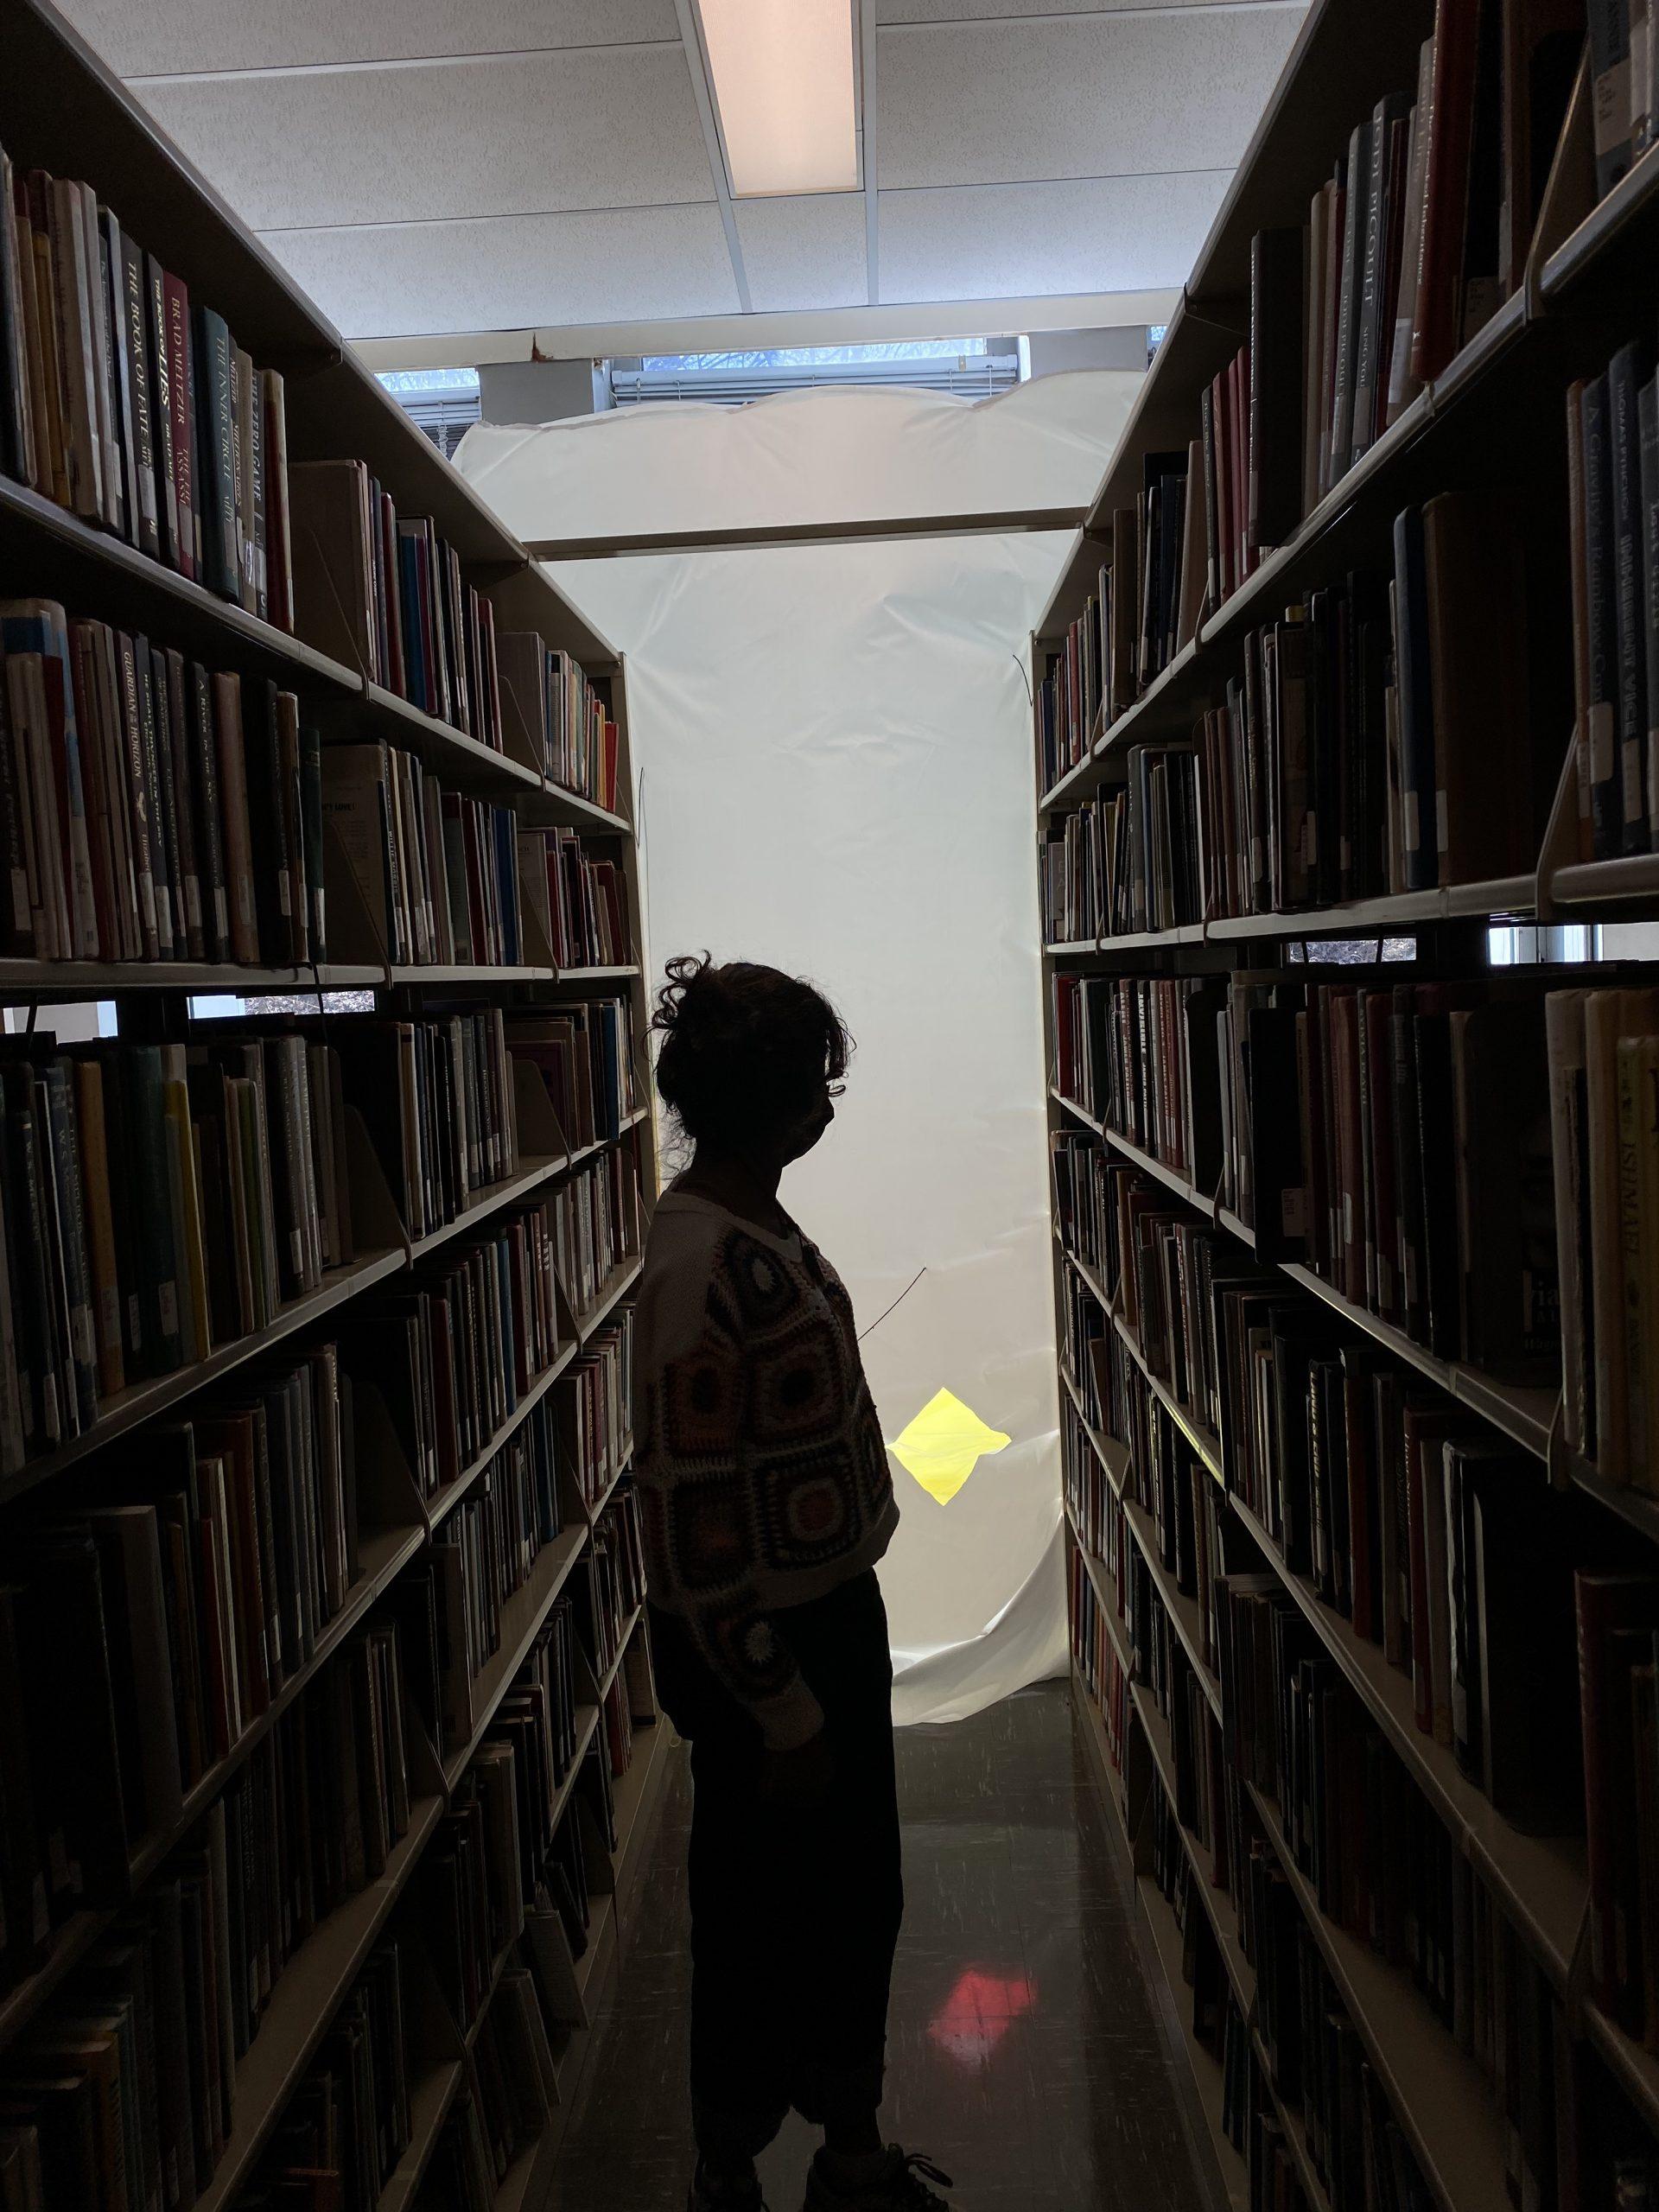
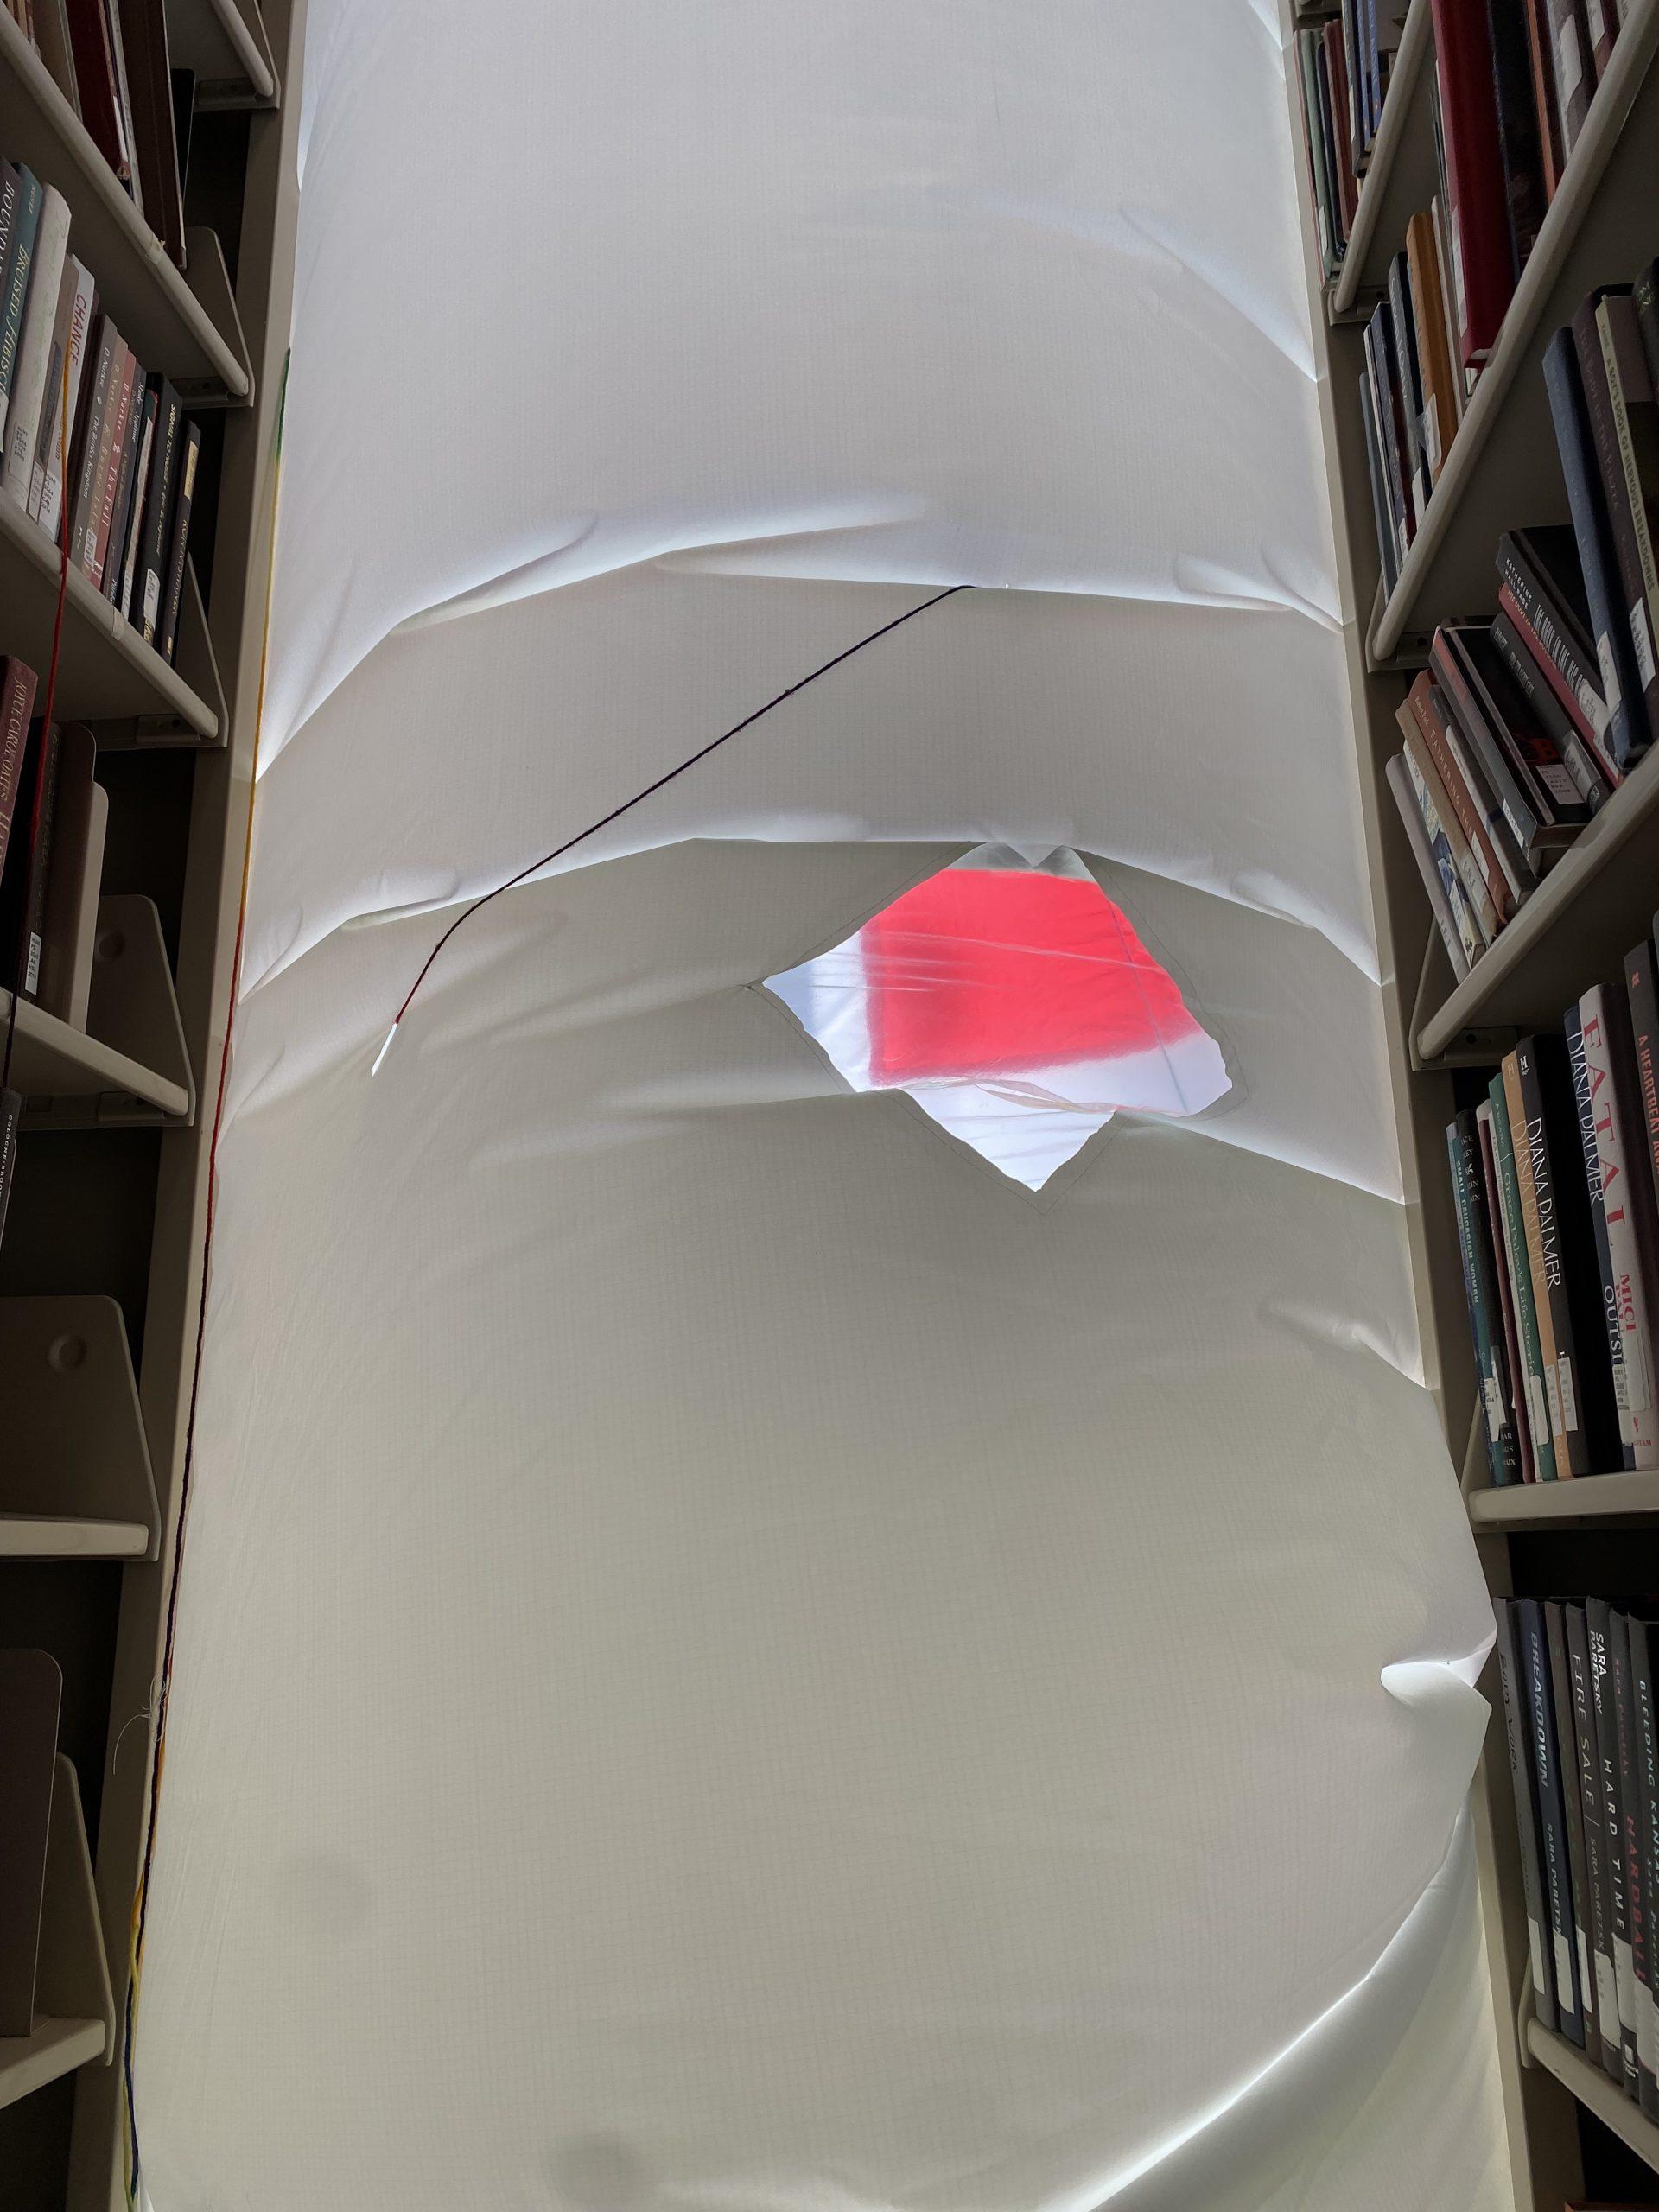
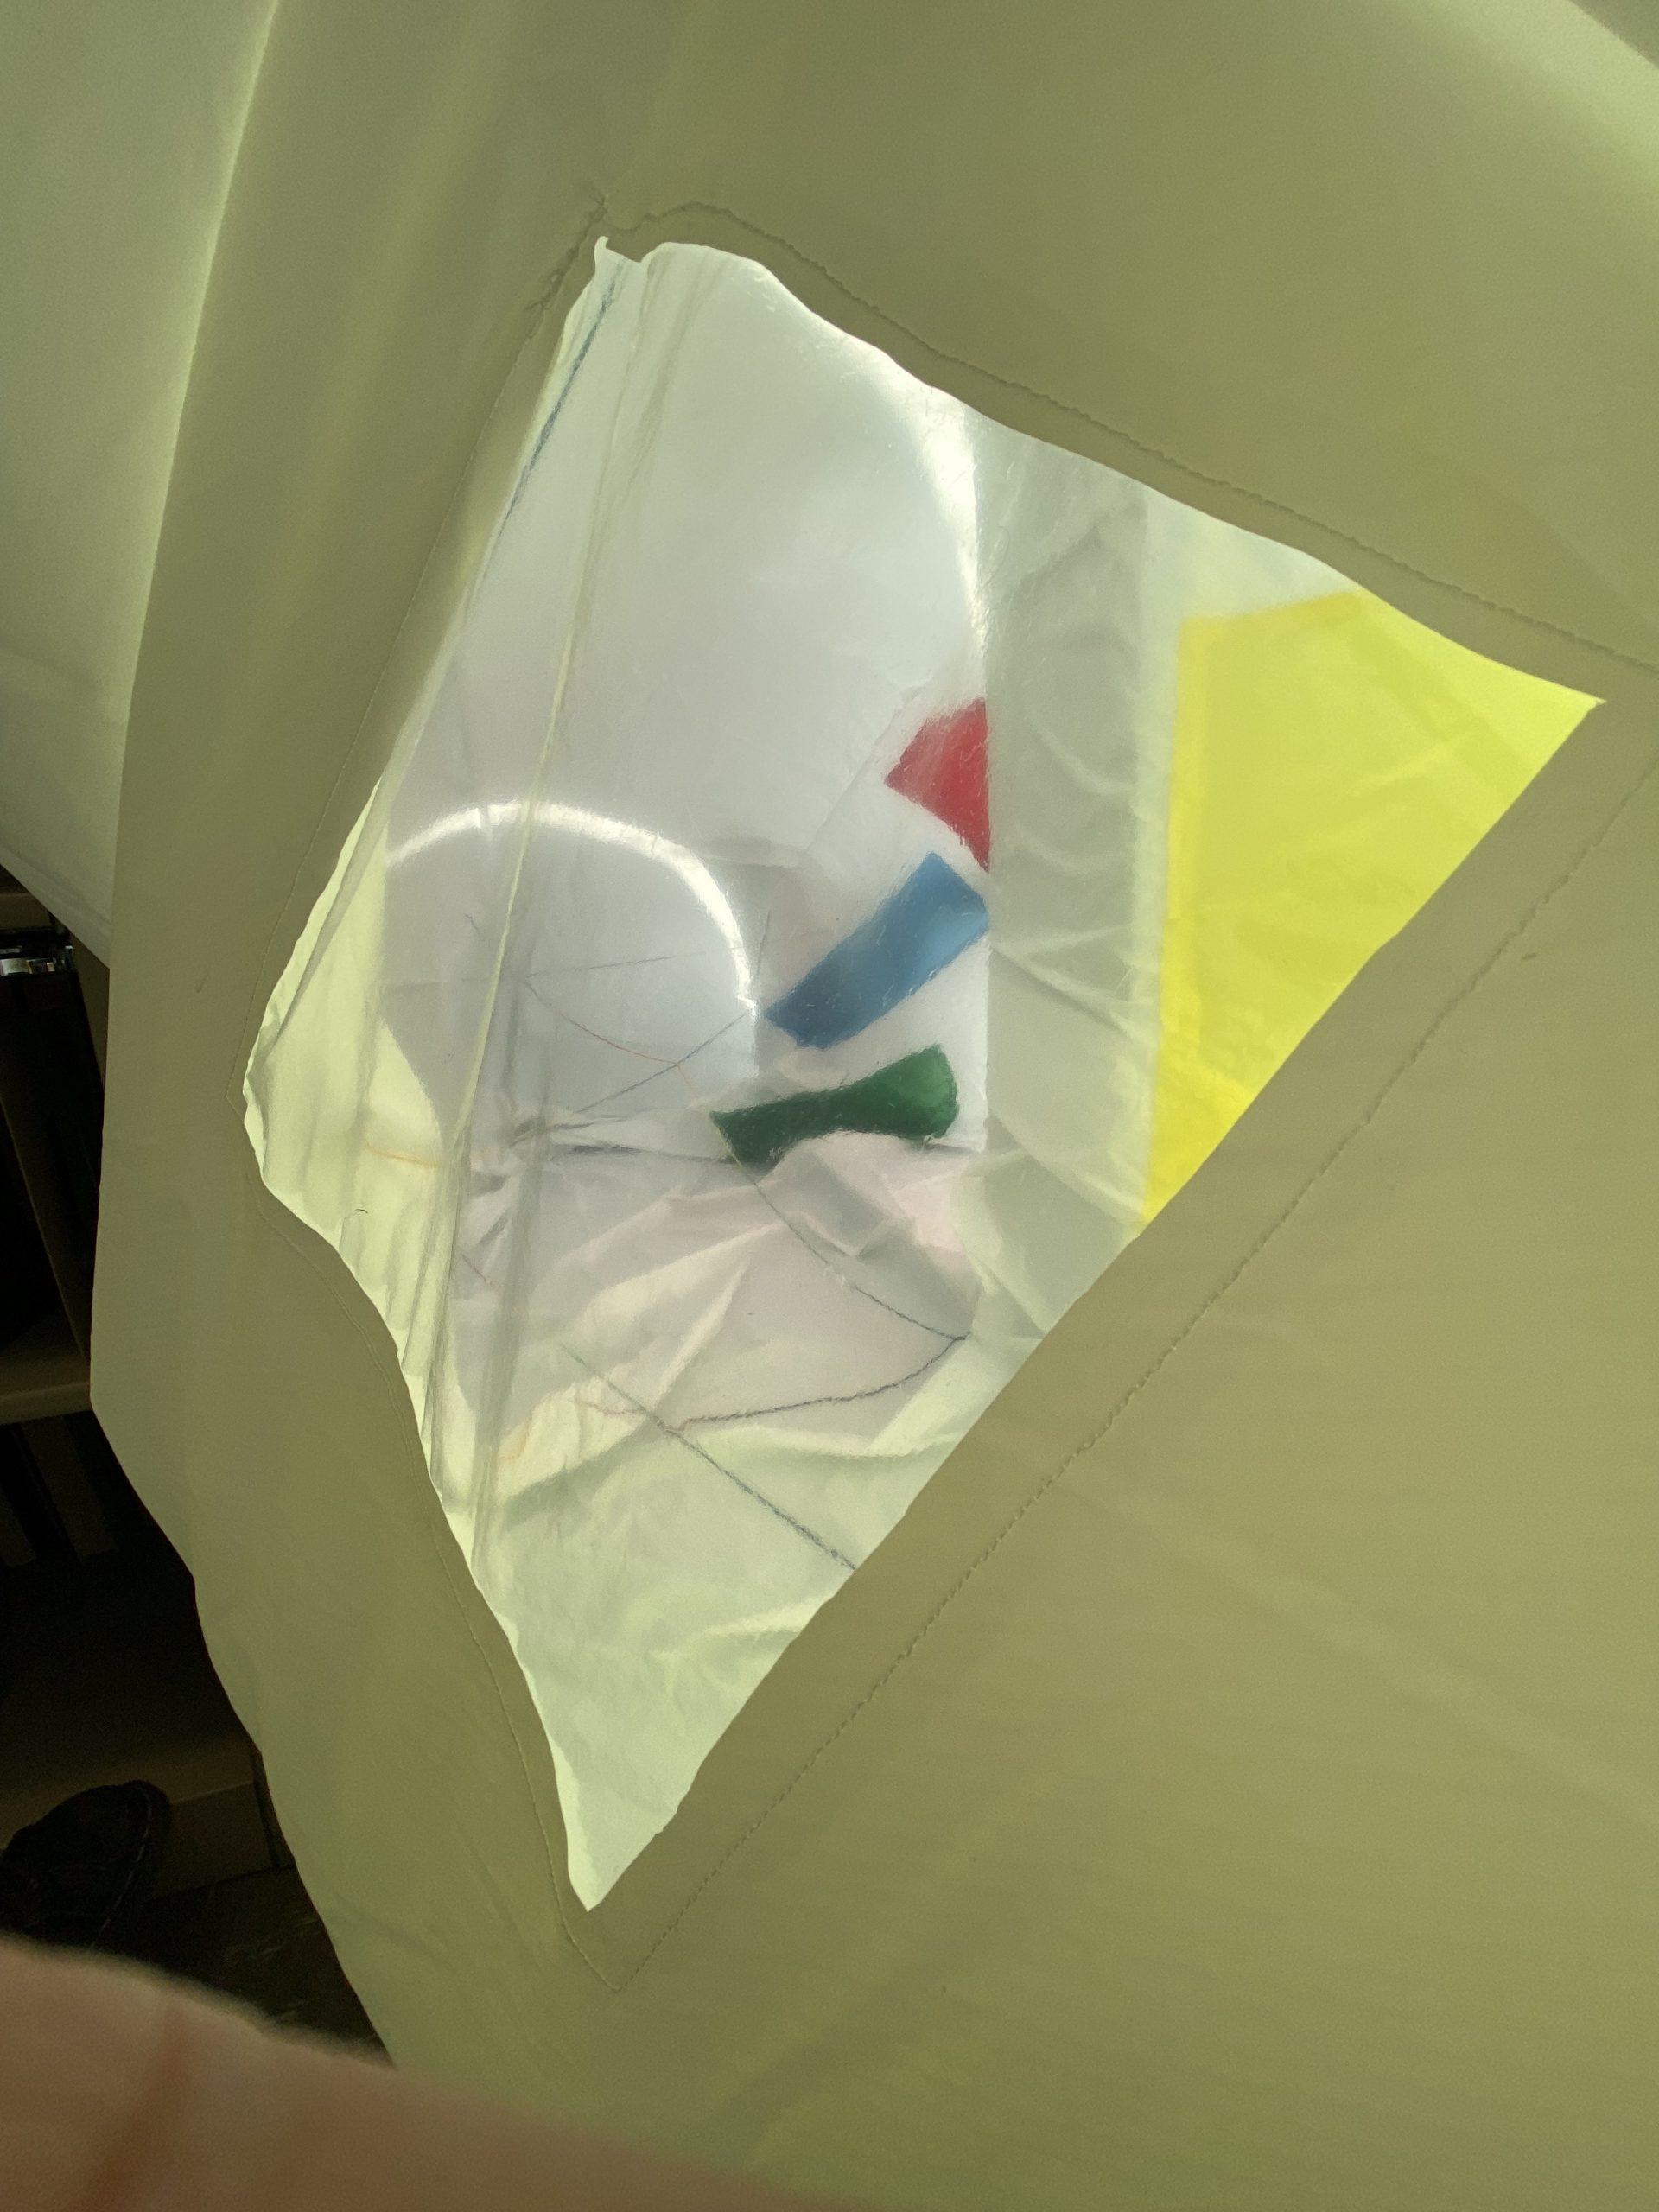
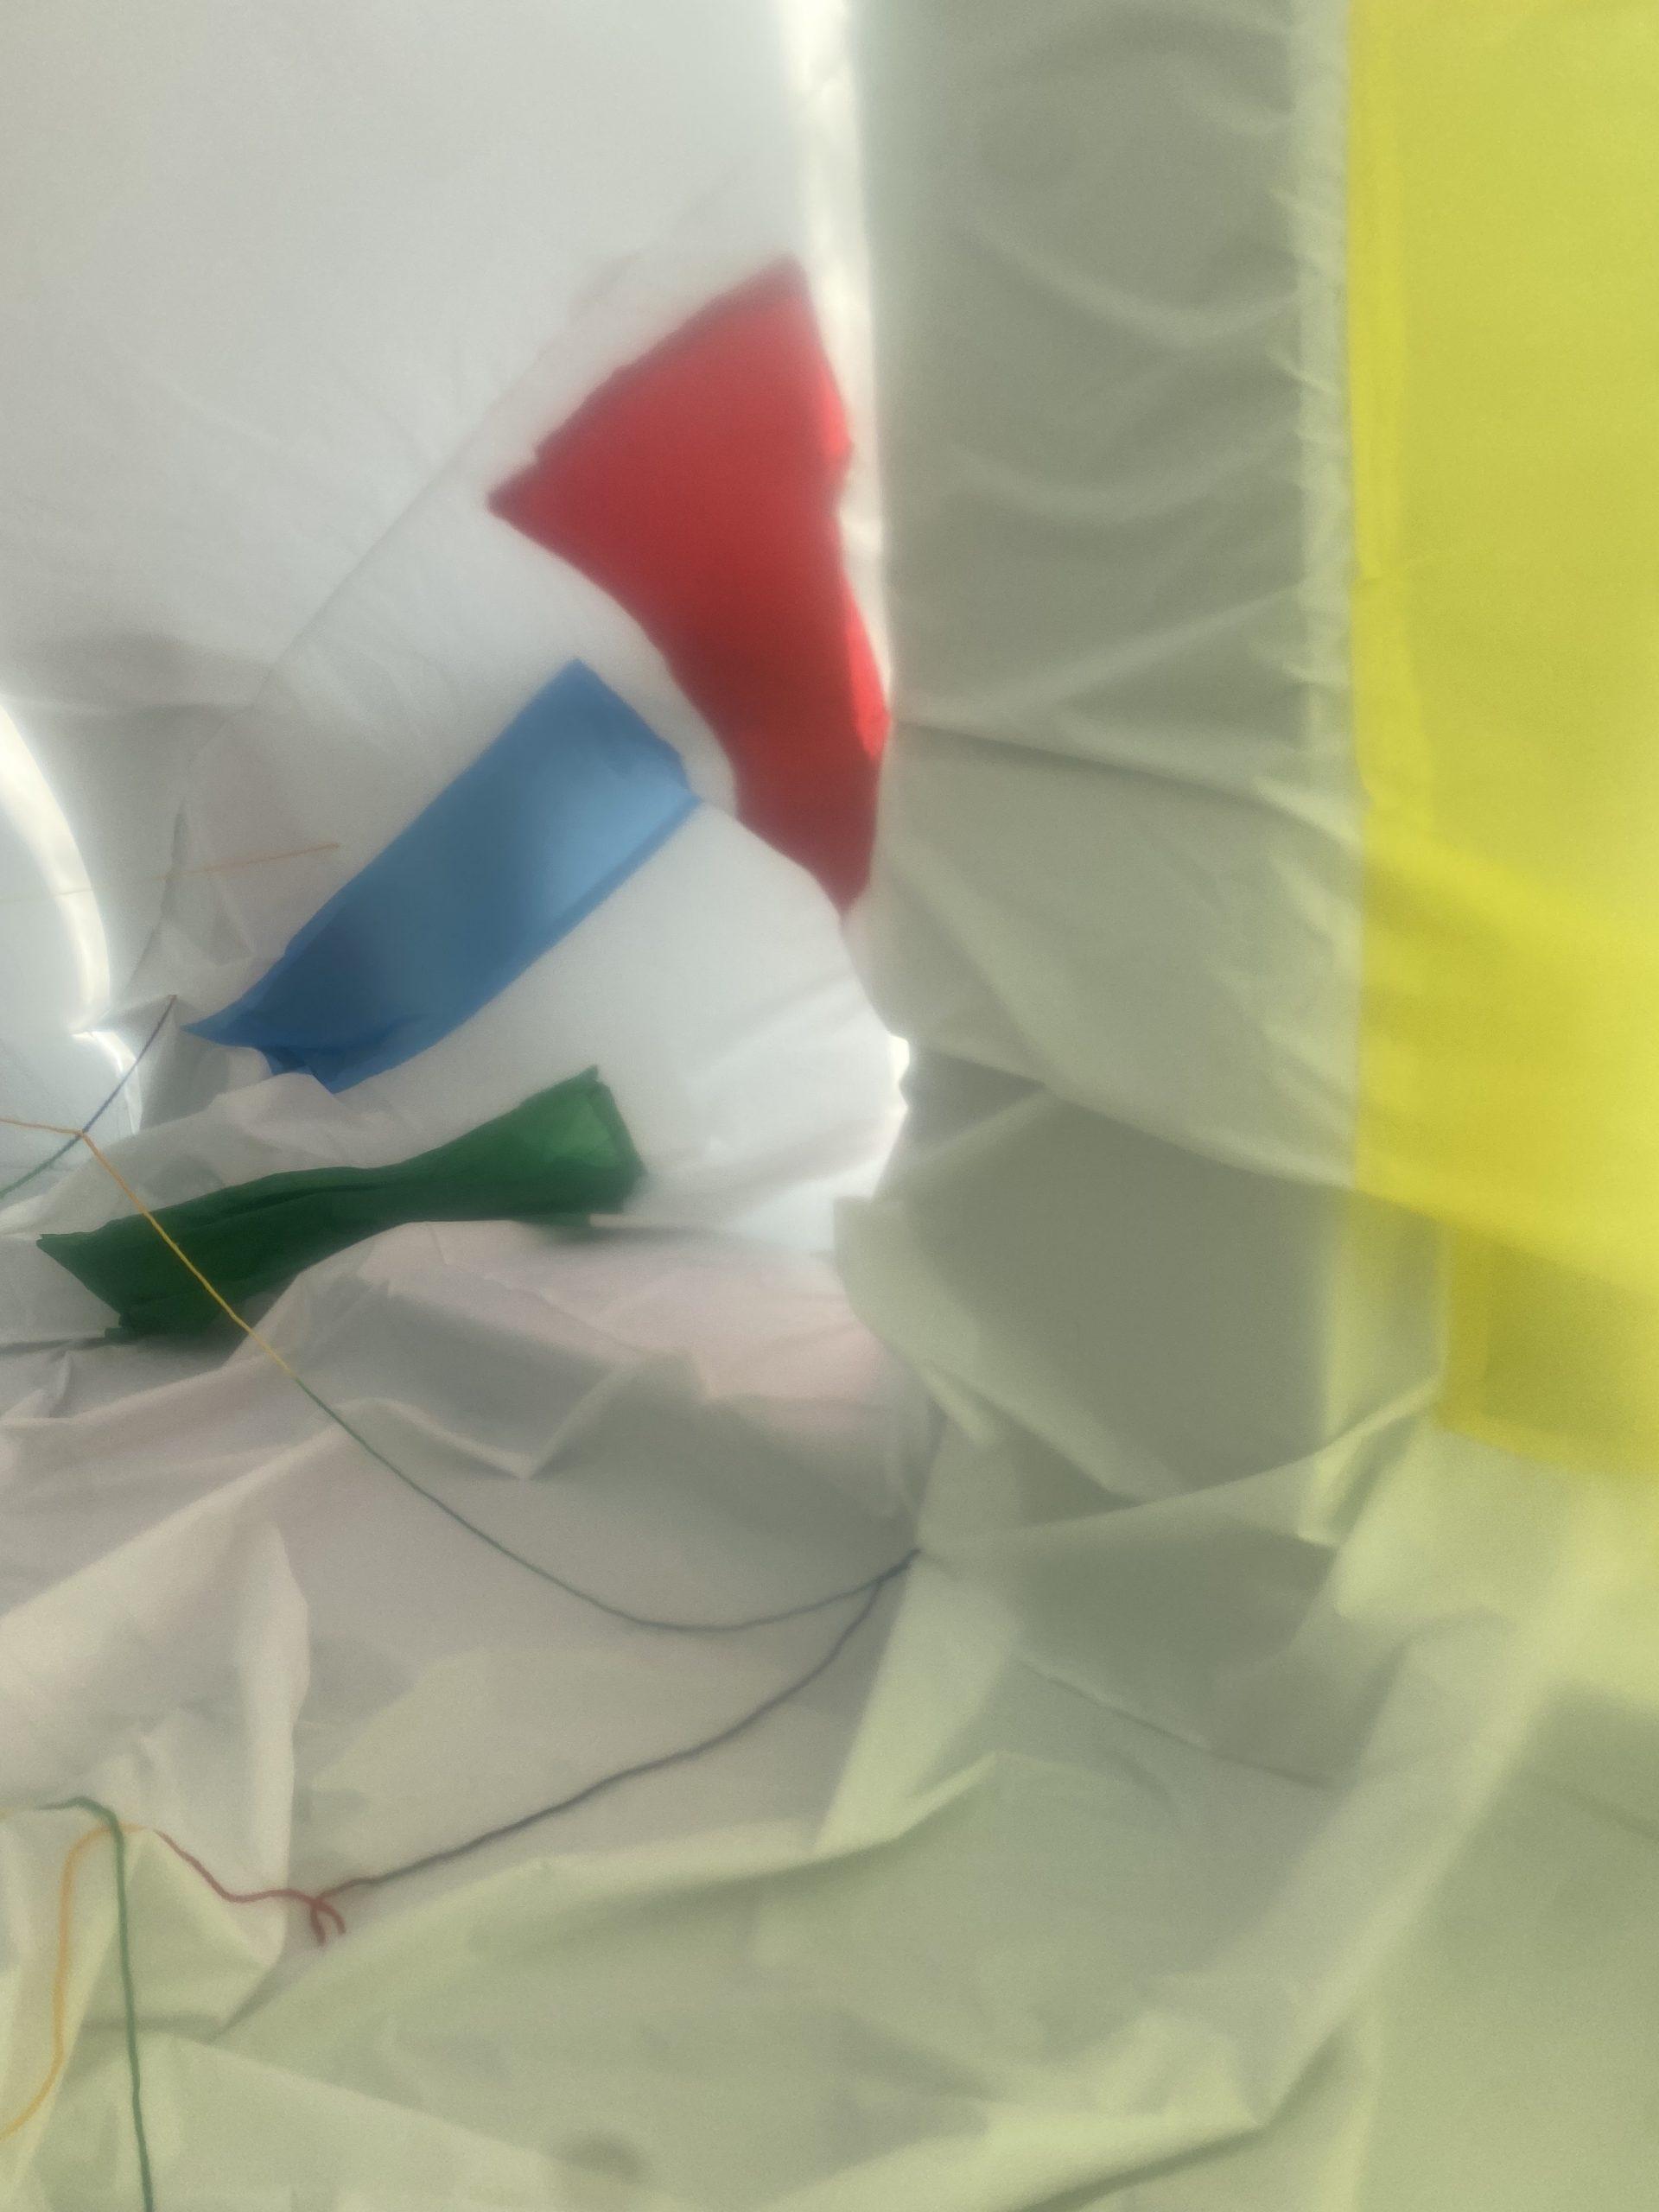
We originally weren’t sure what we were going to add beyond the rectangle, and we thought it would not be in the bookshelves. We decided something colorful would be a good use of the light and decided to add the panels, and then decided the front should have windows so you could see the colors. We were worried you wouldn’t be able to see the colors otherwise. Also, we thought that we would keep it in the window frame using tape, but then realized we wouldn’t be able to use tape, but it actually worked out perfectly that we ended up with the space on the second floor in the bookshelves and made the inflatable way bigger than the window frame, because the bookshelves ended up being the constraints. Here are some photos through the window:
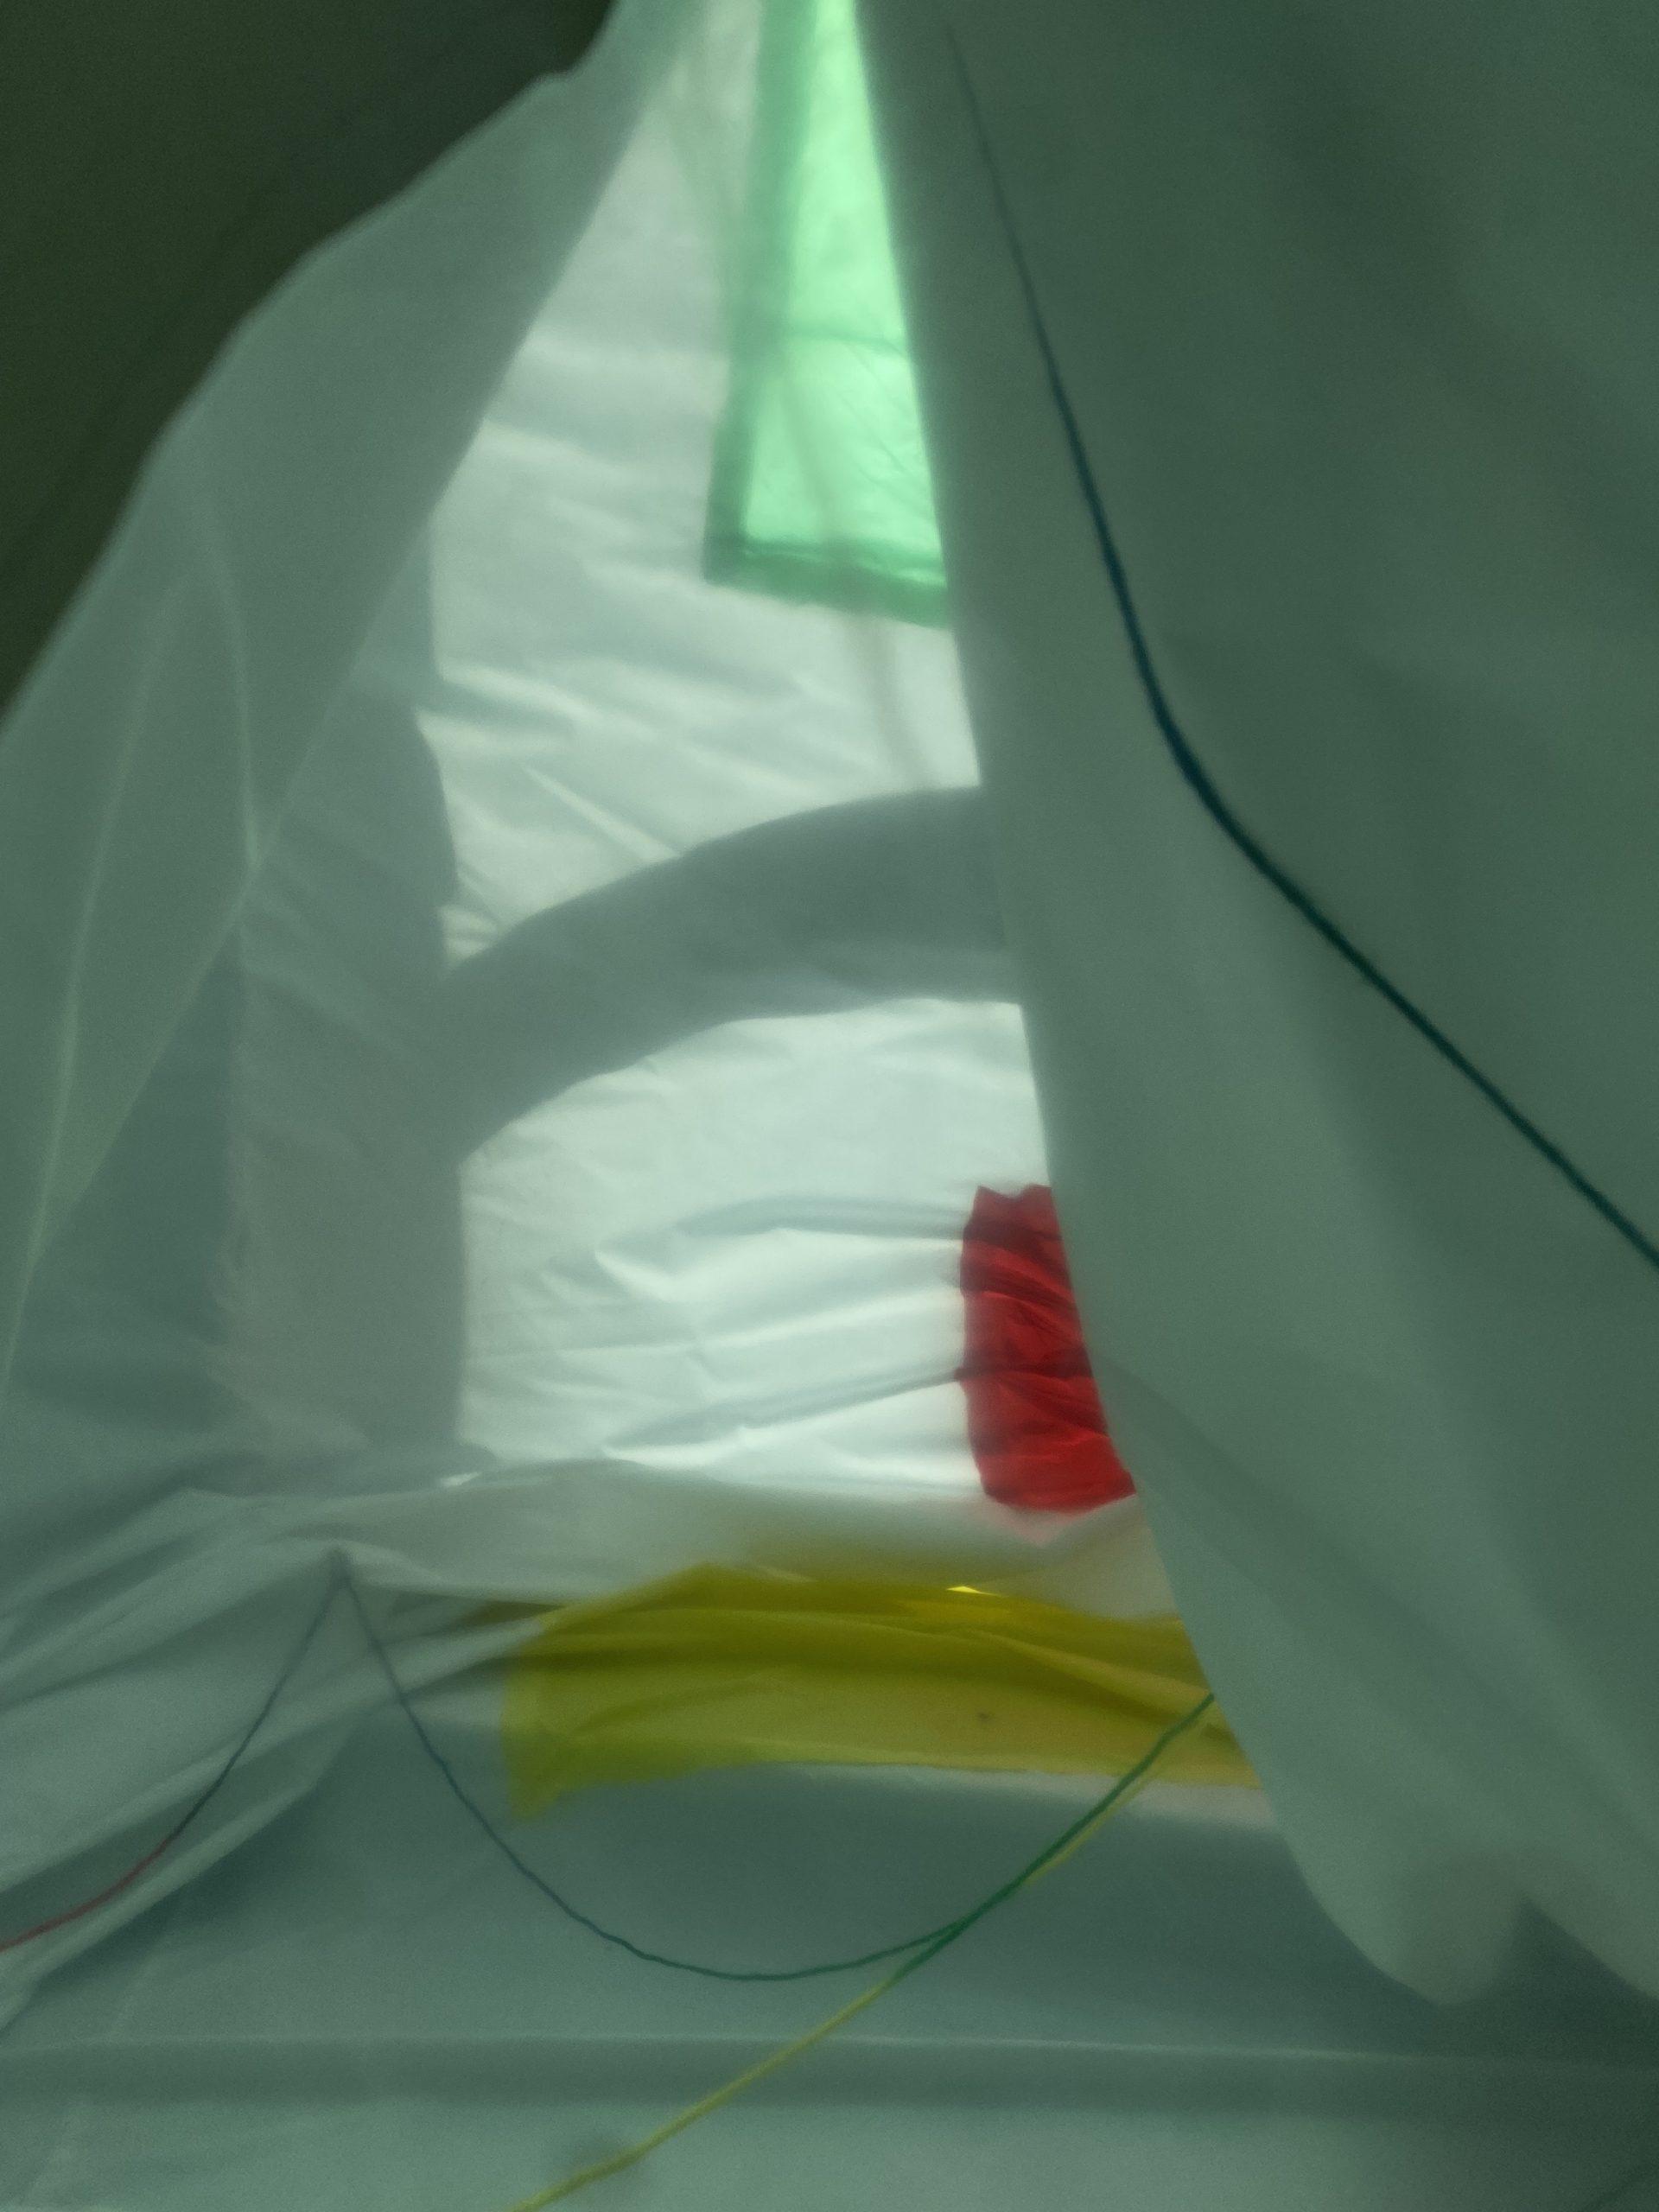
We really liked how the windows gave a view into the structure and ended up creating a very cool effect of showing a different color reflection on the floor than the color you could see through the window. We also were happy with how big the space inside appeared even though from the outside it doesn’t look like much. We added the criss-crossing yarn last and were also pleasantly surprised at how it divided the space inside, and was kind of reminiscent of kites.
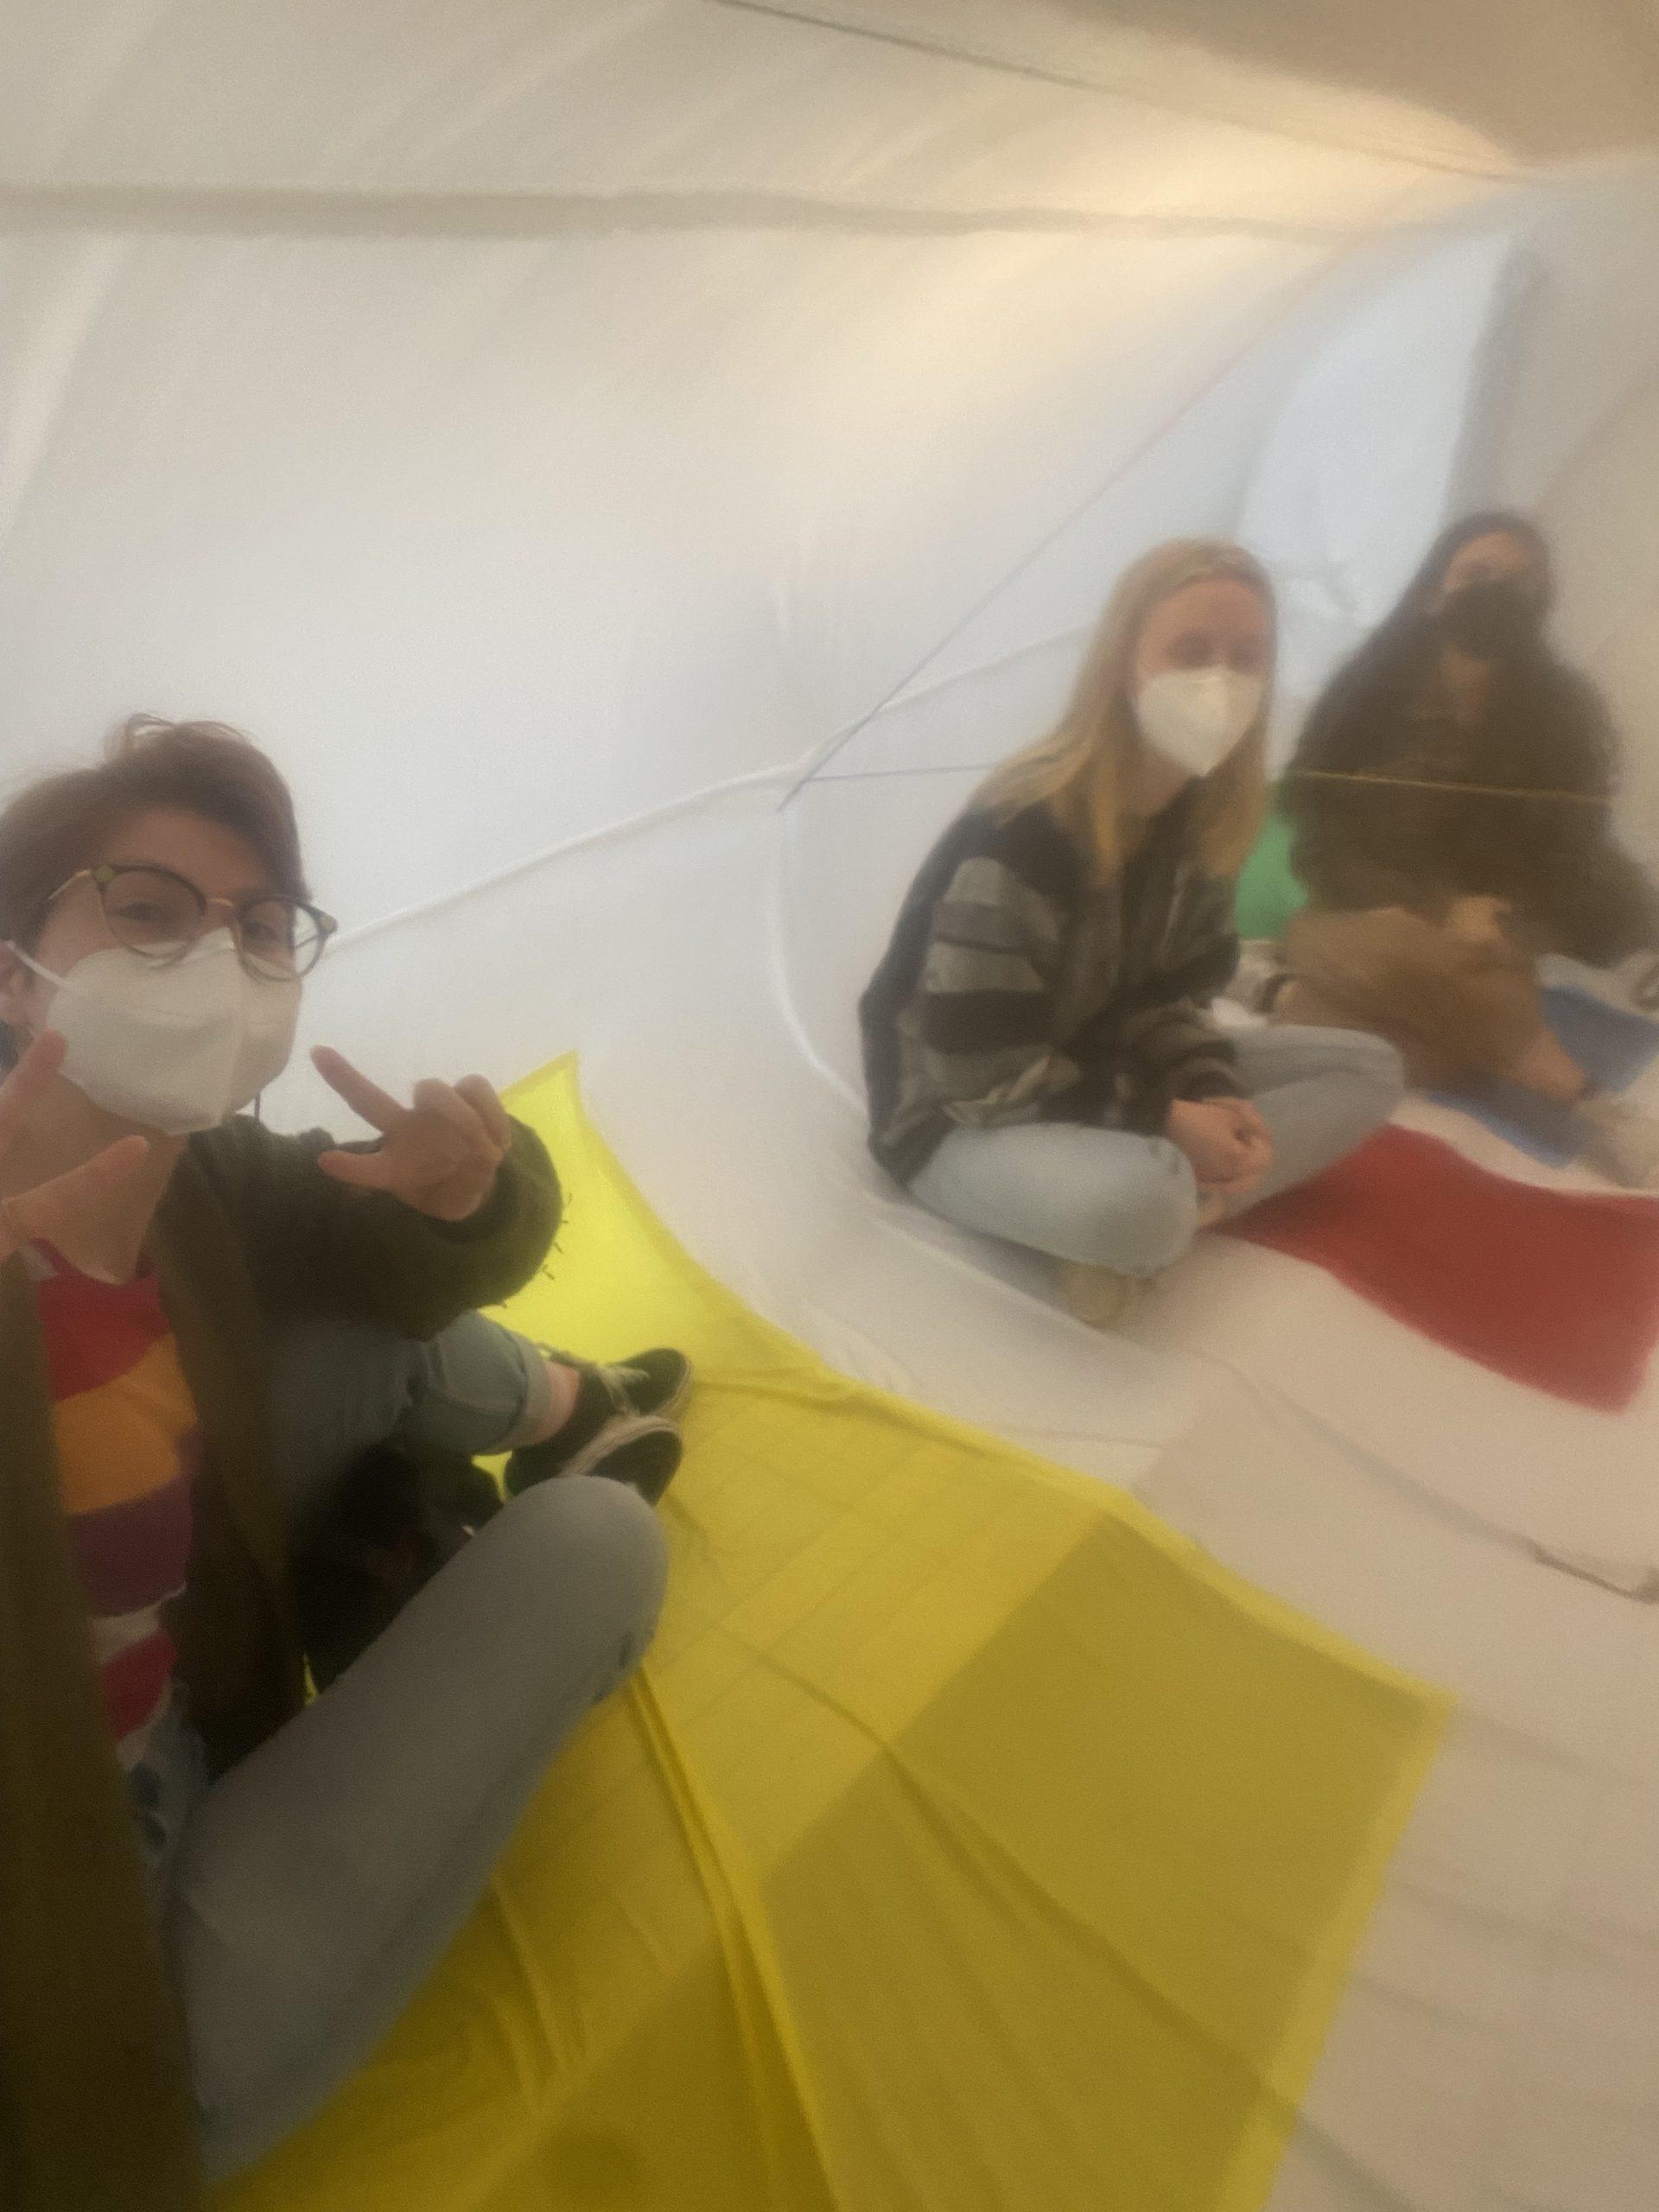
p.s. I also brought it to my art show this weekend and put in it a different space and let people go inside it and it was a lot of fun and very peaceful to be in there even though the colors weren’t catching the sunlight like they were supposed to. 🙂 Here are some of my friends inside it. -Skylar
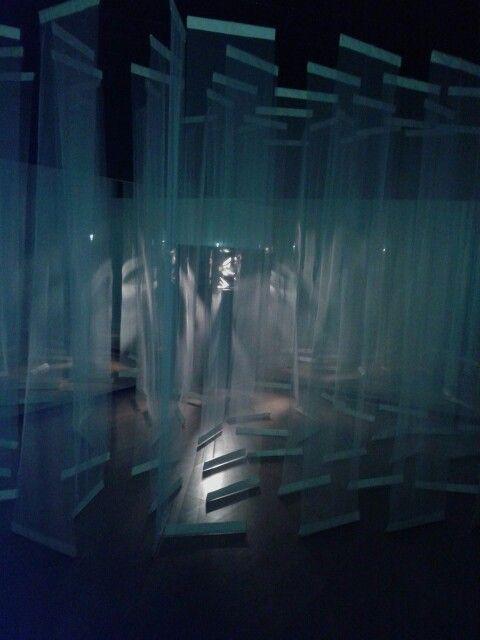
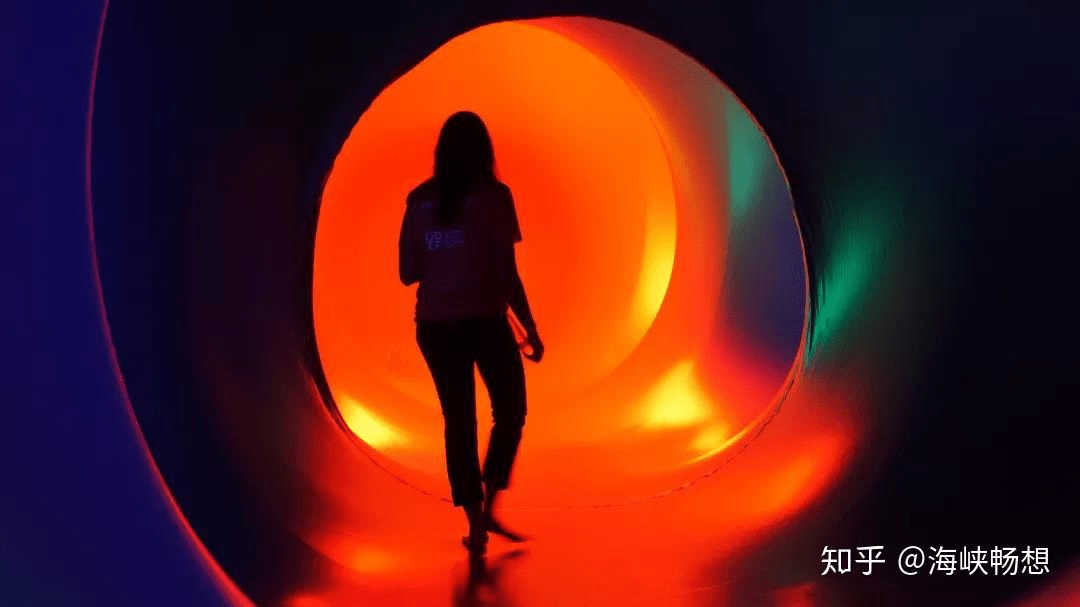
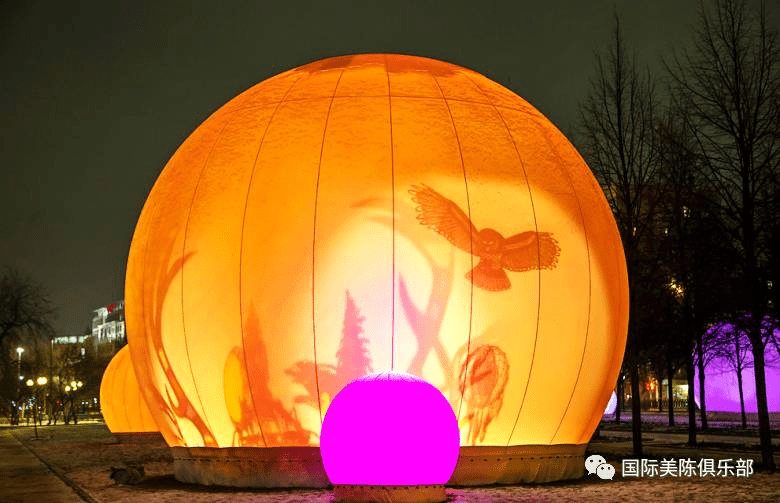
For the final project, we will be creating a dreamy dome-shaped inflatable where people can enter through a tunnel. We want to make a space where people can explore freely on their own. There will be randomly placed curtains within the dome in different colors and designs. We plan to have two domes connected to the tunnel, with one representing the confusion from a dream and one for people to leave their messages if they can reach that dome after the dream dome. Since dreams tend to be chaotic and can have many twists and turns, we think the curtains can replicate that experience by creating unique “paths” that people can walk through. Everyone will have a different experience inside the inflatable because they will choose random curtains to walk through. We anticipate that we can utilize different lighting effects and animations to create different kinds of illusions and dreamy/eerie atmospheres for the audience, which we will definitely discuss with the animators!
We will need a lot of ripstop nylon for our project, enough to make two large spherical shapes. One of the two shapes needs to be big enough to allow 7 people to be comfortably spaced out while standing in the space. The other shape needs to be big enough for at least 2 people to stand in the shape.
Velcro – 5 feet long
Light sheer-ish fabric- 10 strips of 7 feet by 1.5 feet long
Random pieces of different fabric – 5 ft by 5 ft total material
3 sharpies
3 powerful fans
Challenges
One of the most challenging parts of the project is making the two sphere-like shapes and having them be stable throughout the performance. This is because we want to make it double-walled while keeping it a sphere-like shape and having a large entrance area. We want people to enter this space feeling slightly confused. We want them to “get lost” in the space and explore it themselves. There will also be cloth draping from the top of the inflatable to the floor. This adds to the difficulty because we don’t want people to trip over the cloth or knock over the items that will be holding down the inflatable. To address this, we will strategically place the bean bags so that even if a couple of them get moved around, the shape will not move. We also talked about having strips of cloth at different parts of the inflatable and taping it or tying it to the floor/wall. That way, when the bean bags get moved, there are other things holding the inflatable in place. Another possibility for the weights placement could be that they are placed inside the double-walled structure itself. That way, they would be hidden and out of the way of visitors, further enhancing the aesthetic of the structure and space that makes it look dreamlike and ethereal.
Revisions to Original Proposal
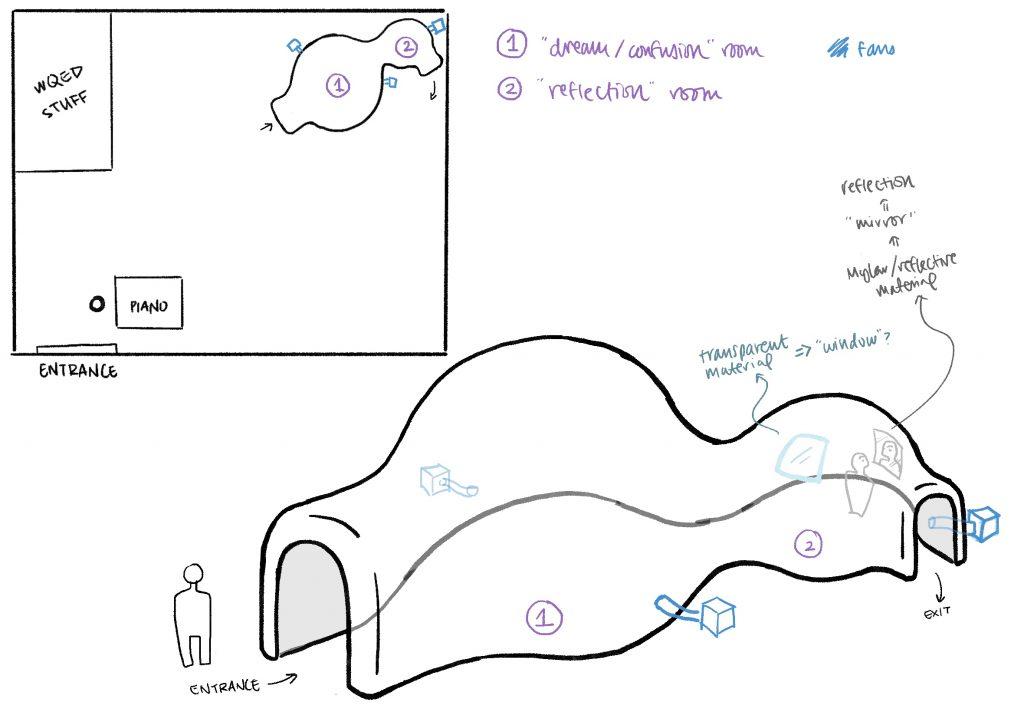
We received a lot of thought-provoking feedback from our peers and Olivia in class. One of the biggest takeaways was the idea of adding an exit to our original inflatable design. This would be to make the space created by the inflatable feel less claustrophobic and be safer, while also providing a better flow for visitors going through our inflatable.
The inflatable’s dimensions were something else that we have to consider more in terms of the proportions of the entrance/exit in relation to the rest of the dome-like structures of the main inflatable body. We currently estimate it to be around a 12 x 15 ft footprint and possibly 12 ft tall, though we will definitely confirm this in person by measuring out these actual dimensions.
We also were given some feedback on the “reflection room.” We are considering placing some transparent fabric cutouts to parts of the wall of this dome to create “windows” and let some external light in, or possibly have projections projected through the window and into the inflatable. Olivia also mentioned using Mylar, or some other reflective fabric, to mimic mirrors so visitors can see their own reflections. We are still considering exploring this material and see how well it could fit with our vision and how well we’d be able to make use of it.
Lastly, we also received feedback for the “dream/confusion room” to make it more confusing to navigate: the inner walls of the structure could be of a similar design to the dazzle ships from WWI, and maybe even include some portruding structures to serve as “obstacles” to visitors’ paths.
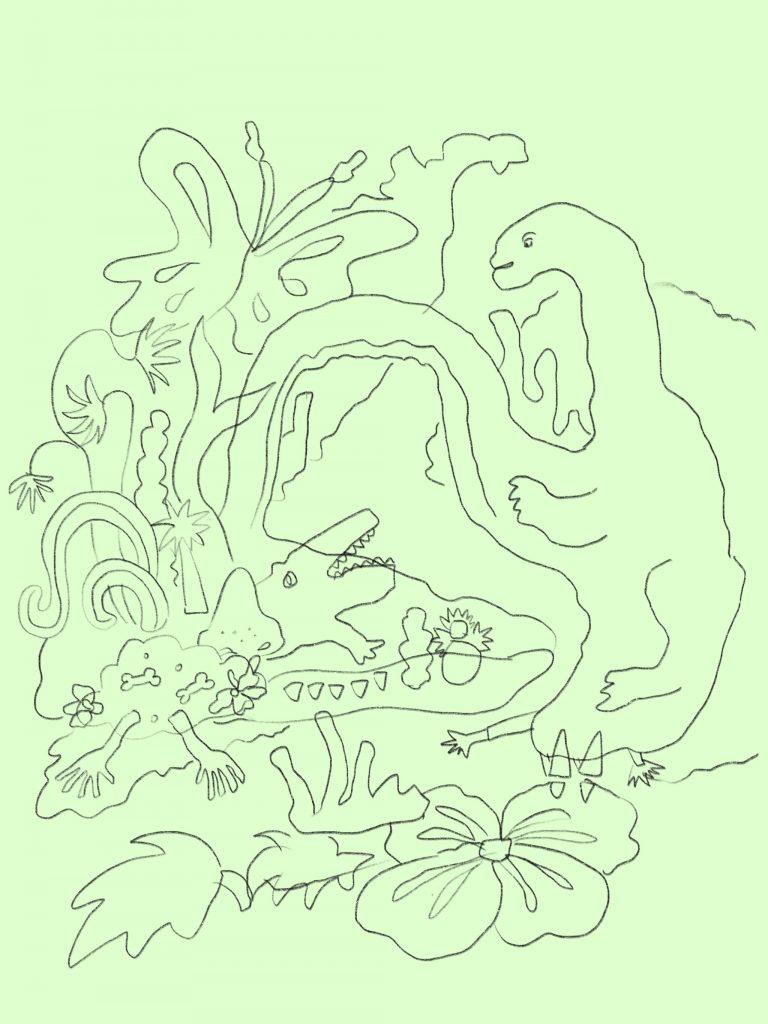
Our idea is to build a creepy garden scene where the ground would roughly span a 15 by 10 foot area. Elements of this scene would include a large creature of some sort, flowers, and garden plants arranged in a rat-king style. There will be roughly 3 parts to the inflatable. One section consists of the cage archway to the garden scene and the other two sections will be the creature on one side and the plants on the other side of the archway.
In order to give the scene a creepy vibe, we intend on including bones, creepy gnomes, and hands as elements in the plant rat-king shape. The archway will appear as if the plants have joined together to form the cage shape.
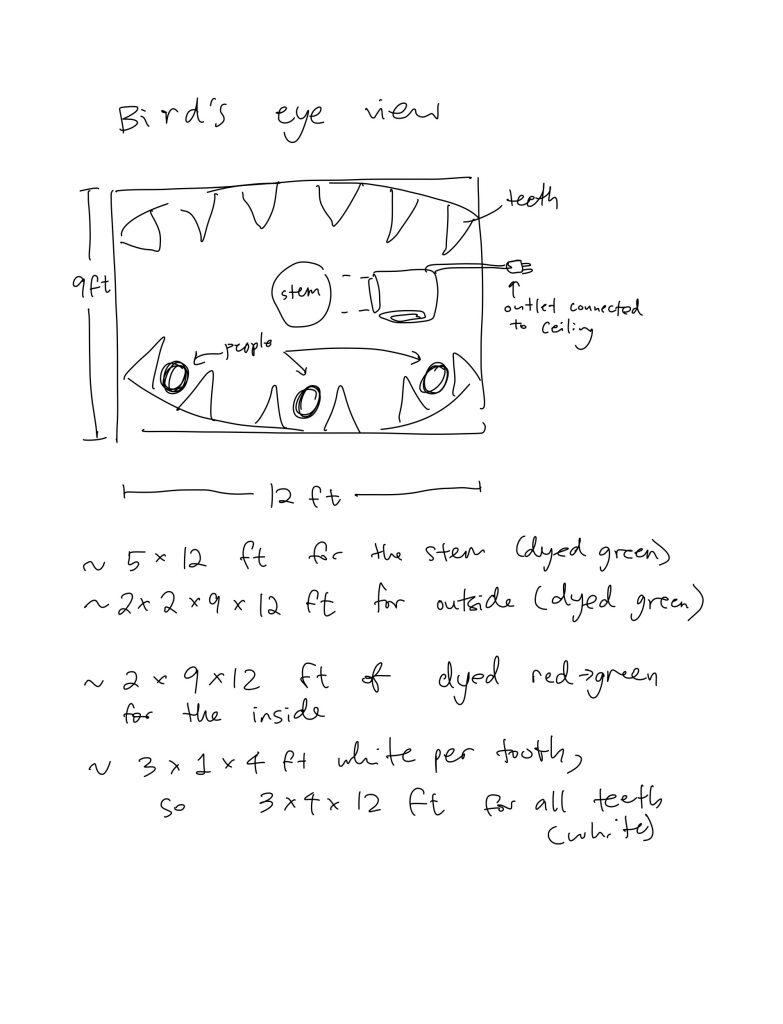
Birds-eye-view drawing
Materials:
We intend on using a lot of a green fabric, so we hope that we would be able to purchase a roll of that. Also, we’re interested in dying parts of fabrics different colors. If we are only able to use the fabrics given, then we would make the whole thing red. In total, we estimate 200 sq. ft. for the floor, 100 sq. ft. for the archway, and 300-400 sq. ft. for the other plant objects.
The most challenging part of this piece would be managing all the different parts and figuring out how they would connect and inflate together. Our idea at the time being seems pretty intricate so it would be difficult to convey the detail that we are aiming for. We think if we plan out the pieces ahead of time and keep them organized and labeled, we will not get too confused in the process of connecting them.
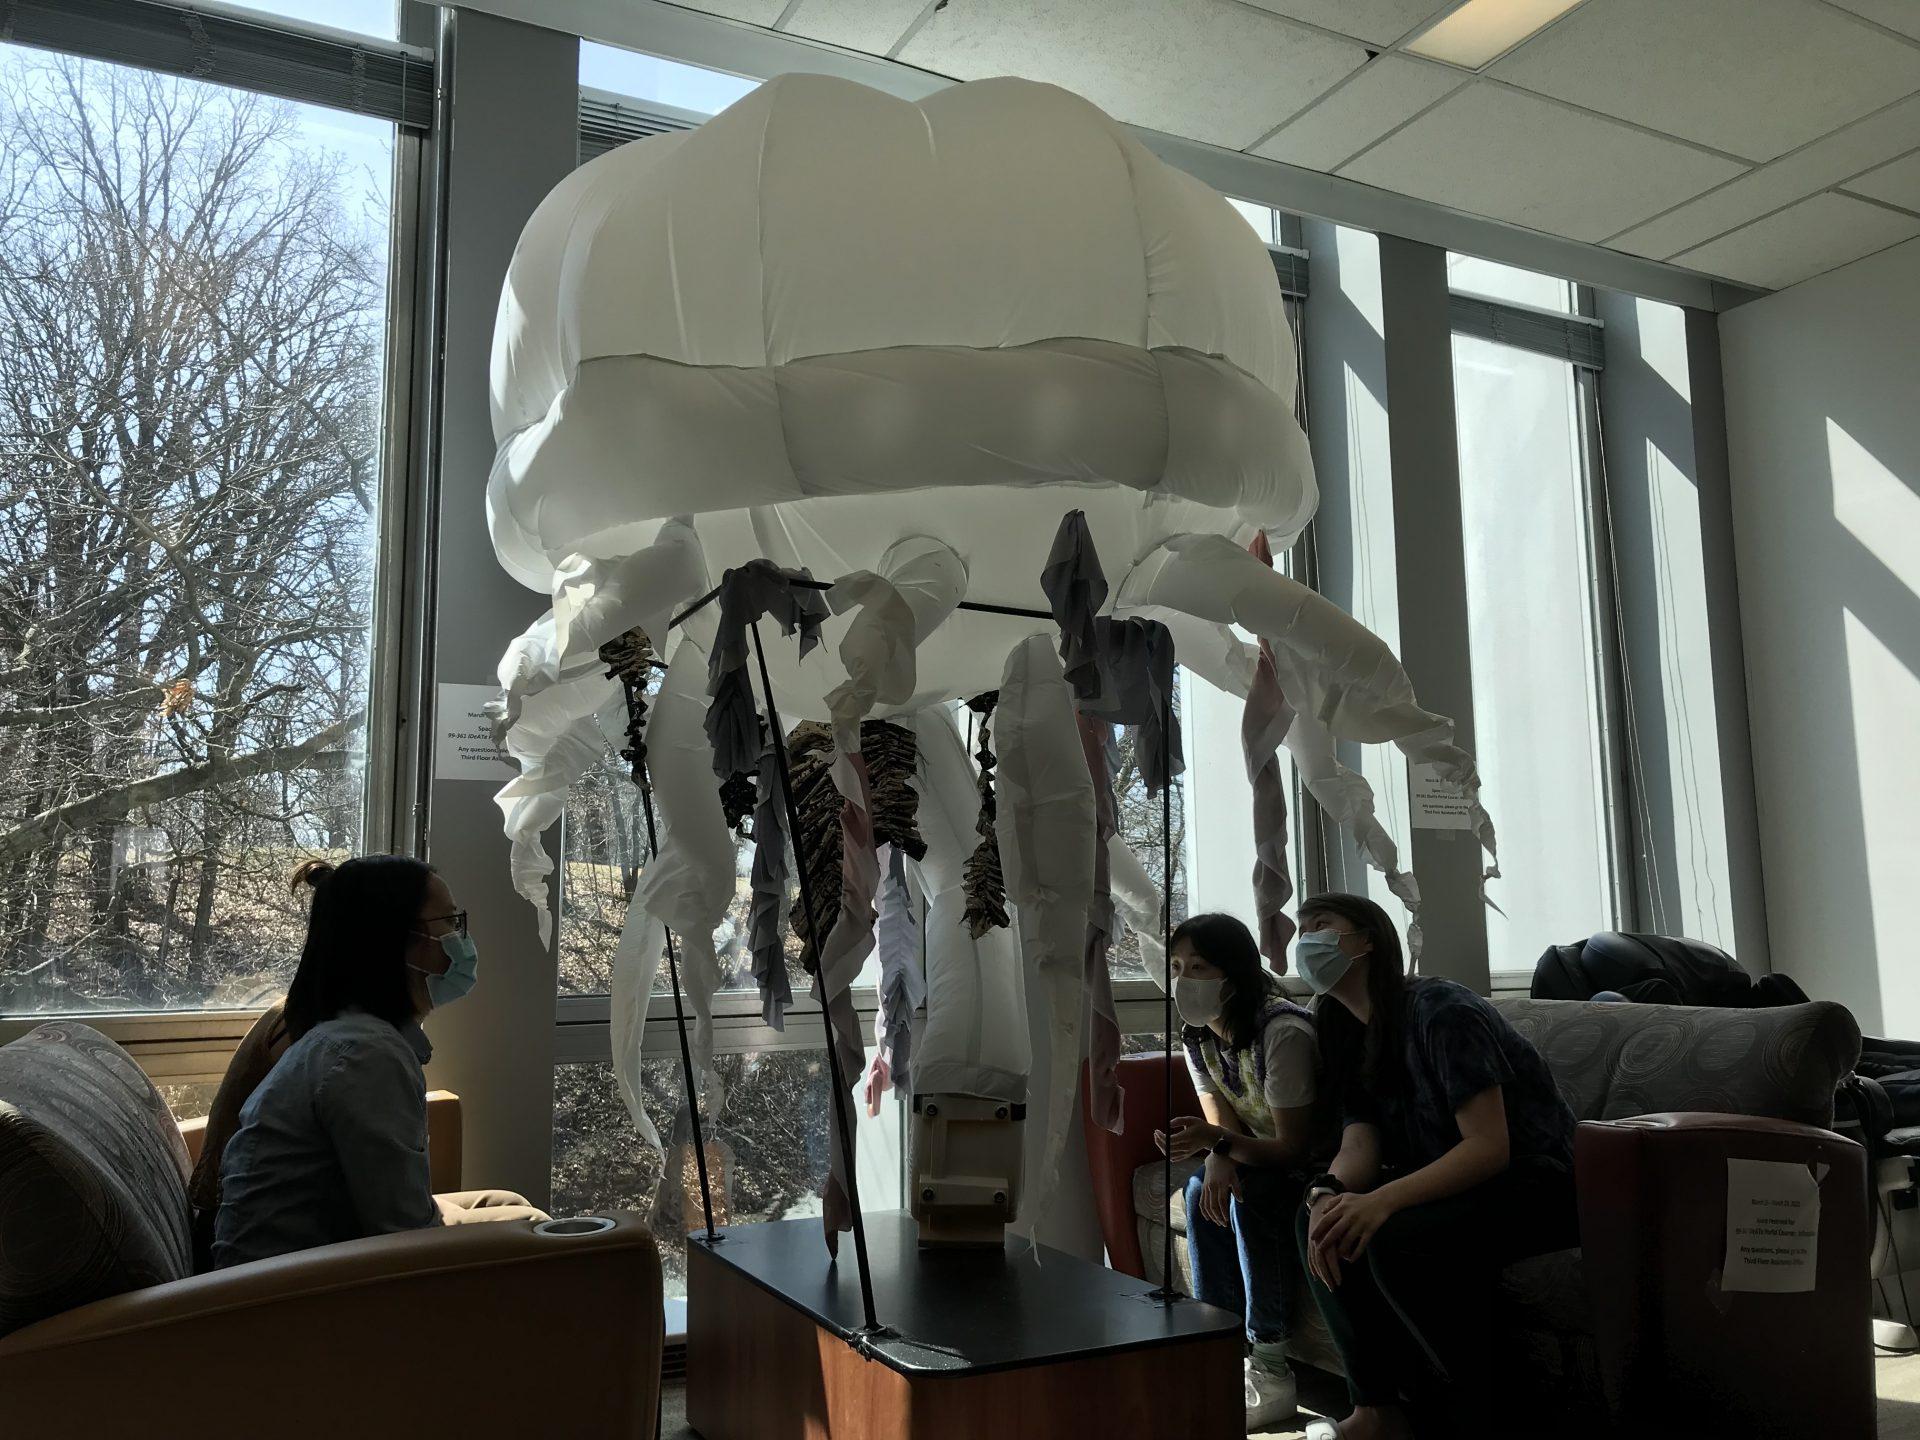
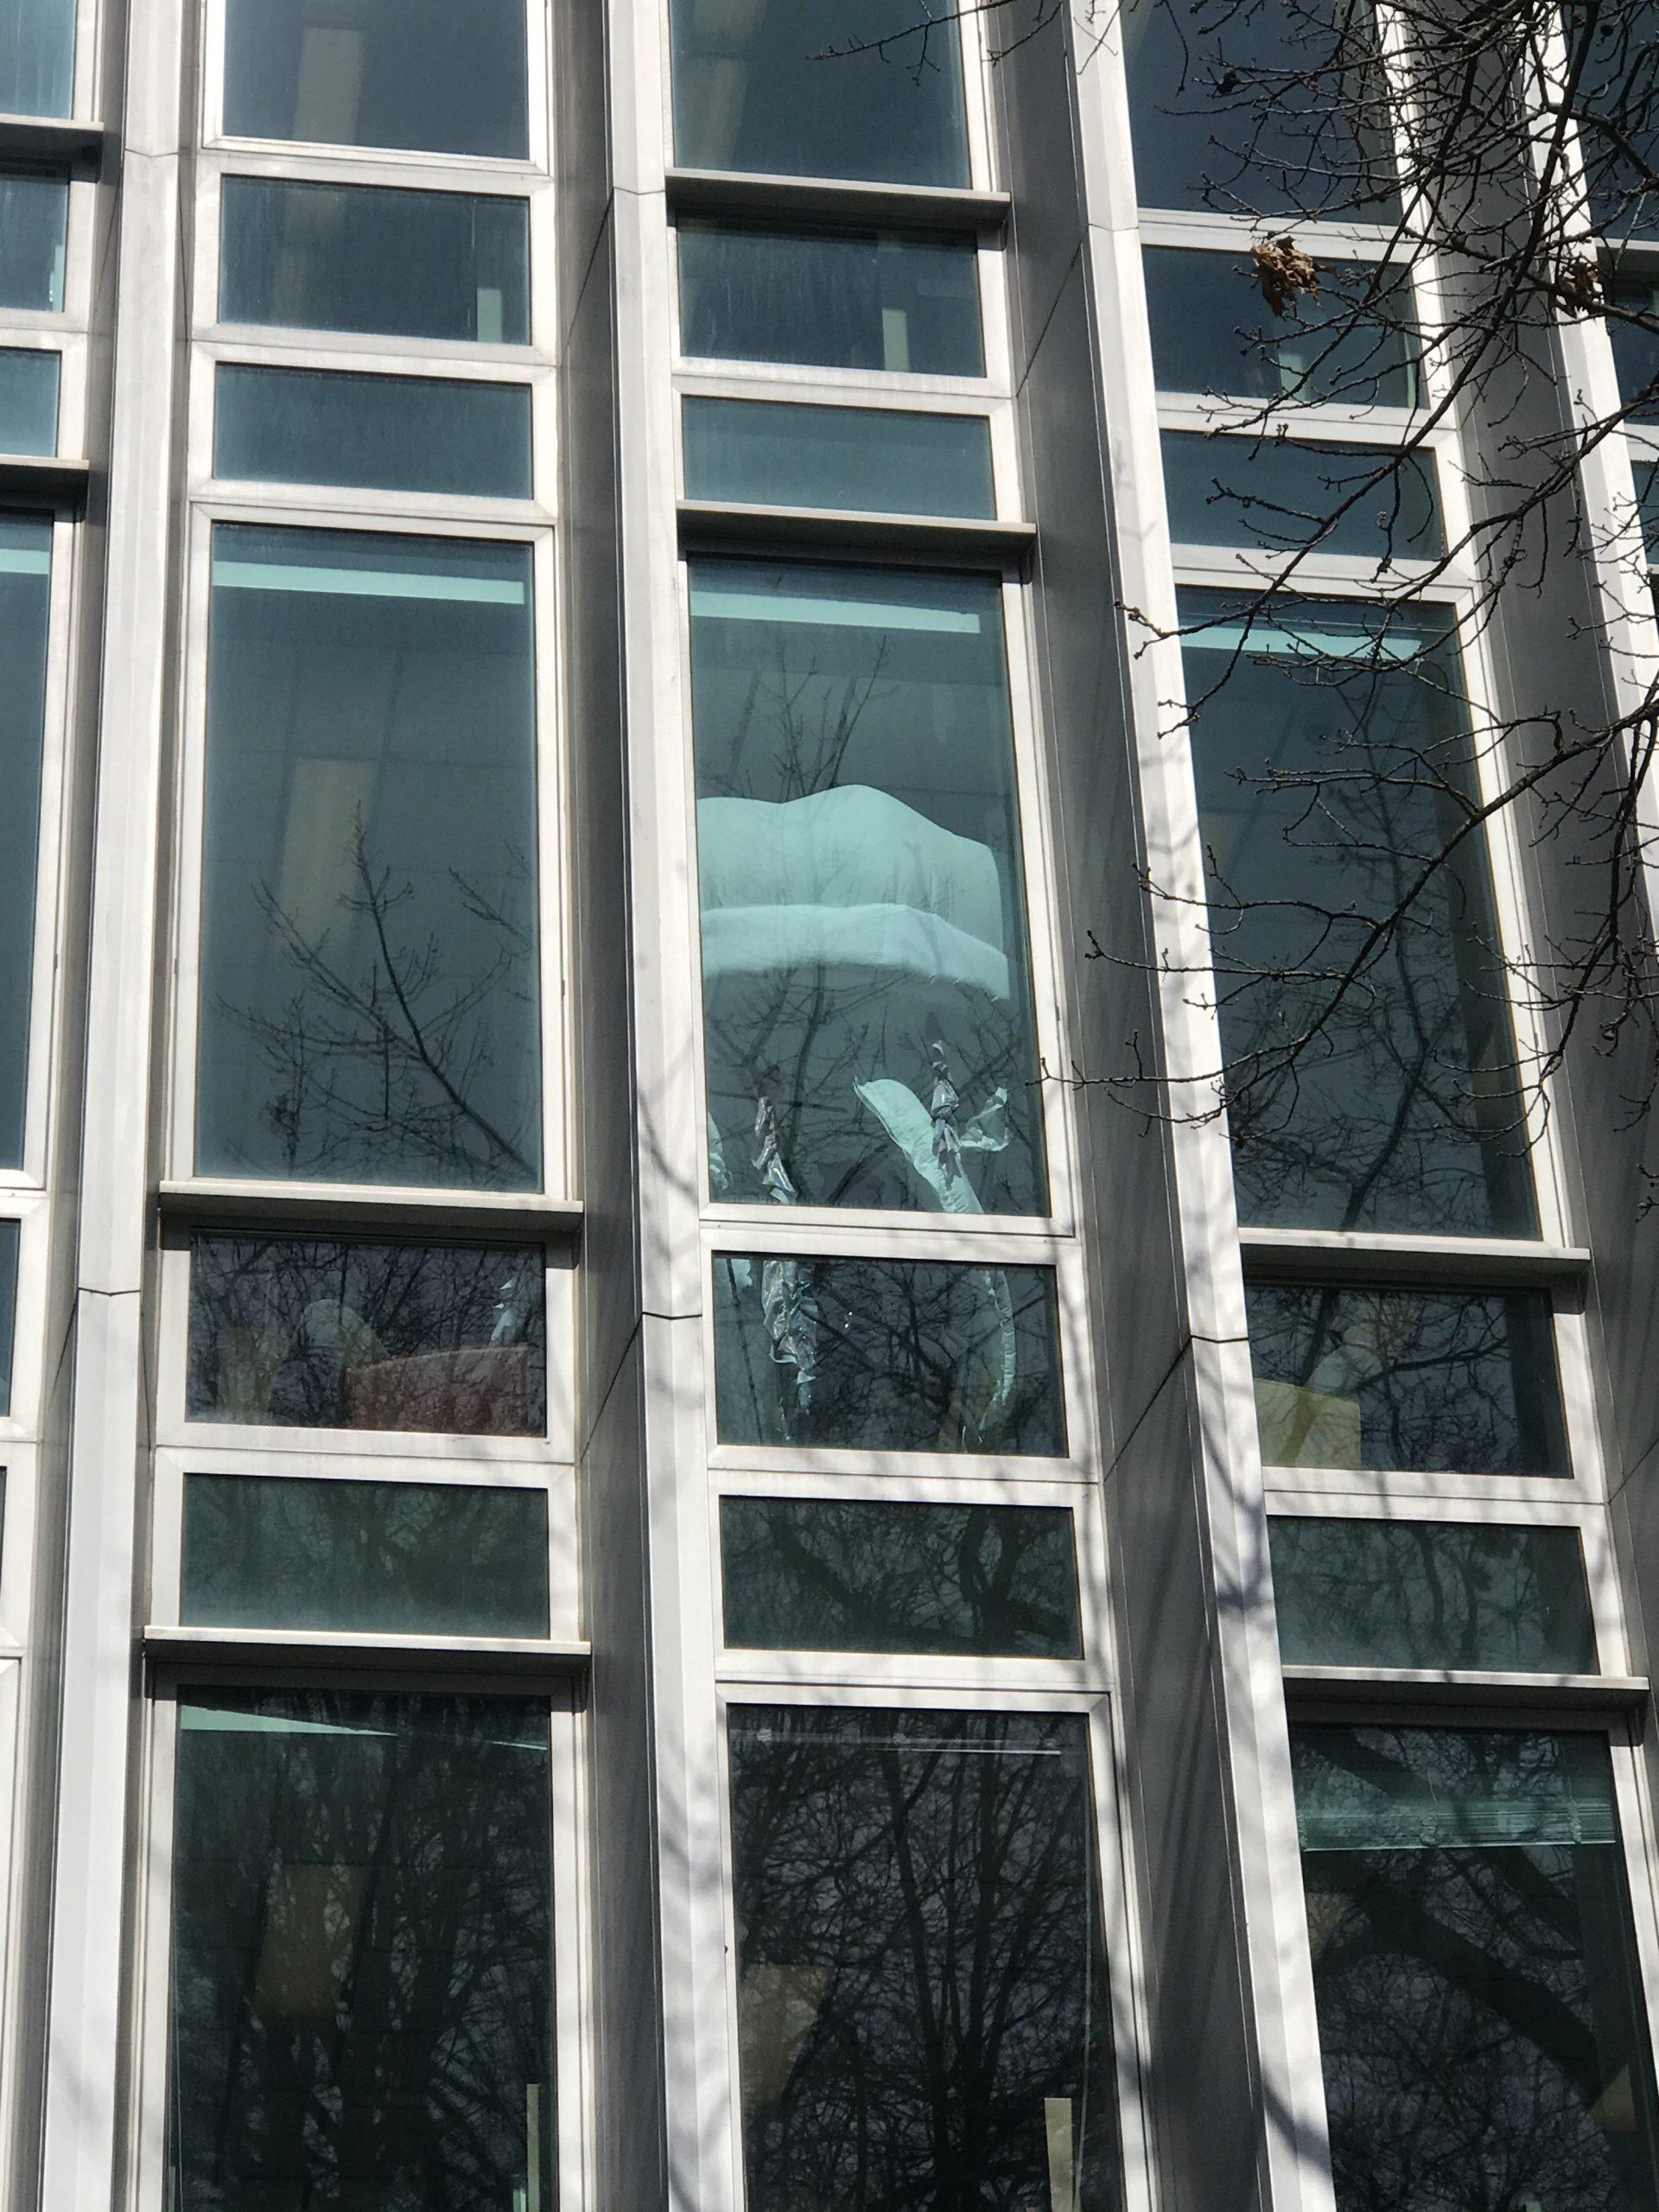
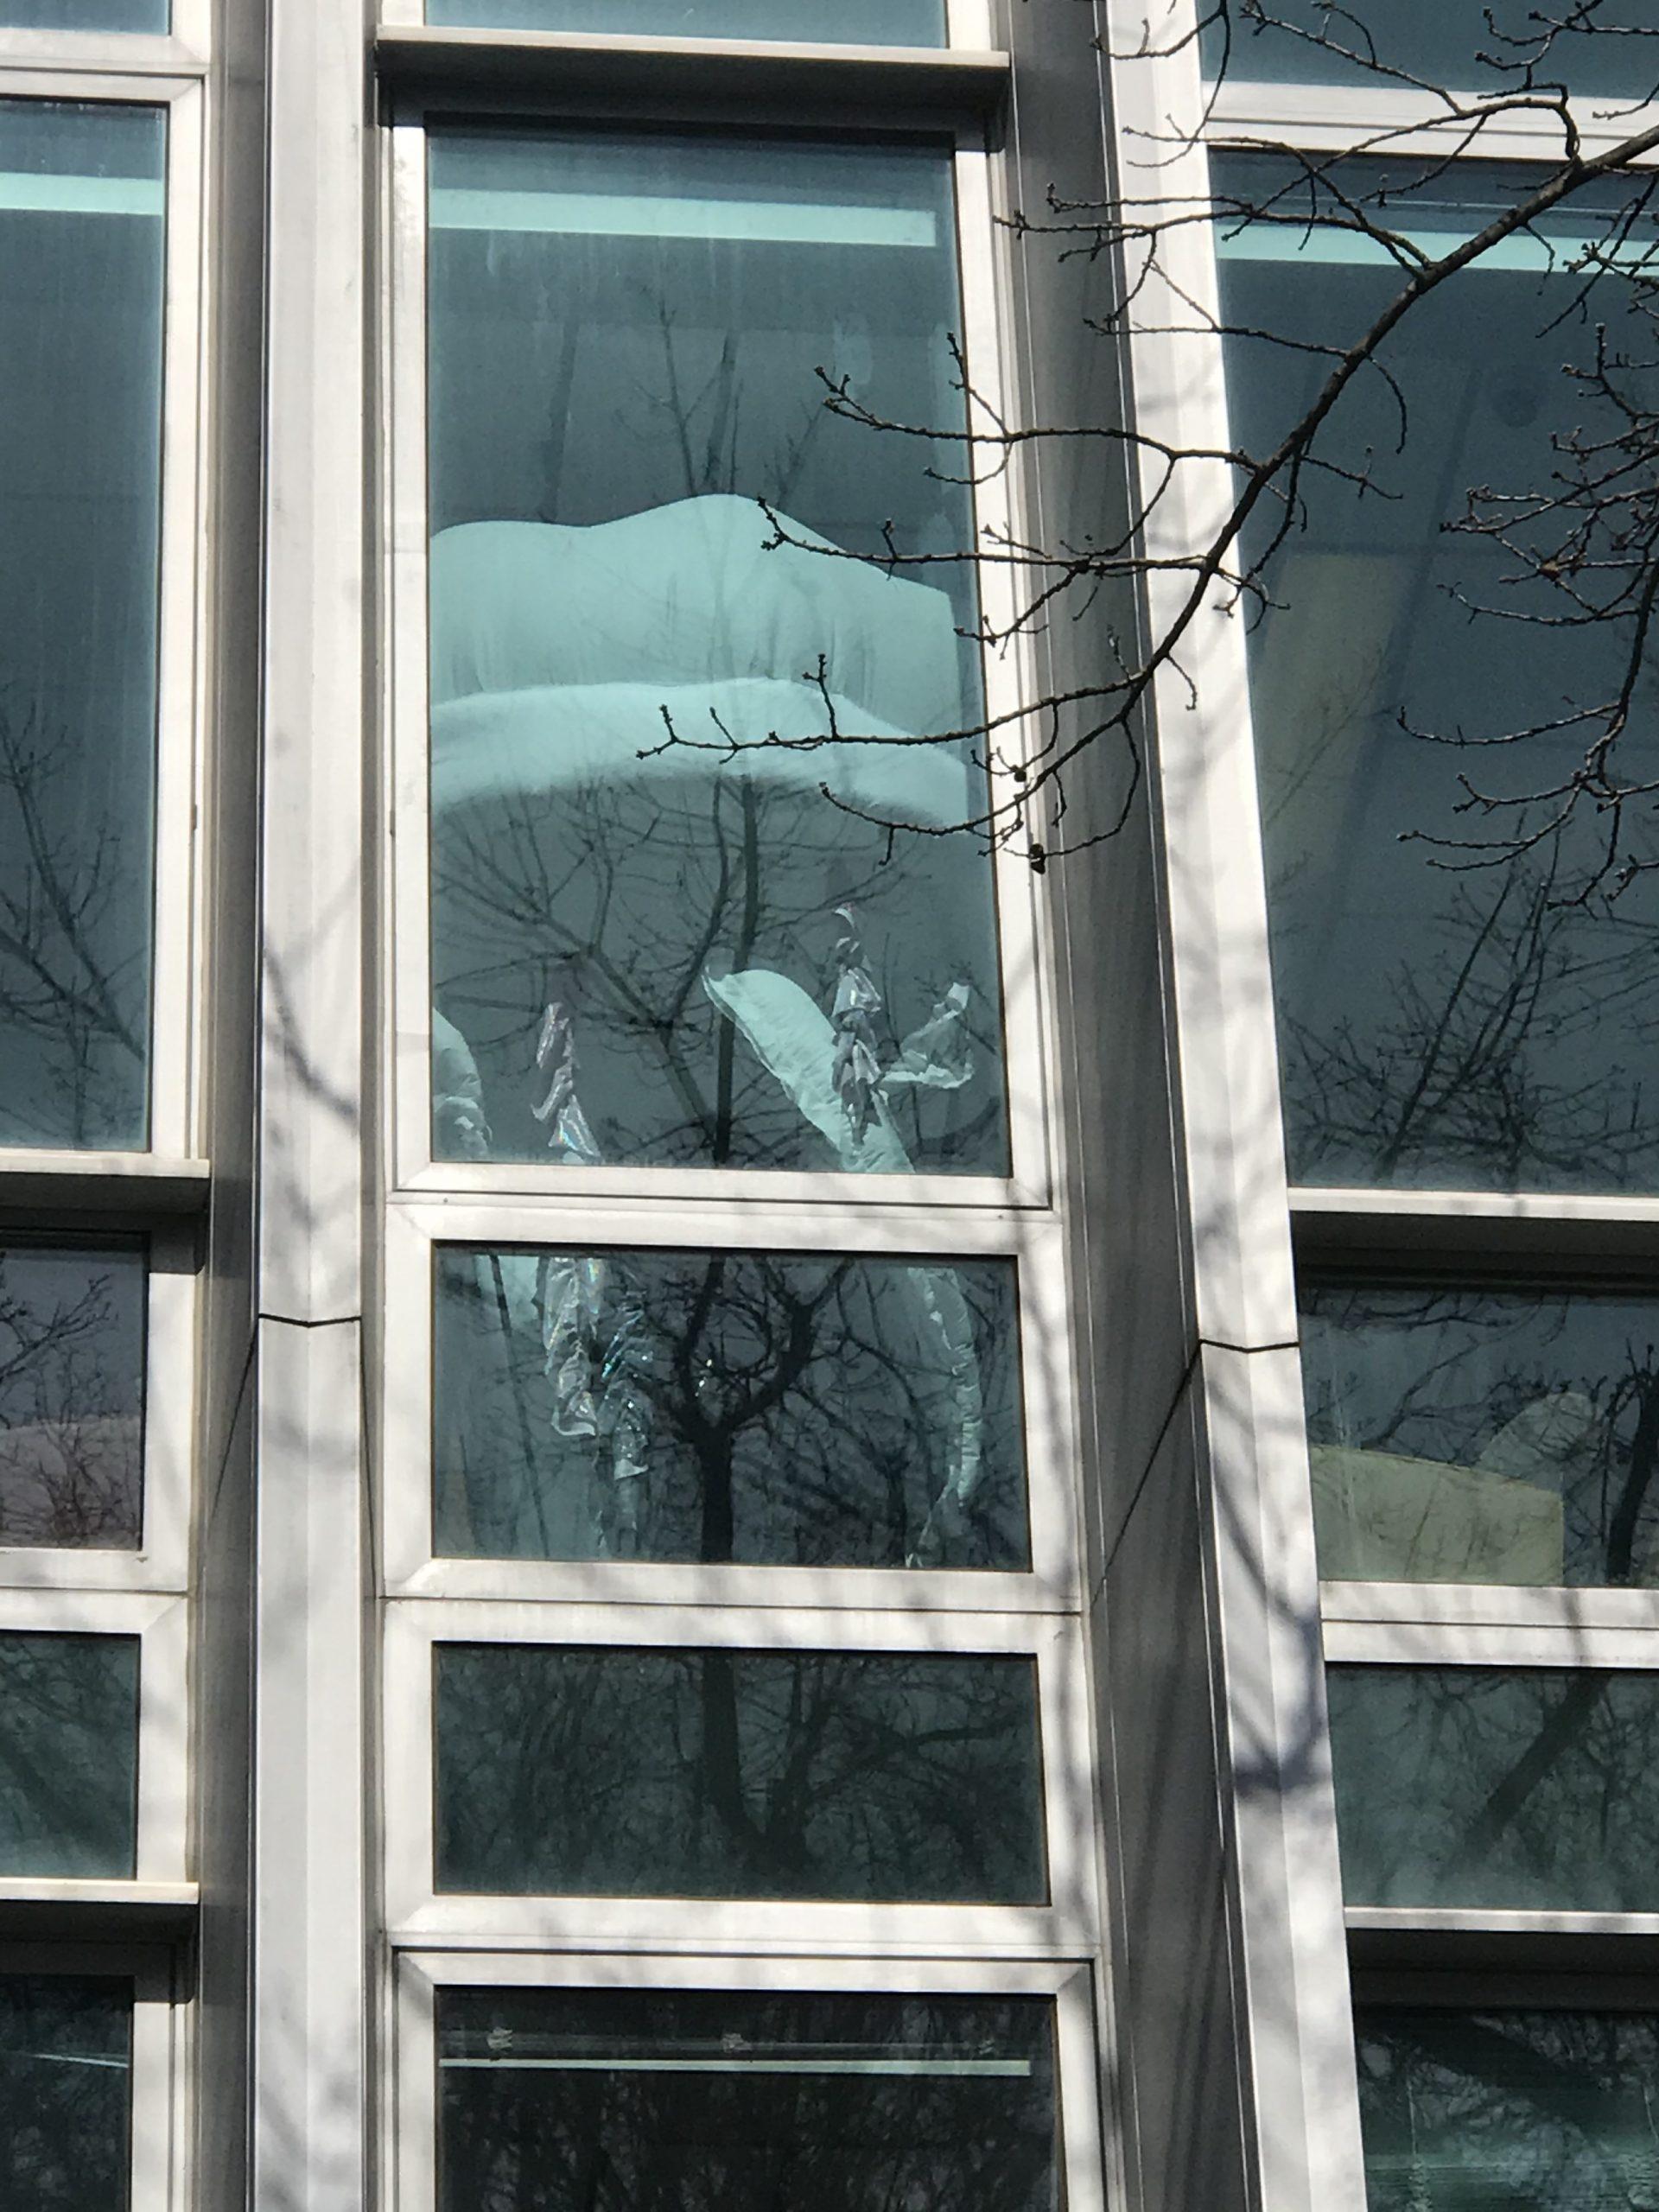
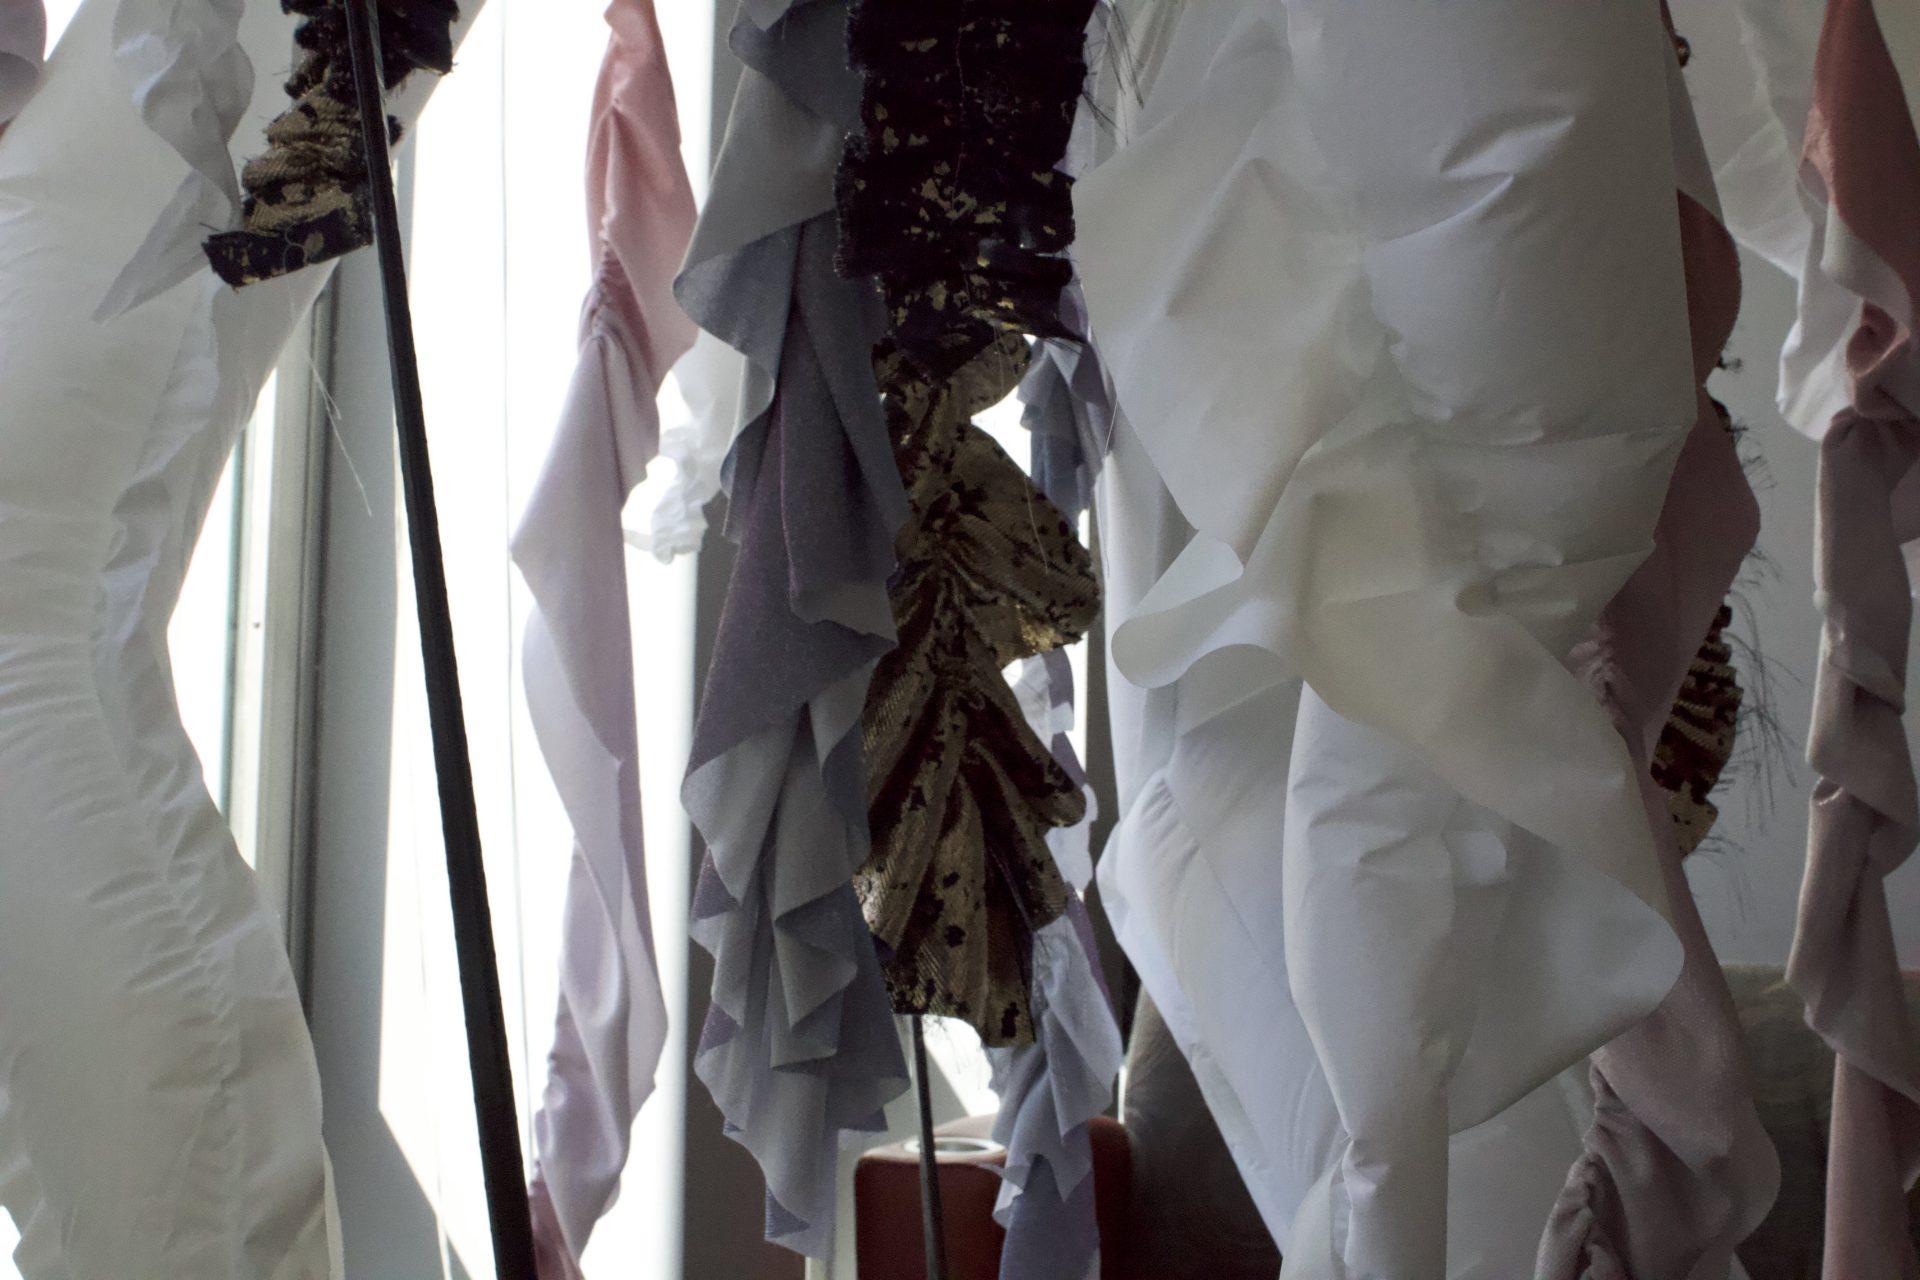
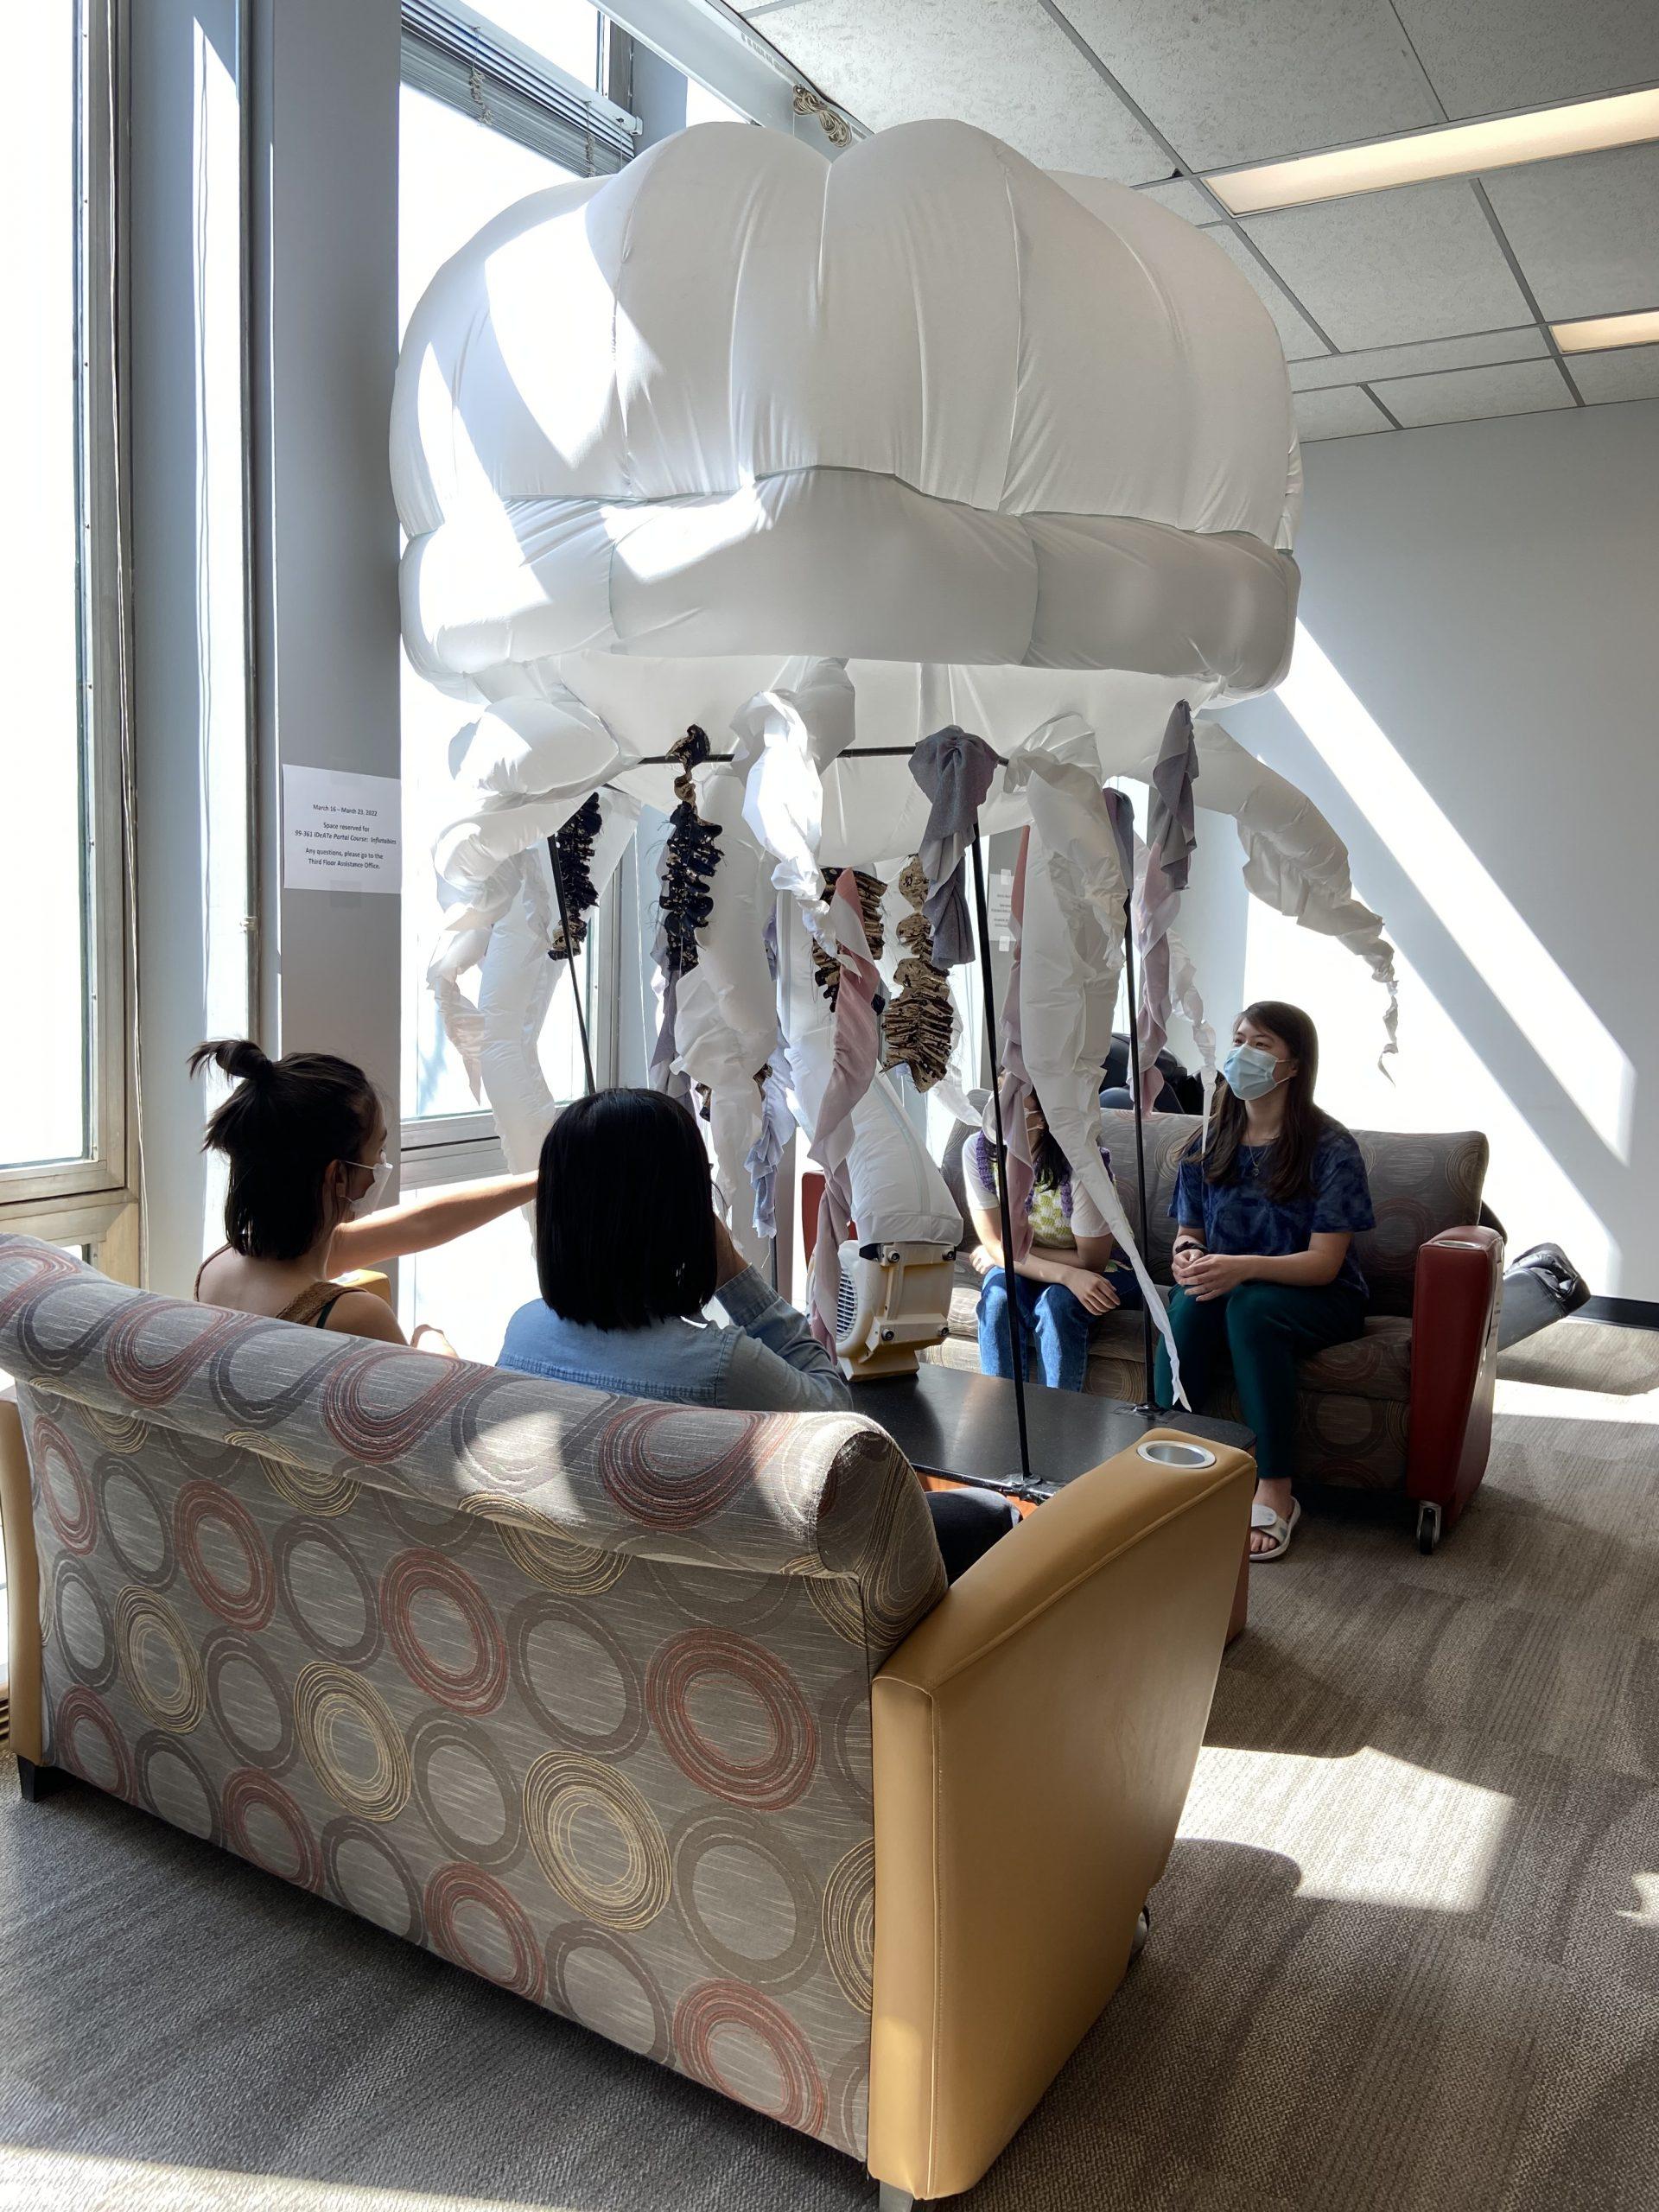
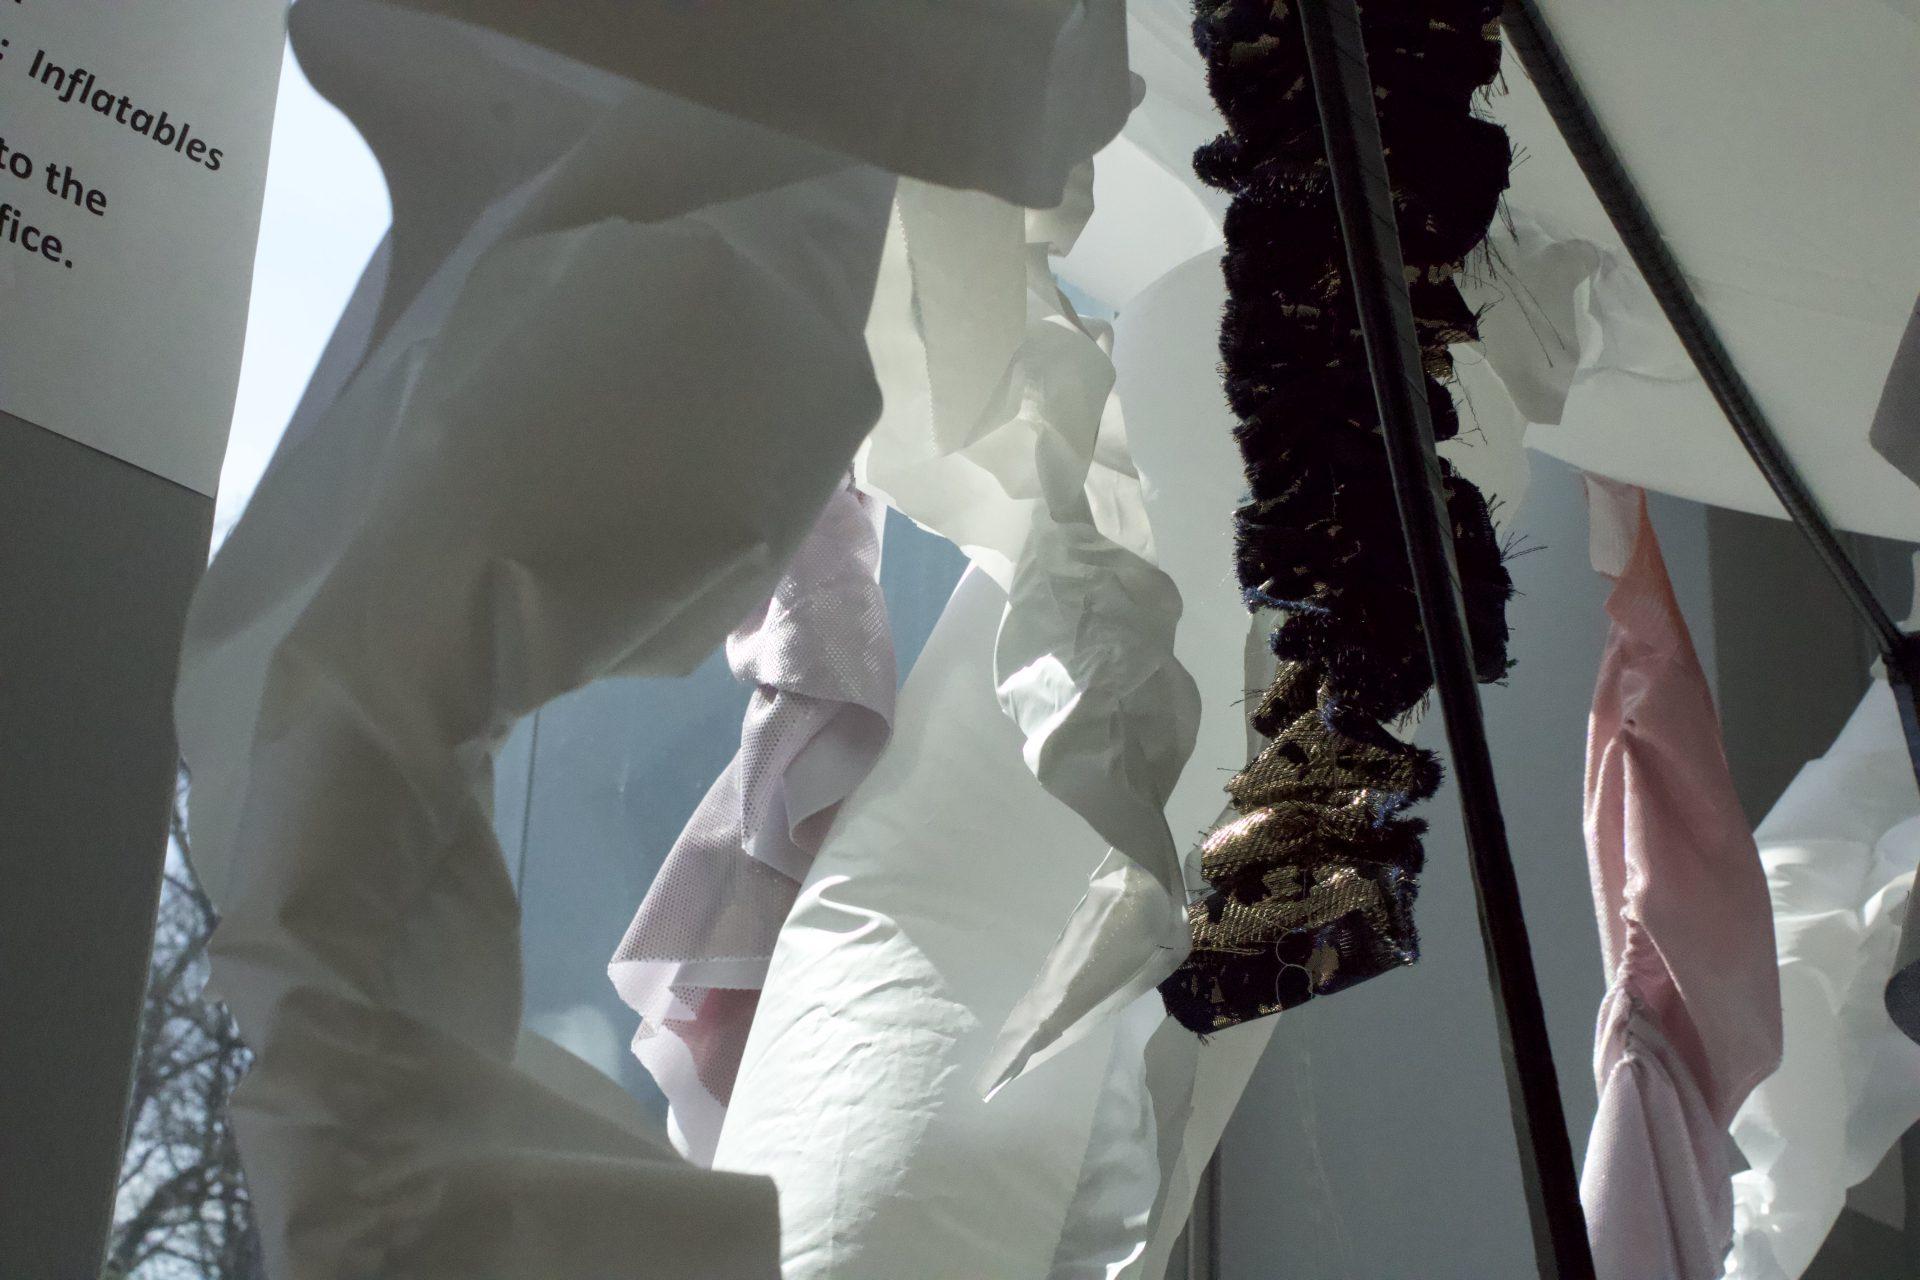
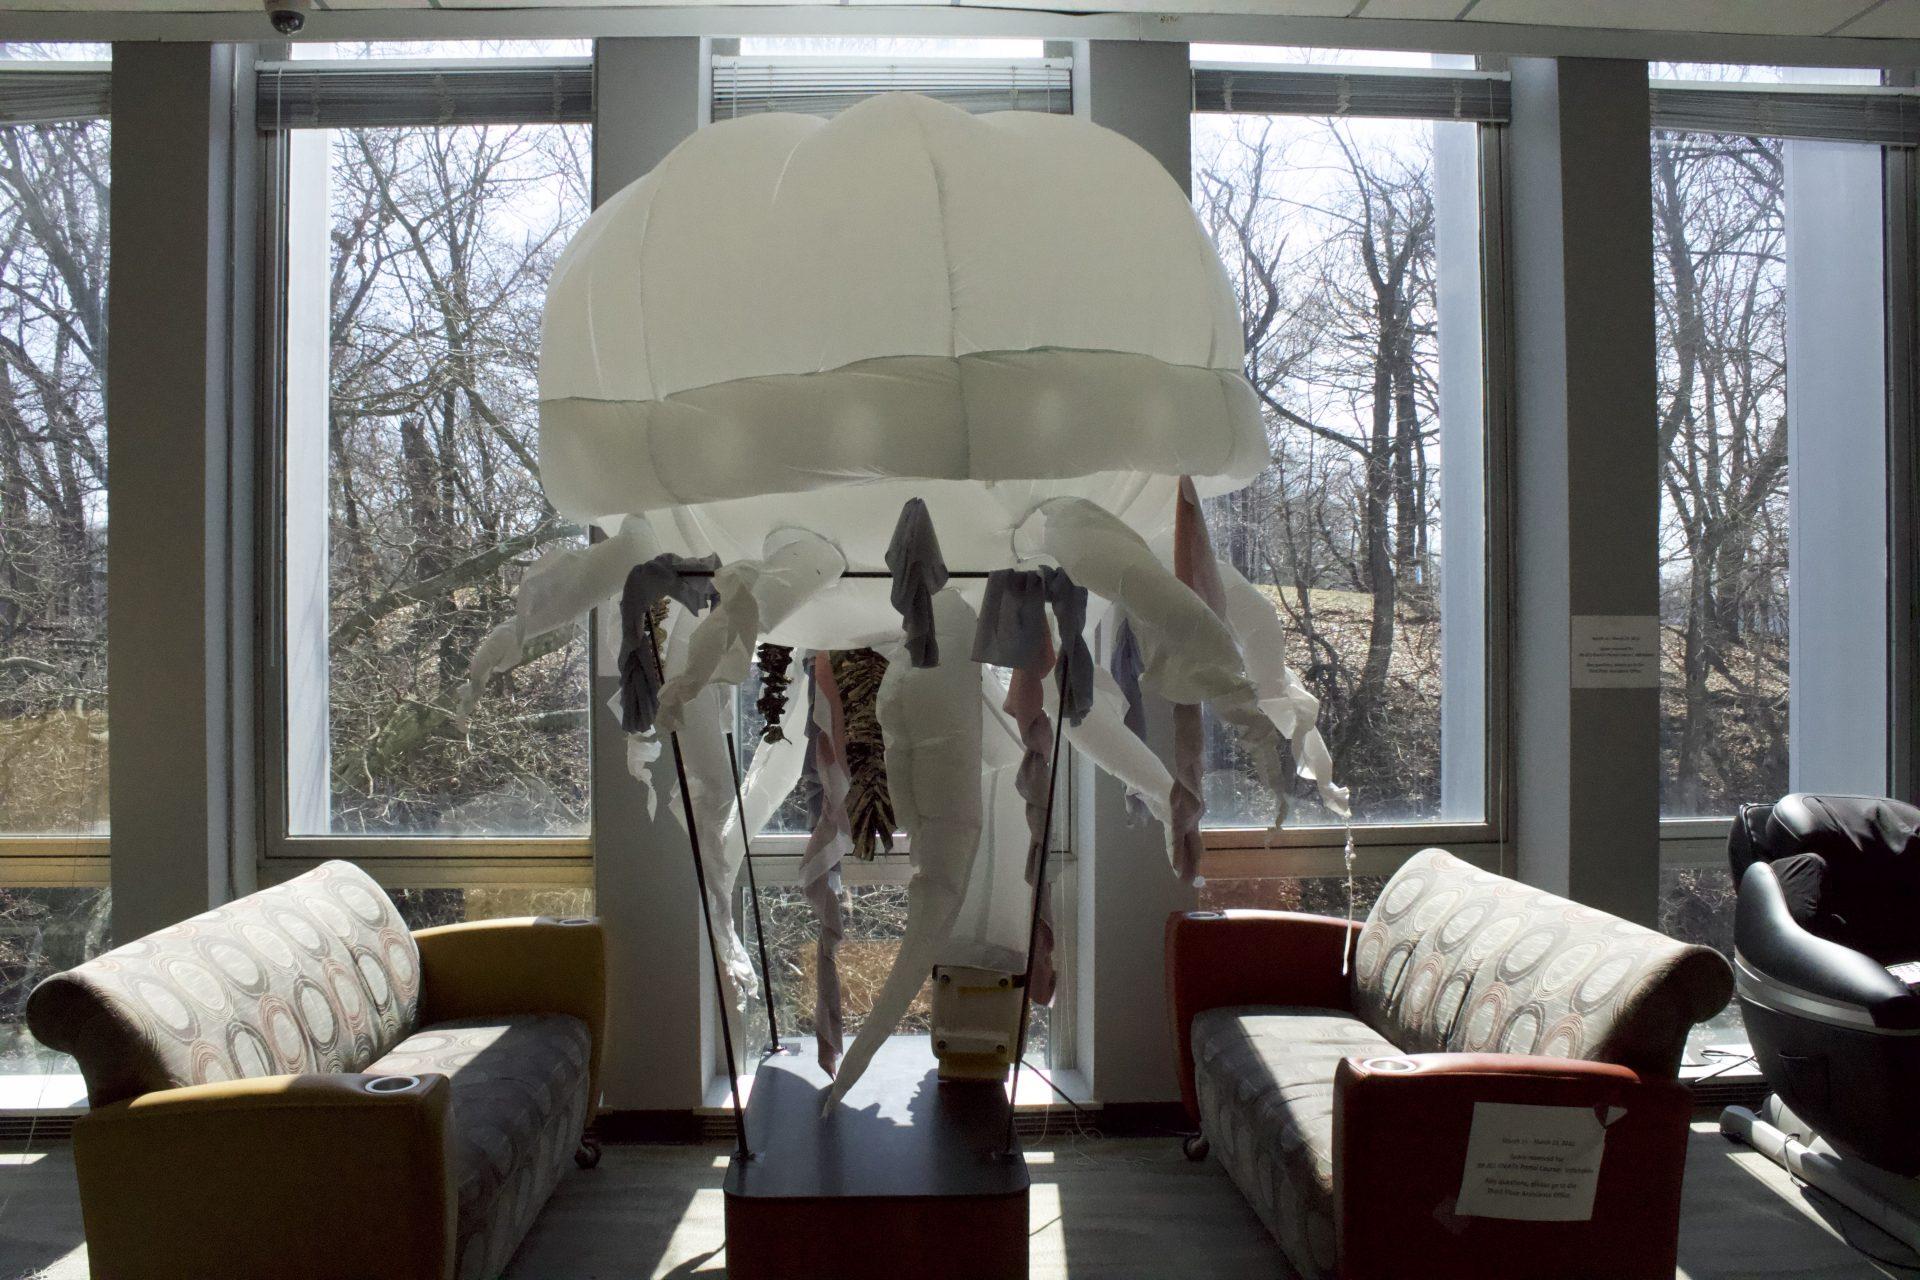
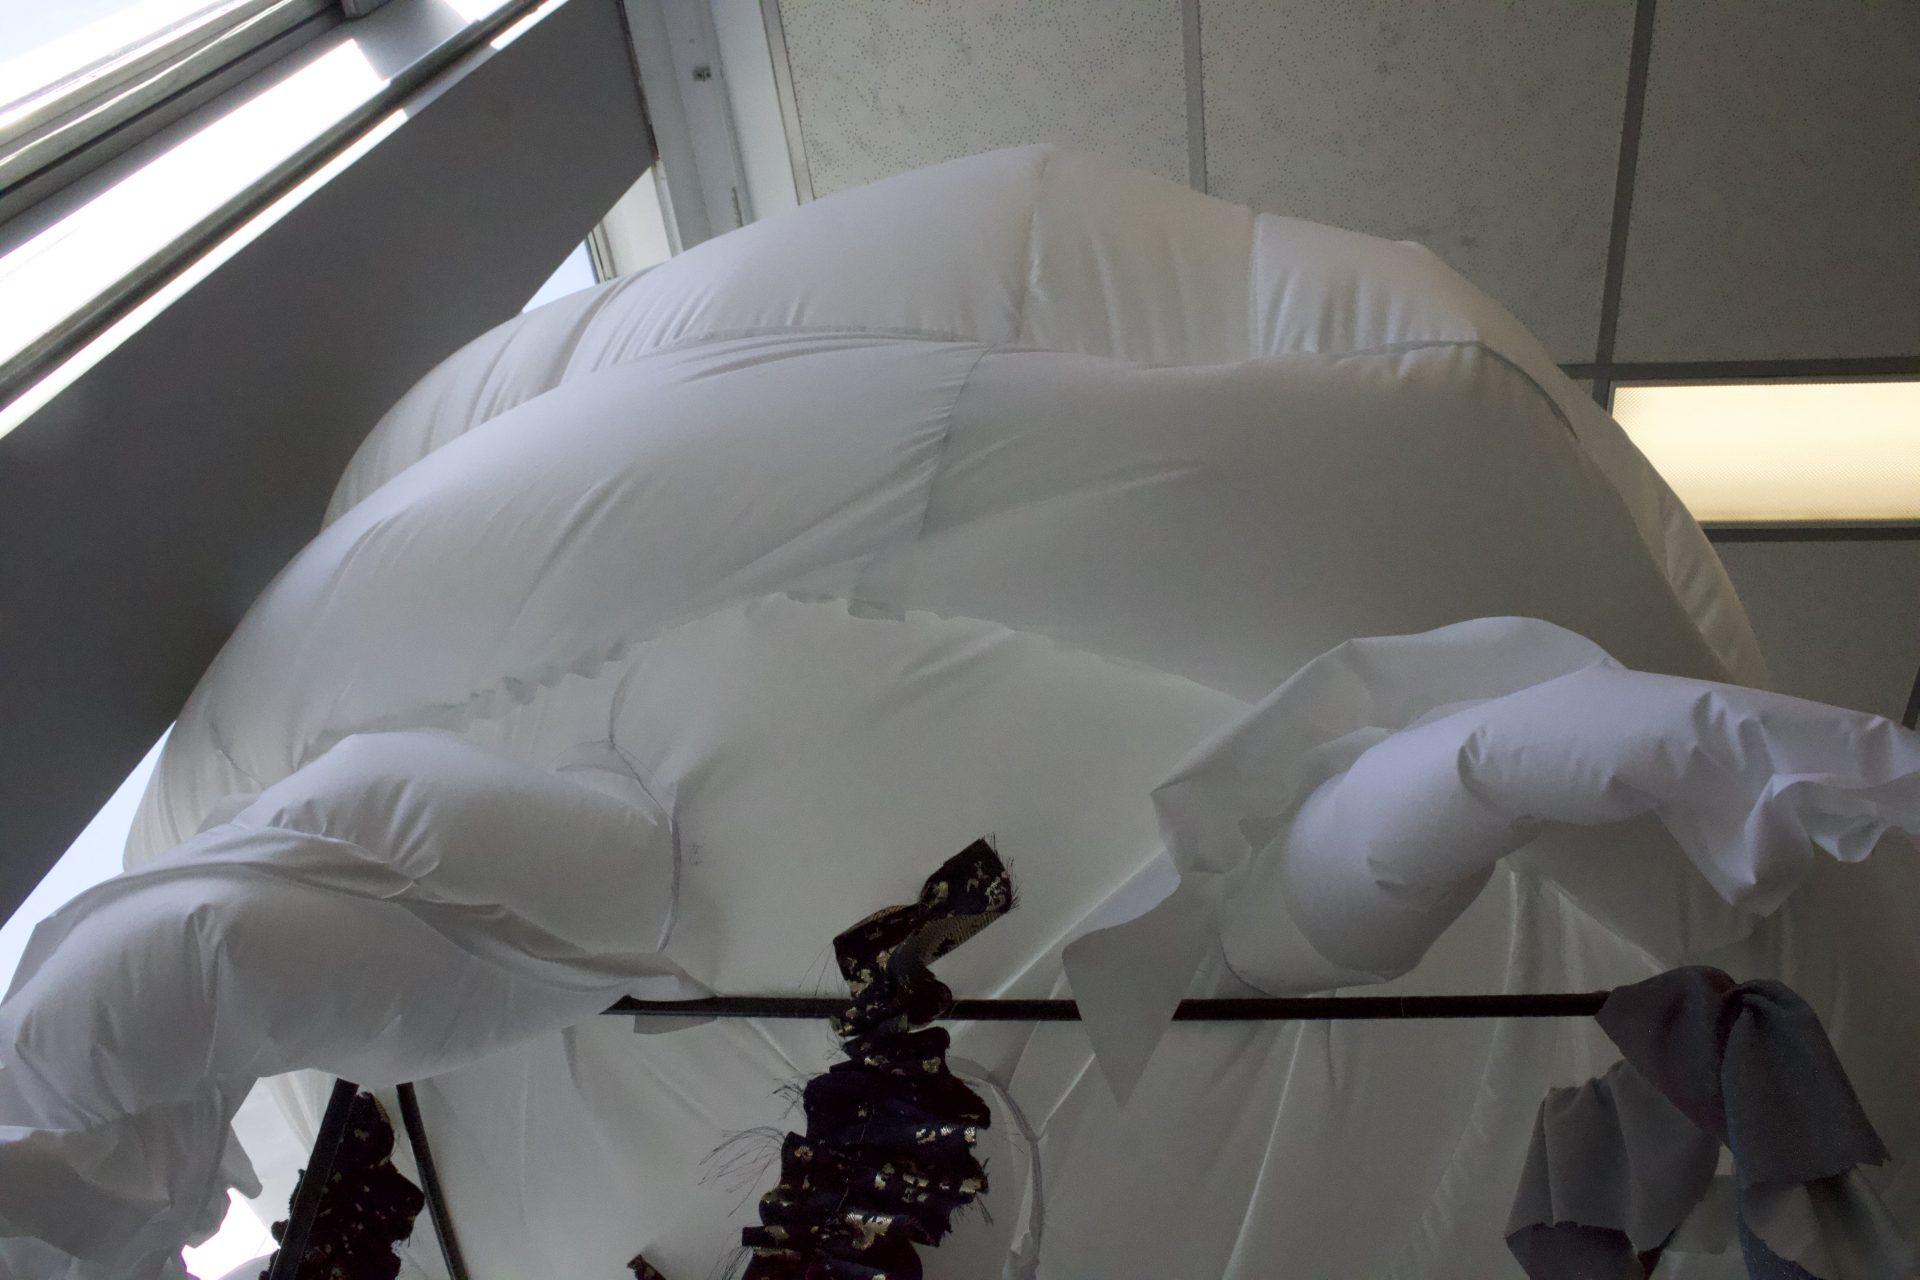
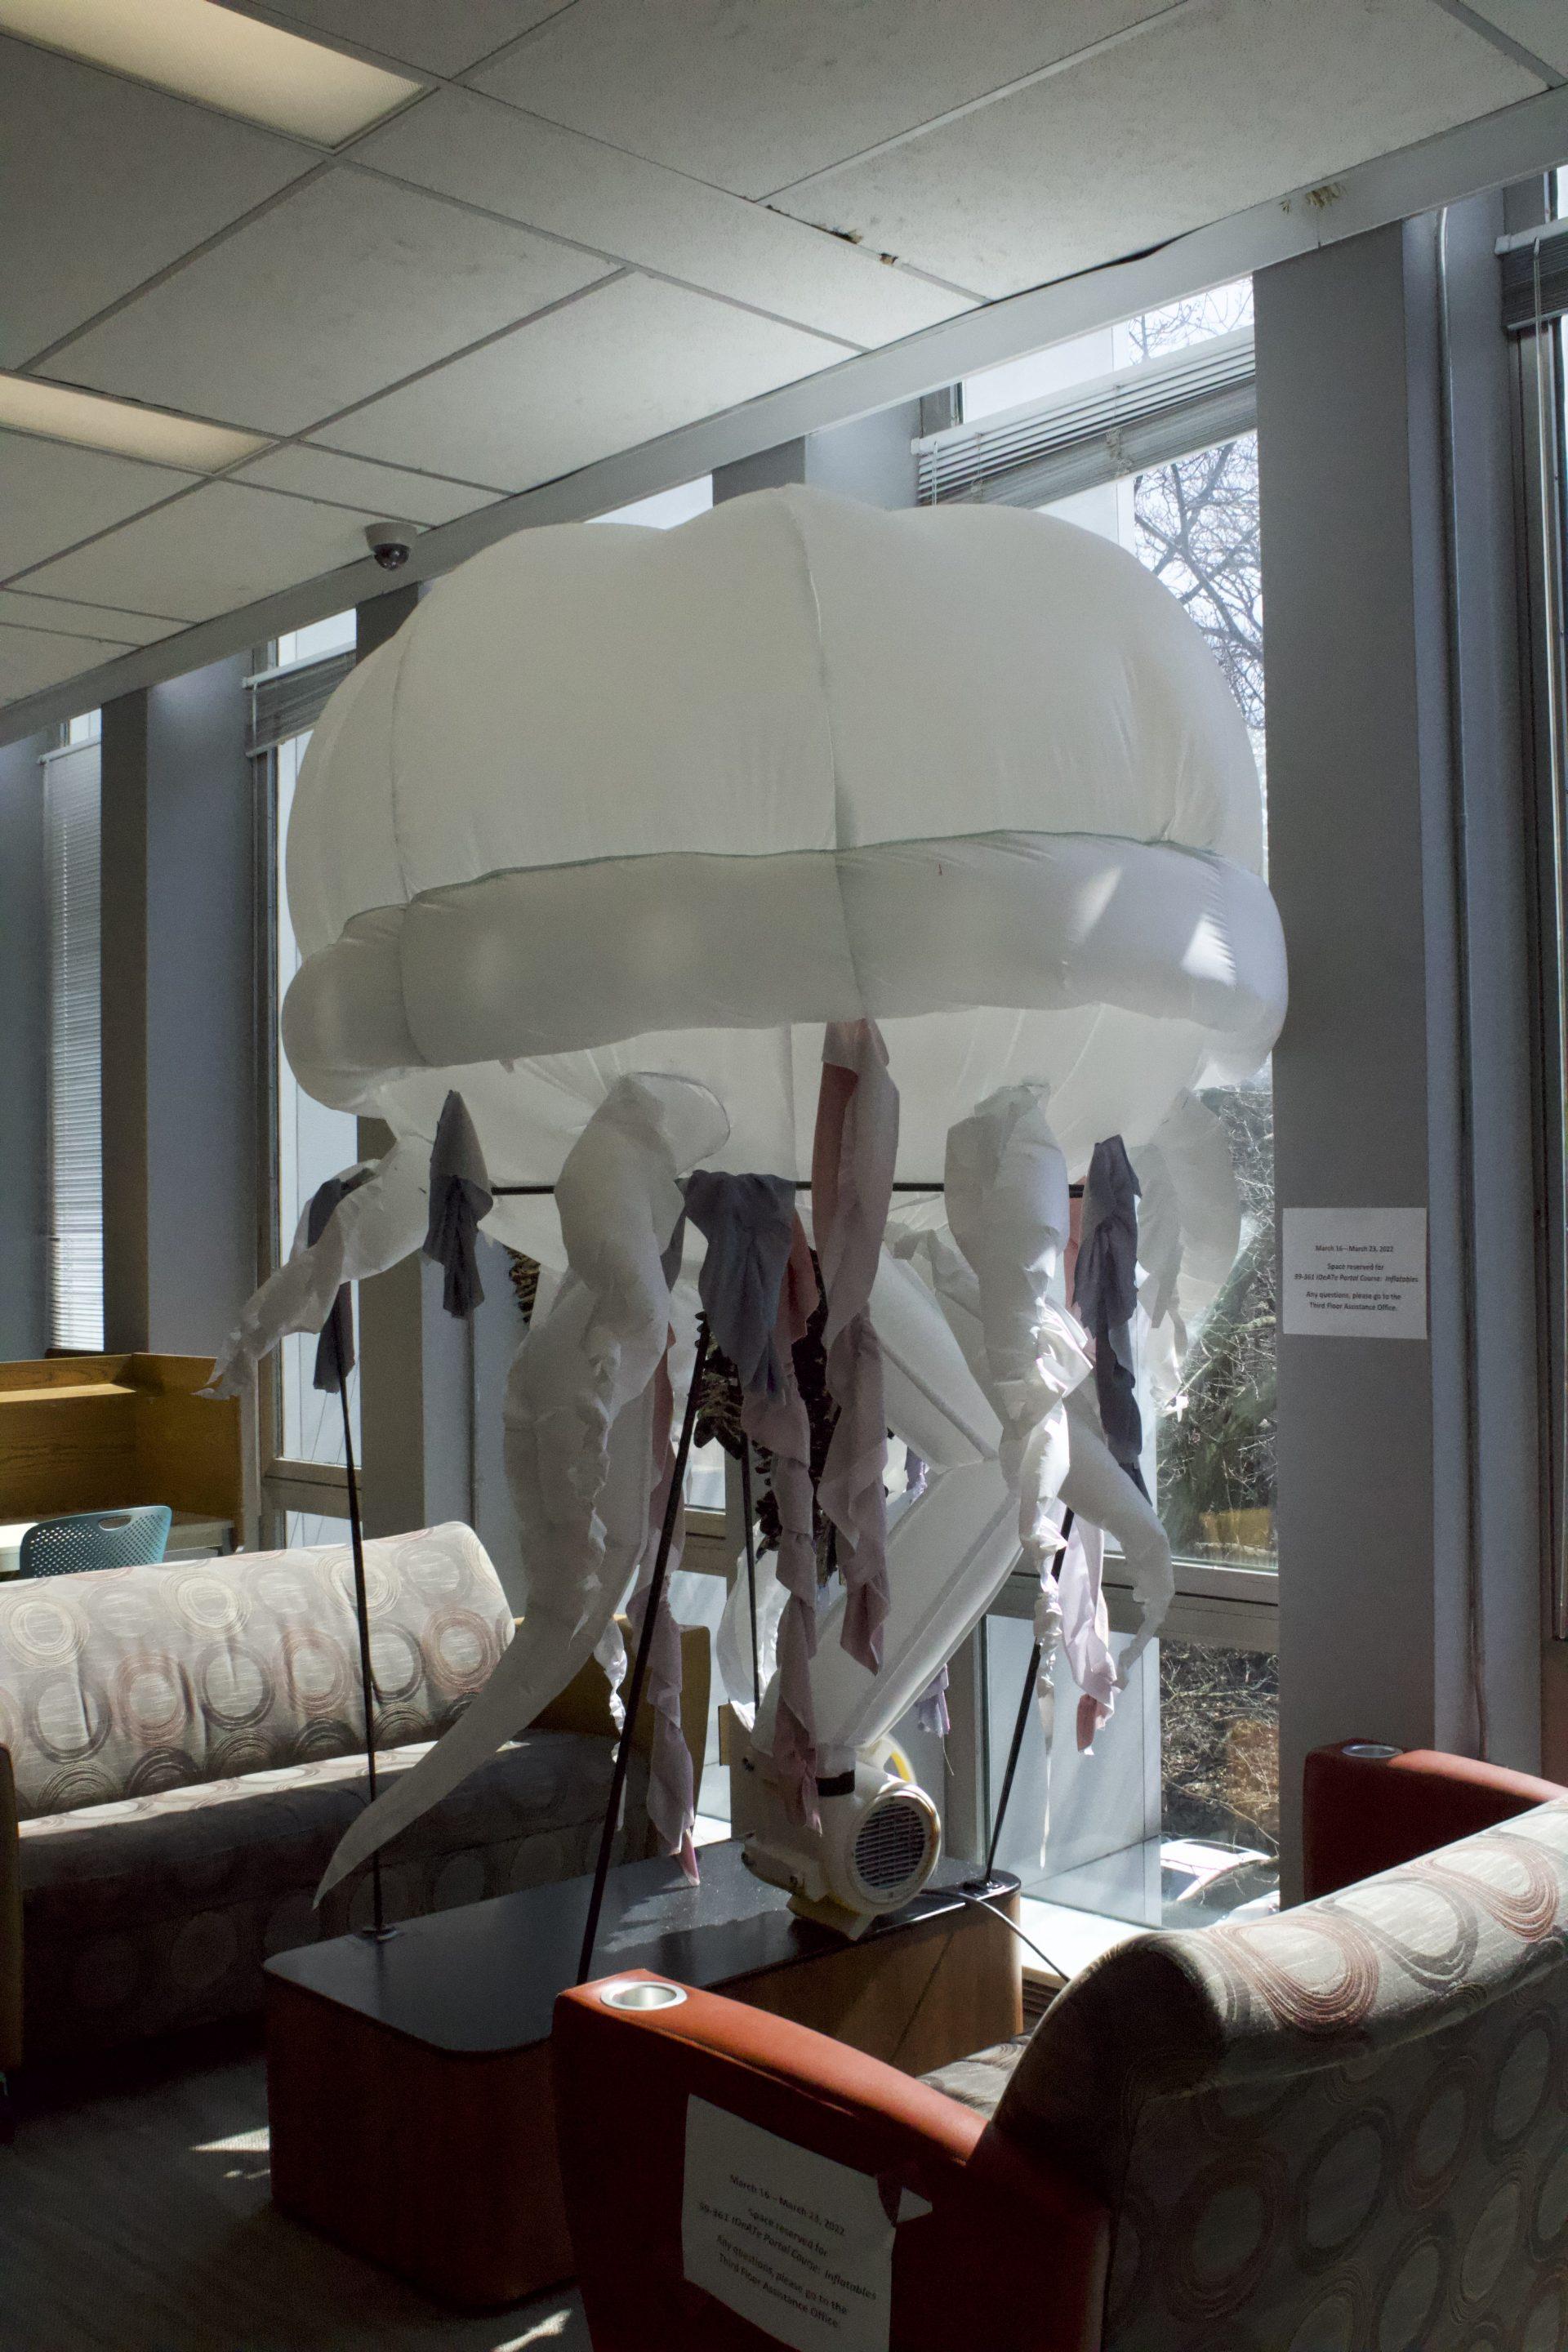
At first, we weren’t able to meet up and work on our giant jellyfish inflatable together, so we split up the work: Georgia focused on the main body while Heeyun made the tentacles. We had decided to make the main body be a dome with a “donut” ring going around it, all of which would be around 6 ft by 6 ft. The tentacles would be of varying lengths, but ideally all of them would be suspended above the ground/table to make it look like it was floating in air.
For the main body I decided to use a beach ball pattern. I had to do some math to figureout how long the pattern should be, especially since we were cutting the pattern in half to make dome shape rather than a ball. I indeed up making 8 giant dome pieces to sew together. They ended up being about 56 inches long which was a feat to put all the long pieces together. I was constantly concerned that the bobbin would run out of thread in the middle of sewing these pieces because how large they were. After I had gotten all the pieces sewn together I left one part open and didn’t completely close the shape together. I did this in order to add the donut, I thought it would be easier to leave this open when adding it. For the donut I cut out 8 rectangular shapes that were 16 inches long and sewed them on to the dome pieces, but I only left 8 inches to the bottom of the dome so that when it inflated it would inflate outward in a circular shape. Next I ended up cutting out circles in the original beach ball pattern for the air flow to get into the rectangles that would be the donuts. After this I sewed up the rest of the beach ball pattern. And asked Heeyun to cut out the last part of the top which would be the 6 by 6 foot circle.
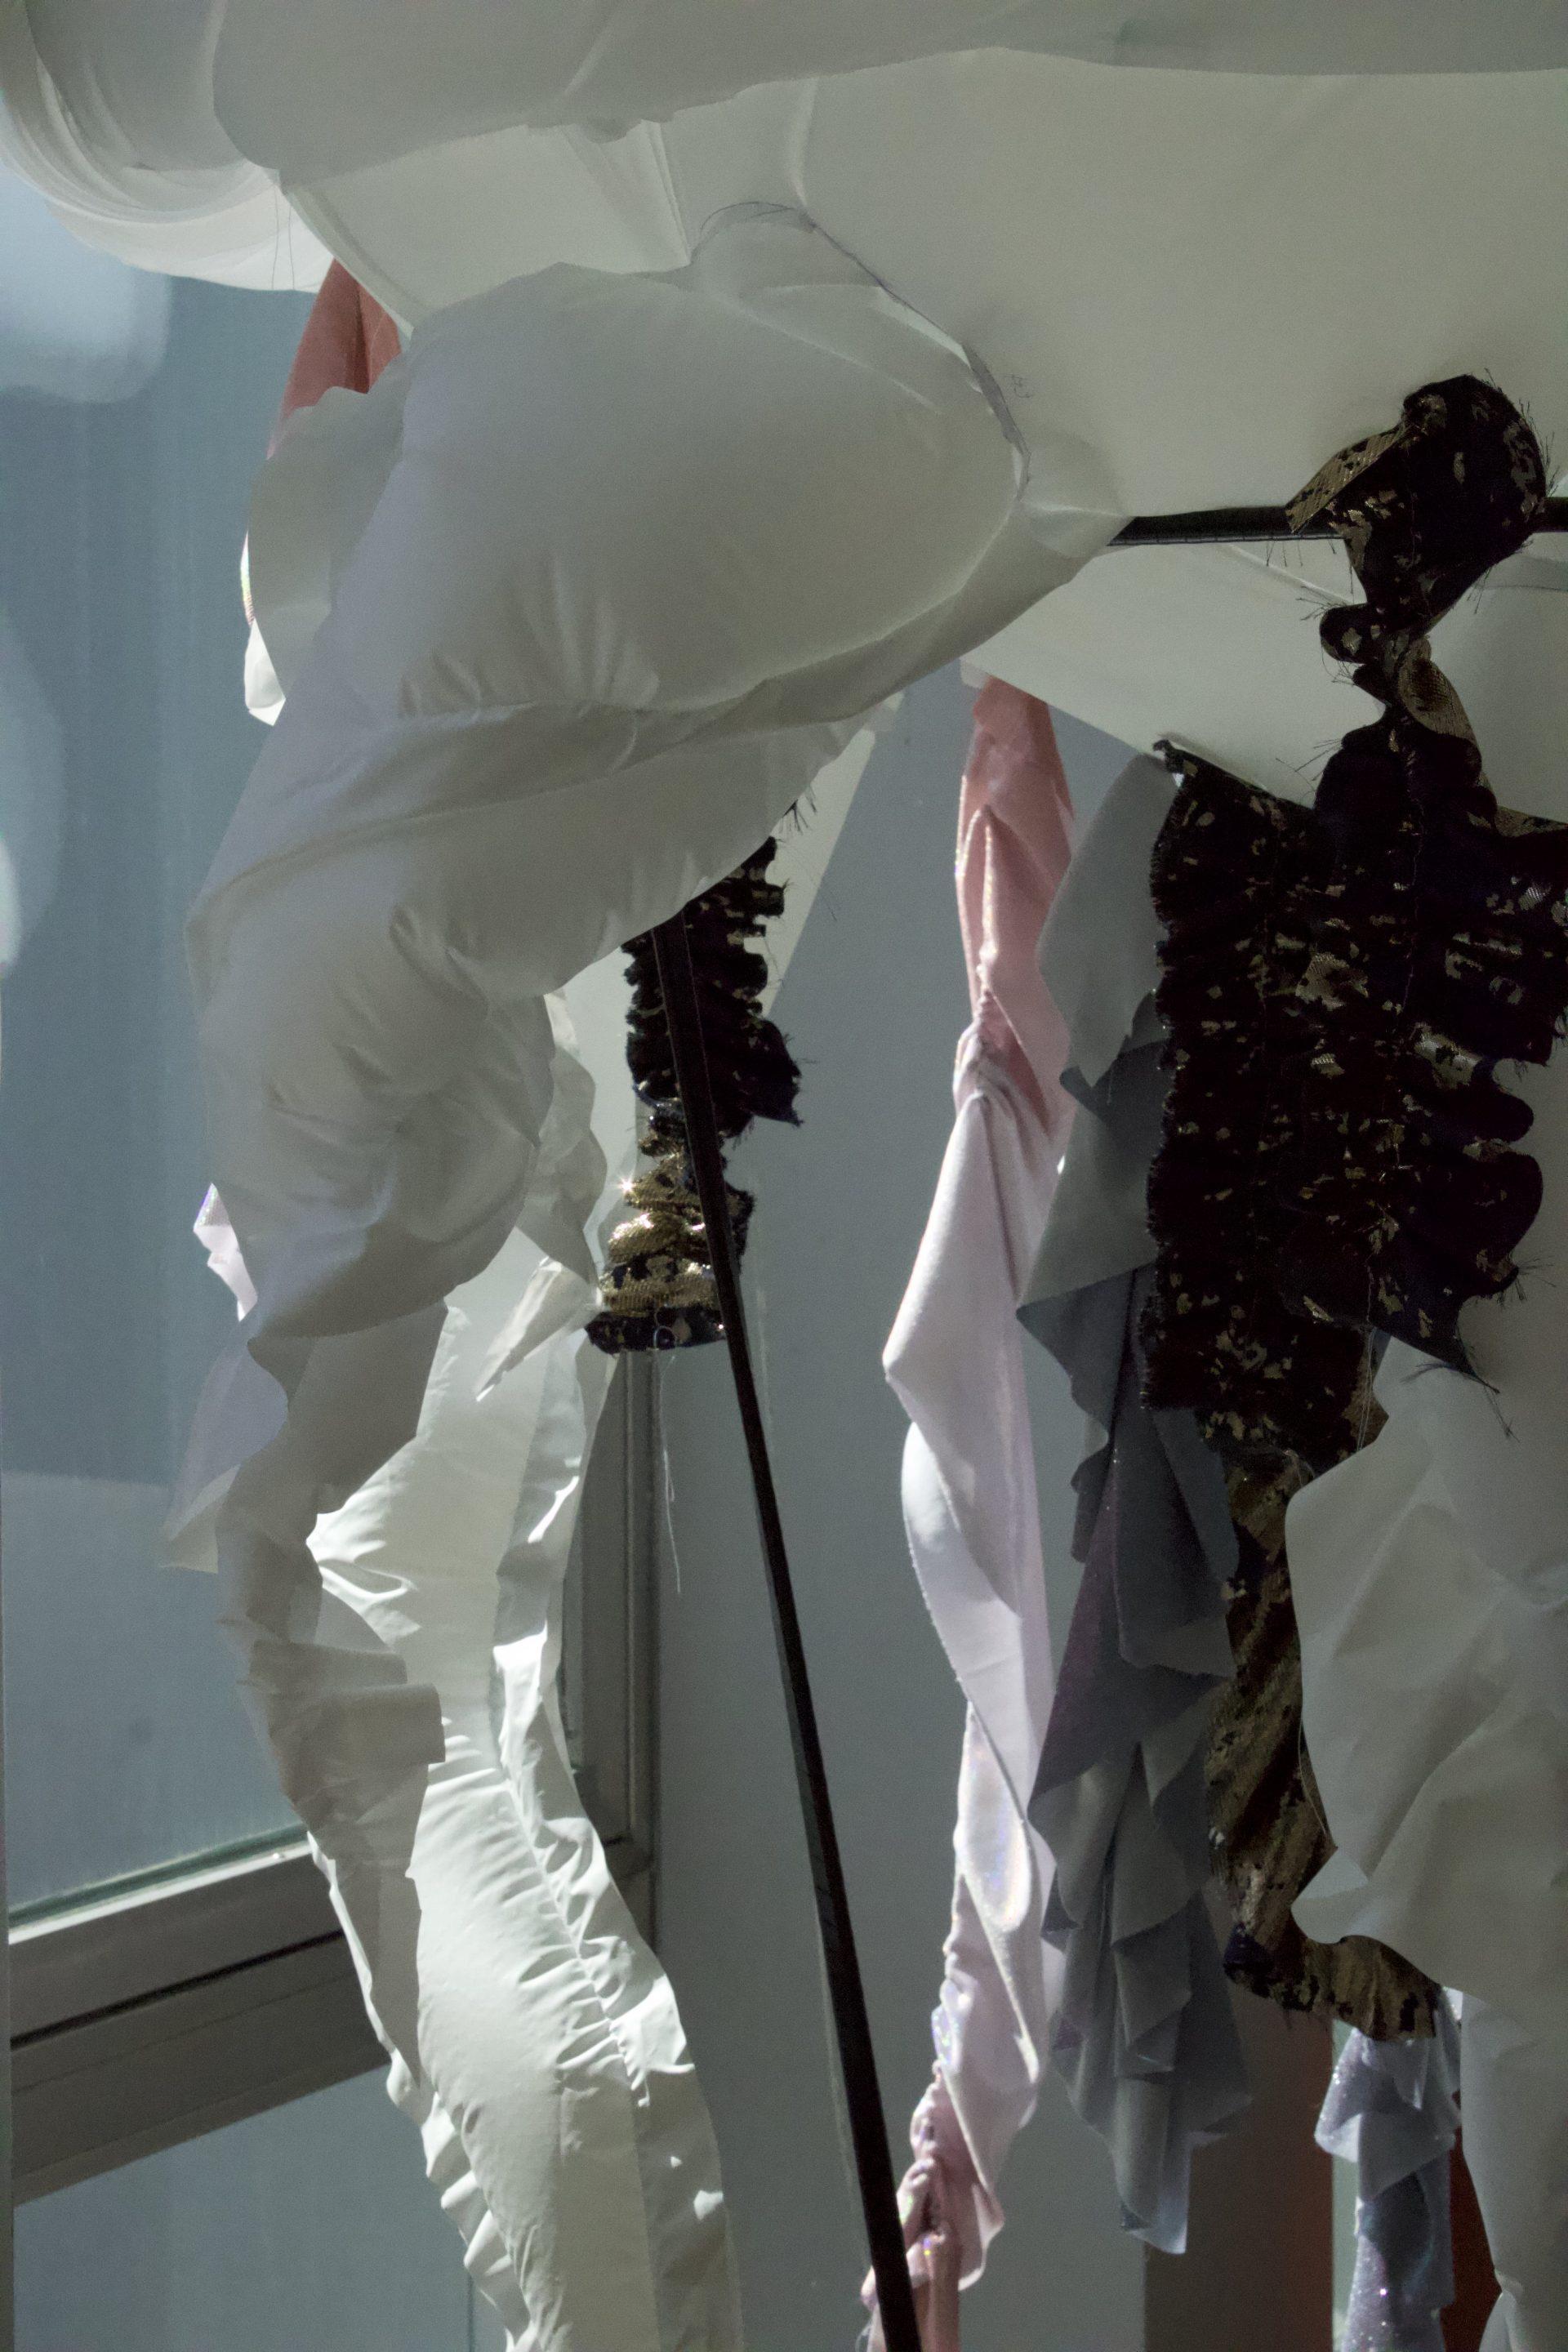
For the tentacles, it was hard to make them at first because we wanted to include the ruffled texture from the fabric tentacles that Georgia had made for one of her push/pull 1 objects. The first few tentacles were improvised curvy tapered shapes, sewn together like pillows. Using some scrap triangular pieces of fabric, I decided to ruffle up the longest side of the triangle and then sew that end together to the next long side. Serendipitously, the ruffled edge spiraled around the overall conical shape of the structure, which is what we had wanted to make initially but were unsure how.
I ended up making the ruffled pieces of fabric like my last project, this was quite easy. I ended up putting them on while our piece was inflated so I could see where they needd to go. For Heeyun and I we got together to attach the tentacles(inflatable ones) to the circular base I had asked her to make. We ended up measuring her tentacles and cutting out circles for them to fit into in the circle. Sewing these on was a lot of fabric going everywhere. We had about 11 tentacles to sew on so after cutting the pieces out of the big main circle it looked like we had just cut out pokadots. After getting the tentacles attached, we added the big circle to the beach ball pattern, and then moved on to inflate.
When we finally assembled the jellyfish together, we both didn’t anticipate that the main body would be so much larger and rounder than the rest of the structure. If we were to make future iterations of this project, we would definitely consider the proportions of all the pieces more carefully. Moreover, a challenge we faced was getting the jellyfish to stay upright but also make it seem like it was floating in air. The center tube where it was connected to the fan was definitely not enough to keep the jellyfish from toppling over to the sides; the weight was not balanced enough, nor was it light enough to stay up with only the “support” from the constant inflow of air. As such, we improvised a “stand” made of sticks wrapped in attached together with electrical tape. After carefully balancing the jellyfish on this stand and against the wall, we managed to keep the jellyfish upright. This was a bit of a fix since we could not hang the piece as we originally intended.
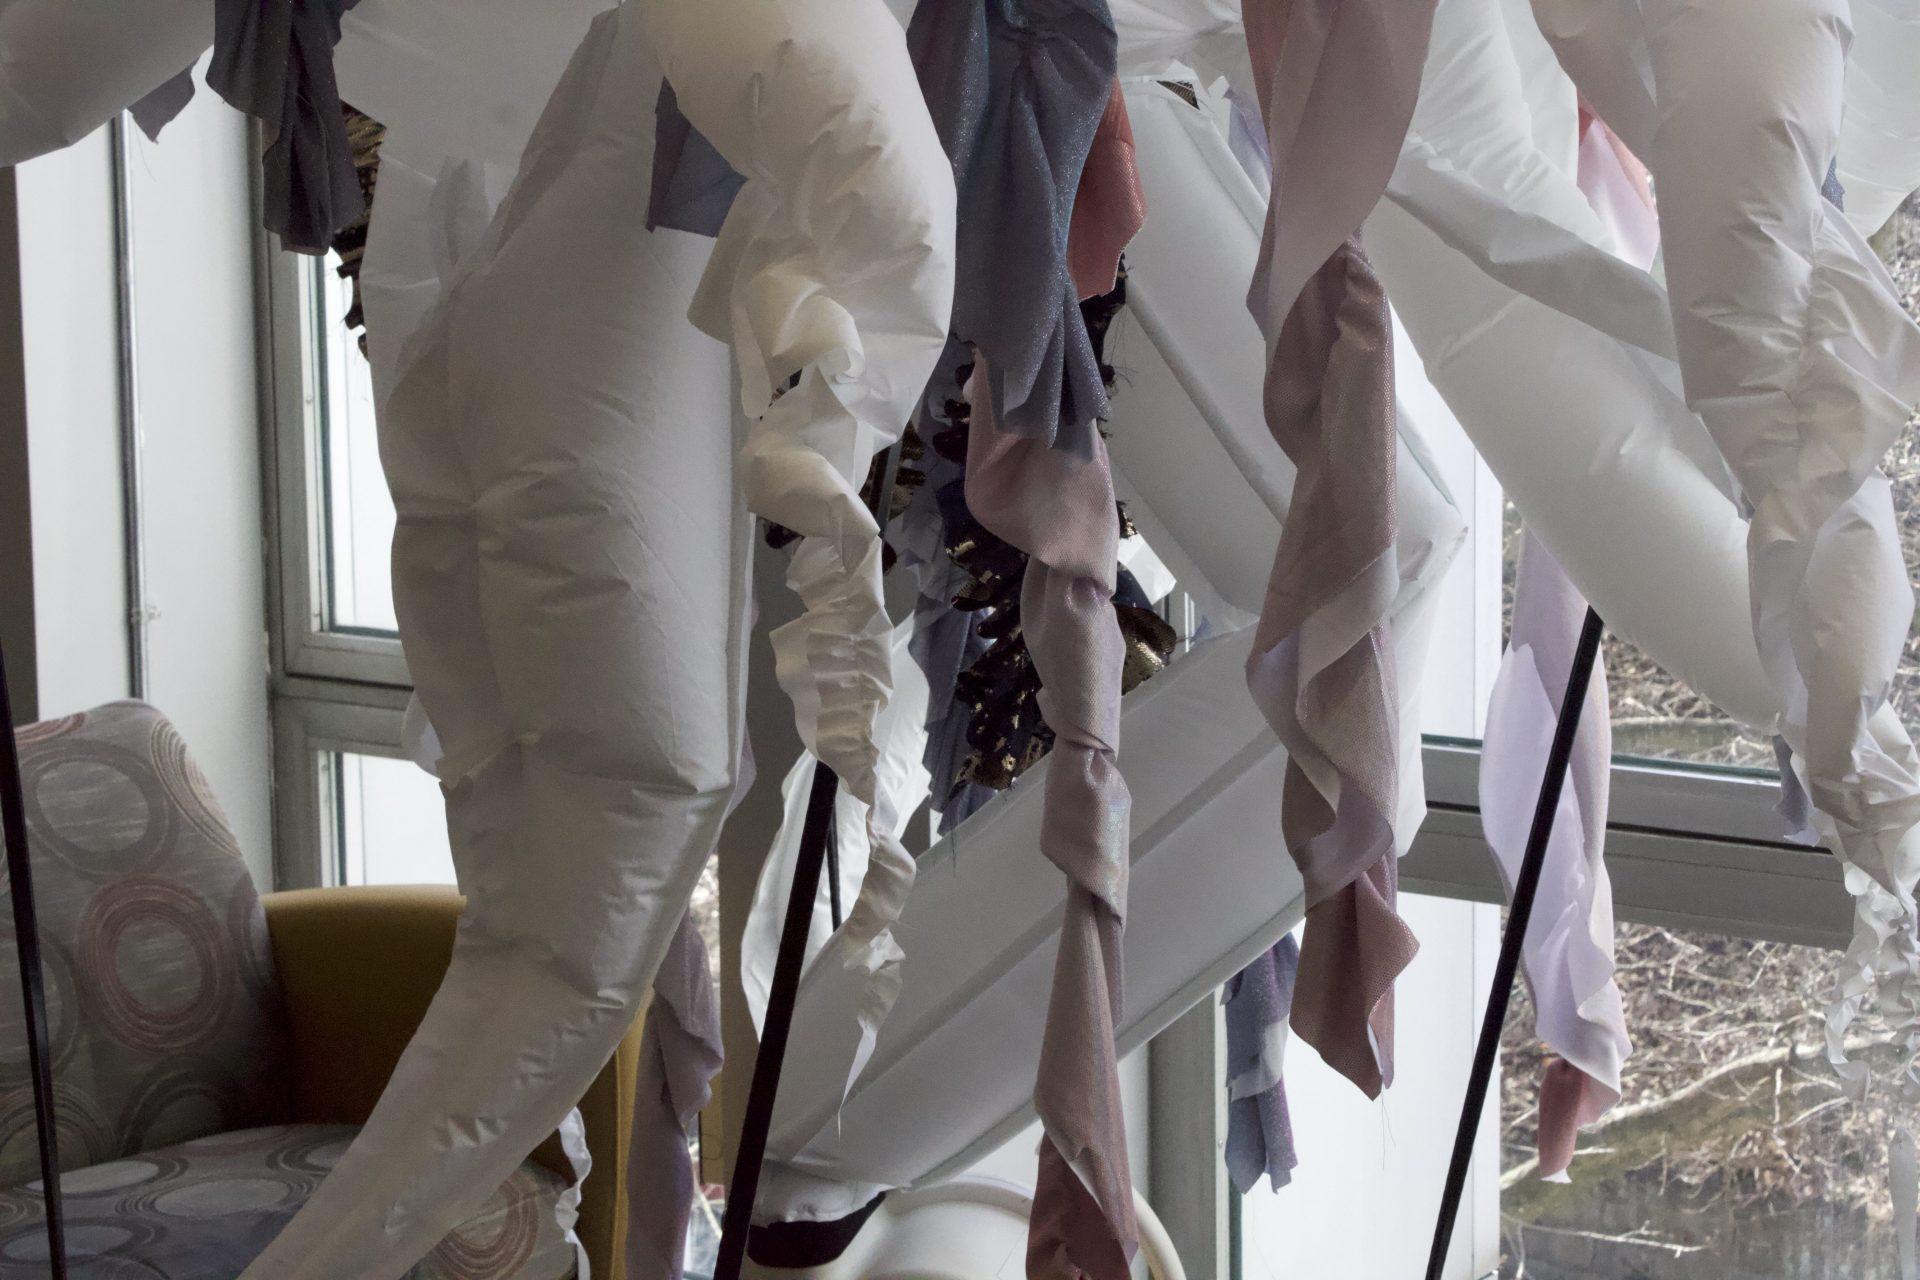
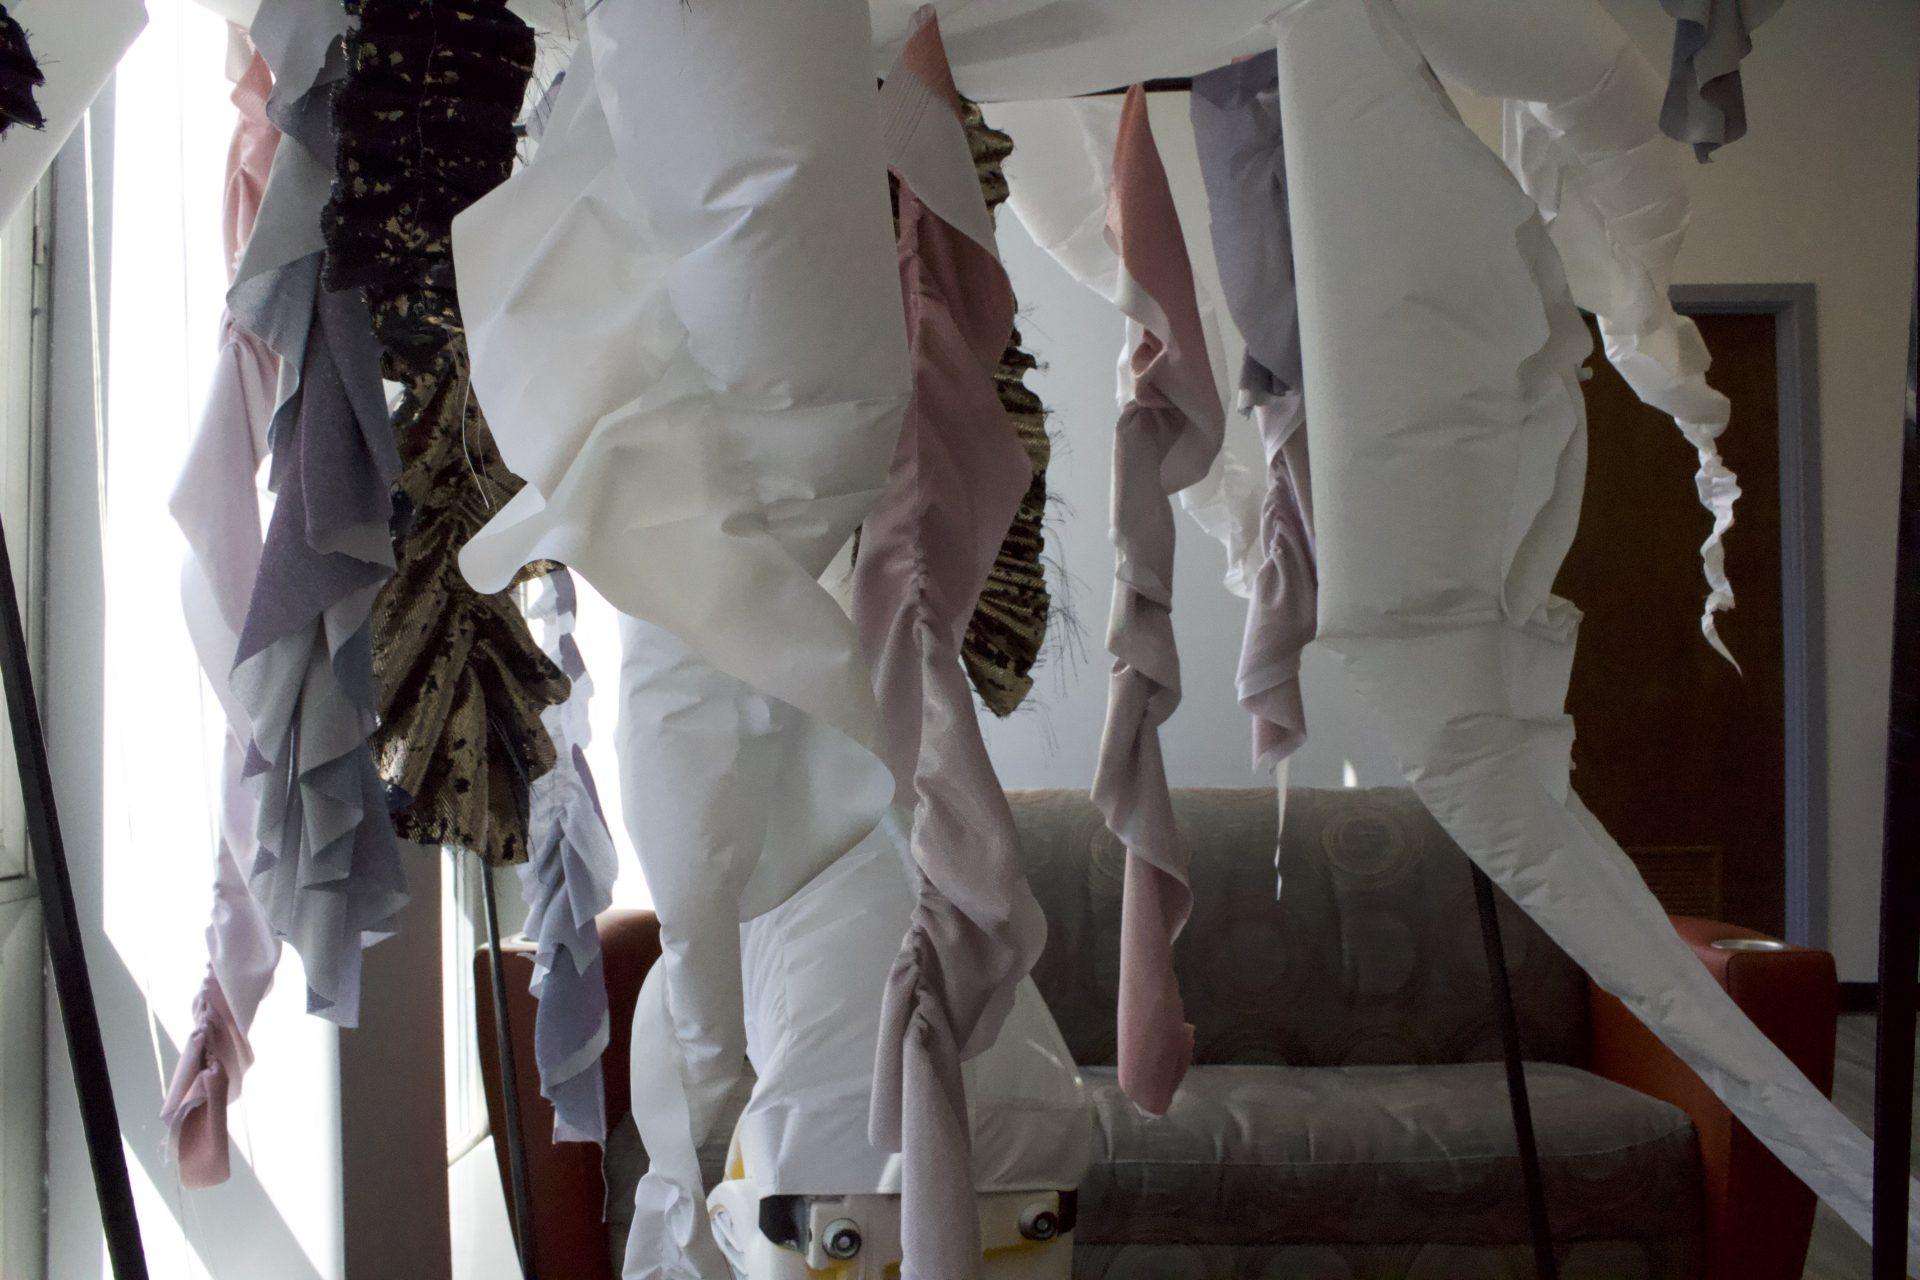
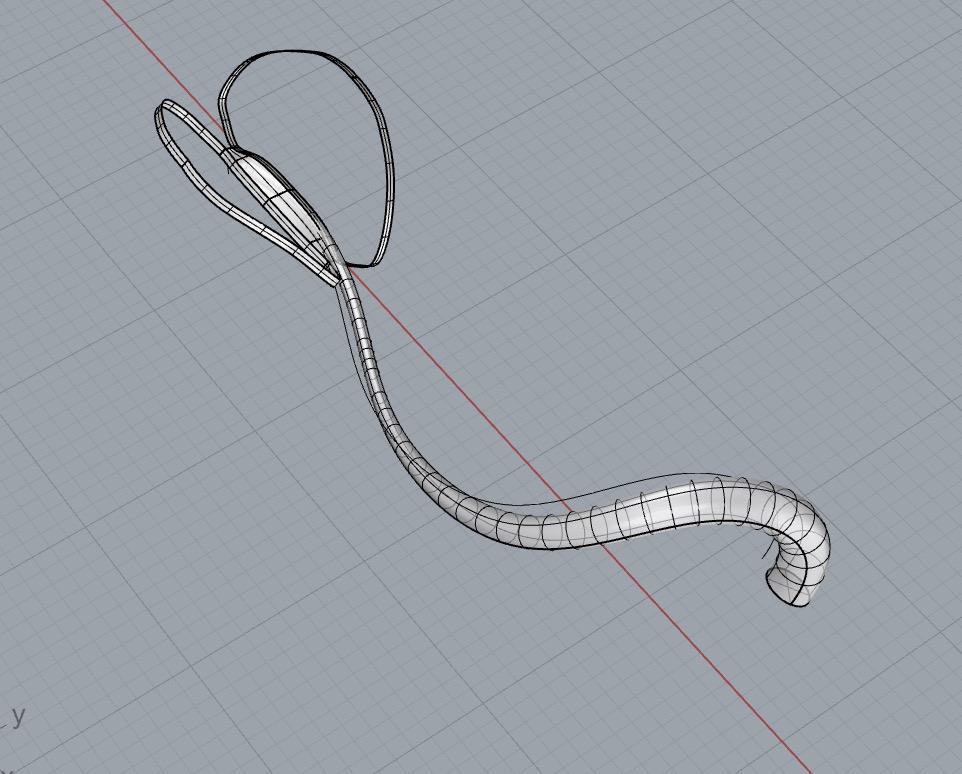
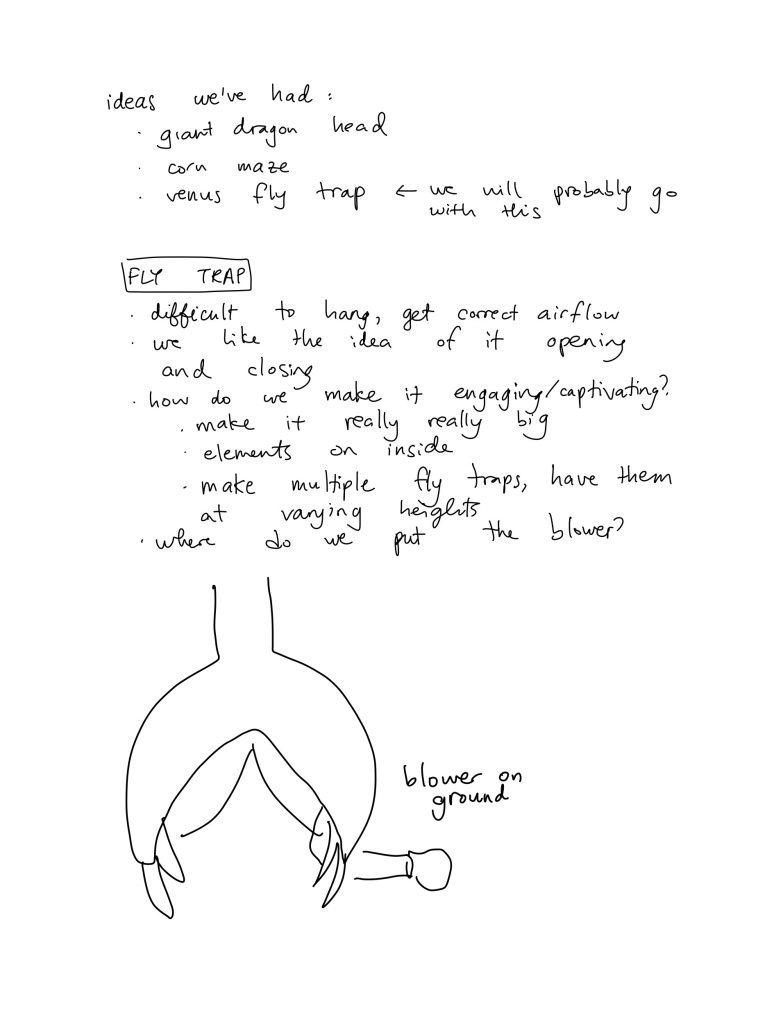
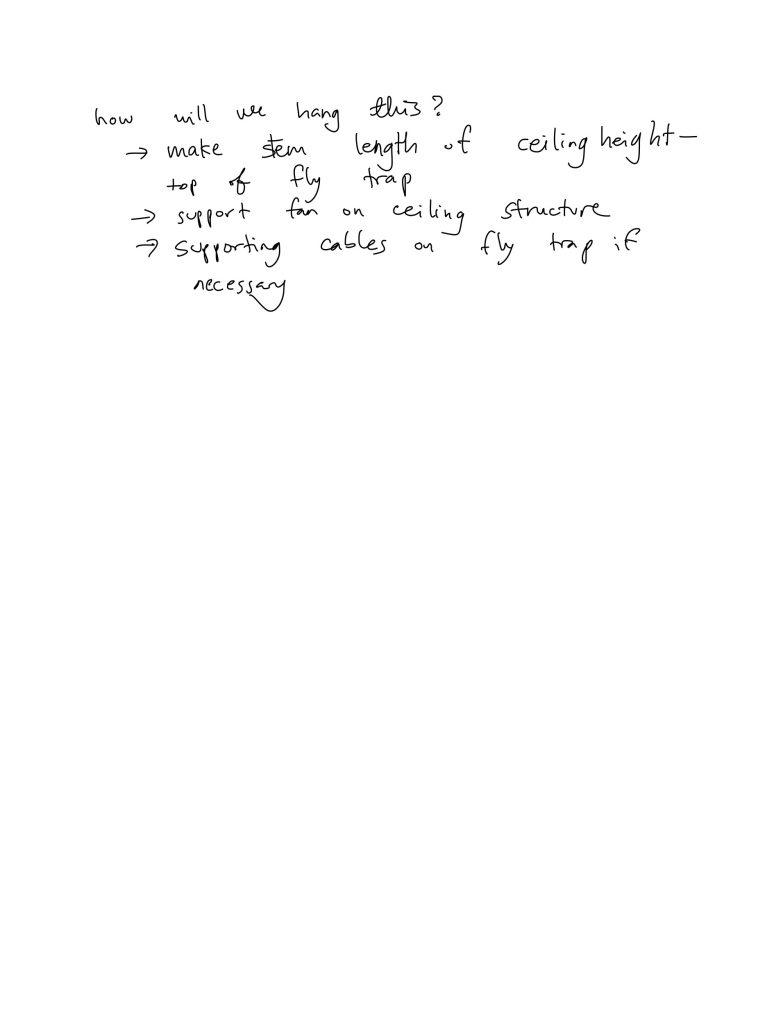
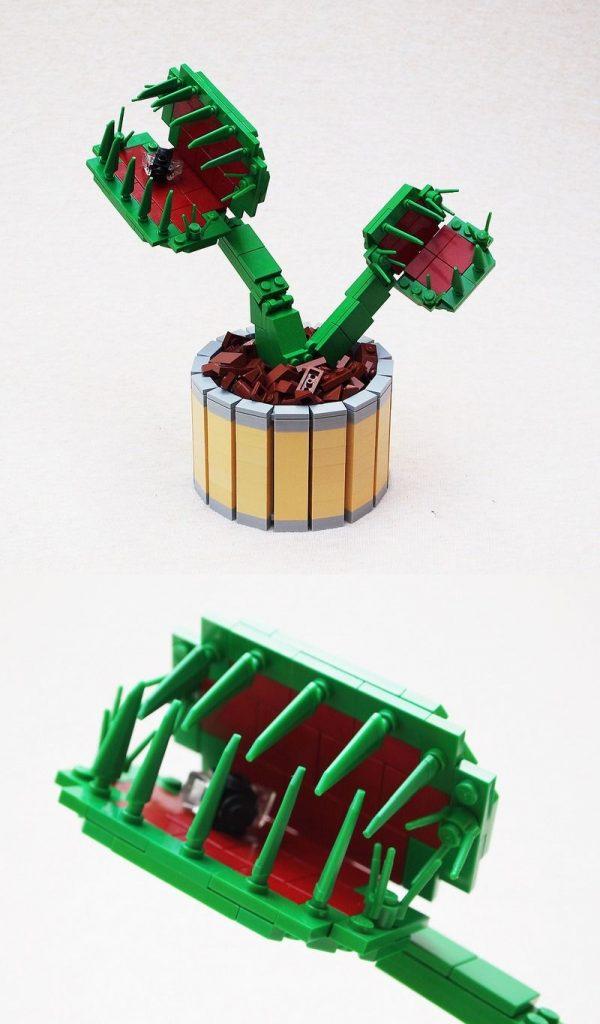
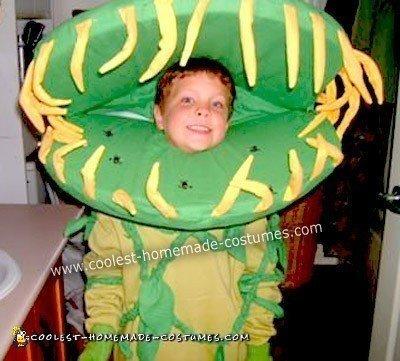
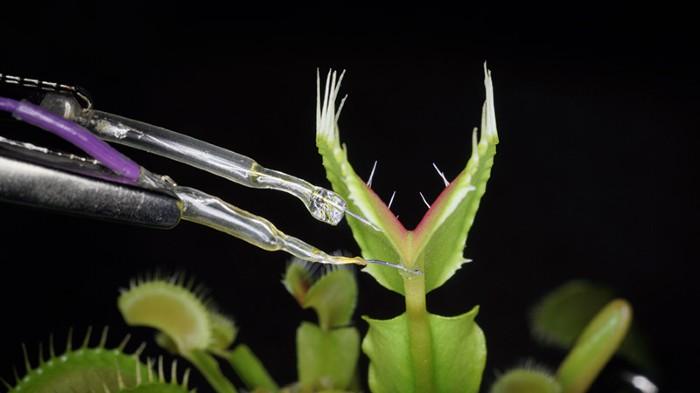
For our final project, we want to create a giant hanging venus fly trap. We intend to make the fly trap big enough for several people to enter it at once. We want to create a space that allows people to interact with one another and enter a transformative space. A standing person would have anywhere from the waist up to just their head in the fly trap, and a person sitting in a wheelchair would be able to put their head in. People would either be able to walk through the fly trap or stand between the teeth. We want to be able to open and close the fly trap. The stem of the fly trap will be connected to the fan blower, attached to the ceiling. We intend to dye our own fabric: the stem and the outer layer would be green, and the inner fabric would be a gradient from red to green. The animation could be projected onto the inside of the fly trap, the ground underneath, or the outside of the fly trap.
After discussing our proposal with the class, we decided it would be best to begin the project by making the body of the fly trap first, then seeing if we have time to hang it. If not, an alternative final product would be putting the fly trap on the ground.
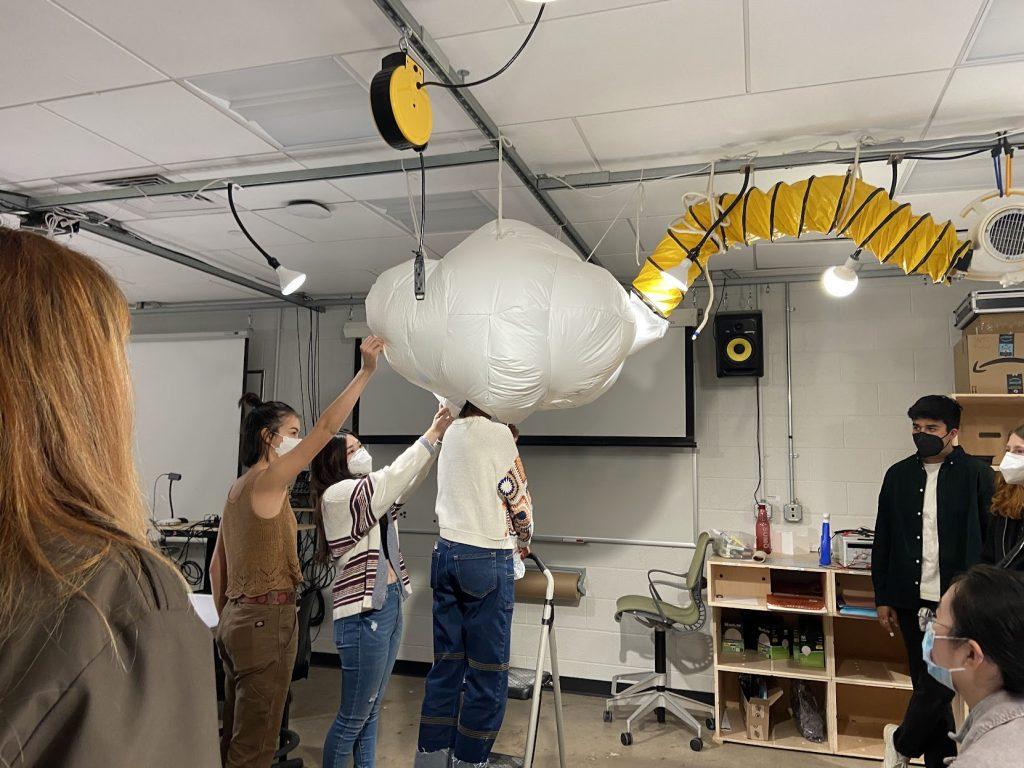
(click the link above to view a video of the inside – I cannot directly embed a video)
We began work on this project by discussing how we could combine our inflatables. We ended up deciding on a combination of Jennifer’s cloud vase, Charlotte’s bacteria thing, and Sandy’s decorative elements. We wanted to create a physical manifestation of “head in the clouds”. We modeled the cloud in Rhino, which proved to have many difficulties – the doubly-curved surfaces wouldn’t squish properly, and when they did squish they broke into many small pieces that were difficult to assemble. Despite these issues, splitting the project up into smaller chunks was helpful because we could each individually work asynchronously on our own pieces. We wanted viewers to be able to put their head in the cloud, so we just cut a slit at the bottom of the cloud. We were worried that too much air would leak through it and the cloud would deflate, but we were happily surprised to find that there was enough airflow to keep the cloud inflated with a head-sized slit. We were also worried that the decorations inside would swing around too much and become tangled, but they mostly just gently moved. The feedback from the class was good to hear and very helpful. We especially liked the commentary on how there are two experiences a viewer can have with the cloud. Being inside the cloud is transformative, bright, and calming; being outside the cloud is funny to see someone put only their head in an object. If we were to expand on this project, we would make it bigger and add more slits so the inside experience could be a social one.
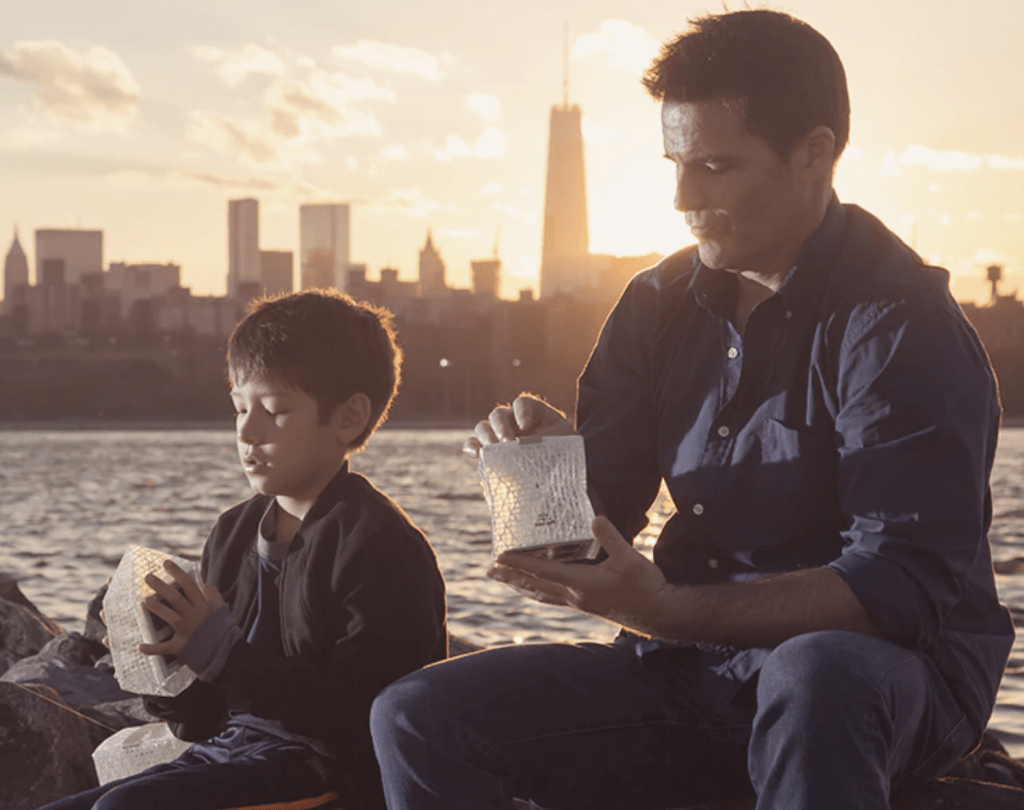
As I was thinking of some examples of soft sculpture, I was actually reminded of these inflatable origami-inspired solar lanterns called the SolarPuff by Solight Design! Although I deeply appreciate the fine art soft sculpture pieces I’ve encountered and learned about (I actually wrote about Do Ho Suh’s sculptures in some of my college application essays!), these SolarPuffs stood out to me for their valuable design, distributability, simple beauty, and direct impact on the environment and built world. Inspired by an origami ball, the SolarPuff is a solar-charged lamp that can flat-pack, and easily be blown up by a few breaths, without the need for a tube or nozzle which can increase the chance of spreading germs and disease. After being charged in the sun, it can provide clean, carbon-free light for up to eight hours. Although simply a small, 5 inch cube at its largest, the SolarPuff exemplifies exactly how much difference good design can make in people’s lives.
For example, Syrian refugees often depend on kerosene lamps to travel to their camps. However, these lamps are heavy and expensive, not to mention outright dangerous– toxic kerosene fumes are the cause of death for an estimated 1.5 million people per year. The weightless and collapsable SolarPuff is a much more efficient and safe alternative, even reducing crimes such as child kidnapping or sexual assault in the camps as it provides safer travel. The light is also used in Haiti, where many families and children don’t have access to electricity or sustainable lighting. With the SolarPuff, people can work into the night, increasing economic productivity, and children can do their homework after nightfall without the need for toxic lamps.
Although very utilitarian, I chose to write about this “soft sculpture,” because that’s exactly what each of these lamps are! Beautiful, simple, and inflatable, this product intrigued me because it also relates to my interests in Product Design, sustainability, and different materials! Although I’m learning wood-working skills in the Products studio, I hope to develop more of a sensitivity to other materials and soft textiles and develop more humane, sustainable, and beautiful designs!