Tanvi Harkare – Looking Outwards – 03

One of the projects discussing computational digital fabrication is part of the MAAD program at CMU. In addition to fabrication, the program consists of architectural robotics and ecological thinking. There are multiple different studios that you can choose from in this program, but the one that interests me the most deals with experimentation with new and different materials that explore contemporary design techniques. The design process starts with using some type of algorithm to create a parametric design. Next, this can be translated into either a physical model or a 2D drawing. Some digital fabrication tools that are helpful to completing projects include 3D modeling software, robotic arms, laser cutting machines, and a CNC router. 

A 3D model created using computational design software

As an architecture undergraduate student at CMU, I’m interested in any future paths I might be able to take. The importance of computational fabrication is increasing greatly in architecture schools; we are taught computational fabrication as early as the second year of the undergraduate program. For example, we had to create an object using fiberglass and resin that was designed using a computational program called Grasshopper, which works through the 3D modeling software Rhino. 

An example of Rhino 3D modeling software and a Grasshopper script


Romi Jin – Looking Outwards 03

Having taken an architecture course about computation fabrication (Fundamentals of Computational Design), I have some familiarity in this field. After researching a few examples, HG’s Opening Chronometry interested me. In the class I took, I created many parametric pavilions similar to that of HG Architecture’s. The process is essentially translating a shell into a larger shell — placing double-layered cones into a mathematical pattern created using Grasshopper.
Grasshopper-created parametric system of units to assemble a pavilion.
(above) Grasshopper-created parametric system of units to assemble a pavilion.

It is interesting to think how a small-scale structure built using simple units can potentially be transformed into a large-scale home or building using a modular system. Parametric systems use a strict logic to create its design; however, this logic can be flexibly manipulated into visually different forms for different purposes as well. Computational fabrication can also be used to help build cheap, sustainable and easy-to-assemble homes, as well as speed up the process and lessen the effort placed into the whole process of construction.

Romi Jin – Project-03-Dynamic-Drawing-Section B

romi-project03

/*
Romi Jin
Section B
rsjin@andrew.cmu.edu
Project-03
*/


var r = 252;
var g = 236;
var b = 235;

var faceWidth = 40;
var earWidth = 15;
var earHeight = 40;
var bodyWidth = 40;
var bodyHeight = 60;
var tailWidth = 20;
var body2w = 50;
var body2h = 40;
var eyew = 3;
var eyeh = 5.5;
var nosew = 6;
var noseh = 5;

var carrot = -150;

function setup() {
    createCanvas(640, 480);
}
 
function draw() {
    background(r,g,b);
    /*if (mouseX>width/2) {
        r=255;
        g=213;
        b=210;
        */
   if (mouseX > 0 & mouseX < width){
        r = 252 - mouseX/30;
        g = 236 - mouseX/30;
        b = 235 + mouseX/10;
    }

     //carrots
    if (mouseX > width/4) {
        carrot ++;
        if (carrot > height-175) {
        carrot = height-175;
        }

    } else {
        carrot =- 150;
    }
    
    stroke(252,194,149);
    strokeWeight(3);
    line(width/2,carrot+10,width/2,carrot+40);
    line(360,carrot-50,360,carrot-20);
    line(360,carrot+10,360,carrot+40);
    line(360,carrot+60,360,carrot+90);
    line(380,carrot-40,380,carrot-10);
    line(380,carrot+20,380,carrot+50);
    line(400,carrot+5,400,carrot+35);
    line(400,carrot+70,400,carrot+100);
    line(420,carrot+50,420,carrot+80);
    line(420,carrot-50,420,carrot-20);
    line(440,carrot+40,440,carrot+70);
    line(440,carrot-20,440,carrot+10);
    line(460,carrot+70,460,carrot+100);
    line(460,carrot+20,460,carrot+50);
    line(480,carrot+30,480,carrot+70);
    line(480,carrot+90,480,carrot+120);
    line(500,carrot+10,500,carrot+40);
    line(500,carrot-40,500,carrot-10);
    line(520,carrot+20,520,carrot+50);
    line(520,carrot+90,520,carrot+120);
    line(540,carrot-50,540,carrot-20);
    line(540,carrot+60,540,carrot+90);
    line(560,carrot-70,560,carrot-40);
    line(560,carrot+80,560,carrot+110);
    line(580,carrot+30,580,carrot+60);
    line(580,carrot-40,580,carrot-10);
    line(600,carrot+70,600,carrot+100);
    line(600,carrot+10,600,carrot+40);
    line(620,carrot+60,620,carrot+90);
    line(620,carrot-20,620,carrot+10);


    //bunny

    //bigger
    if (mouseX > width/2) {
        faceWidth ++ & 
        earWidth ++ && 
        earHeight ++ && 
        bodyWidth ++ && 
        bodyHeight ++ && 
        tailWidth ++ && 
        body2w ++ && 
        body2h ++ &&
        eyew ++ &&
        eyeh ++ &&
        nosew ++ &&
        noseh ++;

    }

    if (faceWidth > 45) {
        faceWidth = 45;
    }
    if (earWidth > 20) {
        earWidth = 20;
    }
    if (earHeight > 45) {
        earHeight = 45;
    }
    if (bodyWidth > 45) {
        bodyWidth = 45;
    }
    if (bodyHeight > 65) {
        bodyHeight = 65;
    }
    if (tailWidth > 25) {
        tailWidth = 25;
    }
    if (body2w > 55) {
        body2w = 55;
    }
    if (body2h > 45) {
        body2h = 45;
    }
    if (body2h > 45) {
        body2h = 45;
    }
    if (eyew > 3.5) {
        eyew = 3.5;
    }
    if (eyeh > 5.5) {
        eyeh = 5.5;
    }
    if (nosew > 6) {
        nosew = 6;
    }
    if (noseh > 5) {
        noseh = 5;
    }

    //smaller
    if (mouseX < width/2) {
        faceWidth-- & 
        earWidth-- && 
        earHeight-- && 
        bodyWidth-- && 
        bodyHeight-- && 
        tailWidth-- && 
        body2w-- && 
        body2h-- &&
        eyew-- &&
        eyeh-- &&
        nosew-- &&
        noseh--;
    }

    if (faceWidth<35) {
        faceWidth=35;
    }
    if (earWidth<10) {
        earWidth=10;
    }
    if (earHeight<35) {
        earHeight=35;
    }
    if (bodyWidth<35) {
        bodyWidth=35;
    }
    if (bodyHeight<55) {
        bodyHeight=55;
    }
    if (tailWidth<15) {
        tailWidth=15;
    }
    if (body2w<45) {
        body2w=45;
    }
    if (body2h<35) {
        body2h=35;
    }
    if (eyew<3) {
        eyew=3;
    }
    if (eyeh<3.5) {
        eyeh=3.5;
    }
    if (nosew<4.25) {
        nosew=4.25;
    }
    if (noseh<4) {
        noseh=4;
    }

    //left ear
    stroke(128,128,128);
    strokeWeight(.2);
    fill(255);
    var x = map(mouseX,0,width,body2w/2,width-body2w/2,true);
    ellipse(x,height-100,earWidth,earHeight);
 
    //right ear 
    stroke(128,128,128);
    strokeWeight(.2);
    fill(255);
    ellipse(x-10,height-95,earWidth,earHeight);

    //body
    stroke(128,128,128);
    strokeWeight(.2);
    fill(255);
    ellipse(x,height-30,body2w,body2h/2);

    stroke(128,128,128);
    strokeWeight(.2);
    fill(255);
    ellipse(x,height-40,bodyWidth,bodyHeight);

    //tail
    stroke(128,128,128);
    strokeWeight(.2);
    fill(255);
    ellipse(x-10,height-15,tailWidth,tailWidth);

    //face
    stroke(128,128,128);
    strokeWeight(.2);
    fill(255); 
    ellipse(x,height-75,faceWidth,faceWidth);

    //eye
    noStroke();
    fill(0);
    ellipse(x-10,height-80,eyew,eyeh);

    //nose
    noStroke();
    fill(237,171,166);
    ellipse(x+14,height-75,nosew,noseh);

}

I think I was too ambitious for this project and wanted to do a lot more than what I have, but I was aiming for this to be a cute cartoon of a bunny eating carrots falling from the sky. If you move the mouse to the right side of the screen, carrots begin to drop from the sky and as the bunny moves to the right, he gets larger as he eats the falling carrots. If you move the mouse back to the left, the bunny becomes smaller and the carrots disappear.

Alessandra Fleck – Project 03 – Dynamic Drawing

sketch

//Name: Alessandra Fleck 
//Class Section : B
//Email: afleck@andrew.cmu.edu
//Project-03

var angle = 0;

function setup() {
    createCanvas(640, 480);
}
function draw() {

    // set background to night color
    background(28, 41, 74);
    noStroke();

    //change background color
    if (mouseX < (width / 2)) {
        background (148, 236, 223); //change background to day when mouse is in left of halway
    }

    //Create the Sun and Moon
    //Moon
    fill(215, 215, 215);
    var m = max(min(mouseX, 400), 0);
    var size = m * 200 /400;
    ellipse(450 + m * 190.0 / 480, 100.0, size, size);

    //Sun
    fill(214, 212, 161);
    size = 100 - size;
    ellipse(200 + m * 190.0 / 480, 200.0, size + 10, size);


    //rolling hill-01 (left)
    push();
    translate (100,600);
    rotate(radians(angle));
    fill(115, 99,87);
    ellipse(-200,150,500,500);
    pop();

    //rolling hill-02 (right)
    push();
    translate (100,600);
    rotate(radians(-angle));
    fill(115, 99,87);
    ellipse(200,50,500,500);
    pop();

    fill(51,41,32); // dark back hill
    ellipse(0, 500, 750, 800);

    //First Tree left
    fill(95, 150, 124);
    rect(opp -50, 40, 20, 400);

    //Hill in the far back
    fill(80,66,56);
    var m = max(min(width - mouseX, 800), 400);
    var size = m * 100 / 450;
    ellipse(100 + m * 100 / 480, 400, size + 400, 300);

    //Hill on the right that moves against cursor
    fill(115, 99,87);
    var m = max(min(width - mouseX, 800), 400);
    var size = m * 100 / 450;
    ellipse(500 + m * 100 / 480, 400, size + 300, 200);
    

    //Solid to cover the hills

    fill(176, 169, 138);
    rect(0, 400, 700, 100);
    fill(176, 169, 138); // solid hill on left (brown)
    ellipse(0, 400, 700, 100);
    fill(115, 99,87); // solid hill on left (brown)
    ellipse(0, 400, 650, 80);
    
    fill(150,125,107); // solid hill on right (brown)
    ellipse(400, 450, 650, 90);

    
    //Bushes
    var opp = width - mouseX; 
 
    fill(87, 129, 59); // bush front
    ellipse(mouseX-500, 350, 800, 60);

    fill(73, 83, 65); //ground floor
    ellipse(mouseX - 300,380,600,80);

    fill(107, 147, 88); // bush behind
    ellipse(mouseX-400, 400, 800, 80);
    

    angle = angle + 3;
 
    //Tree_01
    fill(42, 22, 33); //tree trunk
    rect(opp, 200, 40, 400);
    fill(18, 70, 43); //tree top
    ellipse(opp,200,250,200);
    ellipse(opp,300,350,200);

    //Tree_02
    fill(83, 71, 65); //medium tree trunk
    rect(opp + 95, 100, 30, 400);
    

    //Tree_03
    fill(42,22,33);
    rect(opp + 50, 50, 30, 400);
    fill(100, 120, 69); //tree top-02
    ellipse(opp+100,100,150,200);

    //Tree_04
    fill(98, 66, 36);
    rect(opp -50, 40, 20, 400);
    fill(87, 129, 59); //tree top
    ellipse(opp - 80,100,100,100);
    fill(100, 120, 69); //tree top-02
    ellipse(opp,200,150,200);

    fill(107, 147, 88); //tree top-light
    ellipse(opp,150,100,100);

    fill(77, 83, 65); //tree top
    ellipse(opp+100,200,150,200);

    fill(107, 147, 88); //tree top-light
    ellipse(opp - 60,300,100,100);

    fill(107, 147, 88); //tree top-light
    ellipse(opp + 150,250,80,60);

    fill(96, 166, 104); //ground floor
    ellipse(opp - 60,480,500,100);
    

}


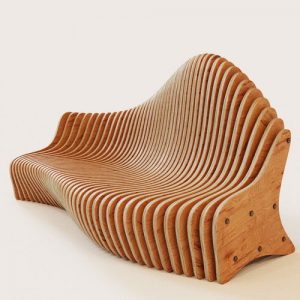
For this project I wanted to use the simple movements we learned with rotation and translation of objects and use ellipses to make rolling hills and scenery. The inspiration for this project came from me working on it indoors and wanting to go outside.

Project-03-Dynamic-Drawing-Veronica

sketch


/*
Veronica Wang
Section B
yiruiw@andrew.cmu.edu
Project-03
*/

var r1 = 100; //size of ellipse 1
var r2 = 80; //size of ellipse 2
var r3 = 120; //size of ellipse 3
var locX = 200; //rotation center of ellipses
var locY = 250; //rotation center of ellipses
var angle = 1; //first angle of rotation
var angle2 = 1; //second angle of rotation
var angle3 = 1; //third angle of rotation
var angle4 = 1; //fourth angle of rotation
var on = true; //background color


function setup() {
    createCanvas(640, 480);
}

function draw() {
//change background between black and white    
    if (on == true) {
        background(255);
      } else {
        background(0);
      }

    noStroke();
    //red ellipse
    fill(255, 0, 0, 150);
    ellipse(320, 100, mouseX, mouseX);
    //blue ellipse
    fill(0, 0, 255, 150);
    ellipse(locX,locY, mouseX, mouseX);
    //green ellipse
    fill(0, 255, 0, 150);
    ellipse(400, 450, mouseX, mouseX);

    //magenta ellipse
    push();
    translate(locX, locY);
    rotate(radians(angle));
    noStroke();
    fill(255, 0, 255, 150);
    ellipse(mouseX / 8 + 0.5 , mouseY / 8 + 1, r1 + mouseY / 2, r1 + mouseY / 2);
    pop();
    angle = angle + 1;

    //cyan ellipse
    push();
    translate(locX + 10, locY);    
    noStroke();
    fill(0, 255, 255, 150);
    rotate(radians(angle));
    ellipse(mouseX / 2 + 0.5 , mouseY / 2 + 1, r2 + mouseY / 1.5, r2 + mouseY / 1.5);
    pop();
    angle2 = angle2 + 2;

    //yellow ellipse
    push();
    translate(locX + 50, locY);    
    noStroke();
    fill(255, 255, 0, 150);
    rotate(radians(angle));
    ellipse(mouseX / 5 + 0.5 , mouseY / 6 + 1, r3 + mouseY / 3, r3 + mouseY / 3);
    pop();
    angle3 = angle3 + 0.5;

    //white line
    push();
    translate(locX, locY + 50);    
    noStroke();
    fill(255, 255, 255, 150);
    rotate(radians(angle));
    rectMode(CENTER);
    rect(mouseX / 5 + 0.5 , mouseY / 6 + 1, 10, 1000);
    pop();
    angle3 = angle3 + 0.5;

    //black line
    push();
    translate(100, 100);    
    noStroke();
    fill(0, 0, 0, 150);
    rotate(radians(angle));
    rectMode(CENTER);
    rect(mouseX / 2 + 0.5 , mouseY / 2 + 1, 20, 1000);
    pop();
    angle4 = angle4 - 1;

    //white line apprears at mouse click
    if (mouseIsPressed) {
        if (mouseButton == LEFT) {
            stroke(255);
            strokeWeight(30);
        } else {
            stroke(0);
        }
        line(0, 200, width, 50);
    }
}

//change background between black and white
function mousePressed() {
  if (on == true) {
    on = false;
  } else {
    on = true;
  }
}

In this project I explored different color models and the relationship between colors. I played around with ellipses of colors red, green, blue, cyan, magenta, and yellow, as well as the overlaps of these colors. The background also changes from white to black.

Jisoo Geum – Looking Outwards – 03


Circular Knitic 2014, created by Varvara Guljajeva and Mar Canet.http://www.varvarag.info/circular-knitic/

Circular Knitic is an automated machine made by an artist duo, Varvara Guljajeva and Mar Canet, which renders textile designs into a physical form through knitting.

The duo first began the project in 2012 when they were interested in working with knitting machines. Although knitting machines have existed since 1976, they became obsolete over time due to the lack of accessibility. As a solution, the duo developed an idea of an open source contemporary knitting machine that can be made by digital fabrication media. They achieved the goal in 2014 by creating Circular Knitic and uploaded the open source file on GitHub so that anyone who has the access to 3D printer, laser cutter, makerbeam, and Arduino can build the machine on their own. The algorithm that was used for their early design of Circular Knitic was a board that holds control over obsolete machines and knit patterns through a computer. At a glance, the machine itself did not seem like an artwork, which is the reason why it fascinated me the most. Circular Knitic was a machine made by digital fabrication ‘machines’ that can create an infinite amount of new artworks through soft sculpture. Furthermore, the fact that anyone can have access to the machine and render their own unique vision seemed like a perfect example of new media. The images that come to my mind when I think about digital fabrication are usually hard objects such as a sculpture with intricate surface patterns and cutouts (or even products such as fidget spinners). But making a machine that produces soft fabrics that not only is an artwork on its own but also can become a resource for daily life and fashion was inspiring. The duo has shown passion in creating interactive artworks using coding and visual arts for many years, but I could see their vision the most clearly in Circular Knitic project since it is a work of art that requires the most interaction.


Tanvi Harkare – Project 03 – Dynamic Drawing

tharkare project 3

/* Tanvi Harkare
Section B
tharkare@andrew.cmu.edu
Project-03-Dynamic Drawing */ 

var r = 1.9;
/*taking the canvas height and width and divided by 255,
the max number allowed in an RGB value. This ensure that no matter
where mouseX or Y is, the colors will continue changing*/

function setup() {  
    createCanvas(640, 480);
}

function draw() {
    noStroke();
    background(255 - mouseX/1.9); //fades background out from black to white
    var i = 0; //keeps count of how many rectangles are created
    var posX = 10; //starting x point for rectangle
    var posY = 5; //starting y point for rectangle
    while(i < 130){
        push();
        translate(mouseX, mouseY);
        rotate(radians(mouseX));
        fill(10, mouseX/r, mouseY/r);
        rect(posX, posY, mouseX/12.8, mouseY/12.8); //range for rectangle size is 10 to 50 pixels. 
        i++;
        posX += 50;
        if(posX >= width){ //creates a new row of rectangles
            posX = 10;
            posY += 50;
        }
    }
    pop();
}

I had a lot of fun with this project, especially in experimenting with the while loop. An example of this is analyzing what happens when certain functions are included inside the loop. My push() function is included in the while loop, while the pop() function is called after the while loop ends. Doing vice versa also creates a similar drawing. Depending on the location of the mouse in the x and y direction, the color, size, position, and angle of the rectangles change. Additionally as the mouse moves across the canvas, the background fades from black to white. I was inspired by simple geometric shapes to create a drawing that catches the eye.

Austin Treu – Project-03 – Dynamic Drawing

atreu – project-03

//Austin Treu
//Section C
//atreu@andrew.cmu.edu
//Project-03

var circX = 300, circY = 300, rad = 100, circStroke = 1,
    stripeC = 50, circC = 20, backC = 100, 
    strokeC = 0, sr, sg, sb;

function setup() {
    createCanvas(640, 480);
    background(backC);
}

function draw() {
    //draw back and stripes
    background(backC);
    noStroke();
    fill(stripeC);
    rectMode(CORNER);
    rect(width/4, 0, width/4, height);
    rect(3*width/4, 0, width/4, height);
    //change to colors on mouse pos
    if(mouseX < width/4 || mouseX > 3*width/4){
        backC = 100;
        stripeC = 50;
        circC = 20;
        strokeC = mouseX/4;
    }
    else{
        backC = 'rgb(50, 100, 255)';
        stripeC = 'rgb(100, 20, 150)';
        circC = 'rgb(0,100,50)';
        //set circle stroke color values
        sr = int(mouseX/4);
        sg = int(mouseY/2);
        sb = int((mouseX+mouseY)/4);
        if(mouseY < 0){
            sg = 0;
            sb = sr;
        }
        strokeC = 'rgb('+sr+','+sg+','+sb+')';
    }
    //set a variable stroke
    circStroke = (mouseX/10);
    strokeWeight(circStroke);
    stroke(strokeC);
    circX = width - mouseX;
    circY = height - mouseY;
    fill(circC);
    //draw circles/squares/triangles
    /*NOTE: circ vars initially intended to deal with
        only circles, later adapted to deal w/all shapes
        so they are circ due to the default shape being a circle*/
    if(mouseX+mouseY < width/3+height/4 
        || mouseX+mouseY > 2*width/3+3*height/4){
        rectMode(CENTER);
        rect(circX, circX, rad*3, rad*3);
        rect(circX, circY, rad*2, rad*2);
        rect(circY, circX, rad, rad);
        rect(circY, circY, rad/2, rad/2);
    }
    else if(mouseX+mouseY < width/3 + 3*height/4){
        triangle(circX, circX-3*rad, 
            circX+3*rad, circX+3*rad, circX-3*rad, circX+3*rad);
        triangle(circX, circY-2*rad, 
            circX+2*rad, circY+2*rad, circX-2*rad, circY+2*rad);
        triangle(circY, circX-rad, 
            circY+rad, circX+rad, circY-rad, circX+rad);
        triangle(circY, circY-rad/2, 
            circY+rad/2, circY+rad/2, circY-rad/2, circY+rad/2);
    }
    else{
        ellipse(circX, circX, rad*3, rad*3);
        ellipse(circX, circY, rad*2, rad*2);
        ellipse(circY, circX, rad, rad);
        ellipse(circY, circY, rad/2, rad/2);
    }
}

I found this project to be incredibly interesting to experiment with, especially when it comes to utilizing the mouse’s position to control everything that happens. Reversing the x and y coordinates and using them in various transformations created ways to line all the shapes up in the middle of their motion.

Lingfan Jiang- Looking Outwards 03

The project that I am interested in is called the Silk Pavilion, done by the Mediated Matter group at MIT in 2013. The project mainly focused on the relationship between digital and biological fabrication in design. With silkworms’ spinning experiments, researchers are able to emulate silkworms’ behavior and digitalize it in computational tools.

It is fascinating to see how we could combine nature with technology, and how we could always learn from nature. Manmade objects would always have limitations to them, and we always make things based on things we know and understand. Although technology has developed so rapidly in the recent hundred years, nature, on the other hand, has much more profound knowledge than at any time in human history.

Shirley Chen – Project 03 – Dynamic Drawing

sketch

// Shirley Chen
// Section B
// junfanc@andrew.cmu.edu
// Project-03


var X = 10;
var Y = 10;
var d;
var m;
var radius = 0;
var shade = 0;
var side = 0;

function setup() {
    createCanvas(640, 480);

}

function draw() {
    background(253, 224, 146);
//Make a Grid
    for (i = 0; i < 24; i++){
        for (j = 0; j < 32; j++){
            X = 20 * j + 10
            Y = 20 * i + 10;
//Divide the Coordinate into Four Quadrants
//The Radius of Circles in the First Quadrant Changes According to the Distance Between Mouse and Center of the Circle
//The Color of the Circle Changes According to the Distance Between Mouse and Center of the Circle
        if (mouseX > 0 & mouseX < 320 && mouseY > 0 && mouseY < 240){
                d = dist(mouseX, mouseY, X, Y)
                m = map(d, 0, 786, 0, 20);
                shade = m * 0.5 + 200;
                radius = 20 - m;
                noStroke();
                fill(shade, 137, shade);
                ellipse(X, Y, radius, radius);
            }
//The Length of Side of the Square in the Second Quadrant Changes According to the Distance Between Mouse and Center of the Sqaures
//The Color of the Sqaures Changes According to the Distance Between Mouse and Center of the Squares
            else if  (mouseX > 320 & mouseX < 640 && mouseY > 0 && mouseY < 240){
                d = dist(mouseX, mouseY, X, Y)
                m = map(d, 0, 786, 0, 20);
                side = m + 10;
                shade = m + 200;
                noStroke();
                fill(223, shade, 138);
                rectMode(CENTER);
                rect(X, Y, side, side);
            }
//The Length of Side of the Rectangles in the Second Quadrant Changes According to the Distance Between Mouse and Center of the Rectangles
//The Color of the Rectangles Changes According to the Distance Between Mouse and Center of the Rectangles
            else if  (mouseX > 0 & mouseX < 320 && mouseY > 240 && mouseY < 480){
                d = dist(mouseX, mouseY, X, Y)
                m = map(d, 0, 786, 0, 20);
                side = m * 0.3 + 18;
                shade = m * 7 + 50;
                noStroke();
                fill(231, 100, shade);
                rectMode(CENTER);
                rect(X, Y, side + 3, side);
            }
//The Size of the Geometry Changes According to the Distance Between Mouse and Center of the Geometry
//The Color of the Geometry Changes According to the Distance Between Mouse and Center of the Geometry
            else if  (mouseX > 320 & mouseX < 640 && mouseY > 240 && mouseY < 480){
                d = dist(mouseX, mouseY, X, Y);
                m = map(d, 0, 786, 0, 20);
                side = m * 0.8 + 2;
                shade = m * 3 + 8;
                noStroke();
                fill(167, 88, shade);
                rectMode(CENTER);
                rect(X, Y, side, side, 1, 8);
            } 
//When the Mouse is not On Canvas, Text Will Show Up
            else {
                fill(89, 134, 189);
                text('PLACE THE MOUSE HERE!', 235, 240);
            }
        }
    }
}

In this assignment, I was inspired by the parametric design that I researched for the Looking Outward Assignment. Controlling by the position of the mouse, some variables like radius, color, size, shape will change accordingly. It creates interesting visual effect that when the mouse gets closer to a geometry, the geometry gets smaller. I practiced the looping command that I learned from other class.