Alessandra Fleck – Final Project

sketch

//Name: Alessandra Fleck 
//Class Section : B
//Email: afleck@andrew.cmu.edu
//Assignment-12-Final

//USING ML5 TO IMPLEMENT MACHINE LEARNING MODEL -- see html for library src
//POSENET - HUMAN POSE ESTIMATION, USING MACHINE LEARNING  

var myCamera; //variable to hold onto webcam data
var poseNet;
var pose =[];
var imgPlanet; //store first planet image
var imgPlanet2; //store second planet image
var imgPlanet3; //store third planet image for right hip

//NON RESPONSIVE BACKGROUND ENVIRONMENT
var stars =[]; //array to hold the stars

//CHARACTER HELMET VARIABLES
var headX = 0;
var headY = 0;
//CHARACTER EYES VARIABLES
var lefteyeX = 0;
var lefteyeY = 0;
var righteyeX = 0;
var righteyeY = 0;
//CHARACTER HANDS
var lefthandX = 0;
var lefthandY = 0;
var righthandX = 0;
var righthandY = 0;
//CHARACTER HIP
var rightHipX = 0;
var rightHipY = 0;


function preload(){
    //load media for use in the sketch
    var planetOneURL = "https://i.imgur.com/f0QBerx.png";
    imgPlanet = loadImage(planetOneURL);
    var planetTwoURL = "https://i.imgur.com/v6UuYtt.png";
    imgPlanet2 = loadImage(planetTwoURL);
    var planetThreeURL = "https://i.imgur.com/bjO4uOW.png";
    imgPlanet3 = loadImage(planetThreeURL);
}

function setup(){
    createCanvas(640,480);
    //load planet one image pixels
    imgPlanet.loadPixels();

    myCamera = createCapture(VIDEO); //giving permission to browser to connect to webcam
    myCamera.size(640,480); //setting display dimensions of camera
    myCamera.hide(); // to hide extra video display below canvas
    poseNet = ml5.poseNet(myCamera, modelLoaded); // load the posenet model and connect it to the video
    poseNet.on('pose', myPose);//when person is detected, execute

}
 //check that ml5 is running on p5js 
function modelLoaded(){
    console.log('model is loaded');
}

//for one person at a time
function myPose(pose){
    //TEST POSE
    console.log(pose); //record+print the poses as detected by the camera
    //note that pose is an array
    if (pose.length > 0){
        //CHARACTER HELMET CAMERA POSITION
        headX = pose[0].pose.keypoints[0].position.x;
        headY = pose[0].pose.keypoints[0].position.y;
        
        //CHARACTER LEFT EYE CAMERA POSITION
        lefteyeX = pose[0].pose.keypoints[1].position.x;
        lefteyeY = pose[0].pose.keypoints[1].position.y;
        //CHARACTER RIGHT EYE CAMERA POSITION
        righteyeX = pose[0].pose.keypoints[2].position.x;
        righteyeY = pose[0].pose.keypoints[2].position.y;
        //CHARACTER LEFT HAND CAMERA POSITION - note that the index is for left wrist
        lefthandX = pose[0].pose.keypoints[9].position.x;
        lefthandY = pose[0].pose.keypoints[9].position.y;
        //CHARACTER RIGHT HAND CAMERA POSITION - note that the index is for left wrist

    //reduce jittering of shapes by implementing linear interpolation 
    //takes position of shape and camera position and taking 0.2 in between
         //RIGHT HAND CAMERA POSTION AND LAG USING LERP FUNCTION
        var righthandNX = pose[0].pose.keypoints[10].position.x;
        var righthandNY = pose[0].pose.keypoints[10].position.y;
        righthandX = lerp(righthandX,righthandNX,0.8);
        righthandY = lerp(righthandY,righthandNY,0.8);

        //CHARACTER RIGHT HIP CAMERA POSITION
        rightHipX = pose[0].pose.keypoints[12].position.x;
        rightHipY = pose[0].pose.keypoints[12].position.y;

    }
}

function draw(){
    //draw the camera image to the canvas using image function
    image(myCamera, 0, 0, width, height); 

    //stars at random
    for(var i=0; i<random(8); i++){
        stars.push(new star()); //put new star into array
    }

    for (var birth of stars){
        birth.display();
    }

    //maintain shape scale to distance from camera
    var cameraDistance = dist(lefteyeX, lefteyeY, righteyeX, righteyeY); 

    filter(POSTERIZE,8); // filters video image into posterize
    filter(INVERT); //overlay gray filter

   
    //CHARACTER HEAD SHAPE SETTING
    fill(250);
    ellipse(headX,headY,200,200); //using nose location for character head
    fill(0);
    ellipse(headX,headY+25,30,10); //using nose location for character mouth
    
    //CHARACTER LEFT EYE SHAPE SETTING
    fill(0);
    ellipse(lefteyeX, lefteyeY, cameraDistance/2,cameraDistance/2);
    //CHARACTER RIGHT EYE SHAPE SETTING
    fill(0);
    ellipse(righteyeX, righteyeY, cameraDistance/2,cameraDistance/2);

    //FIRST (GREEN) PLANET IMAGE MOVING IN RESPONSE TO RIGHT HAND
    image(imgPlanet,righthandX,righthandY,50,50);
    image(imgPlanet,righthandX+50,righthandY+50,100,100);
    image(imgPlanet,righthandX+20,righthandY+100,10,10);
    //SECOND (ORANGE) PLANET IMAGE MOVING IN RESPONSE TO LEFT HAND
    image(imgPlanet2,lefthandX+20,lefthandY,50,50);
    image(imgPlanet2,lefthandX-100,lefthandY,30,30);
    image(imgPlanet2,lefthandX+50,lefthandY+50,60,60);

    //USING CHARACTER RIGHT HIP AS GALAXY
    image(imgPlanet3,rightHipX,rightHipY-50,300,150);


}

function star(){
    this.posX = 0;
    this.posY = random(-100,400);
    this.size = random(50,100);
    this.display = function(){
        fill(0);
        ellipse(this.posX,this.posY, this.size);
    }
}


index

afleck_Final


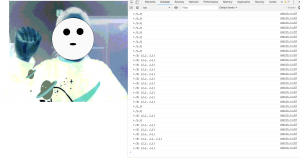
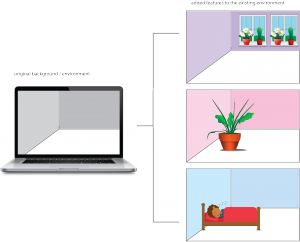
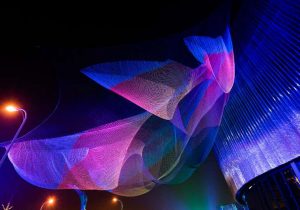
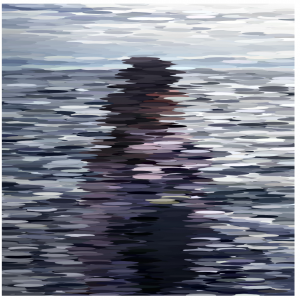
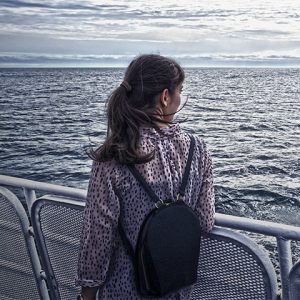
For the final project I wanted to explore a part of p5js that involved computer vision. Originally going to do an Augmented Reality project for objects placement, I ended up going more towards computer vision as it is easier to do with a webcam and there are lots of resources available for it in correlation with p5js. To use computer vision I added the Ml5 library to my html file and used the posNet() model that predicts live time human body estimation with machine learning.

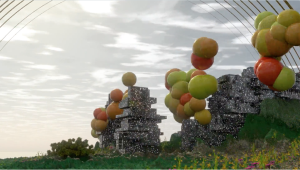
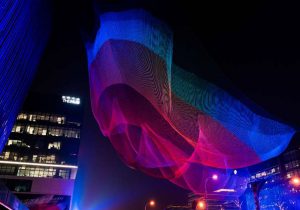
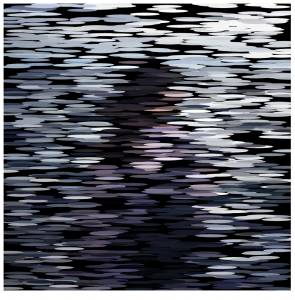
Using posNet I was able to identify different keypoint indexes for different parts of the body and link those to where I could input shapes. As I love space, I thought it might be neat to create a responsive space environment with the movement of the body. I began with making the head and eyes as a large moon thats responds to different distances from the camera and scales to the distance. I then created planets in illustrator and added them into the scene. Using linear interpolation, I was able to detach the keypoint of the wrists from the body and create a bit of a lag so that the planets had the effects of following the wrists, where in reality they were being offset from the keypoint of the wrist and the coordinates of the object.

From this project I got to explore this form of machine learning for the first time. Though it was not as refined as I wanted it to be (as much of the information was very new to me), I enjoyed looking at how computer vision operates and the things it can can do with augmenting reality.

Note: the camera will not work as the library needs to be linked with the html, download and open the source code in the zip file and just open the html file to get started!


Alessandra Fleck-Project 12

For my final project I would like to engage what skills I have learned in creating and illustrating animations in p5js and bringing those skills into an interactive application that allows the user to bring changes into their background. So sort of an interactive green-screen with animation idea that is curated specifically for the purposes of trying to bring design ideas into the environment the user is in. I am not entirely sure what the parameters for the design will be as I have not explored all of the possible moves I could make using augmented reality yet. However for a start, I most certainly want the augmented reality animation created with p5js to be informative and useful as a tool to the user. After looking at some examples in how to engage the user with an animation, I found augmented reality as a common method for making such engagement happen. Though there are less examples and resources available specifically curated towards the p5js library, there are several for javascript available online. In terms of the resources that are available for working with the p5js library, I found TangibleJS, to be a tool that can be used to bringing interactivity to code that relies on the p5js library. In terms of precedent assignments that were worked on in class that relate to the concept of augmented reality and animation, the raining letters with webcam assignment is one such example of the concept of augmented reality being implemented with p5js.

Concept Diagram:

Collaborators: None proposed

Alessandra Fleck-Looking Outwards-12

For my final project I want to engage in an augmented reality application that uses a webcam to change one’s background setting. One project that I found integrating p5js into an augmented reality platform was a project called Kalopsia.

The image above shows a picture of how flower animations are graphed onto a succulent.

Kalopsia utilizes similar scripts used for facial recognition with a webcam to project Japanese-inspired drawings. However, in this application, the AR becomes more a tool for sculpting and detailing.

The second project I looked at was created for a company called VariousWays, and utilizes ar.js to create the augmented reality effect. In the short video it can be seen how an artist who wants to hand out their business card, can integrate a brief example of their work without having to hand out a full portfolio.

The image above shows an object with the business card owners initials on it.

Overall, the purpose of both projects traces back to the desire to bring another dimension to how we perceive our surroundings. Where the project Kalopsia seeks to bring beauty to regular objects, whereas the augmented reality business cards seek to augment the impact of a card, by bringing interactivity to it. However, both projects seek to bring an interesting detail to an everyday object/object that might be perceived in 2D but with 3D notions, become far more expressive. One aspect that I think could be further integrated into both projects is some form of application or connection of the AR image to a social media platform or other users. That way the AR doesnt just work on one scale.

More Information:

Project Kalopsia (http://www.zeitgeistbot.com/blog/kalopsia-is-an-augmented-reality-interactive-generative-art-project/)

Business Card Augmented Reality (http://www.zeitgeistbot.com/blog/augmented-reality-business-card/)

Alessandra Fleck – Looking Outwards – 11

Created by a song done for German duo Meier & Erdmann, this example of computer generated music not only involves the use of algorithms to create music, but also how those patterns in the music can then be translated into a 3D digital landscape. Visual artist from Spain, Victor Doval utilizes the different frequency bands in the music to translate into a visual representation of the band. Inspired by the inherent “journey” music takes its audience on, the music is broken down into data that is then sorted and identified with different lights, shapes, and textures to overlay on the 3D shape and create that “journey” visually to the audience. Note in the background the change in the daylight and sun position as the song progresses. The background is a simple digital representation of the music timeline, where the sun rises in the beginning and sets at the end of the piece.

What I find most interesting about Doval’s work is the idea of visually representing the unseen and utilizing the patterns that can be heard and translating them into something that can be seen.

The above image is a screenshot from the visual landscape Doval creates from the music

Find more information at :

https://www.theverge.com/tldr/2017/4/12/15270026/music-video-algorithm-victor-doval-howler-monkey


Alessandra Fleck – Project 11

sketch

//Name: Alessandra Fleck 
//Class Section : B
//Email: afleck@andrew.cmu.edu
//Project-11


var startFrame;


function setup() {
    createCanvas(480, 480); // create the canvas   
    
}


function draw() {
    background(40,41,35); //setting background color
    var turtle = makeTurtle(80,80); //setting turtle variable


    noFill();
    stroke(0);
    strokeWeight(10);

    turtle.setWeight(20); // make turtle weight 

    // go to starting position but dont start drawing

    //First Iteration of 
    turtle.penUp();

    //placeholder for where mouse should go
    //North Position
    fill('red');
    noStroke();
    ellipse(230,10,30,30);
    //South Position
    fill('red');
    noStroke();
    ellipse(230,450,30,30);
    //West Position
    fill('red');
    noStroke();
    ellipse(10,240,30,30);
    //East Position
    fill('red');
    noStroke();
    ellipse(470,240,30,30);

    for(var i = 0; i<100; i++){

        turtle.penUp();
        turtle.goto(mouseX,150); //set triangle position_01
        turtle.penDown();

        turtle.forward(mouseX);
        turtle.face(-120);
        turtle.forward(mouseX);
        turtle.face(120);
        turtle.forward(mouseY); // creates vertical growth when mouse X is moving in horizontal direction, Y is stretched
    
    }

    for(var i = 0; i<50; i++){
        turtle.penUp();
        turtle.goto(mouseX,150); //set triangle position_02
        turtle.penDown();

        turtle.forward(mouseX);
        turtle.face(-120);
        turtle.forward(mouseX);
        turtle.face(-120);
        turtle.forward(mouseY);
    
    }


    for(var i = 0; i<100; i++){
        turtle.penUp();
        turtle.goto(mouseX,150); //set triangle position_03
        turtle.penDown();

        turtle.forward(mouseX);
        turtle.face(60); // smaller forward motion
        turtle.forward(mouseX);
        turtle.face(60);
        turtle.forward(mouseY);
    
    }

    for(var i = 0; i<100; i++){
        turtle.penUp();
        turtle.goto(mouseY,150); //set triangle position_04
        turtle.penDown();

        turtle.forward(mouseY);
        turtle.face(-120);
        turtle.forward(mouseY);
        turtle.face(120);
        turtle.forward(mouseX); // when mouse moves in Y direction the lines also stretch in x direction
    
    }

    for(var i = 0; i<100; i++){
        turtle.penUp();
        turtle.goto(mouseY,150); //set triangle position
        turtle.penDown();

        turtle.forward(mouseY);
        turtle.face(-60); //smaller forward motion reversed
        turtle.forward(mouseY);
        turtle.face(60);
        turtle.forward(mouseX);
    
    }


}


//setting the Turtle functions 


function turtleLeft(d){this.angle-=d;}function turtleRight(d){this.angle+=d;}
function turtleForward(p){var rad=radians(this.angle);var newx=this.x+cos(rad)*p;
var newy=this.y+sin(rad)*p;this.goto(newx,newy);}function turtleBack(p){
this.forward(-p);}function turtlePenDown(){this.penIsDown=true;}
function turtlePenUp(){this.penIsDown = false;}function turtleGoTo(x,y){
if(this.penIsDown){stroke(this.color);strokeWeight(this.weight);
line(this.x,this.y,x,y);}this.x = x;this.y = y;}function turtleDistTo(x,y){
return sqrt(sq(this.x-x)+sq(this.y-y));}function turtleAngleTo(x,y){
var absAngle=degrees(atan2(y-this.y,x-this.x));
var angle=((absAngle-this.angle)+360)%360.0;return angle;}
function turtleTurnToward(x,y,d){var angle = this.angleTo(x,y);if(angle< 180){
this.angle+=d;}else{this.angle-=d;}}function turtleSetColor(c){this.color=c;}
function turtleSetWeight(w){this.weight=w;}function turtleFace(angle){
this.angle = angle;}function makeTurtle(tx,ty){var turtle={x:tx,y:ty,
angle:0.0,penIsDown:true,color:color(128),weight:1,left:turtleLeft,
right:turtleRight,forward:turtleForward, back:turtleBack,penDown:turtlePenDown,
penUp:turtlePenUp,goto:turtleGoTo, angleto:turtleAngleTo,
turnToward:turtleTurnToward,distanceTo:turtleDistTo, angleTo:turtleAngleTo,
setColor:turtleSetColor, setWeight:turtleSetWeight,face:turtleFace};
return turtle;}


For this project I wanted to explore how moving the mouse to different part of the canvas could create different distinct images from the intersection of a couple lines. As the mouse moves in the X direction, the Y direction lines are shifted vertically so that some go off the canvas or move up/down. This dynamic  movement makes the drawing full at times and have less lines in others. 

Alessandra Fleck – Project 10

sketch

//Name: Alessandra Fleck 
//Class Section : B
//Email: afleck@andrew.cmu.edu
//Project-10


var cake = [];


function setup() {
    createCanvas(480, 480); 
    
    // the initial collection of cake
    for (var i = 0; i < 10; i++){ //automatically counts up
        var rx = random(width);
        cake[i] = makeCake(rx);
    }
    frameRate(100);
}


function draw() {
    background(80,177,198); 
    
    
    displayHorizon();

    updateAndDisplayCake();
    removeCakeThatHaveSlippedOutOfView();
    addNewCakeRandomly(); 

    //bottom table
    fill(225,229,194);
    stroke(0);
    strokeWeight(3);
    rect(0,430,480,100);

    //bear eating cake
    //bear head
    fill(225,229,194);
    stroke(0);
    noStroke();
    ellipse(50,350,150,150);
    //bear ear
    fill(225,229,194);
    ellipse(30,260,50,80);
    //bear cheek
    fill(225,200,190);
    ellipse(30,350,50,50);
    //bear mouth
    fill(80,177,198);
    ellipse(100,380,60,50);
    //bear eye
    fill(0);
    ellipse(80,330,30,30);
    fill(255);
    ellipse(80,320,10,10);
    //bear nose
    fill('red');
    ellipse(120,340,20,20);
    //bear hand
    fill(225,229,194);
    
    ellipse(50,430,80,20);
    

}


function updateAndDisplayCake(){
    // Update the cake's positions, and display them.
    for (var i = 0; i < cake.length; i++){
        cake[i].move();
        cake[i].display();
    }
}


function removeCakeThatHaveSlippedOutOfView(){
    
    var cakeToKeep = [];
    for (var i = 0; i < cake.length; i++){
        if (cake[i].x + cake[i].breadth > 0) {
            cakeToKeep.push(cake[i]);
        }
    }
    cake = cakeToKeep; // remember the surviving buildings
}


function addNewCakeRandomly() {
    // With a small margin of probability, add another cake
    var newCakeLikelihood = 0.010; 
    if (random(0,1) < newCakeLikelihood) {
        cake.push(makeCake(width));
    }
}


function cakeMove() {
	// update cake position
    this.x += this.speed;
}
    

// draw cake
function cakeDisplay() {
    var cakeHeight = 40;
    fill(255); 
    noStroke(); 
    push();
    translate(this.x, height - 40);

    //cake bottom
    fill(197,174,135);
    rect(40,-cakeHeight,50,30);

    //cake middle
    fill(220,157,155);
    rect(40,-cakeHeight -50,50,60);
    //cake middle
    fill(220,157,155);
    rect(40,-cakeHeight -50,50,60);

    //cake top
    fill(197,174,135);
    rect(40,cakeHeight-150, 50,60);

    //cake frosting
    fill(250);
    rect(40,cakeHeight-150, 50,10);


    pop();
}


function makeCake(birthLocationX) {
    var cake = {x: birthLocationX,
                breadth: 10,
                speed: -0.5,
                move: cakeMove,
                display: cakeDisplay}
    return cake;
}


function displayHorizon(){
    stroke(0);
    line (0,height-50, width, height-50); 
}

For this assignment I just wanted to do a conveyor belt with a bear eating cake that came at different lengths.

As seen in the sketch below, I wasn’t able to add toppings to the cake or get the cake to disappear as it entered the bear’s mouth. If I were to go back and edit the script, I would make it so that the vanishing point is set at the bear’s mouth and not the edge of the canvas.

Looking Outwards-10

For this week’s Looking Outwards entry, I wanted to explore the work of Janet Echelman, who explores expression in art through “experimental sculpture at the scale of buildings.” Echelman’s work began its roots during her time at the fishing village Mahabalipuram, where she was waiting for some of her paints to arrive for an exhibition. Inspired by the sculpting culture in the village and the fishermen’s nets, Echelman now installs netted sculptures at the scale of buildings, that seek to express/capture both light and wind.

The image above exhibits one of Echelman’s projects in Shanghai,China. The sculpture is titles “1.26” and seeks to explore the idea of “interconnectedness of opposites.” The work exhibits the tension between what is hard and soft, what can be changed and what cannot be touched.

(The total sculpture spans 80ft long x60ft wide x30ft in depth)

The data used to create such structure uses NASA and NOAA data from the 2010 Chilean earthquake and tsunami. The reason the piece is titled “1.26” is because the earthquake’s shake actually sped the earth’s rotation, shortening the time of the day by 1.26 micro-seconds.

As seen in the video below, the way the data was implemented into the form of the sculpture stems from the points of tension and trends in the data. These correlations in data were then transcribed into programmed lights and the interweaving of polyethylene (UHMWPE) fiber.

What I particularly like about this work is how it expressed such complicated data in a clear, visual form that also ties in the emotional aspect/ reaction to such an event that is lost in numbers.

More information at:

1.26 Shanghai, China, 2017


Alessandra Fleck – Project 09 – Portrait

sketch

//Name: Alessandra Fleck 
//Class Section : B
//Email: afleck@andrew.cmu.edu
//Project-09


var photo; //variable to hold image

function preload(){ //load photo being used off of Imgur
    var myImageURL = "https://i.imgur.com/vCkP5dD.jpg";
    photo = loadImage(myImageURL);
}

function setup(){
    createCanvas(480,480);
    background(0); //sets background to black
    photo.loadPixels();
    frameRate(100000000000000); //load photo pixels quicker
}

function draw() {
    var px = random(width);
    var py = random(height);
    var ix = constrain(floor(px), 0, width-1);
    var iy = constrain(floor(py), 0, height-1);
    var theColorAtLocationXY = photo.get(ix, iy);

    noStroke();
    fill(theColorAtLocationXY);
    ellipse(px, py, 50, 5); //create flat ellipses
}

For this assignment I wanted to do a portrait of my sister. I chose this image because of the painting like qualities of it, despite it being an unedited photo. To capture a more oil painting-like stroke, I played with the ellipse height and width. As noted from the process, the wider the ellipse was, the more difficult it was to get the colors to lay and create the image so I kept it relatively shorter in the end.

Alessandra Fleck-Looking Outwards-09

For this looking outwards, I wanted to look at Yingyang Zhou’s Looking Outwards 08 entry on media artist Chris Cheung. According to Yingyang, Cheung’s work is inspired by the intersection of light rays though a Brilliant cut grade diamond. Yingyang describes the phenomenon of Cheung’s work as “…splendors of our mother nature, ranging from the galaxy and distant stars, rare gemstones, glistens of flowing water, and refracted light beams.” Looking at Cheung’s work I agree that perhaps a key foundation to his work stems from a subtle, yet elegant event of light refraction that brings life to varying elements of mother nature. The fact that the theme of the project carries such a universal language, I think is very interesting. Additionally to Yingyang’s analysis on Cheung’s work I also think that as seen in his installation, Prismverse, the illuminated interior that as Yinyang notes is a metaphor for “the instant tone-up effect of Dr.Jart + V7 Toning Light” also acts as moment of extraction. What Cheung’s work seems to do is take a rudimentary event that occurs in nature and blows it up into a perspective that we can walk into. Typically the type of light refraction Cheung illustrates does not occur at such a large scale. Pulling the scale up and displaying the work at such a large level highlights the subtle beauty that is otherwise overlooked.

The images below shows the glowing effect of the Prismverse installation.

Link to the original looking outwards post by Yingyang Zhou: https://courses.ideate.cmu.edu/15-104/f2018/category/looking-outwards-08/

Link to bio of Chris Cheung: http://eyeofestival.com/speaker/chris-cheung/


Alessandra Fleck – Looking Outwards – 08

(Image from Reuben Margolin’s Pentagonal Wave project)

Reuben Margolin is kinetic artist with a background in math and english from Harvard University who is from Berkeley, California. Inspired by the movement of small green caterpillars, Margolin’s research involves the study of structures that are wave like. Based in Emeryville, California, Margolin has been developing mathematically based natural wave structures for almost 2o years. Growing up with a father who always had woodworking tools around, Margolin was introduced to wood models early in life. He later went to Russia to pursue further study in woodworking  with artists. However, a mathematician at heart, Margolin pursued using mathematics to create flow of his wooden art pieces similar to that of a green caterpillar he had seen years ago while hiking in Utah.

The video below shows one such example of how Margolin implements the caterpillar movement into an actual moving caterpillar machine.


One thing that I particularly admire about Margolin’s work is the details he puts into creating such caterpillar – like flow.  There is a subtle sense of flow in all of the modules that carries that larger piece together. Once such project I think that exhibits this well is his work called Nebula, which also implements 14,064 bicycle reflectors into the structure. I find it fascinating how someone who does not have a very technical background/education, is still able to take concepts of mathematics and apply them to a project of this scale like this. Note that the entire structure used in the Nebula structure is comprised of a thousand amber crystals organized in a “multi-tiered, geometric pattern.”

The means in which Margolin presents his work is very much rooted in the process of trial, failure, critical questioning of what is conventional and discovery. These are three critical aspects of design that I do not think is emphasized very often in the overall design process. Often it seems that Margolin makes several mathematical implementation strategies as he is designing the structure. This approach to designing the structures proves that not all of the work can be planned out them implemented. There is a passing between the drawing board and the shop that goes hand in hand.


More Information

Reuben Margolin

https://www.reubenmargolin.com/waves/

Nebula