![[OLD FALL 2019] 15-104 • Introduction to Computing for Creative Practice](../../../../wp-content/uploads/2020/08/stop-banner.png)
/*
Emma Nicklas-Morris
Section B
enicklas
Project-07
Curves
*/
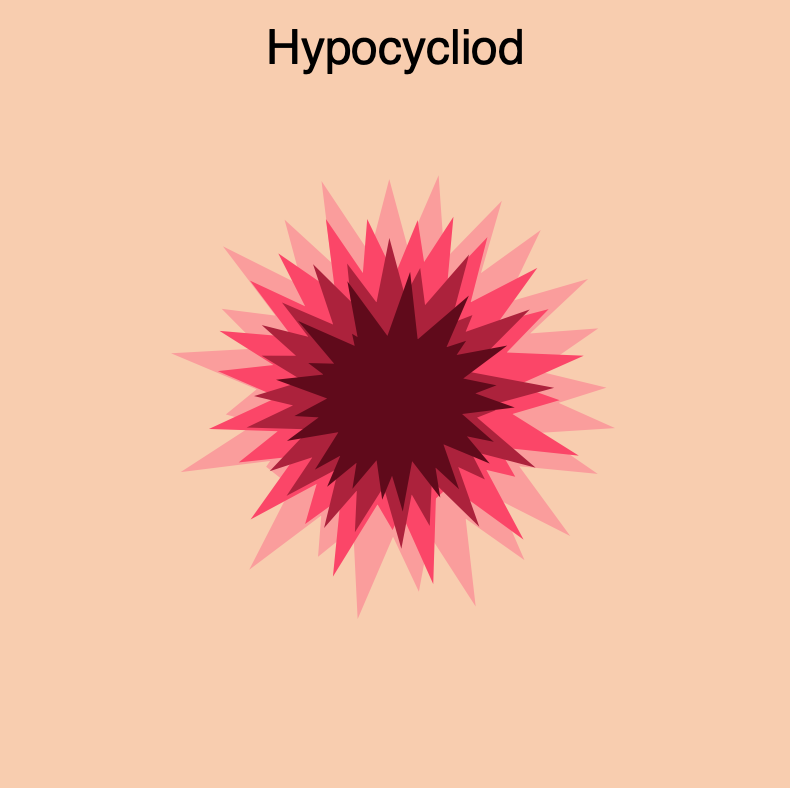
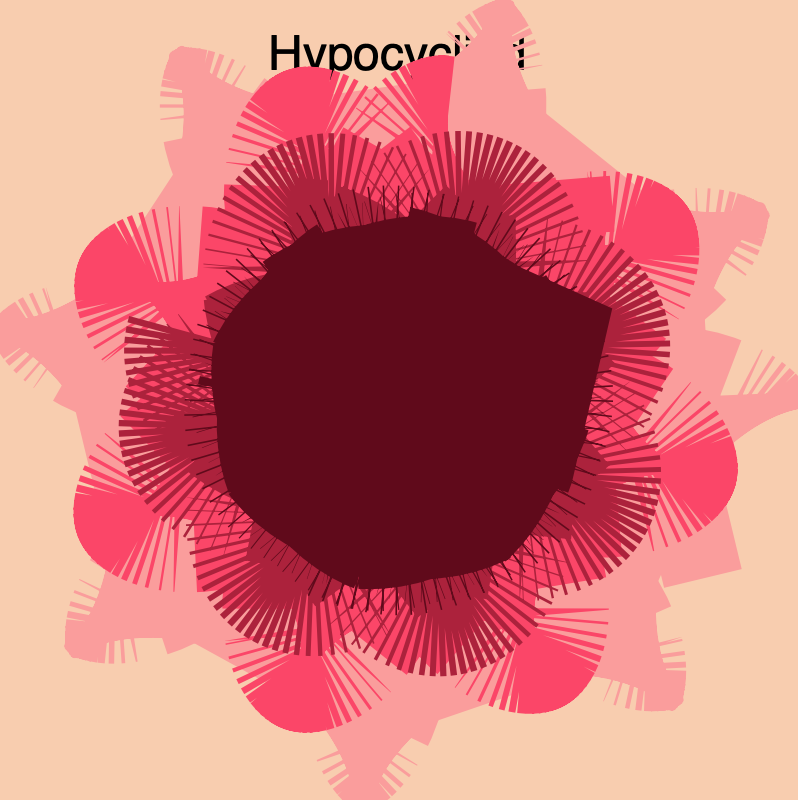
var numP = 200;
function setup() {
createCanvas(400, 400);
}
function draw() {
background("#F9CDAD");
// curve name
noStroke();
textAlign(CENTER);
textSize(24);
fill("black");
text("Hypocycliod", width / 2, 35);
// draws hypocycloids
drawHypocycloid(10, 0, "#FC9D9A"); // light pink one
drawHypocycloid(7, 30, "#FE4365"); // bright pink one
drawHypocycloid(4, 60, "#AE1F3A"); // dark pink one
drawHypocycloid(1, 90, "#610819"); // maroon one
}
function drawHypocycloid(scale, rotation, color) {
// Hypocycliod:
// http://mathworld.wolfram.com/Hypocycloid.html
// effects number of points and the shape of the hypocycloid and size
var a = constrain(mouseX, 118, 300) / 20;
// as the mouse moves down, number of points decrease
var b = constrain(mouseY, 20, 200) / 100;
var n = a / b;
var o = mouseY - (mouseX / 75); // outline size on shape
strokeWeight(o);
stroke(color);
noFill();
push();
translate(width / 2, height / 2); // center of canvas
rotate(rotation);
beginShape();
for (var i = 0; i < numP; i++) {
var p = map(i, 0, numP, 0, TWO_PI);
// equation for hypocycloid
var x = ((a / n) * ((n - 1) * cos(p) - cos((n - 1) * p)));
var y = ((a / n) * ((n - 1) * sin(p) + sin((n - 1) * p)));
vertex(scale * x, scale * y);
}
endShape(CLOSE);
pop();
}
This project seemed daunting at first because I have not done any math in awhile, but once I realized that I could just type the equation for creating a curve it became more exciting. It took me a while to choose a curve. I was interested in one that had multiple points or leafs. I also wanted to use mouseX and mouseY to control how many points/leaf were show at a time. Then, I thought about using mouse position to also control the outline size. Finally, I decided to use scale to make several hypocycloids to make the drawing more interesting. I find the upper right hand corner most interesting and the lower right hand corner the least interesting. Ideally, I wish the maroon hypocycloid didn’t look like such a big blog when the mouse is in the bottom right hand corner because the lines beneath it seem interesting, but the top one block it. I think this was a fun assignment to play with.