LO-My Inspiration

Untitled, Adam Grant

The project that has inspired me is actually work done by my friend Adam, an
arts major in my year at CMU. The summer before coming to Carnegie, he worked on a project where he took a video of people in motion (ballerinas,
breakdancers, and someone doing a flip) and compiled one pixel-length strip
from each of the frames into one image.

I really admired the project because you could still see the motion that was captured in the videos but it was a new and interesting way to express that. Adam was the main artist, but he recruited a few friends to be the models for the project and filmed them himself.

To my knowledge, Adam used video editing softwares like Adobe Premiere Pro and Adobe Photoshop to create these pieces. Adam said he was inspired by work professors at CMU have made because he came here for pre-college. He was really interested in the way technology and art can blend and said that CMU’s art program is more interdisciplinary than others. This project is a good example to show the increasing influence of technology in art, and points toward a future where the two mesh together seamlessly.

LO – My Inspiration

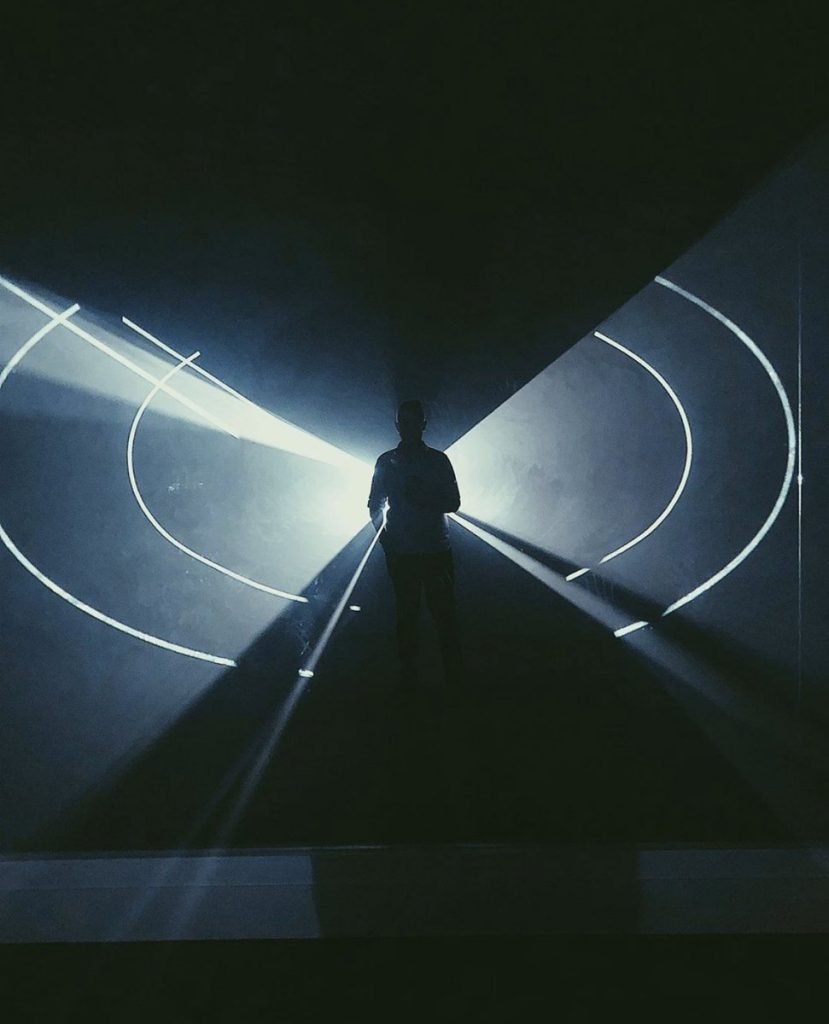
At the Albright-Knox Museum, I saw Anthony McCall’s installation “Dark Rooms, Solid Light.” This mesmerizing exhibit consists of rotating cones of light emerging from a projector. The audience may walk through, intercept and interact with the paths of light. I believe that in creating it McCall was the sole artist. He had iterated and developed upon his ideas for decades. While it may not initially appear to involve computing, McCall actually programmed the pattern of the light’s movements (although I am unsure what software was used). He had done this to create an effect of a transcendence of time.

This artwork is inspirational to me for that reason – McCall can cause people to lose track of time and lose themselves in his work. He is able to give life to something as technical and removed as light and computing. He may have been inspired by contemporaneous works of the time that were able to utilize new technological inventions in order to bring their creations to life. For example, Nam June Paik creatively used new technologies to produce his work.

I think that this work may lead to new advancements in the way that people utilize computational art. Many people likely believe that programming only generates two dimensional works you view on a screen, but McCall has shown that it can be used to create living, interactive experiences.

One of the exhibits from McCall’s installation, “Dark Rooms Solid Light.”

LO – My Inspiration

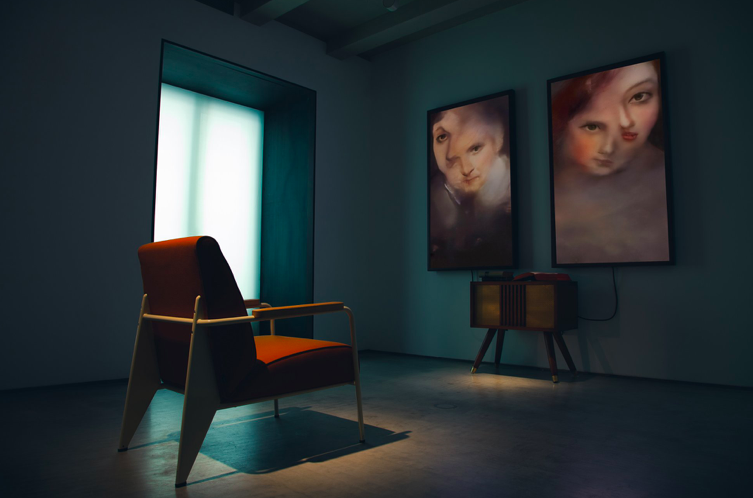
Mario Klingemann uses artificial intelligence, machine learning, and neural networks to create art. His project called Memories of Passersby I is an installation of two framed screens placed right next to each other, over a wood cabinet. These screens contain a very powerful machine capable of continuously creating portraits of un-existing human faces. They are never repeated nor recorded. The infinite stream of portraits is created by the AI brain itself.

This project required the development of custom scripts. He had to train the AI model using thousands of 17th to 19th century portraits. Creating an application similar to a dating application called Tinder, he taught the machine to develop its own preferences of physical traits on human faces.

Klingemann may have been inspired by brushes. The neural networks are similar to that of brushes in that in the end, a medium provides feedback between the artist and the art. The medium, whether it be intricate neural networks or paintbrushes, can create a visual masterpiece.

This project points to a future of other forms of media and presentations, not limited to just portraits.

Memories of Passerby I by Mario Klingemann (2018)

LO-01 – MY INSPIRATION

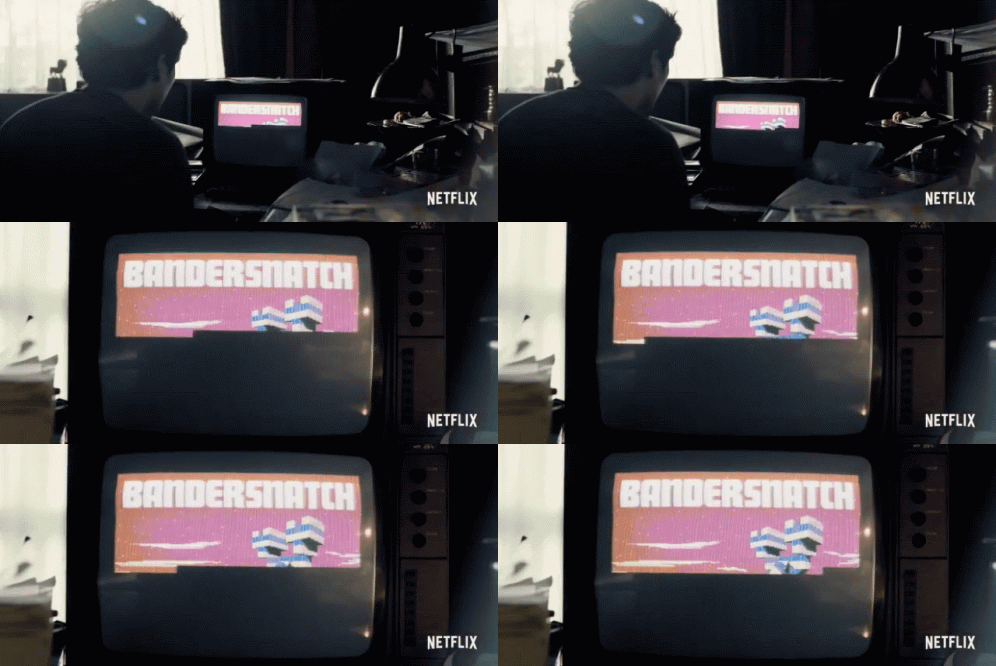
Scene from Black Mirror: Bandersnatch by Netflix.

I found the interactive film “Black Mirror: Bandersnatch” extremely fascinating and inspiring. Bandersnatch is a psychological thriller about a programmer who begins questioning reality when developing a novel (titled Bandersnatch) into an interactive video game. The film itself is also an interactive experience, as the viewers have a role in controlling what happens next during “choice points”.

I found this project admirable because it begins to explore and push the boundaries of cinema and technology. Not only do both work in harmony, they are both able to bring the best out of each other; interweaving technology into cinema pushes the producers and writers to tackle new challenges and rethink many pretenses of a TV show. Introducing cinema to technologies, introduces not only viewers to the expansiveness of what technology can do, but editors and producers to the expansiveness of what they can do.

This film was created by Netflix, the team more specifically, involved Annabel Jones, Charlier Brooker, and David Slade. The process of creating this film also involved the actors, Will Poulter and Fionn Whitehad’s collaboration. Tackling a script with such a large amount of variations of outcome required a lot of exploration in the filming and plot writing. With this all in mind, they also had to make sure the variation of endings wasn’t too overbearing overall for the viewers. The process of which the plot began, started on Post-it notes, then progressed to a whiteboard. Following this, they used a programming tool called Twine. The script was both on paper, but also navigatable on Twine. Scrivener, Final Draft, and Microsoft Notepad were utilised during the process of creating as well. A flowchart was initially used during shooting but then thrown out because it ended up complicating things.

To tackle the interactive component for the viewers, Brooker and Jones had to actually develop a special technology with Netflix, so that the film plays seamlessly, instead of pausing when “choice points” came up. The system they used was one in which lighting, sound design, and aspect ratios change while viewers take the time to choose their options. The time constraint, music in the background, adds to the intensity of the film itself as well.

The interactive film was an idea that Netflix approached the producer and director in May 2017 with. Interactive films have existed prior to this, but the targeted audience was typically for children, with much more straight forward plots.

LO – My Inspiration

The Fallen of World War II is a historical data visualization documentary that analyzes the deaths that occurred during the war and the subsequent decline in battle deaths. Neil Halloran wrote, directed, coded, and narrated the piece (presumably) using commercial software. He conducted extensive research and organized interviews with volunteers to create the project. Andy Dollerson created the music and sound design. The timeline of the project is not specified. The data visualization can be viewed as a 15-minute video or paused to interact with the data.

I admire this project because it is visually captivating and highlights the war’s impact on different countries and details the lasting effects. Halloran uses cinematic storytelling techniques to show a unique perspective of a pivotal moment, allowing viewers to visualize the impact of the war. It integrates data and touches of personal stories that humanize the data.

Halloran was inspired by The Better Angels of Our Nature by Steven Pinker, which explored human nature through the lens of psychology and history that showed the world as inherently non-violent. Halloran intends for this project to spark interest in history and human nature which may inspire future episodes that explore “trends of war and peace.”

Source: The Fallen of World War 2
Neil Halloran

Project 1 : Self Portrait

Week 1

sketch-self portraitDownload
function setup() {
  createCanvas(650, 650);
}

function draw() {
  background(107,116,145);
  
  //hair
  fill(132, 117, 82);
  noStroke();
  beginShape();
  curveVertex(width/2-140,290);
  curveVertex(width/2-130,230);
  curveVertex(width/2-120,350);
  curveVertex(width/2-130,550);
  curveVertex(width/2+130,550);
  curveVertex(width/2+120,350);
  curveVertex(width/2+140,250);
  endShape(CLOSE);
  
  //main body
  fill(247, 194, 150);
  noStroke();
  beginShape();
  vertex(width/2-35, 390);
  vertex(width/2-35, 430);
  vertex(150, 470);
  vertex(100, 550);
  vertex(100, 650);
  vertex(550, 650);
  vertex(550, 550);
  vertex(500, 470);
  vertex(width/2+35, 430);
  vertex(width/2+35, 390);
  endShape(CLOSE);
  
  //face
  fill(247, 194, 150);
  noStroke();
  ellipse(width/2,240,250,320)
  //ears
  ellipse(width/2-110,320,20,40)
  ellipse(width/2+110,320,20,40)
  
  
 //hats
  fill(0);
  noStroke();
  beginShape();
  curveVertex(width/2-200,300);
  curveVertex(width/2-200,320);
  curveVertex(width/2-100,100);
  curveVertex(width/2,50);
  curveVertex(width/2+100,100);
  curveVertex(width/2+200,320);
  curveVertex(width/2+200,300);
  endShape();
  
  
  //lips
  fill(190,111,82);
  noStroke();
  beginShape();
  curveVertex(width/2-35,350);
  curveVertex(width/2-30,360);
  curveVertex(width/2,370);
  curveVertex(width/2+30,360);
  curveVertex(width/2+35,350);
  endShape();
  
  beginShape();
  curveVertex(width/2-35,370);
  curveVertex(width/2-30,360);
  curveVertex(width/2,355);
  curveVertex(width/2+30,360);
  curveVertex(width/2+35,370);
  endShape();
  
  //nose
  fill(239, 217, 192);
  noStroke();
  beginShape();
  vertex(width/2-8, 320);
  vertex(width/2-10, 335);
  vertex(width/2+10, 335);
  vertex(width/2+8, 320);
  endShape(CLOSE);
  noLoop();
  
  fill(239, 217, 192);
  noStroke();
  beginShape();
  curveVertex(width/2-10, 335);
  curveVertex(width/2-10, 335);
  curveVertex(width/2, 340);
  curveVertex(width/2+10, 335);
  curveVertex(width/2+10, 335);
  endShape();
  
  //garment with transparency
  fill(150,190);
  stroke(220);
  strokeWeight(3);
  beginShape();
  curveVertex(width/2-45,405);
  curveVertex(width/2-35,425);
  curveVertex(width/2-57,435);
  curveVertex(150, 460);
  curveVertex(100, 550);
  curveVertex(120, 650);
  curveVertex(520, 650);
  curveVertex(550, 550);
  curveVertex(500, 460);
  curveVertex(width/2+57,435);
  curveVertex(width/2+35,425);
  curveVertex(width/2+45,405);
  endShape(CLOSE);

  //garment on top layer
  fill(250);
  noStroke();
  beginShape();
  vertex(width/2,610)
  vertex(width/2-50,430)
  vertex(width/2-170,430)
  vertex(width/2-180,470)
  vertex(width/2-180,650)
  vertex(width/2+180,650)
  vertex(width/2+180,470)
  vertex(width/2+170,430)
  vertex(width/2+50,430)
  endShape();
  
  //accessories*line
  stroke(2);
  strokeWeight(1);
  strokeCap(SQUARE);
  line(width/2-110,330,width/2-110,385);
  line(width/2+110,330,width/2+110,385);
  noLoop();
  
  fill(249,239,80);//the spherical structure
  ellipse(width/2-110,385,50,50);
  ellipse(width/2+110,385,50,50);
  
  
  }


Project 1: My Self Portrait

This is my project.

sketch_selfportrait-SL
function setup() {
    createCanvas(800, 720);
    text("p5.js vers 0.9.0 test.", 10, 15);
}

function draw() {
    background(247, 221, 235)
    noStroke()

    // hair
    fill(38, 23, 8)
    ellipse(400, 450, 500, 650)

    // face
    fill(235, 190, 143)
    ellipse(400, 420, 300, 400)

    // ears
    circle(250, 400, 50)
    circle(550, 400, 50)

    // neck
    rect(358, 600, 90, 300)

    // nose
    stroke(255, 222, 179)
    strokeWeight(4)
    triangle(382, 475, 400, 420, 418, 475)

    // ear holes
    noStroke()
    fill(0, 0, 0)   
    circle(245, 400, 12, 12) 
    circle(555, 400, 12, 12)

    // earrings
    fill(175, 23, 104)   
    circle(246, 420, 5, 5) 
    circle(554, 420, 5, 5)

    // eyebrows
    noFill()
    stroke(38, 23, 8)
    arc(330, 377, 80, 70, (5 * PI) / 4, (7 * PI) / 4)
    arc(470, 377, 80, 70, (5 * PI) / 4, (7 * PI) / 4)

    // bangs
    fill(38, 23, 8) 
    arc(270, 230, 240, 250, -.18, HALF_PI + QUARTER_PI, OPEN)
    arc(480, 240, 200, 180, QUARTER_PI, -2.5, OPEN)

    // mouth
    fill(255, 255, 255)
    stroke(255, 0, 0)
    strokeWeight(6)
    arc(400, 510, 75, 75, 0, PI, CHORD)
    stroke(0)
    strokeWeight(1.5)
    line(370.2, 526.5, 429.8, 526.5)
	
    // eyes (outer)
    arc(330, 385, 48, 48, PI, 0, CHORD)
    arc(470, 385, 48, 48, PI, 0, CHORD)

    // upper body    
    fill(102, 0, 51)
    square(250, 660, 300)

    //eyeballs
    fill(75, 45, 14)
    circle(330, 373, 20, 20)
    circle(470, 373, 20, 20)
    noStroke()
    fill(0, 0, 0)
    circle(330, 373, 8.5, 8.5)
    circle(470, 373, 8.5, 8.5)
    fill(255, 255, 255)
    circle(333, 375, 4, 4)
    circle(473, 375, 4, 4)
}

here is my project from last week

sketch3
// Amyas Ryan section A
function setup() {
    createCanvas(600, 600);
    background(140, 203, 211);
}

function draw() {
    strokeWeight(0);
    fill(34, 68, 34);  //shirt
    quad(0, 600, 600, 600, 530, 530, 50, 500);
    quad(50, 500, 530, 530, 380, 430, 230, 400);
    fill(201, 114, 65); //skinshadow
    ellipse(290, 450, 175, 75);
    quad(205, 450, 375, 450, 365, 320, 230, 340);
    ellipse(390, 250, 30, 70);
    fill(277, 132, 72); //skinlight
    quad(265, 390, 320, 390, 365, 350, 235, 360);
    quad(235, 360, 365, 350, 385, 290, 215, 325);
    triangle(215, 325, 385, 290, 205, 290);
    quad(205, 290, 385, 290, 395, 160, 195, 160);
    ellipse(200, 250, 30, 70);
    fill(69, 23, 16);  //hair
    ellipse(295, 150, 195, 75);
    quad(380, 250, 395, 220, 400, 180, 375, 180);
    quad(200, 220, 210, 250, 215, 180, 195, 180);
    quad(225, 220, 235, 215, 275, 207, 230, 205);
    quad(315, 207, 360, 205, 365, 220, 355, 215);
    fill(210, 115, 58);  //hatlight1
    quad(195, 200, 295, 150, 295, 135, 195, 170);
    fill(166, 82, 35);  //hatdark1
    quad(295, 150, 410, 210, 400, 185, 295, 135);
    fill(246, 213, 153); //hatlight2
    quad(195, 170, 295, 135, 295, 35, 200, 60);
    fill(211, 182, 136); //hatdark2
    quad(295, 135, 400, 185, 390, 60, 295, 35);
    fill(85, 255, 16, 50);
    ellipse(295, 90, 75, 75);
}