Fanjie Jin – Project 05 – Wallpaper

53

//Fanjie Mike Jin
//Section C
//rpai@andrew.cmu.edu
//Project-05

function setup() {
    createCanvas(400, 400);
    rectMode(RADIUS)
}

function draw() {
    background(100);
    drawGrid();
    drawSquare();
    drawCircle();
    noLoop();
}

function drawSquare() {
//nested loop for drawing the Squares
    for(var a = 1 ; a < 20; a ++){
      for(var b = 1 ; b < 20; b ++){
//change color transparency
        fill(255 - 7 * a, 255 - 2 * a, 200, 150);
        if(a % 2 == 0){
          strokeWeight(1);
          stroke(60, 211, 206, 90);
          rect(a * 20, b * 20, 20 - b , 20 - b);
        }else{
//odd columns that has a bigger square
          strokeWeight(1);
          stroke(255, 211, 206, 90);
          rect(a * 20, b * 20,  1 / 2 * b, 1 / 2 * b);
        }
      }
    }
}

function drawCircle(){
//nested loop for drawing the circles
    for(var a = 1 ; a < 20; a ++){
    for(var b = 1 ; b < 20; b ++){
      fill(255 - 2 * a, 255 - 2 * a,  100, 200);
      if(a % 2 == 0){
        strokeWeight(1);
        stroke(60, 211, 206, 90);
//color gradient
        ellipse(a * 20, b * 20, b , b);
      }else{
// odd columns
        strokeWeight(1);
        stroke(255, 211, 206, 90);
        ellipse(a * 20, b * 20, 20 - b, 20 - b);
      }
    }
  }
}

function drawGrid(){
//grids
    for(var c = 1 ; c < 20; c ++){
        stroke(255, 50);
        line(c * 20, 0, c * 20, height);
        line(0, c * 20, width, c * 20);
    }
}

I have experimented with using color transparency to create the perceptions of layerings in this wallpaper assignment. I aim to use some repetitive pattern to create some visually intriguing composition. From top to bottom, the size of the circle and square is either becoming larger or smaller. This process is enjoyable and I have gained much more familiarity with nested loop.

Joseph Zhang – Project 05 – Wallpaper

sketch

// Joseph Zhang
// Section E
// haozhez@andrew.cmue.edu
// Project-05: Wallpaper

function setup() {
    createCanvas(600,600);
    background('green');
}

// ellipse diam
var diam = 70;
  
function draw() {
    noStroke();
    // creates grid system
    for (x = 0; x < width/30; x+=1) {
        for ( y = 0; y < height/30; y += 1) {
                bigCircle(30 +  60 * x, 30 + 60 * y);
                smallCircleRect(30 +  60 * x, 30 + 60 * y);
        }
    }
    noLoop();
}

// creates the black portion
function bigCircle(xPos,yPos) {
    fill('black');
    ellipse(xPos, yPos, diam , diam)
}

// creates the white portion
function smallCircleRect(xPos,yPos) {
    fill('white');
    rectMode(CENTER);
    rect(xPos, yPos, diam / 1.3, diam / 1.3);
    ellipse(xPos, yPos, diam - 7, diam - 7);
}

For this project, I pulled a lot of inspiration from the Tartan plaid pattern that’s often associated with Carnegie Mellon. That’s why I went with the grid-like pattern and the black green color scheme.

Sewon Park – PO – 05

sketch

function setup() {
    createCanvas(600, 400);
    background(255,250,205);
}

function draw() {

    for (var x=10; x<600; x=x+20) {
        for(var y=10; y<400; y= y+20) {
        stroke(135,206,235);
        fill(135,206,235);
        rect(x,y,1,10); //rain on background
        
        } 
    }
    //small white rectangles 
      
    for (var a=30; a<600; a=a+80) {
        for(var b=30; b<400; b=b+160) {
        stroke(0,0,0);
        
        fill(255,255,255);
        triangle(a-10,b-5,a-10,b-20,a,b-10); //Totoro's left ear
        triangle(a,b-10,a+10,b-20,a+10,b-5); //Totoro's right ear
        
       
        ellipse(a,b,20,30); //Totoro's body
        
        fill(0,0,0);
        ellipse(a-4,b-4,3,4); //Totoro's left eye
        ellipse(a+4,b-4,3,4); //Totoro's right eye
    	}
    }

    for (var c=70; c<600; c=c+80) {
    	for(var d=110; d<400; d=d+160) {

    	fill(0,0,0);
        arc(c,d,30,30,PI,0);
        rect(c-1.5,d,3,20);
        
        } //Umbrella
    }

    
    }


For this project, I used the classic toddler wallpaper color of baby yellow and added rain as a special touch. I used the baby white Totoro and umbrellas (a recurring symbol of Totoro) as the recurring pattern of the wallpaper.

Charmaine Qiu – Looking Outwards – 05


ModelingCafe is a CG company in Tokyo that focuses on 3d modeling and character concept design. They aim to break the current constraints of modeling, and does work in a huge variety of representation methods or genres. The company recently introduced the world’s first computer generated fashion model “Imma” (means “now” in Japanese) who took over magazine covers in Japan.

From a live body and background, Imma’s head are being transposed onto the body, and that is how her images are created. As a hot topic in current Japan, she also has a instagram and Twitter account, where she posts photos and stories almost mimicking a real life human. Though 3d generated fashion models can bring perfection towards the human body, the gap between what is presented in the media and the everyday world would become further apart. This could also damage the modeling industry for real life models. As a designer, I think it is important for the current world to realize the possibility of designs that could people to comply to the innovative world.

Raymond Pai-Looking Outwards-05

Henry Vargas is a 3D illustrator based in Vancouver. He makes 3D computer models of characters from popular shows and adjusts to lighting and background to render a final, 2D print. His style is clear with a matte plastic finish on all of his models. The lighting is often soft, with sharp reflections on certain body parts of the renders to show different materials.

Image
Reflection in eyes communicate a different texture or material

Many of his illustrations are based on characters from video games, but they are only illustrations. His work is likely created in Cinema 4D, as they aren’t created for interaction, which might be done in Unity software instead. Cinema 4D allows for precise textures and lighting, which Vargas uses to express his artistic style.

More of his work can be found here:

https://www.artstation.com/henryvargas

Sammie Kim-Looking Outward-05

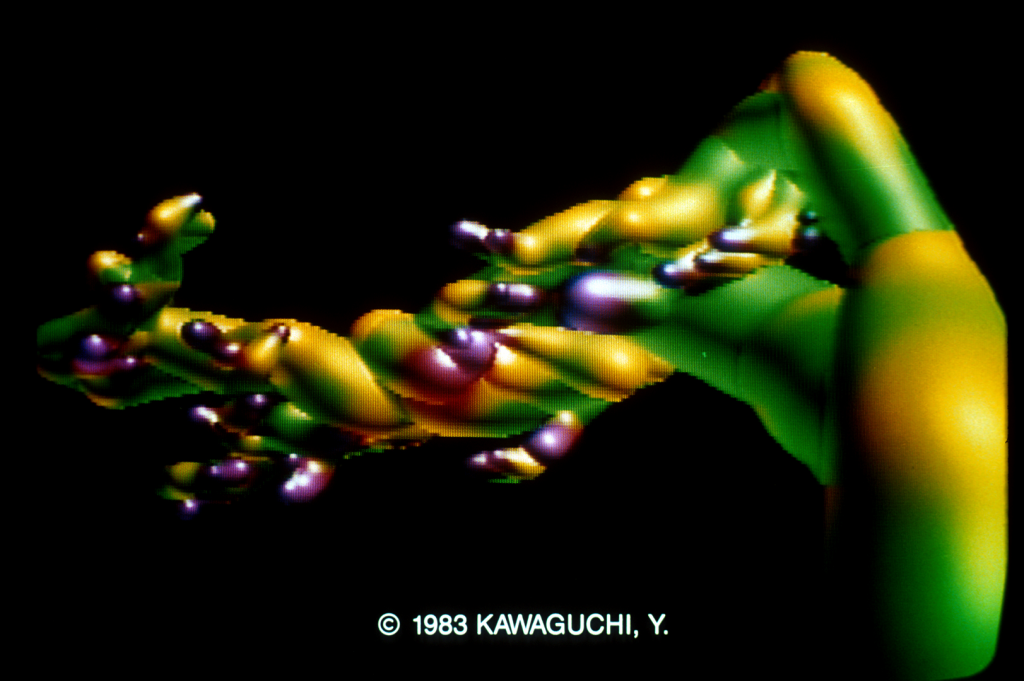
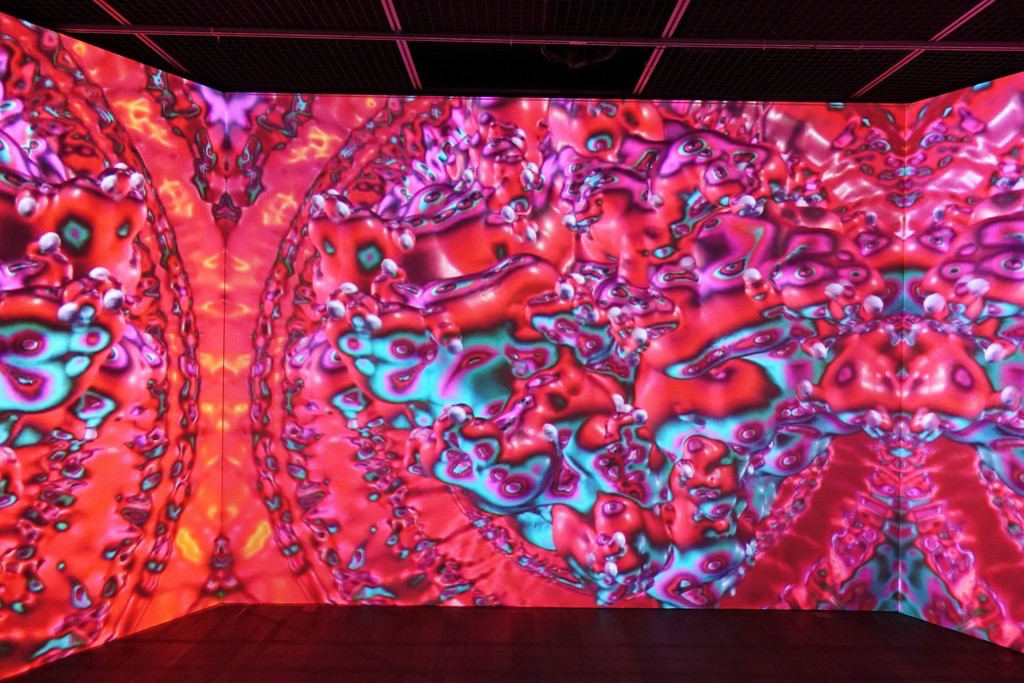
The Japanese computer graphic artist Yoichiro Kawaguchi was the first to build 3D computer generated images based on math and algorithms during the 1980s. He developed the course of image making, incorporating movements, realistic volumes, and high quality textures into his digital art. Kawaguchi calls this the “growth model,” a  “self organizing, formative algorithm for computationally reproducing branches or cell divisions.”  This specific artwork called Growth: Mysterious Galaxy was created in 1983, and it utilizes two essential techniques of ray tracing and metaballs. Ray tracing is an optical technique for calculating the luminance of each pixel, which defines the color to provide depth in the 3D image. I was particularly attracted to this piece due to its poppy and vivid colors and how the elements have such smooth and voluminous curves. As such, the recurring theme of his work is morphogenesis, reflecting on the principles of organic change and evolution—morphing the biological concept to create an artificial art piece.  When creating his art, he has a step by step process, starting with black and white geometric shapes and then allowing computer commands to evolve them into more complex and unknown figures. 

Growth: Mysterious Gallaxy (1983)
Complex computer graphic system (Yoichiro Kawaguchi)
Yoichiro Kawaguchi, Cytolon, 2002.

Jamie Park – Project 05 – Wallpaper

sketch

//Jamie Park (jiminp)
//15-104 Recitation E
//Project 5

var rectSize = 50;
var spacing = 160;

function setup(){
    createCanvas(500, 500);
    background(212, 230, 135);

    //odd row of roses
    for (var xWidth = rectSize; xWidth < width + rectSize; xWidth += spacing){
        for (var yHeight = rectSize; yHeight < height + rectSize; yHeight += spacing){
            rose(xWidth, yHeight);
        }
    }
    //even row of roses
    for (var xWidth2 =  -rectSize * 0.6; xWidth2 < width + rectSize; xWidth2 += spacing){
        for (var yHeight2 = rectSize * 2.6; yHeight2 < height + rectSize; yHeight2 += spacing){
            rose(xWidth2, yHeight2);
        }
    }

    noLoop();
}

function draw(){
    //nothing in draw because called noLoop
}

function rose(x, y){
    noStroke();
    //rectangle set to the center to make rotation easy
    rectMode(CENTER);

    //RED ROSE
    //largest square
    fill(209, 67, 56);
    rect(x, y, rectSize, rectSize);
    //second square
    push();
    translate(x, y)
    rotate(radians(45));
    fill(217, 95, 87);
    rect(0, 0, rectSize * 0.7 , rectSize * 0.7);
    pop();
    //third square
    fill(209, 67, 56);
    rect(x, y, rectSize * 0.5, rectSize * 0.5);
    //fourth square
    push();
    translate(x, y)
    rotate(radians(45));
    fill(217, 95, 87);
    rect(0, 0, rectSize * 0.3 , rectSize * 0.3);
    pop();
    //leaf on the left
    push();
    translate(x - (rectSize * 0.8), y);
    rotate(radians(45));
    fill(127, 191, 54);
    rect(0, 0, rectSize * 0.4, rectSize * 0.4);
    pop();
    //leaf on the top
    push();
    translate(x, y - (rectSize * 0.8));
    rotate(radians(45));
    fill(66, 171, 31);
    rect(0, 0, rectSize * 0.4, rectSize * 0.4);
    pop();

    //YELLOW ROSE
    //largest square
    fill(237, 209, 116);
    rect(x + rectSize * 1.6, y, rectSize, rectSize);
    //second square
    push();
    translate(x + rectSize * 1.6, y)
    rotate(radians(45));
    fill(250, 236, 147);
    rect(0, 0, rectSize * 0.7 , rectSize * 0.7);
    pop();
    //third square
    fill(237, 209, 116);
    rect(x + rectSize * 1.6, y, rectSize * 0.5, rectSize * 0.5);
    //fourth square
    push();
    translate(x + rectSize * 1.6, y)
    rotate(radians(45));
    fill(250, 236, 147);
    rect(0, 0, rectSize * 0.3 , rectSize * 0.3);
    pop();
    //leaf on the left
    push();
    translate(x + (rectSize * 0.8), y);
    rotate(radians(45));
    fill(127, 191, 54);
    rect(0, 0, rectSize * 0.4, rectSize * 0.4);
    pop();
    //leaf on the top
    push();
    translate(x + rectSize * 1.6, y - (rectSize * 0.8));
    rotate(radians(45));
    fill(66, 171, 31);
    rect(0, 0, rectSize * 0.4, rectSize * 0.4);
    pop();
}

I wanted to create alternating rows of “roses” using squares. I am content with the final product, and I wonder what it would look like to have an entire room full of this wallpaper pattern.

Emma NM-LO-06

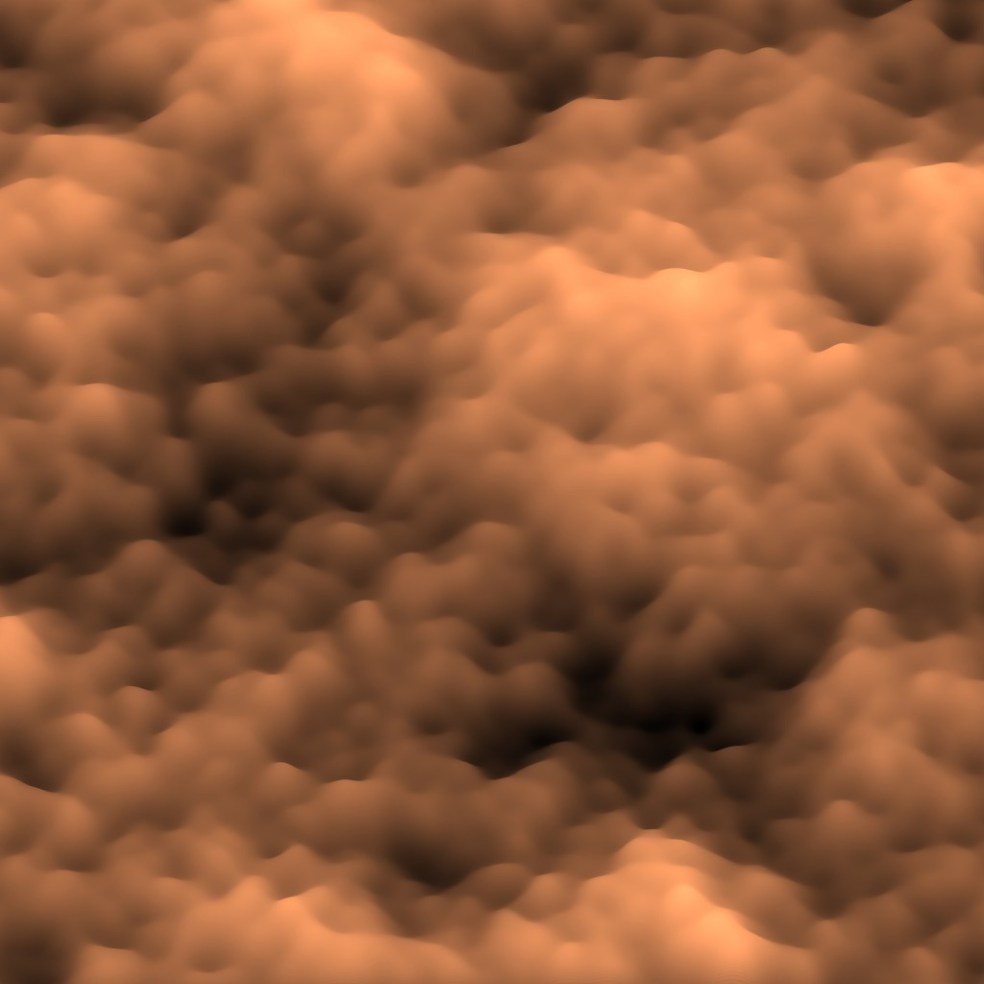
Perlin noise was created by Ken Perlin in 1983 for a film he was working on, Tron. It helps to add randomness to CG renderings of natural elements like smoke, fire, and water. I admire that he created something most people don’t consider. When people watch movies, we don’t think to ourselves “hey that smoke looks random.” He created something that people “take for granted” as we watch movies and see realistic fire. The algorithms don’t use the random() function, but works to interpolate between random values which creating smoother transitions. The creator’s artistic sensibilities come through knowing when he/she has reached randomness that looks aesthetic, or in Perlin’s case, realistic.

Raymond Pai-Project-05

sketch

//Raymond Pai
//Section D
//rpai@andrew.cmu.edu
//Project-05

function setup() {
    createCanvas(400, 400);
}

function draw() {
    background(200, 150, 160);
    fill('yellow');
    for (var y = 7; y < height - 5; y += 30) {
        drawRow(y, 30);
    }
}


function drawRow(y, spacing) {
    spacing = max(2, spacing);
    for (var x = 7; x < width - 5; x += spacing) {
        strokeWeight(0);
        fill(y, x + 50, x + 100);
        rect(x, y, 25, 25);
    }
}

I wanted to make a tile wallpaper that resembled the walls of a shower from the 90’s, with more contemporary colors.

Image result for gradient tiles
Example of gradient tiles

Paul Greenway – Project 05 – Wallpaper

pgreenwa_wallpaper

/*Paul Greenway
Section 1A
pgreenwa@andrew.cmu.edu
Project-05-Wallpaper
*/


function setup() {
  createCanvas(580, 580);
}

//background
function draw() {
   background('white');


  //small background circles
  strokeWeight(1);
  for (var x = 0; x < 70; x++) {
    for (var y = 0; y < 70; y++) {
      fill('white');
      ellipse(10*x, 10*y, 10, 10);
      
    }
  }
  //black lines + circles
  strokeWeight(1);
  for (var x = 0; x < 11; x++) {
    for (var y = 0; y < 20; y++) {
      fill('black');   
      ellipse(50*x+40, 50*y + 40, 10, 10);
      rect(1*x, 50*y+14, 1000,2);
      rect(1*x, 50*y+39, 1000,2);
    }
  }
  //red outer rings
  strokeWeight(1);
  for (var y = 0; y < 10; y++) {
      for (var x = 0; x < 11; x++) {

        if (y % 2 !=0) {
          fill('red');
          ellipse(50*x+40, 50*y+40, 50, 50);
        }
      }
  }
    //inner gradient circles
    for (var y = 0; y < 10; y++) {
      for (var x = 0; x < 11; x++) {

        if (y % 2 !=0) {
          fill('white');
          ellipse(50*x+40, 50*y+40, 40, 40);
          fill(200,20*x,20*y);
          ellipse(50*x+40, 50*y+40, 25, 25);
        
          
        }
      }
  }
      strokeWeight(0);
      for (var y = 0; y < 11; y++) {
      for (var x = 0; x < 10; x++) {

        if (y % 2 ===0) {
          fill(30);
          ellipse(50*x+65, 50*y+40, 20, 25);
          
        }
      }
  }
}

For this project I wanted to created a symmetrical pattern that would have gradient colored circles based on their position within the grid. To segment these colored circles I added black lines with smaller white circles in the background to add more visual interest.