Improvisation Inflatables – Douglas Gearhart

Visual Portfolio, Posts & Image Gallery for WordPress

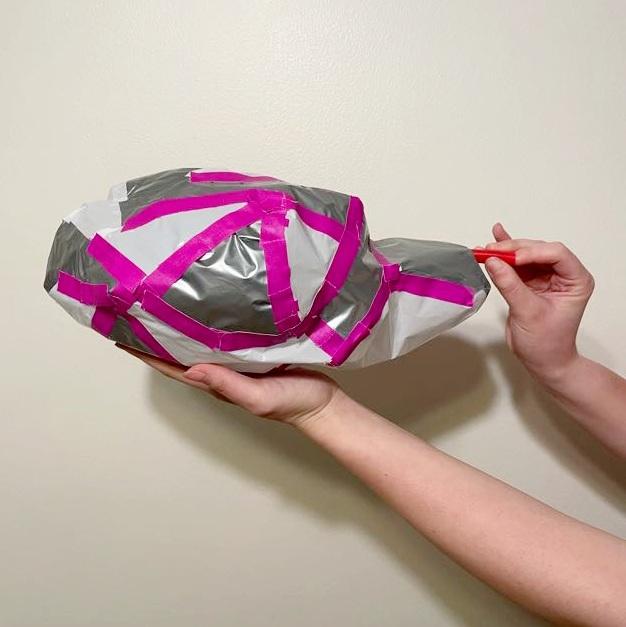
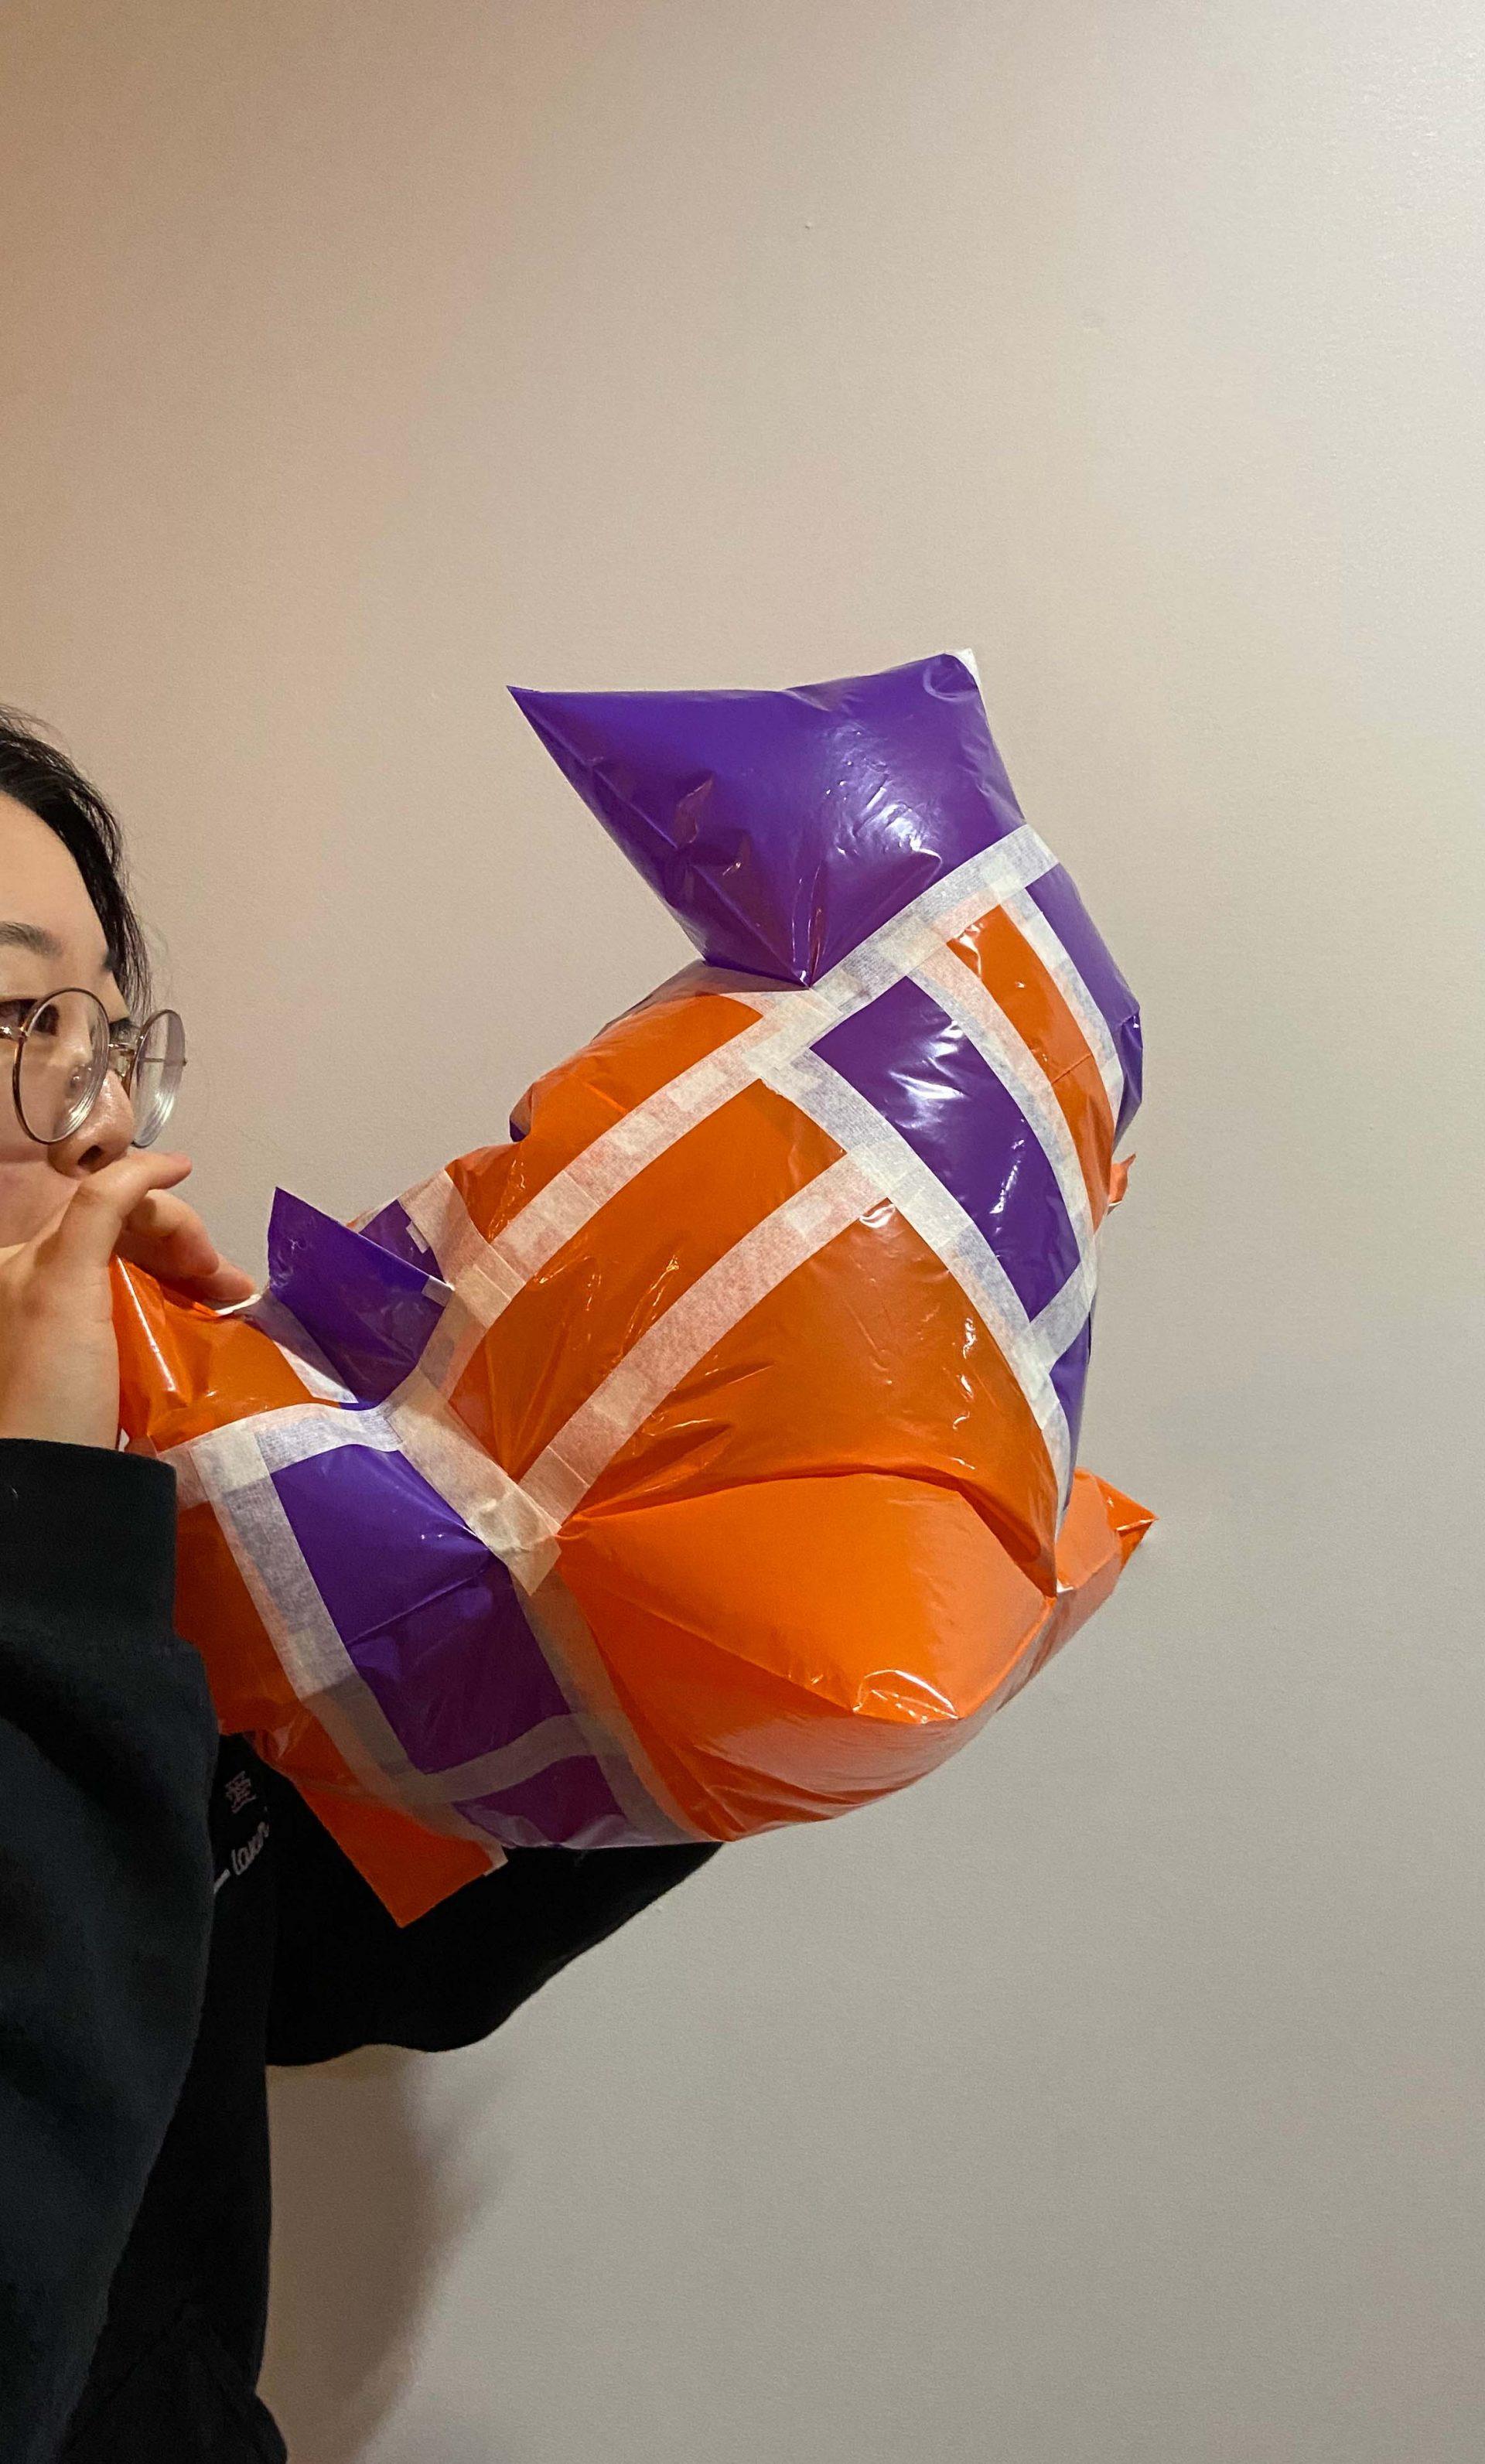
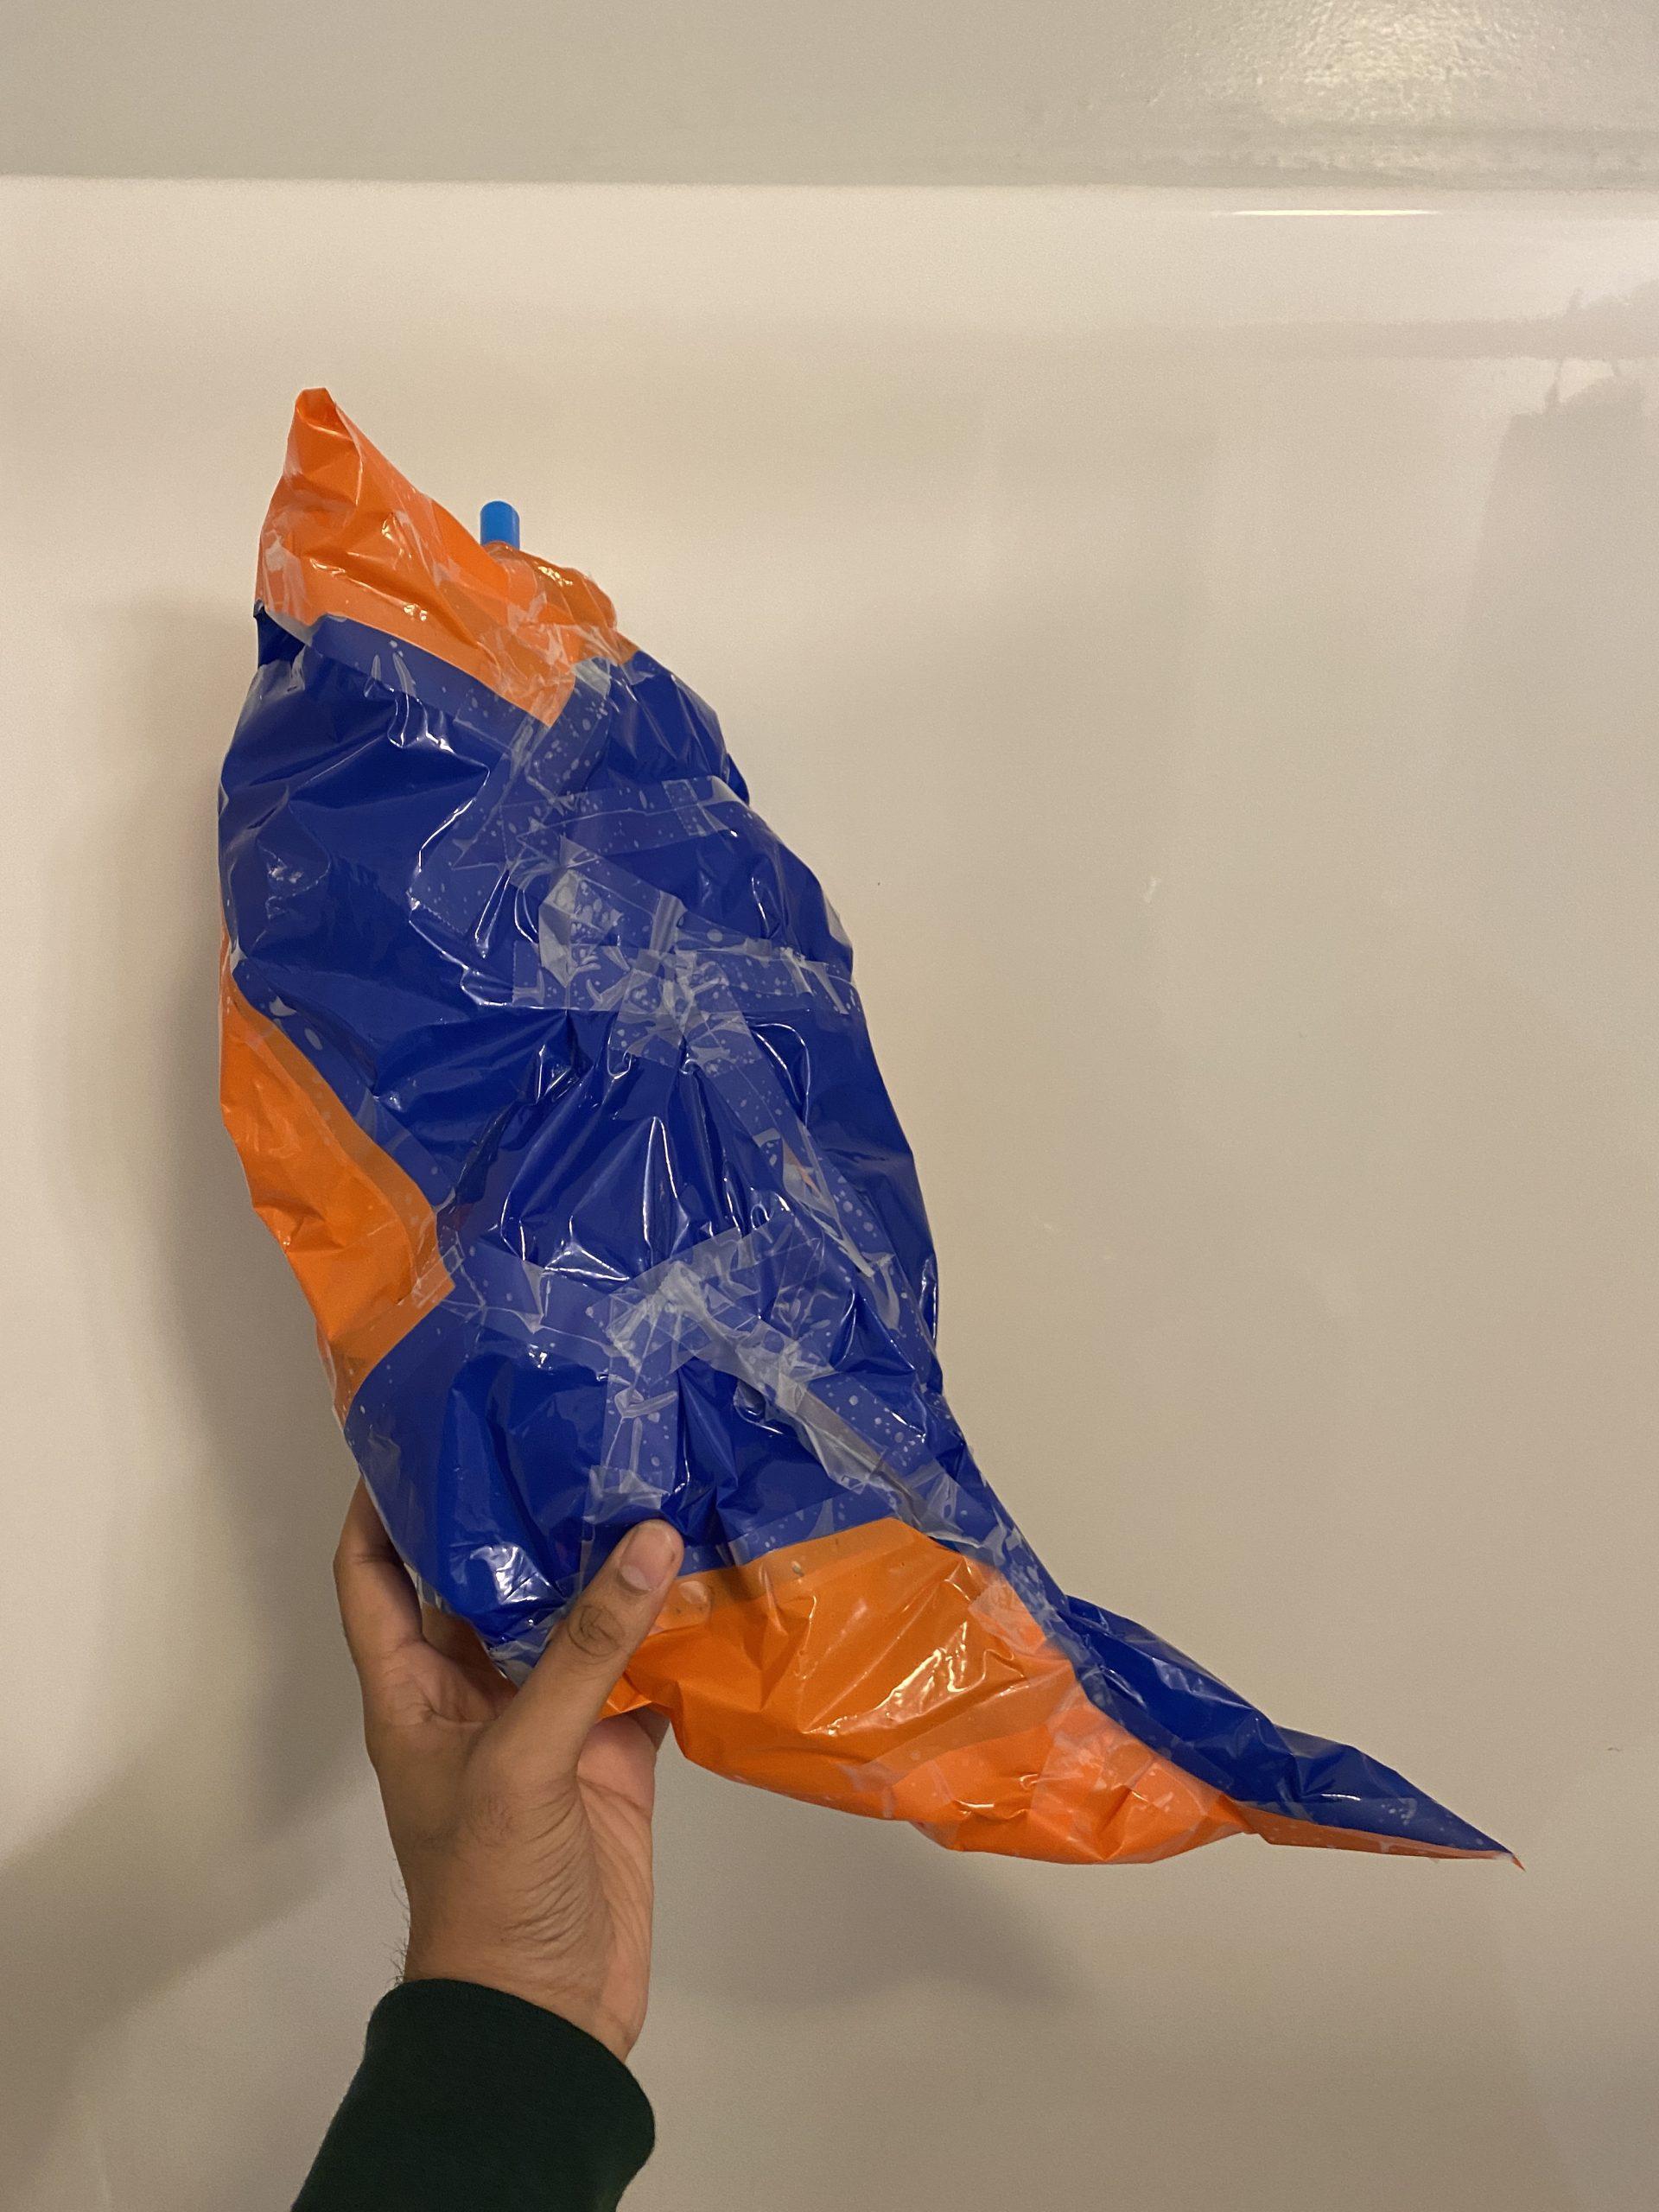
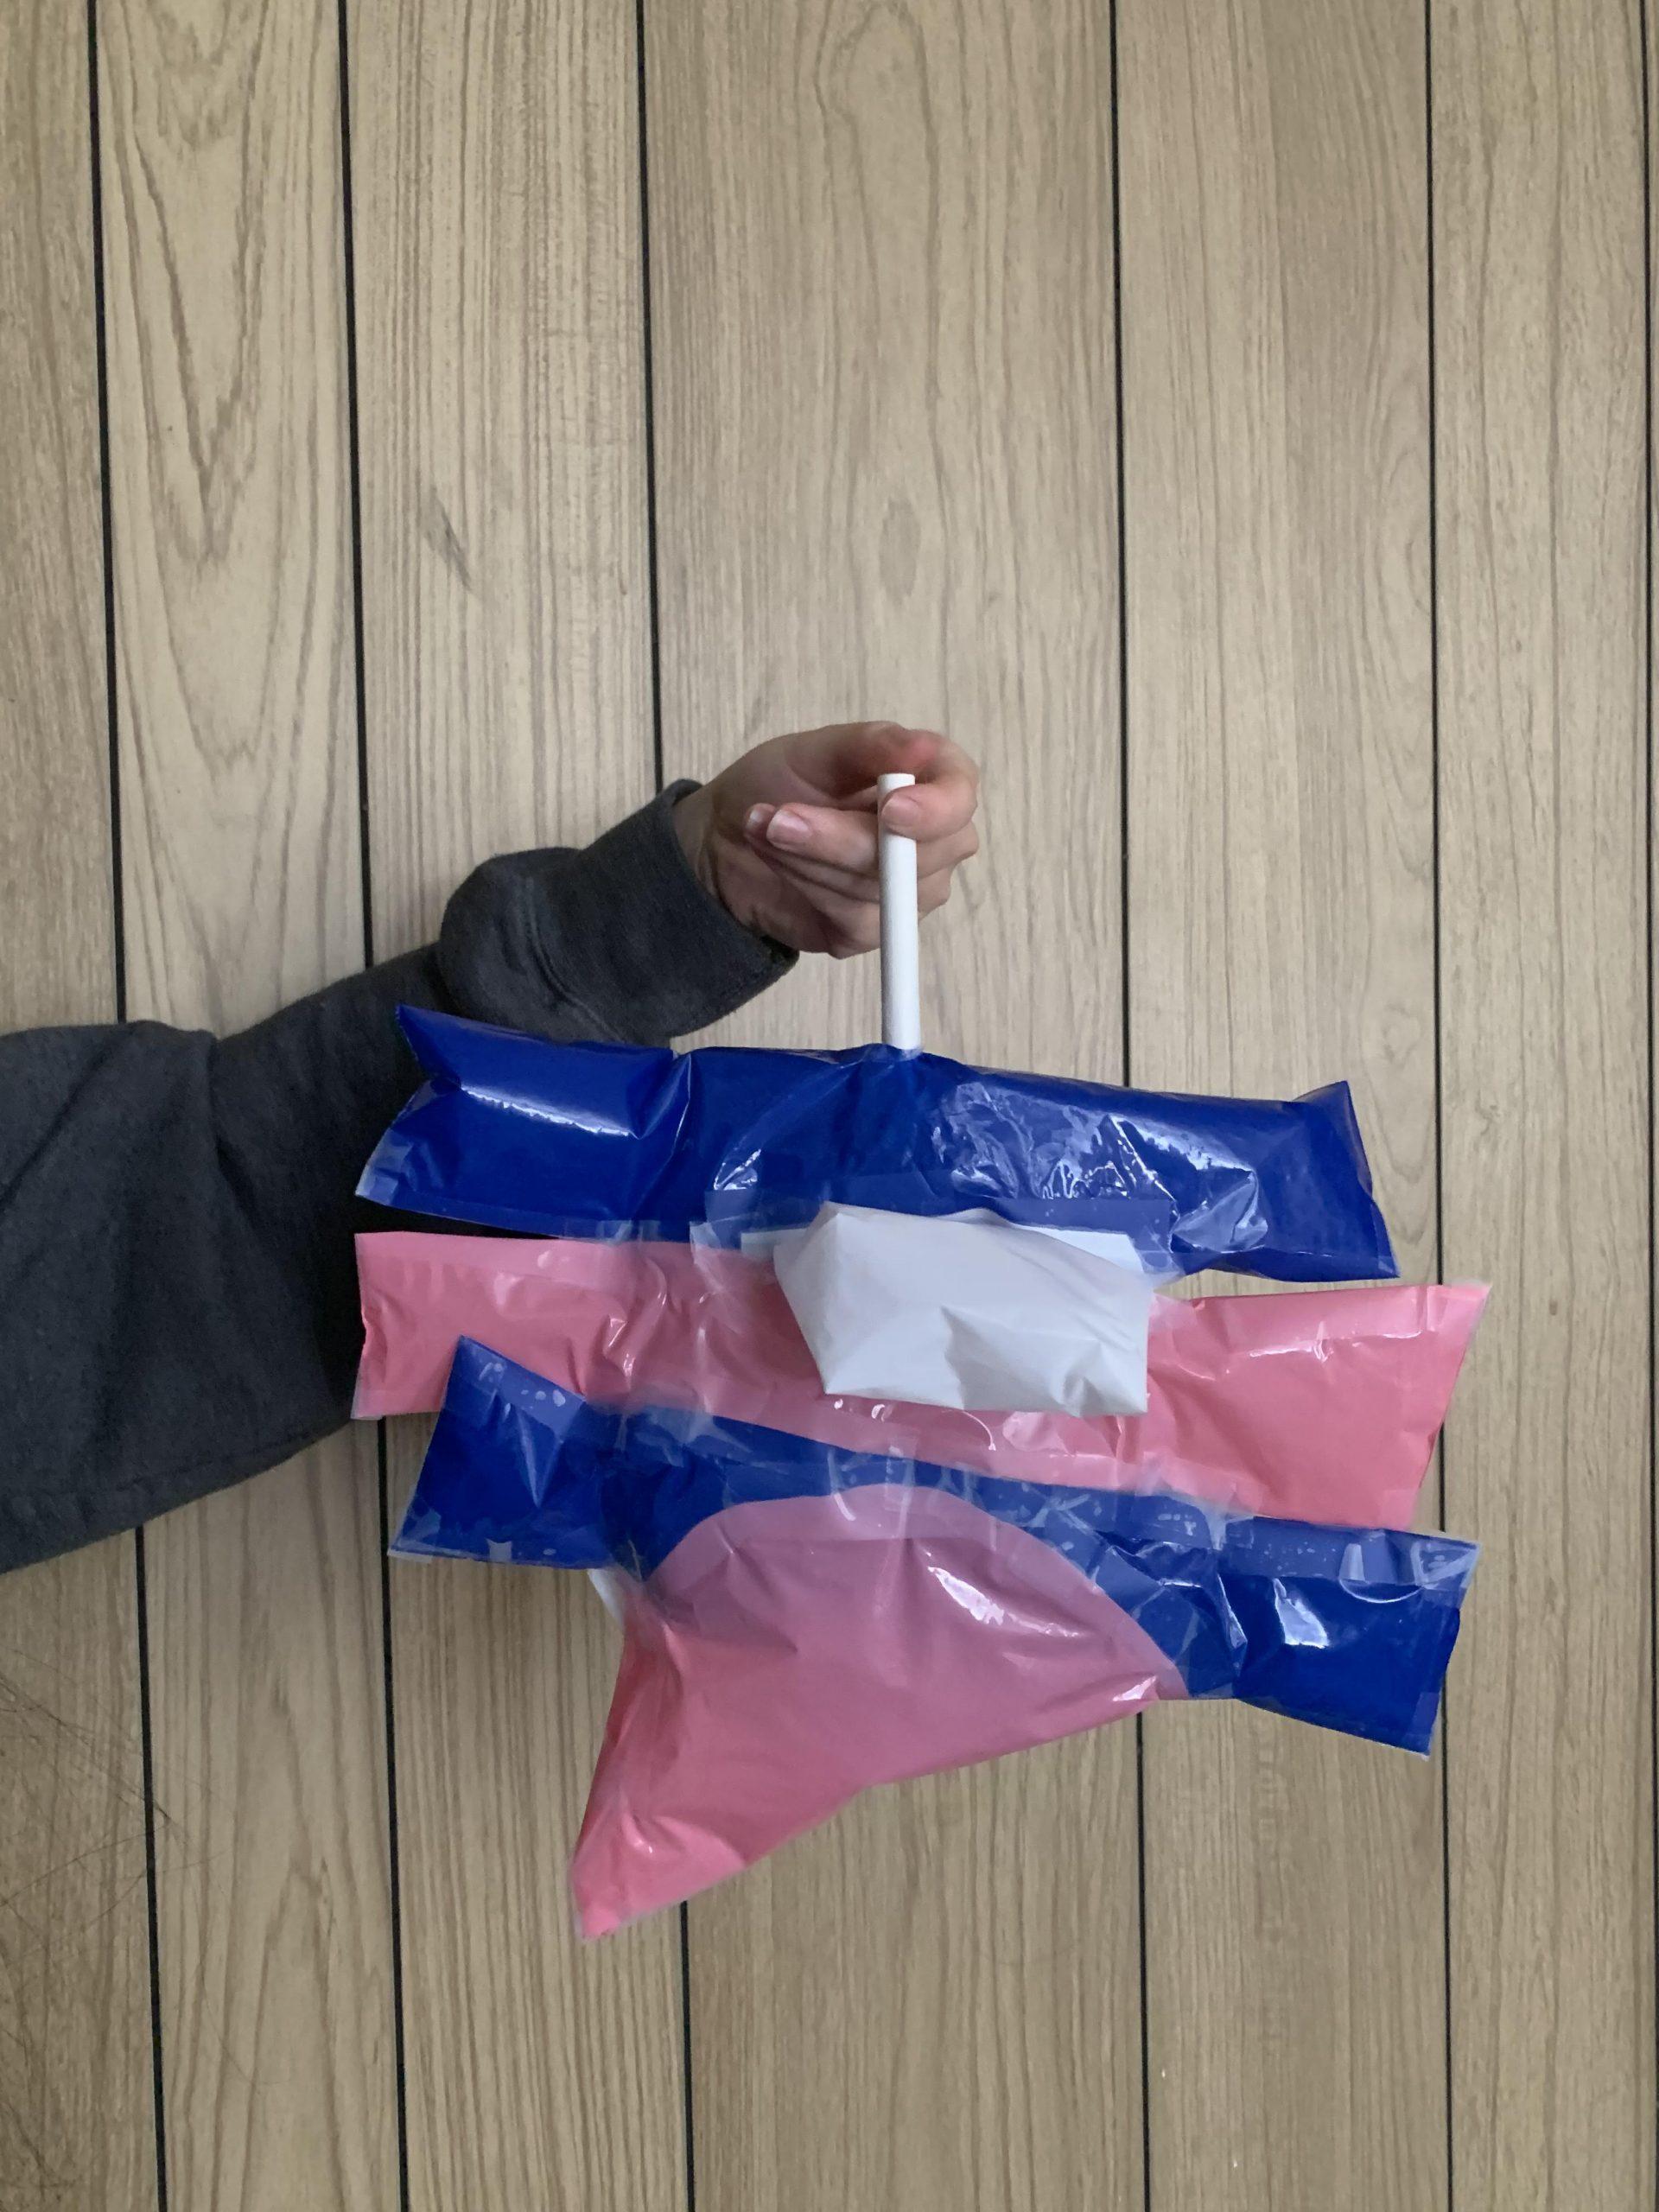
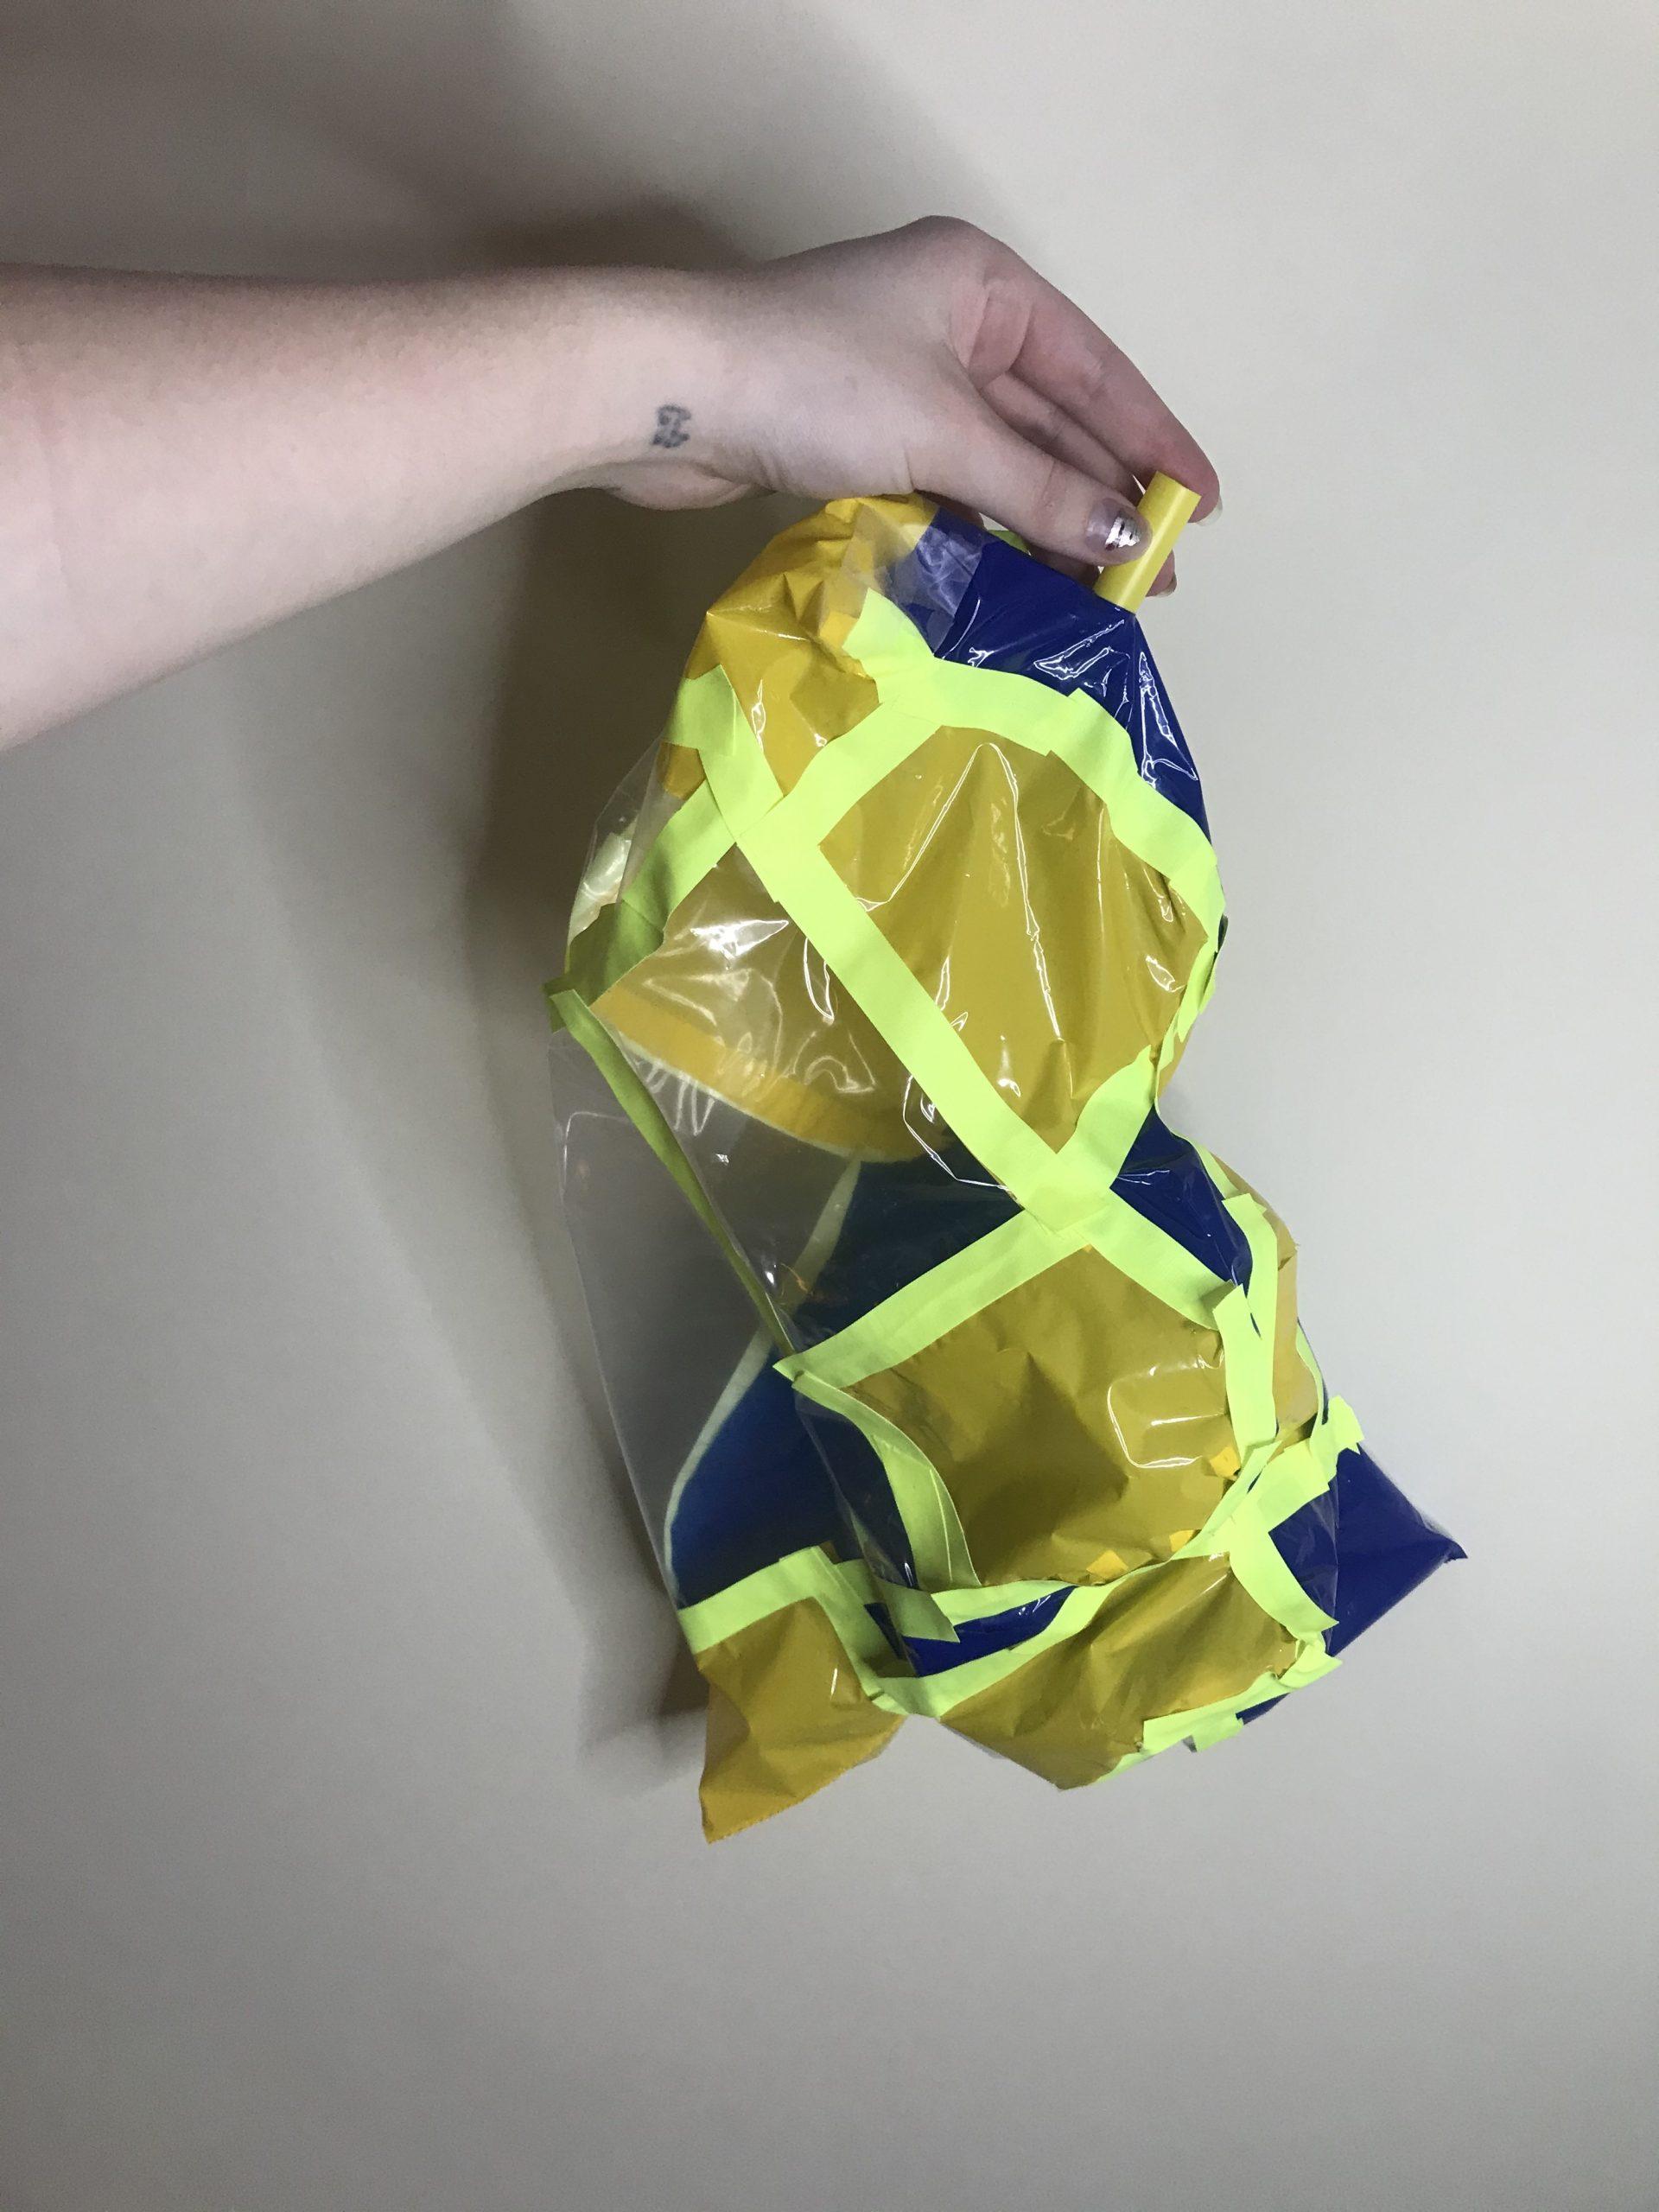
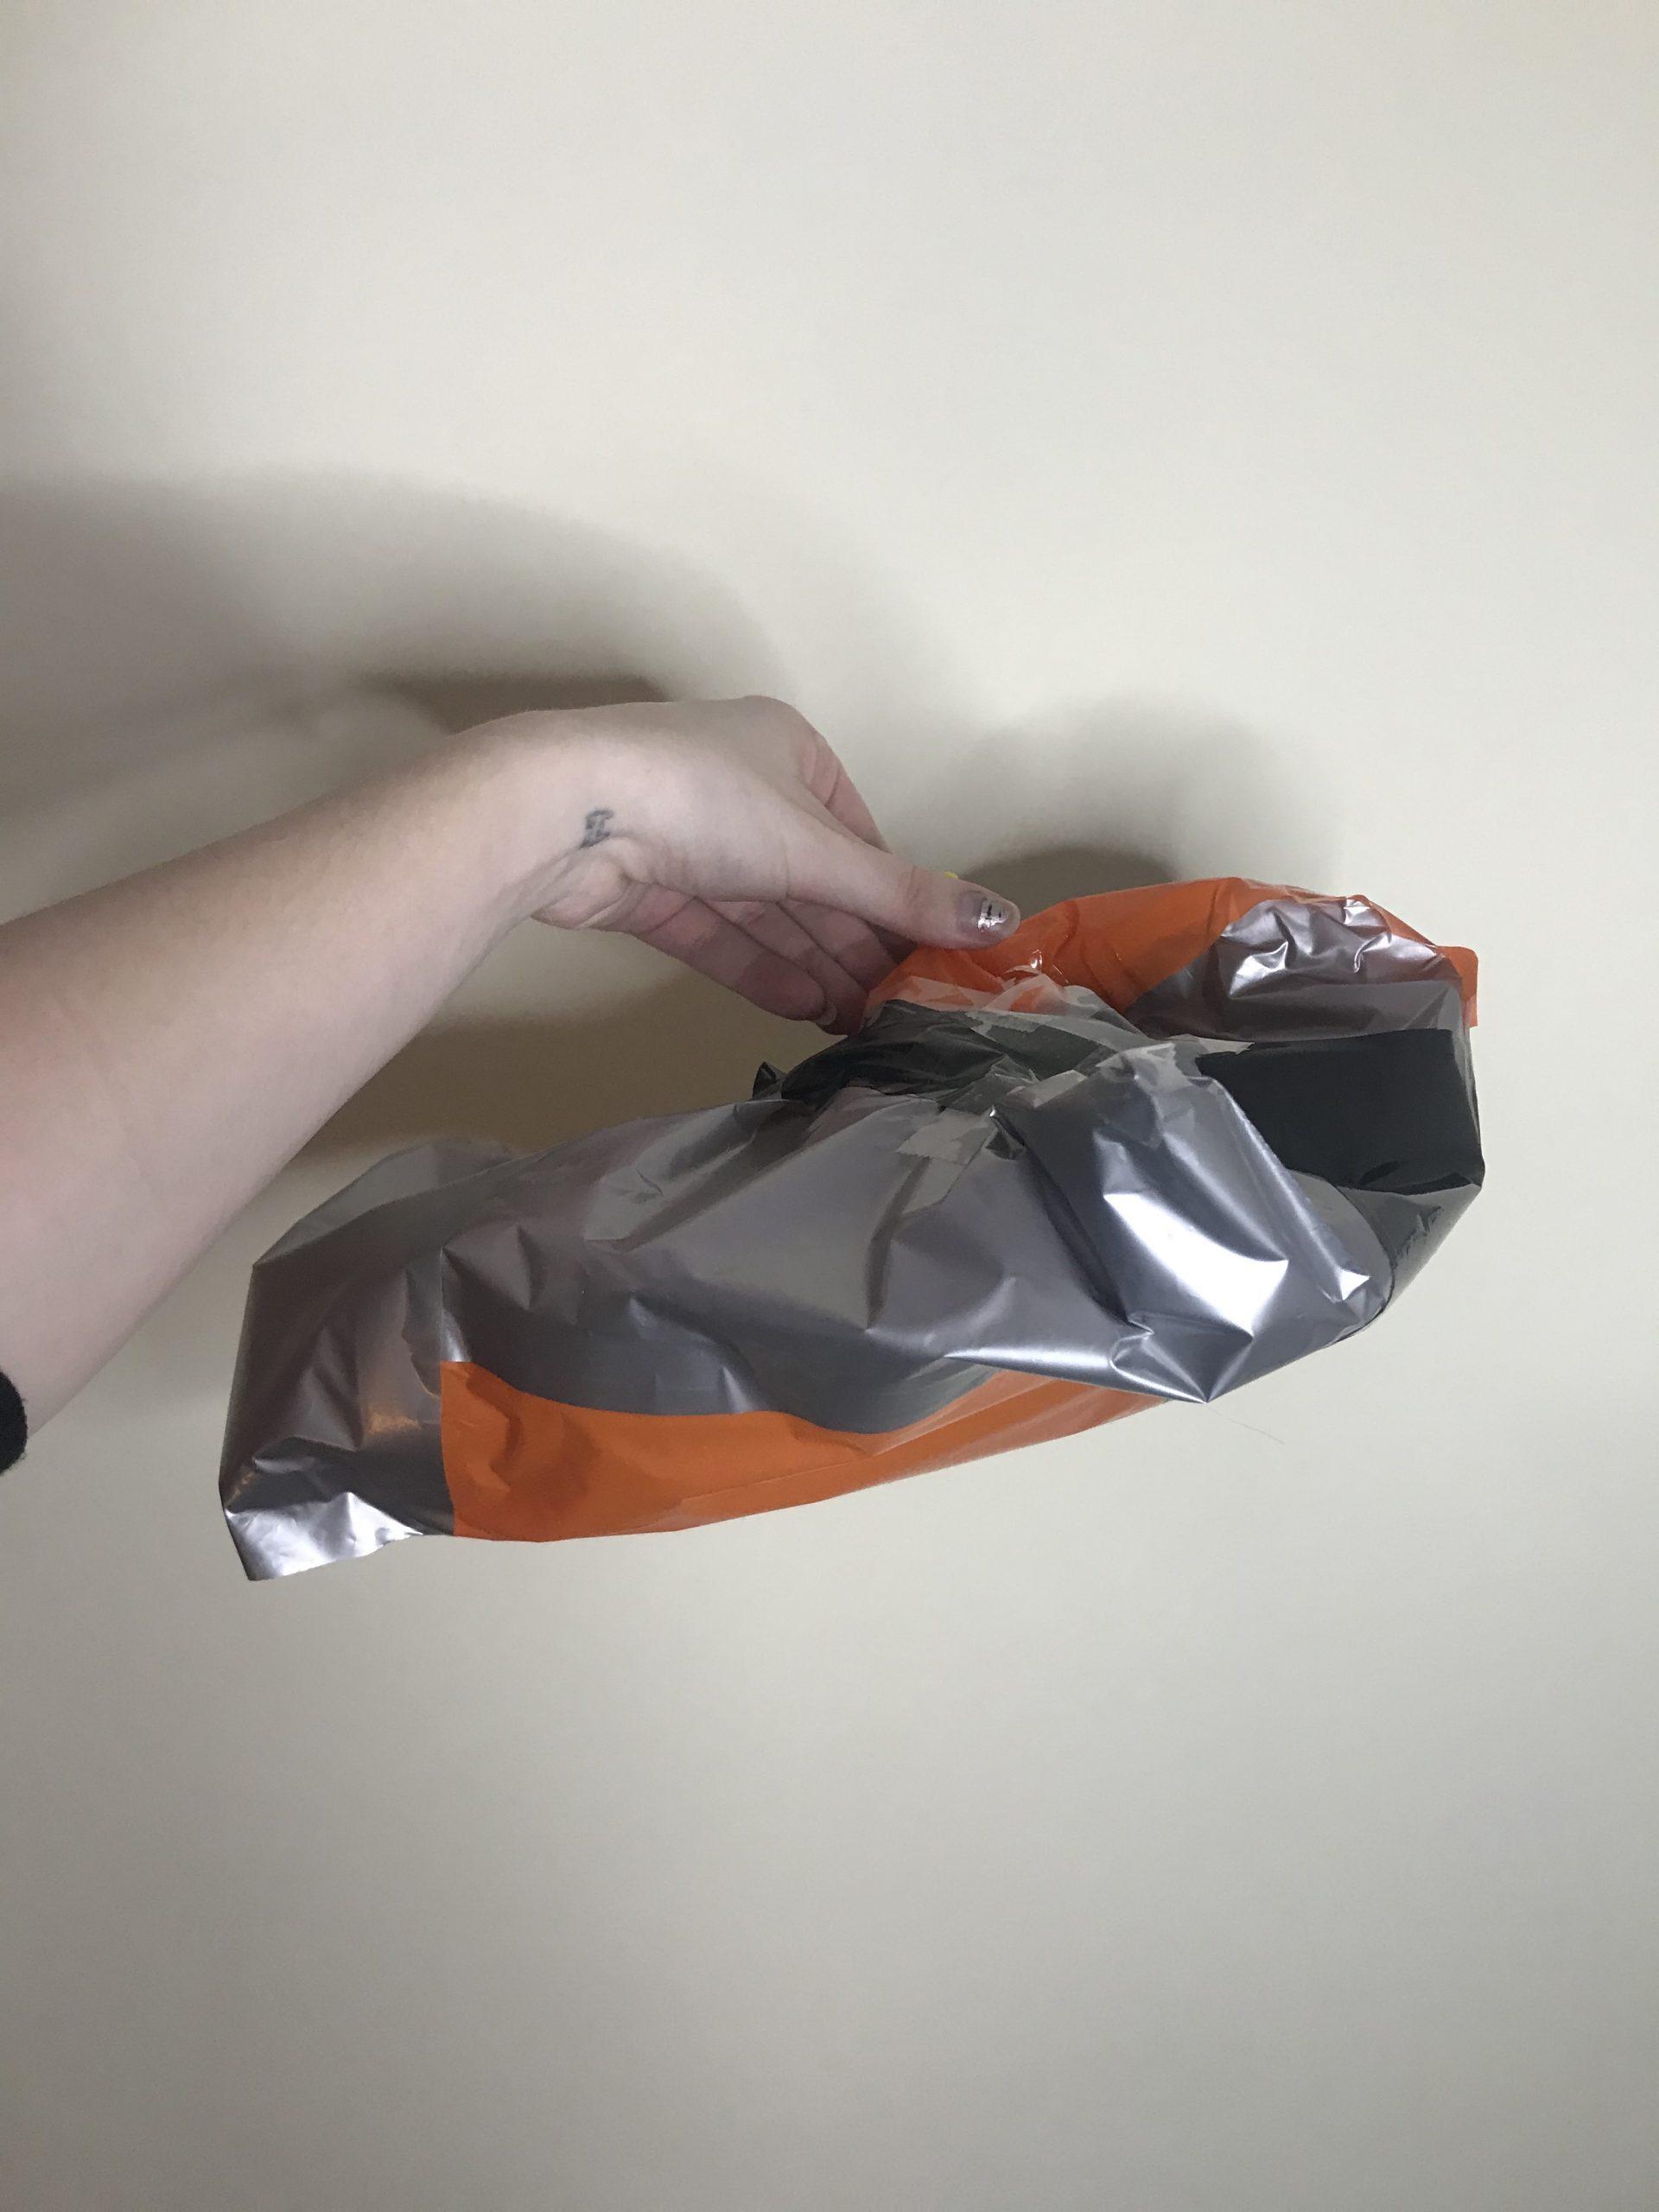
This project has challenged me greatly, perhaps too much. Before receiving the materials for the project, I decided that at some point I’d want to make a bag out of rogue items anyways, so I decided why not first for practice. This was a rude awakening to the art form because I was unhinged cutting the most irregular shapes for myself out of trash bags of varying textures, of varying qualities (some riddled with tiny perforations that had me retracing many steps at times), using three separate kinds of tape, and both inside and outside taping methods. Looking back, what was my most frustrating piece may truly be my favorite. I enjoy the recycled look, the organic form, the semi-deflated state structure, the ingenuity, and the personal symbolism for me that represents trial and tribulation as well as growth as an artist.

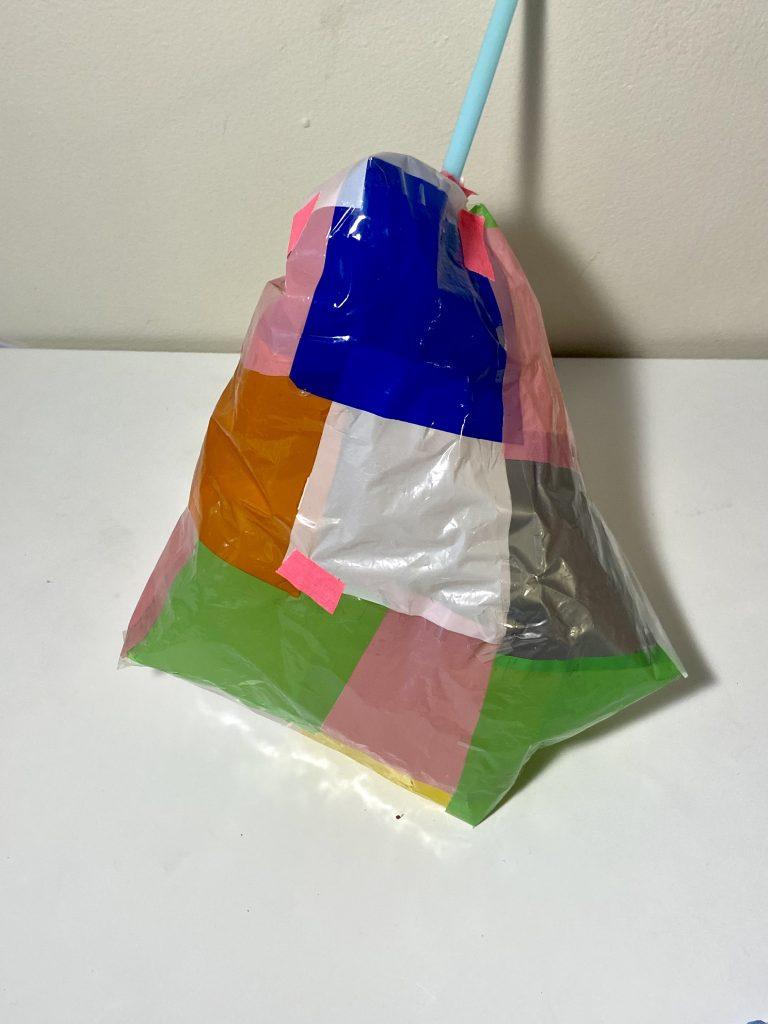
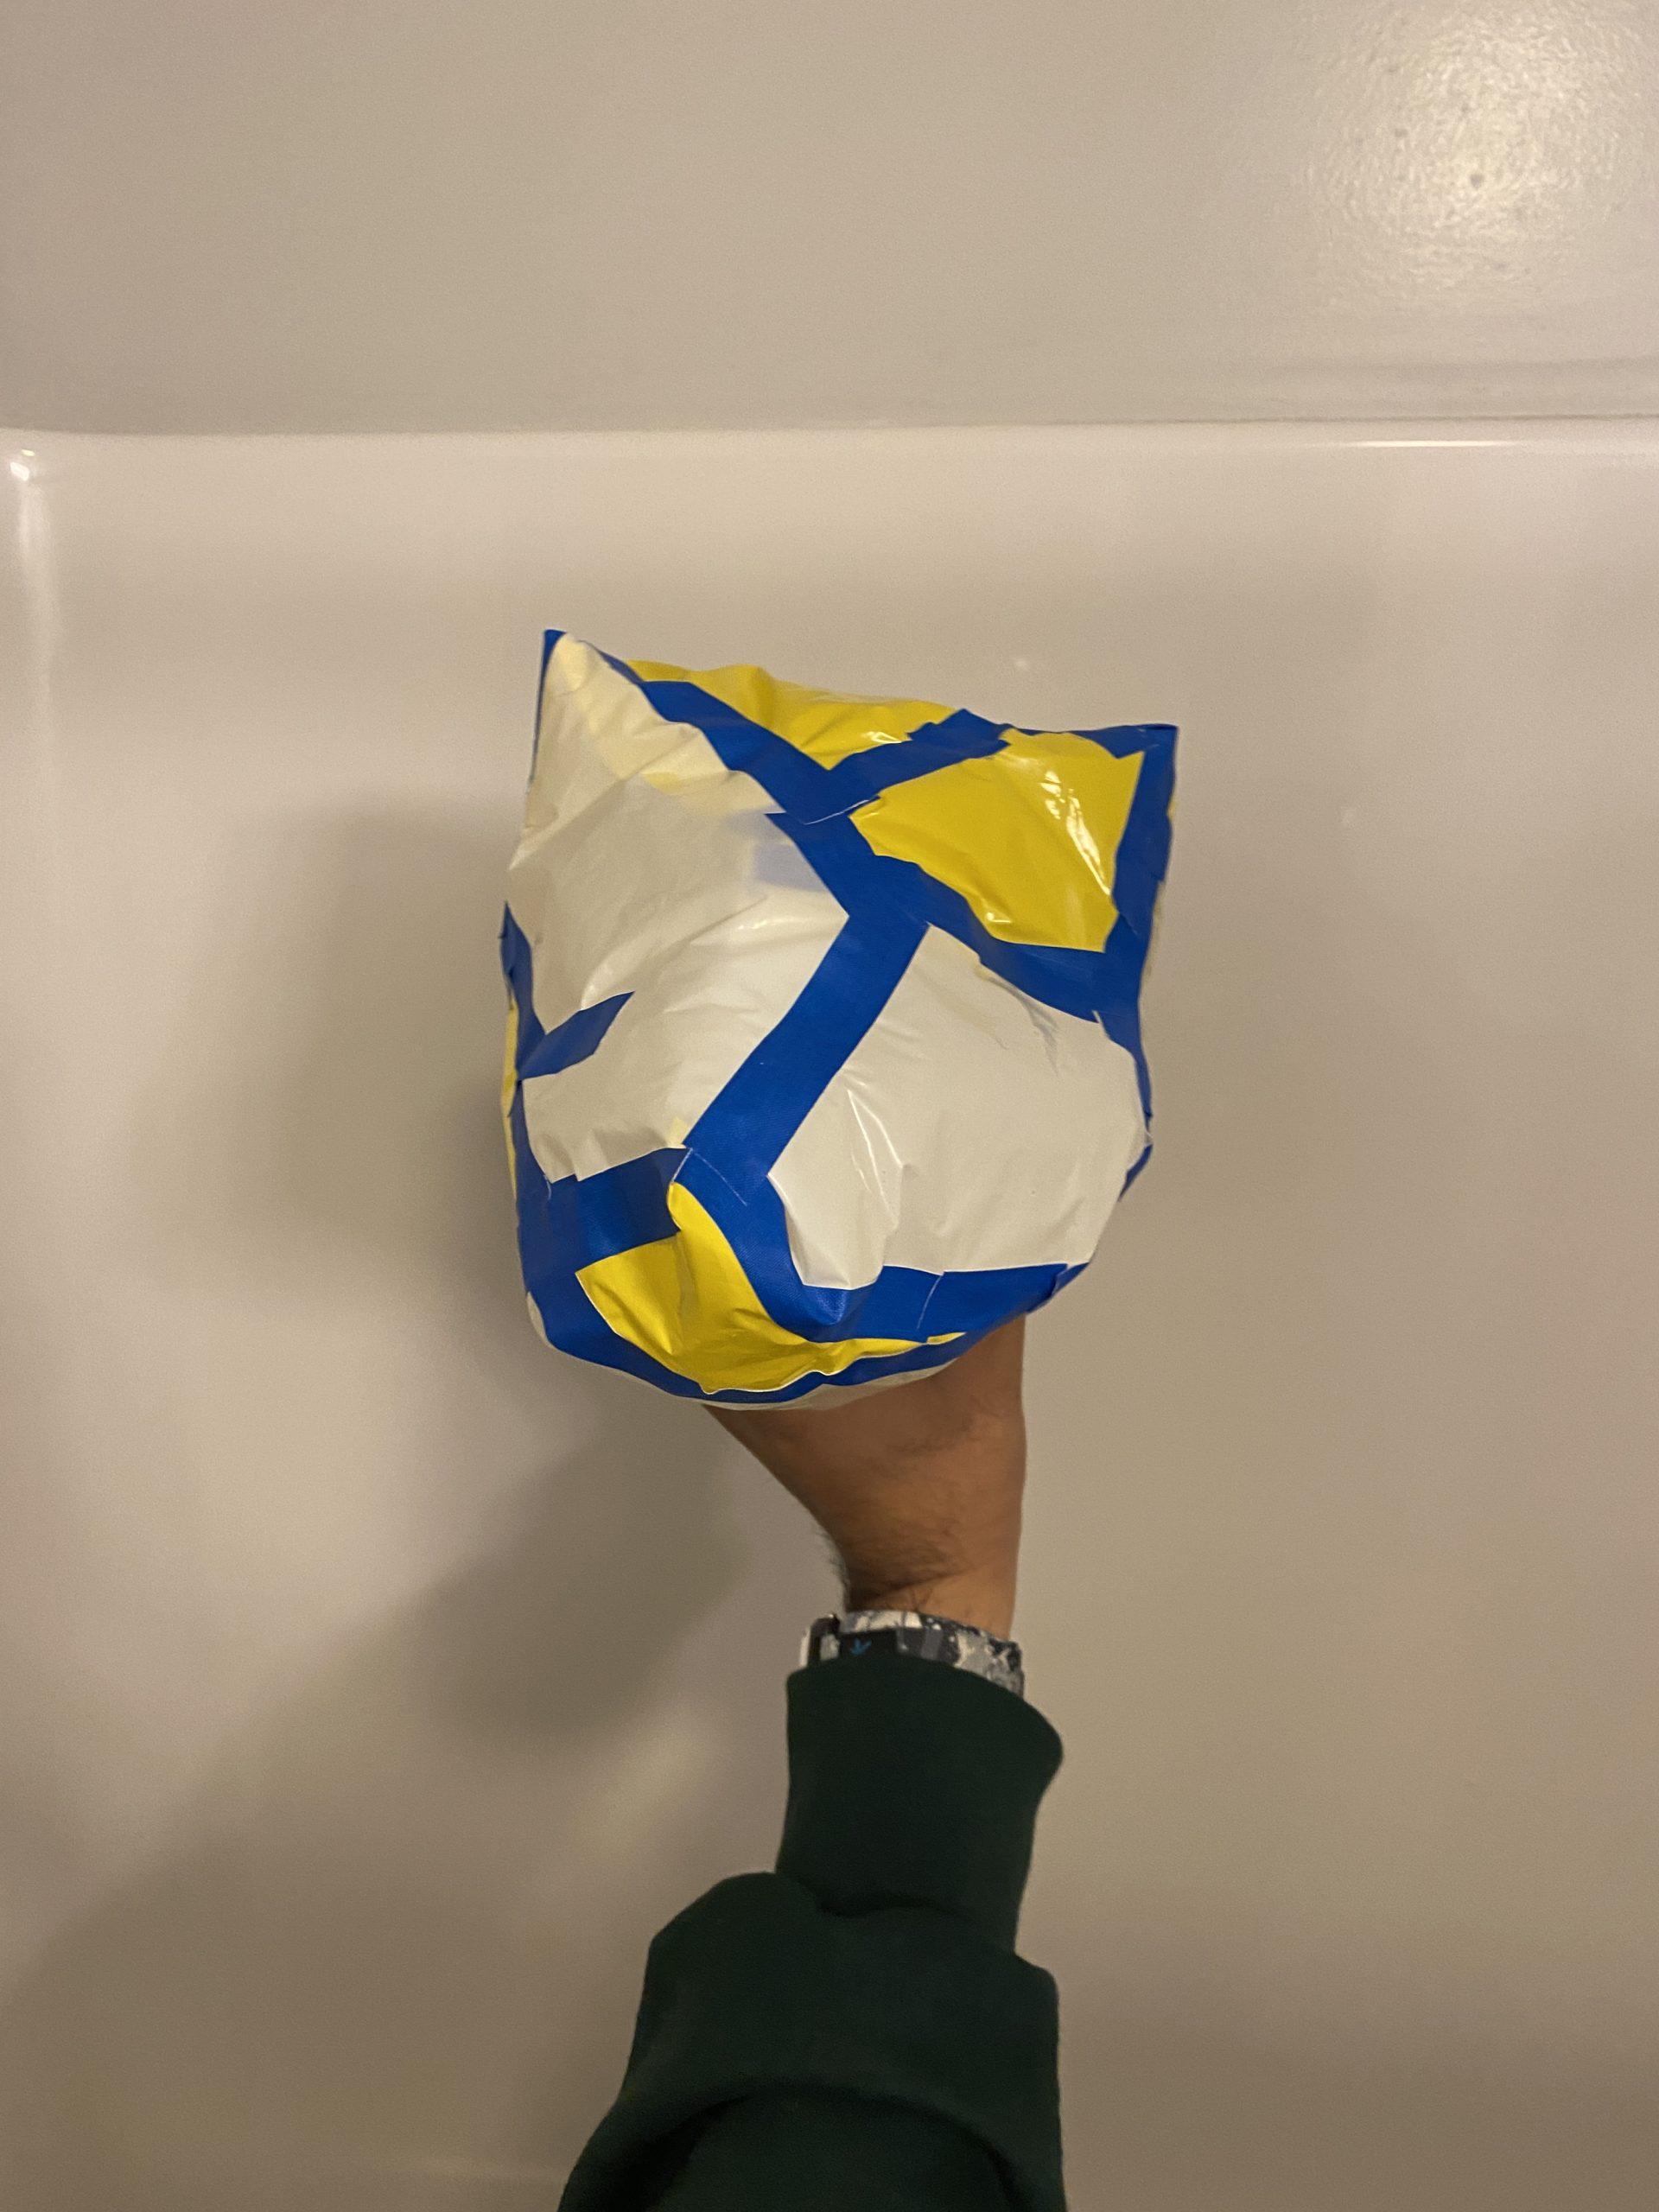
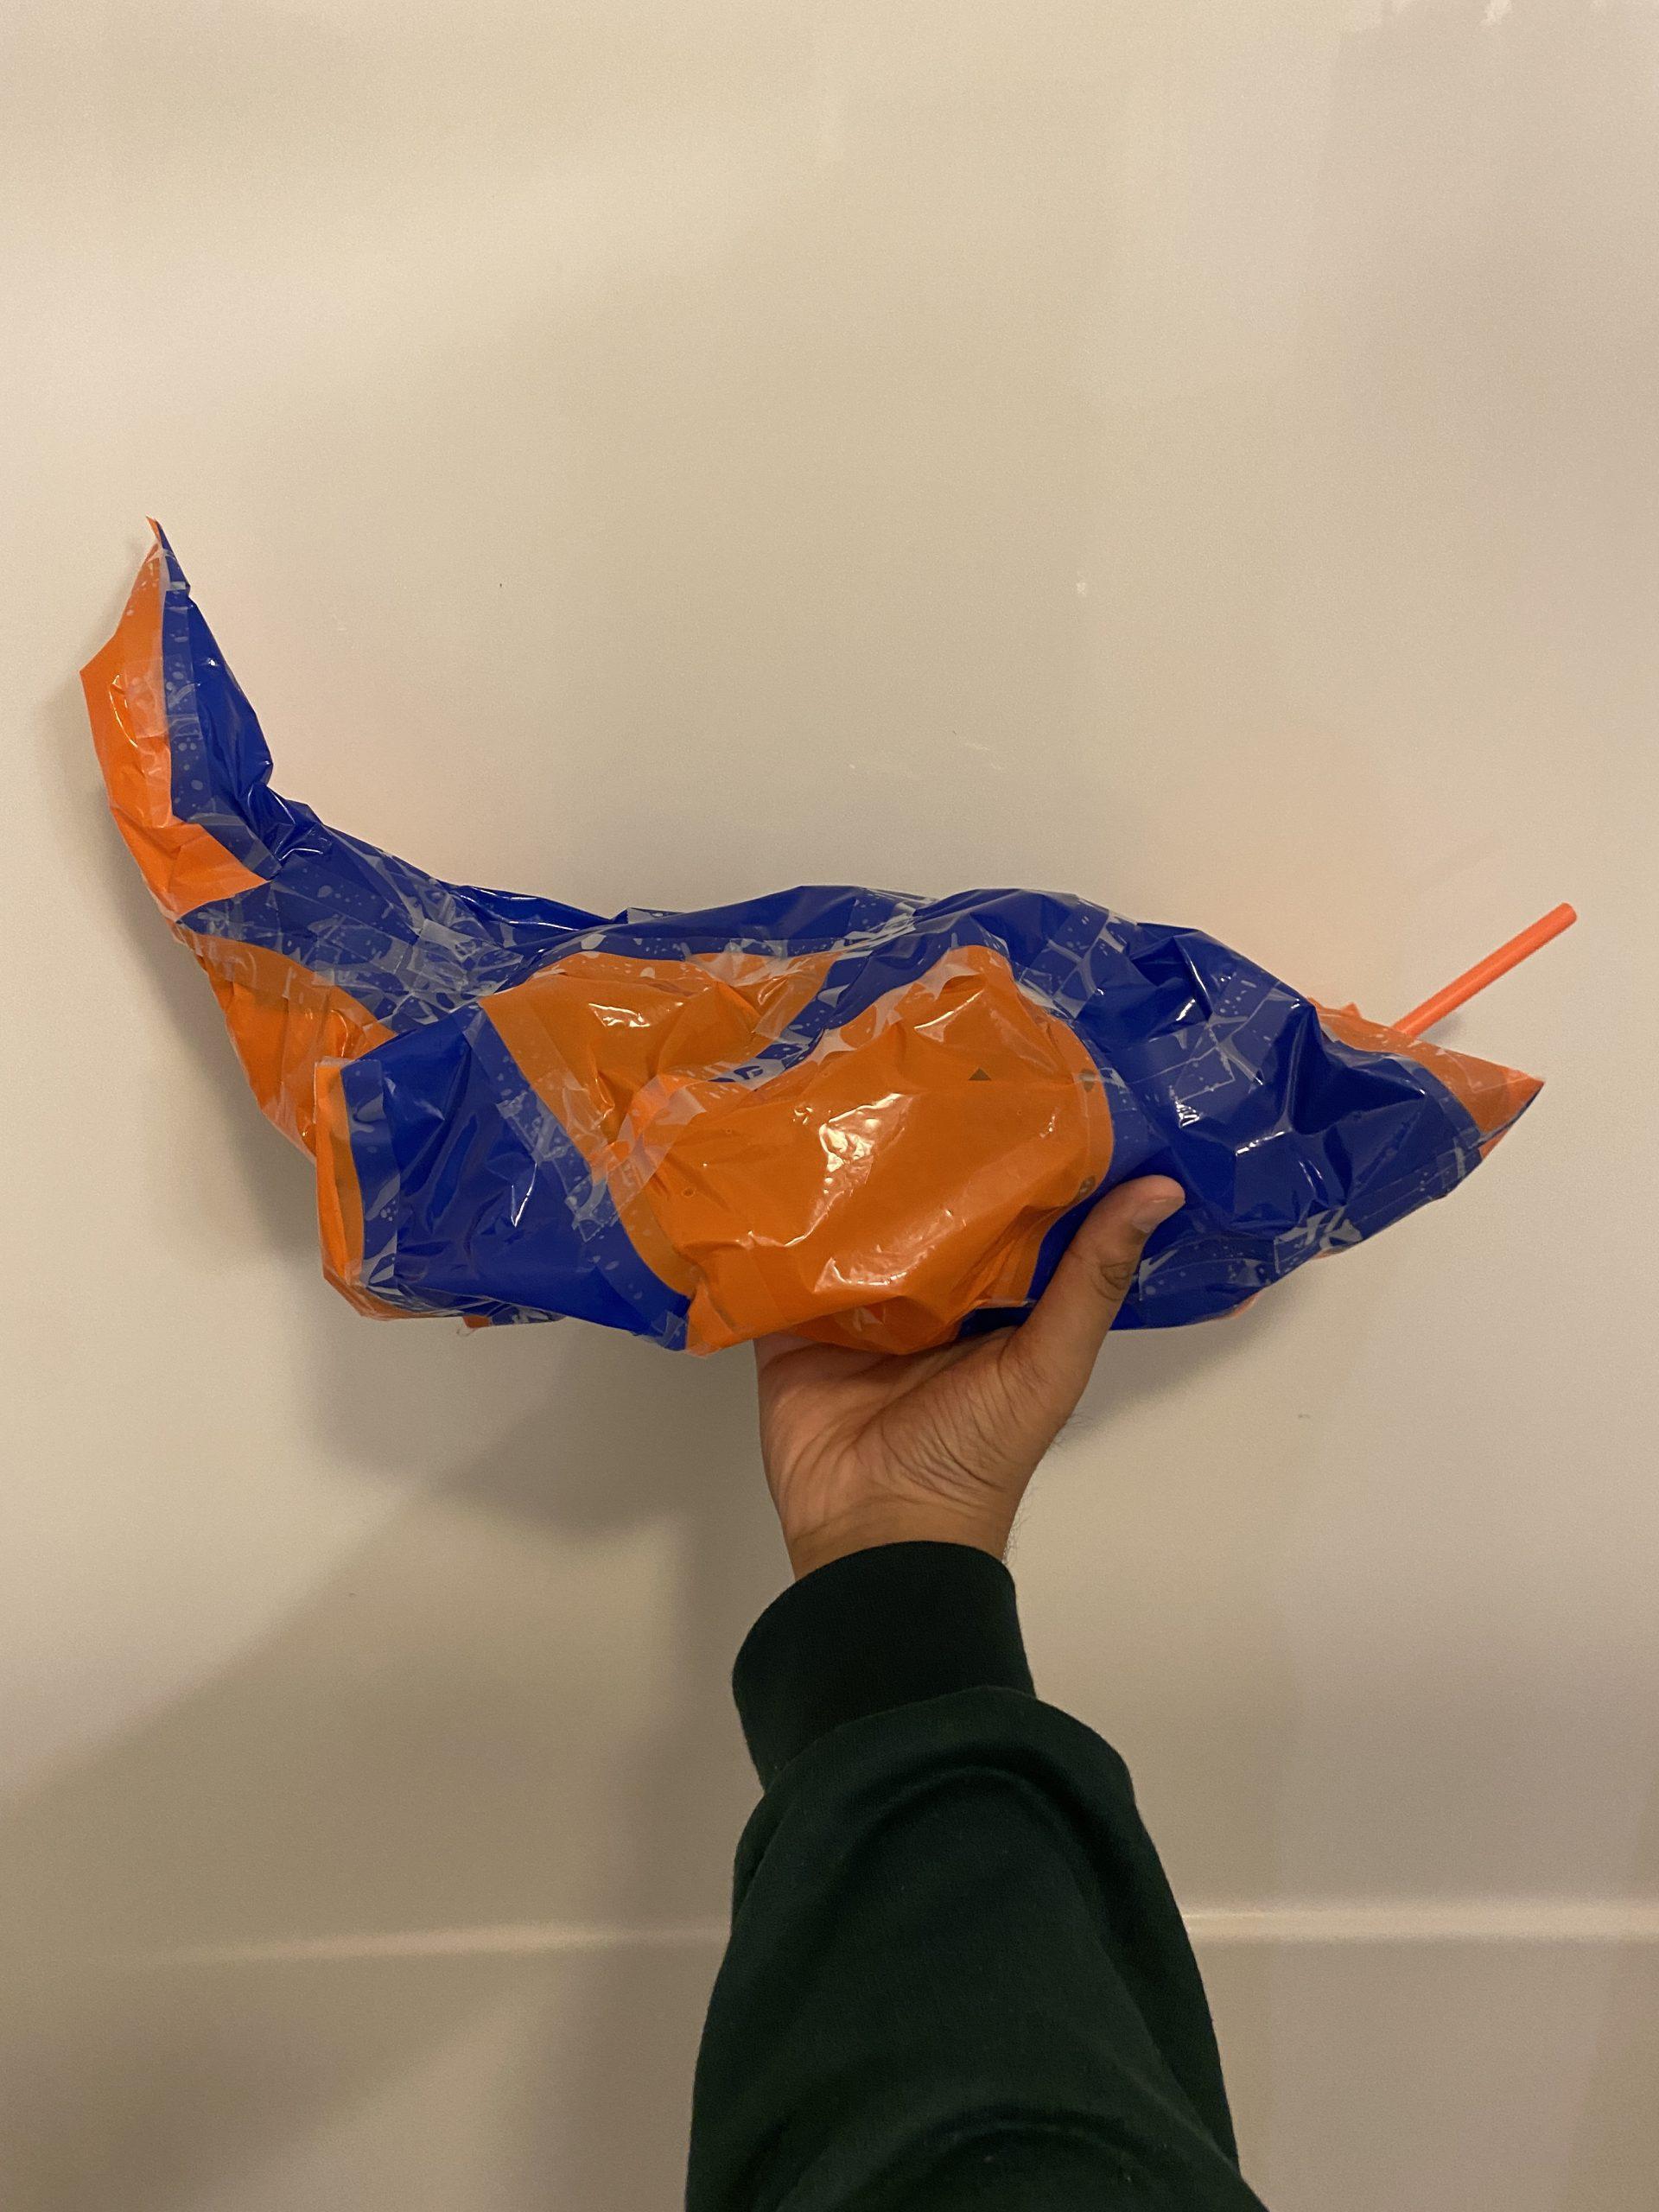
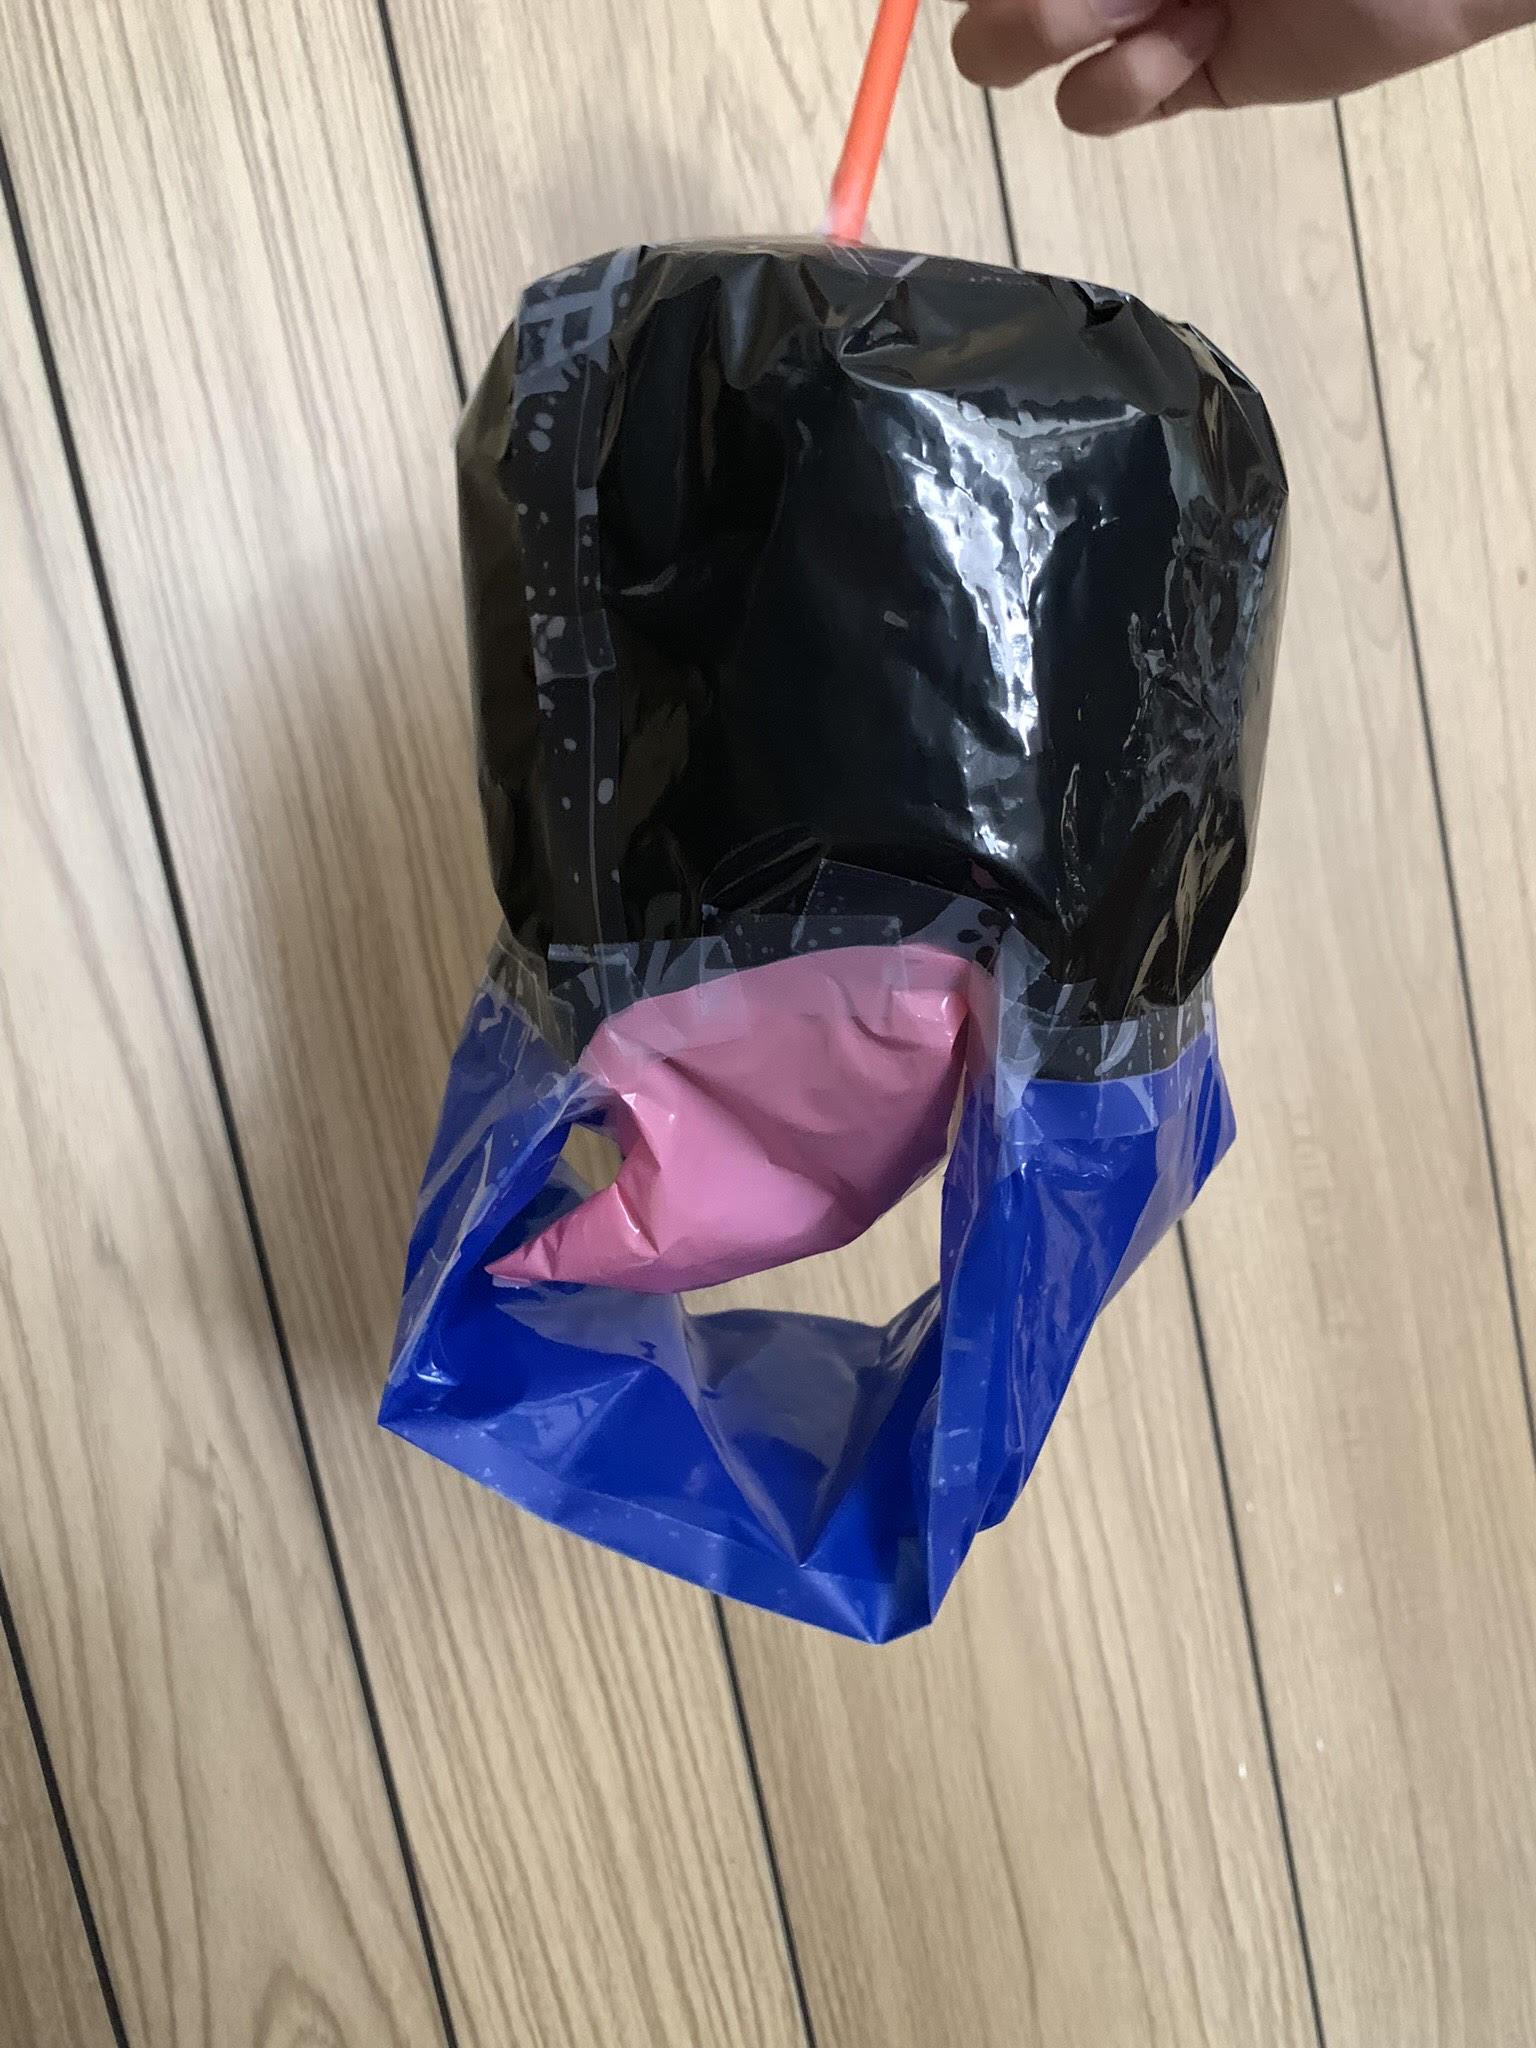
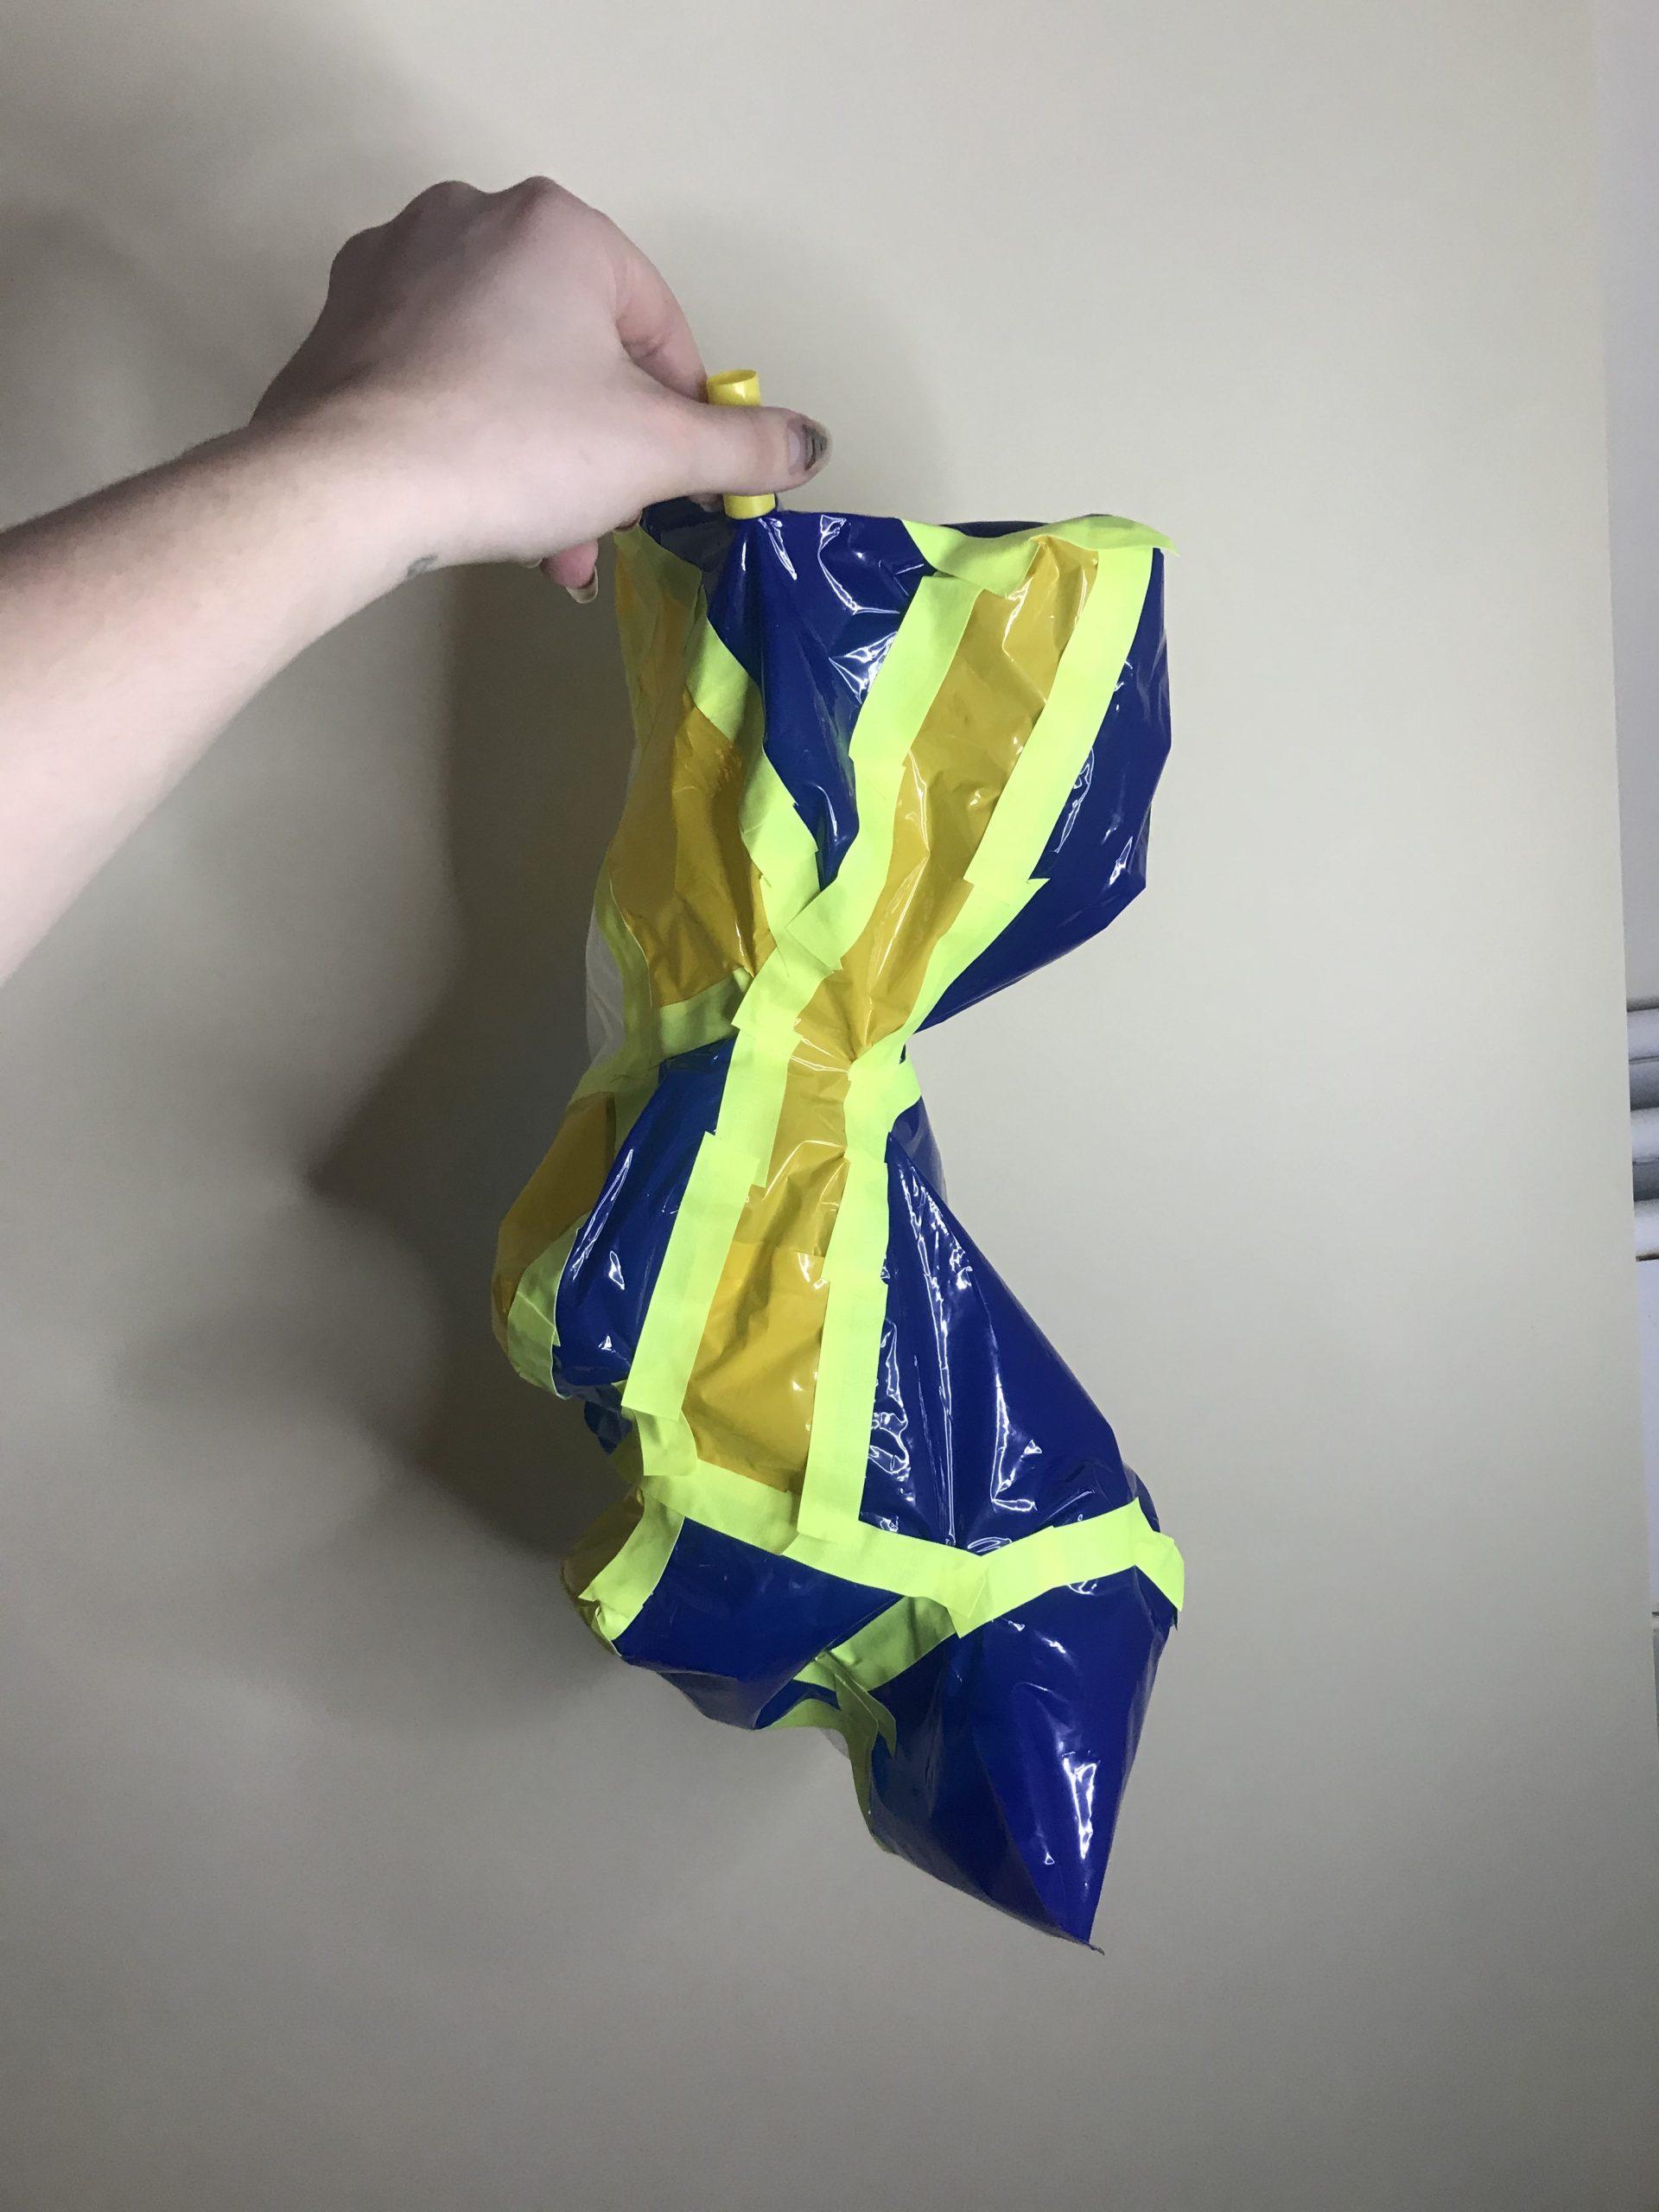
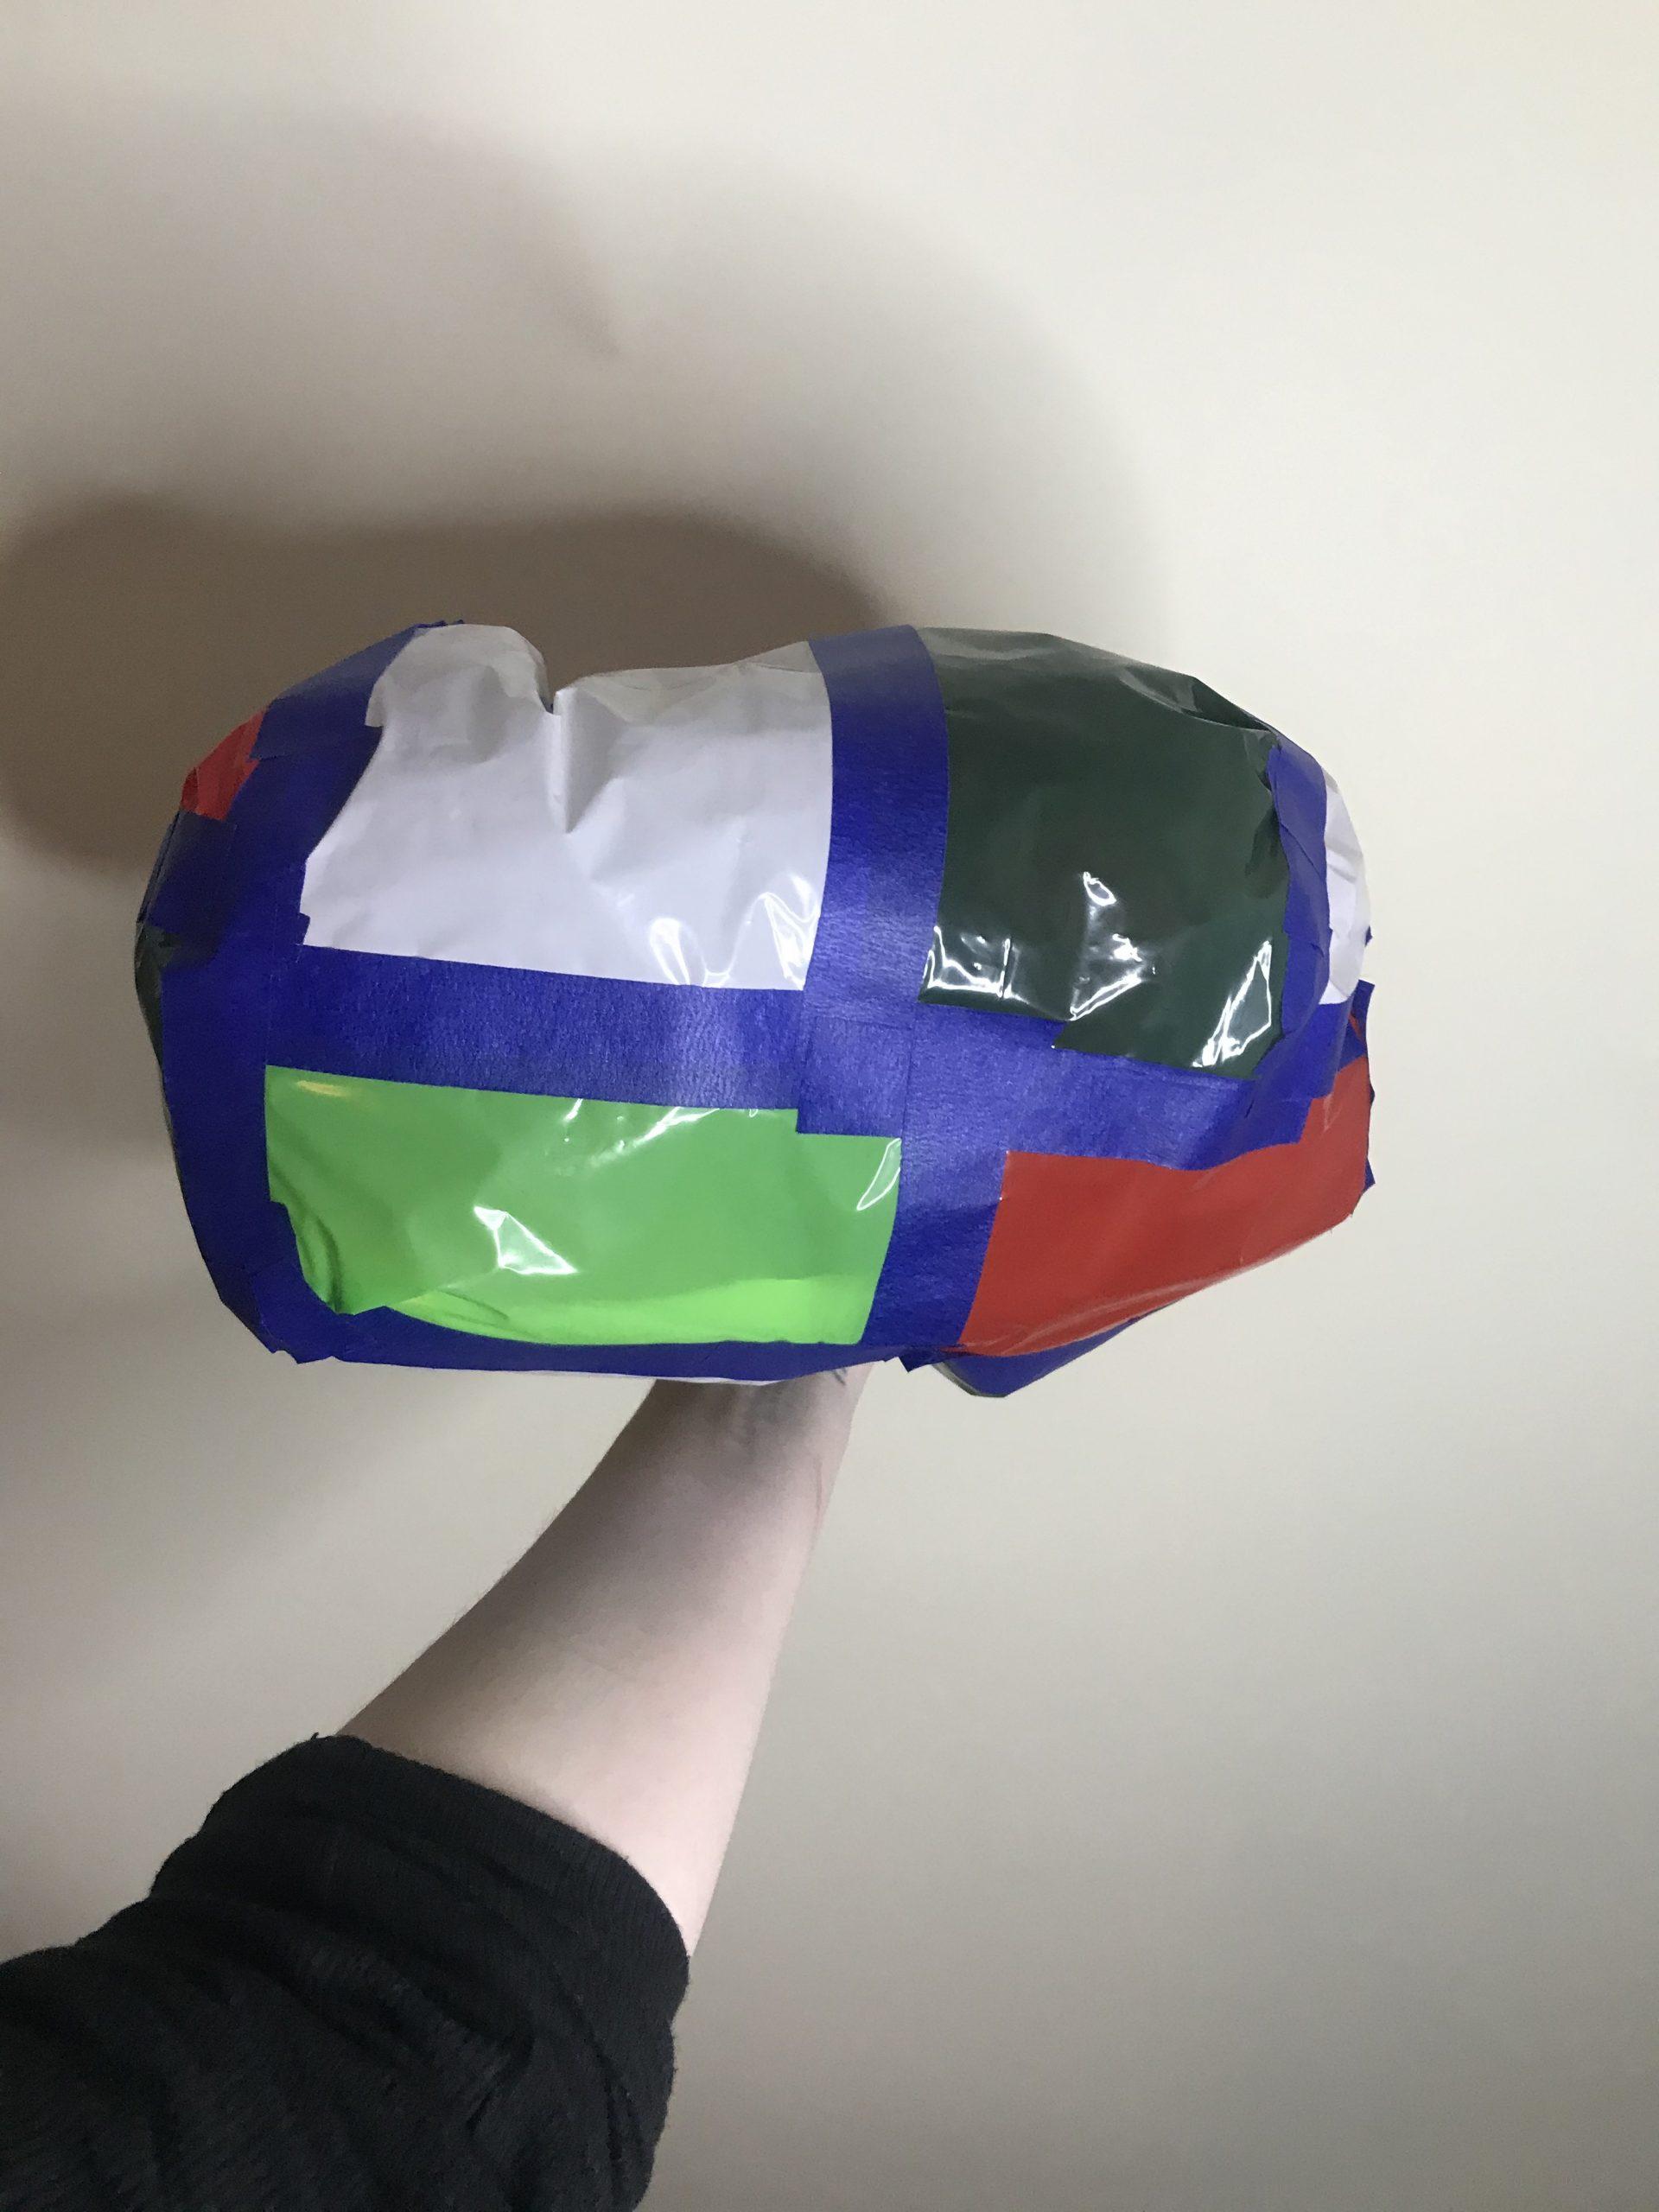
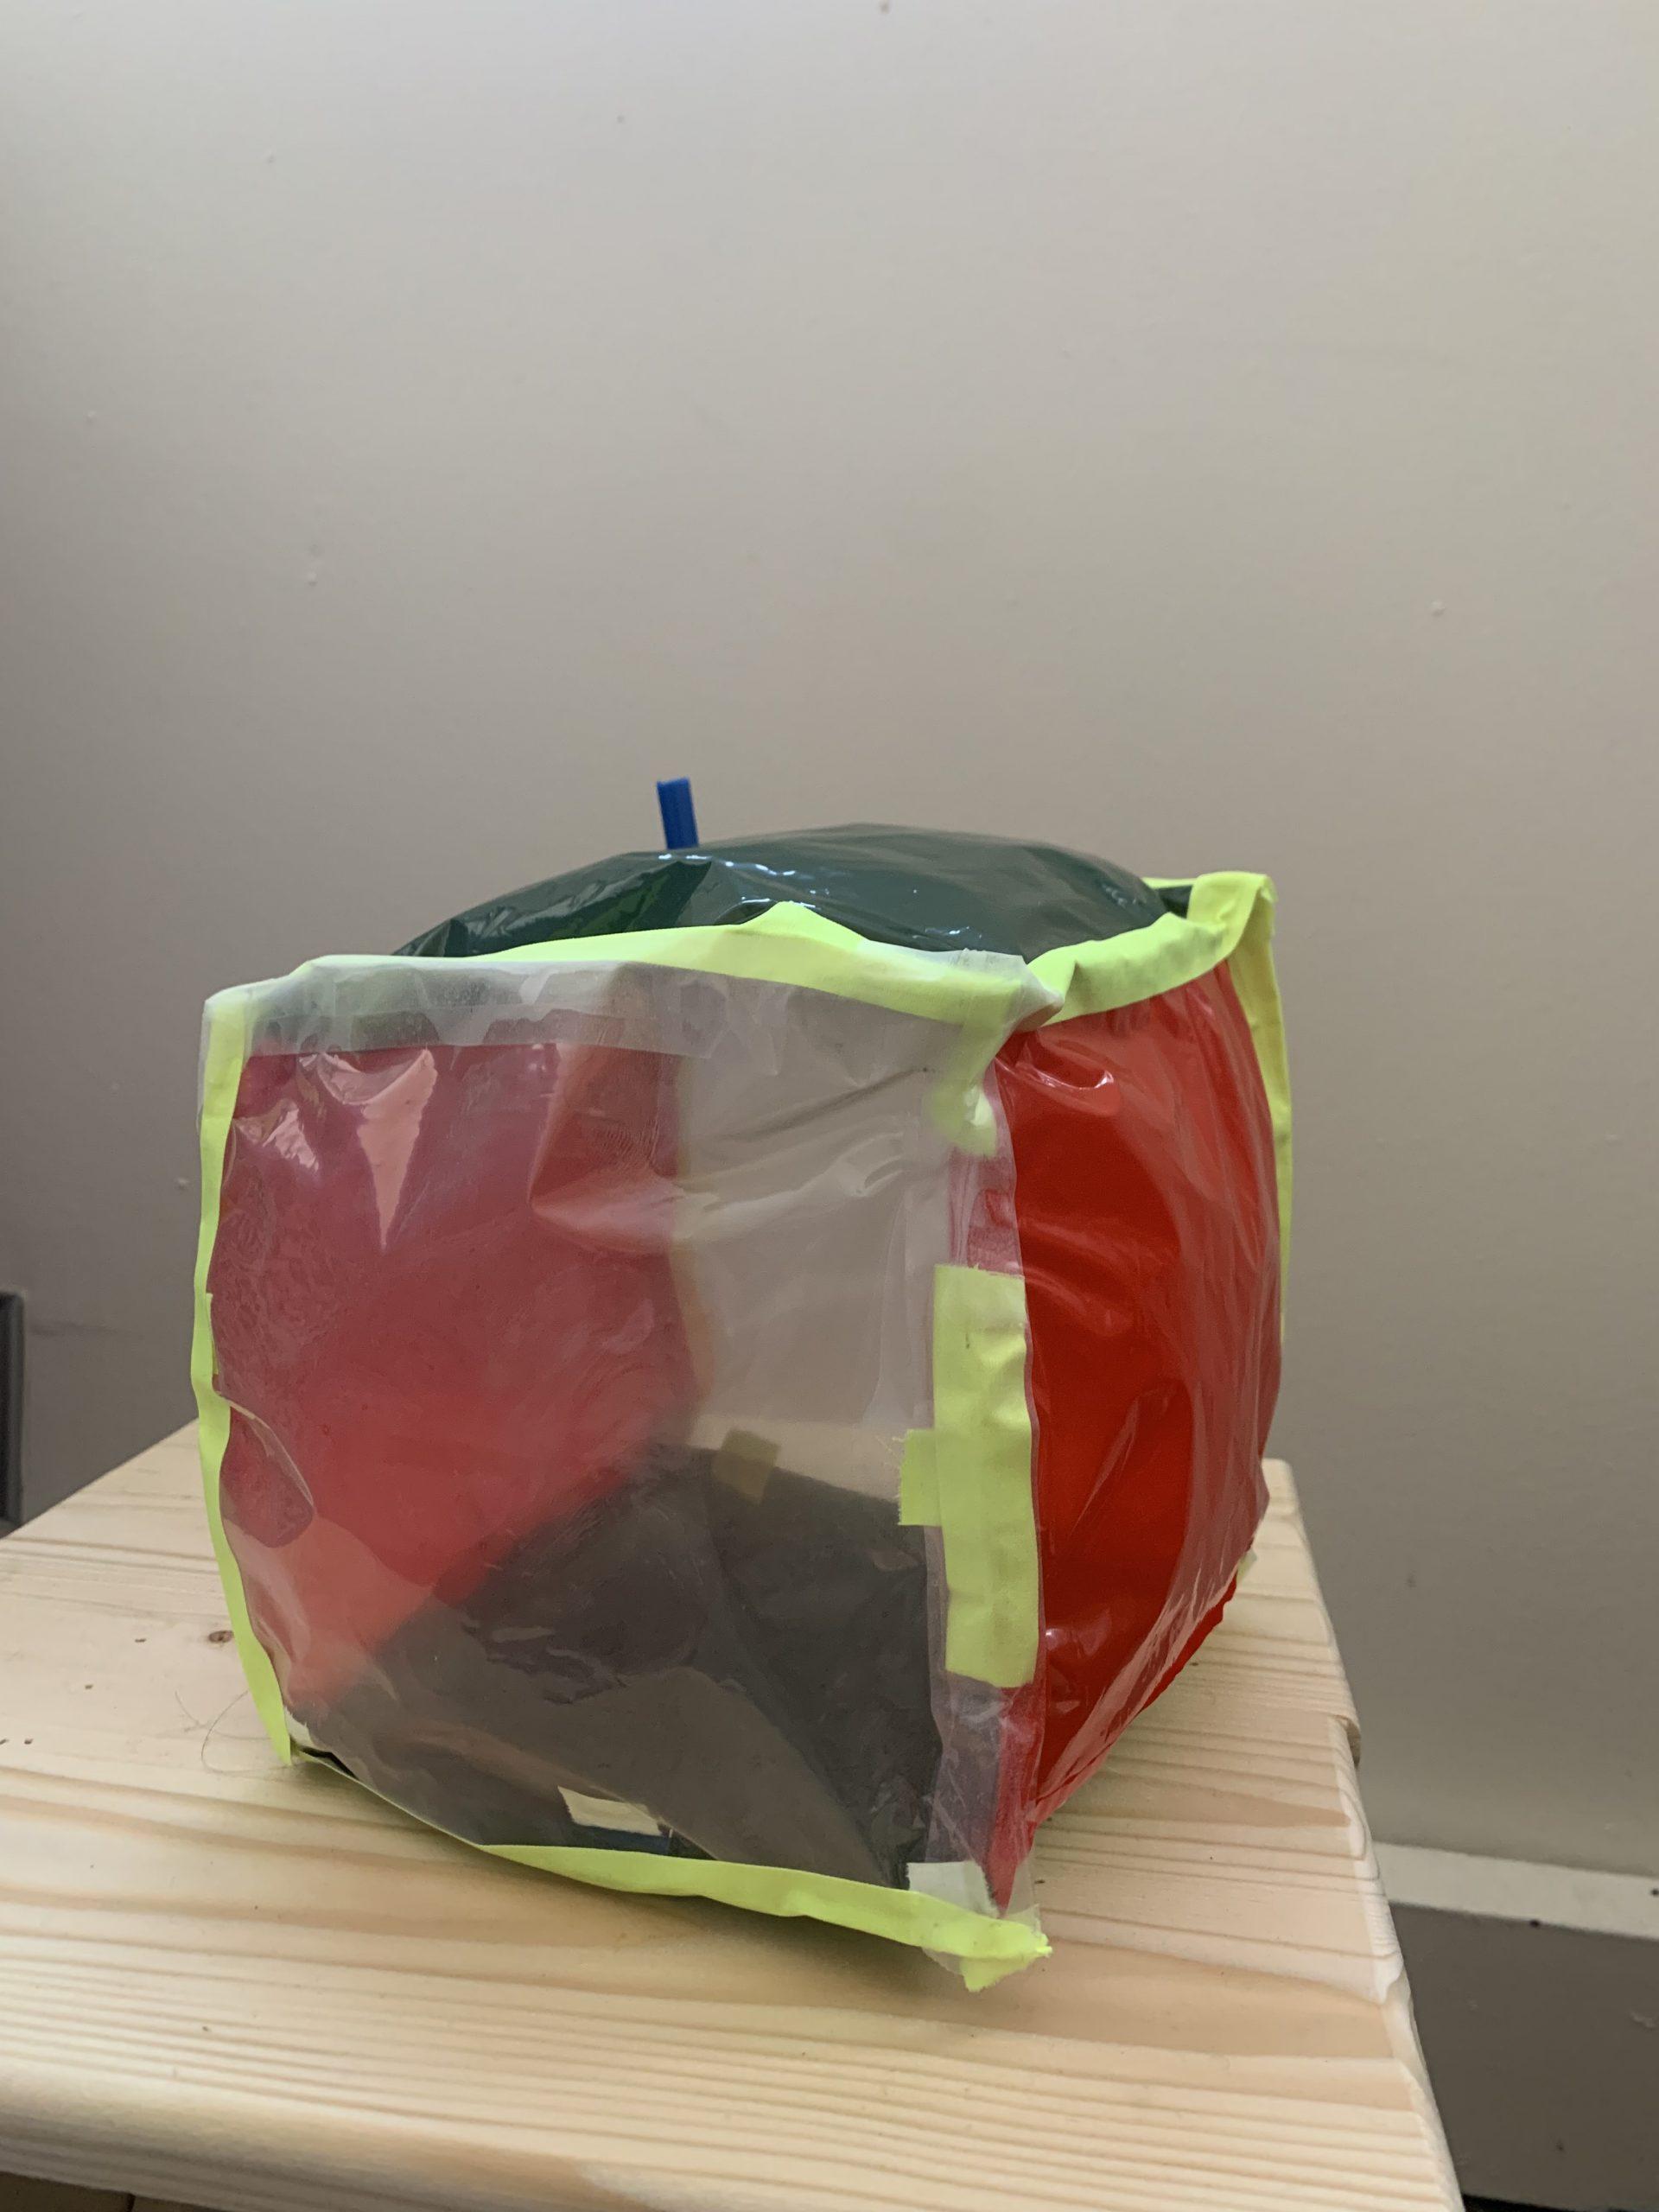
The cube was my next inflatable and a protest to my previous irregular organic form. I wanted to cut neat (as neat as my unsteady hands allow) regular shapes and make an straightforward and what I thought would be easy shape. Turns out a cube is not as easy as it seemed. This presented challenges and learning opportunities in how tiny errors in pattern pieces can add up to create cattywampus edges that do not desire to meet. This was also an opportunity to practice using tape to crease the edges and as a structural element. Going forward, what I will think about most from this cube was the 3 unique states of this cube: pre-inflating deflated, inflated, post-inflation deflation. They range from flat to almost spherical to a “perfect” cube.

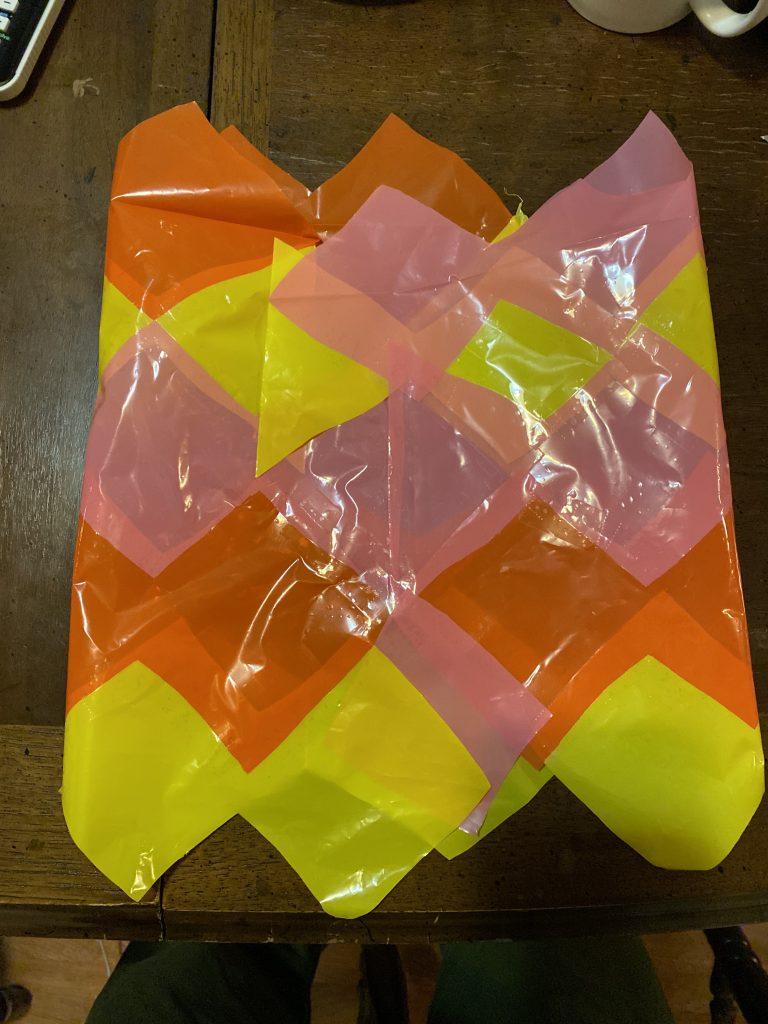
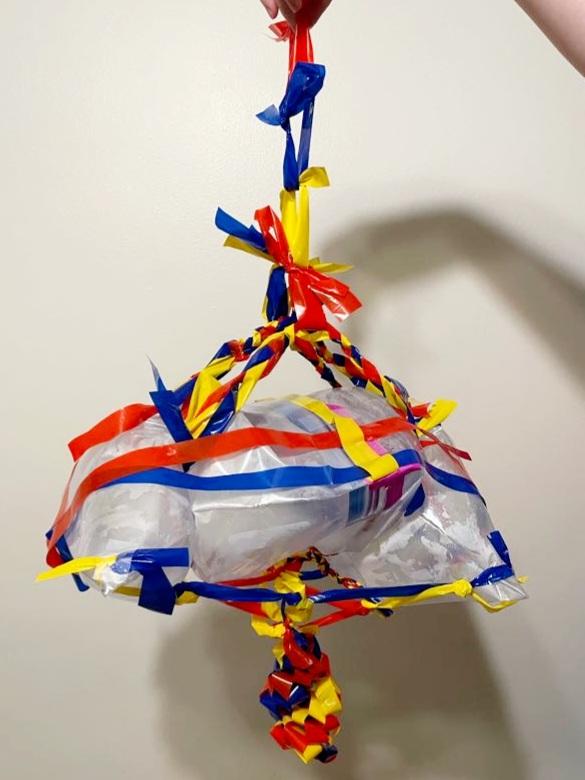
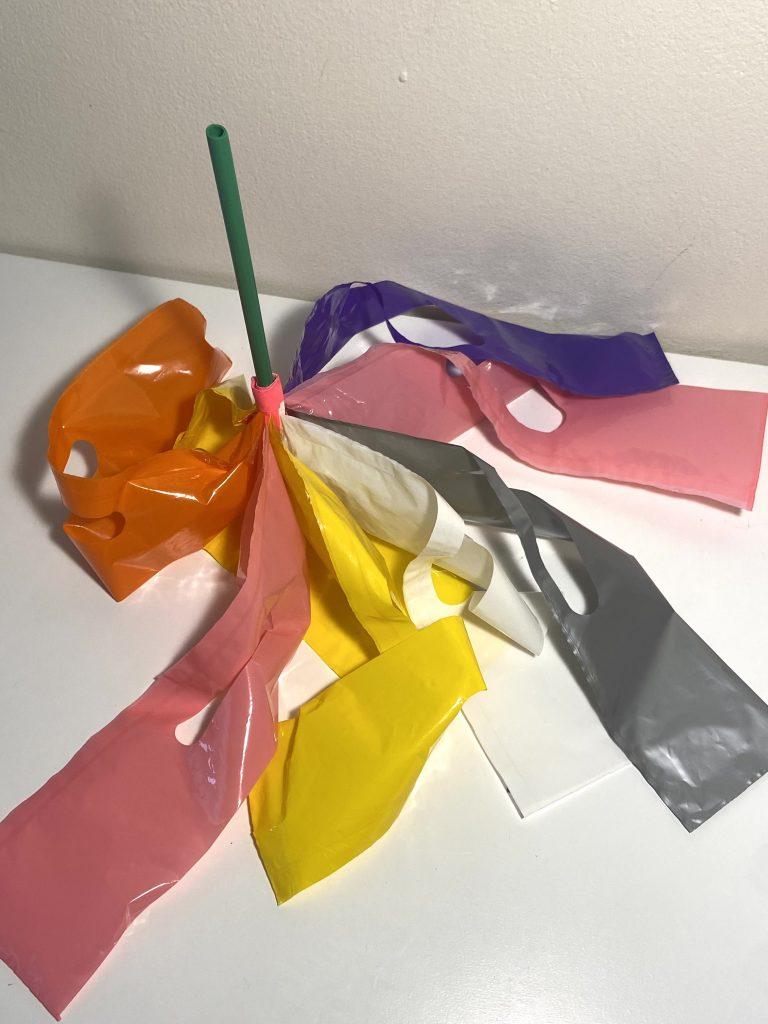
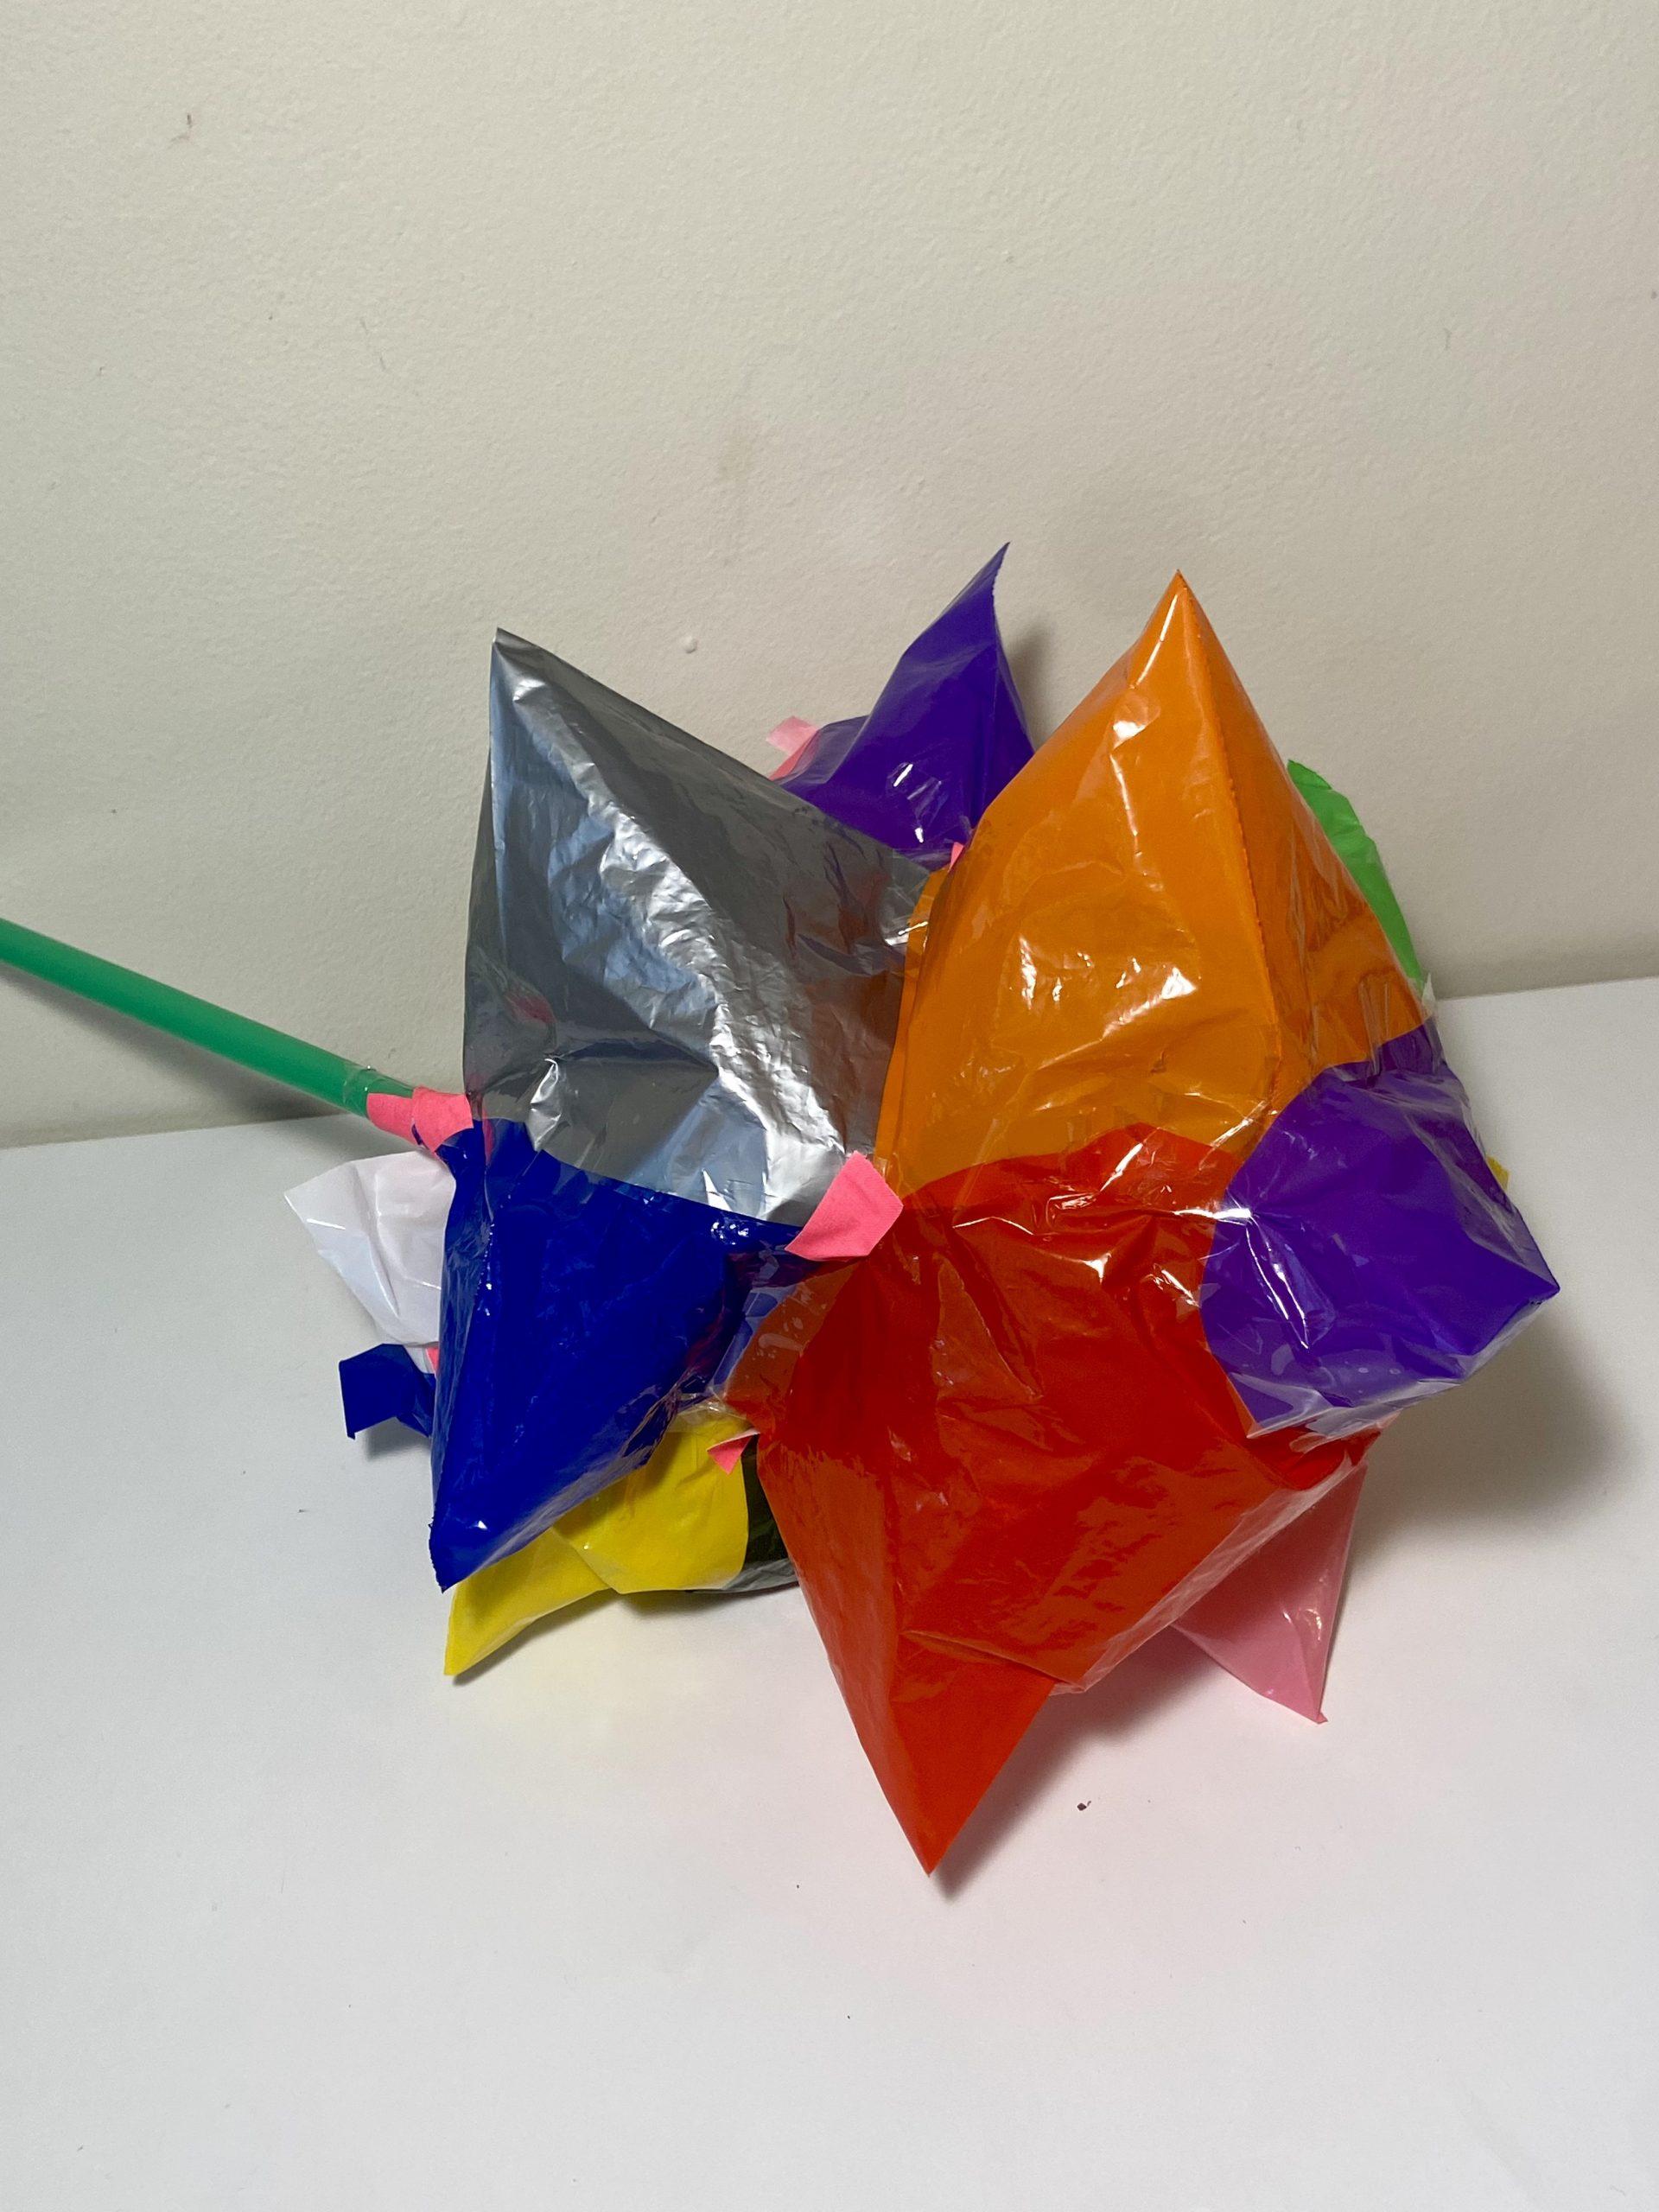
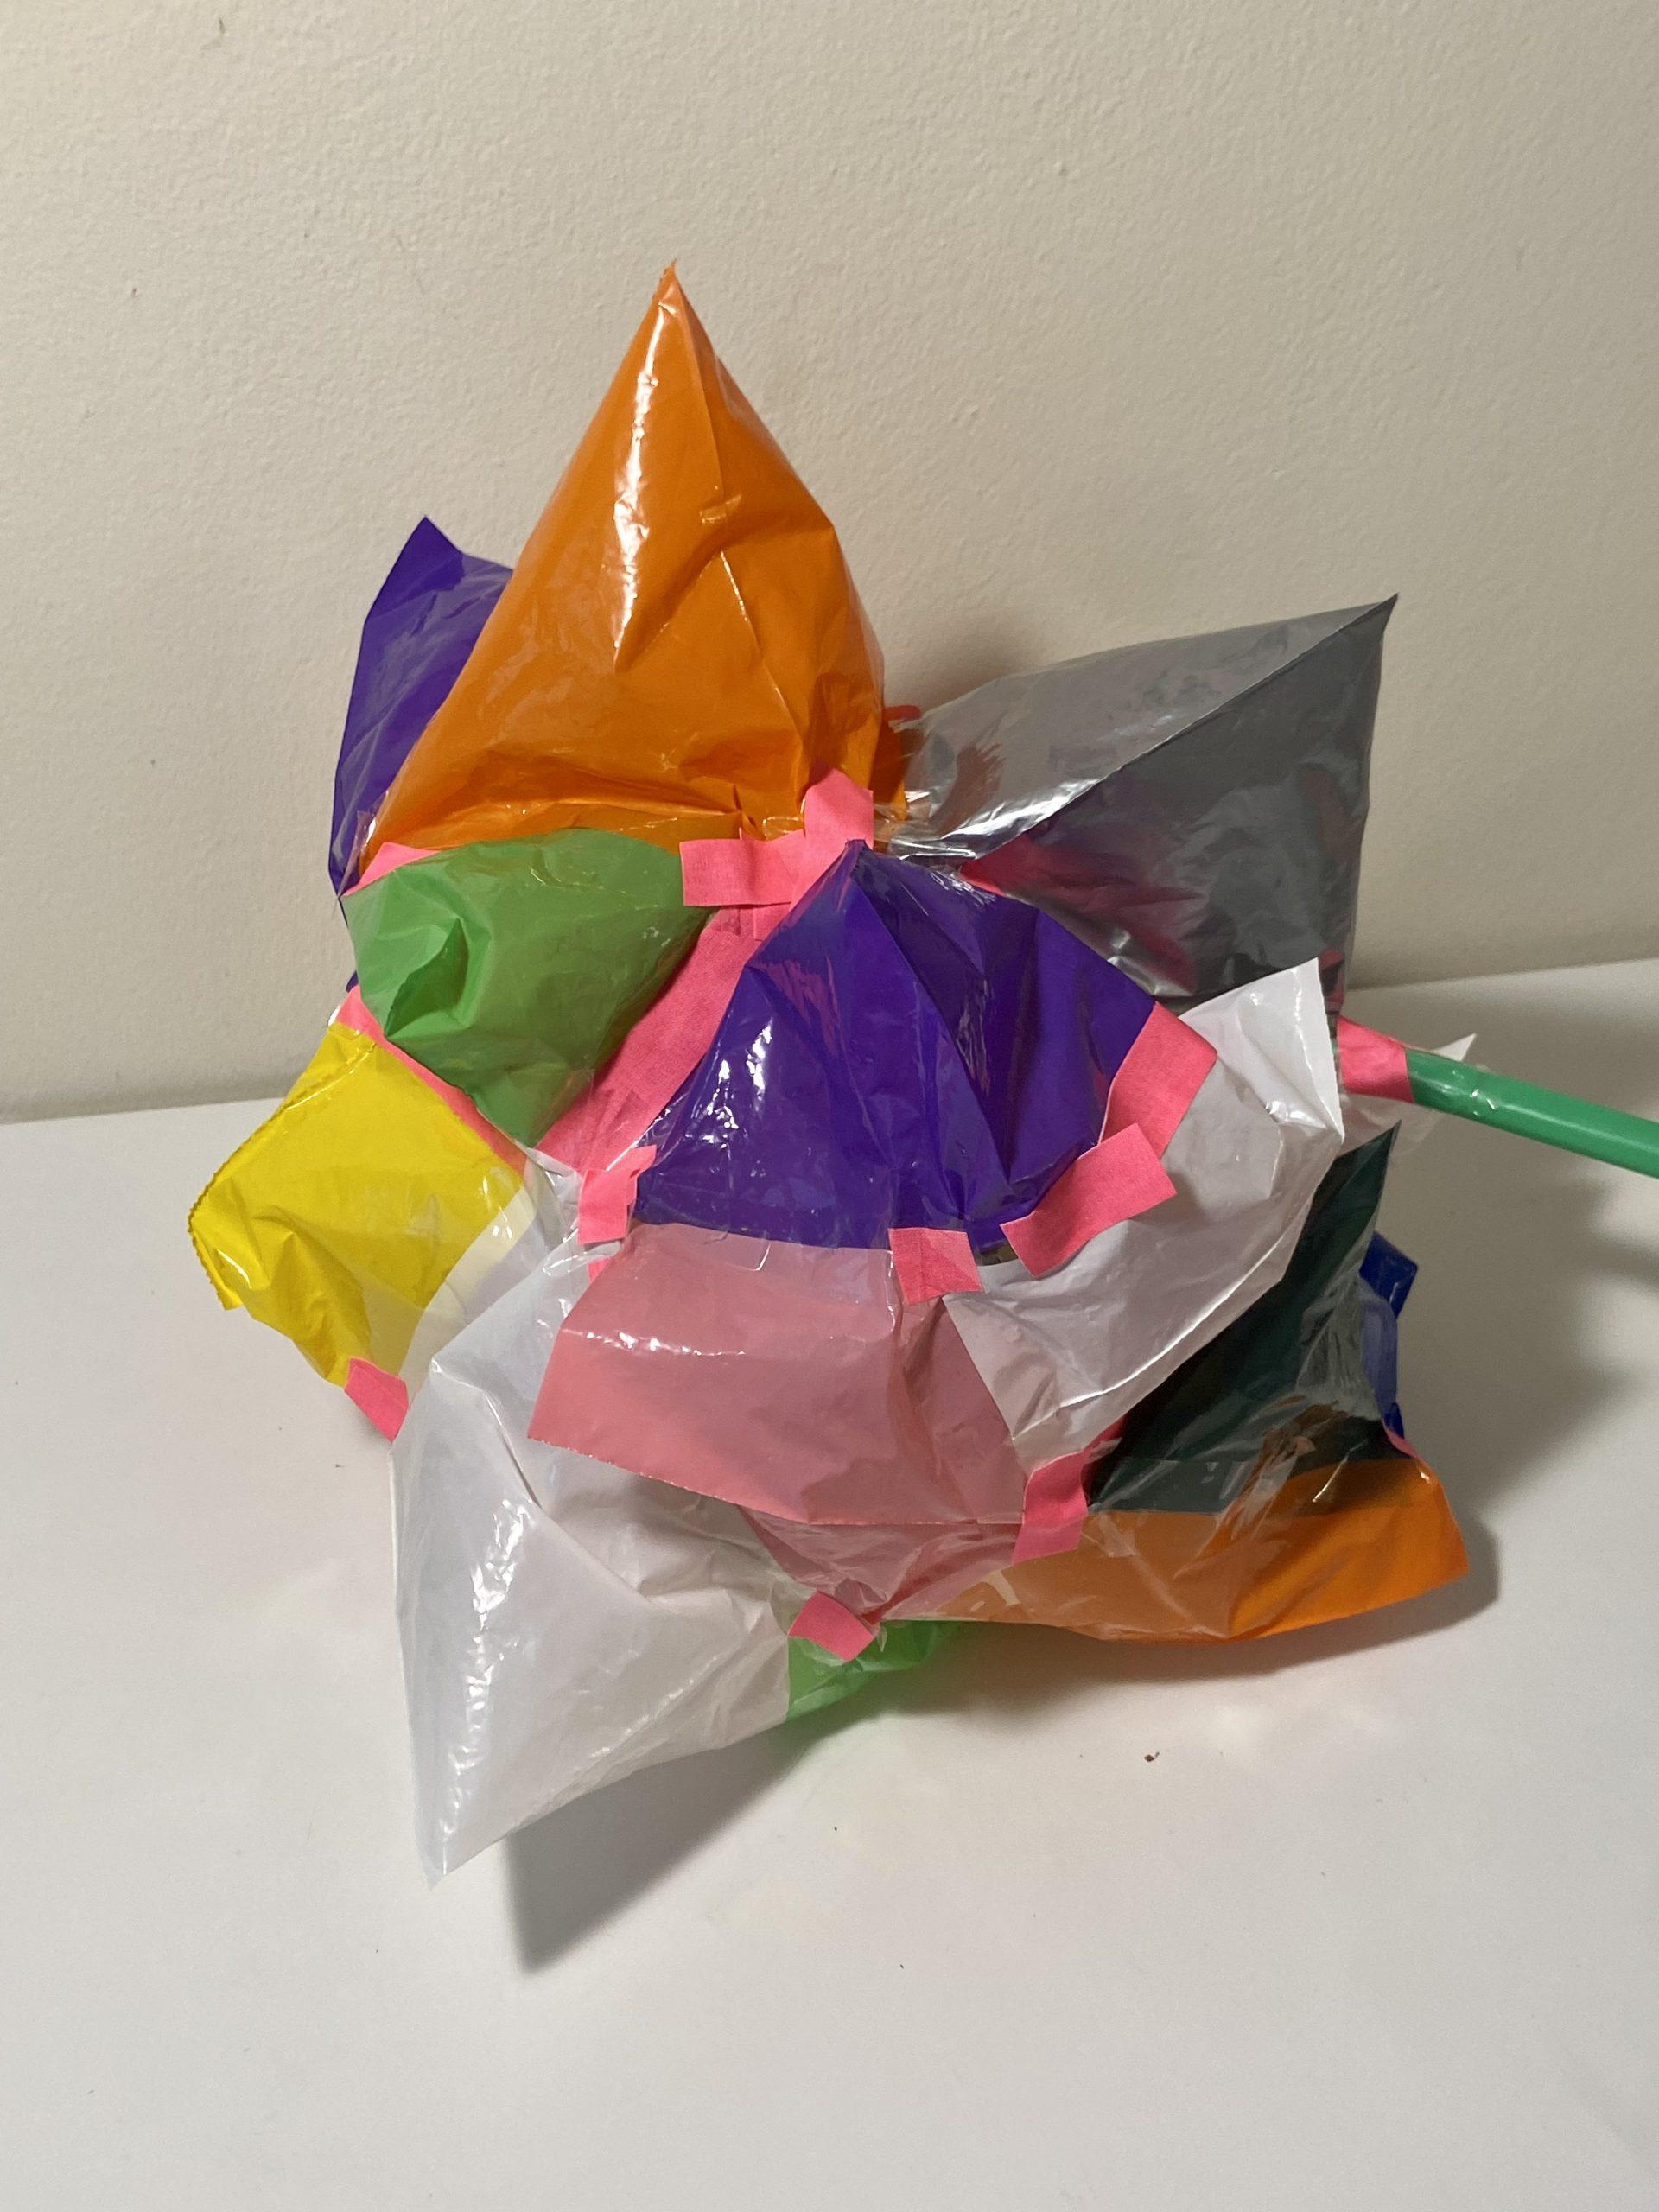
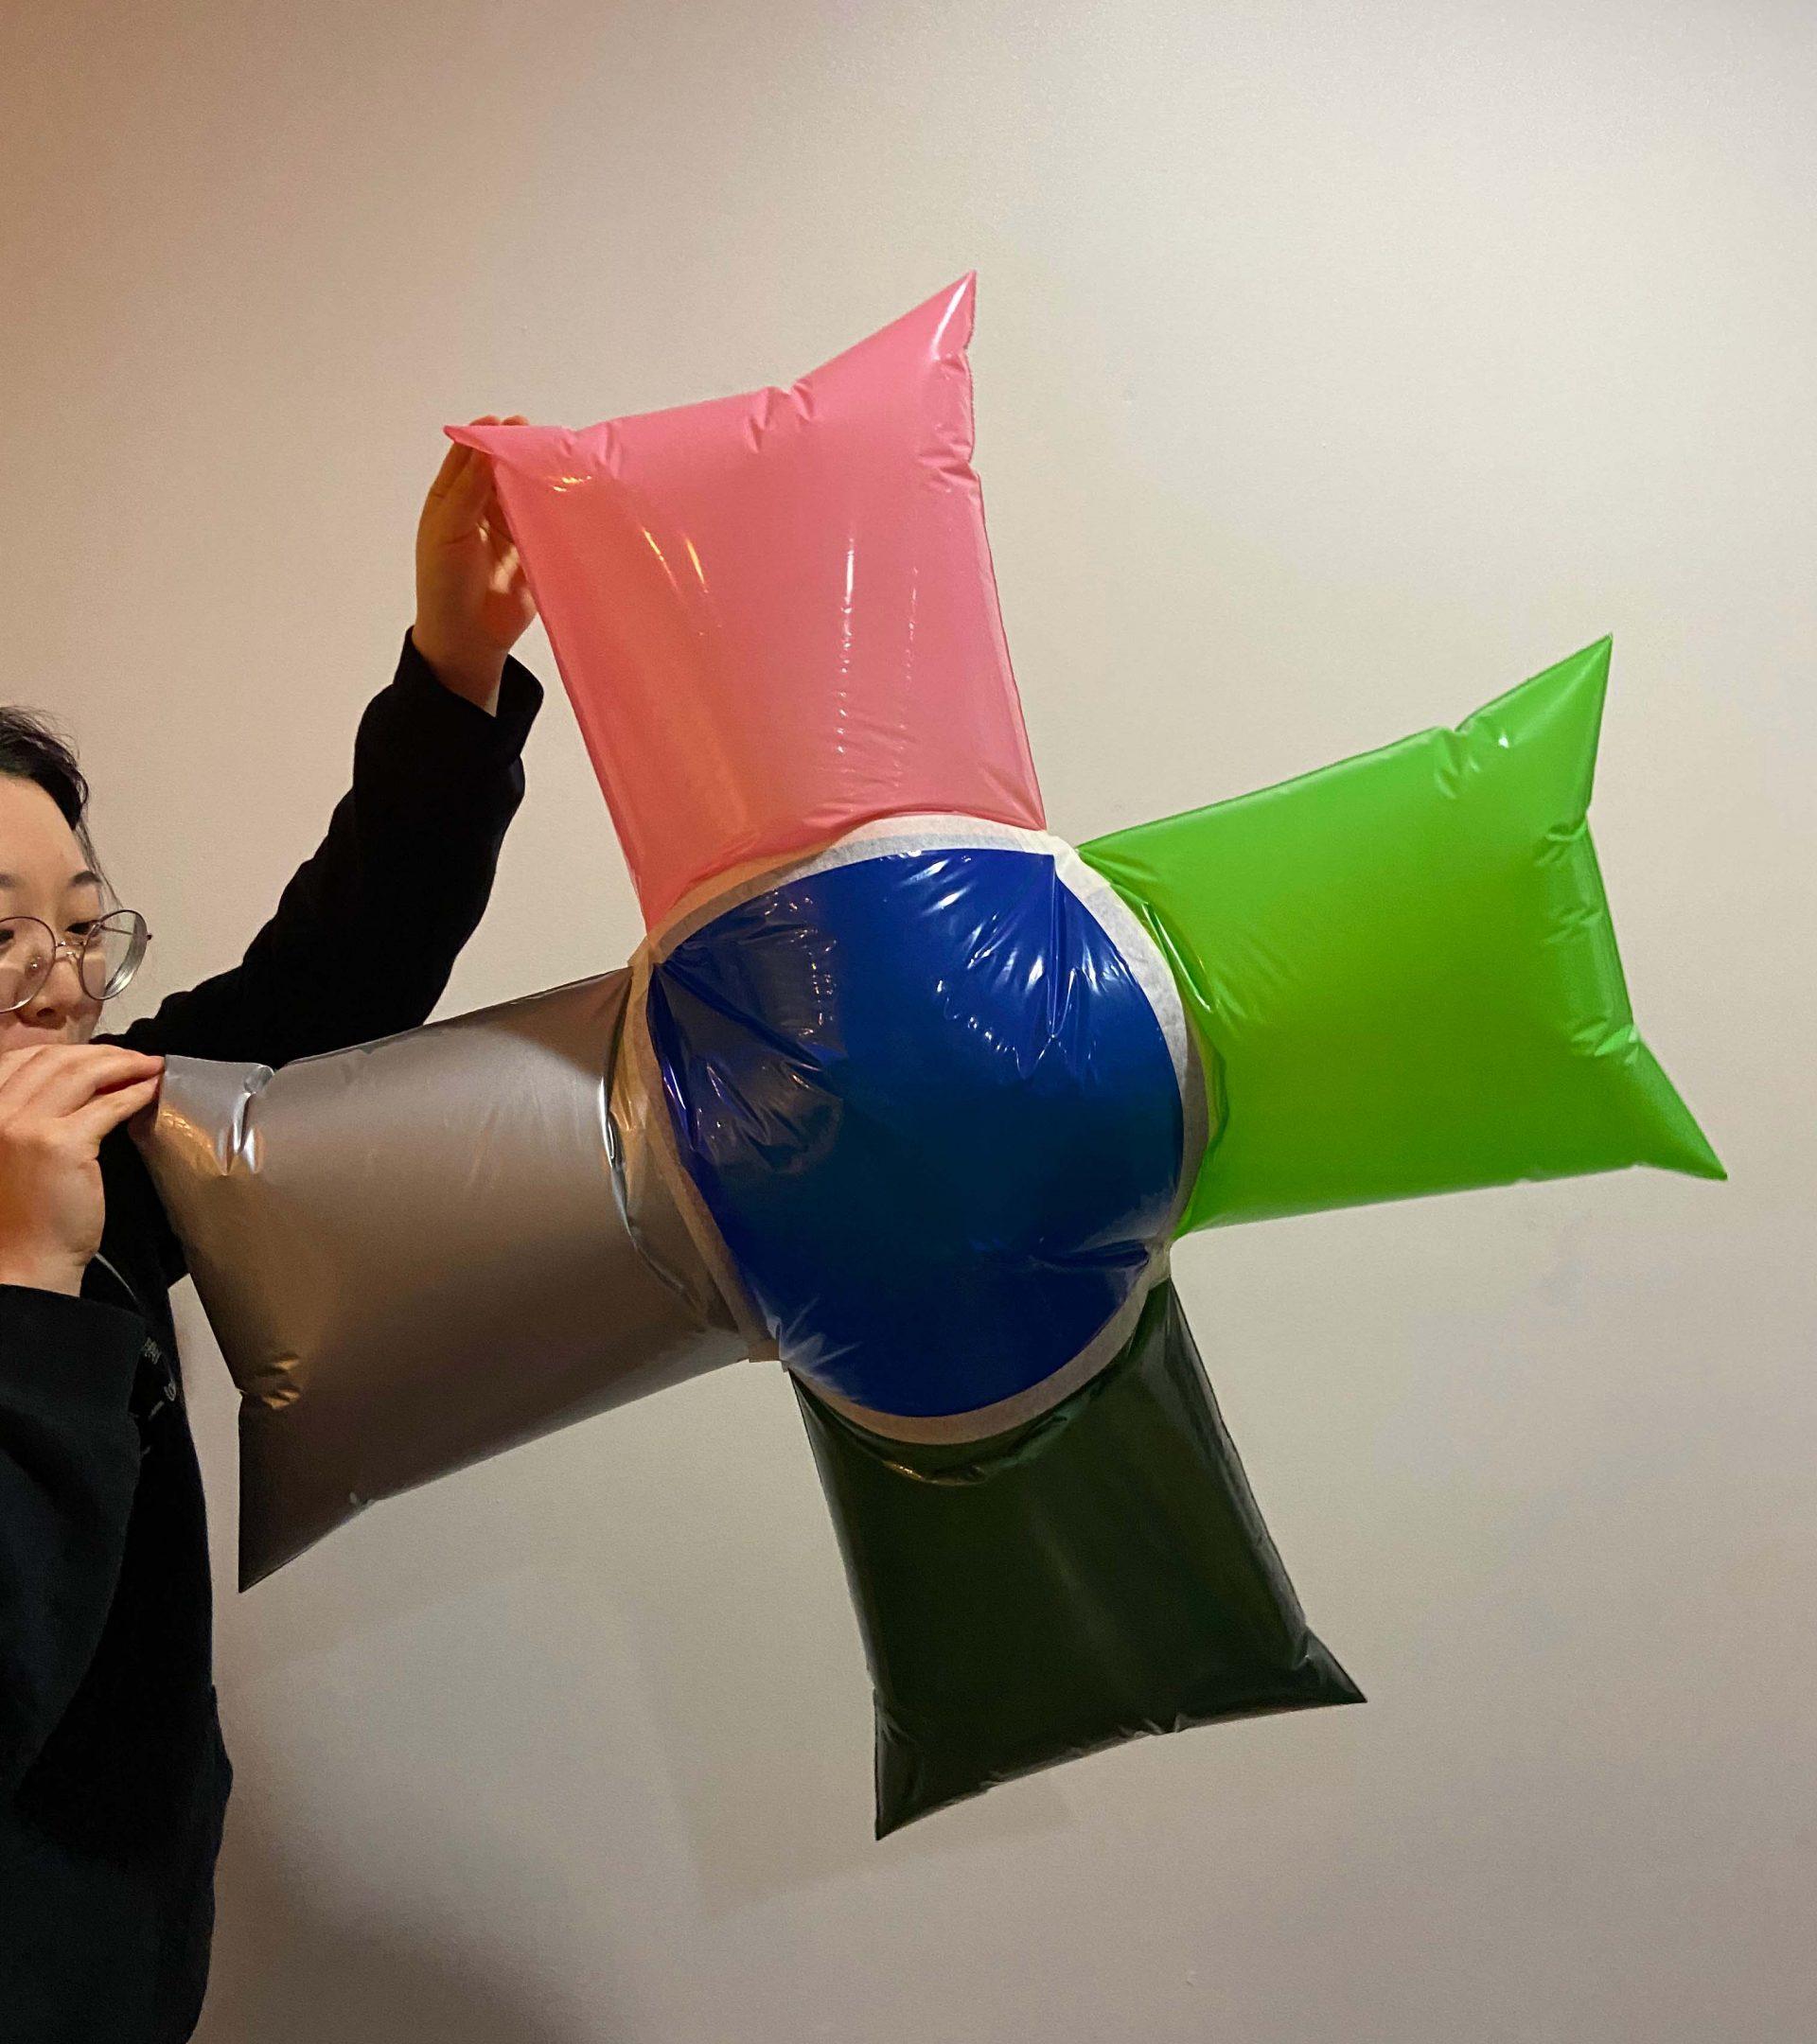
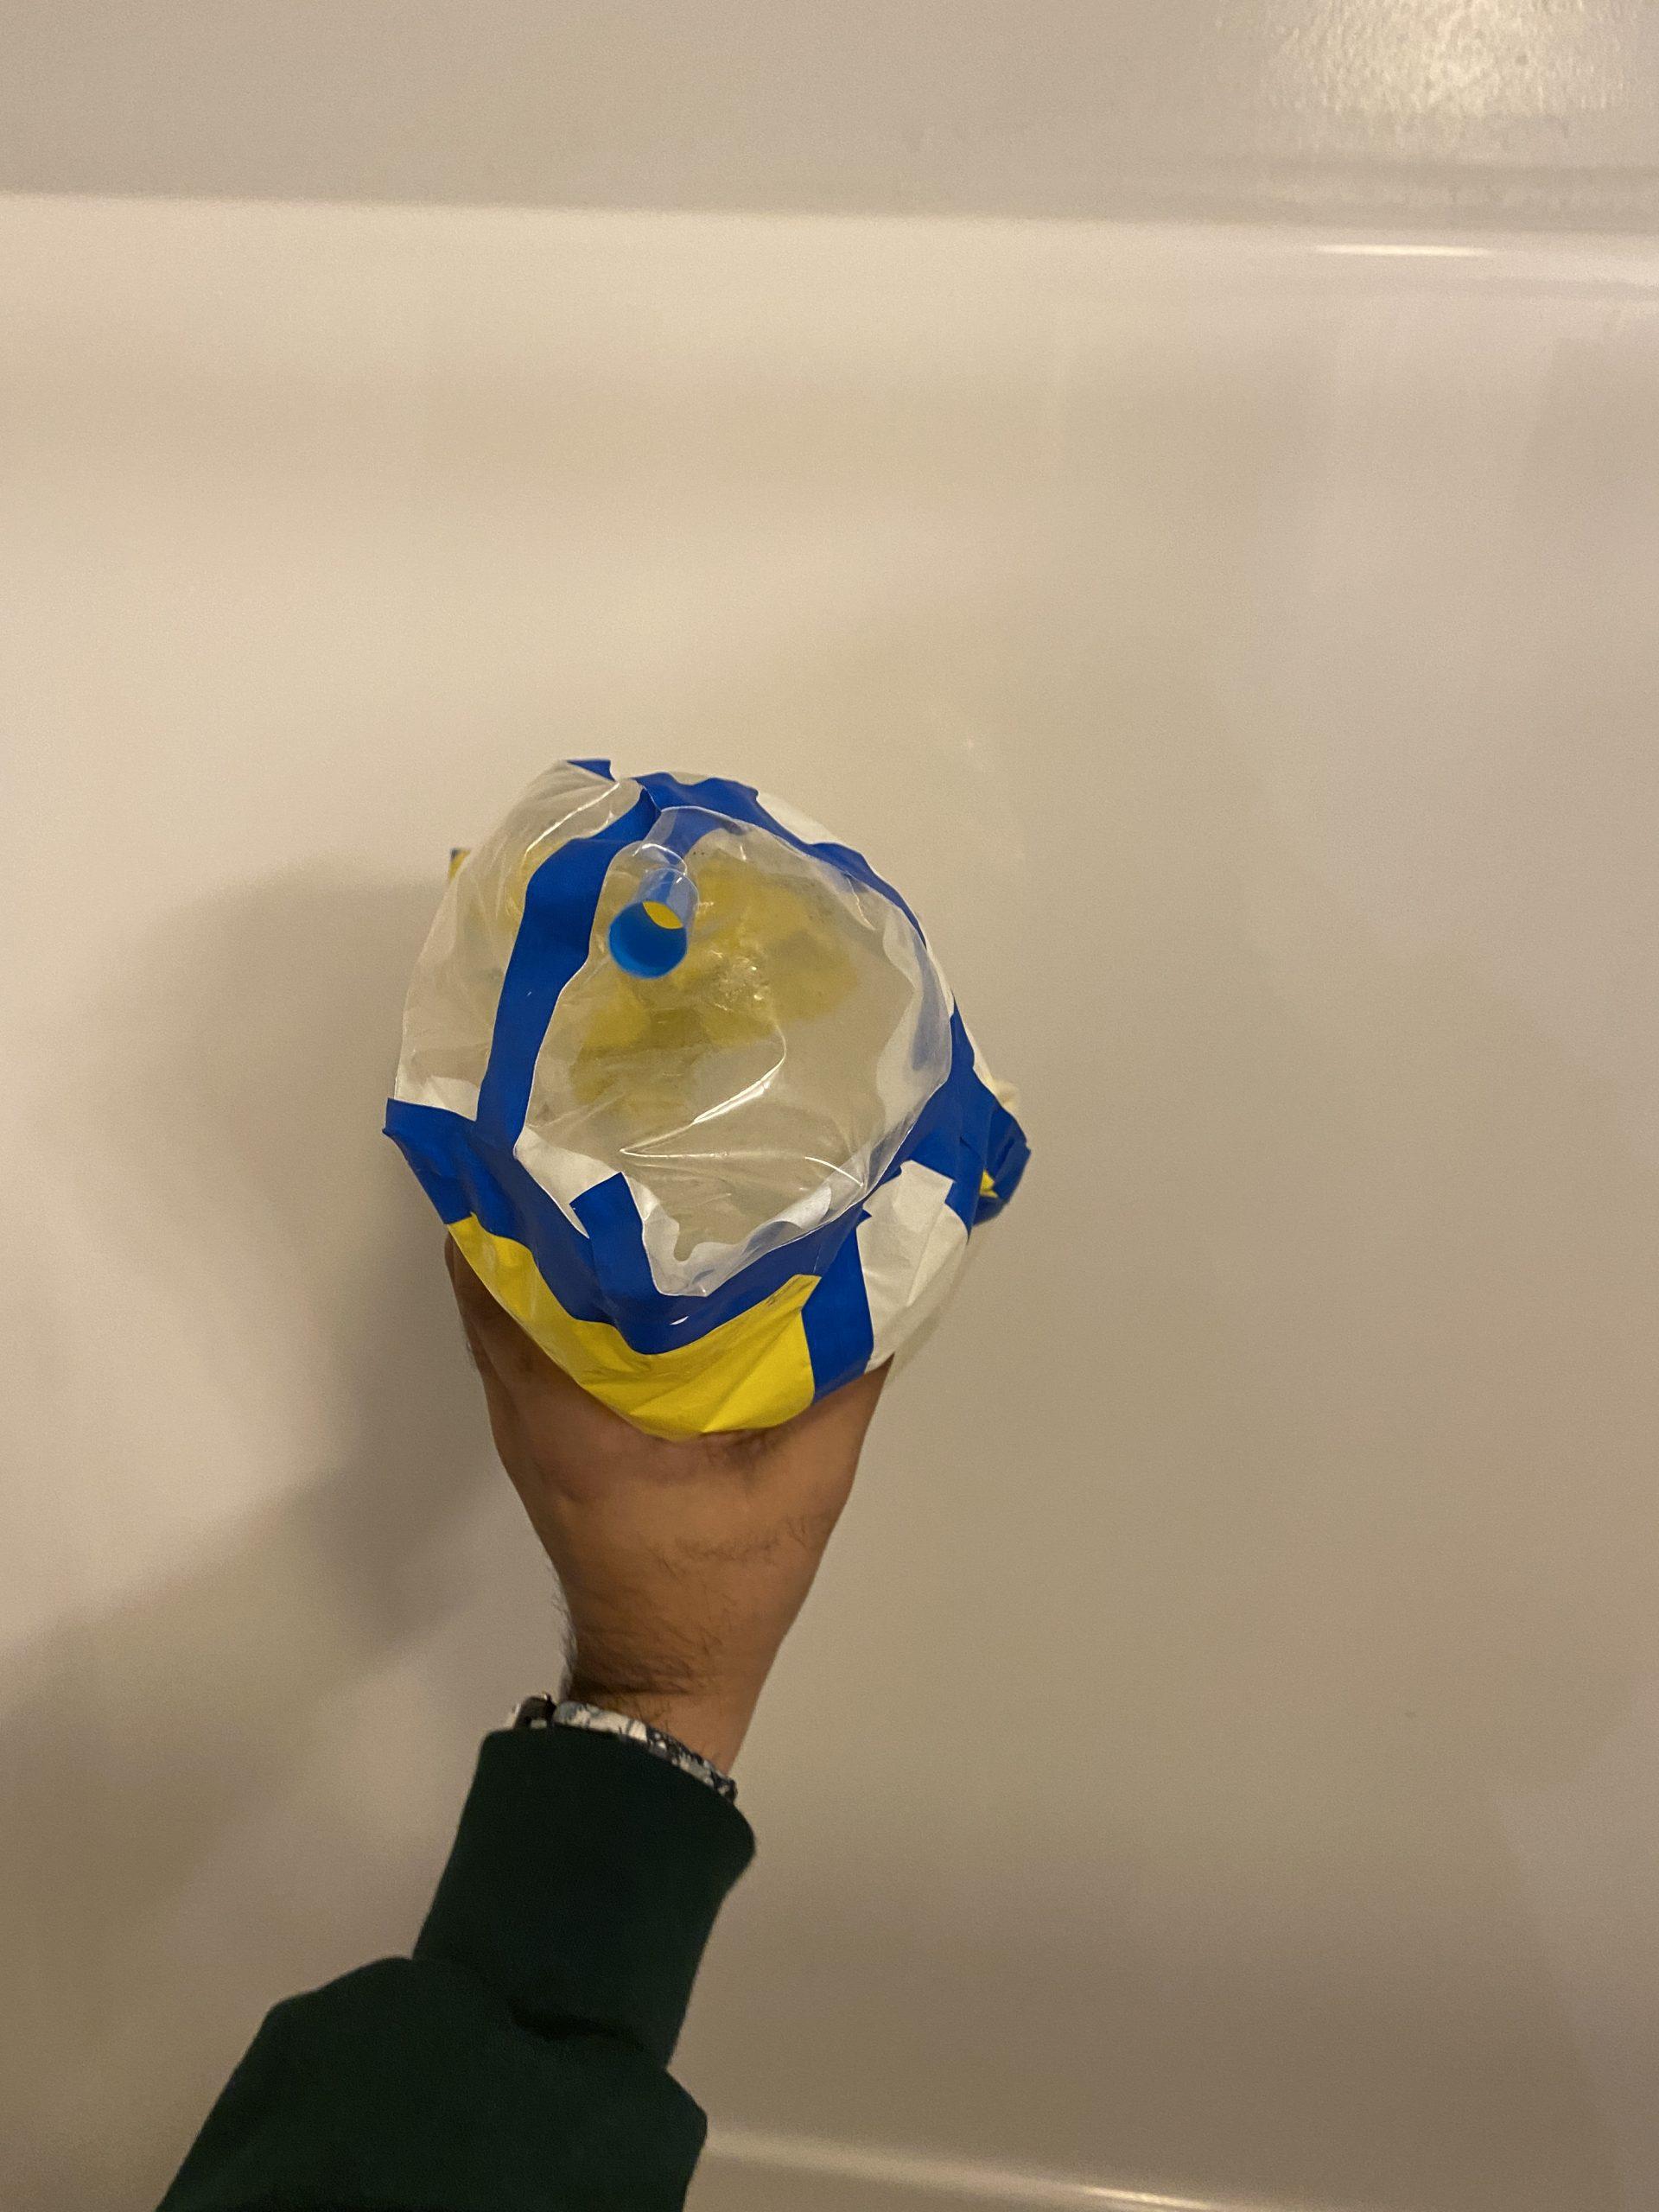
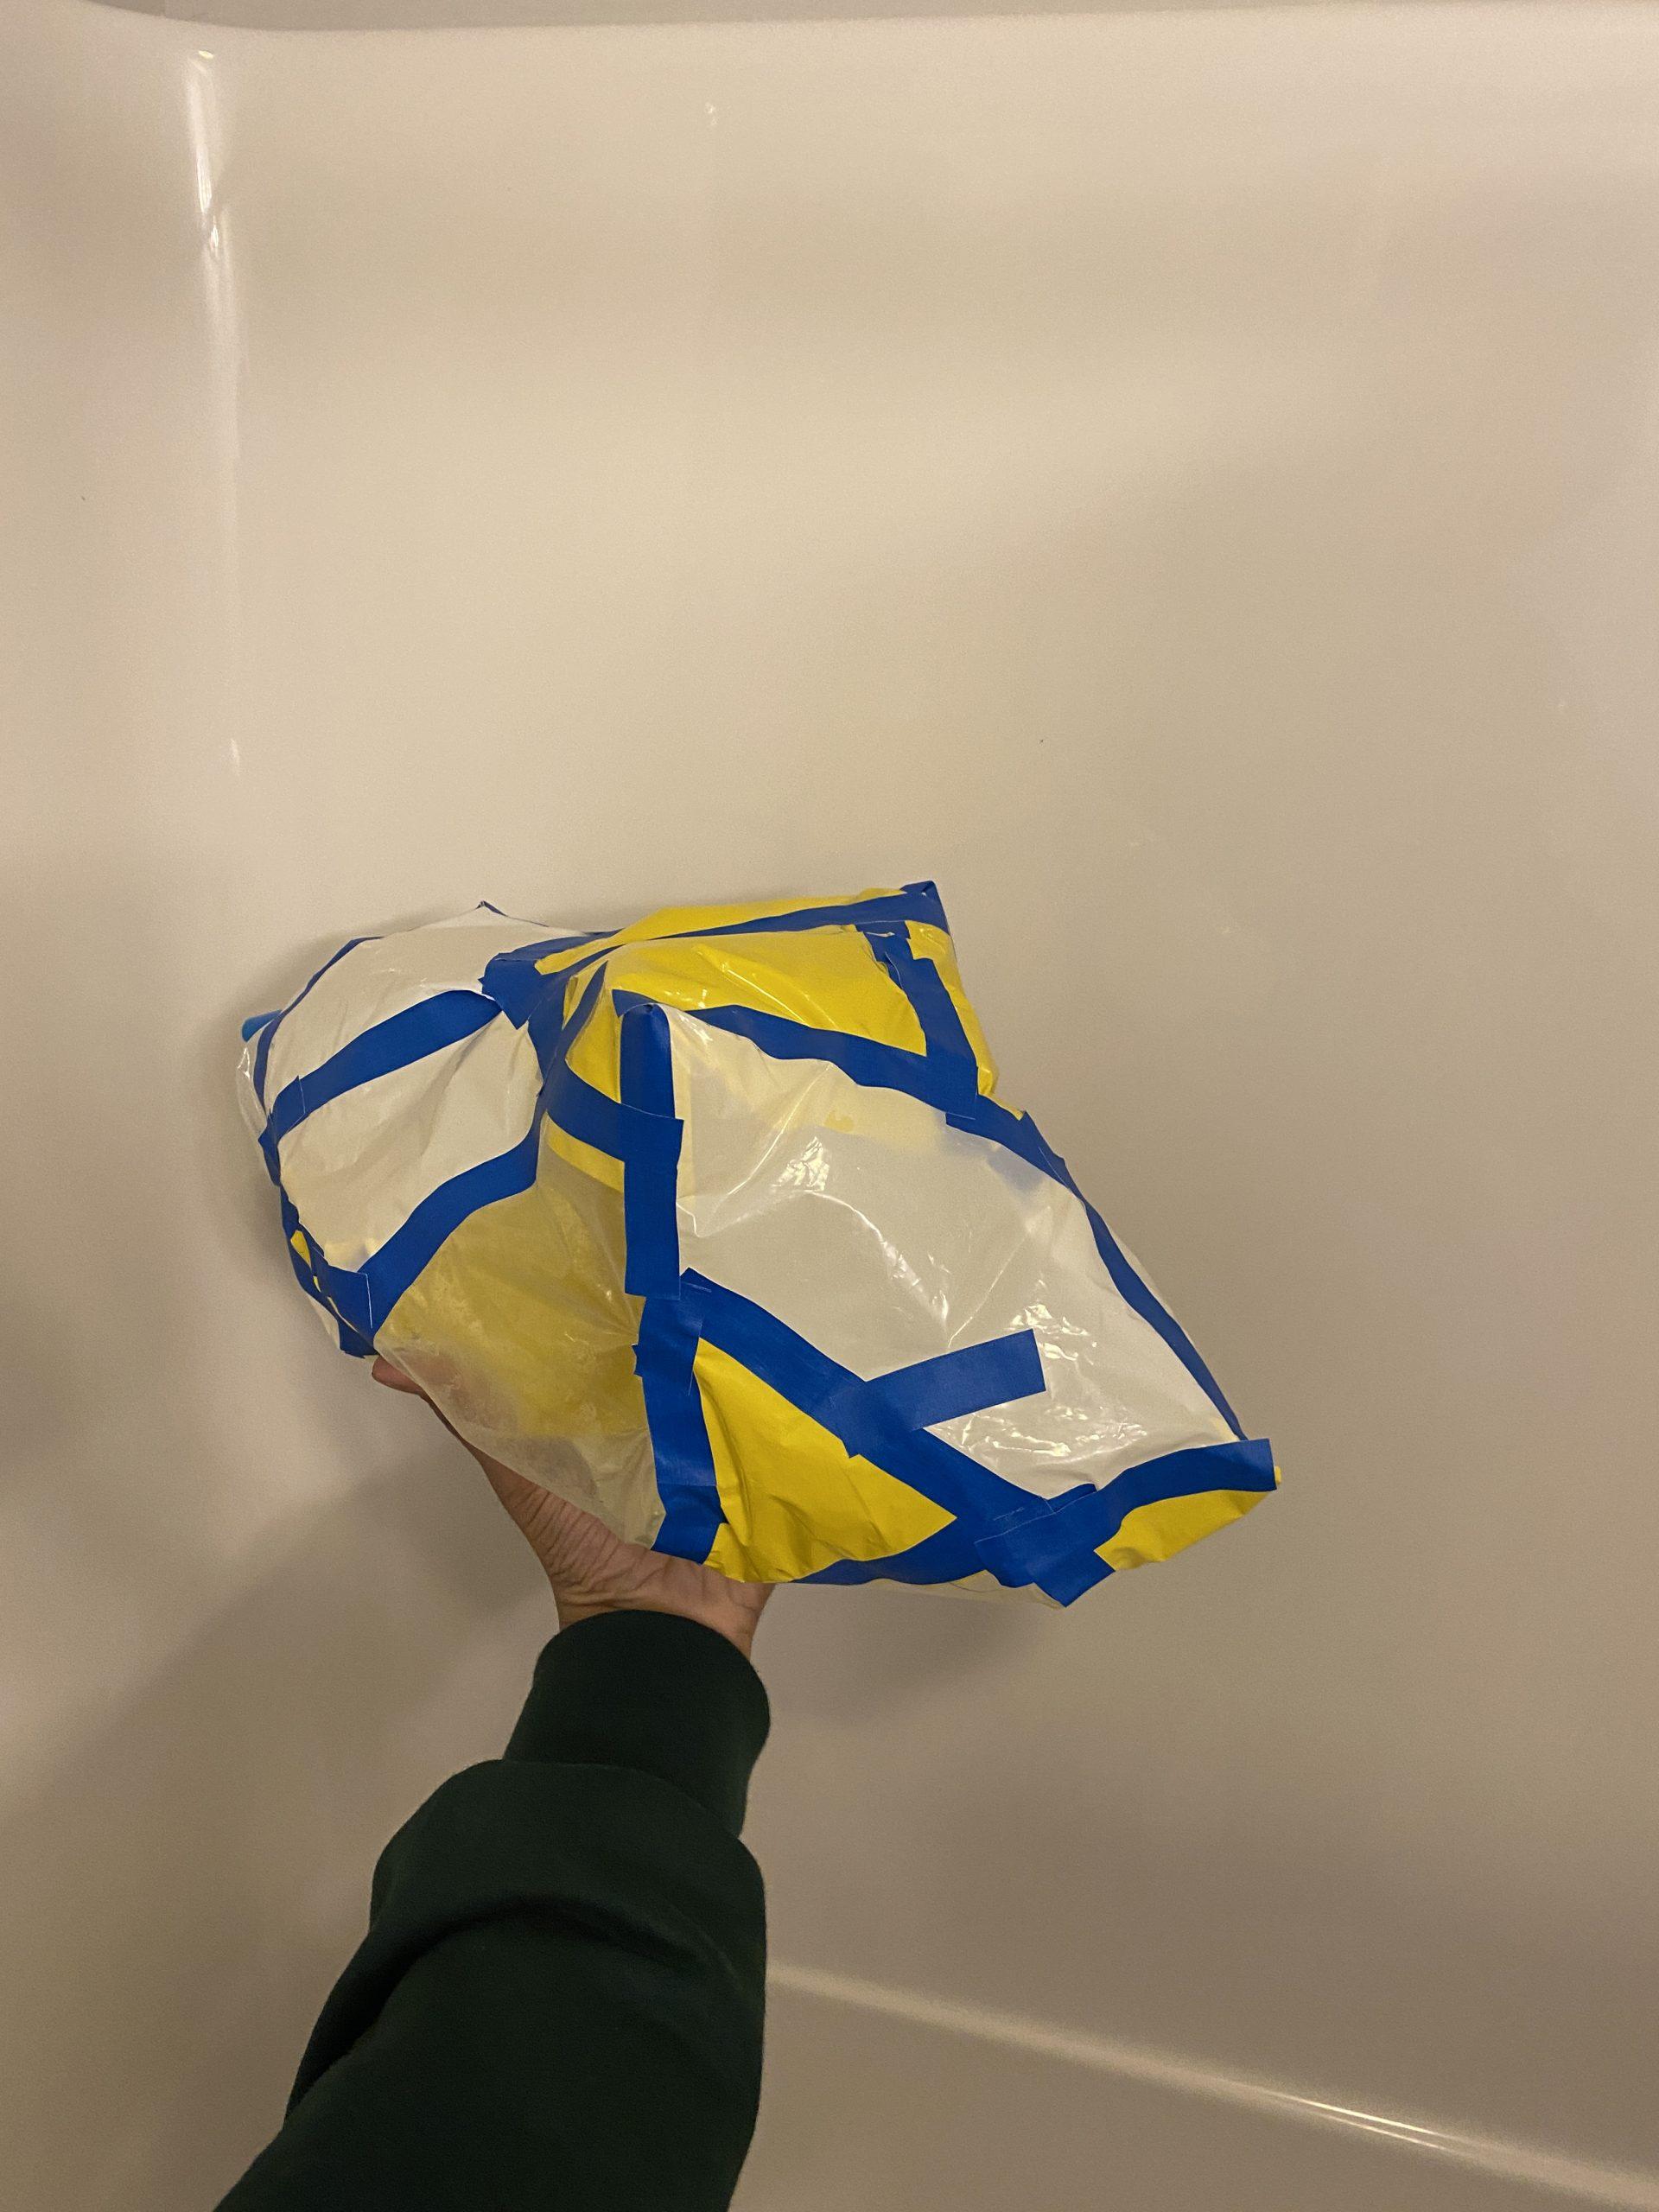
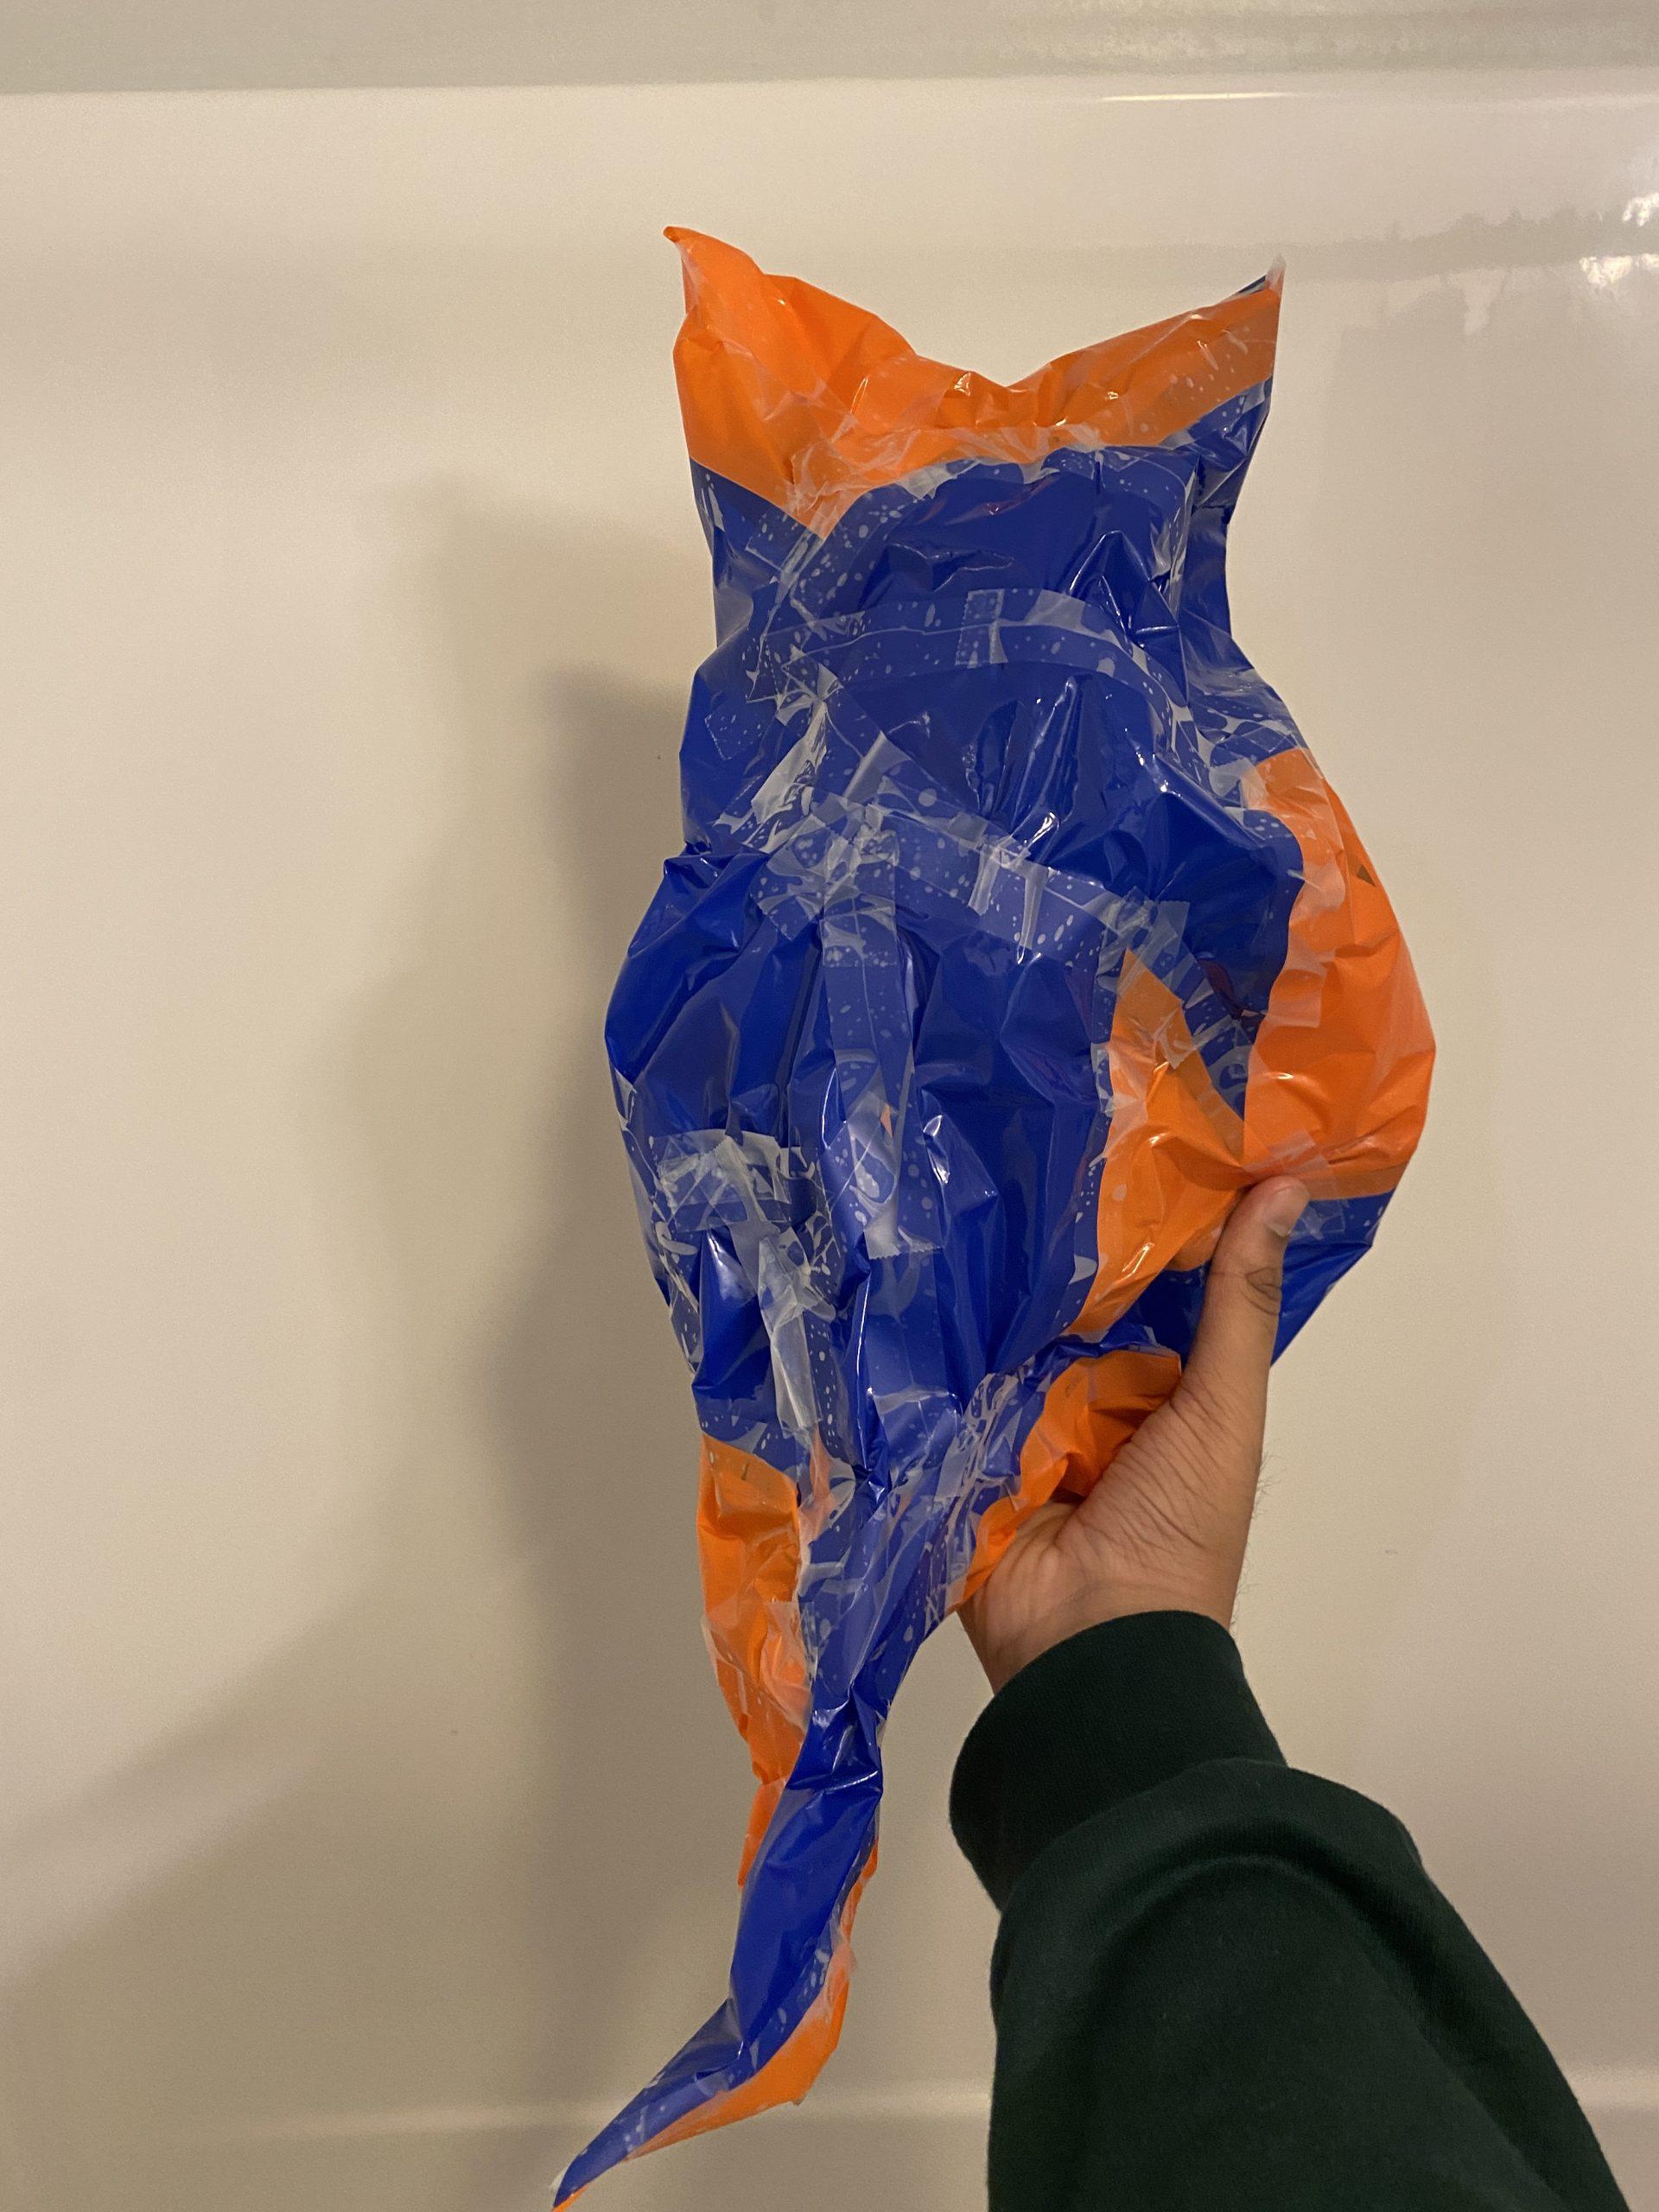
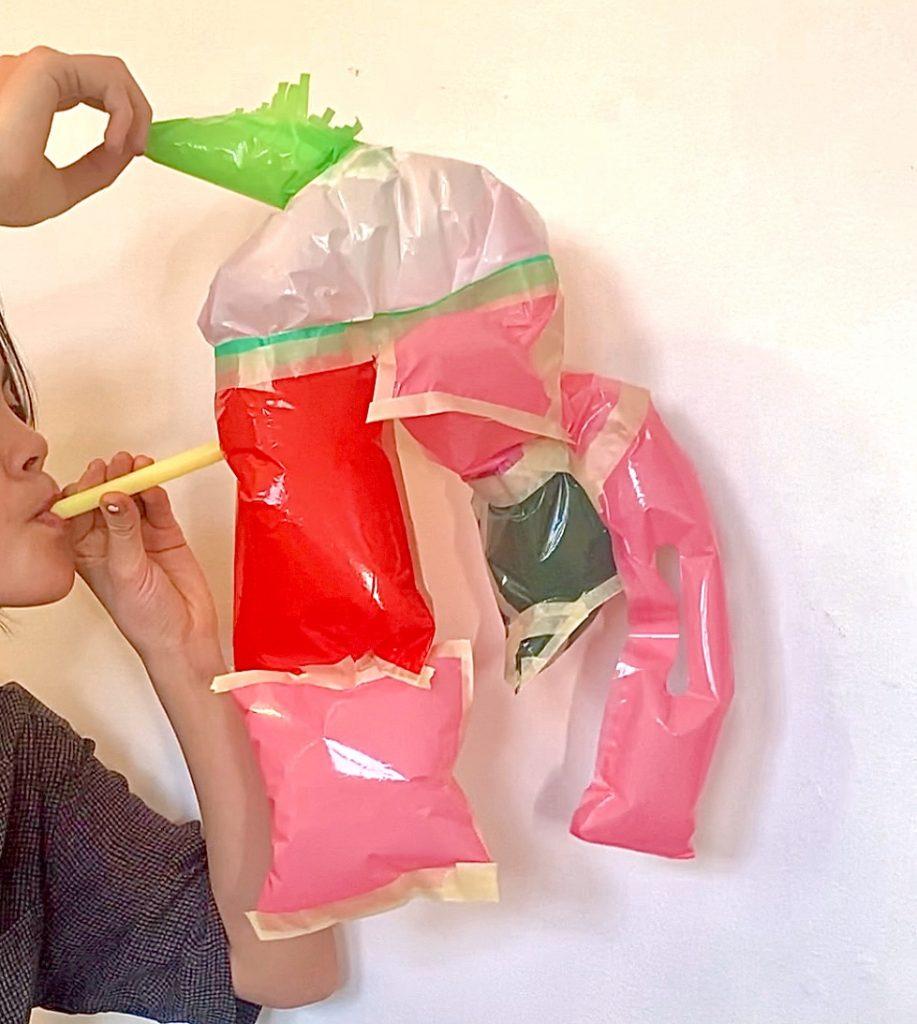
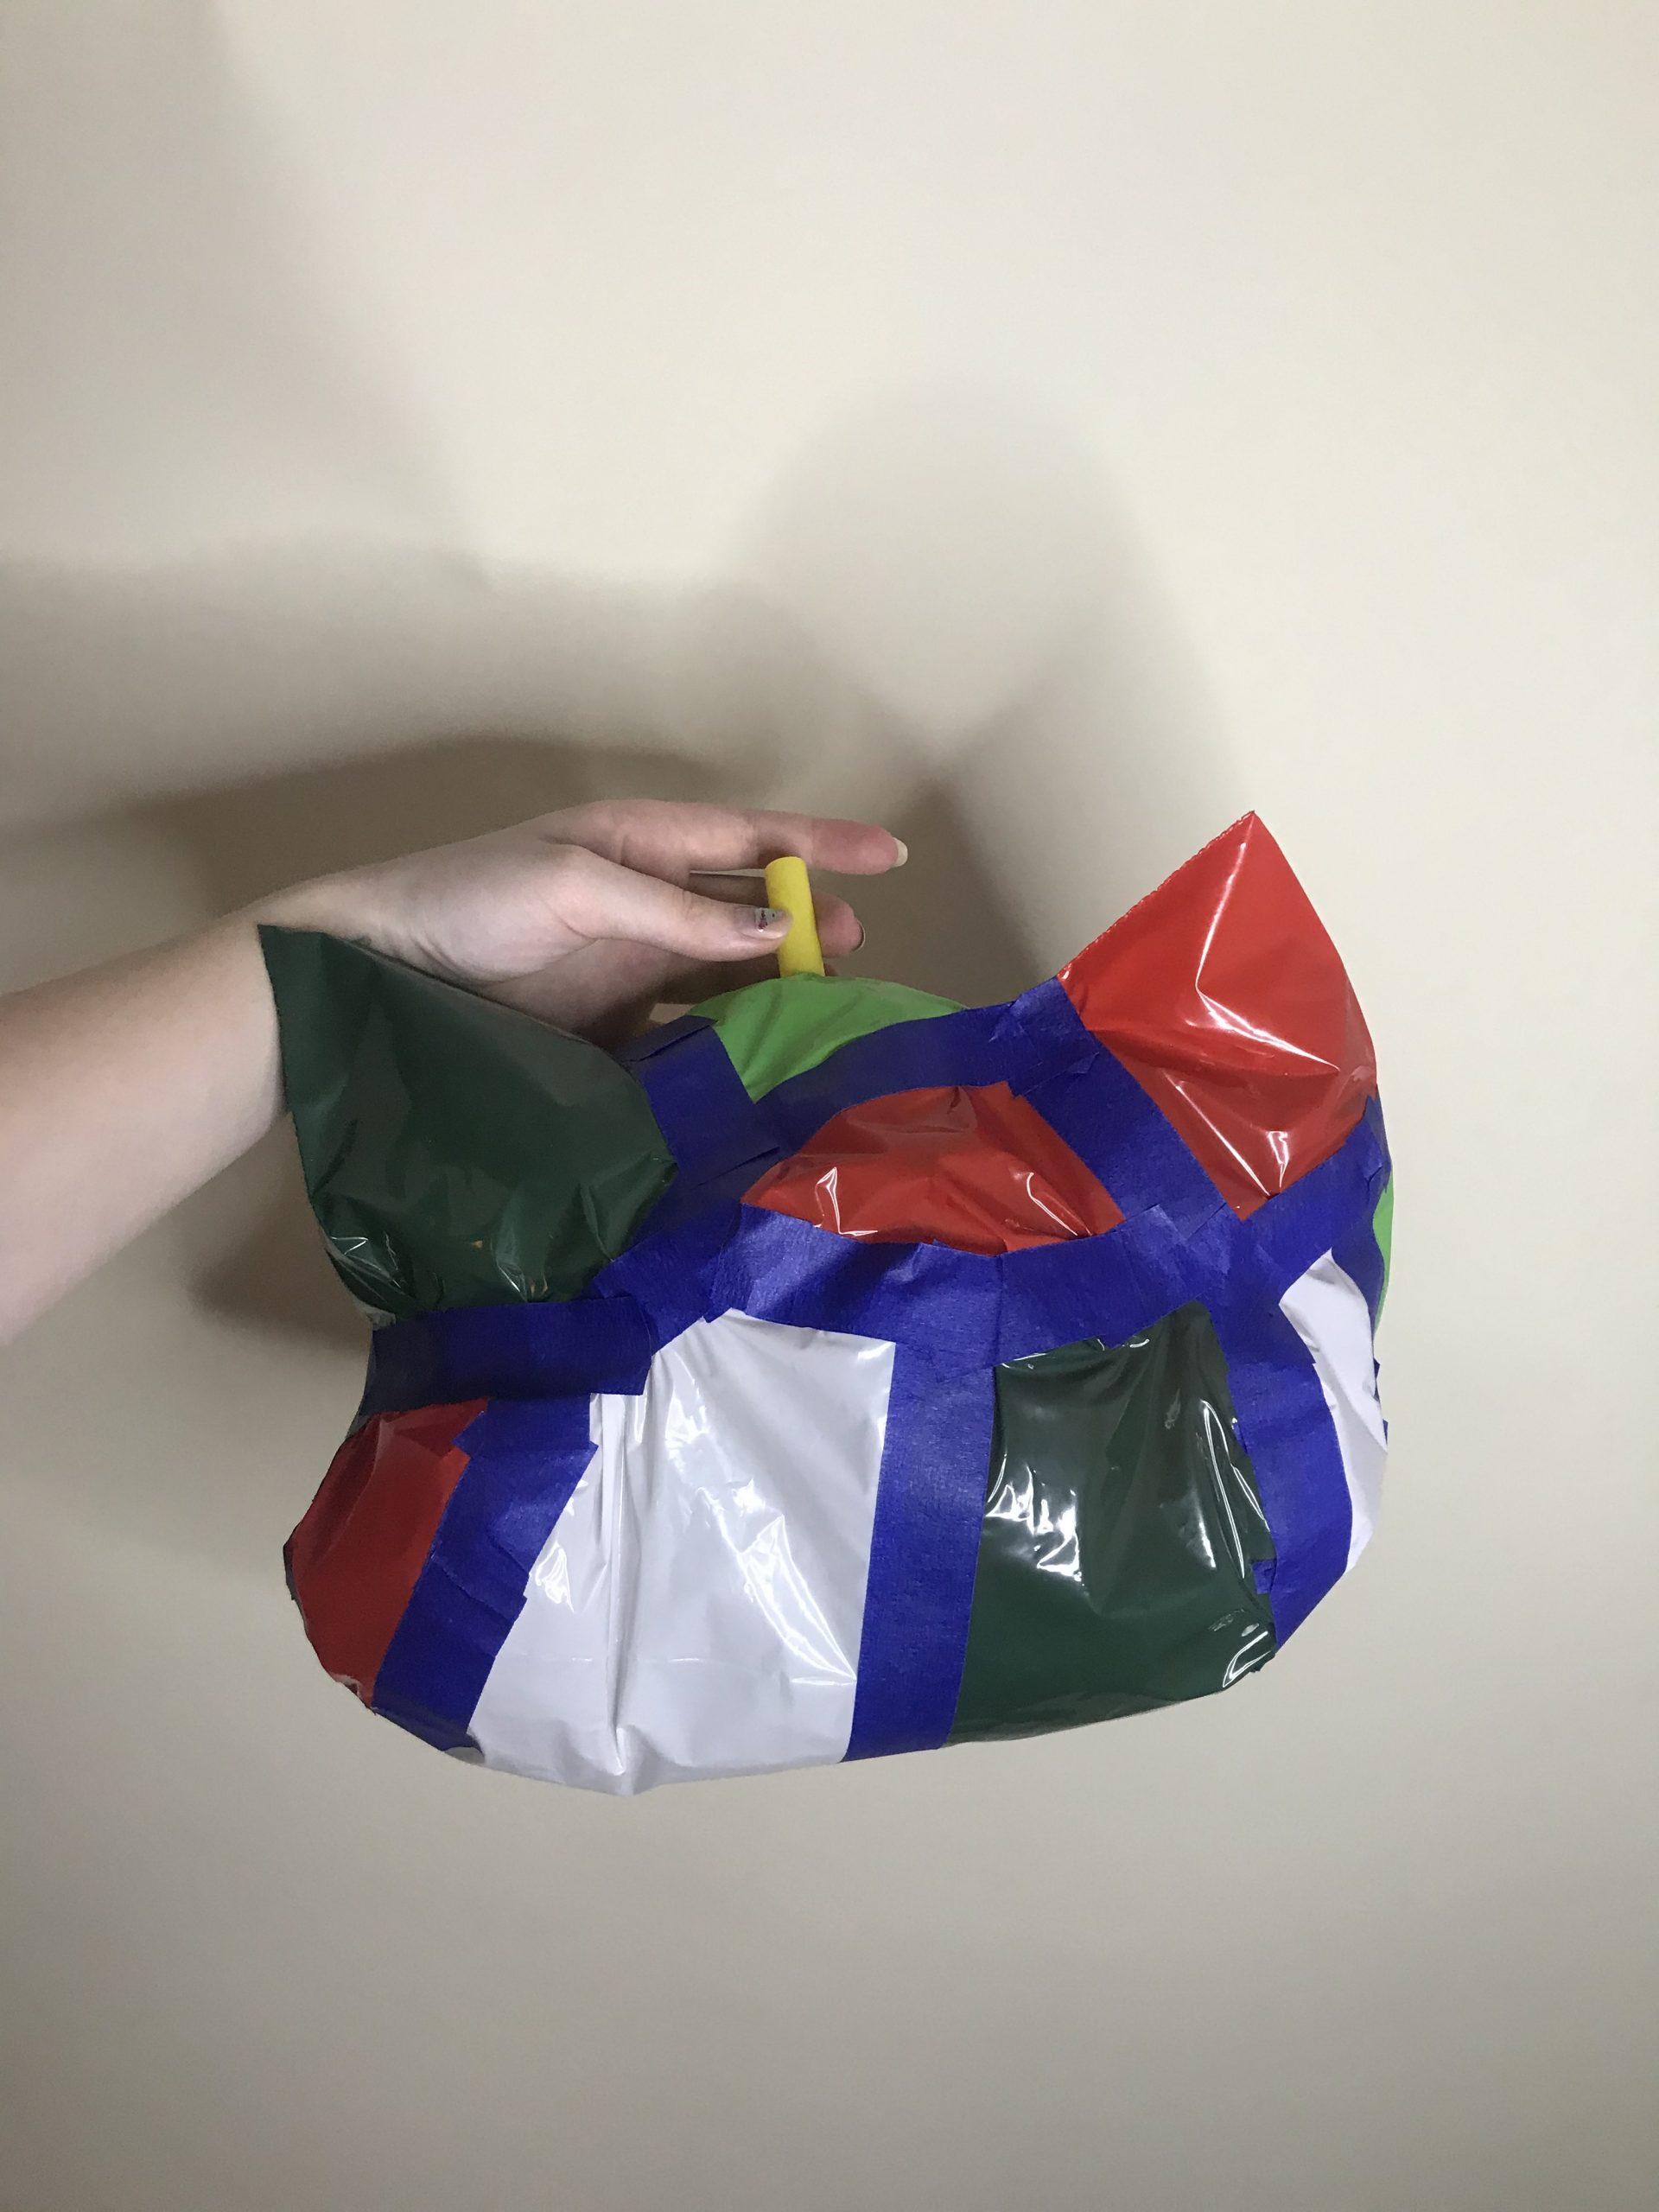
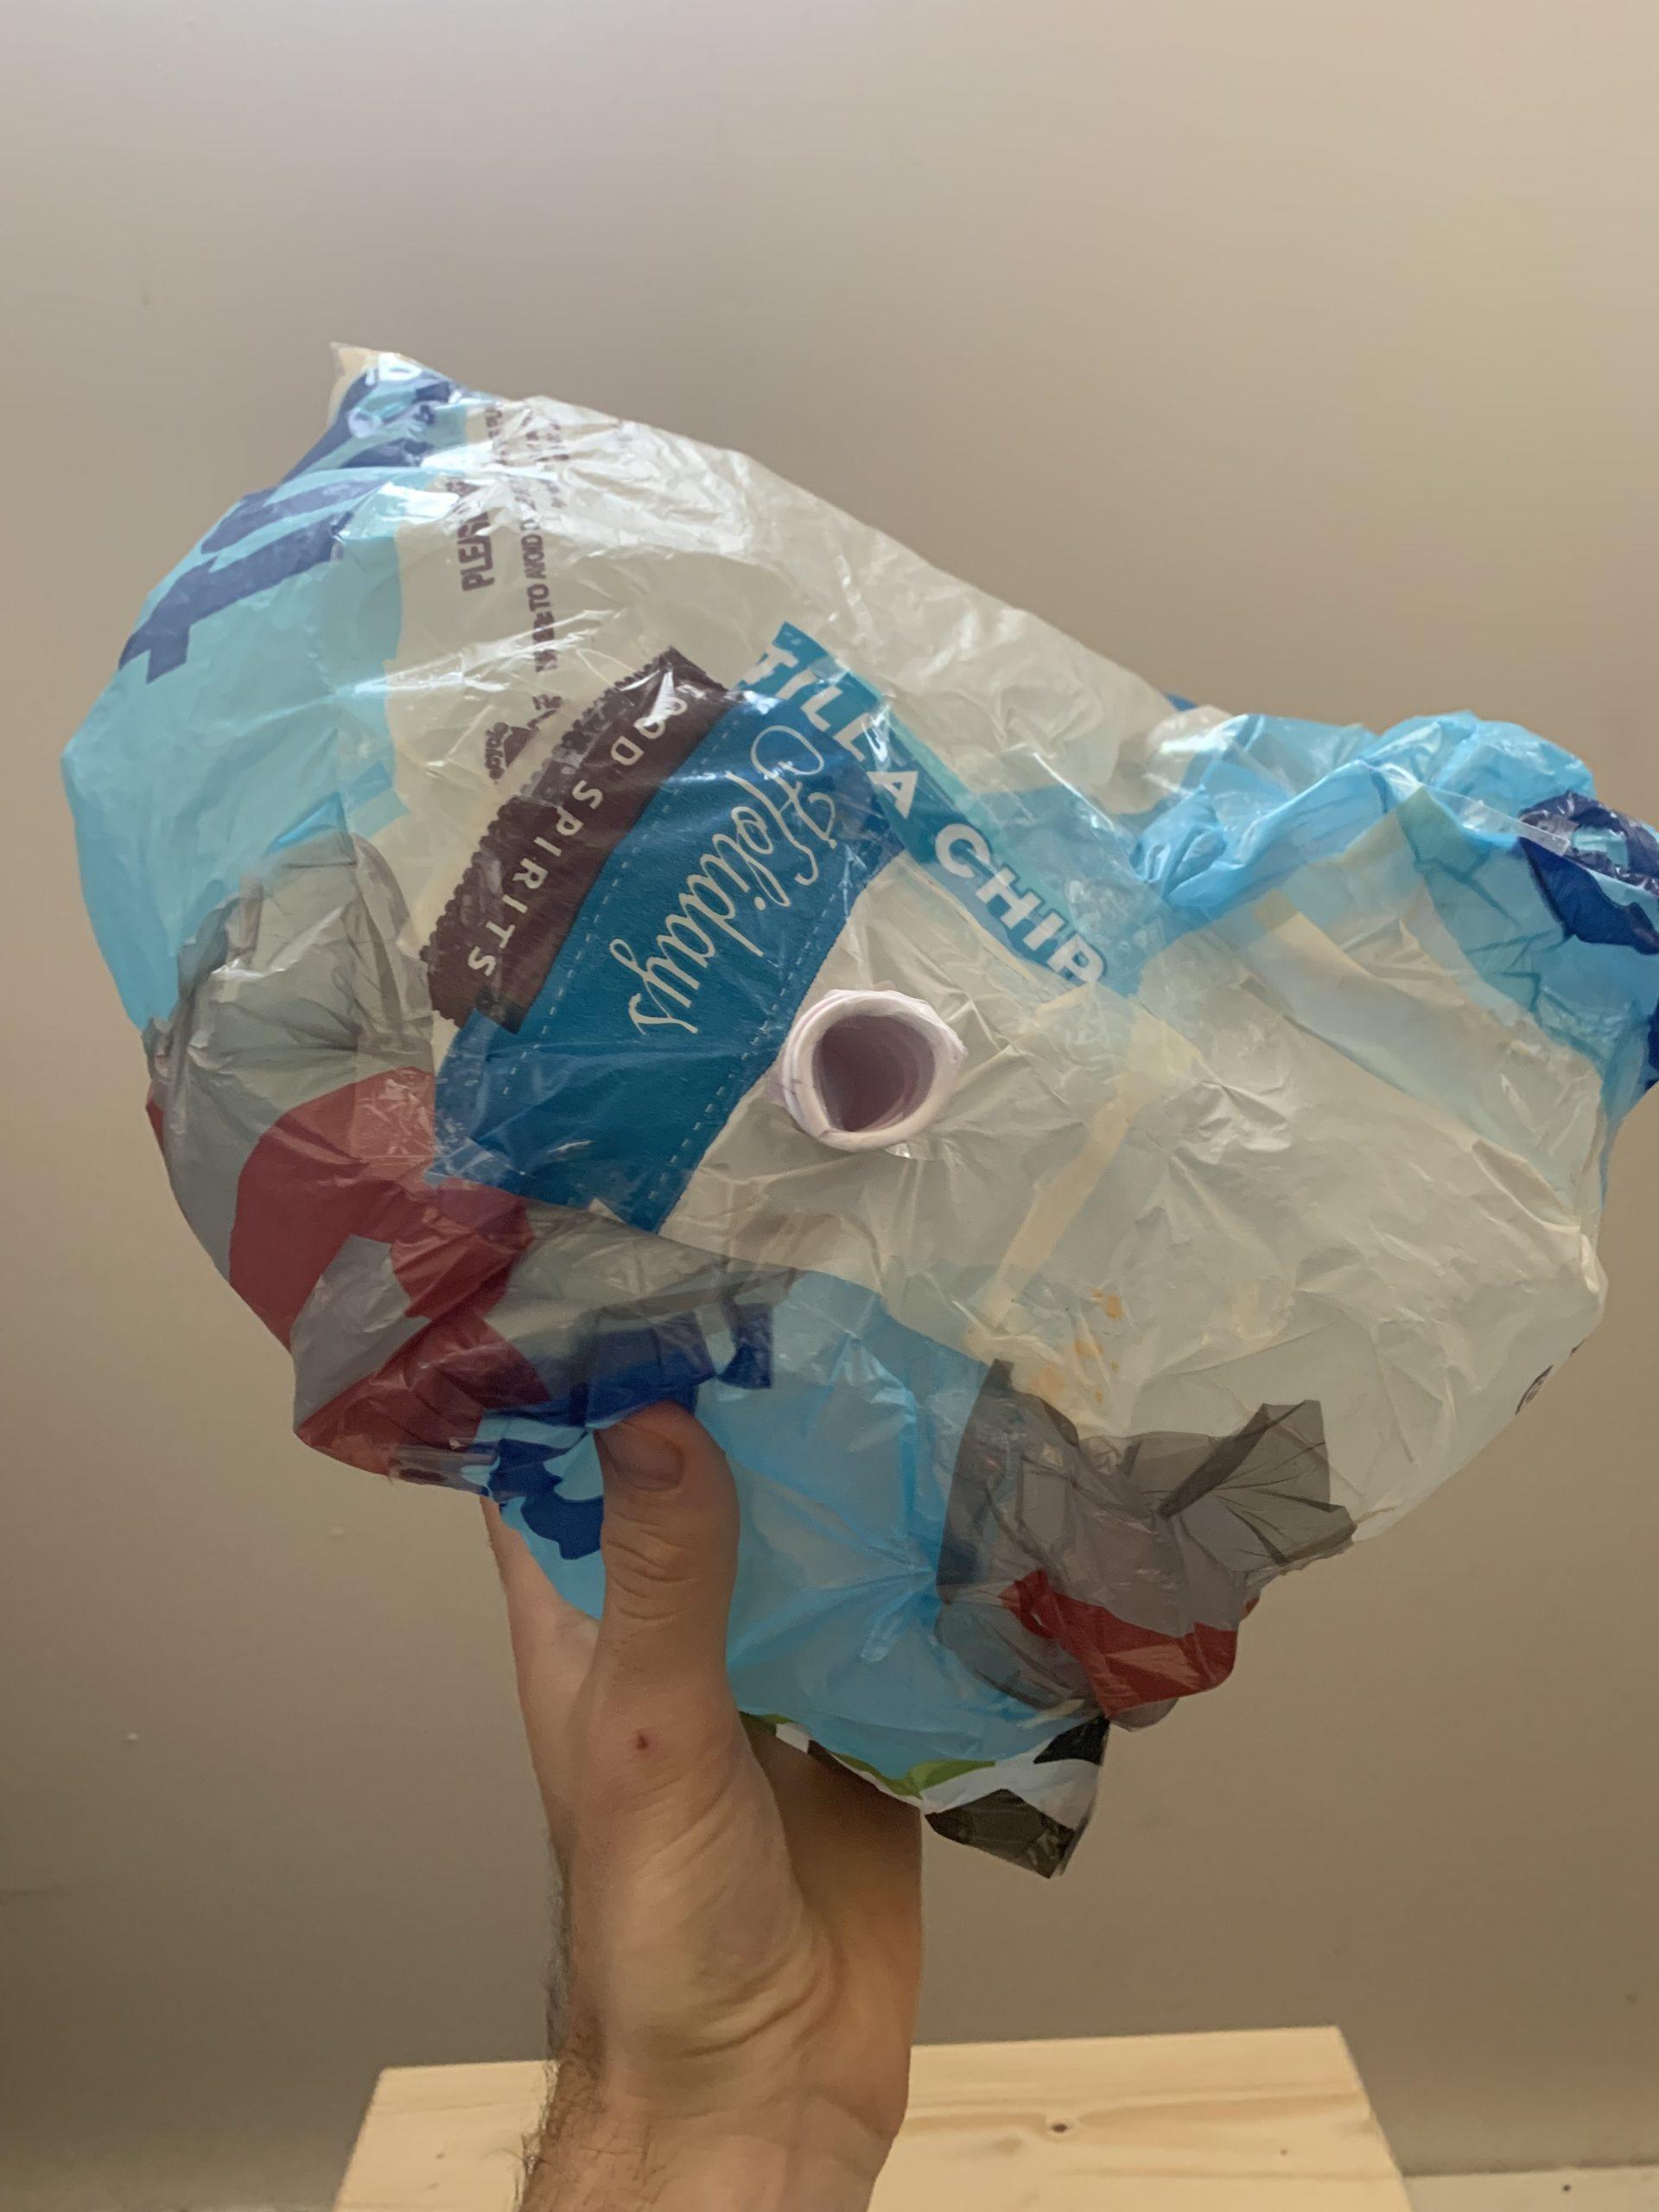
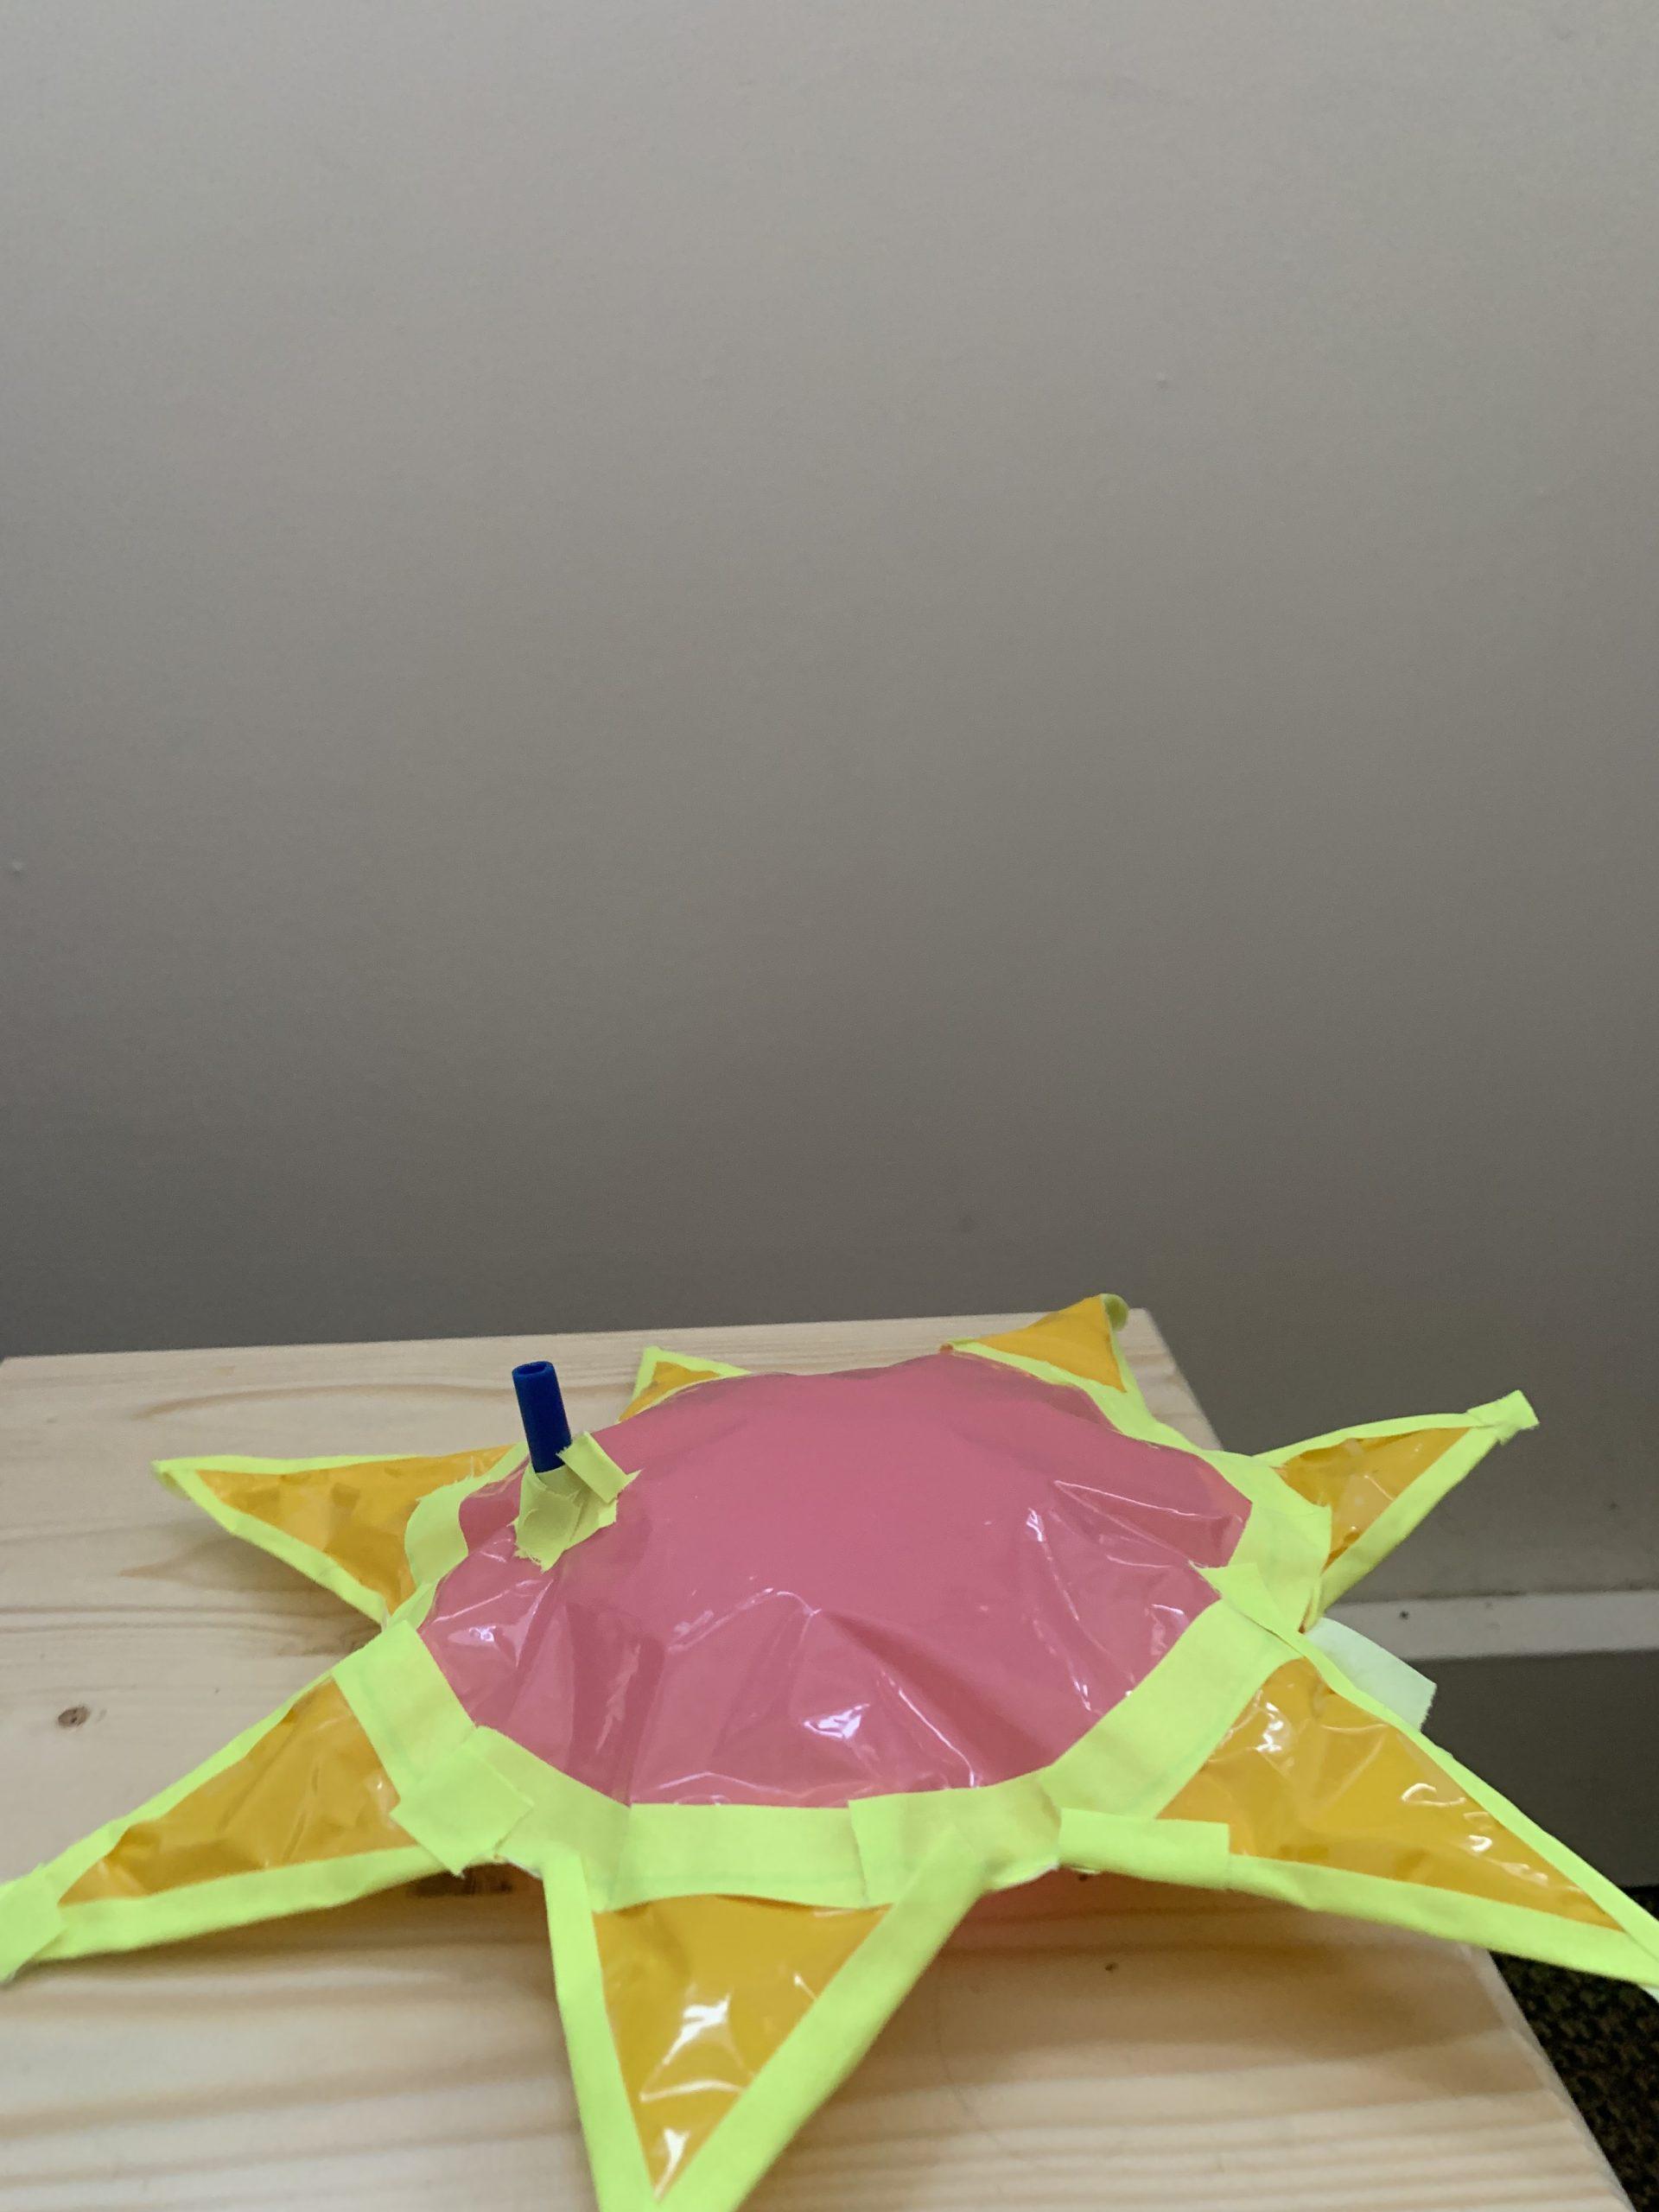
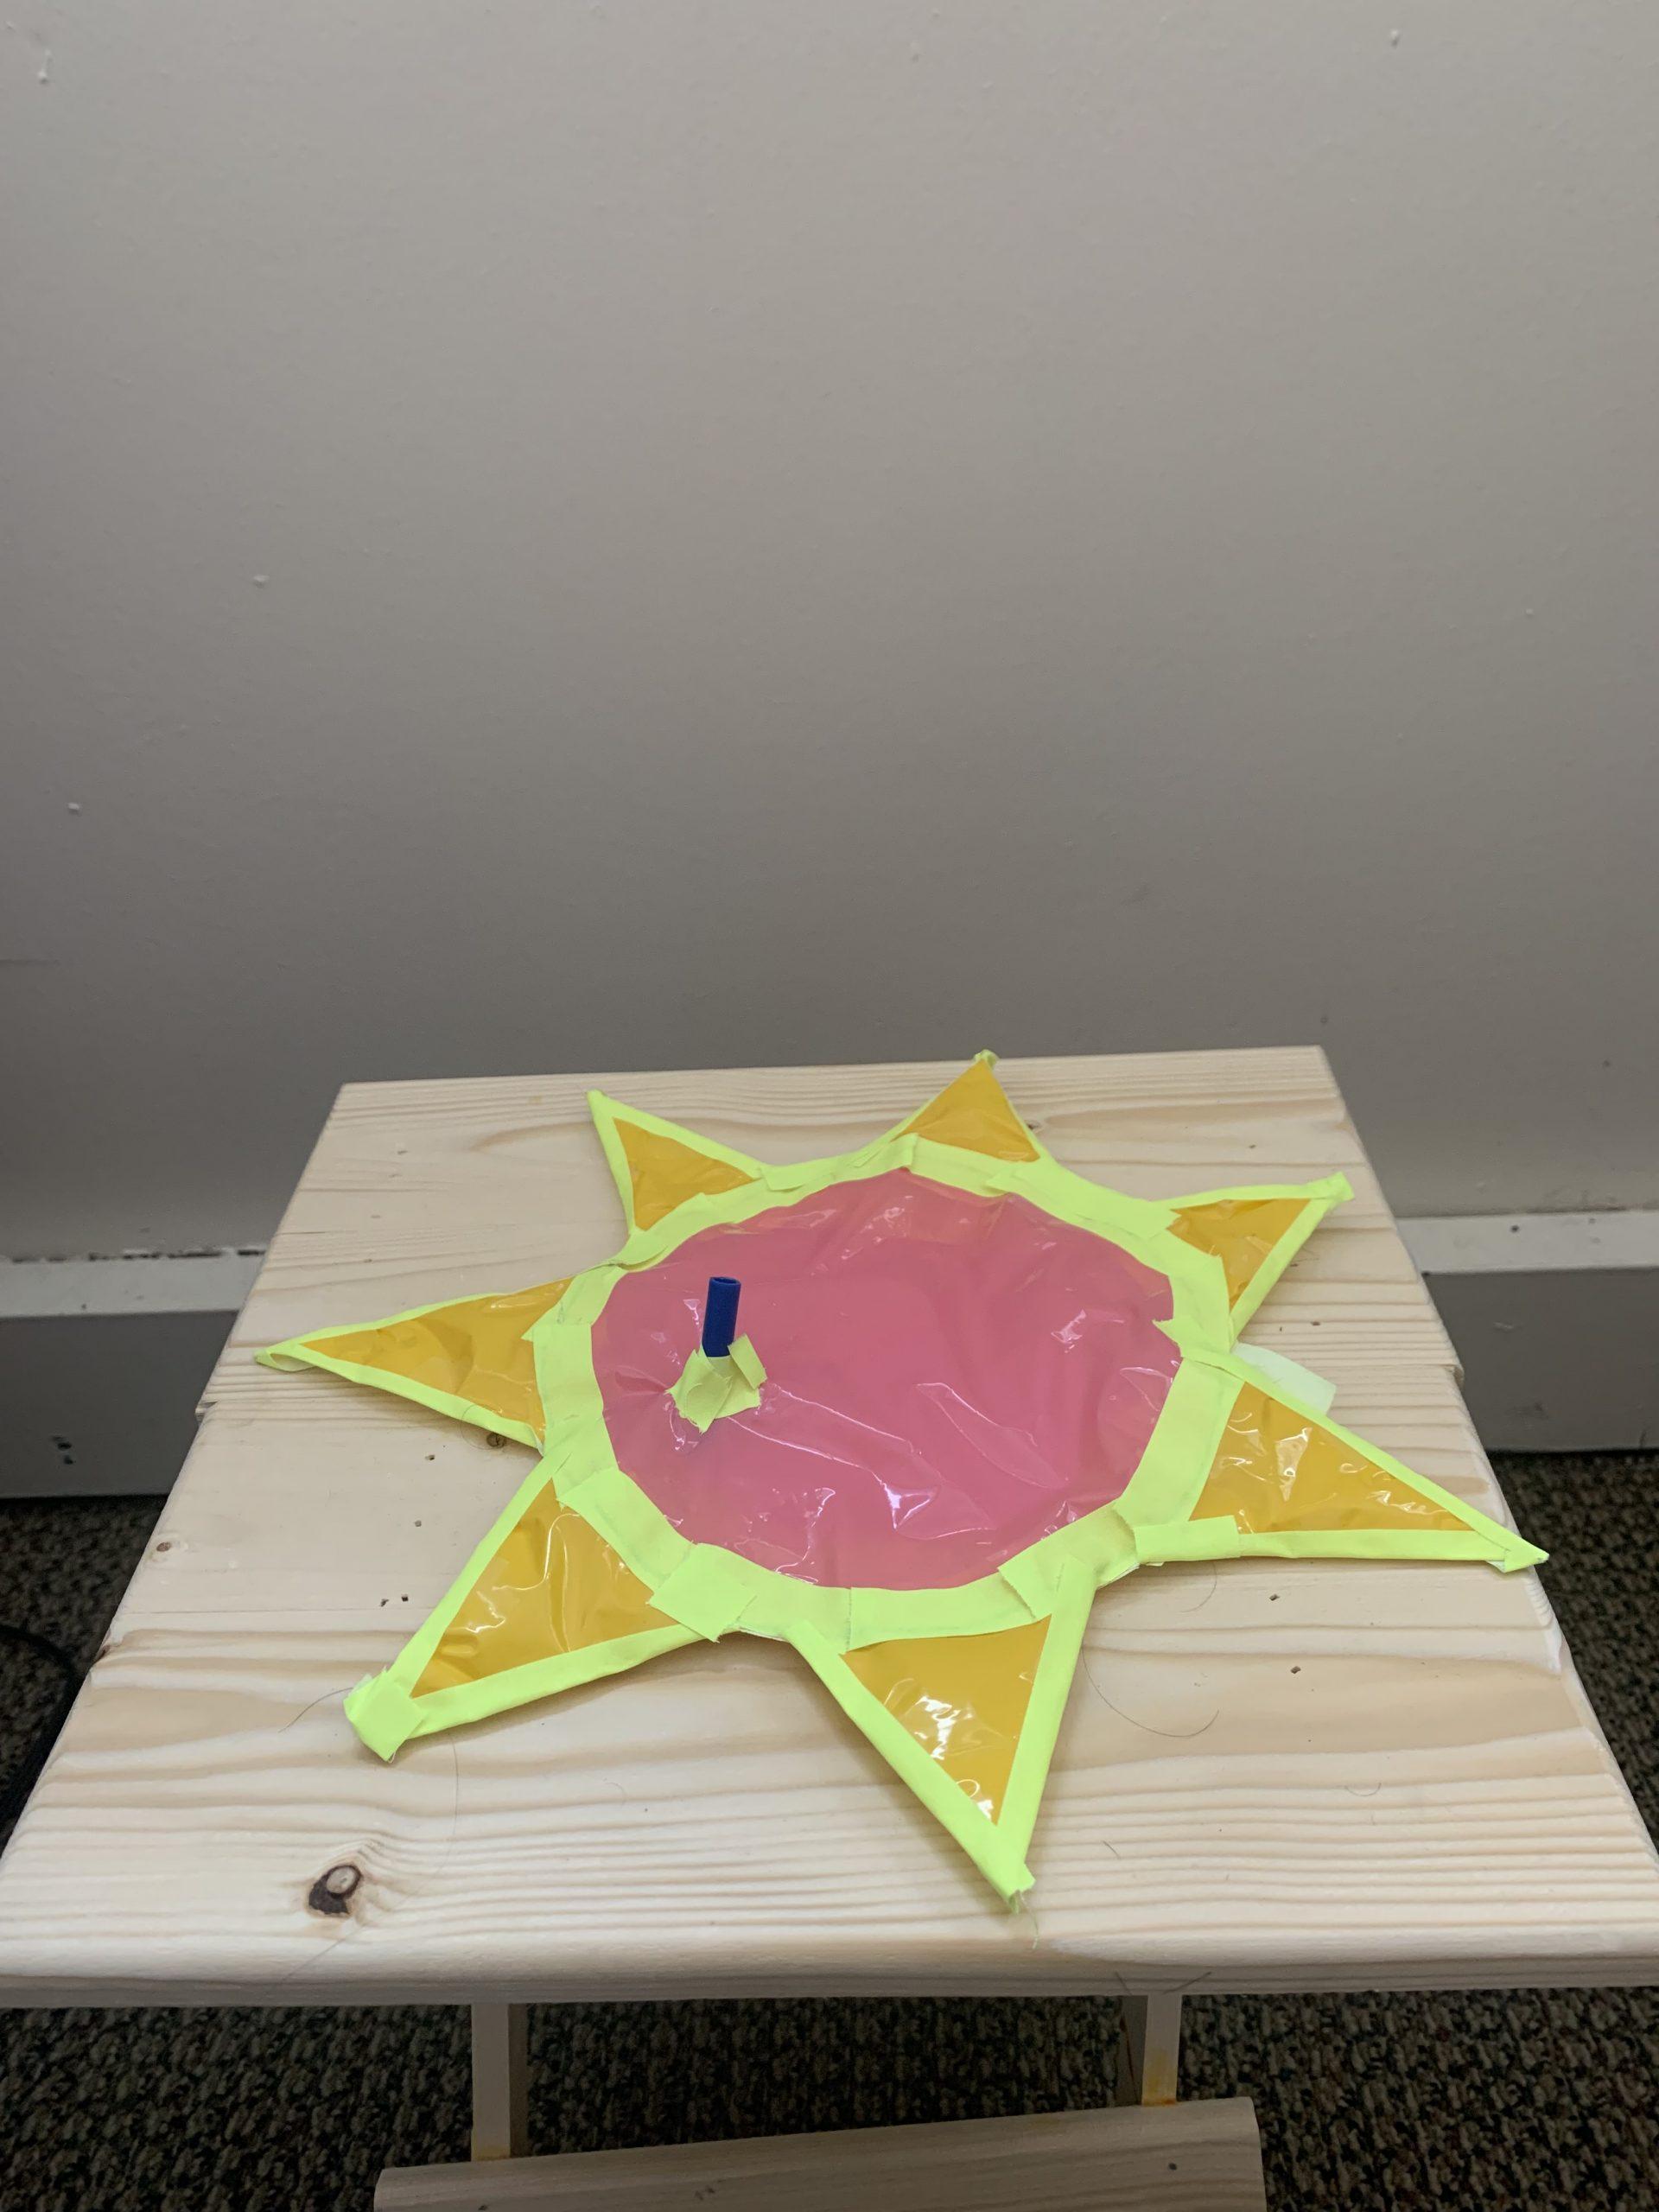
The sun/flower was the result of a post dinner communion drinking tea on the kitchen floor. An excited group of friends saw my supplies for this class and were inspired to join me making inflatables. To their dismay, it is a bit harder than they first thought and had to reel in their tremendous ideas of grandeur, ultimately making a non-inflated headdress, a bag (from pieces of a cut bag), a mitten like structure, and a “floaty”. From this night of arts and crafts, was born an interesting play on how to play with a 2D image of an inflatable. The uniqueness of this third inflatable is the fact that when deflated, one will claim it is a sunflower, though when inflated, the pillow like sphere and conical petals create a firey sun effect.

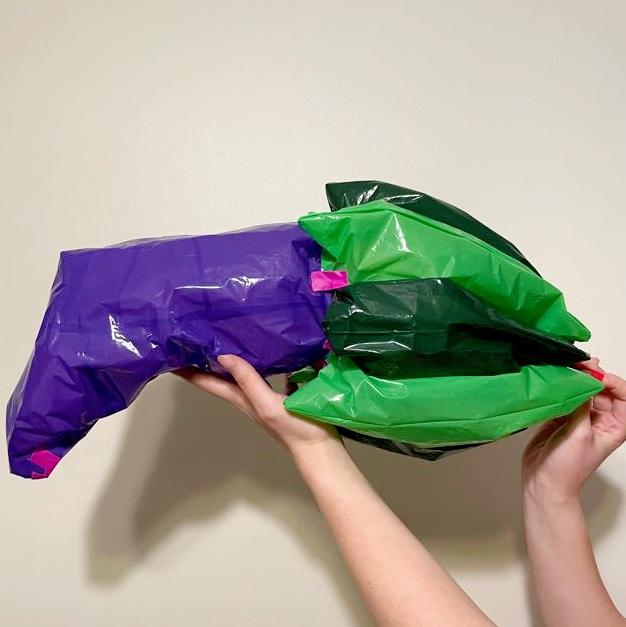
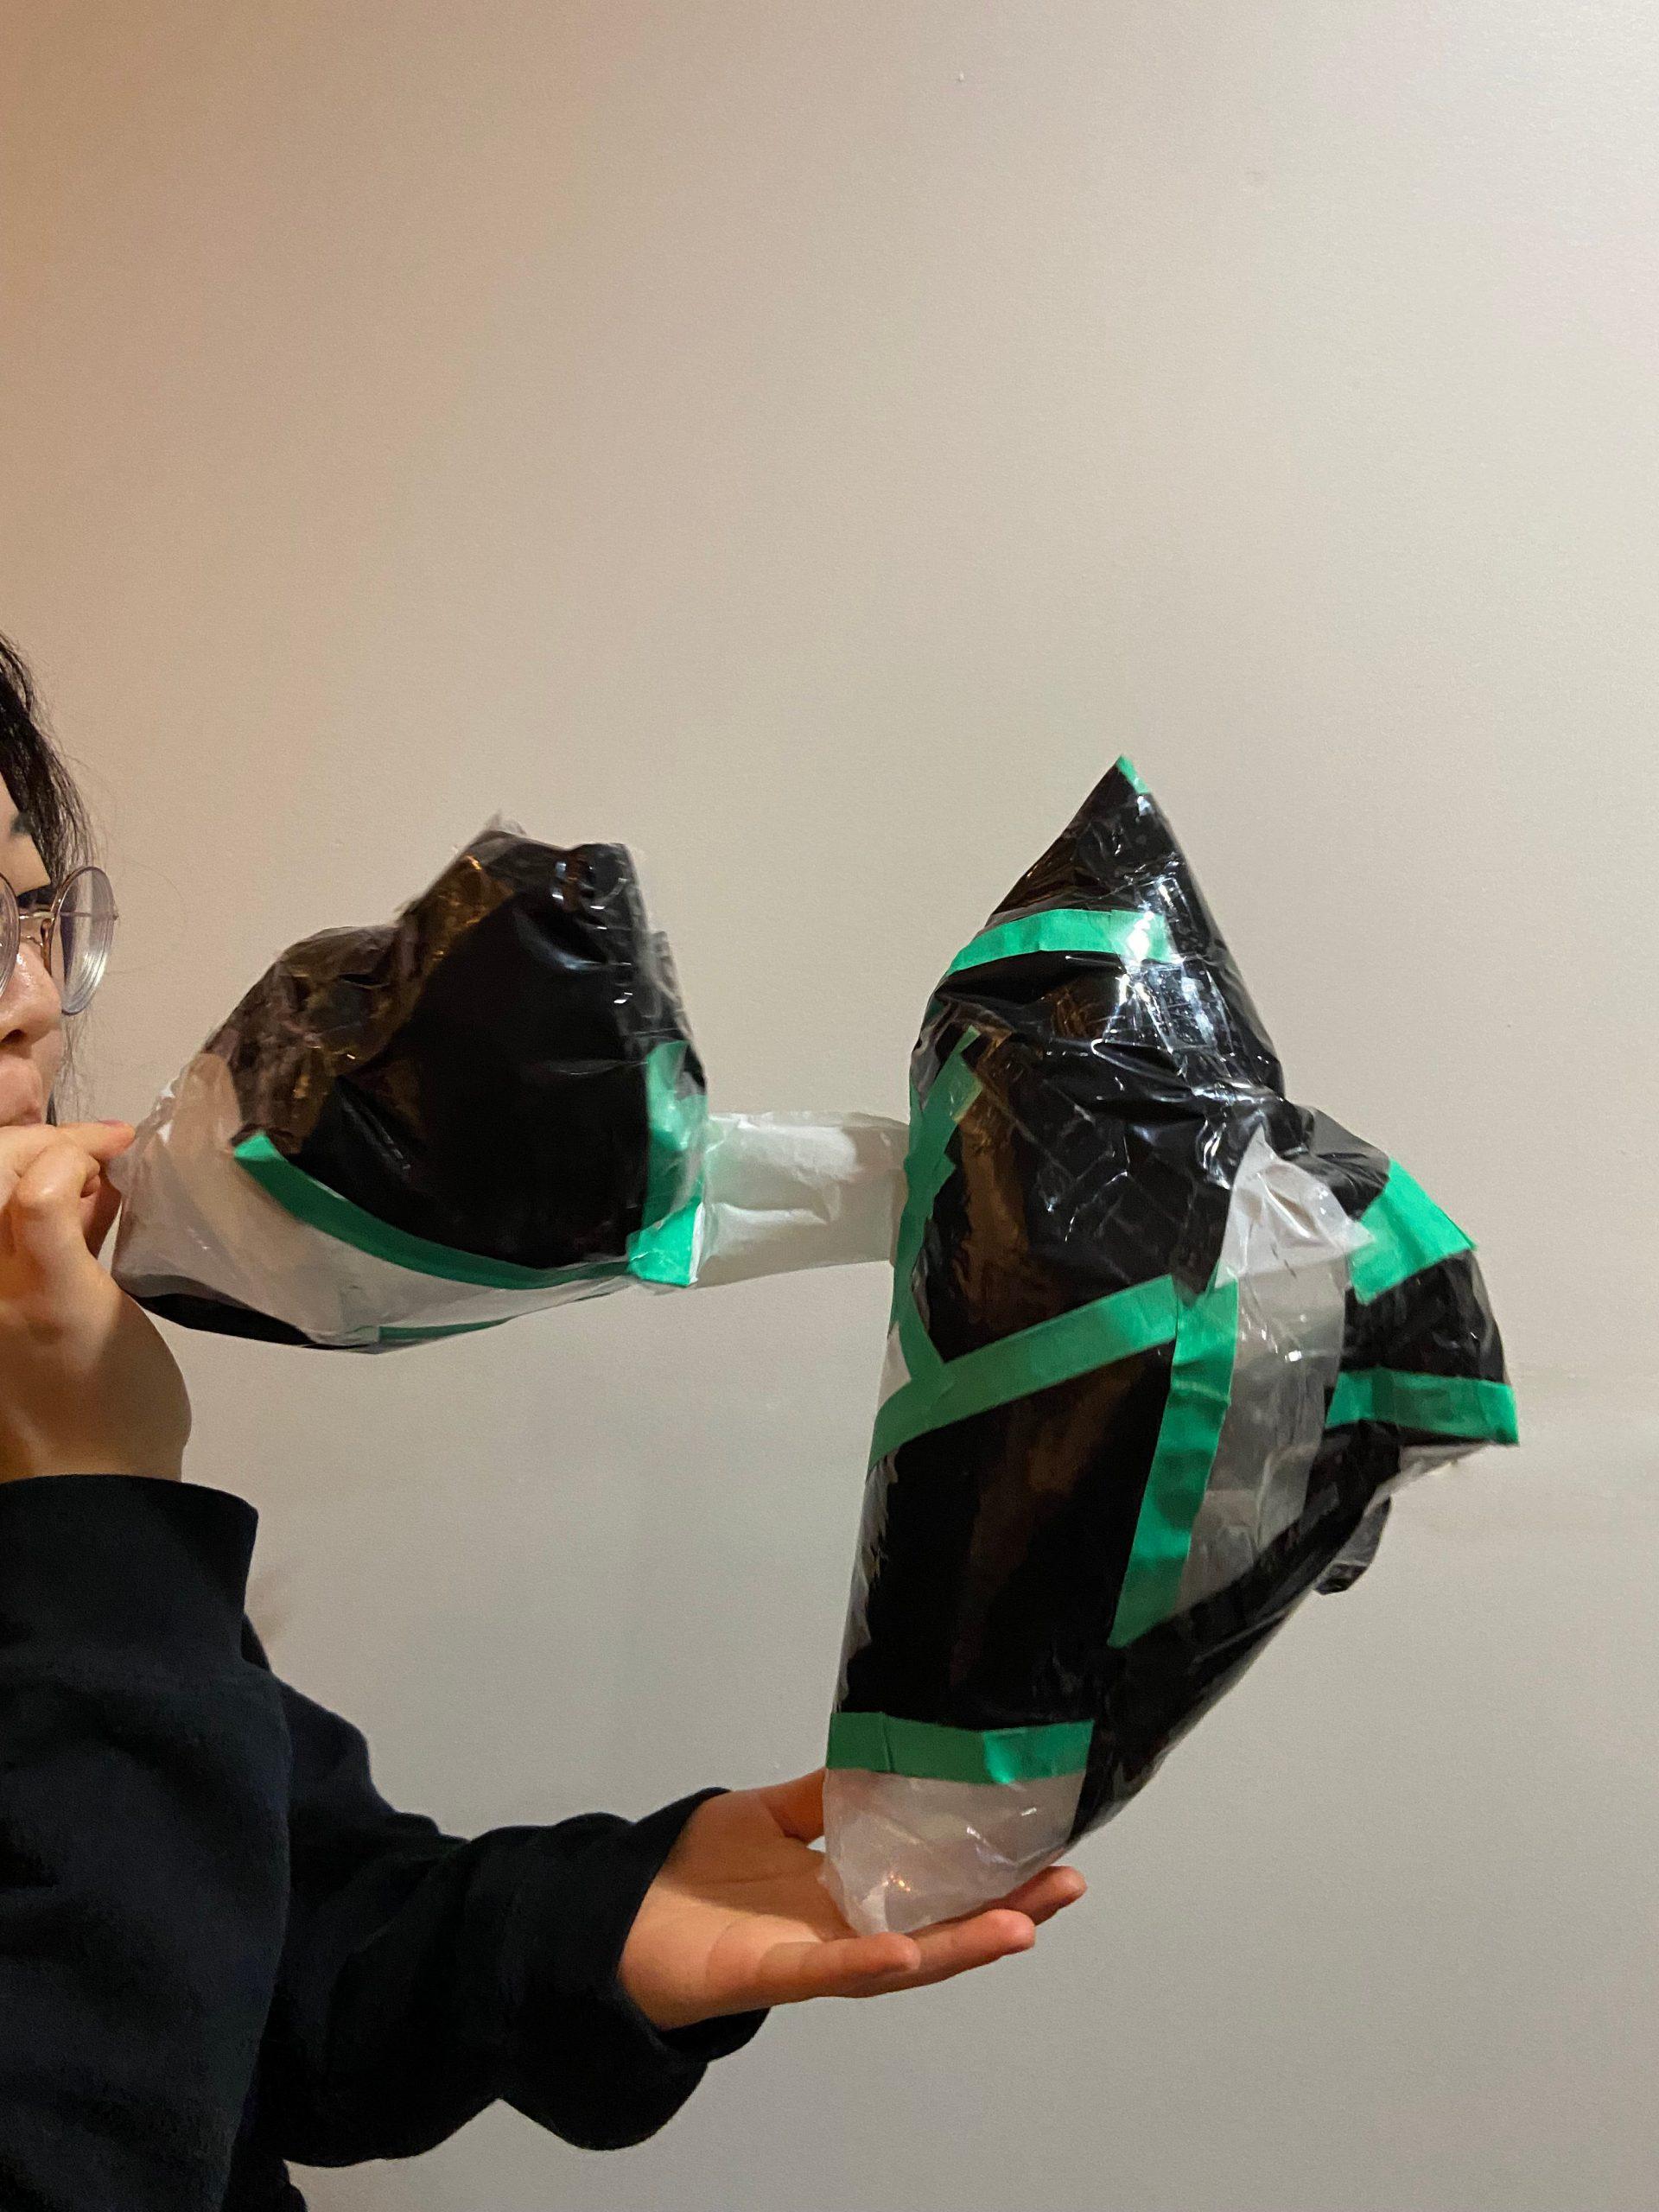
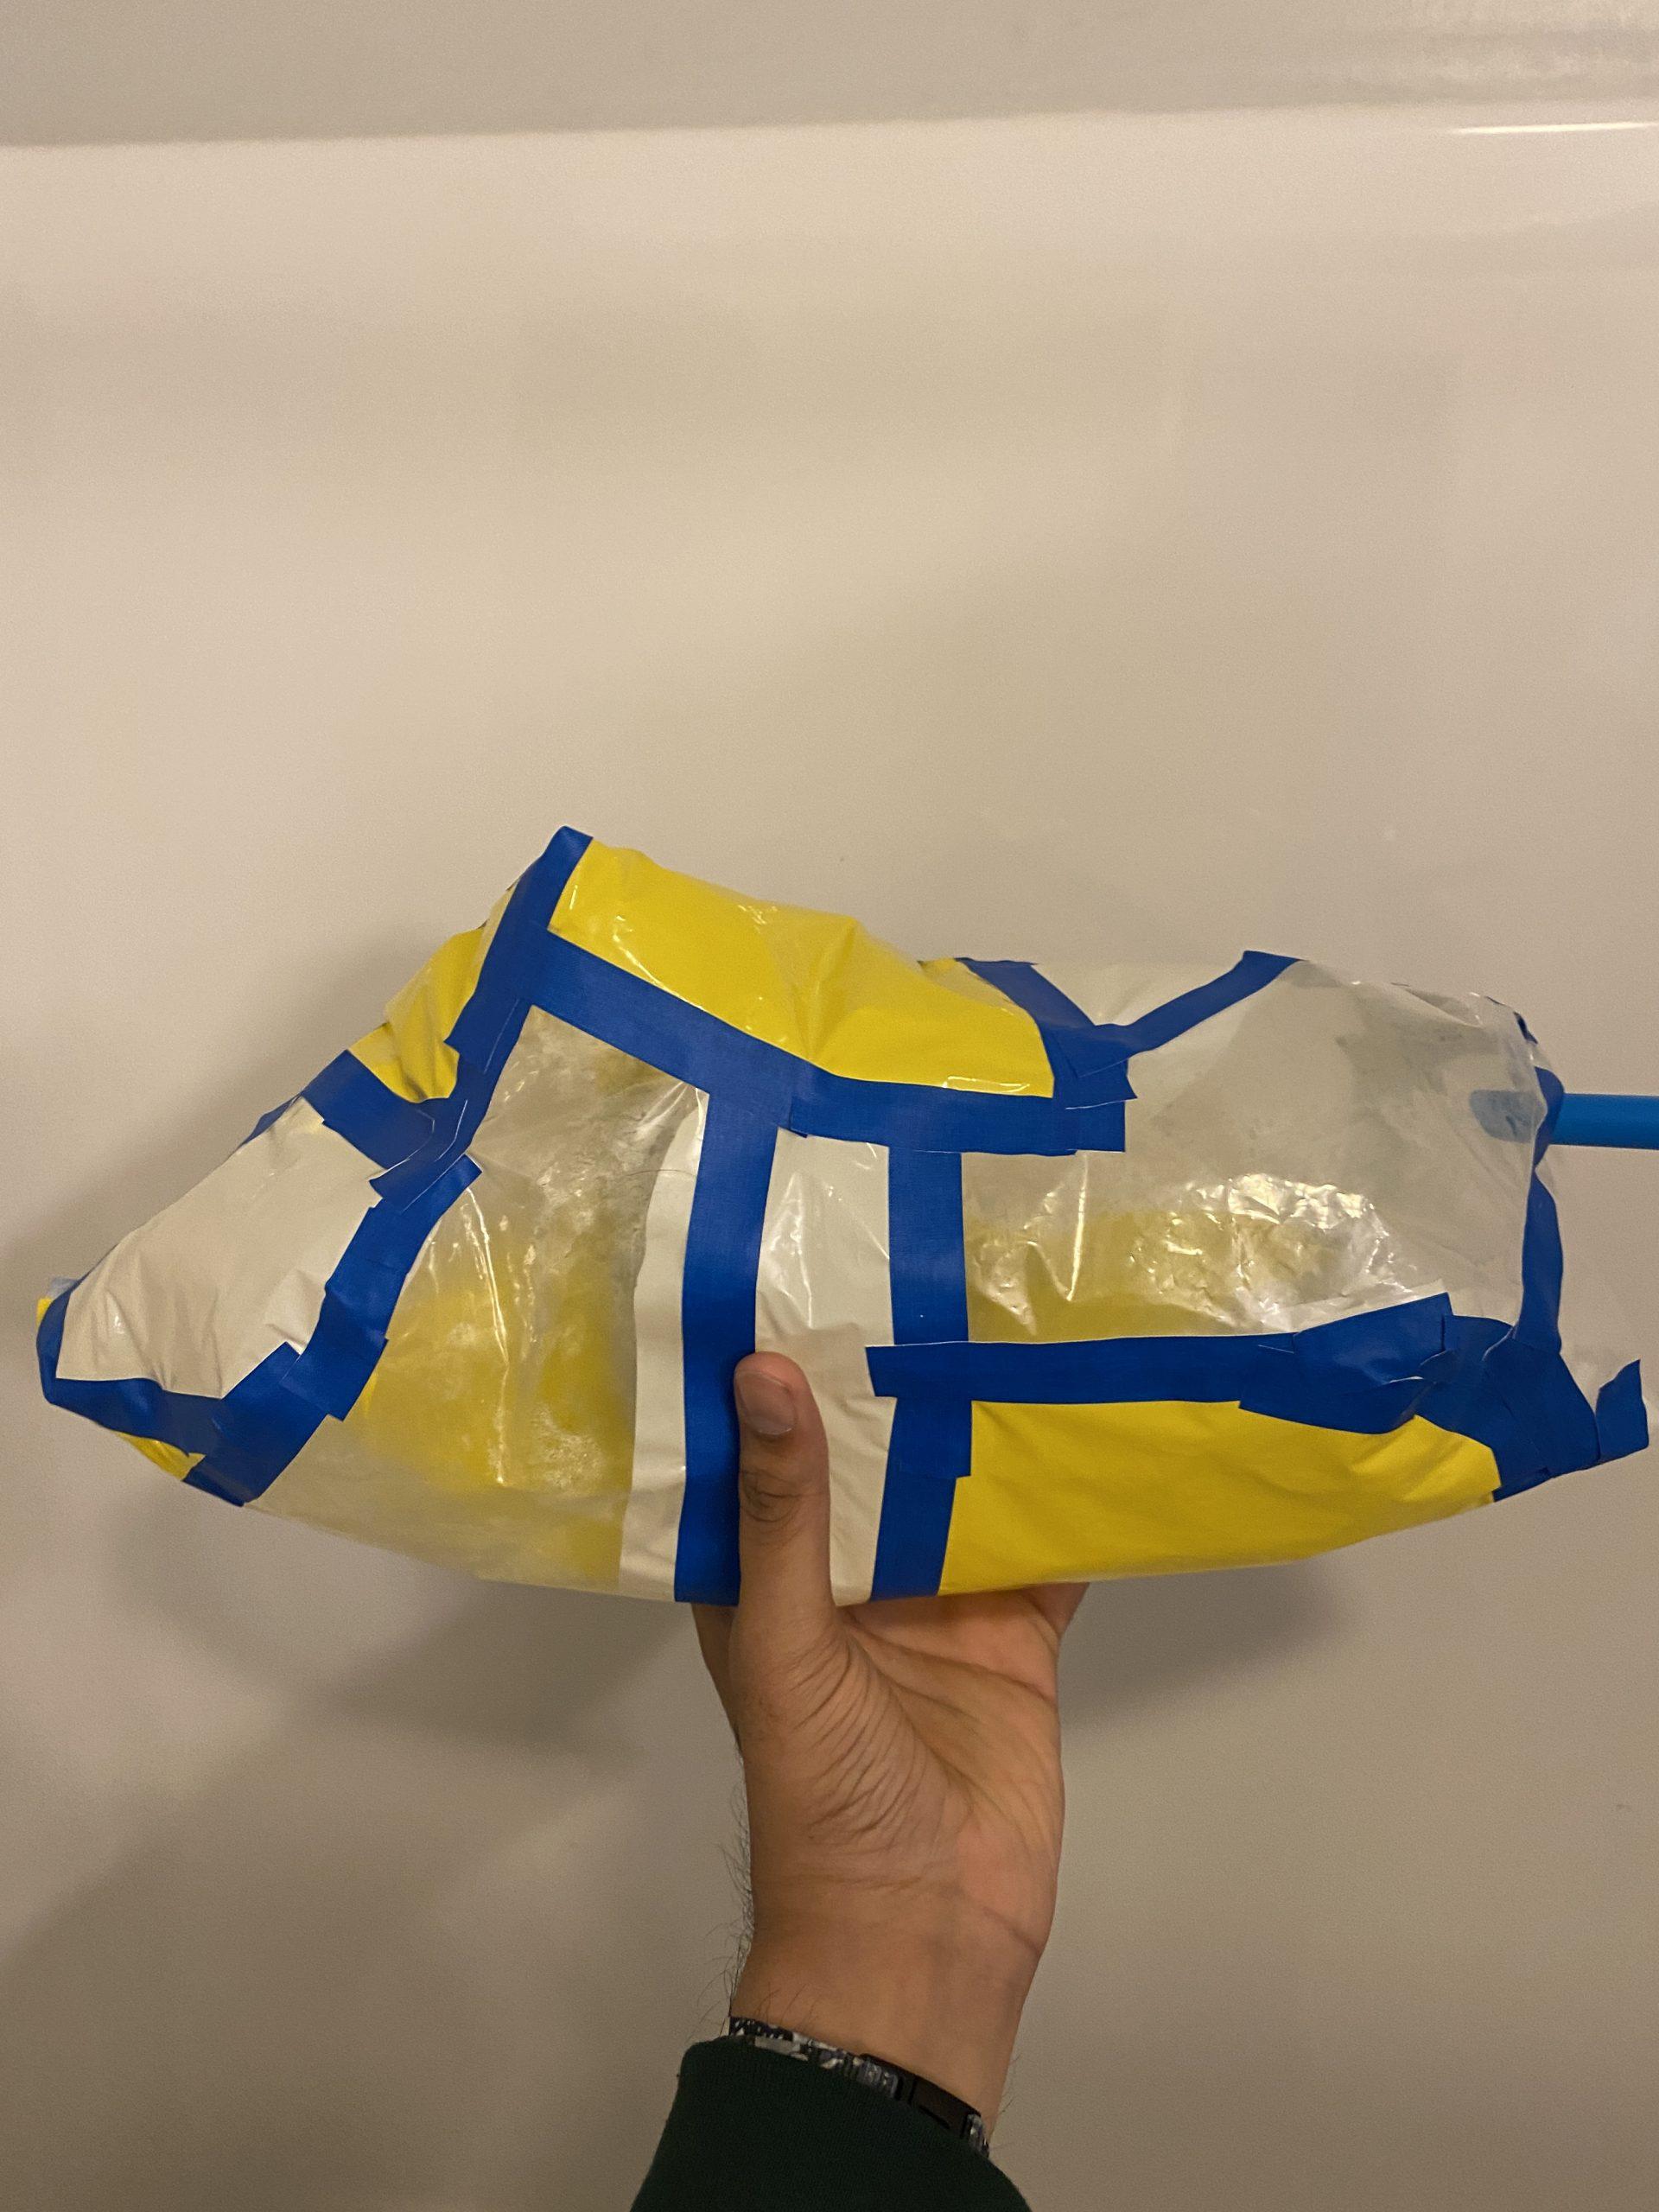
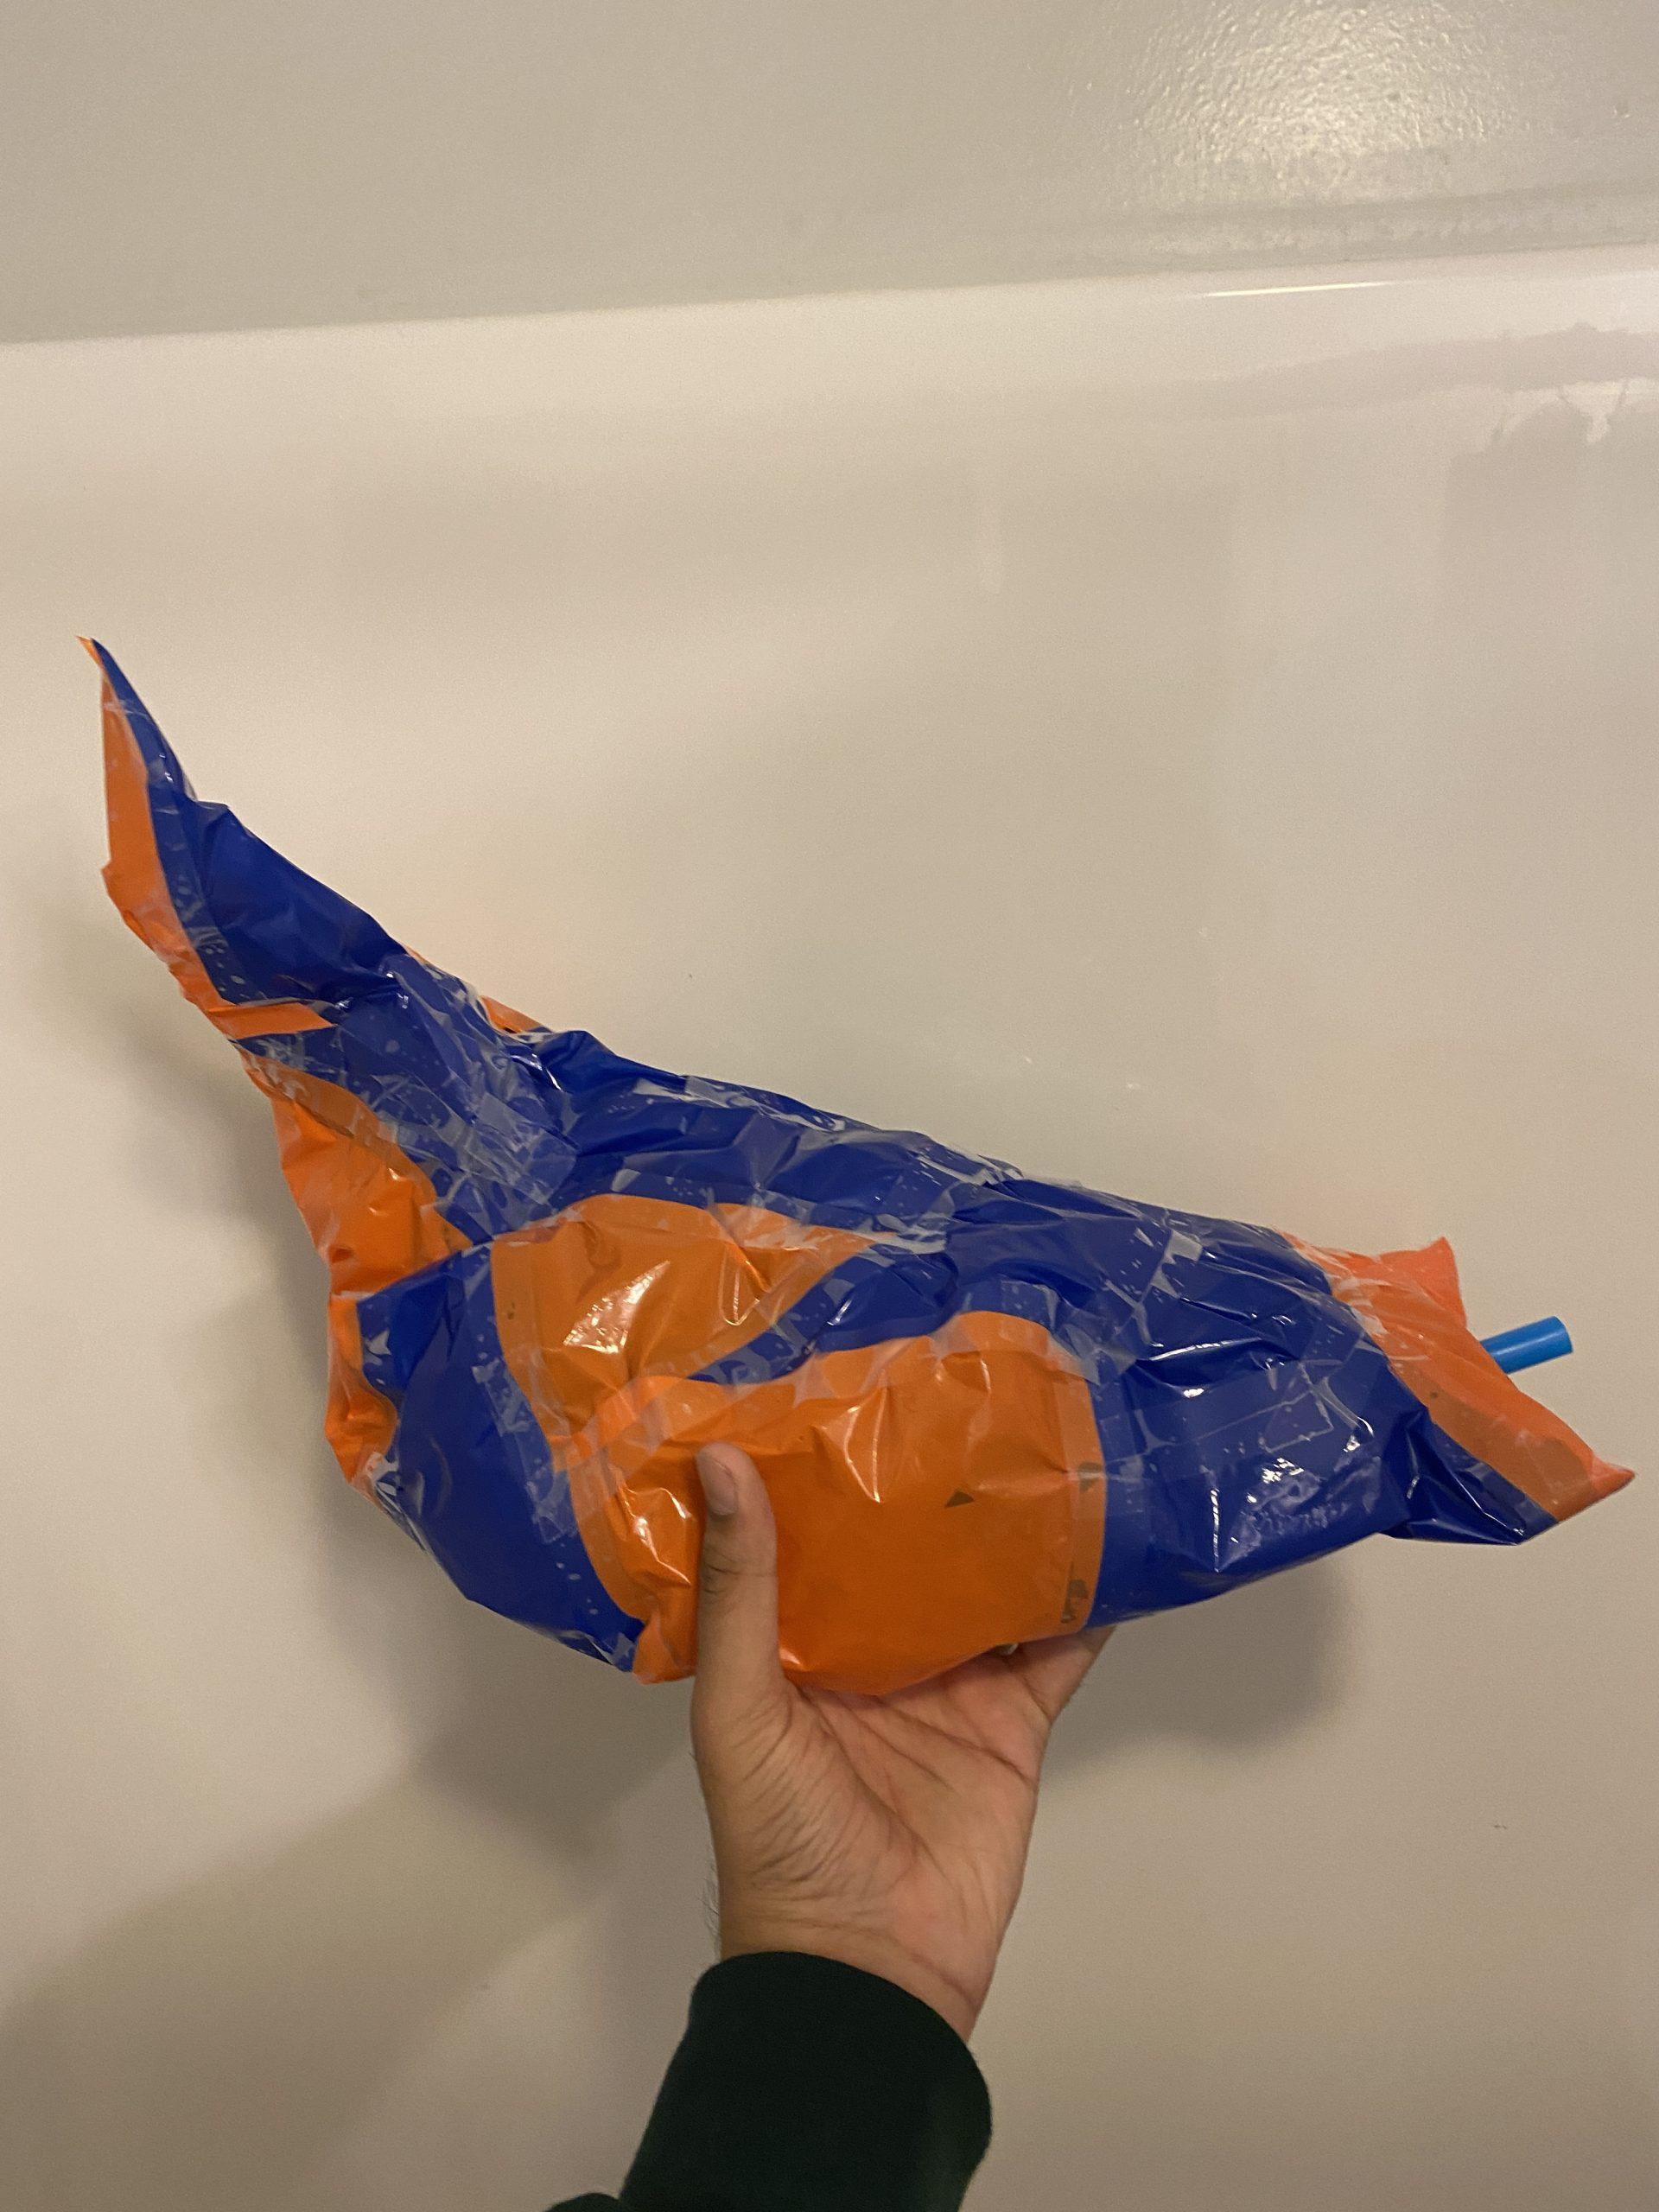
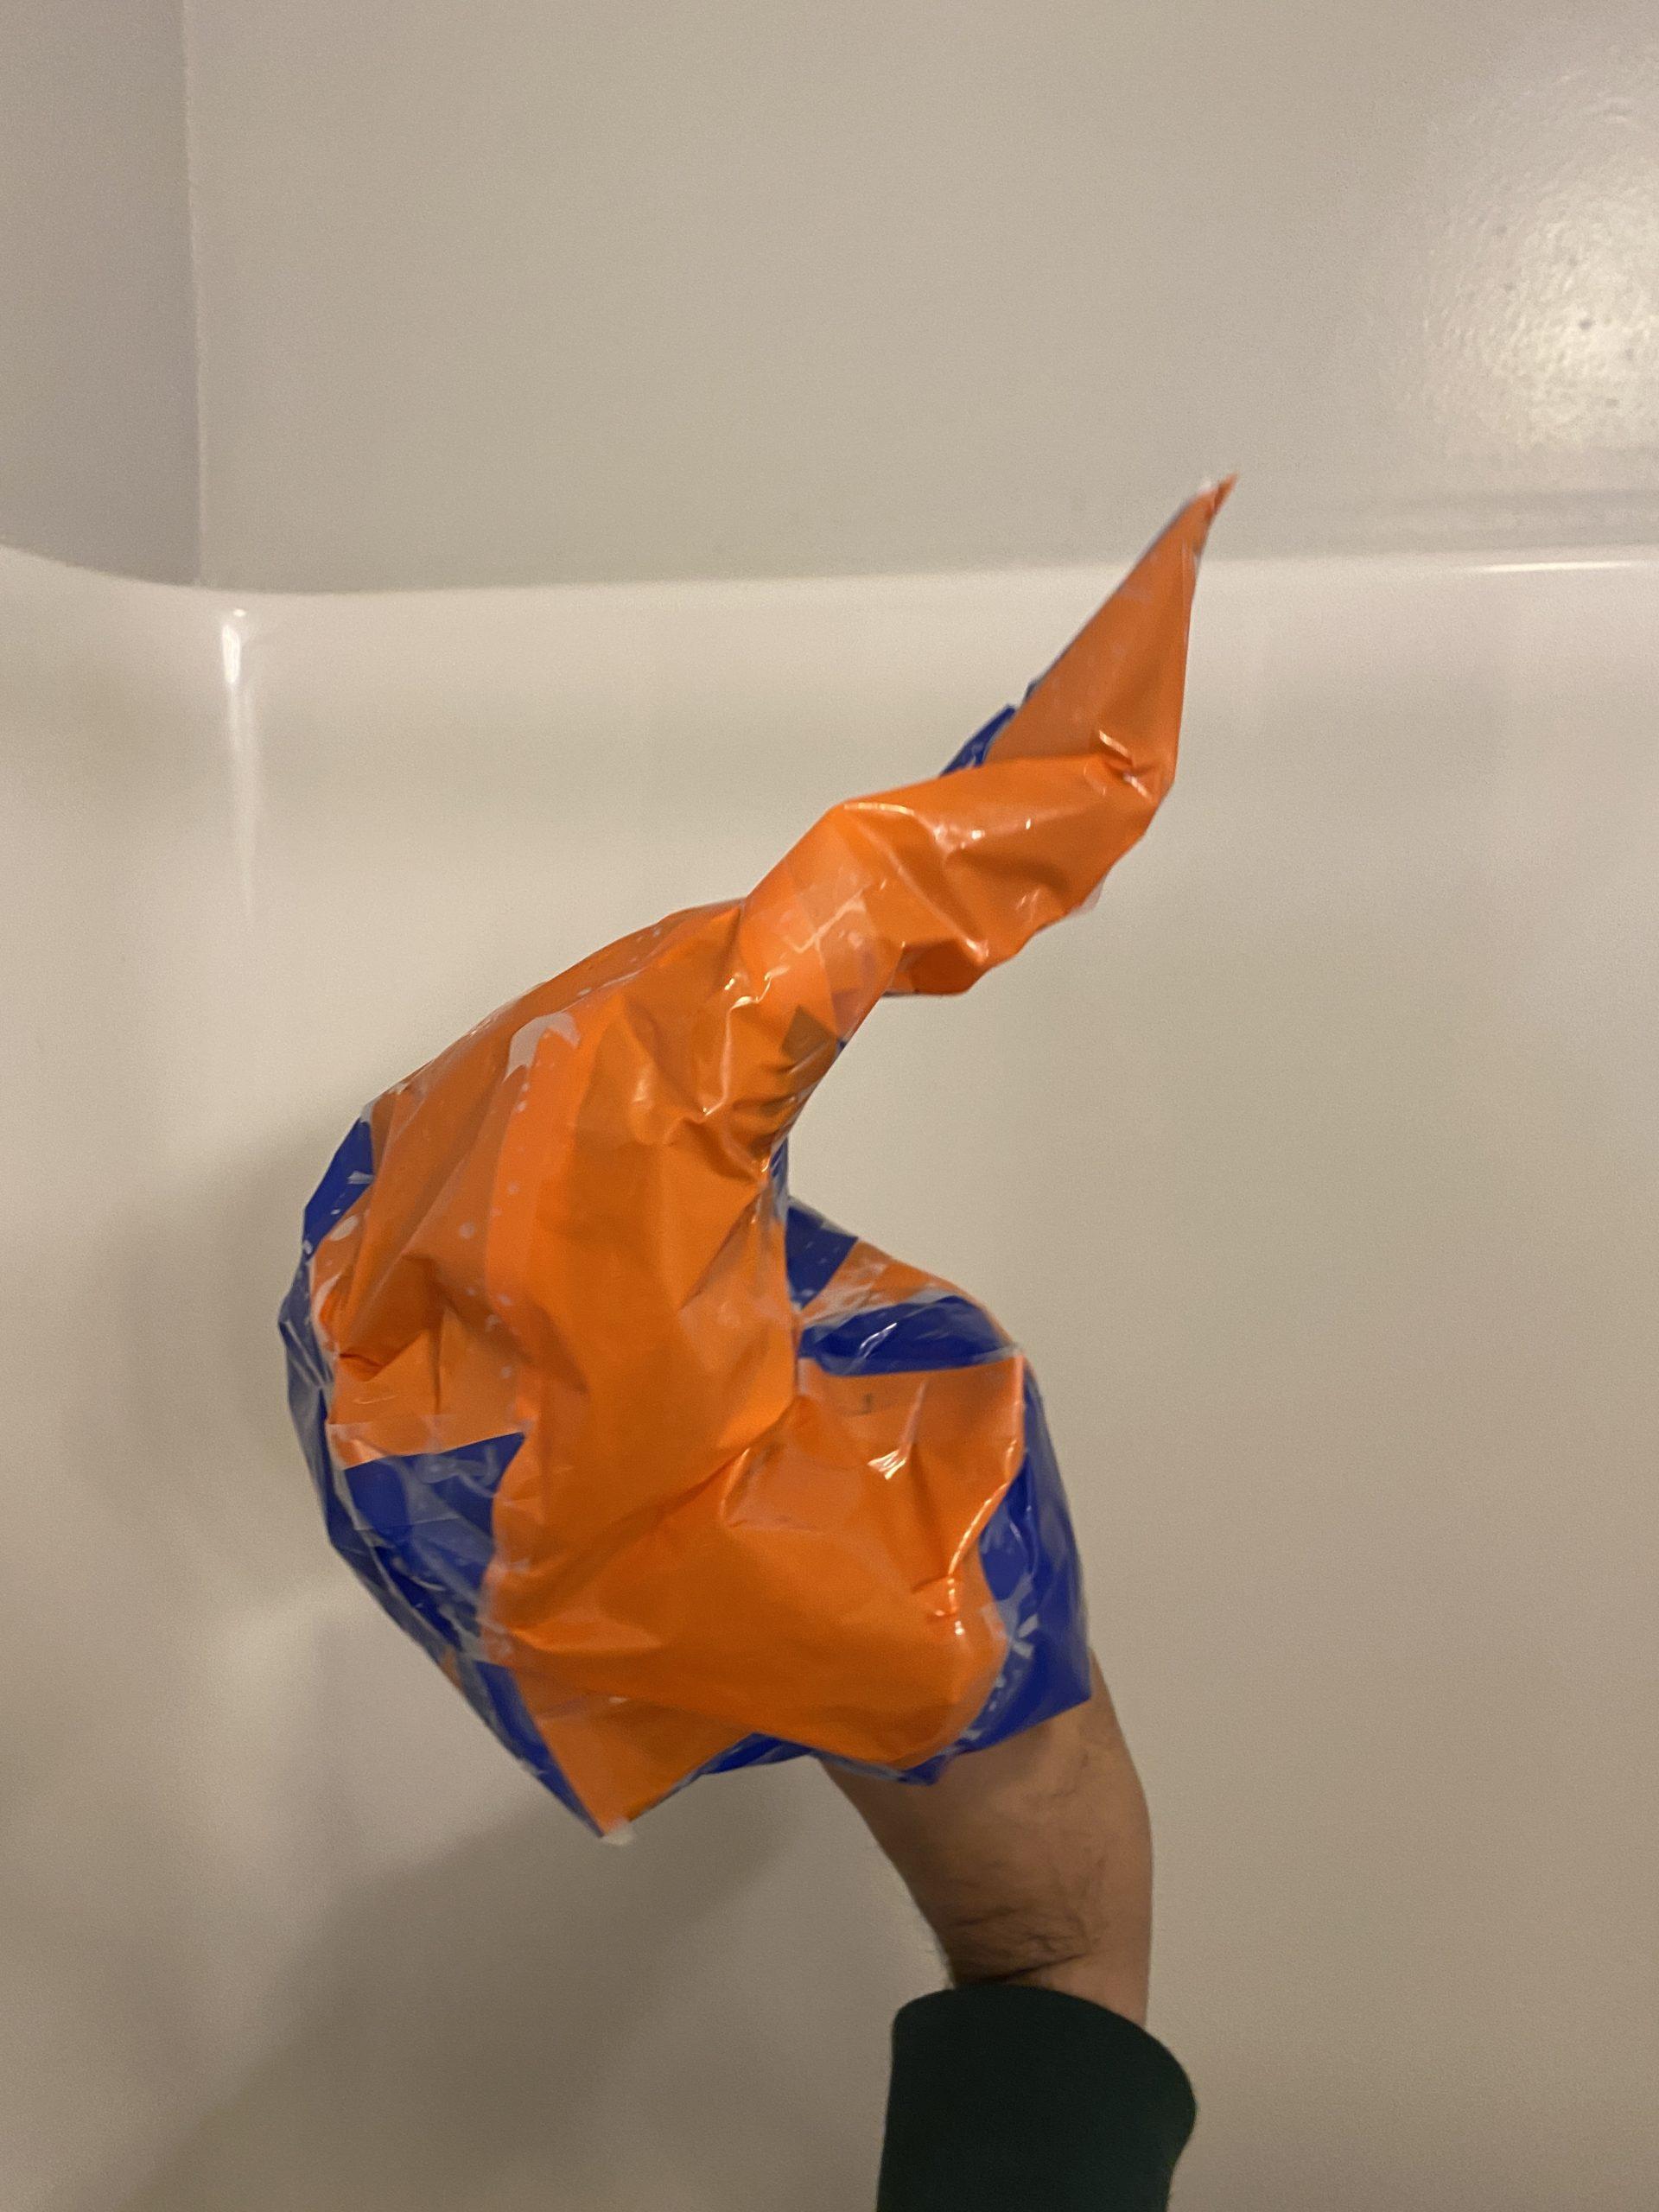
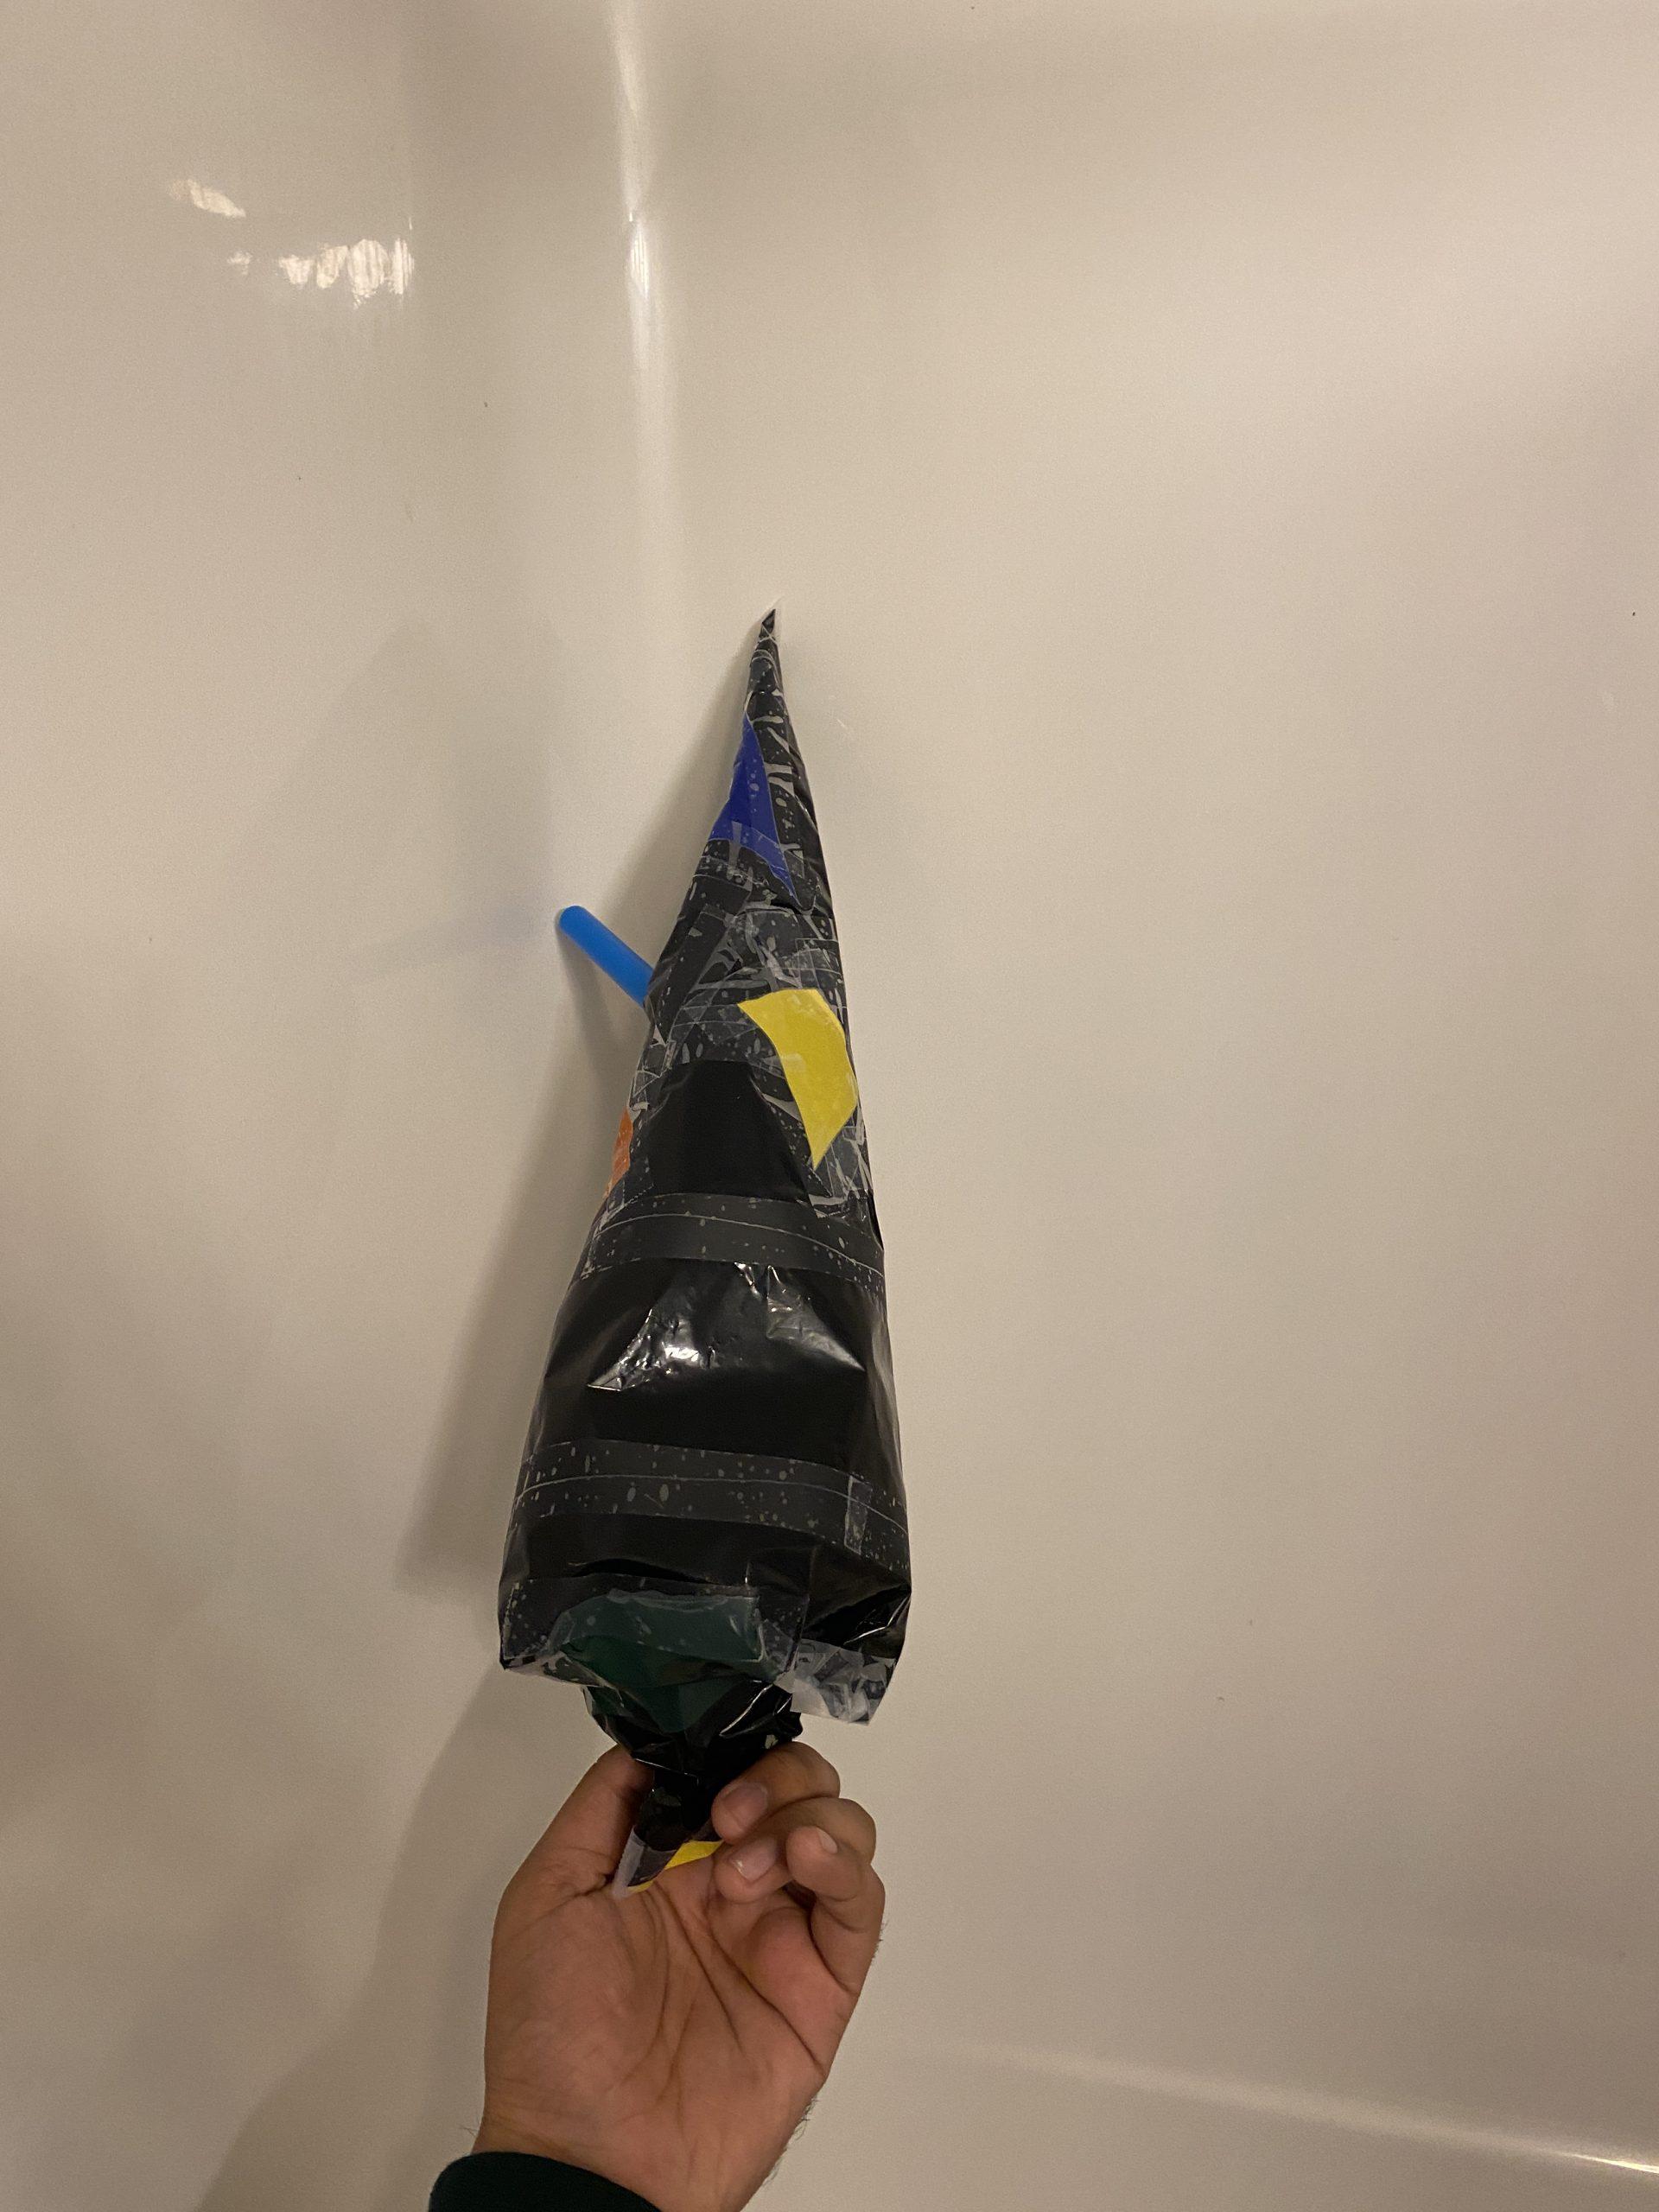
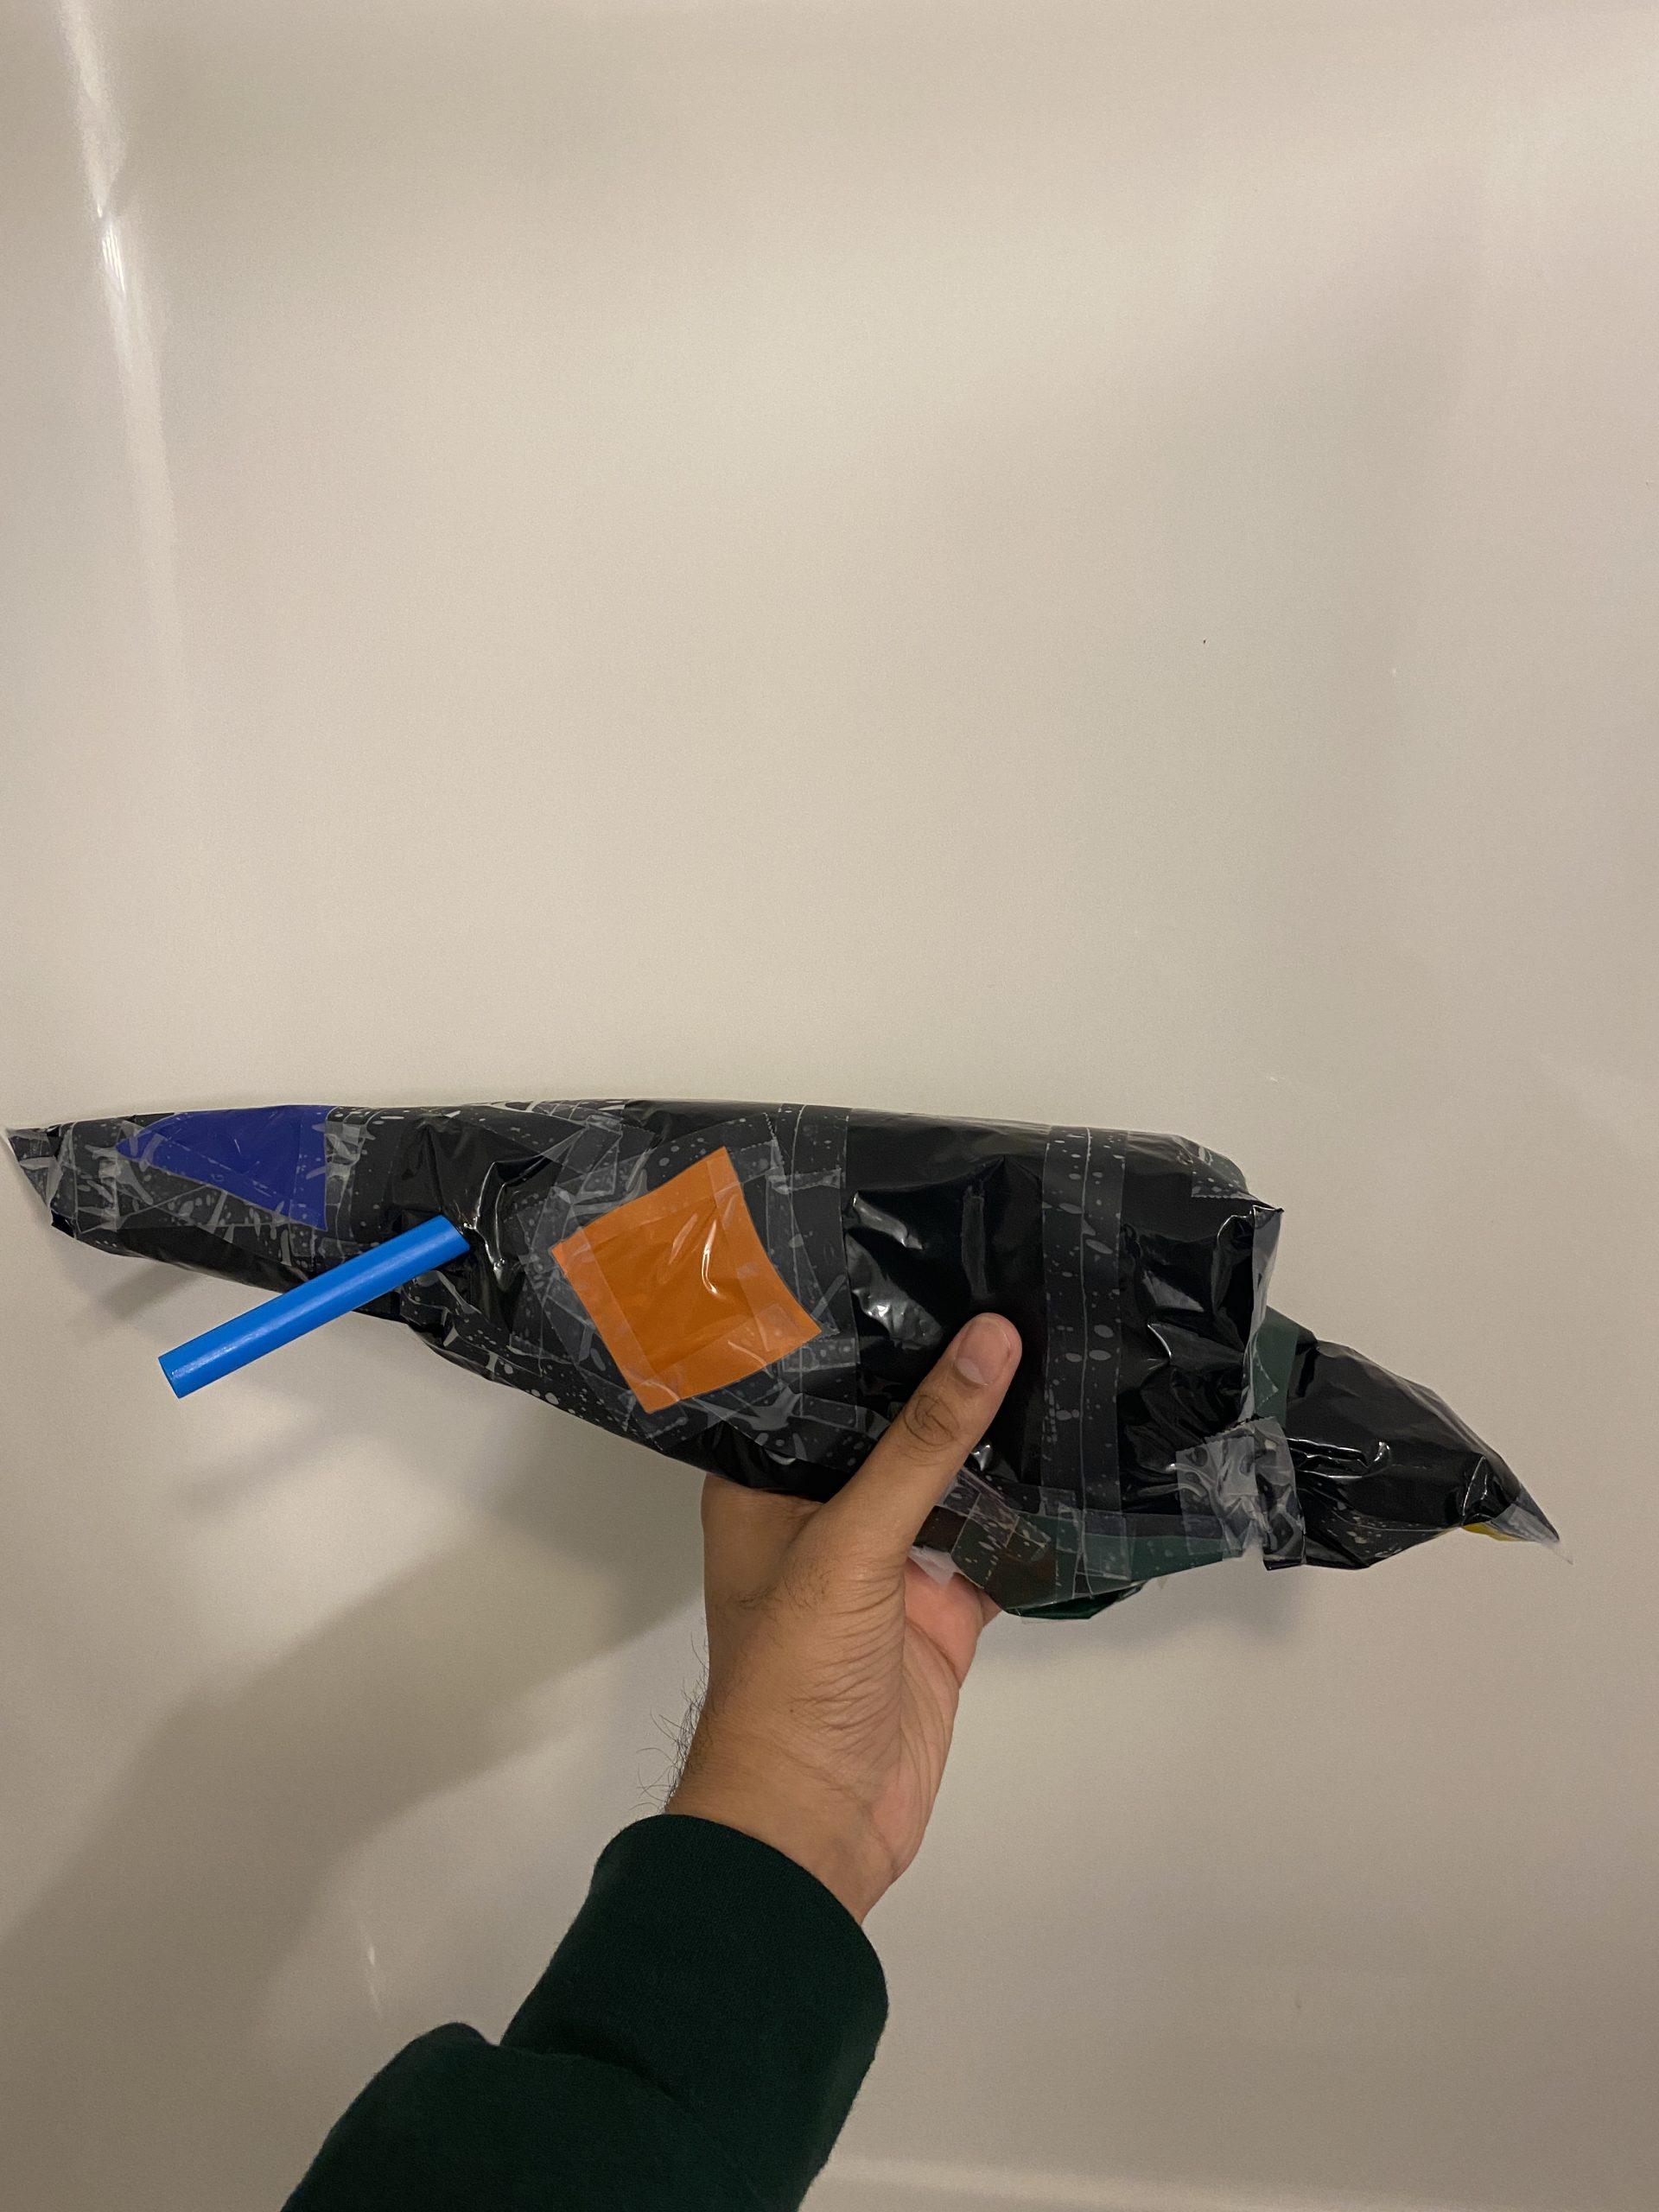
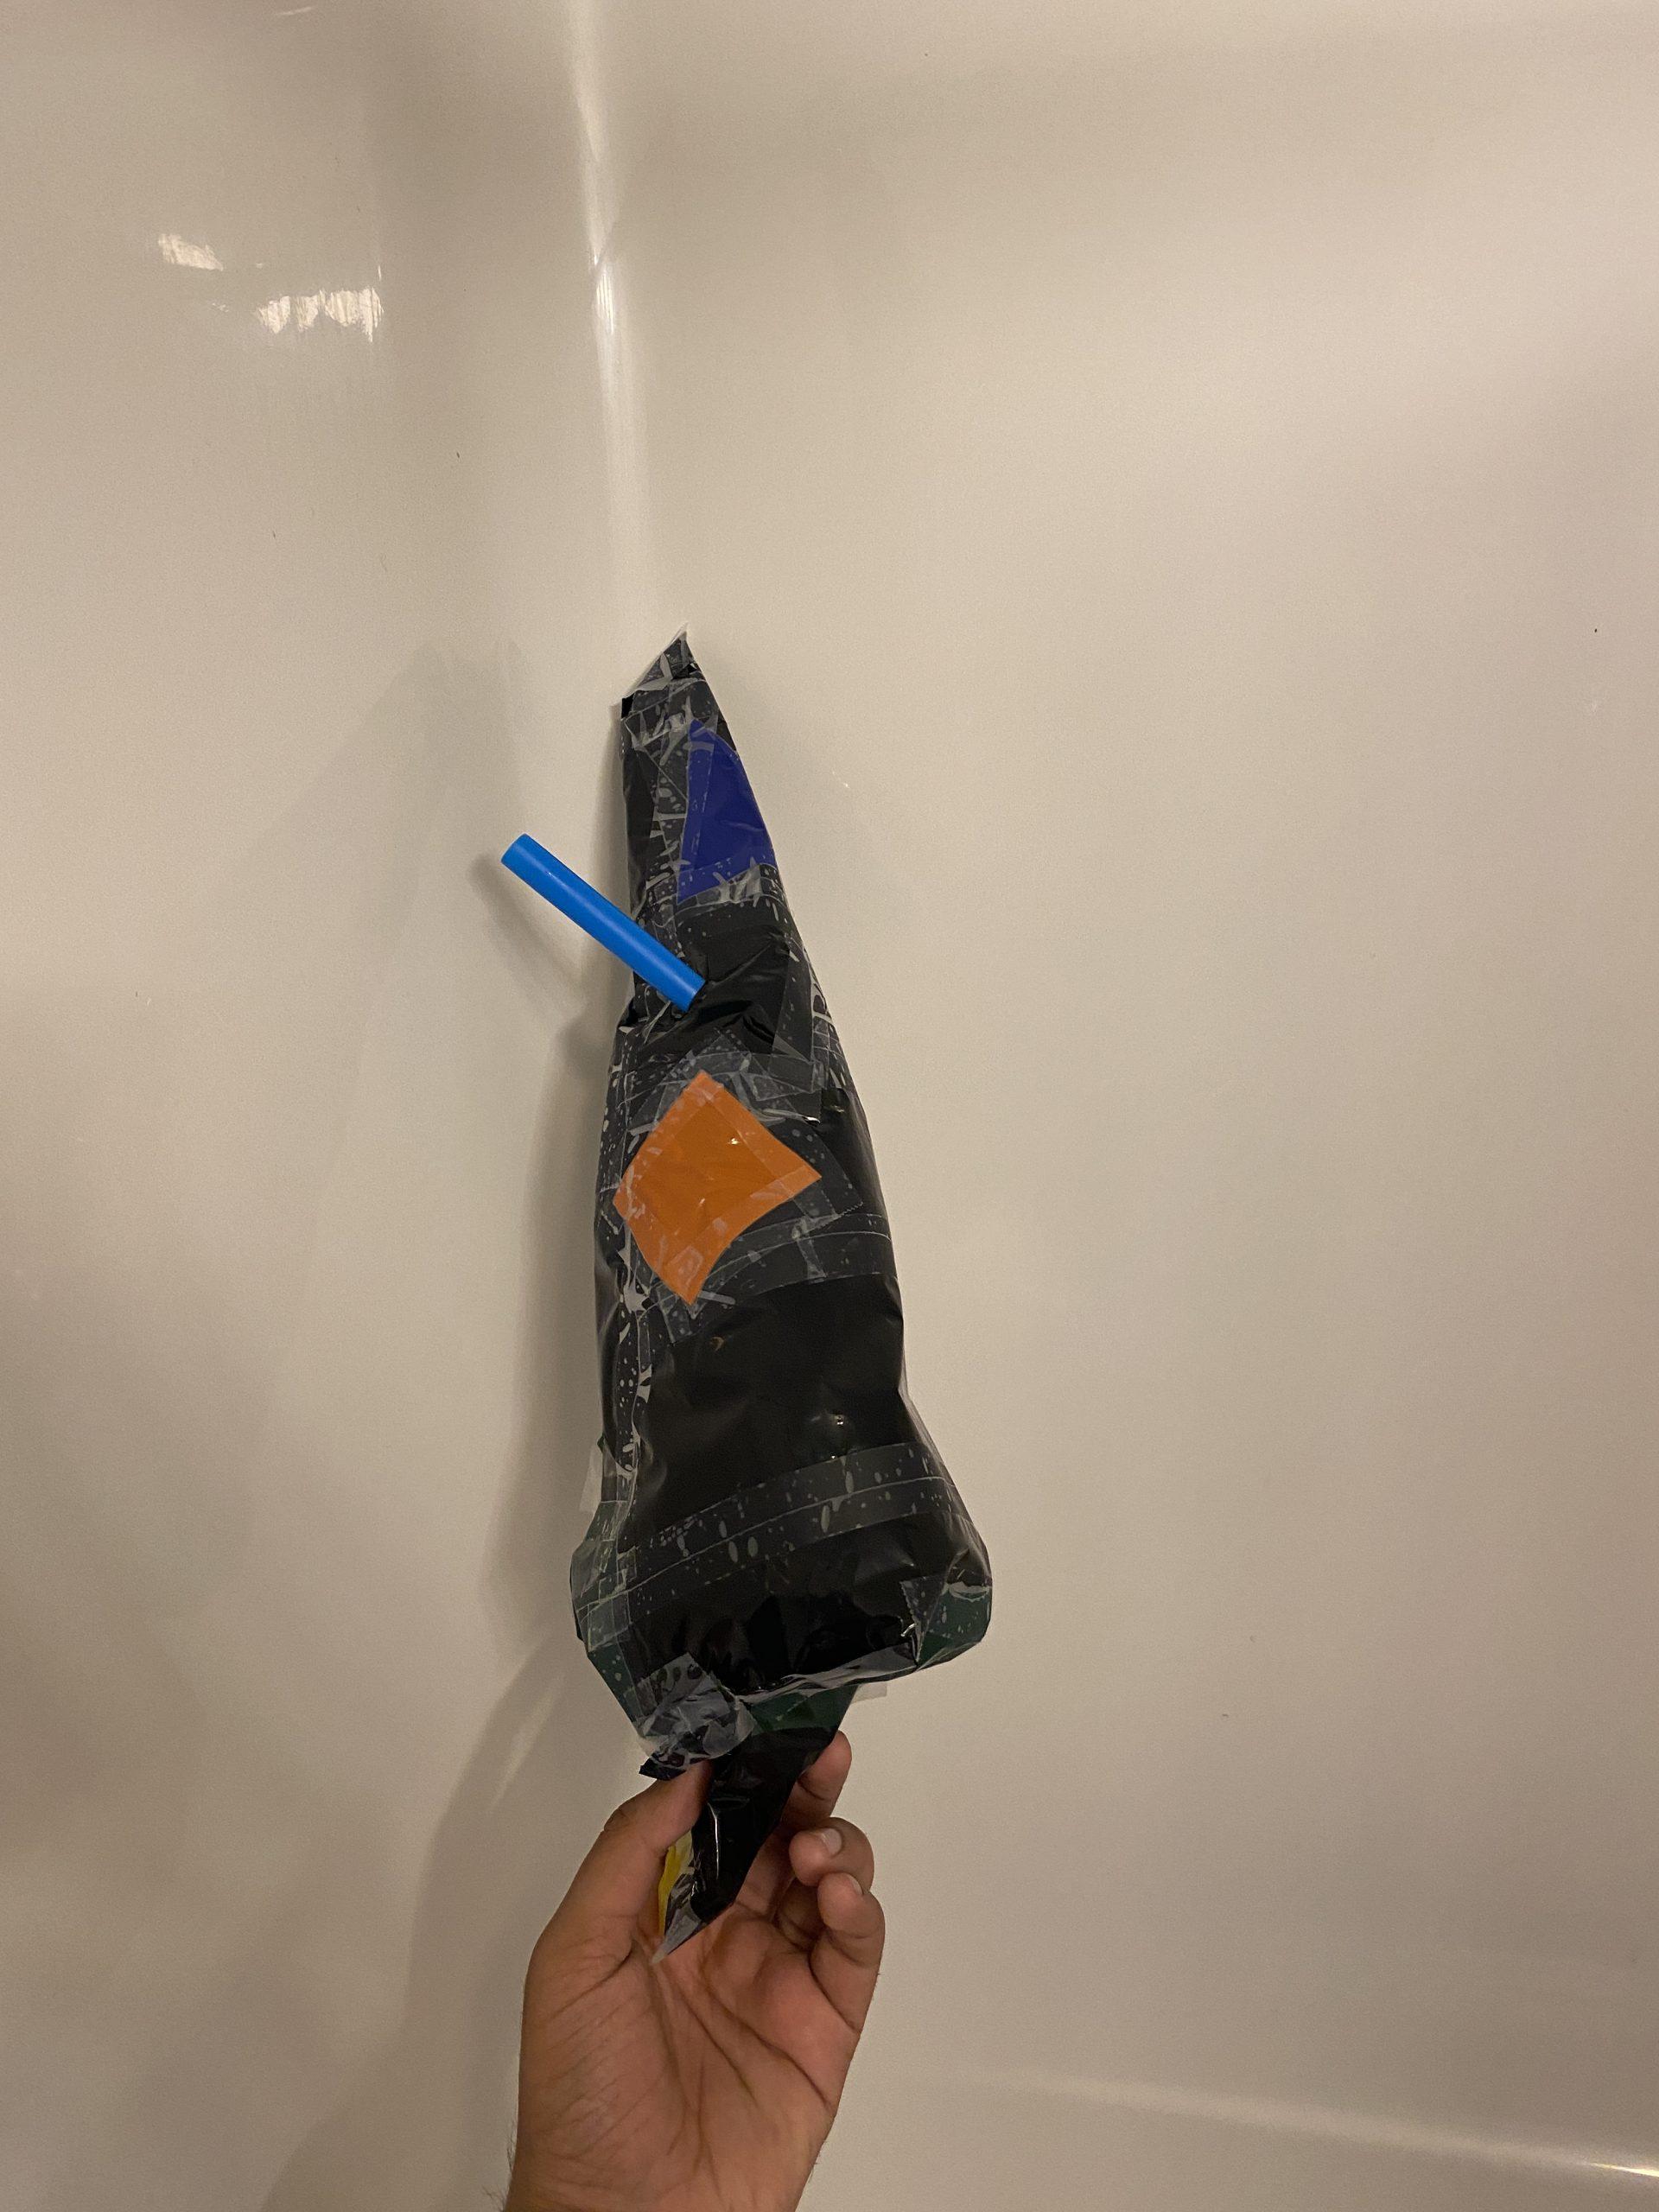
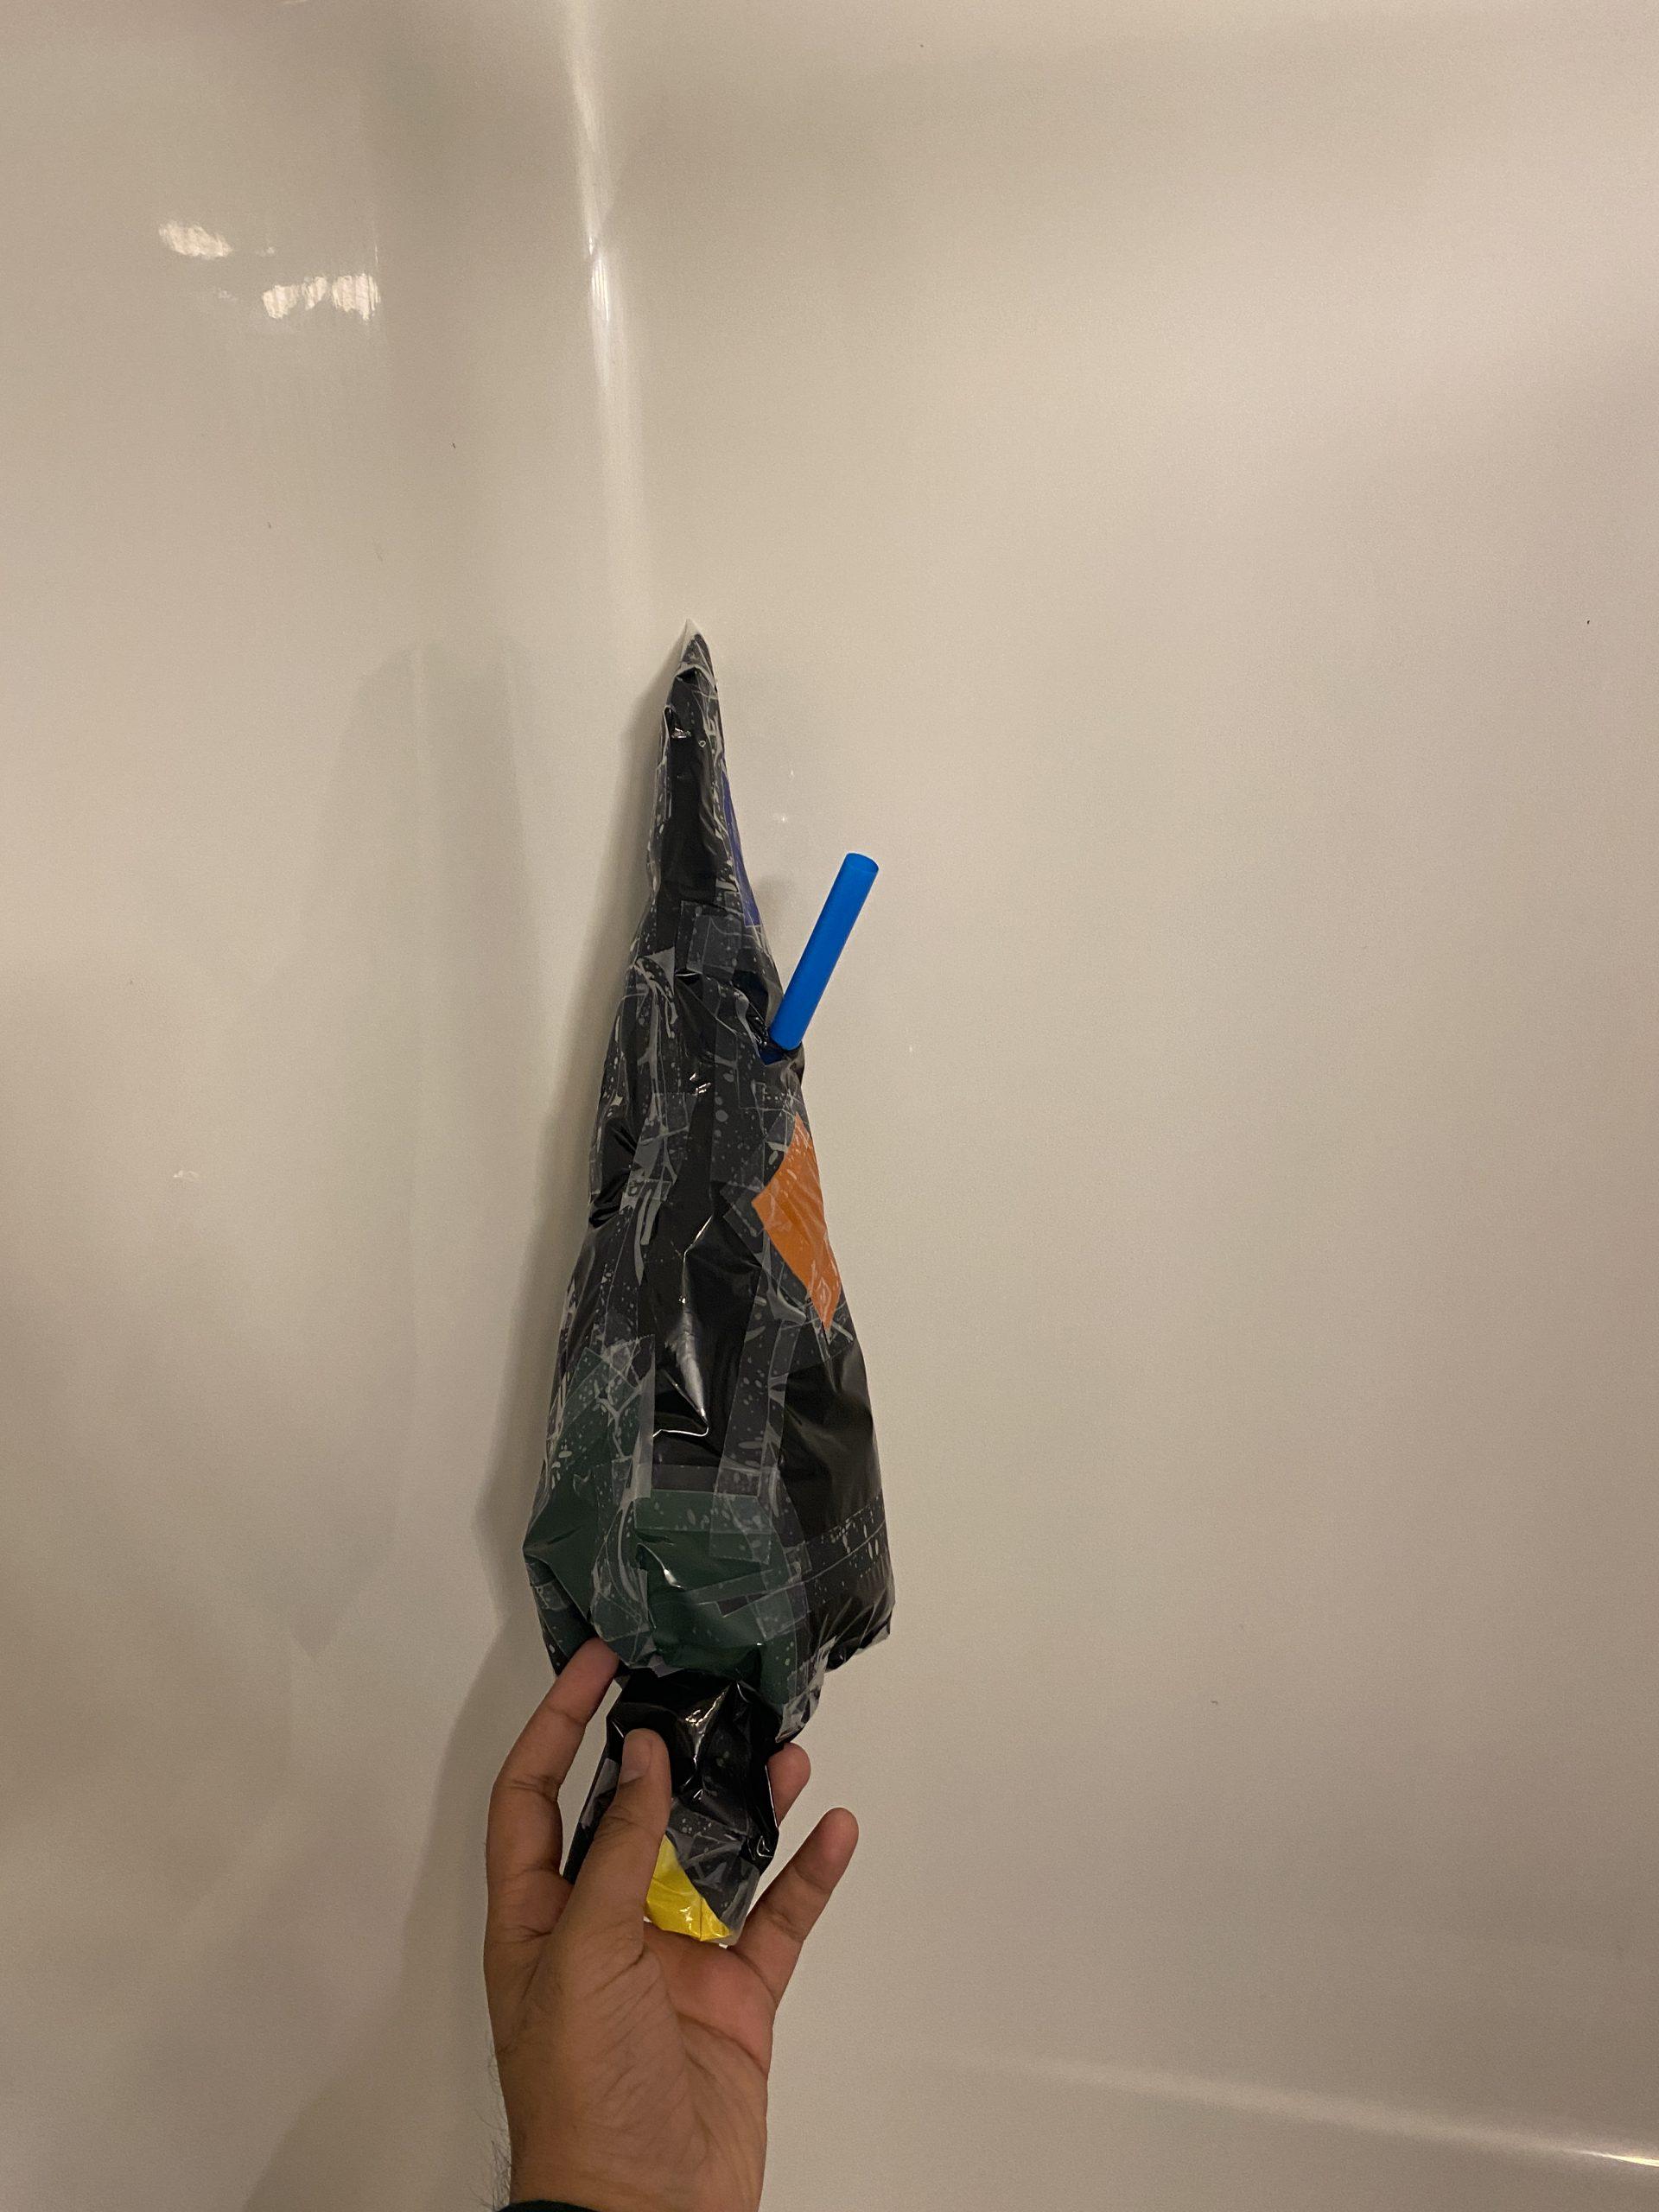
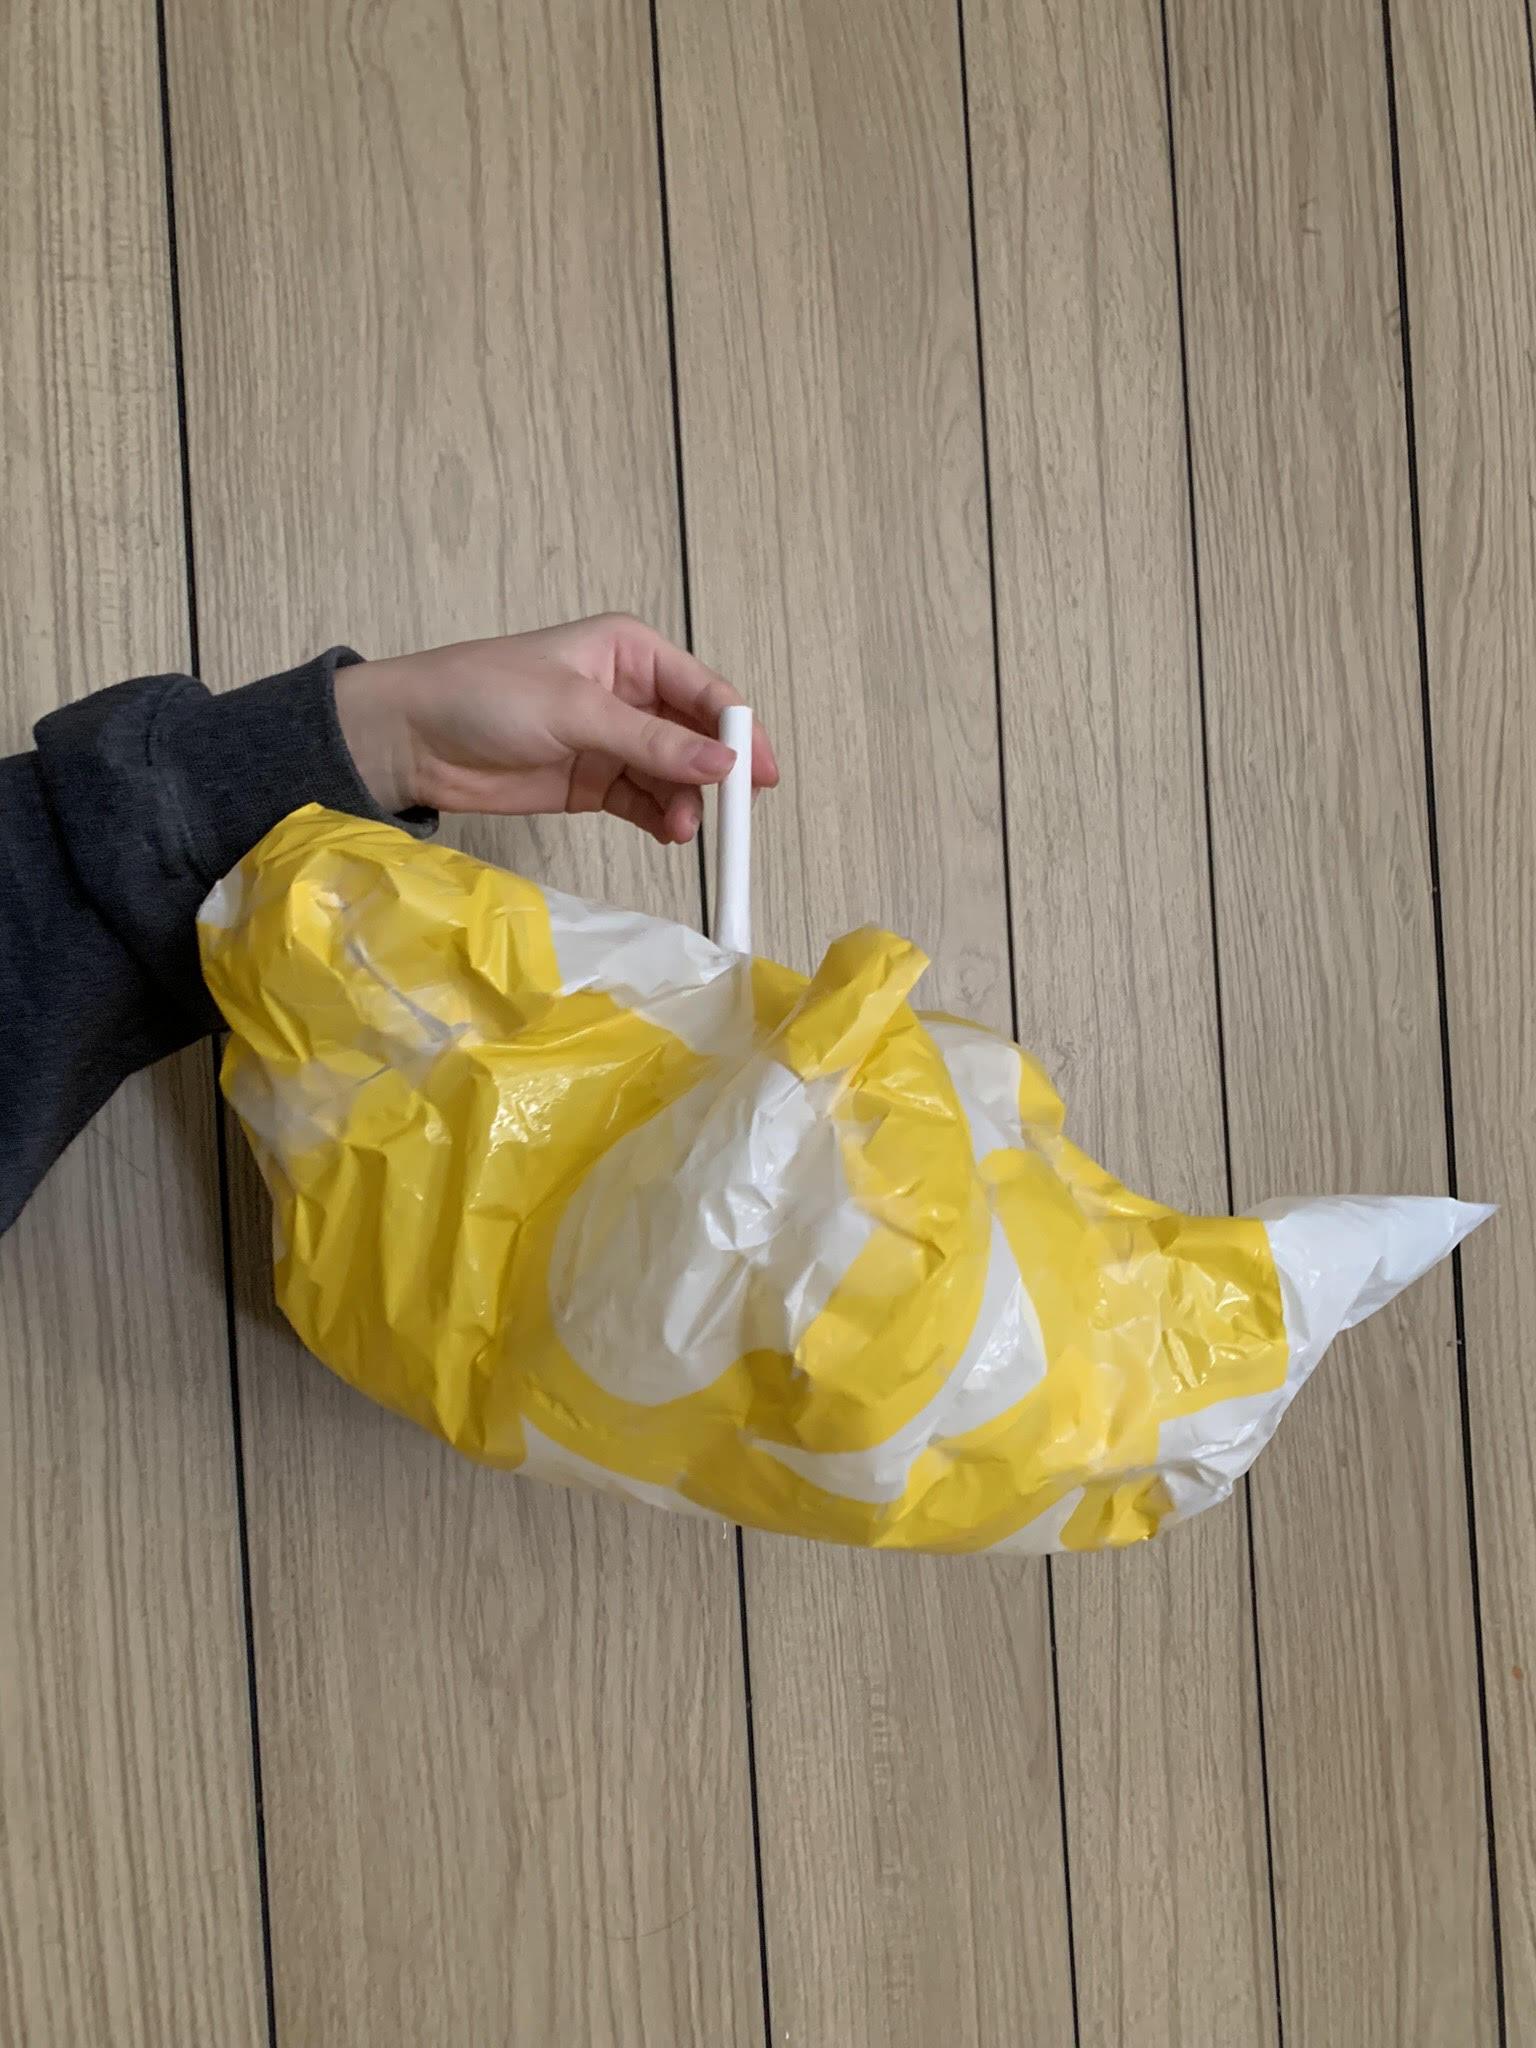
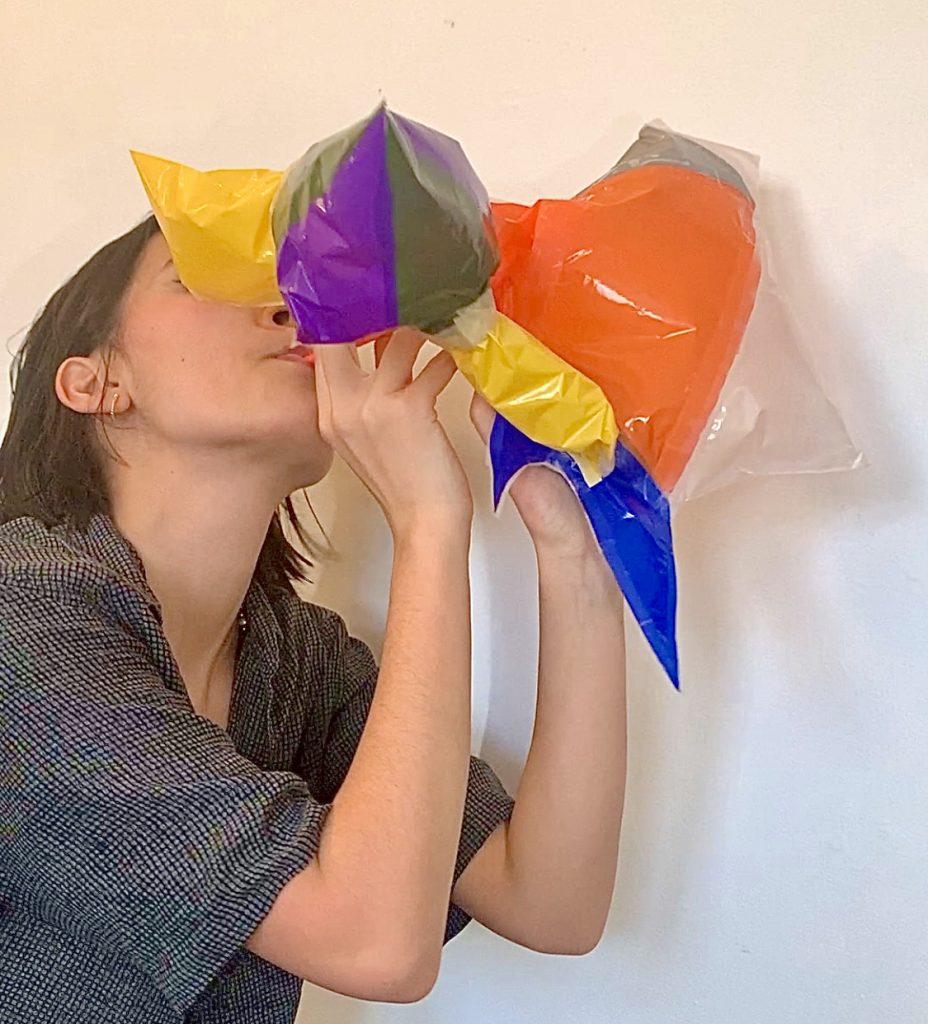
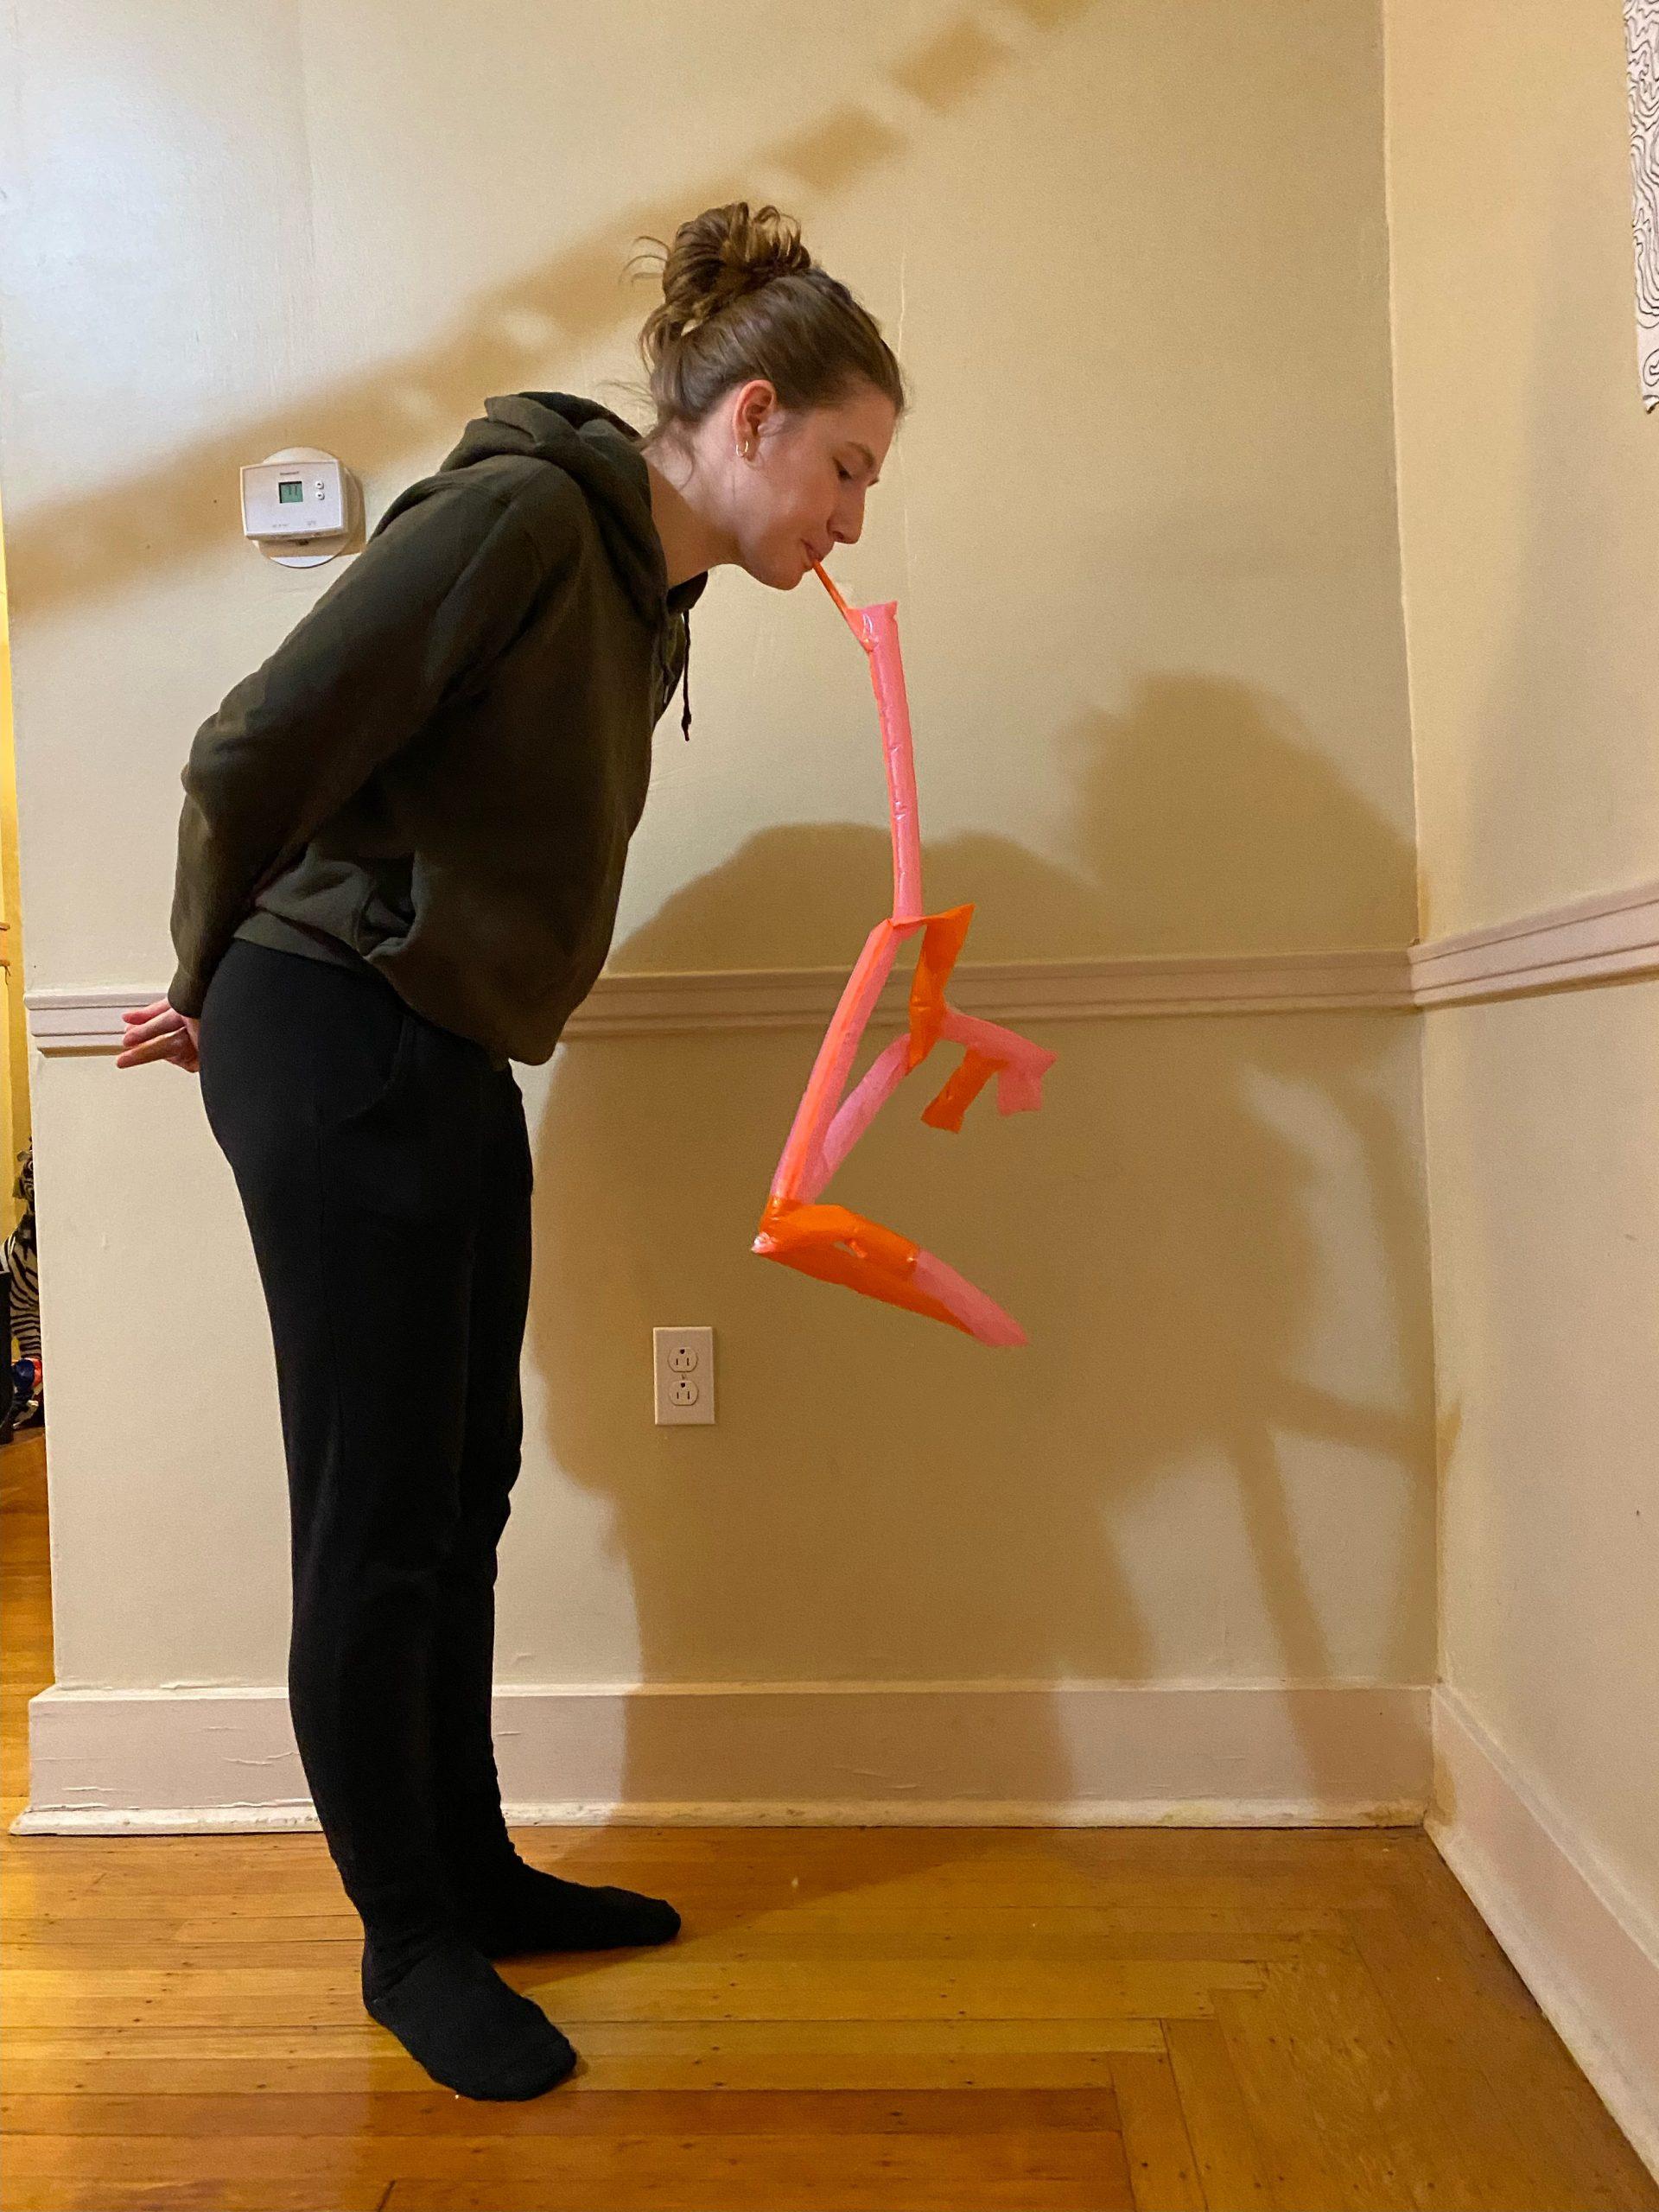
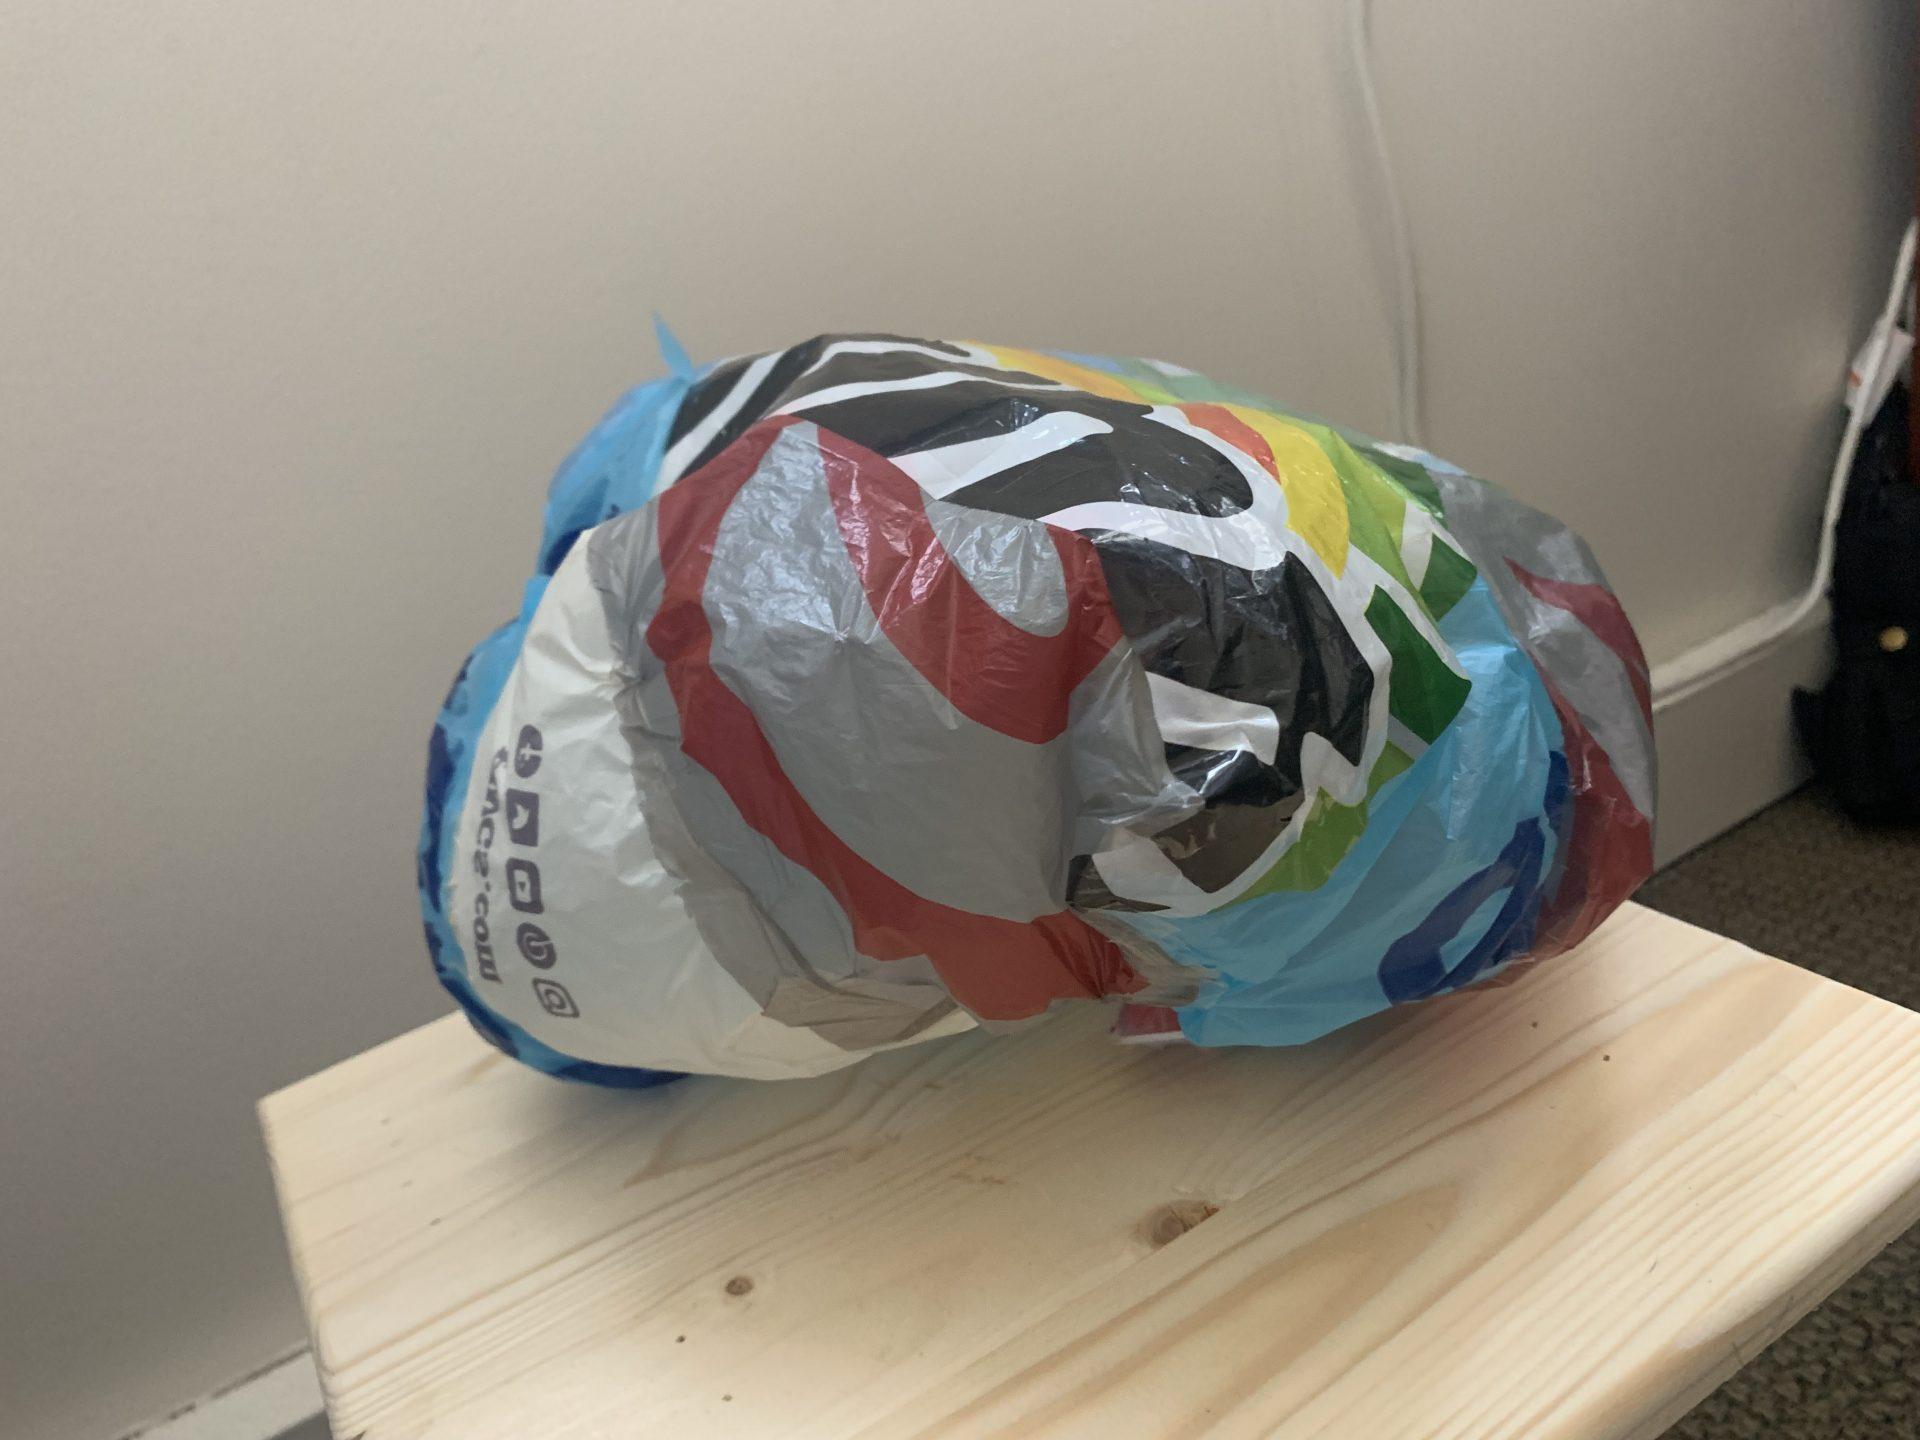
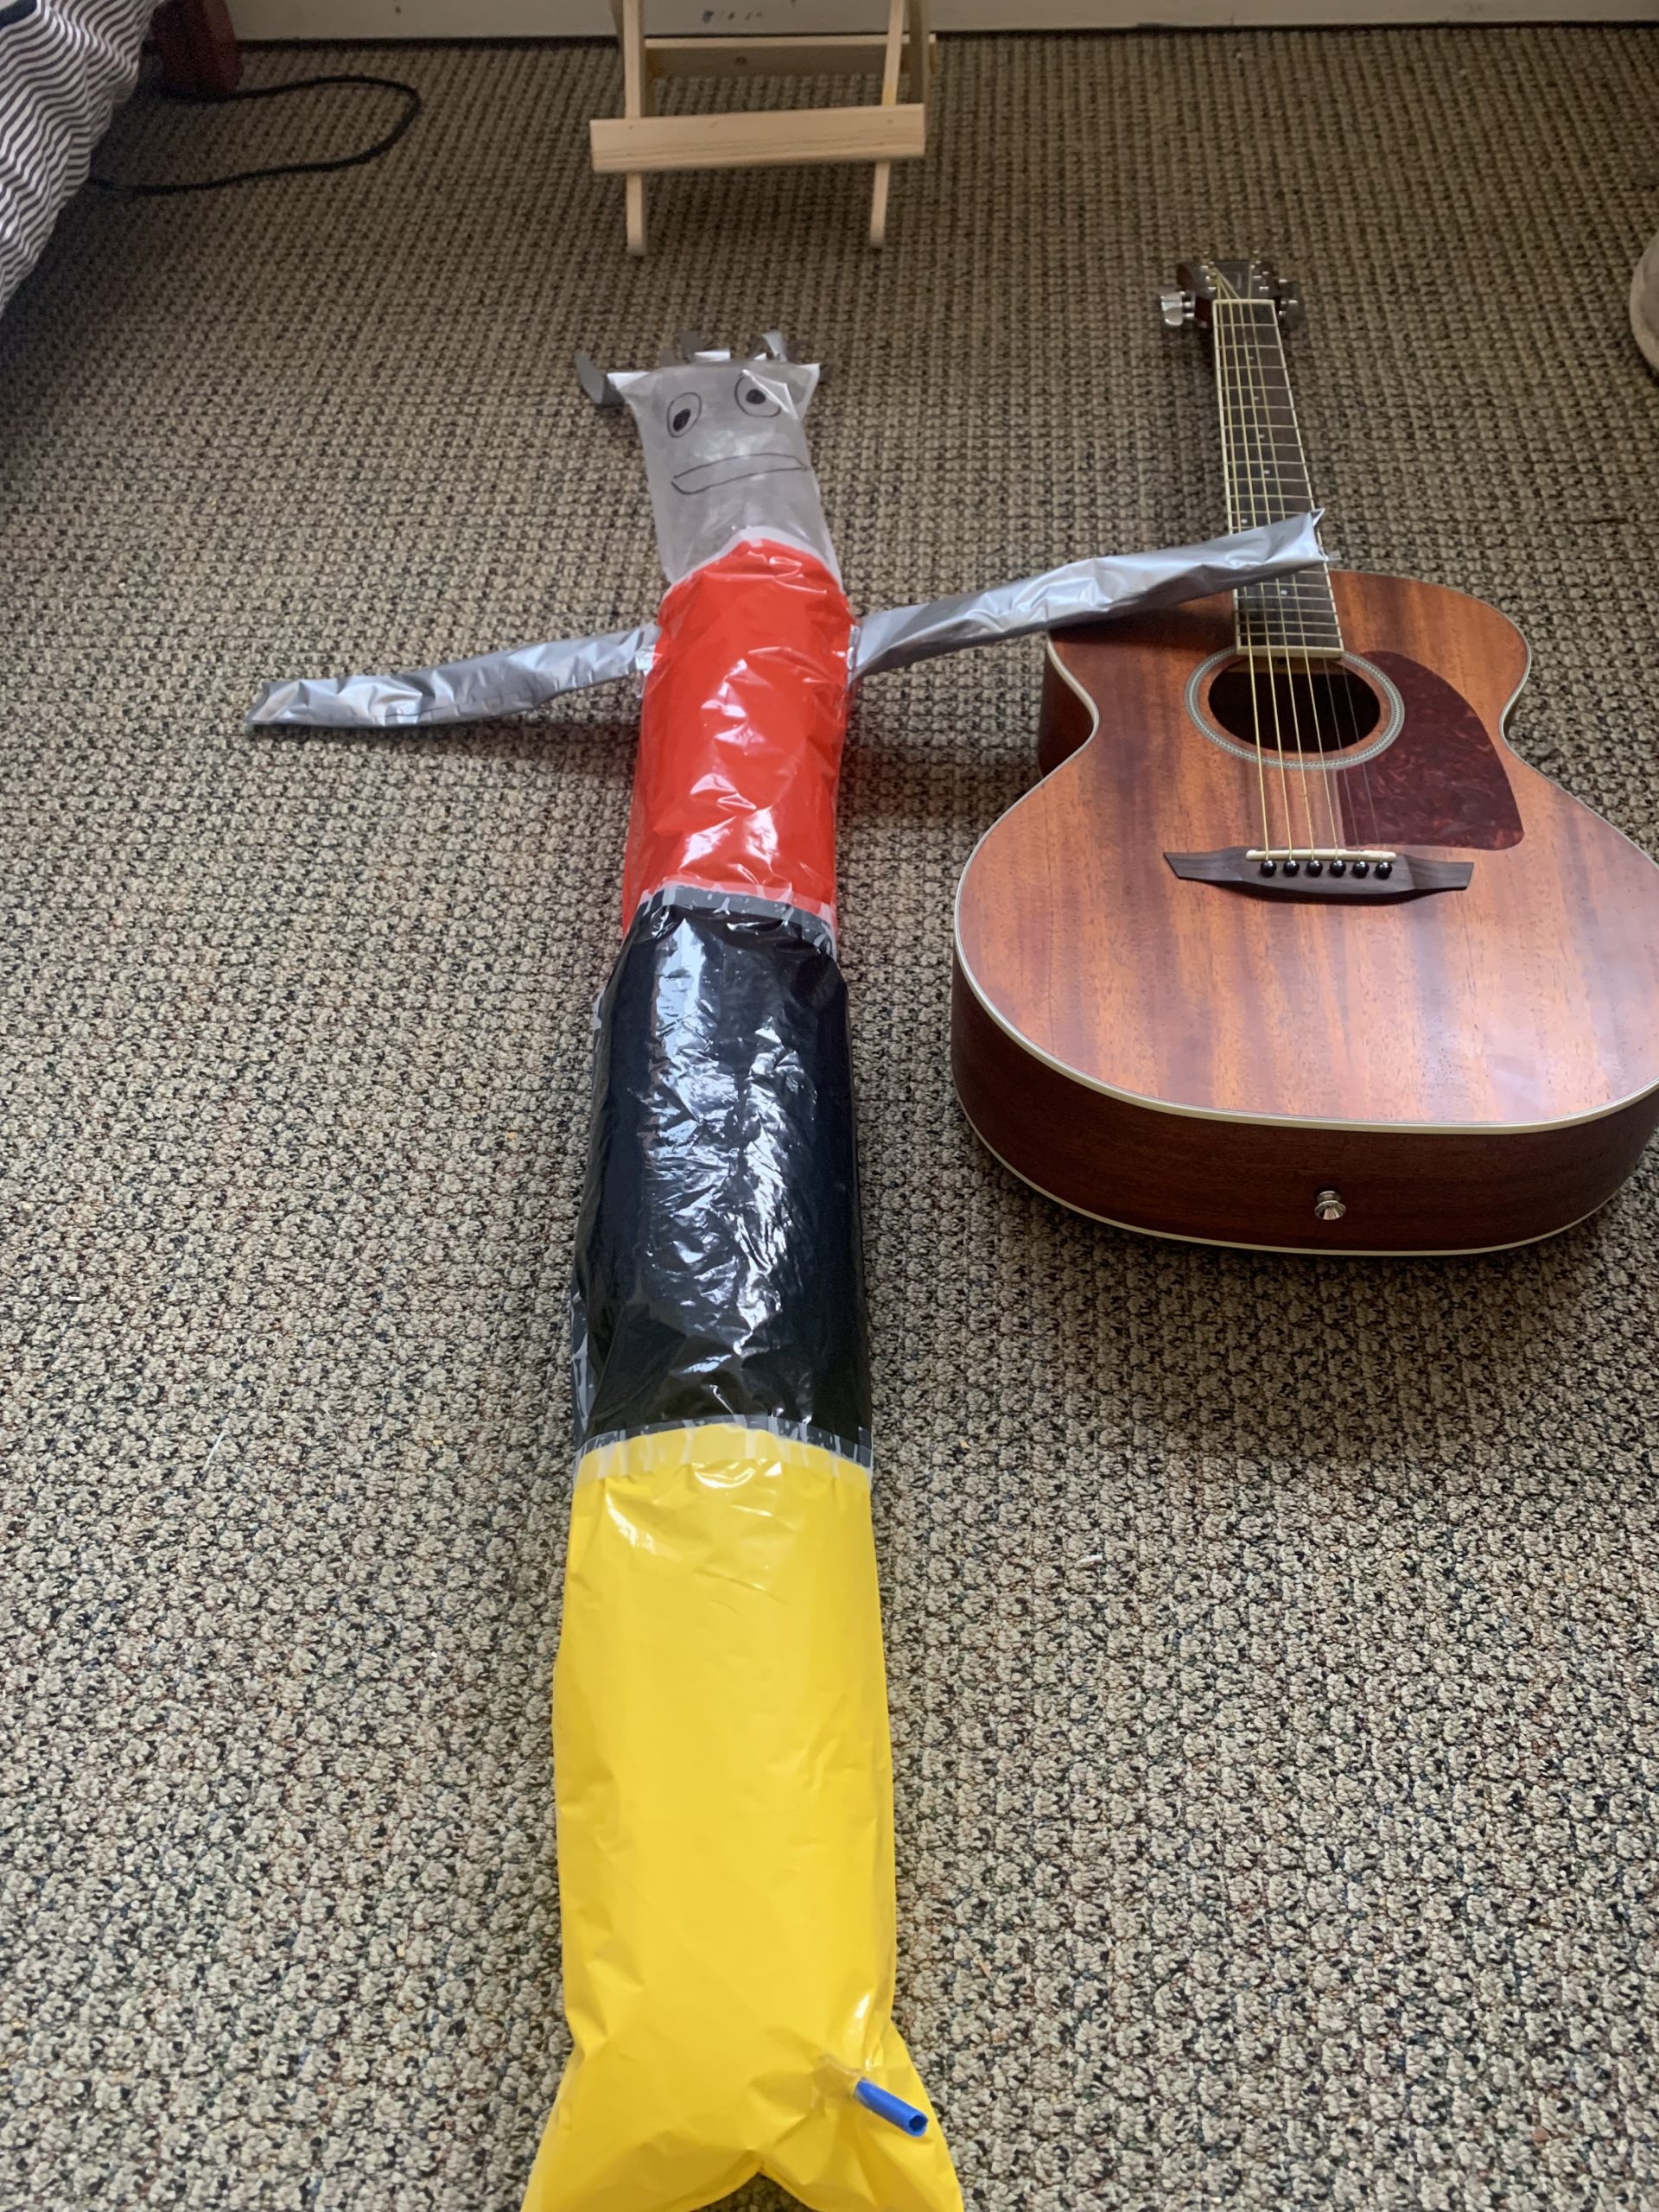
The last inflatable was more for a joke than anything, though of course merit was found in this process. This inflatable allowed me to give personality to the piece which was valuable in character work for future inflatables when I will complete my desire to make an animal. How can I create it to represent a given emotion? How can I accessorize it to add flair? Also, with this long inflatable, I realizes that the inflating motion can be even more dynamic, for example if I rolled up the car wash man similar to a paper towel roll, and as I inflated it from the bottom, it would roll out similar to one of those birthday kazoos.

Jules Yang – Improvisation Inflatables

For my first inflatable, I started off with cutting out lots of random blue, clear, light green, and dark green pieces from the bags. I started off with the corner of one bag that I branched out of. At one point, I thought it looked kind of like a fish and the color palette was giving me ocean vibes.

I had lots of organic shapes that were kind of difficult to piece together. I used up the whole given tape roll on just half of the inflatable!

I learned from building this inflatable that it is hard to fit together pieces that are not made to fit together. Additionally, I figured out kind of how to make my own corners and points through joining together pieces in a 3-dimensional direction. This inflatable had a lot of leaks and holes that made it difficult to inflate so I also learned to repeatedly tape the bag on the outside and then turn it inside out to reinforce all the seams.

For my second inflatable, I decided to stick to some more regular shapes of mostly triangle-ish and square-ish shapes joined together.

I also learned how to use objects I had to lay the “seams” against them so that they are easier to tape.

In this inflatable, I reinforced all the seams by taping on the outside and inside. This one kept air a lot better than my first one because the edges matched together better with these shapes. I also was literally making my first inflatable on my bed so it was taped together all wrinkly, but once I had a large flat workspace, it made it a lot easier to make this inflatable a little more “crisp”. I also got a lot of practice with making these corners that I thought were really fun to make.

With my last inflatable, I decided to go with a more festive color palette. I layered yellow, orange, and pink bags on top of each other, folded them up, and cut out this diamond chain pattern to try something new out.

I joined these edges together and then at the top and bottoms, began attaching random pieces and creating new corners to create a more interesting shape.

At one section, I tried to connect a star-shaped hole together with a star face, but I learned from this inflatable that it is very hard to do that and ultimately was not very successful, but it taught me that in the future, I probably need to measure things more accurately because I was free-handing all the shapes.

I also created a pocket in one corner that I could poke the straw into so that I could secure the straw more tightly.

Overall, this assignment took me a lot longer than I thought, but it was a lot of fun and I learned a lot about how 3D structures are constructed. I was proud of how much I improved from one inflatable to the next.

Lori Kipp – Improvisation Inflatables

Visual Portfolio, Posts & Image Gallery for WordPress

For my first inflatable, I began by cutting random shapes from the provided silver and white plastic bags. These shapes included a mix of polygonal forms (often triangles or quadrilaterals) as well as longer strips and curves. I assembled them together using a combination of pink gaffers tape on the outside and clear scotch tape on the inside, observing observing the difference in appearance when seams are highlighted or hidden. At no point did I know what the final shape would look like, but I observed about 2/3 of the way through assembly that I had a tendency (though unintentional) to try to make my inflatable spherical. To combat this, I explicitly made a portion of the inflatable protrude which gives the form a snail-like appearance. I followed the process demonstrated in class most closely for this inflatable and had reasonable success making it airtight.

Initially, I struggled with having absolutely no direction for my first inflatable, so for my second, I decided to create two halves and join them together, each with a different prescribed rule. For one half, I had all of my starting pieces cut to the same shape (light and dark greens) while for the other half I kept everything one color (purple). I also flipped my inflatable inside out so that at first, the taped seams were not visible. However, I struggled to join the two halves of the form, and when I did the seal was not very airtight and I was unable to inflate the form completely. To remedy this, I used the pink gaffers tape to cover leaks in the inflatable, which intentionally disrupts the seamless look I had been trying to maintain. I found the second inflatable to be the most challenging because I tried to be the most ambitious in my assembly.

After completing the first two inflatables, I found that I was nearly out of tape – both the supplied gaffers tape and my own personal tape. Consequently, I chose to experiment with constricting the shape of a default inflated shape, such that I could use very little tape. I sealed two gallon-sized Ziploc bags together to create a base shape, then cut thin strips of red, yellow, and blue plastic. I tied, braided, and weaved these strips into other forms, then attached them around the Ziploc bags in various ways to shape the final inflated form. While I had the most fun creating this inflatable, I felt restricted by the inherent shape of the bags; I would have enjoyed restricting a less predictable shape.

Improvisational Inflatables – Jennifer Shin

Going into the project, I wanted to lean into the “improvisational” part of the assignment. 

For the first sample, I created 4 inch by 4 inch squares and then started to patch them together without any rules. Starting from one of the most basic shapes, I wanted to see how far I can push to make it a less-basic three-dimensional form. In the end, the final form was not as exciting as I hoped to be but I enjoyed the process of it at least.

In the second sample, I cut out all the handle of the plastic bags to create a fan-shaped inflatable. I liked that the handle part was already double layered and when I tried to inflate each piece, it created a unique shape. The second sample is more planned, but I also had some trouble sealing each handle into one and fully inflating the final piece. 

Visual Portfolio, Posts & Image Gallery for WordPress

The third one is another more improvisational experiment. First, I cut off all the corners of the plastic bag and then taped one edge to another. Though I really enjoy the shape I have created, box tape didn’t really seal the edges together which made the air leak and the final form not fully inflate. Also, since each piece was not a smooth plane, It was hard to not make the edges crease. However, I enjoyed this sample the most since it was a different experience to create a three dimensional form using simpler three dimensional forms.

Improvisation Inflatables – Heeyun

Visual Portfolio, Posts & Image Gallery for WordPress

For the first inflatable, I cut out pieces from the given plastic bags and attached them together randomly. I wanted to see where it would take me if I tried to think and plan as little as possible while creating it to truly embrace the idea of improvisation. However, as I progressed the pieces got increasingly harder to tape together neatly because of how they curved. Especially towards the end when I had to close up the inflatable, I no longer had an opening large enough for my hand to fit through and support the inside of the inflatable to better stick the pieces together. I also found it very challenging to work with this inflatable when I decided to add the thin white tube-like structure. It made the inflatable harder to hold and fold around as I built the piece. 

The second inflatable was a bit more planned out than the first one. I wanted to work with only cubic or rectangular pieces and also incorporated the corners of the plastic bags. At first I vaguely imagined that this piece would turn out like a large cube. But as I pieced it together, I realized each part I cut out was very irregular in width and length, so making a perfectly symmetric structure was not going to work out smoothly. Instead, I just tried to embrace the imperfections and continue piecing edges to edges until my inflatable was fully closed. It’s definitely not a cube, or cube-like, but I like how the freedom of improvising allowed me to create this abstract fish-like inflatable. 

My last inflatable turned out to be the simplest looking one because I thought maybe a little too little. Knowing that I had to improvise, I didn’t think too much about my process and what I was doing. However, I still wanted to make a star-like structure using the existing structure of the plastic bags. I let my mind drift away as I cut and taped together the plastic pieces, and before I knew it I had created a “pillow” in the shape of a cross rather than a star-like structure. This was a strange improvisation process where, unlike the first two, my unplanned building process led me to a simpler, easier to handle structure than I had imagined.

Overall, it was challenging trying to get the pieces to tape neatly and have the tape perfectly seal all holes and gaps. I have naturally pretty sweaty hands so some of the tape pieces I placed would unstick, especially while I inflated them. I could fairly easily tape remaining holes up, though, by inflating them and checking for any leaks as I blew.

Asad Sheikh – Improvisation Inflatables

I honestly was a bit nervous to start this assignment. As someone who is so used to assignments having rules and constraints to follow, having this assignment where quite the opposite is true forced me to think (or, not think) in ways in which I was not used to. Nevertheless, I thoroughly enjoyed being able simply sit down, cut plastic, tape it together, and blow it up and see what I made once I finally got into the groove of things.

For the first inflatable, I went in with absolutely zero direction and simply cut random shapes out of 3 plastic bags. Then, when I put it together, I tried to put them together in a way such that no piece touched a piece of a similar color, just to see what kind of visual effect that would create.

This piece almost resembled a really long fox head, with these 2 ears that seemed to poke out above the body fo the inflatable with a long snout coming out. I thought it was really interesting to see how various edges fit together, namely combining round edges and straight edges to create bends in the inflatable and experimenting with the how much I pulled the inflatable in a certain direction to adjust the tightness and size of it as I put the final pieces together, which seemed to add dimension and bumps to the inflatable.

For the second piece, I opted to use a different strategy when putting the pieces together. Rather than the last piece where each piece touched pieces of different colors, I instead put pieces of similar colors together to see how that could create a visual effect of more interesting forms being seen on the inflatable. I also tried to create more pointed edges to the inflatable by pulling the edges of the pieces more tightly to new pieces I taped on.

This inflatable looks like a lot of different things to me. From one angle, it looks like a cat sitting up, with 2 distinct ears and a tail. From another angle it almost looks like a fish swimming through water. I also ran out of the provided tape with the first inflatable so I had to use plain Scotch tape.

For the last inflatable, I decided to experiment with making a 2D design of the inflatable, and once I was pleased with it, folding and taping it immediately into 3D without adding a single piece.

The 2D design essentially looked like a flat Christmas tree, with a tall triangle and a rounded bottom. As I pulled everything to each other, I experimented with how to connect the edges. I ultimately decided on connecting them as if I folded the design in half vertically. It ultimately created this cone like object which seems to resemble a 3D Christmas tree. Honestly, I was pretty surprised with how this turned out – especially the fact that the 2D and 3D forms were much more similar visually that I thought they would be.

Improvisation Inflatables – Sophia Huang

3 Inflatables

Visual Portfolio, Posts & Image Gallery for WordPress

Sample 1:

For the first sample, I decided to just cut random pieces and tried to tape them together. I wanted to use this as a chance to explore different shapes and to see what will happen after combining different shapes. I also experimented with using the ends of the bags. I realized that if I were to just cut random shapes, it would be really hard to complete and close the inflatable without making sharp edges. I also realized that the more tape I put, the harder it is to inflate certain areas. Lastly, because I used clear tape, a challenge I had was finding what was completely taped and what was causing the air to leak.

Sample 2:

For the second sample, I really wanted to test out making small pockets or just little areas that are not completely connected with the main body. I started by cutting similar shapes and then taping the sides of each piece together and then taping each individual piece to each other. I was able to successfully make these small pocket-like shapes and I also added an additional small pocket (the white piece). After blowing air into this I realized that the pockets in a way inflate into each other/have separate movements.

Sample 3:

For the last sample, I wanted to explore round shapes. I first made a cylinder. I realized that I have always been taping pieces to separate pieces and so for this sample, I tried taping the ends of the same piece (blue) to the same body (black). A challenge I had was trying to close the cylinder. Because of the blue piece, it was a little complicated to add the pink piece to the original cylinder. The pink piece was also slightly bigger than the size needed to close the piece. That is why there seems to be an extra bubble when inflating this sample.

Charlotte Lamm – Improvisation Inflatables

First I made this green and purple inflatable. I wasn’t sure how much trouble I would have wrangling the tape and plastic so I kept it simple with some angular shapes. It was helpful to use the corners and sides of the bags as edges because I didn’t have to tape them together, but I was expecting much more angularity from them than I really got. It seems like it is quite difficult to get hard straight edges with inflatables, but you can get soft edges and pretty good points.

For my next inflatable I wanted to start with something round. I cut a piece of the white plastic into a circle, then ripped off a long piece of tape. I put the edge of the circle at the lefthand side of the tape, then went around the edge of the circle pleating and connecting the pieces to the tape. Once I was finished pleating, I connected the two ends of the tape. This piece looked sort of like a dome, but I was wondering what would happen if you connected two sides of the circle at a small point in between. Looking from the opening of the dome to the very top of it, it looked like the number 8. I thought it would make a cool shape, but when inflated the dome had too many gaps caused by the pleating for it to fully expand and show this shape. In the future, I would like to experiment more with this idea with better understanding of how it would work. The left “leg” of the inflatable was constructed by connecting two basic square shapes but only by part of one edge. By doing this, the shapes can more freely twist about. I thought this was cool. On the other “leg” of the inflatable, I was mostly just trying to practice taping cleanly. I was interested in what would happen if I used the handle of the bag. Again, too much air was escaping for it to fully inflate, but I still think more could have been done here. What about other shapes looping through that hole? Like an inflatable chain? Or an inflatable knot? There is certainly more to explore.

For the last inflatable I constructed, I was thinking a little more about what it would look like in the end. I also tried to be more conscious about the shapes I was cutting out; before, I cut the shapes one by one and tried to make them all fit together. I found that using this method made connecting the last few joints really difficult. I liked the little blue piece at the bottom. It was a little tricky to tape but I love playing with curves and points… and I suppose that’s most of what you can do with things that inflate.

Skylar – Improvisation Inflatables

This is my first inflatable. I cut out a lot of small shapes and did not try to predict the final structure in any way. This one actually turned out pretty good, I didn’t really have any difficulties other than learning to tape specific shapes. It as actually easier than the other two since all of the pieces I was connecting were flat. I like that it looks kind of like a cartoon creature. My friend said it looks like a pokemon.

Visual Portfolio, Posts & Image Gallery for WordPress

This is my second inflatable. I wanted to make it have a lot of long and skinny pieces, so I cut out a bunch of strips from the bags. I still tried to spontaneously decide the angles at which I was taping the bags to each other. This one was a lot harder to put together, partly because I was using packing tape but cutting it into thirds so it was thinner. It aslo was really hard to get the corners, and I think my final product still had a few holes despite my efforts to patch them. When I finished taping the interior together, I realized there wasn’t enough structure to let it inflate fully, so I taped a couple pieces together on the outside to help. I liked how it turned out but I had to constantly blow into it for it to stay inflated to that’s why the pictures aren’t as good!

This was my third inflatable, which I did several days after the first two. I wanted to try using larger pieces of bag, so I mostly just cut a big shape out of each one. This one was also somewhat hard to tape, because there were a lot of smaller connections as opposed to my first one which mostly came together in one cohesive shape. However, I felt like I figured out some way better strategies for taping all sorts of connections than the first two. I think I was able to get most of the holes taped up, and I got it done more quickly and felt less like I was struggling while doing it. The clear part with the green was also kind of hard (mostly doing the corners), but I put confetti in it which I think makes it more fun! There is also a lindor truffle wrapper that I incorporated. I liked how this one inflated in pieces rather than blowing up like a balloon like my first one. It also held air better than my second one.

Improvisation Inflatables

Visual Portfolio, Posts & Image Gallery for WordPress

My blue and yellow and clear inflatable was the first one I did. I did not go in thinking about what I was going to make, I only tried to match my colors. I ended up cutting a lot of pieces that were small, so I did a lot of work taping and fitting pieces together. I made lots of long rectangular shapes and squares as well as half circles. I tried to keep some of the bag angles from the original bag to make spikes. My first model ended up having air leaks but it was still able to inflate. I noticed how the tightness of me pulling and taping my pieces together in this model made it look like it had a cinched waist. (I was not able to get a photo for this one, but the reflection of it hanging in the sun is very pretty)

For my second model which is the orange black and silver one, I ended up doing similar random cutting but decided to use scotch tape instead and to hide my tape inside the form instead of displaying outside. For some reason after my form began to move from flat to having angles when I added rounded pieces, it became difficult to tape the inside, so especially around the top there is visible tape. This one ended up turning more round. I think it was because I used some bigger pieces and did not make or use any hard edges. Once again this one had some inflating difficulties like the last, but the form still inflated almost all the way.

For my last piece (the one that looks like a cat) I wanted to try another tape I had, which was painters tape. This help my piece together and ended up helping with my air problems. This piece became very symmetrical when I was doing it and I put two rounded shapes on the corners of what I am calling the cats cheeks which allowed my shape to round there. When doing it I did not realize that the top spikes would end up looking like ears, but I think it is a happy accident.

The one thing that I did really struggle with was actually cutting the plastic pieces, I do not know if all my scissors are dull, but I ended up tearing a good amount of plastic because it would not cut.