Alexandra Kaplan – Final Project

Instructions:

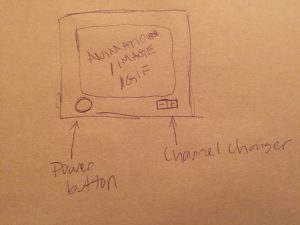
To operate the television, click the power button and use the up and down buttons to cycle through the channels. Come back at a different time of the day to see what else is on! Make sure your webcam access is allowed as well.

Turn on the TV!


var power = false; // power starts off

var h; // hour

var gCLickCount; // track mouse clicks
var channelIsCurrently = 0; // what index of the array is at
var channel = []; // array to store current videos

var myCaptureDevice; // laptop camera

var chanDistUp; // distance to channel up
var chanDistDown; // distance to channel down
var powDist; // distance to power button

var videos;

var buttonsPositionX = 485;

var powerbutton = {x: buttonsPositionX, y: 230, d: 60, render:drawPowerButton, 
                   strokecol:'burlywood', col:'lightyellow', 
                   labelcol:'burlywood'};
var channelUp = {x: buttonsPositionX, y:390 , w:60 , h:60 , render:drawChannelUp, 
                strokecol:'burlywood', col:'lightyellow'};
var channelDown = {x: buttonsPositionX, y:450 , w:60 , h:60 , render:drawChannelDown, 
                   strokecol:'burlywood', col:'lightyellow'};
                   
function setup() {
    createCanvas(550, 600);


    frameRate(30);
    myCaptureDevice = createCapture(VIDEO);
    myCaptureDevice.size(350, 308); // attempt to size the camera. 
    myCaptureDevice.hide(); // this hides unnecessary extra view.

    h = hour(); // what time is it?

    //load videos, assign each video a variable
    var mVid1 = createVideo('https://i.imgur.com/6OBMn2v.mp4');
    var mVid2 = createVideo('https://i.imgur.com/X73HsOP.mp4');
    var mVid3 = createVideo('https://i.imgur.com/AHmztFm.mp4');
    var aVid1 = createVideo('https://i.imgur.com/wNWUrAi.mp4');
    var aVid2 = createVideo('https://i.imgur.com/5nEKwzC.mp4');
    var aVid3 = createVideo('https://i.imgur.com/FbpKnv0.mp4');
    var eVid1 = createVideo('https://i.imgur.com/ziaEsYx.mp4');
    var eVid2 = createVideo('https://i.imgur.com/4kGyLnf.mp4');
    var eVid3 = createVideo('https://i.imgur.com/arD9T0D.mp4');
    var nVid1 = createVideo('https://i.imgur.com/5IfBxXm.mp4');
    var nVid2 = createVideo('https://i.imgur.com/ziyI0g4.mp4');
    var nVid3 = createVideo('https://i.imgur.com/fPyKK17.mp4');

    videos = [mVid1, mVid2, mVid3, aVid1, aVid2, aVid3, eVid1, 
              eVid2, eVid3, nVid1, nVid2, nVid3]; // array of video variables

    for (var i = 0; i < videos.length; i++){
        videos[i].hide(); //hide off canvas videos
        videos[i].loop(); // play videos on loop
    }
    // Which videos are on the different channels
    // if the hour is before 6 am
    if(h <= 6){ 
        channel = [mVid1, mVid2, mVid3];
    // if hour is between 6am and 12 pm
    }else if (h > 6 & h <= 12){ 
        channel = [aVid1,aVid2, aVid3];
    // if hour is between 12apm and 6pm
    }else if(h > 12 & h <= 18){
        channel = [eVid1, eVid2, eVid3];
    // if hour is after 6pm
    }else{
        channel = [nVid1,nVid2, nVid3];
    } 

}

function draw() {
     scale(0.8, 0.8)
    // distance between mouse click and the different buttons
    chanDistUp = dist(mouseX, mouseY, channelUp.x * 0.8, channelUp.y * 0.8); 
    chanDistDown = dist(mouseX, mouseY, channelDown.x * 0.8, channelDown.y * 0.8);
    powDist = dist(mouseX, mouseY, powerbutton.x * 0.8, powerbutton.y *0.8);

    television(0, 40);

    // if the tv is on, show the video on the current channel
    if(power === true){
        image(channel[channelIsCurrently % channel.length], 
            buttonsPositionX - 444, 192, buttonsPositionX - 138, 305);
    }

    //if tv is off, you see your reflection on the screen
    if(power === false){
        myCaptureDevice.loadPixels(); // this must be done on each frame.
        push();
        tint(100, 50); // Display at half opacity
        image(myCaptureDevice, buttonsPositionX - 440, 190); // draw the camera
        pop();
    } 

    //random tv noise, higher mouseY and mouseX is more noise
    if(power === true){
        for (var i = 0; i < mouseY + mouseX * 2; i++) {
            var r = random(0, 255);
            var g = random(0, 255);
            var b = random(0, 255);
            stroke(r, g, b);
            point(random(buttonsPositionX - 445, 388), 
                random(buttonsPositionX - 298, 497));
        }
    }
}

function mousePressed(){

    //click the channel up/down buttons when the power is on, 
    //the video will change
    if(chanDistUp < channelUp.w / 2 & power === true) {
        channelIsCurrently += 1;
    }
    if(chanDistDown < channelDown.w / 2 & power === true){
        channelIsCurrently -= 1;
        if(channelIsCurrently < 0){ // channels cycle, never goes above 2
            channelIsCurrently = 2;
        }
    }

    // if you click the power button, the tv will turn on
    if(powDist < 30 & power === false){
        power = true;
    } else if (powDist < 30) {
        power = false;
    }
}

function drawPowerButton() {
    ellipseMode(CENTER);
    strokeWeight(10);
    stroke(powerbutton.strokecol);
    fill(powerbutton.col);
    ellipse(powerbutton.x, powerbutton.y, powerbutton.d, powerbutton.d);
   
    // power symbol
    strokeWeight(3);

    // hovering over the symbol changes its color
    if(powDist < 30){
        stroke(150);
    }else{
        stroke(powerbutton.labelcol);
    }

    // power symbol
    noFill();
    arc(buttonsPositionX, 232, 25, 25, PI + 2.5, PI + 7);
    line(buttonsPositionX, 220, buttonsPositionX, 232);
}

function drawChannelUp() {
    rectMode(CENTER);
    strokeWeight(10);
    stroke(channelUp.strokecol);
    fill(channelUp.col);
    rect(channelUp.x, channelUp.y, channelUp.w, channelUp.h, 5, 5);
    strokeWeight(0);
    // hovering over the symbol changes its color
    if(chanDistUp < 30){
        fill(150);
    }else{
        fill(channelUp.strokecol)
    }
    textAlign(CENTER);
    textSize(40);
    text('+', channelUp.x, channelUp.y + 10);
}

function drawChannelDown(){
    rectMode(CENTER);
    strokeWeight(10);
    stroke(channelDown.strokecol);
    fill(channelDown.col);
    rect(channelDown.x, channelDown.y, channelDown.w, channelDown.h, 
        5, 5);
    strokeWeight(0);
    // hovering over the symbol changes its color
    if(chanDistDown < 30){
        fill(150);
    }else{
        fill(channelDown.strokecol);
    }
    textAlign(CENTER);
    textSize(40);
    text('-', channelDown.x, channelDown.y + 10);
}

function television(x, y){
    rectMode(CORNER);

    //tv body
    stroke(63, 44, 35);
    strokeWeight(5);
    fill(63,44,35); 
    rect(0, y + 65, width, y + 440, 30, 30); 

    //tv body
    fill('lightyellow');
    rect(x + 10, y + 80, x + 425, y + 410, 10, 10); 

    // screen
    fill(131, 123, 105);
    stroke(63, 44, 35);
    rect(x + 40, 190, 350, 308); 

    // place for tv knobs
    fill(101,69,56);
    strokeWeight(15);
    rect(x + 425, y + 85, x + 115, y + 400); 
    strokeWeight(10);
    stroke(63, 44, 35);
    line(x + 320, 5, x + 390, 105);
    line(x + 420, 5, x + 400, 105);

    drawPowerButton(); // power button
    drawChannelUp(); // channel up
    drawChannelDown(); // channel down 
}

Statement:

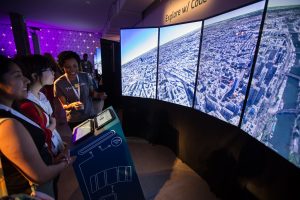
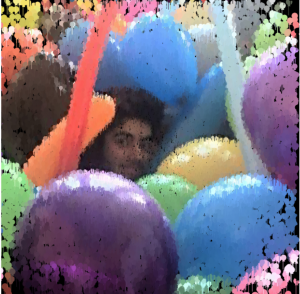
For my final project, I wanted to create a television that had different “programs” on at different times of the day. I was able to create this with a set of 12 different videos, three each for four different times of day (12am-6am, 6am-12pm, 12pm-6pm, 6pm-12am). I also had the buttons on the tv be mouse responsive: when hovering over the buttons they change a different color. As stated in my proposal, I was able to add a webcam component for when the tv is ‘off’ as if you were reflected in the screen like a glass tv. I added some noise on top of the videos controlled by mouse x and mouse y positions.

I feel like this project solidified a lot of the concepts we have learned throughout this semester. I definitely have a better grasp on how I can use p5.js in the future on my own projects as well as the core concepts behind computer programming.

Alexandra Kaplan – Project 12 – Proposal

For my final project, I am planning on making an interactive tv set. It will have with pre-loaded animations, images, and gifs that can be flipped through by pressing channel changer on the tv. I think it could also be cool if the animations were different depending on the time of day, much like a real television programming. I would separate the day into 4 different parts of 6 hours each for the different animations to play. I also want to incorporate an on/off button to turn ‘off’ the tv. If I have time, I would love to incorporate the camera in the computer to show people’s faces “reflected”on the tv screen when it is off like with television sets with glass screens. Also if I have time, it would be fun to have different sounds for the different buttons on the tv.

Project Proposal Sketch

Alexandra Kaplan – Looking Outwards – 12

Video of Samsung’s “The Frame”

The two projects I am focusing on for this week’s Looking Outwards is Samsung’s “The Frame” and a piece called “All the Minutes”. These pieces are very different from each other, but they both are somewhat connected to what I want to do for my final project, an interactive tv set. Samsung’s “The Frame”, created by the company Leo Burnett Sydney, takes place in an art gallery, but some of the paintings/photographs are actually tv’s with which people interact with videos on them. The videos also interact with each other. I think that it is a really fun idea, but I feel like they could have invested more in the quality of the painting videos and tried to disguise them better.

The piece ‘All the Minutes’, created by Studio Puckey, is a clock that uses tweets with a specific time in them. I think that it is much more effective than Samsung’s project, even if it is so different. It is fun to watch the different tweets as the times change throughout the day.

Alexandra Kaplan – Looking Outwards – 11


Video of the project

A computational musician I found to be interesting is Mari Kimura, a violinist. The project I am focusing on is Bebe, a project made performed by violin and computer. The piece was originally written in 2008, with edits made to it in 2012. From Kimura’s description of the project, it seems she used the Max computer program to play music along with her. What caught my eye (or should I say ear) is how she created the program to follow along with her in order to let her improvise. From her comments, it seems that many computer music projects she has previously worked on put the musician in a place in which they had to play exactly to the note to keep up with the computer. I think it is amazing what she accomplished and what technology can do to improvise and keep in harmony with brilliant musicians.

Alexandra Kaplan – Project 11 – Composition

Press any key to restart!

/*
Alexandra Kaplan
aekaplan@andrew.cmu.edu
Section C
Project - 11
*/

function setup() {
    createCanvas(480, 480);
    background(250, 90, 15);
    
}

function draw() {

    var ttl1 = makeTurtle(240,240);
    var ttl2 = makeTurtle(240,240);
    var ttl3 = makeTurtle(width + width / 2, 240);
    var ttl4 = makeTurtle(width, 245);
    var ttl5 = makeTurtle(width * 2, 240);
    var tt2ColR = map(mouseY, 0, height / 2, 200, 50);
    

    // sand 1
    ttl1.penDown();
    ttl1.setWeight(10)
    col1 = color(250, 220, 200);
    ttl1.setColor(col1);
    for(var i = 0; i < 10; i++){
        ttl1.forward(-mouseY / 4);
        ttl1.right(-mouseX /50); 
        ttl1.left(mouseX/100)  
    }
    
    //sky
    ttl2.penDown();
    ttl2.setWeight(20);
    col2 = color(tt2ColR, 150, 225);
    ttl2.setColor(col2);
    for(var j = 0; j < 200; j++){
        ttl2.forward(mouseY / 4);
        ttl2.right(-mouseX / 50);
    }

     //sand 3
    ttl3.penDown();
    ttl3.setWeight(10);
    col3 = color(250, 230, 190);
    ttl3.setColor(col3);
    for(var i = 0; i < 10; i++){
        ttl3.forward(-mouseY / 4);
        ttl3.right(-mouseX / 50); 
        ttl3.left(mouseX / 100)  
    }
    //sand 2
    ttl4.penDown();
    ttl4.setWeight(10);
    col4 = color(250, 230, 200);
    ttl4.setColor(col4);
    for(var i = 0; i < 10; i++){
        ttl4.forward(-mouseY / 5);
        ttl4.right(-mouseX / 50); 
        ttl4.left(mouseX / 100);  
    }

    ttl5.penDown();
    ttl5.setWeight(10);
    col5 = color(250, 220, 200);
    ttl5.setColor(col5);
    for(var i = 0; i < 10; i++){
        ttl5.forward(-mouseY / 4);
        ttl5.right(-mouseX / 50); 
        ttl5.left(mouseX / 100);
    }

}

function keyPressed(){
    background(240, 90, 15);

}

function turtleLeft(d){this.angle-=d;}function turtleRight(d){this.angle+=d;}
function turtleForward(p){var rad=radians(this.angle);var newx=this.x+cos(rad)*p;
var newy=this.y+sin(rad)*p;this.goto(newx,newy);}function turtleBack(p){
this.forward(-p);}function turtlePenDown(){this.penIsDown=true;}
function turtlePenUp(){this.penIsDown = false;}function turtleGoTo(x,y){
if(this.penIsDown){stroke(this.color);strokeWeight(this.weight);
line(this.x,this.y,x,y);}this.x = x;this.y = y;}function turtleDistTo(x,y){
return sqrt(sq(this.x-x)+sq(this.y-y));}function turtleAngleTo(x,y){
var absAngle=degrees(atan2(y-this.y,x-this.x));
var angle=((absAngle-this.angle)+360)%360.0;return angle;}
function turtleTurnToward(x,y,d){var angle = this.angleTo(x,y);if(angle< 180){
this.angle+=d;}else{this.angle-=d;}}function turtleSetColor(c){this.color=c;}
function turtleSetWeight(w){this.weight=w;}function turtleFace(angle){
this.angle = angle;}function makeTurtle(tx,ty){var turtle={x:tx,y:ty,
angle:0.0,penIsDown:true,color:color(128),weight:1,left:turtleLeft,
right:turtleRight,forward:turtleForward, back:turtleBack,penDown:turtlePenDown,
penUp:turtlePenUp,goto:turtleGoTo, angleto:turtleAngleTo,
turnToward:turtleTurnToward,distanceTo:turtleDistTo, angleTo:turtleAngleTo,
setColor:turtleSetColor, setWeight:turtleSetWeight,face:turtleFace};
return turtle;}

For this project, I wanted to focus on mouse interactivity and how turtles could be used to create an overall picture. Using a few different turtles, I was able to make a desert landscape with different colors of sand and a sun that can be included depending on the person using it.

earlier iteration
final iteration with crescent sun
Final iteration

Alexandra Kaplan – Looking Outwards – 10


                           Picture of Yael Braha’s project “Google Made With Code”

For this week, I am focusing on the artist Yael Braha. She has a Bachelor’s degree in Graphic Design from the European Institute of Design in Rome, and a Master’s degree in Cinema from San Francisco State University. She currently works at the Moment Factory, a multimedia company focused on creating experiences as a multimedia director.  A project of hers that stands out to me is called “Google Made With Code” which she made for Google to get girls interested in STEM and computer coding. It seems like that she made coding interesting and fun for the girls participating as an introduction to what coding can do. I think that this work is very important, as coding can seem scary to newcomers, so making it fun at the beginning can help make girls more confident and keep going with coding careers.

Alexandra Kaplan – Project 10 – Generative Landscape

sketch

/*
Alexandra Kaplan
Section C
aekaplan@andrew.cmu.edu
Project - 10
*/

var planets = [];
var stars = [];
var ex = 500;
var ey = 500;

function setup() {
    createCanvas(480, 480); 
    
    // create an initial collection of planets
    for (var i = 0; i < 10; i++){
        var rx = random(width);
        if (planets.length < 5){
            planets[i] = makePlanet(rx);
        }
    }
    for(var j = 0; j < 200; j++){
        var sx = random(width);
        stars[j] = makeStar(sx);
    }
    frameRate(20);
}

function draw() {
    background(10,30,120);

    updateAndDisplayStars();
    removestars();
    addNewstars();

    updateAndDisplayplanets();
    removeplanets();
    addNewplanets();
    
    drawShootingStar();
    var newShootingStarLikelihood = 0.01; 
    if (random(0, 1) < newShootingStarLikelihood){
    	if(ex > width || ey > height){
    	   createshootingStar();
    	}
    }	
}
function drawShootingStar(){
	fill('khaki');
	strokeWeight(0);
	var dx = 5;
	var dy = 10;
	ellipse(ex + dx, ey + dy, 10);
	ex += dx;
	ey += dy;
}

function createshootingStar(){
	ex = random(0, width);
	ey = 0;
 }

///////////PLANETS////////////////////////////////////////////////
function updateAndDisplayplanets(){
    // Update the Planet's positions, and display them.
    for (var i = 0; i < planets.length; i++){
        planets[i].move();
        planets[i].display();
    }
}

function removeplanets(){
    // If a Planet has dropped off the left edge,
    // remove it from the array
    var planetsToKeep = [];
    for (var i = 0; i < planets.length; i++){
        if (planets[i].x + 50 + planets[i].breadth > 0){
            planetsToKeep.push(planets[i]);
        }
    }
    planets = planetsToKeep; // remember the surviving planets
}

function addNewplanets() {
    // With a very tiny probability, add a new Planet to the end.
    var newPlanetLikelihood = 0.6; 
    if (random(0, 1) < newPlanetLikelihood){
        if (planets.length < 5){
            planets.push(makePlanet(width + 40));
        }
    }
}

// method to update position of Planet every frame
function PlanetMove() {
    this.x += this.speed;
}
   
// draw the Planet
function PlanetDisplay() {
    var pwidth = this.wid;
    fill(this.col); 
    strokeWeight(0); 
    ellipse(this.x, this.y, pwidth);
    stroke(this.strkCol);
    strokeWeight(this.strk);
    line(this.x - (this.wid / this.srtklength) , this.y, this.x + (this.wid / this.srtklength), this.y); 
}


function makePlanet(birthLocationX) {
    var plnt = {x: birthLocationX,
    	        y: random(0, height),
                breadth: 10,
                speed: random(-5,-1),
                wid: random(20, 75),
                move: PlanetMove,
                display: PlanetDisplay,
                col:color(random(50, 100), random(50, 150), random(100, 255)),
                strk: random(0, 5),
                strkCol: color(random(50, 100), random(50, 150), random(100, 255)),
                srtklength: random(1,2),
                }
    return plnt;
}

///////////STARS////////////////////////////////////////////////
function updateAndDisplayStars(){
    // Update the star's positions, and display them.
    for (var i = 0; i < stars.length; i++){
        stars[i].move();
        stars[i].display();
    }
}

function removestars(){
    // If a star has dropped off the left edge,
    // remove it from the array
    var starsToKeep = [];
    for (var i = 0; i < stars.length; i++){
        if (stars[i].x + stars[i].breadth > 0) {
            starsToKeep.push(stars[i]);
        }
    }
    stars = starsToKeep; // remember the surviving stars
}

function addNewstars() {
    // With a very tiny probability, add a new star to the end.
    var newStarsLikelihood = 0.5; 
    if (random(0,1) < newStarsLikelihood) {
        stars.push(makeStar(width + 40));
    }
}

// method to update position of stars every frame
function StarMove() {
    this.x += this.speed;
}
   
// draw the star
function StarsDisplay() {
    var swidth = this.wid;
    fill(this.col); 
    strokeWeight(0); 
    ellipse(this.x, this.y, swidth);  
}


function makeStar(birthLocationX) {
    var st = {x: birthLocationX,
    	        y: random(0, height),
                breadth: 10,
                speed: -.5,
                wid: random(1, 5),
                move: StarMove,
                display: StarsDisplay,
                col:color('palegoldenrod'),
            }
    return st;
}

When thinking about a generative landscape, my mind went straight to space, with planets and stars passing by.

                                                    Image of the original sketch

I started off by referring to the bulding base code and changing it to planets of various sizes. I then added strokes of different random weights and lengths to be the planet’s rings. The stars behind the planets were made in a similar way, but with more of them. I then added some shooting stars for fun. I think it turned out pretty well.

Alexandra Kaplan – Project 09

sketch

/*
Alexandra Kaplan
aekaplan@andrew.cmu.edu
Section C
Project - 09
*/

var img; //image
var w; //width of balloons

function preload () {
    img = loadImage("https://i.imgur.com/0F4euVwm.jpg?2") //loads image
}

function setup() {
    createCanvas(320, 315);
    background(0);
    noStroke();
    img.loadPixels(); // loads pixels
    frameRate(200); // fast
}

function draw() {

    var x = floor(randomGaussian(width / 2, 75)); // draws balloons concentrated in the center
    var y = floor(randomGaussian(height / 2, 75)); // draws balloons concentrated in the center
    var col = color(img.get(x, y)); 
    var d = dist(x, y , width / 2, height / 2);
    w = map(d, 0, width, 1, 10); // balloons in center are smaller than edge
    fill(col); // fill is color of image at x and y
    stroke(col); // stroke color is color of image at x and y
    balloon(x, y, w, w); // draws balloon
}

function balloon(x, y, w){
	strokeWeight(0.5);
	line(x - (w / 12), y, x - (w / 12), y + (w * 2)); // draws balloon string
	strokeWeight(0);
	ellipse(x, y, w, w); // draws filled up balloon 
	triangle(x - (w / 4), y + (w / 1.5), x + (w / 4), y + (w / 1.5), x, y); // draws balloon nubbin
}

I had a lot of fun finding a picture for this project, and I ended up going with a photo I took of my housemate at the end of last year when we filled up another housemate’s room with balloons. For the computational image, I decided that it should be made up of balloon shaped pixels. The pixels are bigger and more concentrated in the center (and therefore a higher resolution) and bigger and less concentrated on the outskirts.

Beginning of image
Closer to end of image
Original Image

Alexandra Kaplan – Looking Outwards – 09


I chose to look at Sophie Chen’s Looking Outwards Week 5, a 3D animation for TEDx Sydney 2018 created by Rich Nosworthy and directed by Scott Geerson. When I read Sophie’s comments about how unbelievable it is how the project is all computer generated, I knew I had to take a look. I completely agree with Sophie, I can’t believe the amount of work and detail that went into this animation. If I didn’t know beforehand it was all made on the computer I probably would not have realized that fact most of the video. I thought that the project itself was very impactful. The visuals and audio paired well together to create a surprisingly powerful and emotional piece about humankind.

Alexandra Kaplan – Looking Outwards 08


Lecture at Eyeo given by Neil Mendoza

  An artist that stood out to me is Neil Mendoza, who has an MA in math and computer science from Oxford University and an MFA in design media art from UCLA. He only started to self-describe himself as an artist in 2014 and often imbues his art with humor, which is why I really like his work. I admire his approach to his work, in his lecture, he often talks about getting a simple idea from a single idea or object, thinking about it, then expanding upon in a whimsical way.

An example of Neil Mendoza’s work I found particularly amusing.

    One project that really stood out to me was his “Hamster Powered Hamster Drawing Machine. His thought process started with the idea of selfies, which led down the rabbit hole of why selfies are limited to humans. He then took this concept and built a contraption that, when a hamster runs on its wheel, it draws a picture of a running hamster. The way it combined technological software (the cams were needed to draw a hamster) and the physical (a hamster controlling the drawing device) is really inspiring and opens my mind to the different possibilities programming, code, and computer science can offer even outside the technological world.