//Name: Alessandra Fleck
//Class Section : B
//Email: afleck@andrew.cmu.edu
//Assignment-12-Final

//USING ML5 TO IMPLEMENT MACHINE LEARNING MODEL -- see html for library src
//POSENET - HUMAN POSE ESTIMATION, USING MACHINE LEARNING

var myCamera; //variable to hold onto webcam data
var poseNet;
var pose =[];
var imgPlanet; //store first planet image
var imgPlanet2; //store second planet image
var imgPlanet3; //store third planet image for right hip

//NON RESPONSIVE BACKGROUND ENVIRONMENT
var stars =[]; //array to hold the stars

//CHARACTER HELMET VARIABLES
var headX = 0;
var headY = 0;
//CHARACTER EYES VARIABLES
var lefteyeX = 0;
var lefteyeY = 0;
var righteyeX = 0;
var righteyeY = 0;
//CHARACTER HANDS
var lefthandX = 0;
var lefthandY = 0;
var righthandX = 0;
var righthandY = 0;
//CHARACTER HIP
var rightHipX = 0;
var rightHipY = 0;


function preload(){
    //load media for use in the sketch
    var planetOneURL = "https://i.imgur.com/f0QBerx.png";
    imgPlanet = loadImage(planetOneURL);
    var planetTwoURL = "https://i.imgur.com/v6UuYtt.png";
    imgPlanet2 = loadImage(planetTwoURL);
    var planetThreeURL = "https://i.imgur.com/bjO4uOW.png";
    imgPlanet3 = loadImage(planetThreeURL);
}

function setup(){
    createCanvas(640,480);
    //load planet one image pixels
    imgPlanet.loadPixels();

    myCamera = createCapture(VIDEO); //giving permission to browser to connect to webcam
    myCamera.size(640,480); //setting display dimensions of camera
    myCamera.hide(); // to hide extra video display below canvas
    poseNet = ml5.poseNet(myCamera, modelLoaded); // load the posenet model and connect it to the video
    poseNet.on('pose', myPose);//when person is detected, execute

}
 //check that ml5 is running on p5js
function modelLoaded(){
    console.log('model is loaded');
}

//for one person at a time
function myPose(pose){
    //TEST POSE
    console.log(pose); //record+print the poses as detected by the camera
    //note that pose is an array
    if (pose.length > 0){
        //CHARACTER HELMET CAMERA POSITION
        headX = pose[0].pose.keypoints[0].position.x;
        headY = pose[0].pose.keypoints[0].position.y;

        //CHARACTER LEFT EYE CAMERA POSITION
        lefteyeX = pose[0].pose.keypoints[1].position.x;
        lefteyeY = pose[0].pose.keypoints[1].position.y;
        //CHARACTER RIGHT EYE CAMERA POSITION
        righteyeX = pose[0].pose.keypoints[2].position.x;
        righteyeY = pose[0].pose.keypoints[2].position.y;
        //CHARACTER LEFT HAND CAMERA POSITION - note that the index is for left wrist
        lefthandX = pose[0].pose.keypoints[9].position.x;
        lefthandY = pose[0].pose.keypoints[9].position.y;
        //CHARACTER RIGHT HAND CAMERA POSITION - note that the index is for left wrist

    //reduce jittering of shapes by implementing linear interpolation
    //takes position of shape and camera position and taking 0.2 in between
         //RIGHT HAND CAMERA POSTION AND LAG USING LERP FUNCTION
        var righthandNX = pose[0].pose.keypoints[10].position.x;
        var righthandNY = pose[0].pose.keypoints[10].position.y;
        righthandX = lerp(righthandX,righthandNX,0.8);
        righthandY = lerp(righthandY,righthandNY,0.8);

        //CHARACTER RIGHT HIP CAMERA POSITION
        rightHipX = pose[0].pose.keypoints[12].position.x;
        rightHipY = pose[0].pose.keypoints[12].position.y;

    }
}

function draw(){
    //draw the camera image to the canvas using image function
    image(myCamera, 0, 0, width, height);

    //stars at random
    for(var i=0; i<random(8); i++){
        stars.push(new star()); //put new star into array
    }

    for (var birth of stars){
        birth.display();
    }

    //maintain shape scale to distance from camera
    var cameraDistance = dist(lefteyeX, lefteyeY, righteyeX, righteyeY);

    filter(POSTERIZE,8); // filters video image into posterize
    filter(INVERT); //overlay gray filter


    //CHARACTER HEAD SHAPE SETTING
    fill(250);
    ellipse(headX,headY,200,200); //using nose location for character head
    fill(0);
    ellipse(headX,headY+25,30,10); //using nose location for character mouth

    //CHARACTER LEFT EYE SHAPE SETTING
    fill(0);
    ellipse(lefteyeX, lefteyeY, cameraDistance/2,cameraDistance/2);
    //CHARACTER RIGHT EYE SHAPE SETTING
    fill(0);
    ellipse(righteyeX, righteyeY, cameraDistance/2,cameraDistance/2);

    //FIRST (GREEN) PLANET IMAGE MOVING IN RESPONSE TO RIGHT HAND
    image(imgPlanet,righthandX,righthandY,50,50);
    image(imgPlanet,righthandX+50,righthandY+50,100,100);
    image(imgPlanet,righthandX+20,righthandY+100,10,10);
    //SECOND (ORANGE) PLANET IMAGE MOVING IN RESPONSE TO LEFT HAND
    image(imgPlanet2,lefthandX+20,lefthandY,50,50);
    image(imgPlanet2,lefthandX-100,lefthandY,30,30);
    image(imgPlanet2,lefthandX+50,lefthandY+50,60,60);

    //USING CHARACTER RIGHT HIP AS GALAXY
    image(imgPlanet3,rightHipX,rightHipY-50,300,150);


}

function star(){
    this.posX = 0;
    this.posY = random(-100,400);
    this.size = random(50,100);
    this.display = function(){
        fill(0);
        ellipse(this.posX,this.posY, this.size);
    }
}
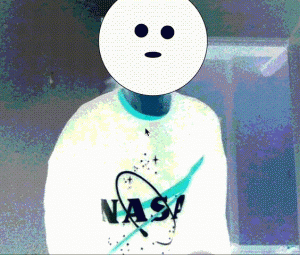
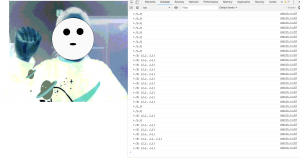
For the final project I wanted to explore a part of p5js that involved computer vision. Originally going to do an Augmented Reality project for objects placement, I ended up going more towards computer vision as it is easier to do with a webcam and there are lots of resources available for it in correlation with p5js. To use computer vision I added the Ml5 library to my html file and used the posNet() model that predicts live time human body estimation with machine learning.
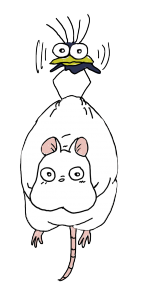
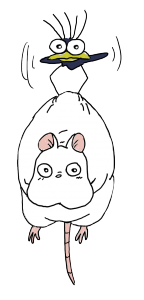
Using posNet I was able to identify different keypoint indexes for different parts of the body and link those to where I could input shapes. As I love space, I thought it might be neat to create a responsive space environment with the movement of the body. I began with making the head and eyes as a large moon thats responds to different distances from the camera and scales to the distance. I then created planets in illustrator and added them into the scene. Using linear interpolation, I was able to detach the keypoint of the wrists from the body and create a bit of a lag so that the planets had the effects of following the wrists, where in reality they were being offset from the keypoint of the wrist and the coordinates of the object.
From this project I got to explore this form of machine learning for the first time. Though it was not as refined as I wanted it to be (as much of the information was very new to me), I enjoyed looking at how computer vision operates and the things it can can do with augmenting reality.
Note: the camera will not work as the library needs to be linked with the html, download and open the source code in the zip file and just open the html file to get started!
![[OLD FALL 2018] 15-104 • Introduction to Computing for Creative Practice](../../wp-content/uploads/2020/08/stop-banner.png)
