Ankitha Vasudev & Mari Kubota – Final Project

Instructions:

Up- w key

Down- s key

Left- a key

Right- d key

WARNING: DO NOT TOUCH THE FIRE

The objective of the game is to avoid the wild fires and reach the plant at the lower right hand corner of the screen. If you reach the plant, the words “You Win” appear along with the button that leads you to the next level. If you touch the fire, the words “You Lose” appear along with a restart button. The game has multiple levels which get harder as you go due to the increase in the number of fires and the heightened speed of the character. The level resets without an increase in difficulty if you touch the fire. The game is meant to bring awareness to forest fires caused by climate change.

Note: click on the screen to start the game 

sketch

// Ankitha Vasudev and Mari Kubota
// 15-104 Final Project

// ghost position
var dx = 0; 
var dy = 0;
var posX;
var posY;

//ghost speed
var speed = 1;

//sapling postion
var xsap = 375;
var ysap = 370;

//fire 
var shapes = [];

//level number
var lvl = 1;

var gameOn = true;
var lose = false;

function setup() {
	createCanvas(400, 400);
    //Makes fires and puts into array
	for (var i = 0; i < 15; i++) { 
        shapes.push(makeShapes());
    } 
}

function draw() { //written together 
	background(178, 204, 163);

	//calls functions
	sapling();
	ghost();
	pressingKey();
	levelNumber();
	
	for (i = 0; i < shapes.length; i++) { 
        shapes[i].display();

        //Game Over route
		if (posX >= shapes[i].x & posX <= shapes[i].x+30 
		    && posY >= shapes[i].y-25 && posY <= shapes[i].y+20) {
		 	lose = true;
		    speed = 0;
		    resetButton();
		    gameOn = false;
	    }
	}
 		
        //You Win route
    if (posX >= xsap-10 & posY >= ysap) { 
    	noStroke();
    	fill(0);
		textSize(50);
		// winsound.play();
		text('You Win!', 100, 200);
		speed = 0;
		nextLvl();
		gameOn = false;
    }

    if (lose==true){
    	noStroke();
		fill(0);
		textSize(50);
    	text('You Lose', 100, 200);
    }
}

function pressingKey() { //by Ankitha
    //Ghost movements controlled by keys

	if(keyIsDown(87)) { //W key
		dy -= speed;
	}	
    
	if(keyIsDown(83)) { //S key
		dy += speed;
	}	

	if(keyIsDown(65)){ //A key
		dx -= speed;
	}	

	if(keyIsDown(68)){ //D key
		dx+=speed;
	}
}

function ghost() { //by Mari
    //Ghost character shape and constraints
	noStroke();
	fill(255);
	posX = 25+dx;
	posY = 17+dy;

	if (posX <= 7){
		dx += speed;
	}

	if (posX >= width - 7){

		dx -= speed;
	}

	if (posY <= 9){
		dy += speed;
	}

	if (posY >= height-14){
		dy -= speed;
	}

	ellipse(25+dx,17+dy,17,20);//head
	ellipse(25+dx,27+dy,5,10);//feet
	ellipse(20+dx,27+dy,5,10);//feet
	ellipse(30+dx,27+dy,5,10);//feet
	fill(0);
	ellipse(20+dx,19+dy,3,3);//left eye
	ellipse(30+dx,19+dy,3,3);//right eye
	strokeWeight(1);
	stroke(0);
	line(22+dx,23+dy,28+dx,23+dy);
}

function shapesDisplay() { //by Ankitha
    //Make fire shape using vertex
    strokeWeight(3);
	stroke("red");
    fill("orange");
    beginShape();
    vertex(this.x-5, this.y);
    vertex(this.x, this.y+20);
    vertex(this.x+20, this.y+20);
    vertex(this.x+30, this.y+20);
    vertex(this.x+40, this.y+10);
    vertex(this.x+30, this.y-20);
    vertex(this.x+25, this.y+5);
    vertex(this.x+22, this.y-20);
    vertex(this.x+13, this.y);
    vertex(this.x+12, this.y-20);
    vertex(this.x-5, this.y);
    endShape();
}

function makeShapes() { //by Ankitha
    //randomizes fire position 
    var sh = {x: random(-30,430), 
    	      y: random(50,340),
              display: shapesDisplay}
    return sh;
}

function resetButton() { //by Mari
    //Reset button when game over appears
	stroke(0);
	strokeWeight(2);
	fill("red");
	rectMode(CORNER);
	rect(115,360,75,30);
	fill(0);
	textSize(12);
	noStroke();
	text("RESTART",128,379);
}

function nextLvl() { //by Mari
    //next level button when you win
	rectMode(CORNER);
	strokeWeight(2);
	stroke(0);
	fill("green");
	rect(30,360,75,30);
	fill(0);
	textSize(10);
	noStroke();
	text("Next Level",45,378);
}

function sapling() { //by Mari
    //sapling (the goal)
	fill("green");
	strokeWeight(5);
	stroke("green")
	line(xsap,ysap,xsap,ysap+20); //stem
	noStroke();
	ellipse(xsap-10,ysap,20,10); //left leaf
	ellipse(xsap+10,ysap,20,10); //right leaf
	fill("yellow");
	ellipse(xsap,ysap+20,10,10);
}

function levelNumber() { //by Mari
	noStroke();
	fill(0);
    textSize(15);
    text("Level: " + lvl, 340, 20);
}

function mouseClicked() { //by Ankitha
    //mouse clicking on button resets the games
    //game over button LOSE
	if (mouseX<245 & mouseX>130 && mouseY>360 && mouseY<400 && gameOn==false) { 
		shapes=[];
		gameOn=true;
		lvl = 1;
		speed=lvl;
		makeShapes();
		for (var i = 0; i < 15; i++) {
        	shapes.push(makeShapes());
    	} 
    	dx=0;
    	dy=0;
    	lose = false;
	}
    //next level button WIN
	if (mouseX<80 & mouseX>30 && mouseY>360 && mouseY<400 && gameOn==false) { 
		gameOn=true;
		lvl++;
		speed=lvl;
		makeShapes();
		for (var i = 0; i < 15; i++) {
        	shapes.push(makeShapes());
    	} 
    	dx=0;
    	dy=0;
	}
}

Ankitha Vasudev – Looking Outwards – 12

The two projects that I have chosen to discuss relate to climate change discuss this topic in different ways.

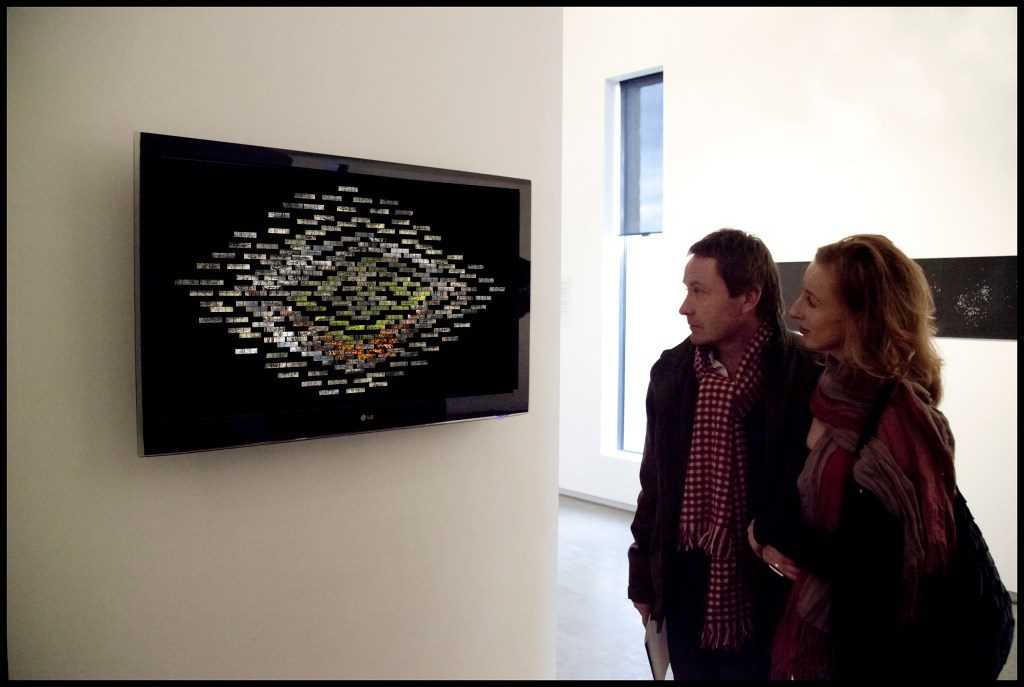
The first project is called Entropy, which was created by ecological artist Lloyd Godman in 2010. I find this project inspiring because it was made as a response to the fire that affected Australia in 2009. The projection was written in C++ and begins by selecting one of 30 composite images and randomly generates a pathway to a single image. The project is a randomized sequence based on images in the data bank. I think this project could have been improved by making it interactive and allowing viewers to click on certain images for more information.

Entropy displayed at the TarraWarra Muesum of Art in Australia, 2010.

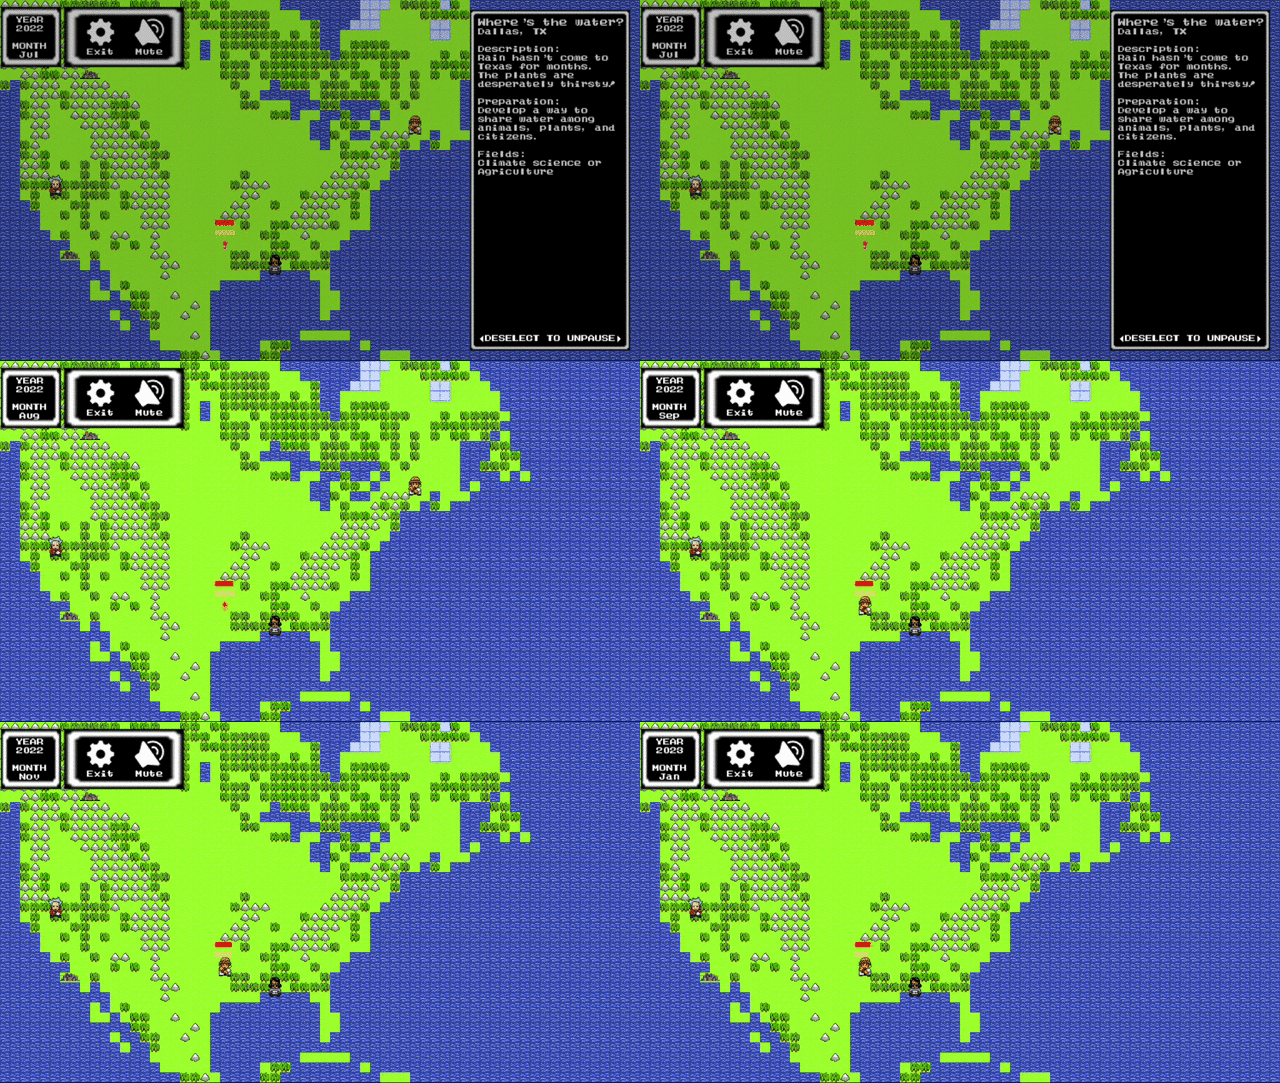
The next project is a game called Climate Quest that was developed in 2015 at the University of Washington. The purpose of this game is to promote environmental awareness. The story behind the game is that climate disasters are occurring across the country, but the heroes must save lives and protect ecosystems. I admire this project because it conveys an important message in a non-conventional way. The idea of storytelling through a video game seems interesting and creative.

Link to an interview with one of the creators of Climate Quest

A GIF of Climate Quest

Ankitha Vasudev – Project 11 – Landscape

sketch

// Ankitha Vasudev
// Section B
// ankithav@andrew.cmu.edu
// Project-11

// global variables
var birds = []; // bird objects

var terrainSpeed1 = 0.0005; // back mountains speed
var terrainDetail1 = 0.015; // back mountains detail
var terrainSpeed2 = 0.001;  // front mountains speed
var terrainDetail2 = 0.008; // front mountains detail

function setup() {
	createCanvas(450, 400);

	// create an initial collection of birds
	for (var i = 0; i<10; i++) {
		var rx = random(width);
		birds[i] = makeBirds(rx);
	}

    frameRate(10);
}

function draw() {
    background(80);
    
    // window arc frame 
    fill(230);
    arc(width/2, 400, width*2, 750, PI, 0);

    // landscape elements
    sun();
    backMountains();
    carWindowandRoad();
    frontMountains();
    mountainreflection();

    // displaying birds 
    updateAndDisplayBirds();
    removeOldBirds();
    addNewBirds();

    // vertical window frame line
	stroke(0);
	strokeWeight(7);
	line(75, 50, 75, height);
}

function carWindowandRoad() {

    // window frame
	stroke(0);
	strokeWeight(7);
	noFill();
	arc(width/2, 400, width*2, 750, PI, 0);

	// water
	noStroke();
	fill(230);
	rect(0, 340, width, 100);

	// road
	stroke(255);
	strokeWeight(2);
	fill(100);
	rect(-10, 380, width+20, 70);

    // bottom window frame
    noStroke();
    fill(0);
	rect(0, 393, width, height);
}

function backMountains() {
	// large mountains in the back 
    stroke(215);
    beginShape();
	for(var x=0; x<=width; x++) {
		var t = (x * terrainDetail1) + (millis() * terrainSpeed1);
		var y = map(noise(t), 0, 1, 100, 350);
		line(x, y, x, 380);
	}
	endShape();
}

function frontMountains() {
	// smaller mountains in the front
	stroke(150);
    beginShape();
	for(var x=0; x<=width; x++) {
		var t = (x * terrainDetail2) + (millis() * terrainSpeed2);
		var y = map(noise(t), 0, 2, 300, 200);
		line(x, y, x, 340);
	}
	endShape();
}

function mountainreflection() {
	// reflection of small mountains in the water
    stroke(200);
    beginShape();
	for(var x=0; x<=width; x++) {
		var t = (x * terrainDetail2) + (millis() * terrainSpeed2);
		var y = map(noise(t), 0, 5, 120, 250);
	    line(x, y+220, x, 340);
	}
	endShape();
}

function sun() {
	//sun 
	noStroke();
	fill(238);
	ellipse(370,100, 60);
	fill(247);
	ellipse(370, 100, 55);
	fill(255);
	ellipse(370, 100, 50);
}

function updateAndDisplayBirds() {
	// display and move birds
    for (var i=0; i<birds.length; i++) {
    	birds[i].move();
    	birds[i].display();
    }
}

function removeOldBirds() {
	// remove old birds off canvas
	var birdsToKeep = [];
	for (var i=0; i<birds.length; i++) {
		if (birds[i].x + birds[i].breadth > 0) {
			birdsToKeep.push(birds[i]);
		}
	}
	birds = birdsToKeep;
}

function addNewBirds() {
	// add new birds with a probability of 0.05
	var newBirds = 0.05;
	if (random(0,1) < newBirds) {
		birds.push(makeBirds(width));
	}
}

function moveBirds() {
	this.x += this.speed;
}

function displayBirds() {
	// code to draw each bird
	noFill();
	stroke(this.col);
	strokeWeight(0.8);
	arc(this.x, this.y, this.width, this.height, PI, TWO_PI);
	arc(this.x+this.width, this.y, this.width, this.height, PI, TWO_PI);
}

function makeBirds(birthLocationX) {
	// randomization of birds
	var birdy = {x: birthLocationX,
		y: random(140, 230),
		col: random(30,100),
		breadth: 50,
        speed: random(-3,-6),
        width: random(3,8),
        height: random(2,4),
        move: moveBirds,
		display: displayBirds
	}
    return birdy;
}

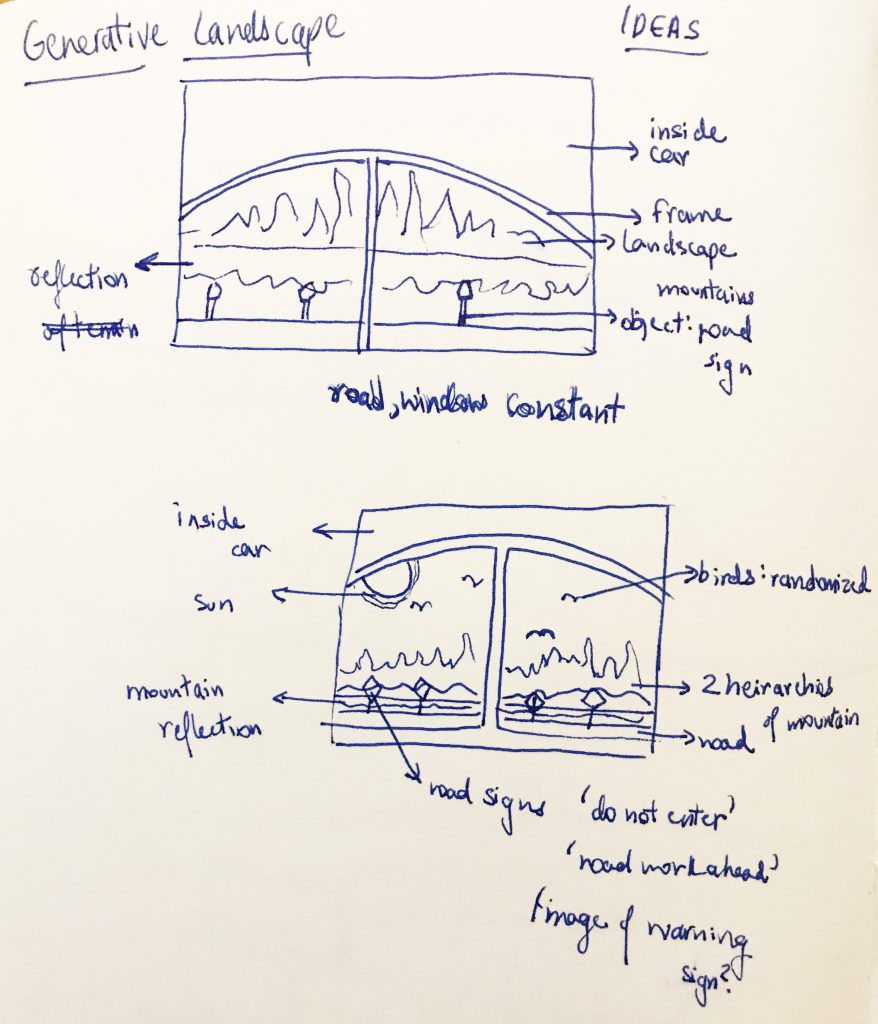
For this project I created a generative landscape of a view out a car window. I wanted to create a strong sense of foreground vs background and did this by including many elements: mountains in the back and front, water with the mountain reflections and a thin strip of the road. I used birds as my objects and randomized the width, height and color. I also used this project as an opportunity to play with a monotone color scheme (since all my previous project use a lot of color). Overall, it was fun and I’m much more confident about using objects. 

Initial ideas for my project

Ankitha Vasudev – Project 10 – Interactive Sonic Sketch


sketch

// Ankitha Vasudev
// Section B
// ankithav@andrew.cmu.edu
// Project 10 - Sonic Sketch

//global variables
var rx = 80;      //x position of stereo
var ry = 150;     //y position of stereo
var stereoImg;    //stereo image
var radiosong;    //slow song
var catchysong;   //fast song
var static;       //static/interference sound
var phonering;    //phone ring sound
var switcheffect; //play/pause switch sound effect
var Amp = 0;

// preloading sounds and image
function preload() {

    // stereo image
    var ImageURL = "https://i.imgur.com/MX0qMoE.jpg"
    stereoImg = loadImage(ImageURL);

    // Loading five sounds
    radiosong = loadSound("https://courses.ideate.cmu.edu/15-104/f2019/wp-content/uploads/2019/10/basic.wav");
    catchysong = loadSound("https://courses.ideate.cmu.edu/15-104/f2019/wp-content/uploads/2019/10/bg.mp3");
    static = loadSound("https://courses.ideate.cmu.edu/15-104/f2019/wp-content/uploads/2019/10/interference.wav");
    phonering = loadSound("https://courses.ideate.cmu.edu/15-104/f2019/wp-content/uploads/2019/10/ringing.wav");
    switcheffect = loadSound("https://courses.ideate.cmu.edu/15-104/f2019/wp-content/uploads/2019/10/switch.wav");
}

function setup() {
    createCanvas(450, 450);
    background(0);
}

function soundSetup() {
    //volume for individual sounds
    radiosong.setVolume(1);
    catchysong.setVolume(0.5);
    static.setVolume(0.5);
    phonering.setVolume(0.4);
    switcheffect.setVolume(0.6);
}

function draw() {
    noStroke();

    // grey background behind stereo 
    fill(220);
    rect(0, 0, width, 300);

    // brown table
    fill(130, 80, 50);
    rect(0, ry+150, width, 200);

    // phone on table
    push();
    translate(75, 410);
    rotate(5);
    fill(80);
    rect(0, 0, 50, 90);
    fill(240);
    rect(5, 5, 40, 80);
    fill(30);
    rect(5, 10, 40, 70);
    pop();

    // antennae behind stereo
    fill(75);
    rect(350, 40, 5, 150);

    // stereo img
    image(stereoImg, rx, ry);

    // pause button 
    fill(200, 60, 60);
    rect(width/2+10, 200, 15, 20);
    stroke(30);
    strokeWeight(2);
    line(width/2+16, 205, width/2+16, 215);
    line(width/2+20, 205, width/2+20, 215);

    // play button 
    noStroke();
    fill(200, 60, 60);
    rect(width/2-10, 200, 15, 20);
    fill(50);
    triangle(width/2-7, 205, width/2-7, 215, width/2+2, 210);
}

function mousePressed() {

    //Play music when play button is pressed - switch between two songs
    if (mouseX>=(width/2)-10 & mouseX<=(width/2)+5 & mouseY<=220 & mouseY>=200) {
        if (radiosong.isLooping()) {
            catchysong.loop();
            radiosong.pause();
        } else {
            switcheffect.play();
            radiosong.loop();
            catchysong.pause();
        }
    }
    

    //Click on pause switch to stop music
    if (mouseX>=width/2+10 & mouseX<=width/2+25 & mouseY<=220 & mouseY>=200) {
        if (catchysong.isLooping || radiosong.isLooping) {
            switcheffect.play();
            catchysong.pause();
            radiosong.pause();
        }
    }


    //Play static when antennae is clicked on
    if (mouseX>=350 & mouseX<=355 & mouseY<=190 && mouseY>=40) {
        if (static.isLooping()) {
            static.pause();
        } else {
            catchysong.pause();
            radiosong.pause();
            static.loop();
        } 
    }   else {
            static.pause(); 
        }


    //Play phone ring when phone is clicked on
    if (mouseX>100 & mouseX<160 & mouseY>375 && mouseY<440) {
        if (phonering.isLooping()) {
            phonering.pause();
        } else {
            catchysong.pause();
            radiosong.pause();
            static.pause();
            phonering.loop();
        }  
    }
}

This project was tricky but fun to create. I decided to create a stereo with different sound effects that can play multiple songs when clicked on. Overall, there are five sounds in this project.

When the play button is pressed a song is played and can be changed to the next song by clicking the button again. The pause button stops the music. I added a clicking sound effect every time one of the buttons are pressed to make it more realistic.When the antennae is clicked a static noise plays and can be stopped by clicking anywhere else on the canvas. When the phone is clicked on, a ringing noises plays and can be stopped by re-clicking on the phone. 

Ankitha Vasudev – Looking Outwards – 10

Orchestrion is a computerized band that was programmed and created by Eric Singer in 2010. Singer is a Brooklyn-based musician and technologist who founded SingerBots and LEMUR – a group of artists and technologists who create robotic musical instruments. Orchestrion consists of a set of automated musical instruments that are mechanically equipped to perform a composition.

Lido Orchestrion, 2010

I find this project interesting because the instruments in orchestrion can play anything that is composed for them. This means that a musician composes a song on basic production software, but instead of playing the notes back, the program activates the physical playing actions on the orchestrion. The video below shows the Lido Orchestrion, which was built for a nightclub in Paris and consists of 45 automated instruments. 

In 2009, Singer attended Carnegie Mellon as an undergrad— and founded SingerBots, a company fully dedicated to building robotic music instruments. Singer beleives that musicality and infallibility are the two priorities for an orchestrion, so that they sound good and do not make mistakes. I agree with his belief that robotic infallibility could create a lively performance, contrasting to others’ beliefs. 

A video describing Singer’s Orchestrions

Ankitha Vasudev – Looking Outwards – 11

Reactive Canopy is a project by Caitlin Morris, made in 2011. Caitlin Morris is a designer, researcher and educator who uses various software and digital fabrication techniques to create projects relating to the theme of perception and the human-environment relationship. She is currently a research assistant at the MIT Media Lab and has previously taught at NYU and Parsons. As a student she studied Design and Technology, Architectural Building Sciences and Cognitive Psychology.

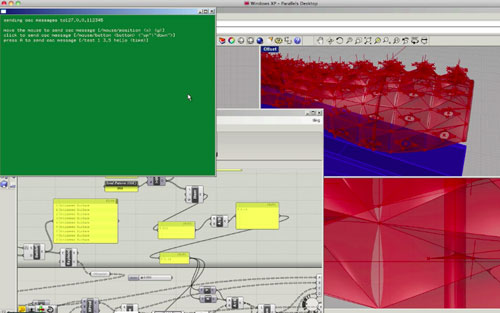
Reactive Canopy interests me because it combines traditional architectural modelling using Rhino with algorithmic computer vision using openFrameworks (and Grasshopper – parametric design).

Process of creating Reactive Canopy using grasshopper, openFrameworks and Rhino

This project consists of a canopy (modeled in Rhino and Grasshopper) situated overhead that people pass under as they walk past. Cameras track motion below the canopy that causes the apertures of the canopy to open, which creates areas of light on those passing by. The motion data of pedestrians is collected using openFrameworks and passed onto Rhino and Grasshopper.

Demonstration of Reactive Canopy

Click here to watch a video that shows how amount of motion from frame to frame in openFrameworks is translated to aperture size in a Grasshopper model.

Ankitha Vasudev – Project 09 – Computational Portrait

sketch

// Ankitha Vasudev
// ankithav@andrew.cmu.edu
// Section B
// Project 09

var portrait;

// load image of friend
function preload() {
	var ImageURL = "https://i.imgur.com/vtBUV2J.jpg";
	portrait = loadImage(ImageURL);
}

function setup() {
	createCanvas(450, 437);
	background(0);
	frameRate(1000);
	portrait.loadPixels();
}

function draw() {
	var x = random(width);
	var y = random(height);
	var px = constrain(floor(x), 0, width);
	var py = constrain(floor(y), 0, height);
	var size = random(1, 30);
	var colorxy = portrait.get(px, py);
	var colmouse = portrait.get(mouseX, mouseY);
    
    //circles controlled by mouse
    fill(colmouse);
    ellipse(mouseX, mouseY, 10);
    
    //text "J" to fill canvas
    noStroke();
    fill(colorxy);
    textSize(size);
    textFont('Arial');
    text("J", x, y);
}

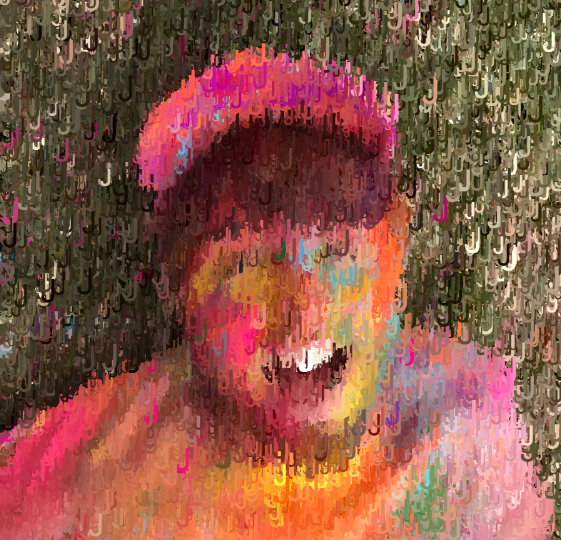
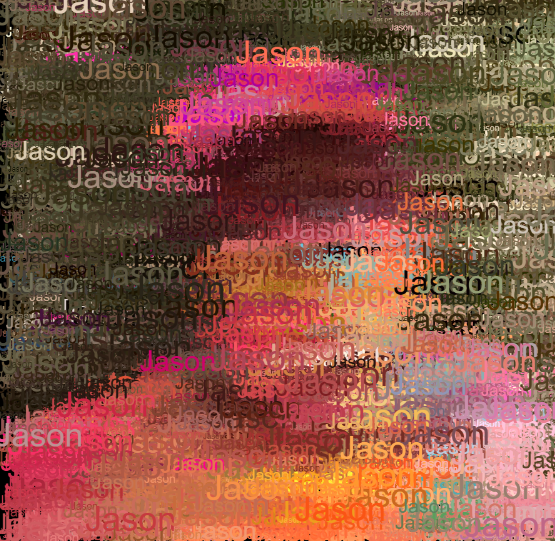
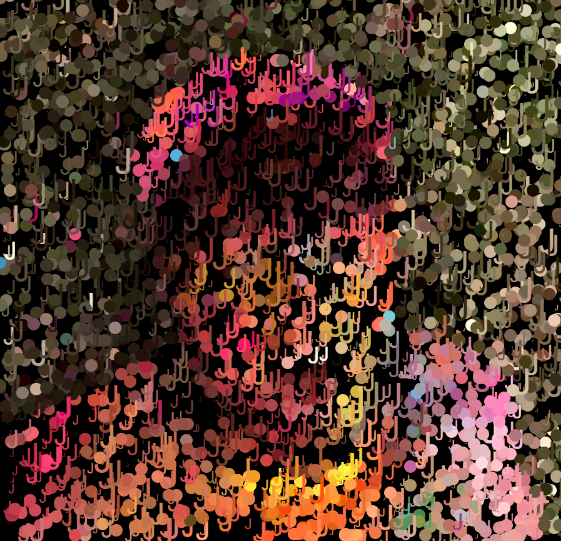
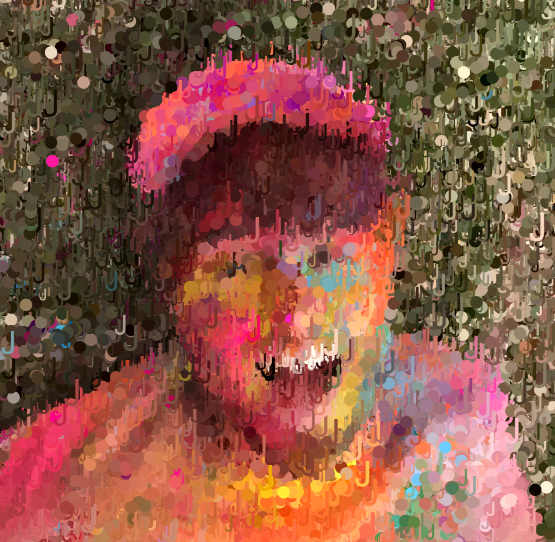
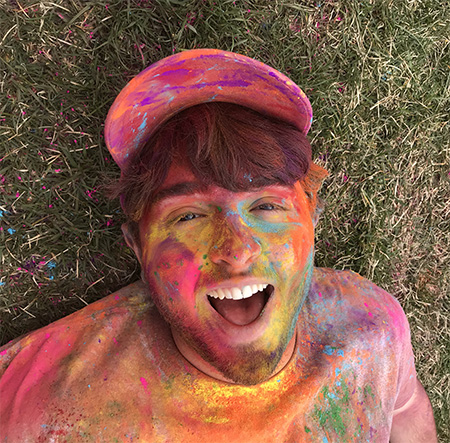
This project was fun to do because I liked playing with different shapes and text and watching the pixels create the image. I chose a picture that I took of my friend a few months ago. I like this image because of how colorful it is. The images below show different stages of progress during this project.

Original picture of my friend

Ankitha Vasudev – Looking Outwards – 09

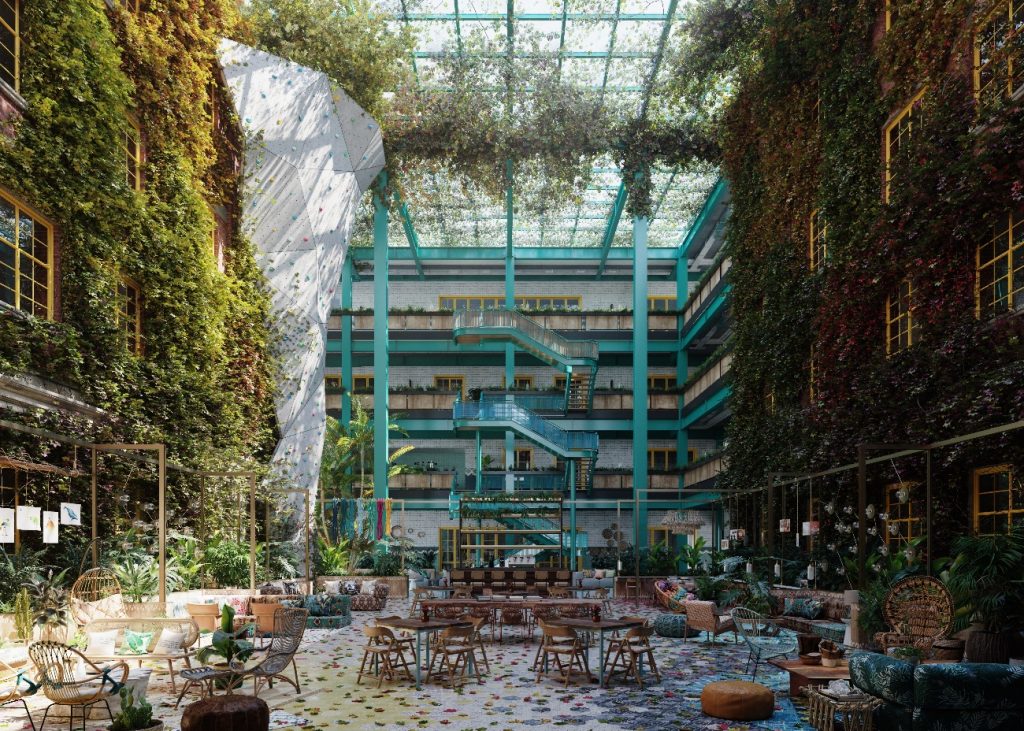
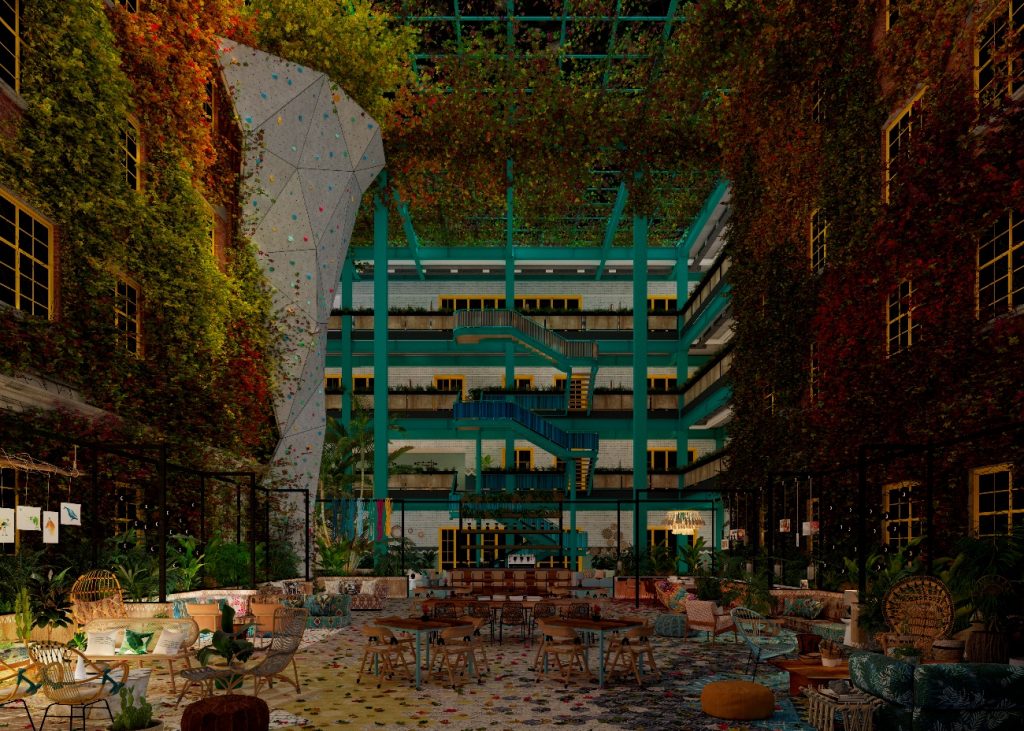
A Looking Outwards assignment that I found interesting was Mari’s post on 3DQ, which is a digital agency based in Barcelona that specializes in Hospitality and Interior Design and Architecture Computer Generated Images (CGI). In her post, Mari focused on the project The Coworking 2040, which was made using Corona Renderer in 2017.

I found this project intriguing because of how realistic it looks and how efficient the process behind making it seemed. Usually, photo realism rendering is a very time-consuming process; however, 3DG is able to create detailed design, composition, lighting and texturing in a very creative and flexible way. I agree with Mari’s comments about the usefulness of creating a tool to visualize a space without actually creating it since it allows people to get a feel of the space without jeopardizing money or time.

As an architecture student, the work by this studio is inspirational because the designers know how to build realistic scenes fast with the right amount of detail versus geometry. Their workflow seems ideal because they have a good balance between technique and creativity.

Video showing the blending of layers

Ankitha Vasudev – Looking Outwards – 08

Jesse Louis-Rosenberg and Jessica Rosenkrantz are generative artists who founded the design studio Nervous System (New York) in 2007. They created this studio as an outlet for interdisciplinary experiments that did not fit within their respective educations (Rosenberg was studying math and computer science while Rosenkratz was studying biology and architecture). Their body of work emphasizes an interaction between science, art and technology.

One of the projects highlighted in their video: Flora Collar(2015), uses the concept of computation geometry, plant morphogenesis, differential growth

I find their work inspirational because of the methods they use to create computer simulations and digitally fabricate designs and products that draw inspiration from nature. In their Eyeo video, the artists talk about their interest in digital fabrication techniques, plant morphogenesis and differential growth, algorithmic gardening and the creation of objects such as jewelry and clothes using these processes. This video was interesting because it showed multiple experimental fabrication and computational techniques. Both artists also touched upon their interest in making these objects affordable and functional rather than just aesthetically pleasing. 

Another project talked about in their video is Kinematic Dress(2015), which is a 3D printed dress consisting of interlocked panels
The artists’ video from the Eyeo Festival in 2015

Ankitha Vasudev – Project 07 – Composition with Curves

sketch

//Ankitha Vasudev
//ankithav@andrew.cmu.edu
//Section B
//Project 07

//global variable
var nPoints = 600;

function setup() {
    createCanvas(450, 450); 
    frameRate(100);
}

function draw() { 
	background(0);

    //variables to change stroke color depending on mouse position
	var r = map(mouseX, 0, width, 50, 255);
	var g = map(mouseX, 0, width, 50, 255);
	var b = map(mouseY, 0, height, 50, 255);

    noFill();

    //calling Hypotrochoid function
	push();
    stroke(r, g, b);
    strokeWeight(0.15);
    translate(width/2, height/2);
	drawHypotrochoid();
	pop();

    //calling Astroid function
	push();
	stroke(g, b, r);
	strokeWeight(0.15);
	translate(width/2, height/2);
	drawAstroid();
	pop();

}

function drawHypotrochoid() {
    var x;
    var y;
    var h = width/2;
    //Mouse controls radius of hyportochoid
	var a = map(mouseX, 0, width, 0, width/100);
	var b = map(mouseY, 0, height, 0, height/200);
   
    beginShape();
      for (var i = 0; i < nPoints; i++) {
    	var angle = map(i, 0, 180, 0, 360);
    	//using formula for Hypotrochoid
    	//mathworld.wolfram.com/Hypotrochoid.html
    	x = (a - b) * cos(angle) + h * cos((a - b) * angle);
        y = (a - b) * sin(angle) - h * sin((a - b) * angle);
        vertex(x, y);
      }
    endShape();
 }

function drawAstroid() {
	var x;
	var y;
	//Mouse controls radius of Astroid
	var a = map(mouseX/2, 0, width, 0, width/5);
	var b = map(mouseY/2, 0, height, 0, height/10);

    beginShape();
      for (var i = 0; i < nPoints/2; i++) {
        var angle = map(i, 0, 100, 0, 360);
        //using formula for Astroid/Hypocycloid
        //mathworld.wolfram.com/Hypocycloid.html
        x = (a - b) * cos(angle) - b * cos(angle * (a - b));
        y = (a - b) * sin(angle) - b * sin(angle * (a - b));
        vertex(x, y);
      }
    endShape();
}

This project was the most difficult one so far because it took me a while to understand how to draw the curves the way I wanted them to be. I had to look at some online videos to get a better understanding. Additionally, reading the explanations behind the curve equations on Mathworld helped a lot. I played around with the variables and curve layers before finalizing on a Hypotrochoid and Astroid curve. However, the equation for an astroid was too complex so my curve uses a general Hypocycloid equation.

Both curves layered
Both curves layered