Ghalya Alsanea – Final Project

Project Interface

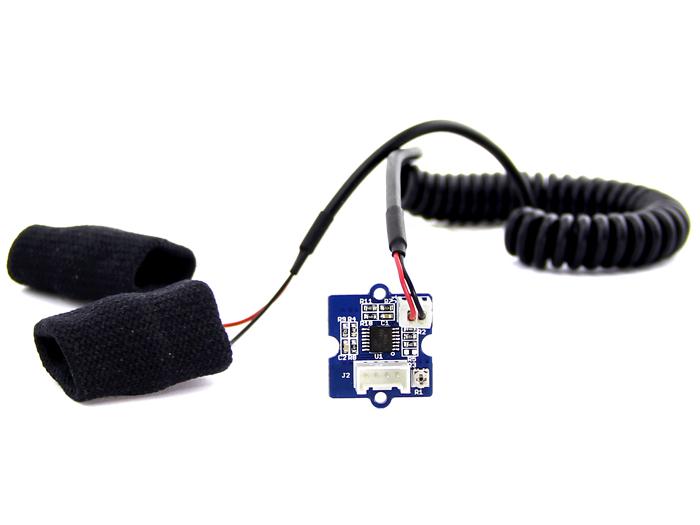
I created a smart watch interface for someone with anxiety and panic disorder. It reads someone’s pulse and breath rate and can detect when someone is having a panic attack. I used real-time biometric data from a pulse sensor and a wind sensor and hooked it up to an ardiuno, then I used serial communication to send the data and trigger & display different calming graphics using p5.js. I will go through the project interface and design first, then I will show you how I went about doing it.

Regular Interface
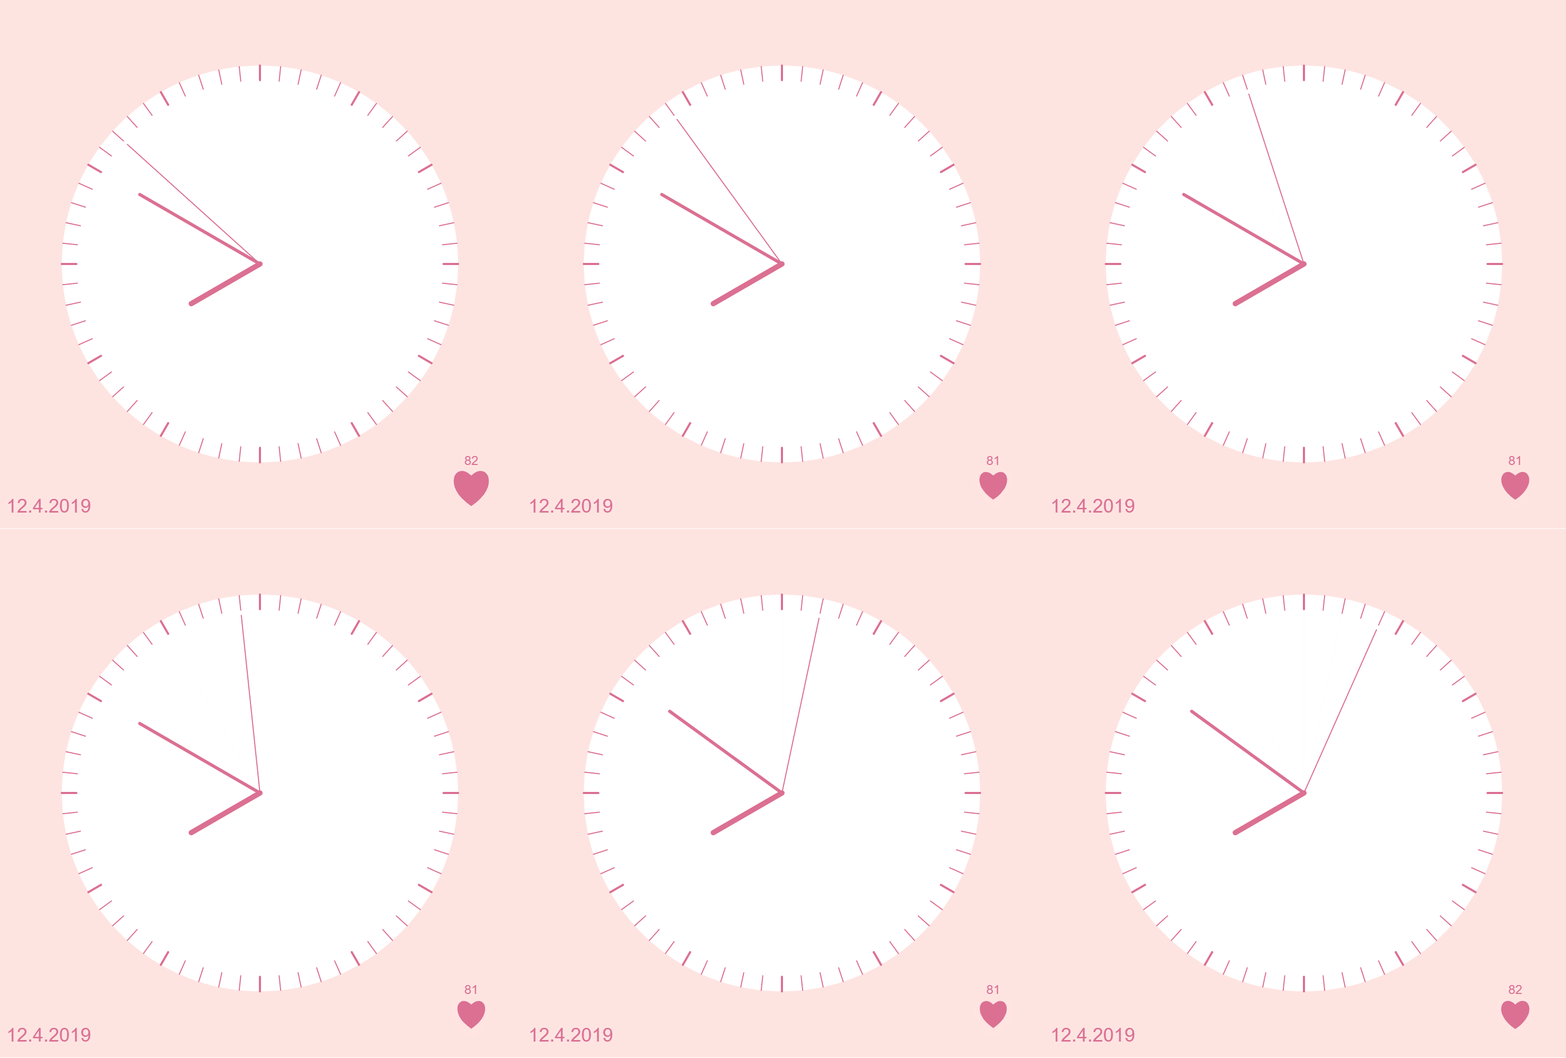
The regular display when someone is not having a panic attack consists of a clock, the date, and a BPM graphic that reacts to your pulse.

Interface during a panic attack

Depending on the kind of panic attack you are having, there are 3 modes/techniques. The good thing is that any of these techniques would work during a panic attack. I weighted certain techniques to be triggered based on someone’s sensor data. But for the purpose of the scope of this project, and because this requires more knowledge, time and research, I used keyboard keys to to demonstrate the different interfaces.

  1. Deep Breathing Technique (for when you’re hyperventilating)
  2. Counting Technique (for when your heart rate cannot be controlled)
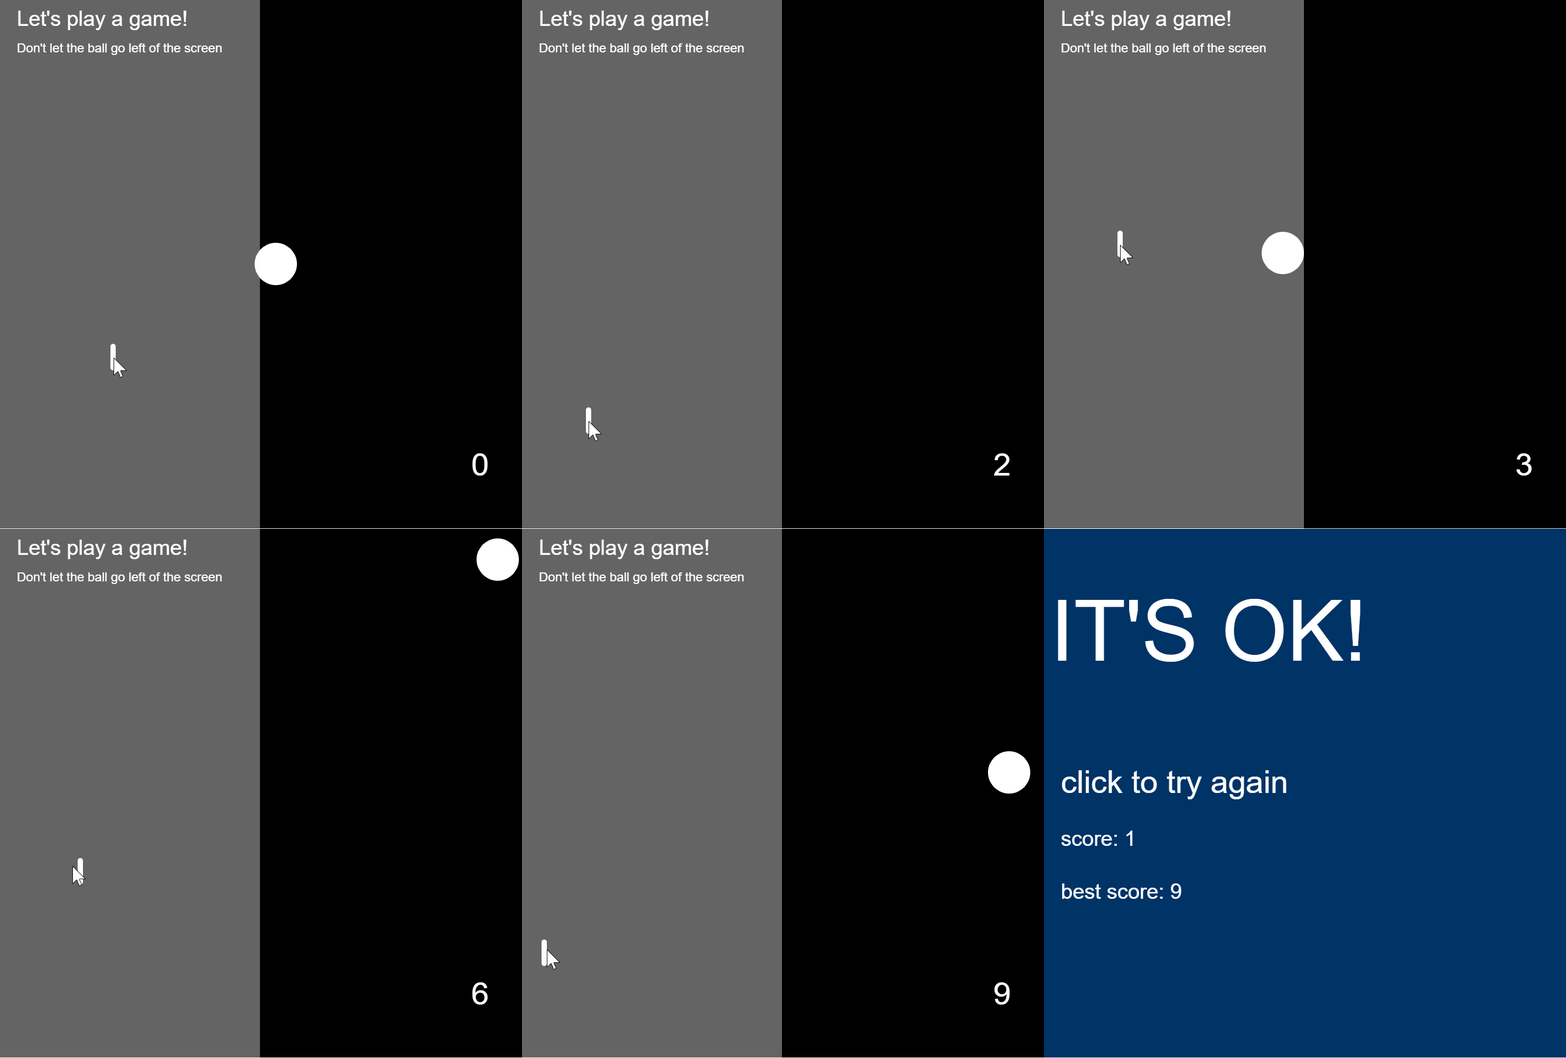
  3. Distraction Technique (for when you need to be distracted from your overwhelming thoughts)

These techniques and methods were based on my research on medical articles here, here, and here.

Deep Breathing
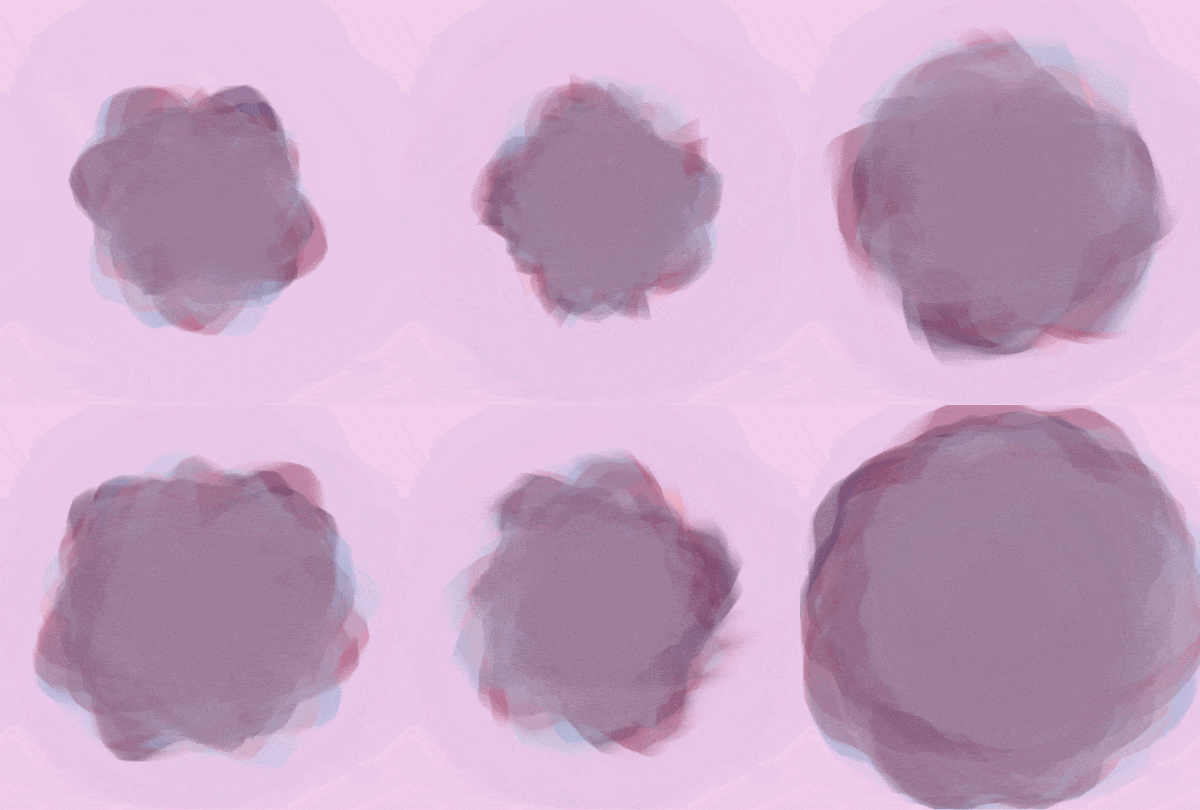
The blobs are made to soothe you and help you concentrate on your breathing. As you breath in, the blobs expand, and as you exhale the deflate.
Counting

“Recently I found that trying to focus on something else such as counting numbers… works, because it requires concentration.”

Melanie Luxenberg
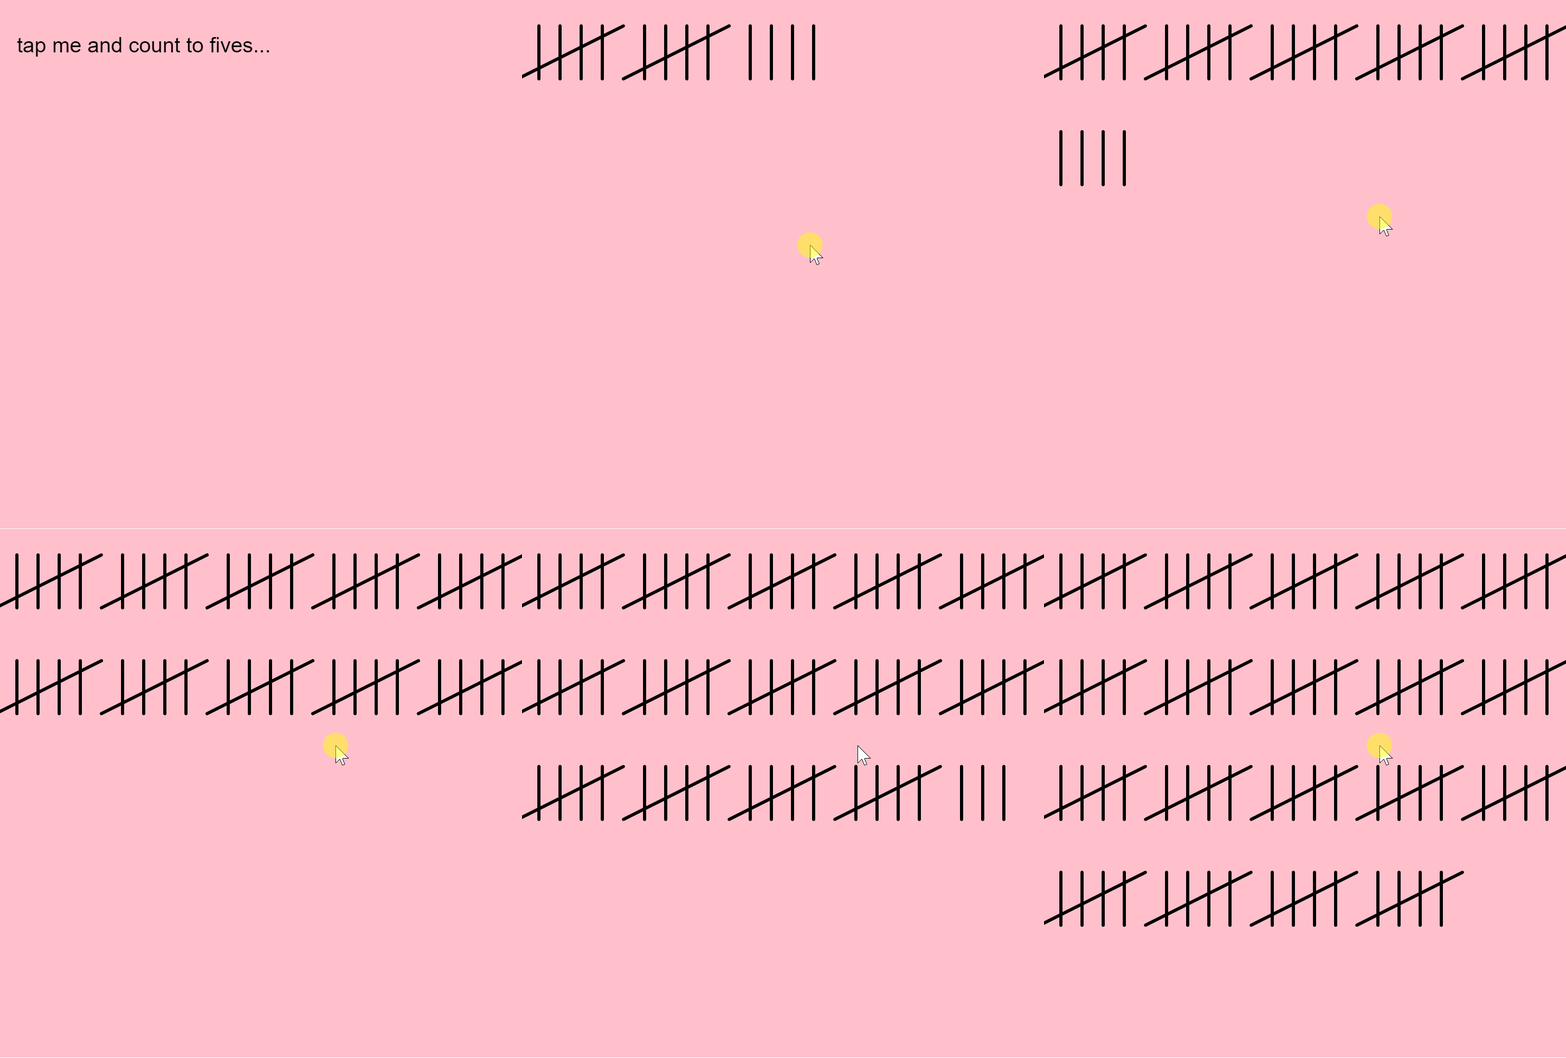
The idea here is you count to 5 over and over again, until you naturally realize that your slowly calming down. Before you know it, as you’re trying to fill the canvas with tick marks, you’ll start to feel much better!
Distraction
This is a game interface to act as a distraction technique. Note the large “IT’S OK!” text as an emphasis on how it’s okay that you lost, and you can try again, since it’s not about winning. This way, you can play for as long as you want and/or until you feel calmer.

Proof of Concept

Testing the pulse sensor and how it communicates using the p5.js serial port.
Testing the wind sensor and how it communicates with the p5.js graphics
Going through all the different types of interfaces and how they react to the user’s biometric sensor data and interactions.

How to Implement it

I used the step by step guide provided by NYU’s physical computing department here to learn how to use ardiuno and p5.js together. If you follow that guide, you can know how to download and run the project. You will need to download the P5.js complete library, the P5.serialserver, and the ardiuno software.
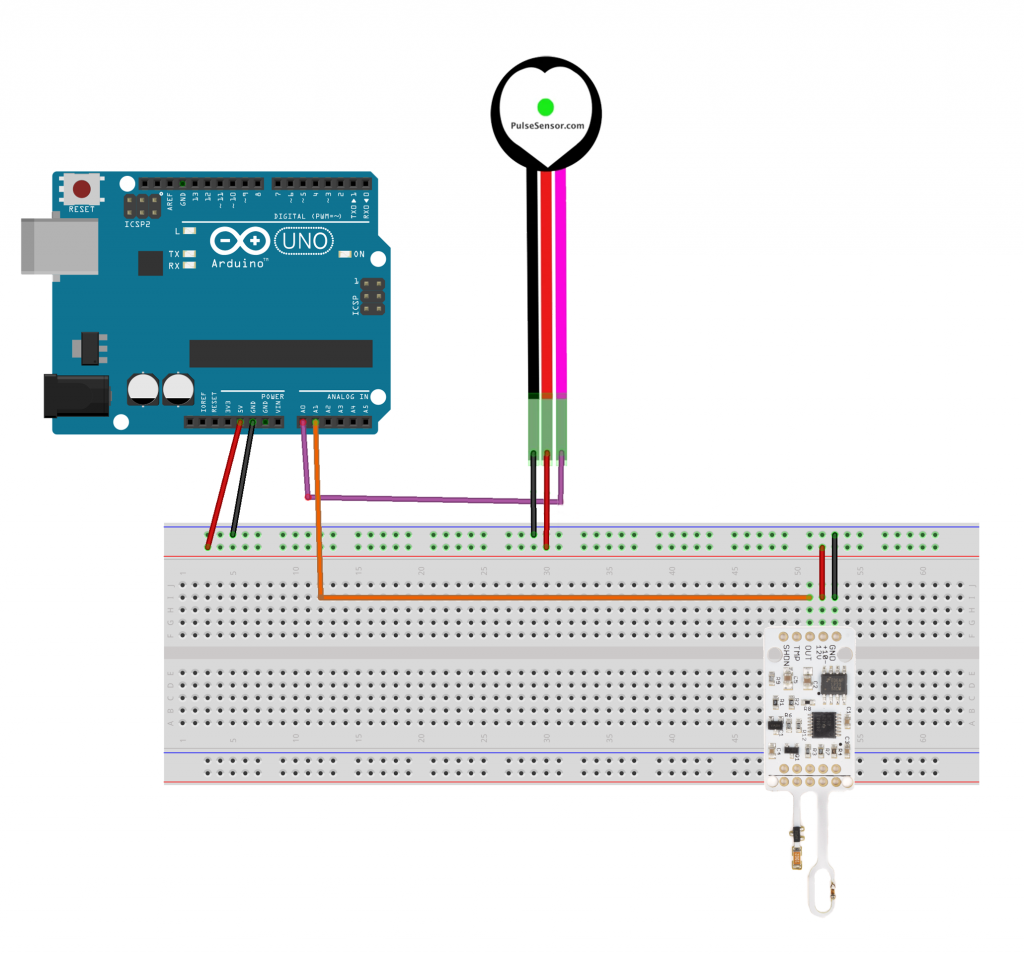
Circuit Sketch of how to hook up the sensors to an ardiuno

You can download all the files you need to run the project here:

galsanea_FinalProject_allFiles

WordPress Version

If you just want to see the p5.js interaction, I modified the project to run on WordPress using mouse X location to simulate breathing pattern, and mouse Y location to simulate pulse patterns.

Use the following to replace the sensor data interaction:

keys:
b:
breathing blobs interface
c: counting interface
g: game interface
any other key: regular clock interface

mouse:
x:
move mouse in x directions to simulate breathing
y: move mouse in y directions to simulate heart beat

sketch

/* 
Ghalya Alsanea
Section B
galsanea@andrew.cmu.edu
Final Project

normal mode:clock
            date
            sensor data: heart rate with beating heart

panic mode: deep breathing --- moving blob objects reacting to your breathing
            distraction technique --- use pingpong-like game to distract you
            counting technique --- count till a number to calm down
*/
// ----------------------------------------------------------------------------
// overall global variables
var proportion = 500;   //canvas proportion
var MX, MY;             //mouse x and y locations
// ----------------------------------------------------------------------------
//SENSOR global variables
var pulseSensor;        //global variable for pulse sensor data
var breathSensor;       //global variable for breath sensor data
var toggle = false;     //toggle to help sort the incoming sensor data from the serial
var pulseData = [];     //array container for incoming pulse data
// ----------------------------------------------------------------------------
// SERIAL global variables
var serial;                     // variable to hold an instance of the serialport library
var portName = 'COM11';         // fill in your serial port name here
var inData;                     // for incoming serial data. NOTE: it comes a byte at a time
var options = {baudrate: 9600}; // change the data rate to whatever you wish
// ----------------------------------------------------------------------------
// CLOCK global variables
var diameter = proportion * 0.75;   //clock diameter
//configure clock hands based on clock diameter
var secHand = diameter * 0.45;
var minHand = diameter * 0.35;
var hourHand = diameter * 0.2;
// ----------------------------------------------------------------------------
// BLOBS global variables
var blobs = [];     //used to store instances of blob objects
var change = 0;     //stores the rate of rotation and the y coordinate for noise later
var colorsPalette;  //color palette for blob objects
var numBlobs = 120; //number of blobs to make
// ----------------------------------------------------------------------------
// GAME global variables
var ballX;          //ball x position
var ballY;          //ball y position
var ballSize = 40;  //diameter of ball
var xvel;           //horizontal velocity
var yvel;           //vertical velocity
var d;              //distance between mouse and circle center
var dangerX;        //danger zone
var ballColor;      //what to color the ball
var score;          //keep score of hits
var scores = [];    //keep a list of all final scores to get the highest score
// ----------------------------------------------------------------------------
// CLICKER global variables
var gClickCount = 0;    //mouse click counter
var inc = 20;           //x increments
var yInc = 100;         //y increments         
var yPos1 = 25          //top y position
var yPos2 = yPos1 + 50; //bottom y position
// ----------------------------------------------------------------------------

function setup() {
    createCanvas(proportion, proportion);
    // setupSerial();   ..comment out to disable serial
    setupBlobs();
    setupGame();
}

// ----------------------------------------------------------------------------

function draw() {
    //constrain mouse x and y to within the canvas
    MX = constrain(mouseX, 0, width);
    MY = constrain(mouseY, 0, height);

    if (key === "b") {
        //draw the blobs
        displayBlobs();
    } else if (key === "g") {
        //draw the game
        drawGame();
    } else if (key === "c") {
        //draw clicker
        displayClicker();
    } else {
        clockDisplay();
    }
}

////////////////////////////////////////////////////////////////////////
//**************************** SERIAL ********************************//
////////////////////////////////////////////////////////////////////////

function setupSerial() {
    serial = new p5.SerialPort();       // make a new instance of the serialport library
    serial.on('data', serialEvent);     // callback for when new data arrives
    serial.open(portName);              // open the serial port
}

function serialEvent() {
    // read a byte from the serial port, convert it to a number
    // NOTE: the inData comes in a byte at a time (so range is 0-255)
    inData = serial.read();
    // sort the data incoming by distributing every other byte to their respective variable
    // serial data comes in 2 at a time, so using a toggle you can store the data correctly
    if (toggle) {
        pulseSensor = inData;
    } else {
        breathSensor = inData;
    }
    toggle = !toggle;
}


////////////////////////////////////////////////////////////////////////
//*********************** base/CLOCK Display *************************//
////////////////////////////////////////////////////////////////////////

function clockDisplay() {
    background(255, 228, 225);    //mistyRose
    noStroke();

    //show the date
    dateDisplay();

    //for testing: using mouse data instead of sensor data
    var size = map(MY, 0, height, 20, 40);
    var BPM = 88;

    // // for serial: map heart size to pulse sensor data
    // var size = map(pulseSensor, 0, 255, 20, 40);
    // 
    // //calculate beats per min (BPM) based on average pulse data
    // pulseData.push(pulseSensor);
    // //total pulse values read
    // var total = 0;
    // //find the total of all the readings
    // for(var i = 0; i < pulseData.length; i++) {
    //     total += pulseData[i];
    // }
    // //divide by the length of the data to get the average
    // var avg = total / pulseData.length;
    // //map the average number onto a range of BPM hear rates
    // var BPM = map(avg, 0, 255, 70, 130);
    //
    // //only read the last 100 readings
    // if (pulseData.length > 100) {
    //     pulseData.shift();
    // }

    //show the heart rate data
    heartDisplay(size, BPM);

    //draw from the center of the canvas
    push();
    translate(width / 2, height / 2);

    //draw clock base
    fill(255);
    circle(0, 0, diameter);

    //convert time to angles
    //subtract half a circle so the clock starts at the top, rather than 6 o'clock 
    var s = map(second(), 0, 60, 0, TWO_PI) - PI; 
    var m = map(minute(), 0, 60, 0, TWO_PI) - PI;
    //the % takes the remainder of the hours/12, which makes the dif between AM/PM 
    var h = map((hour() % 12), 0, 12, 0, TWO_PI) - PI;
 
    //draw the hands
    drawClockHands(s, secHand, 1);  //seconds hand
    drawClockHands(m, minHand, 3);  //minutes hand
    drawClockHands(h, hourHand, 5); //hour hand

    //draw the ticks every 6 degrees (6 * 60 = 360)
    for (i = 0; i < 360; i += 6) {
        //make every 5th tick thicker
        if(i % 30 == 0) {
            strokeWeight(2);
        } else {
            strokeWeight(1);
        }
        push();
        rotate(radians(i));
        line(0, diameter / 2, 0, secHand + 5);
        pop();
    }
    pop()
}

//draw the clock hands 
function drawClockHands(angle, hand, weight) {
    stroke("PaleVioletRed");
    push();
    rotate(angle);
    strokeWeight(weight);
    line(0, 0, 0, hand);
    pop();
}

//display today's date
function dateDisplay() {
    var d = day();
    var m = month();
    var y = year();
    fill("PaleVioletRed");
    textAlign(LEFT);
    textSize(18);
    text(m + "." + d + "." + y, 10, height - 15);
}

//display heart rate with heart graphic
function heartDisplay(size, BPM) {
    textSize(12);
    textAlign(CENTER);
    text(floor(BPM), width - 50, height - 60);
    drawHeart(width - 50, height - 50, size);
}

function drawHeart(x, y, size) {
    beginShape();
    vertex(x, y);
    bezierVertex(x - size / 2, y - size / 2, x - size, y + size / 3, x, y + size);
    bezierVertex(x + size, y + size / 3, x + size / 2, y - size / 2, x, y);
    endShape(CLOSE);
}

////////////////////////////////////////////////////////////////////////
//******************** breathing BLOB Display ************************//
////////////////////////////////////////////////////////////////////////

function setupBlobs() {
    //create color paletter for the blob objects
    colorsPalette = [color(146, 167, 202,30),
                    color(186, 196, 219,30),
                    color(118, 135, 172,30),
                    color(76, 41, 81,30),
                    color(144, 62, 92,30),
                    color(178, 93, 119,30),
                    color(215, 118, 136,30),
                    color(246, 156, 164,30)];

    // create new blob object for every num of blobs
    for (var i = 0; i < numBlobs; i++){
        var temp = makeBlob(i + 0.1, i, i * random(90),
            colorsPalette[floor(random(colorsPalette.length))]);
        blobs.push(temp);
    }
}

function displayBlobs() {
    background(240, 200, 240, 30);
    //for testing: using mouse data instead of sensor data
    var addToRadius = map(MX, 0, width, 0, 100);

    // //for serial: map the breathing sensor data to blob radius
    // //it's inversely mapped because when you breath out it decreases and vice versa
    // var addToRadius = map(breathSensor, 255, 0, 0, 100);

    for(var i = 0; i < blobs.length; i++){
        blobs[i].r = i + addToRadius;
        blobs[i].draw(change);
    }
    //create rotation change and noise change
    change+=0.01;
}

function makeBlob(radius, roughness, angle, color){
    var blob = {r: radius,      // radius of blob
                x: width / 2,   // x position of blob
                y: height / 2,  // y position of blob
                rough: roughness, // magnitude of how much the circle is distorted
                ang: angle,     // how much to rotate the circle by
                c: color,       // color of the blob
                draw: drawBlob, //draw the blobs
    }
    return blob;
}

function drawBlob(change) {
    noStroke(); 
    fill(this.c);   //color to fill the blob

    push();     
    translate(this.x, this.y);  //move to xpos, ypos
    rotate(this.ang + change);  //rotate by this.angle+change
    
    beginShape();   //begin a shape based on the vertex points below
    
    //create vertex points
    var off = 0;
    for (var i = 0; i < TWO_PI; i += 0.1) {
        var offset = map(noise(off, change), 0, 1, -this.rough, this.rough);
        var R = this.r + offset;
        var x = R * cos(i);
        var y = R * sin(i);
        vertex(x, y);
        off += 0.1;
    }
    endShape(); 
    pop();
}

////////////////////////////////////////////////////////////////////////
//************************ GAME display ******************************//
////////////////////////////////////////////////////////////////////////

function setupGame() {
    noStroke();
    //ball starts at the center of the canvas
    ballX = width / 2;
    ballY = height / 2;
    //define danger zone
    dangerX = width / 4;
    //set x and y velocity
    xvel = 5;
    yvel = 0;
    //set score
    score = 0;
}

function drawGame() {
    background (100);

    //draw the hitting paddle
    strokeWeight(5);
    stroke(255);
    line(mouseX, mouseY + 10, mouseX, mouseY - 10);

    //instructions
    noStroke();
    fill(255);
    textAlign(LEFT);
    writeText(20, "Let's play a game!", 20, 25);
    writeText(12, "Don't let the ball go left of the screen", 20, 50);

    //define the playing area
    fill(0);
    rect(width / 2, 0, width / 2, height);

    //warn if ball is too close to edge
    if(ballX - ballSize / 2 <= dangerX & xvel < 0){
        ballColor = "yellow"; 
    } else {
        ballColor = "white";
    }

    //draw the circle
    fill (ballColor);
    circle(ballX, ballY, ballSize);
    
    //makes the ball move in x and y directions
    ballX = ballX + xvel;
    ballY = ballY + yvel;

    //When it hits the right edge of the canvas,
    //it reverses horizontal velocity
    if (ballX >= width - ballSize / 2) {
        xvel = -1 * xvel;
    }

    //when it hits the bottom or top edge of the canvas,
    //it reverses vertical velocity
    if (ballY <= ballSize / 2) {
        yvel = -1 * yvel;
    } else if (ballY >= height - ballSize / 2) {
        yvel = -1 * yvel;
    }

    //find the distance between ball center and mouse
    d = dist(mouseX, mouseY, ballX, ballY);

    //if  (1) the mouse hits the edge of the ball 
    //and (2) the mouse is on the left half of the canvas
    //and (3) the x velocity is negative
    //then switch directions and get a random yvel. 
    if (d <= ballSize / 2 & mouseX <= width / 2 && xvel < 0){
        yvel = random(-3, 3);
        xvel = -1 * xvel;
        yvel = -1 * yvel;
        score = score + 1;            
    }

    //keep current score
    fill("white");
    writeText(30, score, width - 50, height - 50);

    //reset game if th eball went to far out the canvas
    if (ballX < -150) {
        resetGame();
    }
}

//reset game
function resetGame() {
    scores.push(score)          //push final score to scores
    background (0, 51, 102);
    fill(255);
    textAlign(LEFT);
    writeText(80, "IT'S OK!", 10, height / 4);
    writeText(30, "click to try again", 20, height / 2);
    //cureent score
    writeText(20, "score: " + score, 20, height / 2 + 50);
    //highest score
    writeText(20, "best score: " + max(scores), 20, height / 2 + 100);
    
    if (mouseIsPressed){
        setupGame();
    }
}

function writeText(size, words, x, y) {
    textSize(size);
    text(words, x, y);
}

////////////////////////////////////////////////////////////////////////
//*********************** COUNT display ******************************//
////////////////////////////////////////////////////////////////////////

function displayClicker() {
    background("pink");

    if (gClickCount === 0) {
        noStroke();
        fill(0);
        textAlign(LEFT);
        textSize(20);
        text("tap me and count to fives...", 20, 50);
    } 

    stroke (0);
    strokeWeight(3);

    //everytime you click, draw a line
    for(var i = 0; i < gClickCount; i++){
        //variable to show which line the tickmarks are on
        var a = floor((i * inc + inc - 1) / width);

        //x and y locations depending on which line
        var x = i * inc + inc - width * a;
        var y1 = yPos1 + a * yInc;
        var y2 = yPos2 + a * yInc;

        if ( (i + 1) % 5 === 0) {
            //draw diagonal line every fifth tick
            line(x, y1, x - 5 * inc, y2);
        } else {
            //otherwise draw a straight line
            line(x, y1, x, y2);
        }    
    }
}


function mousePressed() {
    //everytime you click, you increase the amount of times the loop runs
    gClickCount++;
}

function keyPressed() {
    //reset gClickCount to zero whenever a keyboard key is pressed
    gClickCount = 0;
}

Ghalya Alsanea – LO – 12

Project 1: Turning biometric data into art by The Mill+

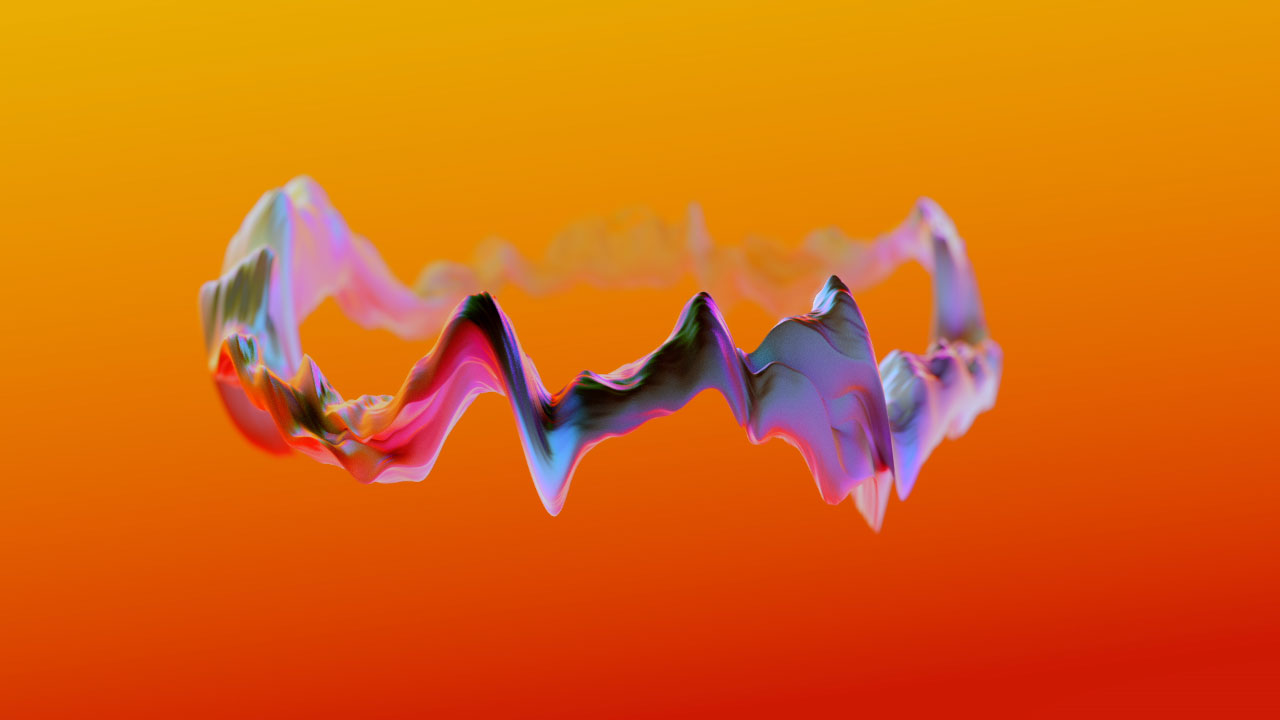
The Lush Spa Experiment was designed to capture biometric data. This data drove a series of unique and meditative visualisations, which mirror the multisensory experiences of a Lush Spa treatment.

The Mill+ joined forces with Lush to create a 2-minute film created via biometric data visualization – the aim being to visualize the physical response someone has to a Lush spa treatment. Essentially, turning biometric data into art.

The film is an artistic rendition of the body’s response to the spa treatment.

Mill+ Creative Director Carl Addy comments, “The data captured was fascinating. It shows a clear correlation between the treatment and the subject’s biometric response. You can actually see the moments when a sound or touch elicited a shift in brain wave which then triggers a reaction in breath and heart rate.”

Find more here(credits) & here(behind the scenes).

PROJECT 2: Visualization Techniques to Calm Your Anxious Mind by Barbara Davidson

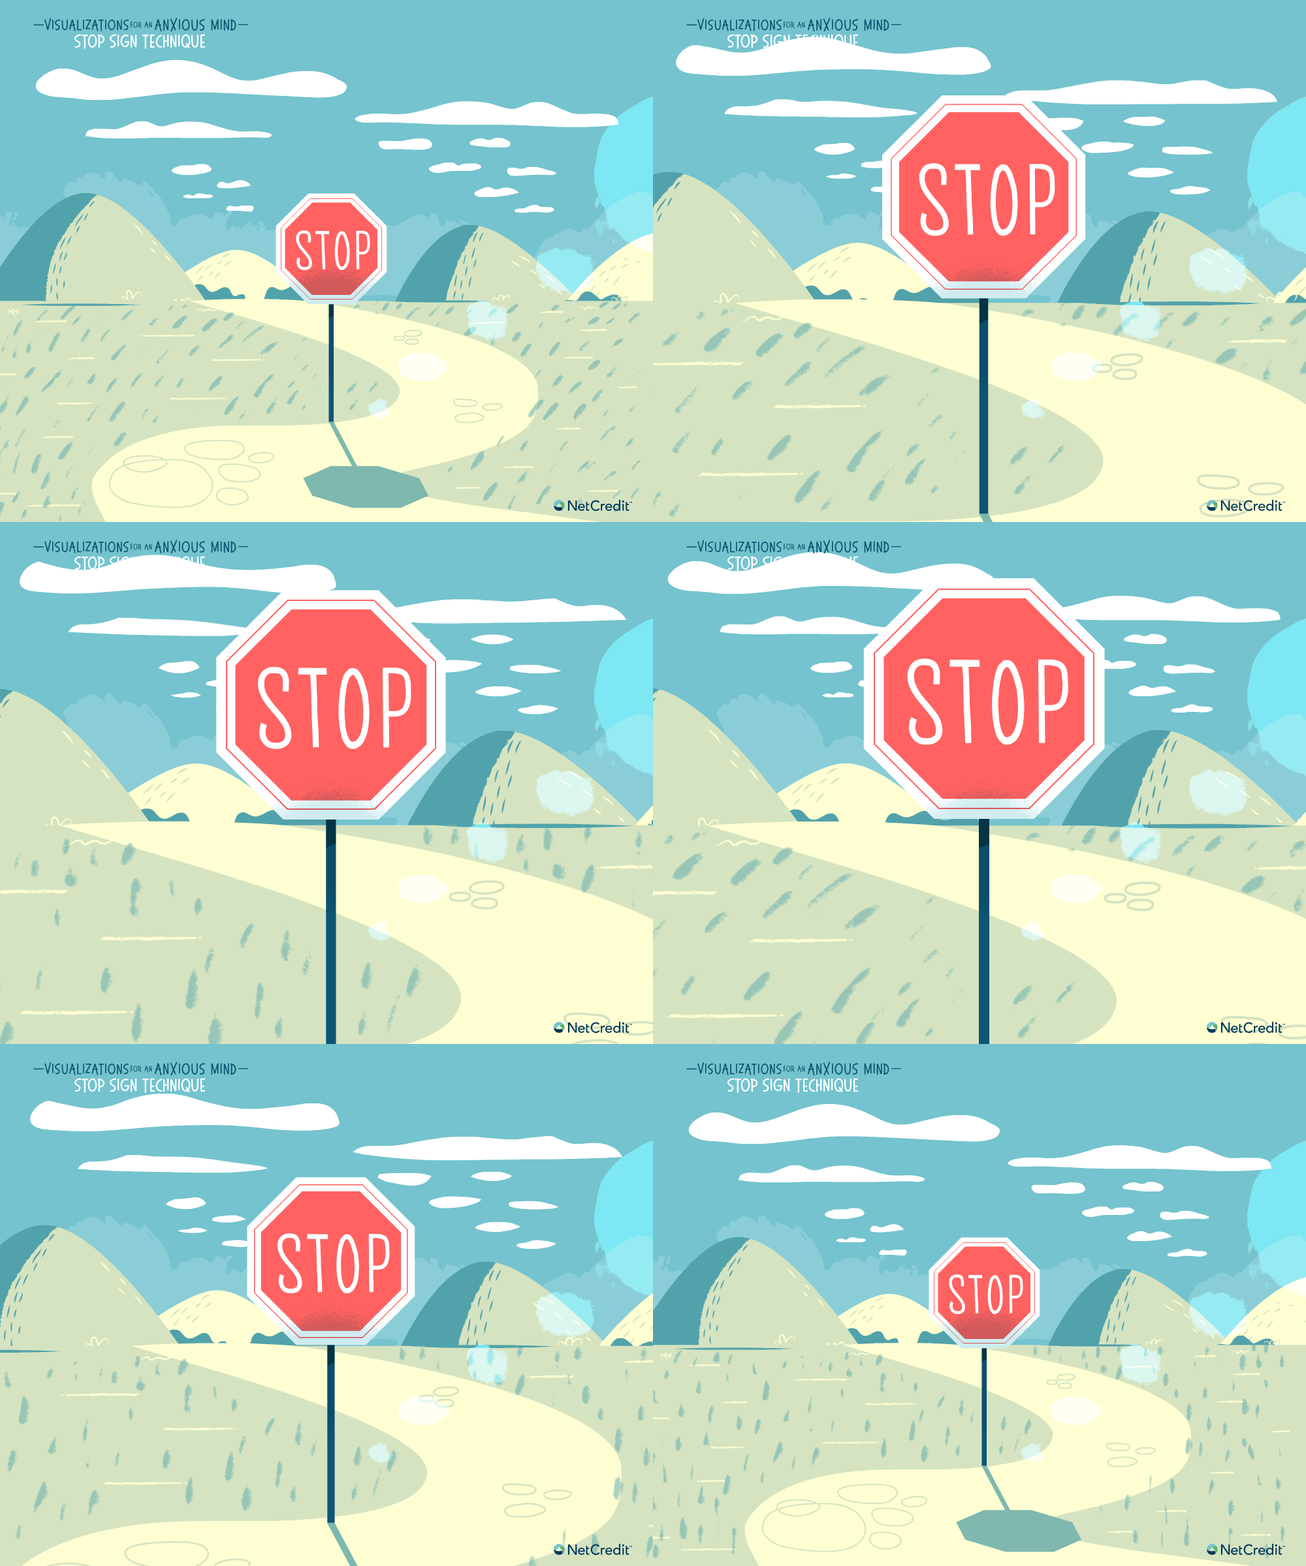
This post shows 7 visualization techniques to help ease your anxiety. For my final project I am looking at how visual queues can trigger emotional calming responses, and I was using this project as a study point. Here are some examples:

The stop sign technique is best used when you have an unwanted thought.
This technique is best used when you feel overwhelmed by your chattering mind .

I love the how coherent and consistent the graphics are. Something that I wouldn’t necessary do is put people in the visualization, unless they’re vague enough figures, because I worry when something is as personal as your mind, you wouldn’t want someone to feel like they can’t relate to the visualization because “it doesn’t look like them”.

Read more here.

Concolusions..

When comparing the two, I admire both the visual coherency that exists within each project. The first one is interesting because it is a visualization the takes inputs and does not necessarily have a specific output in mind. The second one is the opposite in the sense that it has a highly specific output it is trying to achieve through the visualization. For my final project, I want to find a way to do both and play with the two balances based on what’s needed.

Ghalya Alsanea – Project – 12 – Proposal

I want to create a smart watch interface for someone with anxiety and panic disorder. I plan on using real-time biometric data from sensors and using the data to trigger and display things using p5.js. I have done projects before the use p5 serial communication, but my plan b is that is it does not work, then I will simply use button interactions in p5.js to trigger the different modes.

The watch has two modes: Normal Mode & Panic Mode.

Normal Mode includes a watch interface that displays the time and date, in addition to the sensor data in an artistic, data-visualization way (I am thinking something similar to a mood visualizer type of thing). The panic mode can be triggered through two ways: a panic button the user presses or sensor data that indicates the user is having a panic attack. In Panic Mode, the canvas cycles through the following anxiety relieving techniques:

  1. Deep Breathing Exercise: using calming graphics to help guide the user through a deep breathing exercise. I will use online resources to figure out how the breathing exercise need to be in order to work, like WebMed’s Techiques for deep breathing.
  2. Body Scan: using the body scan technique found here.
  3. Distraction/Game Technique: using a jigsaw puzzle or some sort of mind occupying game that reduces stress but still allow you to channel your overactive brain somewhere.
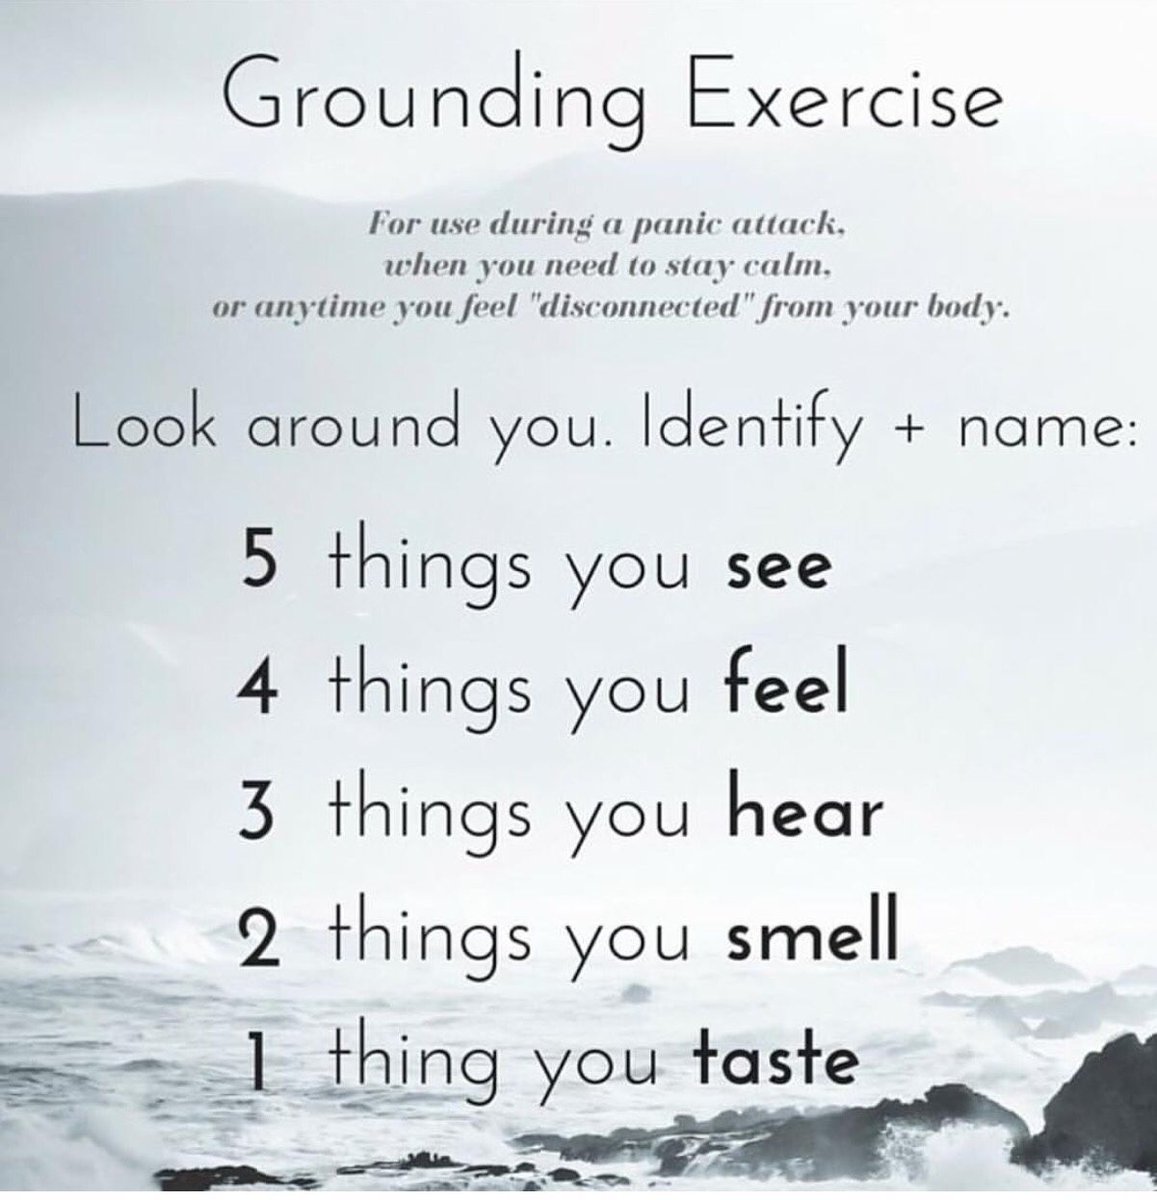
  4. 5 Senses Technique: using the 5 senses to ground you, as shown below:
This is a type of grounding technique to help bring you back to reality during a panic attack.

If all of the following techniques do not work, then this triggers a “call emergency contact” state, which calls someone you designated as a person to reach out to. For example, “calling your mom…”

The biometric sensors I am thinking of using are: a heart rate (PPG) sensor, a GSR sensor, and a respiratory rate sensor. The last one, I might not need, I am waiting to confirm with a specialist…

The photoplethysmography (PPG) circuit ascertains the user’s heart rate.
The galvanic skin response (GSR) circuit ascertains the user’s skin conductance level – a measurement loosely coupled with perspiration indicative of stressful conditions (in other words, the more stressed you are, the more you sweat).

Ghalya Alsanea – LO-11 – PULSE

PULSE, PHILADELPHIA, PA GREEN LINE PHASE, 2018

PROJECT: PULSE

ARTIST: Janet Echelman

Janet Echelman is an artist who defies categorization. She creates experiential sculpture at the scale of buildings that transform with wind and light.

How it’s made: Atomized water particles and colored lighting, 60 ‘ x 230′ x 5’

This is the first part of a permanent installation which opened on September 12, 2018 in the heart of Philadelphia’s thriving downtown. It is integrated with Kieran Timerlake’s Dilworth Park Plaza (opened to public in 2014), on the west side of City Hall, where many transit lines run below. The artist was commissioned by the Center City District to incorporate the site’s historic associations with water and transportation. The trains passing below will activate four-foot-tall curtains of colorful atomized mist that shows the path of a specific transit line. “These rail lines bring over 70,000 passengers to the site each day.”

Permanent artwork installation made from moving mist and colored light, “Pulse” traces in the surface of the fountain the paths of the subway and trolley lines that converge under the plaza in real time.

This piece is really interesting because the specialized pumps create an ephemeral fog-like mist made of filtered, softened water onto which lighting is projected so it is completely safe for children to play in. I learned that this design and plaza integration took 9 years from the start of construction to the first reveal and launch of the green line phase and they’re fundraising to open the blue and orange lines, each will correspond to different SEPTA transit lines. I think this project starts to show how Philly is really harnessing the strength of their Center City District, a non profit org, to show how public efforts can successfully be directed towards creating better lives and experiences for people in the city. As much as this art celebrates history (first water pumping station in this area and also across from Pennsylvania Railroad Station) it also embraces the future by bringing technology into public space for not only spectatorship, but also interaction.

CREDITS

Artist: Janet Echelman
Studio Echelman Team: Melissa Henry, Daniel Zeese, Cameron Chateauneuf, Drew Raines, Melanie Rose Peterson, Rachel Kaede Newsom, Becky Borlan, Daniel Lear
The Olin Studio: Susan Weiler, Richard Roark, Ben Monette, Greg Burrell, Kasey Toomey
ARUP Lighting: Brain Stacy, Christoph Gisel
Urban Engineers: Andrew Scott
Kieran Timberlake: Steve Kieran, Marilia Rodrigues
CMS: Nadine Nemec, Chris Cook, Roy Kaplan
Center City District: Paul Levy
Images: Sean O’Neill, Melvin Epps, Sahar Coston-Hardy

Ghalya Alsanea- Project 11 – Landscape

I was inspired by space games and how it shows movement of landscape using the background stars and moving objects.
Soource: Galaga

For this project, I wanted to maximize randomization of the space objects, but still have some sort of coherency. Mostly, I was trying to become more comfortable with creating different classes of objects.

sketch

//Ghalya Alsanea
//galsanea@andrew.cmu.edu
//Section B
//Project 11

var lines;
var totalLines = 0;

var j;              //jiggle
var f;              //flower

var p1, p2, p3;     //planets
var sp;             //spinning planet

//stars
var star;
var star2;

function preload() {
    //
}

function setup() {
    createCanvas(600, 600);
    background(0);
    lines = new Array(500);

    //initiate the dif class ojects
    j = new Jiggle();
    f = new Flower();
    p1 = new Planet();
    p2 = new Planet2();
    p3 = new Planet3();
    sp = new SpinPlanet();
    star = new Star();
    star2 = new Star();
}

function draw() {
    background(0);
    //create the shooting starts lines
    lines[totalLines] = new Line();
    totalLines++;
    for (var i = 0; i < totalLines; i++) {
        lines[i].move();
        lines[i].display();
    }
    //show and move the objects
    //jiggle circle
    j.move();
    j.show();
    //flower
    f.move();
    f.show();
    // planets
    p1.move();
    p1.show();
    p2.move();
    p2.show();
    p3.move();
    p3.show();
    //spinplanet
    sp.move();
    sp.show();
    //star 1
    star.move();
    star.show();
    //star 2
    star2.move();
    star2.show();
}


//////////////////////////////////////////////////////////////////////
//                      define the classes                          //
//////////////////////////////////////////////////////////////////////

class Jiggle {
    constructor() {
        this.x = random(0, width);      //start at a random xpos
        this.y = height + 100;          //make sure to start  off the canvas
        this.size = random(20, 50);     //create a new size
        this.col = color("orange");     //define the color
    }
    move() {
        this.y-=2;                          //move up
        this.x = this.x + random(-5, 5);    //make the "jiggle" movement
        //if it moves too far up, reset the object
        if (this.y < -this.size) {
            this.y = height;
            this.x = random(0, width);
            this.size = random(20, 50);
        }
    }
    show() {
        //draw the object
        noStroke();
        strokeWeight(1);
        fill(this.col);
        circle(this.x, this.y, this.size);
    }
}

//////////////////////////////////////////////////////////////////////

class Flower {
    constructor() {
        this.x = random(0, width);      //start at a random xpos
        this.y = height + 100;          //start y loc off the canvas
        this.size = random(40, 80);     //randomize size
    }
    move() {
        this.y--;                       //move up
        this.x = this.x + random(-1, 1);//cause the jiggle
        //reset if it goes too far up
        if (this.y < -this.size) {
            this.y = height;
            this.x = random(0, width);
            this.size = random(40, 80);
        }
    }
    show() {
        // draw the object
        noStroke();
        fill(204, 101, 192, 180);
        //rotate 
        push();
        translate(this.x, this.y);
        for (var i = 0; i < 10; i++) {
            ellipse(0, 30, this.size / 6, this.size);
            rotate(PI / 5);
        }
        pop();
    }
}

//////////////////////////////////////////////////////////////////////

class Star {
    constructor() {
        this.x = random(0, width);          //start at random xpos
        this.y = height - 50;               //start y loc off canvas
        this.col = color("yellow"); 
        this.npoints = random(5, 12);       //points in star
        this.angle = TWO_PI / this.npoints;
        this.halfAngle = this.angle / 2.0;      
        this.r1 = random(5, 20);            //inner radius
        this.r2 = random(20, 40);           //outer radius

    }
    move() {
        this.x;
        this.y = this.y - random(0.8, 1.2);         //move in a random speed
        // reset if it goes off cnavas
        if (this.y < -100) {
            this.y = height;
            this.y -= random(0.8, 1.2);
            this.x = random(0, width);
            this.npoints = random(5, 12);
            this.angle = TWO_PI / this.npoints;
            this.halfAngle = this.angle / 2.0;
            this.r1 = random(10, 30);
            this.r2 = random(60, 100);
        }
    }
    show() {
        //draw the object
        noStroke();
        fill(this.col);
        //rotate it
        push();
        translate(this.x, this.y);
        rotate(radians(frameCount)/2);
        beginShape();
        //draw a star based on angles and npoints
        for (var a = 0; a < TWO_PI; a += this.angle) {
            var sx = cos(a) * this.r2;
            var sy = sin(a) * this.r2;
            vertex(sx, sy);
            sx = cos(a + this.halfAngle) * this.r1;
            sy = sin(a + this.halfAngle) * this.r1;
            vertex(sx, sy);
        }
        endShape();
        pop();

    }
}

//////////////////////////////////////////////////////////////////////

class Planet {
    constructor() {
        this.x = random(0, width);
        this.size = random(10, 50);
        this.y = height - this.size;
        this.col = color("red");
    }
    move() {
        this.x;
        //Moving up at a constant speed
        this.y -= 0.75;
        // Reset to the bottom
        if (this.y < -100) {
            this.y = height + 250;
            this.size = random(10, 50);
        }
        if (this.x < 0 || this.x > width) {
            this.x = (random(10, 500)) - 25;
        }
    }
    show() {
        //draw planet with ring
        fill(this.col);
        noStroke();
        circle(this.x, this.y, this.size);
        noFill();
        stroke(this.col);
        strokeWeight(1);
        ellipse(this.x, this.y, this.size * 2, this.size / 2);
    }
}

//////////////////////////////////////////////////////////////////////

class Planet2 {
    constructor() {
        this.x = random(0, width);
        this.y = height + 100;
        this.size = random(50, 80);
        this.col = color("pink");
    }
    move() {
        this.x;
        //Moving up at a constant speed
        this.y-=1.1;
        // Reset to the bottom
        if (this.y < -50) {
            this.y = height;
            this.size = random(50, 80);
        }
        if (this.x < 0 || this.x > width) {
            this.x = (random(10, 500)) - 25;
        }
    }
    show() {
        //draw planet with rotated ring
        fill(this.col);
        noStroke();
        circle(this.x, this.y, this.size);

        stroke(this.col);
        strokeWeight(2);
        noFill();
        push();
        translate(this.x, this.y);
        rotate(PI/4);
        ellipse(0, 0, this.size * 1.5, this.size / 3);
        pop();
    }
}

//////////////////////////////////////////////////////////////////////

class Planet3 {
    constructor() {
        this.x = random(0, width);
        this.y = height + 100;      //start below window
        this.size = random(50, 80);
        this.col = color("coral");
    }
    move() {
        this.x = this.x + random(-1, 1);
        //Moving up at a constant speed
        this.y -= 0.85;
        // Reset to the bottom
        if (this.y < -100) {
            this.y = height;
            this.size = random(50, 80);
        }
        if (this.x < 0 || this.x > width) {
            this.x = (random(10, 500)) - 25;
        }
    }
    show() {
        //draw planet with rotating ring
        fill(this.col);
        noStroke();
        circle(this.x, this.y, this.size);
        noFill();
        stroke(this.col);
        push();
        translate(this.x, this.y);
        rotate(radians(frameCount)/2);
        strokeWeight(1);
        ellipse(0, 0, this.size / 2, this.size * 2);
        pop();
    }
}

//////////////////////////////////////////////////////////////////////

class SpinPlanet {
    constructor() {
        this.x = random(0, width);
        this.y = height + 100;      //start below window
        this.size = random(50, 90);
        this.col = color("green");
    }
    move() {
        this.x = this.x + random(-1, 1);
        //Moving up at a constant speed
        this.y -= 0.65;
        // Reset to the bottom
        if (this.y < -100) {
            this.y = height;
            this.size = random(50, 90);
        }
        if (this.x < 0 || this.x > width) {
            this.x = (random(10, 500))-40;
        }
    }
    show() {
        //draw a spinning planet
        fill(this.col);
        noStroke();
        circle(this.x, this.y, this.size);
        noFill();
        stroke(this.col);
        strokeWeight(2);
        push();
        translate(this.x, this.y);
        rotate(frameCount);
        ellipse(random(-1,1), 0, this.size / 2, this.size * 2);
        pop();
        
    }
}

//////////////////////////////////////////////////////////////////////

class Line {
    constructor() {
        this.r = height + 200;      // starting pt + 200 so to make sure it starts off canvas
        this.x = random(width);     // Start with a random x location
        this.y = this.r;            // Start pt below the window
        this.speed = random(2, 5);  // Pick a random speed
        this.l = random(100, 200);  //randomize length of line 
    }

    move() {
        // move y upwards by speed
        this.y -= this.speed;
    }

    display() {
        //only draw if it's in the canvas
        //draw the shooting stars lines
        if (this.y > 0) {
            strokeWeight(1);
            stroke(random(100, 255), random(100, 255), random(100, 255), 200);
            line(this.x, this.y, this.x, this.y - this.l);
        }
    }
}

Ghalya Alsanea -LO-10 – The Reverse Collection

An improvised performance with ten newly created instruments 

The Reverse Collection (2013 – 2016)

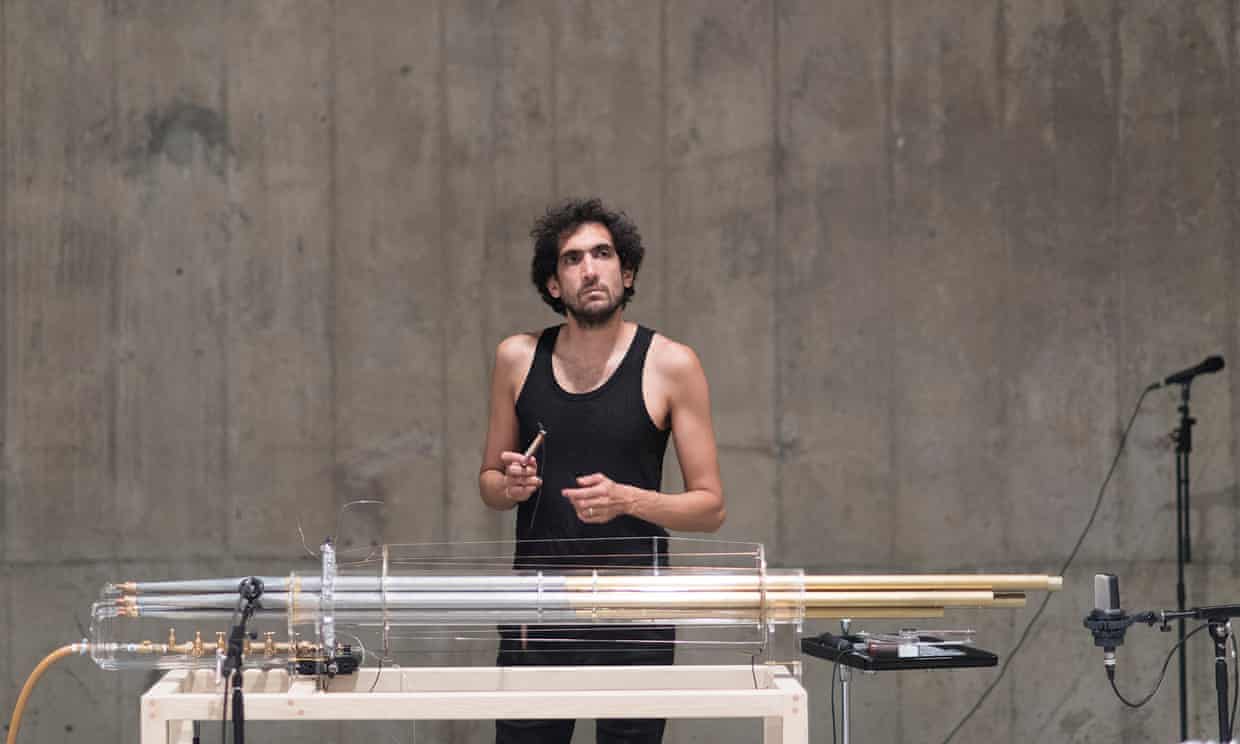
Creator: Tarek Atoui is a Beirut based artist and composer. What I admire about his work is that they’re grounded in extensive knowledge about music history and tradition.

Tarek Atoui with the “koto”, organ pipes connected to an air compressor.
Photograph: Oli Cowling/Tate Photography

The Reverse Collection is an ensemble of newly created instruments that were conceived in a few steps. The first stage was born out of the storage facilities of Berlin’s Dahlem museum, which houses the city’s ethnographic and anthropological collections. Atoui found that in the museum’s stash of historical instruments, there were many instruments with hardly any information/indication of their sociocultural provenance or any instructions on how to play them. So, he invited established musicians and improvisers to play with them, and recorded what happened, even though they had no idea how to use them.

The second stage was in collaboration with instrument makers. He asked them to listen to those recordings – layered and edited – and create new instruments on which someone could play something that sounds similar. Around 8 new instruments where created, and were used for several performances and new compositions, called the Reverse Sessions.

Finally, the third stage, which is The Reverse Collection, had a new generation of ten instruments to work with. Atoui recorded several performances to create a collection. This was done by a multi-channel sound work in an exhibition space, that was evolving over the whole duration of a show and allowing multiple associations between object, sound, space and performance. More on the performance and what the instruments are here.

I chose this project because I really admire the translation of historical artifacts into a modern instrument. Even though the result was a physical manifestation, the process of creating and understand the instruments was computational.

Ghalya Alsanea – Project-10 – Sonic Sketch

Unlikely pairings

To play or stop a sound, simply click inside the corresponding circle.

sketch

//Ghalya Alsanea
//galsanea@andrew.cmu.edu
//Section B
//Project 10

var amplitude;          //global amp variable
var defaultSize = 50;   //size of circles if nothing is playing

//compile titles into array for easy access
var titles =
["alien", "bass", "chirp", "snare",
"marimba", "piano", "synth", "hop"];

//have a callerID for the dif sounds for easy access
var callIDs = [];

//X location of all the circles
var xLoc = [];

//set starting booleans for dif sounds
let alienBool = false;
let bassBool = false;
let chirpBool = false;
let kickSnareBool = false;
let marimbaBool = false;
let pianoBool = false;
let synthBool = false;
let hopBool = false;

//store all booleans in an array for easy access
var bools = [alienBool,     bassBool,   chirpBool,  kickSnareBool,
            marimbaBool,    pianoBool,  synthBool,  hopBool]

function preload() {
    //load all sound files
    alienBass = loadSound("https://courses.ideate.cmu.edu/15-104/f2019/wp-content/uploads/2019/11/alien-bass-loop.wav");
    bassLoop = loadSound("https://courses.ideate.cmu.edu/15-104/f2019/wp-content/uploads/2019/11/bass-loop.wav");
    chirp = loadSound("https://courses.ideate.cmu.edu/15-104/f2019/wp-content/uploads/2019/11/electricbirdchirp.wav");
    kickSnare = loadSound("https://courses.ideate.cmu.edu/15-104/f2019/wp-content/uploads/2019/11/kick-snare-loop.wav");
    marimba = loadSound("https://courses.ideate.cmu.edu/15-104/f2019/wp-content/uploads/2019/11/marimba-loop.wav");
    piano = loadSound("https://courses.ideate.cmu.edu/15-104/f2019/wp-content/uploads/2019/11/piano-loop.mp3");
    synth = loadSound("https://courses.ideate.cmu.edu/15-104/f2019/wp-content/uploads/2019/11/synth-142.wav");
    hop = loadSound("https://courses.ideate.cmu.edu/15-104/f2019/wp-content/uploads/2019/11/trip-hop.wav");
}

function setup() {
    createCanvas(600, 150);
    useSound();
    amplitude = new p5.Amplitude();
    //assign IDs to each sound
    callIDs = [alienBass, bassLoop, chirp, kickSnare, marimba, piano, synth, hop];
    for (var i = 0; i < callIDs.length; i++) {
        callIDs[i].stop();          //start with no sound
        callIDs[i].setLoop(true);   //make sure it plays a continous loop
        xLoc.push(i * 75 + 37.5);   //assign x location based on ID index
    }
}

function draw() {
    //function call for rendering the circles
    renderCircs();
}

function renderCircs () {
    background(0);
    for (var i = 0; i < callIDs.length; i++) {
        //if the sound is playing, draw as red
        //otherwise render as white
        if (bools[i] === true) {
            fill('red');
        } else {
            fill(255);
        }

        //render circle and text
        circle(xLoc[i], height / 2, figureSize(bools[i]));
        textSize(15);
        textFont("Arial");
        textAlign(CENTER);
        text(titles[i], xLoc[i], height - 30);
    }
}

//configure diameter of circle based on volume
function figureSize(a) {
    //if the sound is playing, assign a size respectively
    if (a === true) {
        let level = amplitude.getLevel();
        let size = floor(map(level, 0, 1, 50, 70));
        return size;
    }
    //if no sound is playing then have the default size
    else {
        return defaultSize;
    }
}

//configure whether to play the sound or stop based on boolean
function soundState(ind) {
    if (bools[ind] === true) {
        callIDs[ind].play();
    } else if (bools[ind] === false) {
        callIDs[ind].stop();
    }
}

//state change when mouse is clicked
function mousePressed() {
    for (var i = 0; i < xLoc.length; i++) {
        //check where the mouse was clicked
        var d = dist(mouseX, mouseY, xLoc[i], height / 2);
        //if it's within one of the circles, then toggle sound state
        if (d < figureSize(bools[i]) / 2) {
            bools[i] = !bools[i];
            soundState(i);
        }
    }
}

function soundSetup() {
    //nothing here
}

For this project, I wanted to create something similar to a looping machine where you have different sounds and you can play them together and start and stop certain loops based on creative desire. I wanted the user to be in control of what’s being played and express themselves through sound. The 8 sounds I chose have the ability to be looped continuously and smoothly. The sounds sometimes work together and sometimes don’t, and the idea behind that is to see what music you can come up with using an unlikely pairing of sounds. Have fun and see what you come up with!

Ghalya Alsanea – Looking-Outwards-09

Since I don’t know many people in our class, I decided to go through one specific Looking Outwards week, rather than through a specific person’s assignments. I chose LO-02, because I personally loving generative art and really enjoyed researching that topic that week.

I chose to write about Ellan Suder’s post about Alfred Hoehn’s Drawing Machine mostly because I have never seen a project like this and find it really intriguing.

Work by Alfred Hoehn, Swiss Artist.
Project: Drawing Machine Ptolemaios.
Year: 2008.

Building off of Ellan’s thoughts, I also am very intrigued by this project. I appreciate the simplicity, yet complexity of the machine. It is somehow shocking how just changing a bit of the diameter/length of the spinning circles can create completely different works of art. This reminds me of the Spirograph project we did.

Something that I would add to the conversation is that why make a machine that does this, when we know we can program computers to do them better? I personally like pen-and-paper, but it gets me to wonder the wast of energy and paper of creating such beautiful artworks.

Finally, I agree with Ellan, that it is very mesmerizing and calming to watch the drawing happen.

Ghalya Alsanea – Project 09 – Portrait

sketch

//Ghalya Alsanea
//Section B
//galsanea@andrew.cmu.edu
//project-09

var img;
var WIDTH;
var HEIGHT;

var brightnessValues = [];  //stores the brightness values
var toggle = true;          //add a toggle for the for loop to help the code run faster

//x and y coordinate arrays for 4 shades
var curve1x = [];
var curve2x = [];
var curve3x = [];
var curve4x = [];

var curve1y = [];
var curve2y = [];
var curve3y = [];
var curve4y = [];

function preload() {
  img = loadImage("https://i.imgur.com/Aqg5q8V.jpg");

}

// getPixel: fast access to pixel at location x, y from image 
function getPixel(image, x, y) {
    var i = 4 * (y * image.width + x);
    return color(image.pixels[i], image.pixels[i + 1], image.pixels[i + 2]);
}

function setup() {
    //image is 480 x 480
    WIDTH = img.width;
    HEIGHT = img.height;
    createCanvas(WIDTH, HEIGHT);
    noFill();
    img.loadPixels();
}

function draw() {
    background(255);

    // Search and store brightness of each pixel. 
    //toggle: you only really need to load the brightness once, toggle can be re-toggled later
    if (toggle) {
    for (var i = 0; i < img.width; i++) {
        for (var j = 0; j < img.height; j++) {
            var b = brightness(getPixel(img, i, j));

            //sort vertices depending on brightness levels
            if (b < 0.04) {
                curve1x.push(i);
                curve1y.push(j);
            }
            if (b >= 0.04 & b < 10) {
                curve2x.push(i);
                curve2y.push(j);
            }
            if (b>= 10 & b < 40) {
                curve3x.push(i);
                curve3y.push(j);
            }
            if (b >= 40 & b < 100) {
                curve4x.push(i);
                curve4y.push(j);
            }
        }
    }
    toggle = false;

    }

    //LIGHTEST - light blue
    stroke(200, 220, 255, 50);
    drawCurve (curve4x, curve4y);
    //LIGHT -medium blue
    stroke(100, 120, 255, 50);
    drawCurve (curve3x, curve3y);
    //DARK - blue
    stroke(0, 0, 255, 50);
    drawCurve (curve2x, curve2y);
    //DARKEST - dark gray
    stroke(50, 100);
    drawCurve (curve1x, curve1y);
}

function drawCurve (x, y) {
    //originally I wanted to create a continous line through vertices,
    //but it was getting overcrowded, so to ket the sketch-like feeling
    //I used random circle sizes
    // beginShape();
    for (i = 0; i < x.length; i+=4) {
        circle(x[i], y[i], random(10));
        // curveVertex(x[i] + random(15), y[i] + random(15));
    }
    // endShape();
}

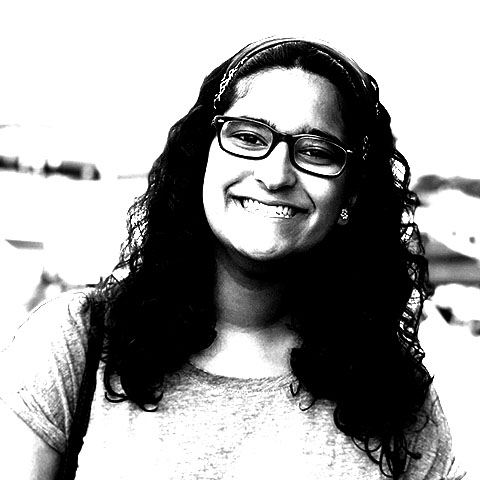
For this assignment, I used a portrait I took of my sister. I wanted to somehow show her personality through the portrait, hence using blue, her favorite color. Originally, I was inspired by the one-line contour drawings and set out to create those with 4 different continuous lines, each for 4 different shades of brightness.

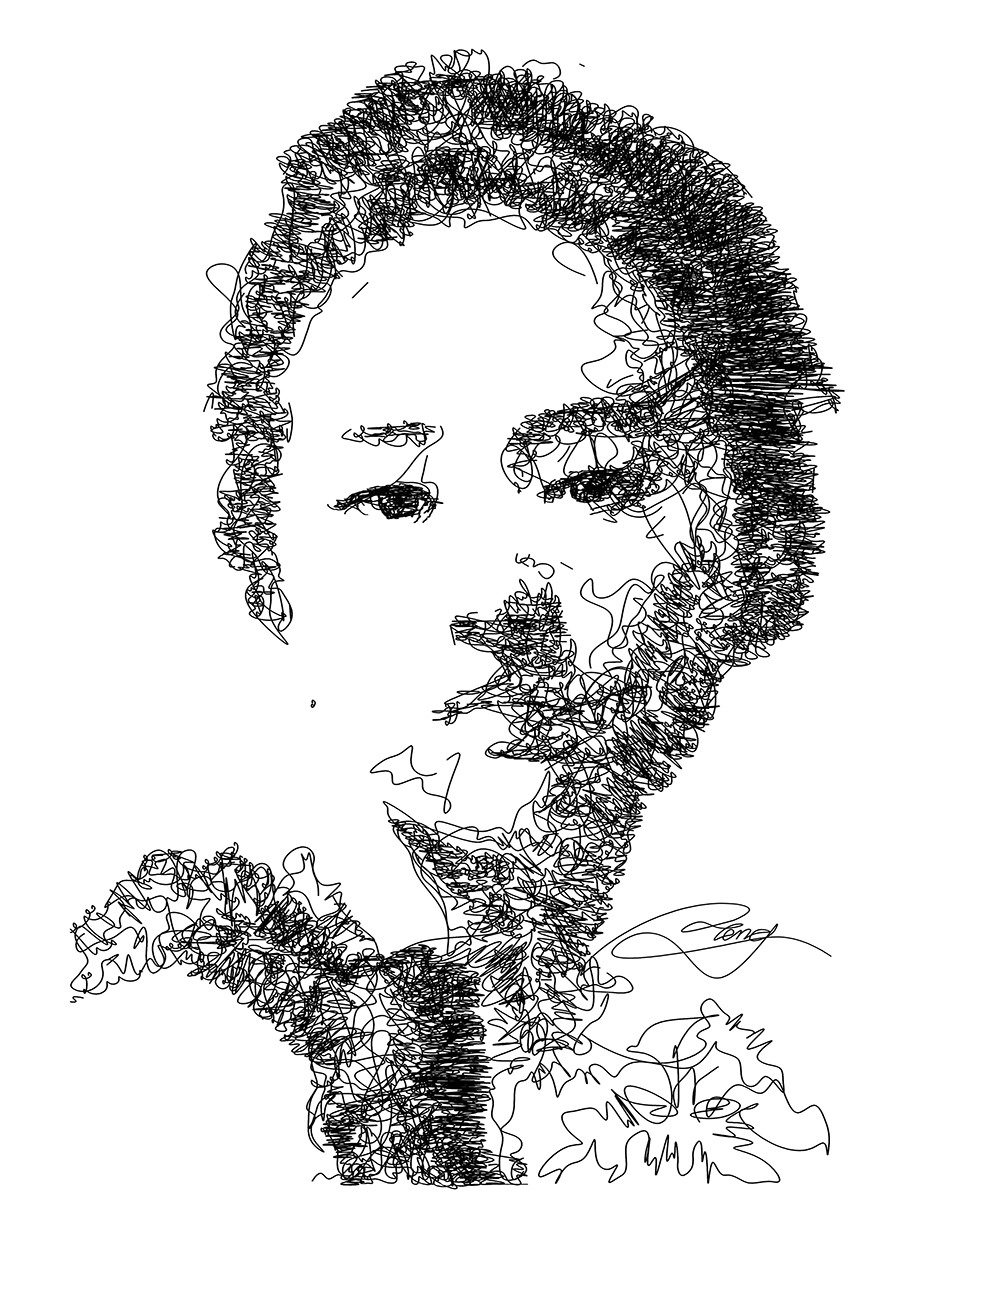
I was inspired by Teng Teng’s Computational portrait drawings. Find more here.

I couldn’t figure out how to create a non-messy looking portrait, so instead I slowly shifted to using circles. I still wanted to retain the drawing-like feel, which can be shown in the final right now. Going back to showing her personality through the piece, I thought the varying sizes of the circles and varying capacities also shows her kind and loving personality.

Ghalya Alsanea – LO-07 – What the street!?

MOVE LAB- Resident Researcher/Artist
Direction
Full Credits
–Data derived from OpenStreetMap (OSM)
This project looks into wasted public spaces in cities. The tool creates awareness about the disparity between the distribution of space for bikes, cars, parking lots, rails, etc.

Who “owns” the city?

They first looked at how much space there is in a city for moving around (ie the allocation/distribution ratios between cars, bikes, etc). The tool, “What the Street!?” is labelled as “The Mobility Space Report”, where the designers created an open-source public tool for exploring urban mobility spaces. They created a fun way to look at inequality of mobility spaces systematically AND interactively.

Play with the tool here!

Cover for About What the Street!?
I choose this project because of how the resulting shapes give a mesmerizing, never before seen perspective of urban spaces. For example, the image above shows all parking spaces in NYC, packed tightly together.

How does it work?

They use the data visualization tools of unrolling, packing, and ordering irregular shapes.  Therefore, they packed and rolled all mobility spaces into rectangular bins to visualize the areas they take up, then the tool allows you to see the same shape on a regular satellite map.

The mobility triangle shows how people move in each city – how much by car, bike, or public transport. Each dot stands for one city, and this specific image is highlighting Berlin (in blue). A dot in the very middle means an even share of these 3 forms of transportation is being used.

With each large dot there is a second dot that shows how much space a city has allocated for moving around with this particular transit mode. If first and second dots coincide, this would mean that city space is allocated in a fair way towards all forms of mobility. The triangle shows that space allocated is unfair: cars get much more space than they “deserve” – and bikes typically get much less. The team hope this tool shines a light on this disparity.