Clock Project

sketch
var fall;
var spring;
var winter;
var summer;

function setup() {
    createCanvas(480, 480);
    angleMode(DEGREES);
    textAlign(CENTER);
    rectMode(CENTER);
    fall = {r1:108, g1:12, b1:12, 
            r2:75, g2:28, b2:0, 
            r3:189, g3:81, b3:19};
    winter = {r1:253, g1:249, b1:231, 
            r2:202, g2:213, b2:255, 
            r3:21, g3:54, b3:186};
    spring = {r1:177, g1:244, b1:249, 
            r2:253, g2:217, b2:73, 
            r3:255, g3:204, b3:255};
    summer = {r1:123, g1:227, b1:243, 
            r2:255, g2:145, b2:145, 
            r3:250, g3:244, b3:228};
}

function draw() {
    background(220);
    translate(240, 240);
    date();
    rotate(-90);

    let hr = hour();
    let mn = minute();
    let sc = second();

    strokeWeight(30);
    noFill();

    if (m==3 || m==4 || m==5) {
        secondscircle(sc, spring);
        minutescircle(mn, spring);
        hourscircle(hr, spring);
    }
    else if (m==6 || m==7 || m==8) {
        secondscircle(sc, summer);
        minutescircle(mn, summer);
        hourscircle(hr, summer);
    }
    else if (m==9 || m==10 || m==11) {
        secondscircle(sc, fall);
        minutescircle(mn, fall);
        hourscircle(hr, fall);
    }
    else {
        secondscircle(sc, winter);
        minutescircle(mn, winter);
        hourscircle(hr, winter);
    }

}
function date() {
    stroke(0);
    strokeWeight(9);
    fill(255);
    rect(0,0, width/2,height/3,20);
    m = month();
    d = day();
    y = year();
    textSize(50);
    fill(0);
    strokeWeight(1);
    stroke(0);
    textFont('Orbitron')
    text(m + '.' + d + '.' + y, 0,15);

}

function secondscircle(sc, coloring) {
    stroke(coloring.r1,coloring.g1,coloring.b1);
    let secondsAngle = map(sc, 0, 60, 0, 360);
    arc(0, 0, 450, 450, 0, secondsAngle);
}

function minutescircle(mn, coloring) {
    stroke(coloring.r2,coloring.g2,coloring.b2);
    let minutesAngle = map(mn, 0, 60, 0, 360);
    arc(0, 0, 385, 385, 0, minutesAngle);
}

function hourscircle(hr, coloring) {
    stroke(coloring.r3,coloring.g3,coloring.b3);
    let hoursAngle = map(hr % 24, 0, 24, 0, 360);
    arc(0, 0, 320, 320, 0, hoursAngle);
}

Some challenges I faced were trying to use objects as a system of carrying the different color schemes for the different seasons in the year. Once I got the hang of using objects, I realized how useful and helpful they can be.

My Background – 05 Project

sketch
//Brandon Yi
//Section A
//btyi@andrew.cmu.edu
//Project-05-A
function setup() {
    createCanvas(600, 600);
    background(0);
    rectMode(CENTER);
}

function draw() {
    //initializing variables 
    var d=width/10;
    var x=d/2
    var y=d/2

    //iterating it over the background size
    for (var row = 0; row < width/d; row++) {
        y=d/2;
        for (var col = 0; col < height/d; col++) {
            tile(x,y,d);
            y+=d;
        }
        x+=d;
    }
    
    noLoop();
}
function tile(x,y,d) {
    //translation requires a push and pop
    push();
    stroke(152,255,255);
    strokeWeight(5);
    translate(x,y)
    fill(0);
    ellipse(0,0,d);
    ellipse(0,0,d-15);
    for (var i = 0; i < d; i+=10) {
        strokeWeight(2);
        stroke(104,0,208);
        noFill();
        rect(0,0,i,i)
    }
    pop();

}

The trickiest part of this program was making a for loop inside the function. On top of that, it was difficult to also make the entire program relative to the background size.

Week 4: String Art Project

sketch
//Brandon Yi
//btyi
//Section A
var dx1;
var dy1;
var dx2;
var dy2;
var numLines = 25;

function setup() {
    createCanvas(300, 400);
    background(200);
    line(10,10,10,390);
    line(10,390,290,390);
    line(10,10,290,10);
    line(290,10,290,390);
    dx = (290-10)/numLines; //setting x increments
    dy = (390-10)/numLines; //setting y increments
}

function draw() {
    //setting moveable points for increments
    var x1 = 290;
    var y1 = 390;
    var x2 = 10;
    var y2 = 10;
    var x3 = 10;
    var y3 = 10;
    
    for (var i = 0; i <= numLines; i += 1) {
        line(10, 10, x1, y1);
        x1 -= dx;
        line(290,390,x2,y2);
        y2 += dy;
        line(290,10,x3,y3);
        x3 += dx;
        y3 += dy;

    }
    noLoop();
}

I had a little bit of trouble working around the diagonal piece of my artwork. I think at first I struggled a little bit to understand my own code, but after solidifying the idea that dx and dy are the increments, it made sense that I would need to use them in my code for the diagonal piece.

Musical and Computational Inspiration

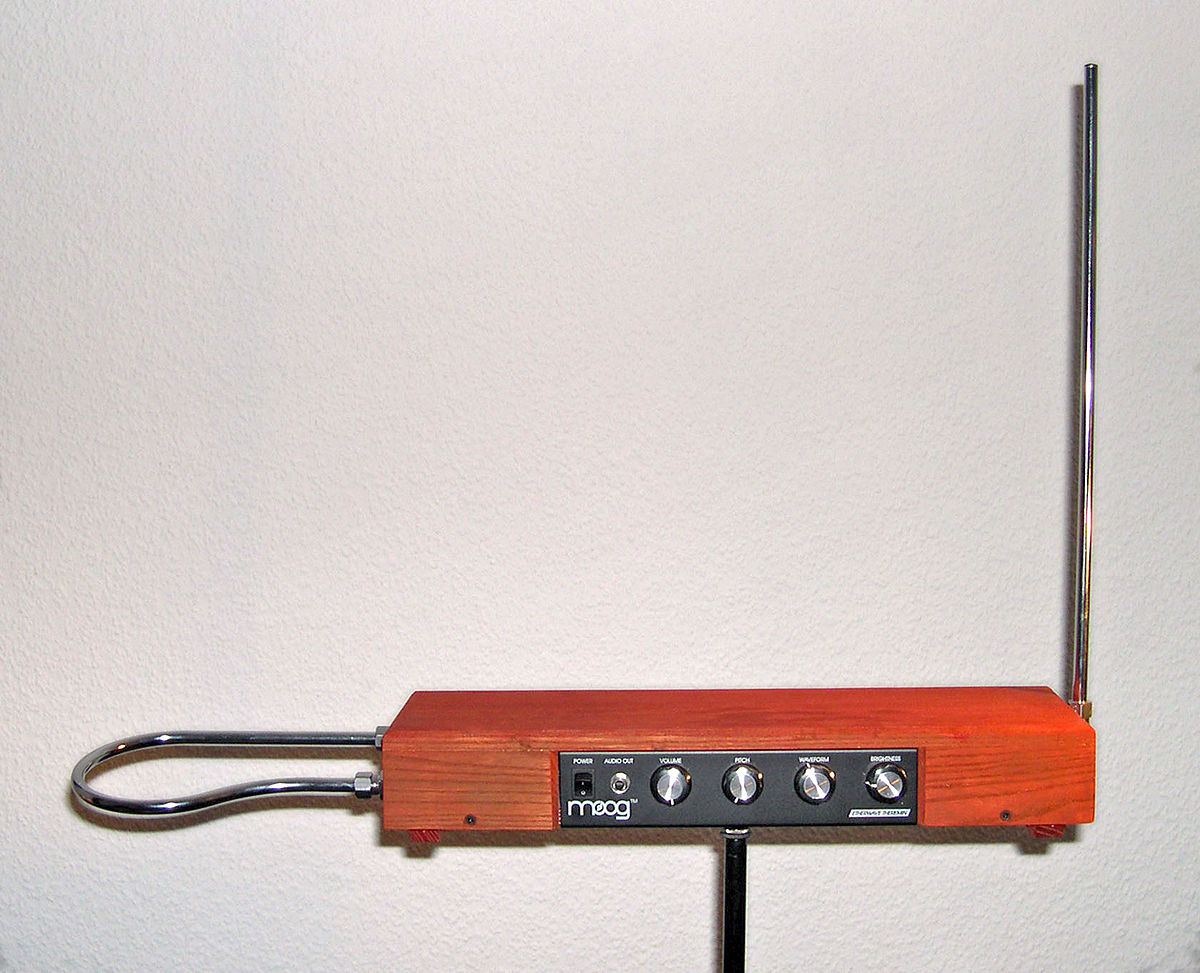
The mix of computer science and music is a combination that I love to no end. As both a musician and an avid computer science nerd, the idea that there are ways to combine these two concepts is amazing to me. There is one musical instrument that has always fascinated me. That would have to be the Theremin. Built by physicist Lev Sergeyevich Termen, the theremin is an instrument that does not need to be touched in order to create sound. The Theremin works by generating electromagnetic waves between two antennae. Kind of like a graph, the horizontal antenna controls volume while the vertical antenna controls pitch. I admire this instrument because of its originality and uniqueness. The sounds produced are heavily saturated computer-generated sounds that are like no other. When a musician is playing the Theremin, their hands move through space like they are dancing.

Theremin
Edward Sussman – Theremin

Dynamic Drawing

sketch
function setup() {
    createCanvas(400, 400);
}

function draw() {
    background(0);
    fill(255, 255, 0);
    var m = max(min(mouseX, 400), 0);
    var size = m * 350.0 / 400.0;
    ellipse(10 + m * 190.0 / 400.0, height/4, size, size); //yellow circle
    fill(255, 0, 0);
    ellipse(200 + m * 190.0 / 400.0, 3*height/4, size, size); //red circle
    size = 350 - size;
    fill(0, 0, 255);
    ellipse(200 + m * 190.0 / 400.0, height/4, size, size); //blue circle
    fill(0,255,0); 
    ellipse(10 + m * 190.0 / 400.0, 3*height/4, size, size); //green circle

}

I really liked the live movements of the squares in the example, so I took my own spin-off of it using circles. The trickiest part was figuring out how to make it change size diagonally.

My Inspiration – Week 3

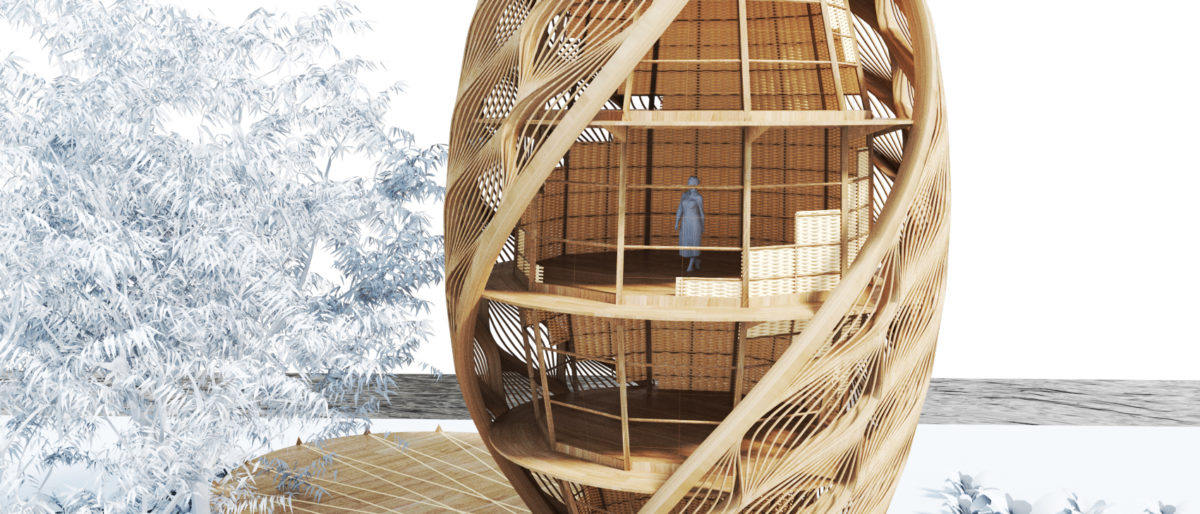
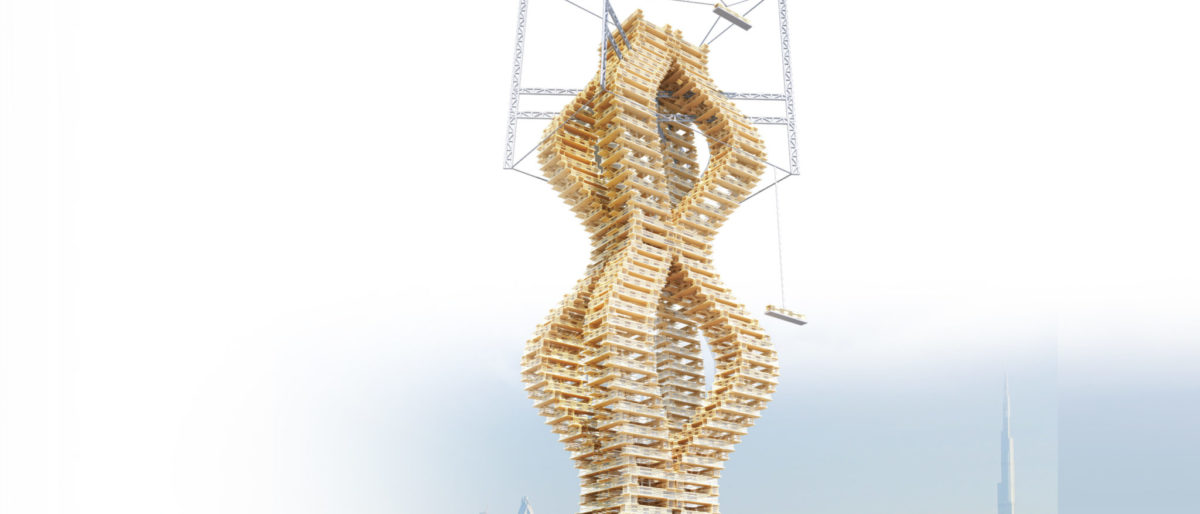
I really admire the Mamou Mani project because of its soft and modern-looking design. The unique shapes and curves of the different digital structures in his work create a futuristic style while also having enough simplicity to make the structures more realistic. Each one of his projects also has an intention behind it, whether it is to create a building that is more eco-friendly or a building that emphasizes the rich culture of the community that built it. A lot of the shapes in the buildings are looping and repeating throughout the construction, so parts of the algorithm are looping to create that consistent and patterned look. For example, in the ECOPODS project, the entire building is one looped grouping of code. You can tell that if the building were taller, the design would continue climbing upward with the spiraling pattern. The artist also seems to like to use flowy movements with his work, which are most evident in his DNA BlockChain Skyscraper.

Mamou Mani Projects

Mamou Mani’s Ecopod Project
Mamou Mani’s DNA Blockchain Skyscraper

Face Randomizer

sketch
var eyeSize = 20;
var pupilSize = 10;
var faceWidth = 100;
var faceHeight = 150;
var mouth = 1;

function setup() {
    createCanvas(300, 300);
    faceShape = 1;
}


function mousePressed() {
    faceShape = -faceShape;
    faceWidth = random(75, 200);
    faceHeight = random(100, 200);
    eyeSize = random(10, 50);
    pupilSize = random(1,4)
    mouth = random(1,4);

}

function draw() {
    background(180);
    //head shapes
    if (faceShape>0) {
        ellipse(width/2,height/2,faceWidth,faceHeight);

    }
    else if (faceShape<0){
        rect((width - faceWidth)/2,(height - faceHeight)/2,faceWidth,faceHeight);
    }

    //eyes and pupils
    var LeftEye = width / 2 - faceWidth / 4;
    var Righteye = width / 2 + faceWidth / 4;
    ellipse(LeftEye, 5*height / 12, eyeSize);
    ellipse(Righteye, 5*height / 12, eyeSize);
    fill(0);
    ellipse(LeftEye, 5*height / 12, eyeSize/pupilSize);
    ellipse(Righteye, 5*height / 12, eyeSize/pupilSize);
    fill(255);

    //mouths

    if (mouth<2) {
        //smile
    ellipse(width/2,height/2+25,50,25);
    stroke(255);
    rect(width/2-30,height/2+10,60,15);
    stroke(0);
    }
    else if (mouth<3) {
        //sad
    ellipse(width/2,height/2+35,50,25);
    stroke(255);
    rect(width/2-30,height/2+35,60,15);
    stroke(0);
    }
    else if (mouth<4) {
        line((width/2)-faceWidth/4, (height/2)+faceHeight/5, (width/2)+faceWidth/4, (height/2)+faceHeight/5);
    }
    
}

One of the difficulties I had with this project was creating a uniform smile. In order to do so, I used certain blocks to cover the ellipses and removed the stroke color. I had a lot of trouble with the random() function because I had also forgotten that it outputted float point numbers.

Michael Hansmeyer

I really admire the complexities of the geometric shapes that are created by Michael Hansmeyer, in particular, his “Subdivided Columns” work. In addition, I like how the pillars and the architecture have such minute details and the way the art is configured creates a sense of fantasy and magic. I like the “Subdivided Columns” piece because the code allowed for such flowy and symmetrical columns. While the art is very fantastical, it still operates as a normal column. I have no idea to begin analyzing the code for such detailed columns, but one thing is for sure, I feel like because of the level of detail, it would nearly be impossible for a normal architect to create this design. There do seem to be some repeating patterns, which tells me that there are loops involved in the algorithm. In addition, the way that the general shape of the columns flows smoothly in and out allows the columns to not only appear as smooth but sturdy.

Subdivided Columns(2010-now)

Subdivided Columns

Project 1: My Self Portrait

SelfPortrait-btyi
function setup() {
    createCanvas(500, 500);
    background(220);
    eyeyposition=200
    yhair=85
}

function draw() {
    fill(255,226,174);
        ellipse(250,250,400,400); //face
    fill(255); //whites of eyes
        ellipse(175,eyeyposition,100,25);
        ellipse(325,eyeyposition,100,25);
    fill(51,25,0); //pupils
        ellipse(175,eyeyposition,25,25);
        ellipse(325,eyeyposition,25,25);
    fill(255); //smile
        ellipse(250,325,200,100);
        stroke(255,226,174);
        fill(255,226,174);
        ellipse(250,325,200,50);
        rect(150,275,200,50);
    fill(255); //nose
    stroke(0);
        triangle(225,275,275,275,250,225)
    fill(0); //eyebrows
        rect(125,eyeyposition-45,100,15);
        rect(275,eyeyposition-45,100,15);
        stroke(255,226,174);
        fill(255,226,174);
        ellipse(250,145,300,40);
    fill(0); //hair
    stroke(0);
        rect(75,yhair,350,50);
        rect(100,yhair-25,350,50);
        rect(125,yhair-50,350,50);
        stroke(255,226,174);
        fill(255,226,174);
        ellipse(250,yhair+45,300,50);
    noLoop();
}

LO: My Inspiration

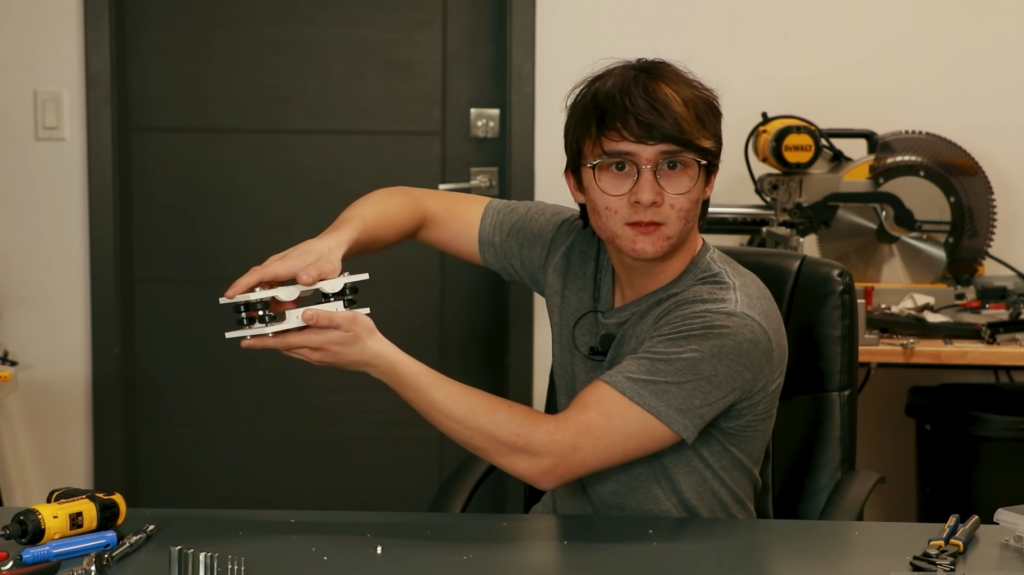
I think for me, I have always been extremely interested in code with a creative focus, so finding a place of inspiration was relatively difficult. When I was a kid, I was so obsessed with video game creation that by the time I had entered 5th grade, I had already mastered three different game-developing software. Whatever free time I had, I was either playing video games, watching youtube, or making my own games. However, when I entered middle school, I didn’t have the time to grow and flesh out my interest in computer science. But when I hit high school, I was scrolling through youtube and came across this content creator named Michael Reeves, who inspired me yet again to get back into coding. Although extremely lackluster, Michael Reeves was motivated by passion just as I was in elementary school. He only wanted to make projects that he thought were interesting; such as little robots and screaming Roombas. I admired him because all his work was original and authentic, and while he joked about it, he cared very deeply about each of his projects. The first video I watched was one of his earlier videos, where he created a real-life cursor using two motors that he hot glued together. Just by moving his mouse on the computer screen, the laser pointer connected to the motors would move on the wall in real life. I thought the idea was both hilarious and intriguing–and without thinking, I decided to recreate his idea. He had built and coded everything himself, so in the spirit of Michael Reeves, I decided to do the same. I continued to follow him through his youtube journey, watching in create more interesting projects such as the cursor. While simple, at first, his projects became more and more sophisticated as his skills continued to grow. For example, most recently he made a surgery robot that you could control simply by moving your hand through space. While his content I would say is not going towards anything right now, the future for me resides in his ideology. I believe that innovation derives itself from passion and authenticity in your own work and I aspire to continue that thought process in my future endeavors.

An image of Michael Reeves in his workshop in his new house working on one of the motors for his surgery robot. Image Source

Michael Reeves Youtube Channel