Final Project Lydia Jin – Piano Keys for Beginners

//Lydia Jin
//jialuj@andrew.cmu.edu
//Section D
//Final Project

//define necessary variables
var piano = [];
var alphabet = ['a', 's', 'd', 'f', 'g', 'h', 'j'];
var alphabet2 = ['A', 'S', 'D', 'F', 'G', 'H', 'J'];
var ASSETS_DIR = "assets/";
var POSTFIX = "-piano.wav"
var amp;
var hz;
var rec = [];
var w;
var buffer;
var button1, button2, button3, button4, button5, button6, button7;
var colorNum = 0;
var bgm1, bgm2, bgm3; //BGM stands for background metronome 
var mic, recorder, soundFile;
var state = 0;

var soundLinks = ["https://courses.ideate.cmu.edu/15-104/f2016/wp-content/uploads/2016/12/0-piano.wav",
                "https://courses.ideate.cmu.edu/15-104/f2016/wp-content/uploads/2016/12/1-piano.wav",
                "https://courses.ideate.cmu.edu/15-104/f2016/wp-content/uploads/2016/12/2-piano.wav",
                "https://courses.ideate.cmu.edu/15-104/f2016/wp-content/uploads/2016/12/3-piano.wav",
                "https://courses.ideate.cmu.edu/15-104/f2016/wp-content/uploads/2016/12/4-piano.wav",
                "https://courses.ideate.cmu.edu/15-104/f2016/wp-content/uploads/2016/12/5-piano.wav",
                "https://courses.ideate.cmu.edu/15-104/f2016/wp-content/uploads/2016/12/6-piano.wav"];


for (var i = 0; i < 7; i++){
    //push keys into the array 
    piano[i] = new KeyStroke(alphabet[i], alphabet2[i]);

}

function setup() {
    createCanvas(600, 200);
    amp = new p5.Amplitude();
    hz = new p5.FFT(0, 256);
    w = width/256;
    colorMode(HSB);
    angleMode(DEGREES);
    
    //create button for BGM 40
    button1 = createButton('40 BPM');
    button1.position(543,40);
    button1.mousePressed(PlayBGM1);

    //create button for BGM 50
    button2 = createButton('50 BPM');
    button2.position(543,64);
    button2.mousePressed(PlayBGM2);

    //create button for BGM 60
    button3 = createButton('60 BPM');
    button3.position(543,88);
    button3.mousePressed(PlayBGM3);

    //create button for no background metronome
    button4 = createButton('No BGM');
    button4.position(541,112);
    button4.mousePressed(ResetBGM);

    //create button for recording
    button5 = createButton('Record');
    button5.position(545,136);
    button5.mousePressed(RecordAudio);

    //create button for playing recording
    button6 = createButton('Play');
    button6.position(562,160);
    button6.mousePressed(PlayAduio);
    button6.hide();

    //create button for saving recording
    button7 = createButton('Save');
    button7.position(557,184);
    button7.mousePressed(SaveRecord);
    button7.hide();

    //create recorded soundfile
    recorder = new p5.SoundRecorder();
    recorder.setInput();
    soundFile = new p5.SoundFile();

    
}

//helper function for playing BGM1
function PlayBGM1(){
    bgm2.stop();
    bgm3.stop();
    bgm1.loop();
}

//helper function for playing BGM2
function PlayBGM2(){
    bgm1.stop();
    bgm3.stop();
    bgm2.loop();
}

//helper function for playing BMG3
function PlayBGM3(){
    bgm1.stop();
    bgm2.stop();
    bgm3.loop();
}

//helper function for no BGM
function ResetBGM(){
    bgm1.stop();
    bgm2.stop();
    bgm3.stop();
}

//helper function to record audio
function RecordAudio(){
    if (state == 0 ){
        recorder.record(soundFile);
        state ++;
    }
    else if (state = 1){
        recorder.stop();
        state++;
    }
  
}

//helper function to play recording
function PlayAduio(){
    soundFile.play();
}

//helper function to download recording
function SaveRecord(){
    saveSound(soundFile, 'mySound.wav');
}


function draw() {
    noStroke();
    background('black');

    //draw buttons
    fill('white');
    textSize(13);
    noStroke();
    text('Metronome', 535, 15);
    text('Rhythms', 543, 27);
    
    //hide buttons
    if (state === 0) {
        button6.hide();
        button7.hide();
        //state++;
    }

    else if (state === 1) {
        //display instructing text
        text('Recording! Click Record Again to stop.', 150, 20);
    }

    else if (state === 2) {
        
        if (soundFile.isPlaying() == true){
            button6.hide();
            bgm1.stop();
            bgm2.stop();
            bgm3.stop();
            //display text
            text('Playing...', 250, 20);

        }
        else{
            button5.hide();
            //show buttons after recording is done
            button6.show();
            button7.show(); 
            text('Recording stopped! Chose to play or save. Refresh the page to start a new recording.', 20, 20);
        }
    }


    //draw keyboard letters
    for (var i = 0; i < 7; i++){

        push();
        textSize(25);
        stroke('white');
        fill('white');
        text(alphabet2[i], i* (width - 70)/7 + (width - 70)/14, 195); 
        pop();


    }
    
    //draw displays
    if (state != 0){
        push();
        var level = amp.getLevel();
        rec.push(level);
        stroke('white');
        noFill();
        var cy = map(level, 0 , 1, height, 0);
        translate(0, height/2 - cy);
        beginShape();
        colorNum++;
        if (colorNum > 255){
                colorNum = 0;
            }
        for (var i = 0; i < rec.length; i++){
            var y = map(rec[i], 0 , 1, height, 0);
            stroke(colorNum, 255, 255);
            vertex(i, y);
        }
        endShape();

        if (rec.length > width - 70){
            rec.splice(0, 1);
        }
        pop();

        push();
        stroke('red');
        line(rec.length, 0, rec.length, height);
        pop();
    }
    //display amplitude with rectangles
    var spectrum = hz.analyze();
    noStroke();
    for (var i = 0; i < spectrum.length; i++){
        var amp1 = spectrum[i];
        var y = map(amp1, 0, 256, height, 0);
        fill(i, 255, 255);
        if (soundFile.isPlaying() == true){
            rect(i + (width - 90)/2, y , w - 2, height - y);
        }
        else{
            rect(i + buffer, y , w - 2, height - y);
        }
    }

}


function preload(){
    //preload sound files 
    for (var i = 0; i < piano.length; i++){
        piano[i].sound = loadSound(soundLinks[i]);

    }
    //store sound files to variables 
    bgm1 = loadSound("https://courses.ideate.cmu.edu/15-104/f2016/wp-content/uploads/2016/12/40-BPM.wav");
    bgm2 = loadSound("https://courses.ideate.cmu.edu/15-104/f2016/wp-content/uploads/2016/12/50-BPM.wav");
    bgm3 = loadSound("https://courses.ideate.cmu.edu/15-104/f2016/wp-content/uploads/2016/12/60-BPM.wav");
}


function KeyStroke(LKey, CKey){
    var sound;
    //lower case keys
    this.LKey = LKey;
    //upper case keys
    this.CKey = CKey;
}

function keyPressed(){
    
    if (state === 0 & key === 'space') {

        state++;
    }
    for (var i = 0; i < piano.length; i++){
        if ((key === piano[i].LKey) || (key === piano[i].CKey)){
            piano[i].sound.play();
            
            buffer = i*80;
            fill('orange');
            rect(i*width/7, 170, width/7, 30);
        }

    }
}

My program is designed for kids or beginners who don’t have any musical background in the goal of getting them to know the 7 basic keys in piano with the aid of a metronome. This program is simple to use and should build interest in users because they get to record what they played and replay or download the recordings. Users can follow instructions that are displayed in the program to know exactly how to use this program.

Instructions for use:
1. 4 background metronome options: 40 BPM, 50 BPM, 60 BPM or no BPM at all. Press the button to access each. (The buttons are named BGM, which stands for background metronome)
2. Keys A,S,D,F,G,H,J when pressed, will play piano keys A,B,C,D,E,F,G respectively. The code is written in a way that both capital and lower case keyboard keys will work.
3. Record your performance by hitting the record button, once done, hit the record button again to stop recording.
4. After you are finished recording, you have the option to either play your recording or save it. By pressing the save button, your audio recording file will be downloaded to your computer.
5. Refresh the page to start new recording.

Additional features displayed:
1. The line in the middle shows you the amplitude of the sound. The lines changes color for more fun 🙂
2. The rectangles that pop up when sound is played shows you the frequency of the sound.
* These are made possible by using P5js built in sound functions

Notes to be taken into consideration when grading:
1. This is modified from the final proposal. The reason I decided to change this is because I think this program is more practical for users and also has cool features. (Already talked to the professor about the change)
2. The sounds are downloaded from freesound.org
3. The buttons’ scales are off when sketch is embedded on WordPress. The original file did not have overlapping buttons.
4. When running locally, the program only runs when Firefox is used.

Project 12 Lydia Jin

I really liked the idea of Patatap by Jono Brandel. Therefore, I have decided to work on an artistic keyboard instrument. I want to make typing a more interesting task by creating this project. So when the user types letters and numbers on the keyboard, they will see their printed letters appear on the screen with unexpected visual and sound effects. So that typing is more of an artistic experience for the user. I haven’t decided what theme of sound I want to use yet but the sounds will all fall into the same mood so the typing experience stays consistent. It was a bit hard to draw the different visual effects but this picture I found online will be similar to the visuals in my project.

Looking Outwards 12 Lydia Jin

I have decided to work on something similar to Patatapfor my final project. So I decided to look at Patatap and a similar creation named Typatone. Patatap creates unique sound and visual when a specific key is pressed, whereas Typatone generates special tones when as the user types. Both are interesting projects in that they bring uniqueness and unpredictability in user experience. Patatap may have been better if there is a clearer indication of which key is pressed so that when users try to create a composition or sound combination they can better utilize their knowledge on which key produces which sound and visual. On the other hand, Typatone may be improved by changing font color or add more visual variations to it. Overall, I really like the idea of Patatap and Typatone as they bring in more variability and color to everyday lives.

typatobe Typatone screenshot

Project 11 Lydia Jin

sketch

//Lydia Jin
//Section D
//jialuj@andrew.cmu.edu
//Project 11
var myTurtle1;
var flag=false;
function setup(){
    createCanvas(600,600);
    background('black');
    //create 5 turtles that does different things
    myTurtle1=new makeTurtle();
    noLoop();
    }
function draw(){

    strokeJoin(MITER);

    myTurtle1.setColor('silver');
    myTurtle1.setWeight(2);
    //draw stars
    for (i=0;i<50;i++){
      ellipse(random(width),random(height),3,5);
    }
}
//draws constellation when mouse pressed
function mousePressed(){
  noStroke();
  fill('silver');
  var x=mouseX;
  var y=mouseY;
  ellipse(x,y,8,8);
  stroke(0);
  if (flag==false){
      myTurtle1.penDown();
      myTurtle1.goto(x,y);  
  } else{
    //resets the pen
    flag=false;
    myTurtle1.penUp();
    myTurtle1.goto(x,y);
  }
  
        
}
//resets the status when key is pressed
function keyPressed(){
    if (flag==false){
      flag = true;
    } 
}

//////////////////////////////////////////////////////////////////////////////////////////////
function turtleLeft(d) {
    this.angle -= d;
}
 
 
function turtleRight(d) {
    this.angle += d;
}
 
 
function turtleForward(p) {
    var rad = radians(this.angle);
    var newx = this.x + cos(rad) * p;
    var newy = this.y + sin(rad) * p;
    this.goto(newx, newy);
}
 
 
function turtleBack(p) {
    this.forward(-p);
}
 
 
function turtlePenDown() {
    this.penIsDown = true;
}
 
 
function turtlePenUp() {
    this.penIsDown = false;
}
 
 
function turtleGoTo(x, y) {
    if (this.penIsDown) {
      stroke(this.color);
      strokeWeight(this.weight);
      line(this.x, this.y, x, y);
    }
    this.x = x;
    this.y = y;
}
 
 
function turtleDistTo(x, y) {
    return sqrt(sq(this.x - x) + sq(this.y - y));
}
 
 
function turtleAngleTo(x, y) {
    var absAngle = degrees(atan2(y - this.y, x - this.x));
    var angle = ((absAngle - this.angle) + 360) % 360.0;
    return angle;
}
 
 
function turtleTurnToward(x, y, d) {
    var angle = this.angleTo(x, y);
    if (angle < 180) {
        this.angle += d;
    } else {
        this.angle -= d;
    }
}
 
 
function turtleSetColor(c) {
    this.color = c;
}
 
 
function turtleSetWeight(w) {
    this.weight = w;
}
 
 
function turtleFace(angle) {
    this.angle = angle;
}
 
 
function makeTurtle(tx, ty) {
    var turtle = {x: tx, y: ty,
                  angle: 0.0, 
                  penIsDown: true,
                  color: color(128),
                  weight: 1,
                  left: turtleLeft, right: turtleRight,
                  forward: turtleForward, back: turtleBack,
                  penDown: turtlePenDown, penUp: turtlePenUp,
                  goto: turtleGoTo, angleto: turtleAngleTo,
                  turnToward: turtleTurnToward,
                  distanceTo: turtleDistTo, angleTo: turtleAngleTo,
                  setColor: turtleSetColor, setWeight: turtleSetWeight,
                  face: turtleFace};
    return turtle;
}

This canvas represents a night sky in the universe. The user can create constellations using the turtle by clicking the mouse and connecting the dots. Once you finish one drawing, you can press any key and start on a new constellation. Below are two finished drawings:

screenshot-1

screenshot2

Looking Outwards 11 Lydia Jin

Computational Design of Metallophone Contact Sounds

I found this interesting computational design of sound online at this website. This project uses the technology of 3D printing to create specified shapes that makes sound. The parts include 3 sub parts: the mallet, fabricated shape, and the optimized stand. The parts have animal shapes that are very precisely calculated to make sure the best outcome of the sound comes out. It combines engineering and acoustic design skills. The project was created in 2013 and from this work, we can assume that the artist pays heavy attention to detail. I really like this project because it combines music and art in the most creative ways. And I admire how precise the pieces are, especially when it is made using innovative technology such as 3D printing.

Looking Outwards 10 Lydia Jin

Today I am going to dive into the work of Kristin Neidinger who is an augmented fashion designer. Her major work is a brand named Sensoree, a therapeutic biomedia. It is not certain when Kristin started her creations, but the things for sale on Sensoree are all patented in 2016. This is a emotive technology with auditory, visual, and tactile displays to promote extimacy, showing people how the feel on the inside to the outside world. The founder Kristin Neidinger is a future concepts designer who endeavors to craft phenomenal technology to enhance and expand physical embodiment. She studied dance, kinetic costumes, and physical therapy. She has presented works at technology and healthcare conferences, in fashion shows, museums, and future visionary platforms. She now works at SENSOREE to further develop her idea on how to make wearable computers therapeutic, emotive, and enhance sensory awareness.
I picked her work because I browsed through some of the works she has on her website. Her clothes changes colors when the emotion sensor senses different feelings of the person wearing them. I thought this to be cool and that it might change the world if people’s clothing reflects their actual feelings inside. I have included some photos of a mood sweater that changes color according to changes in mood.

moodsweater-blue-mask 
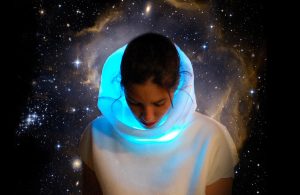
Mood Sweater in Blue State,Neidinger,2016

moodsweater-pink-mask
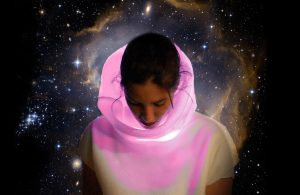
Mood Sweater in Pink State,Neidinger,2016

Project 10 Lydia Jin

sketch

//Lydia Jin
//Section B
//jialuj@andrew.cmu.edu
//Project 10
var stars = [];
var BacSpd;
var newCloudProbability;

function setup() {
  createCanvas(600, 400);
  //initialize variables
  BacSpd = 0.0003; //background mountain speed
  StarProb = 6; //set star appear probability to 6%

  //preset 20 stars when launch
  for (var i = 0; i < 20; i++) {
    stars[i] = new Star(random(width));
  }

}


//-----------------------------------------
function draw() {
  noStroke();

  //Create gradient color for the background
  topColor = color(48, 58, 48);
  botColor = color(162, 98, 85);

  //gradient color steps
  var gradientSteps = height;

  for (var i = 0; i <= gradientSteps; i++) { //for each gradient strip
      fill(lerpColor(topColor, botColor, i/height)); //fill color inerpolation
      rect(0, (i/height * height) - (1/height * height), width, 1/height * height); //use the color draw boxes
    }

  //Generate random mountain landscape by using noise
  //The moving speed is controlled by BacSpeed and noise level
  for (var j = 0; j < width; j++) {
    var t = height - 0.70 * height * noise(j * 0.005 + millis() * BacSpd);
    stroke('black');
    line(j, height, j, t);  
  }


  //add a new star to canvas in the chance of 6%
  if (StarProb > random(0,100)) {
    stars.push(new Star(width));
  }


  for (var i = 0; i < stars.length; i++) {
    stars[i].move(); //update star array
    stars[i].display(); 

    if (stars[i].x < 0) { //if star goes out of boundary, remove it
      stars.splice(i, 1);
    }    
  }
}

//generate stars
function Star(xx){
  
  this.x = xx;
  this.y = random(1, 130); //set vertical range for starts 
  this.speed = (-1.5); //set speed       

  this.move = function() {
  	  this.x += this.speed;
  }

  this.display = function() {

	  push();
	  stroke('yellow');
	  point(this.x, this.y);
	  pop();
  }

}


1342909403

I used the terrain template to create this project. I wanted to create a night view of mountains and stars. I used random function to generate random numbers of stars that appear at random times. Then, because I want to make a contrast between the mountains and night sky, I used lerp color to create a gradient colored sky that looks like a gloomy day right after sunshine and when stars first appear. The product is a moving image that looks like the scenery you would see if you are driving in rural areas at night. The theme is quiet and calming.

Project 9 Lydia Jin

sketch

//Lydia Jin
//Section D
//jialuj@andrew.cmu.edu
//Project 9

var brother;

function preload() {
	//load picture of my brother
    var myImageURL = "http://i.imgur.com/NrbfIdb.jpg";
    brother = loadImage(myImageURL);
}

function setup() {
	//set up canvas
    createCanvas(500, 500);
    background(0);
    brother.loadPixels();
    //load 100 times in 60 seconds
    frameRate(100);
}

function draw() {
    var px = random(width);
    var py = random(height);
    var ix = constrain(floor(px), 0, width-1);
    var iy = constrain(floor(py), 0, height-1);
    var theColorAtLocationXY = brother.get(ix, iy);

    //draw quads
    noStroke();
    fill(theColorAtLocationXY);
	quad(px-random(10), py-random(10), px-random(10), py-random(10), px+random(10), py, px, py+random(10));

}

I decided to use a photo of my brother taken in hockey uniform. I used quads to present the image to make it more cool since quads are more random than ellipses. A finished portrait looks like the one below:
collin

Looking Outwards 9 Lydia Jin

Today I am responding to Sihan Dong’s looking outwards on the Tilt Brush project .
Original link to project: Tilt Brush


Tilt Brush by Google, created in September 2014. 

The Tilt Brush project idea is fascinating and I am impressed with how much virtual reality can do for us. I agree with Sihan’s comments about the basic facts of the Tilt Brush. I also like how she talked about how the tilt brush’s function in adding in the audio element to virtual reality is going to attract more people to experience VR. It is also true that Tilt Brush does not let the public in on their algorithm which I hope they did because the idea seems very interesting and magical to me. One thing that I would like to add is a brief explanation on how this works. Which can be found on the website. I recommend this addition because I don’t completely understand how the brush works when I first saw the video as the concept is a bit vague. Also it would be great to add the year and creator of the tilt brush.

Looking Outwards 8 Lydia Jin

In Eyeo Festival 2015, two presenters talk about their work to protest against police violence. Their research can be found here.
Deray Mckesson is a protestor who used to live in Minneapolis and tweeted a lot. He strives to tell stories in a different way as police and officials demonstrated a shocking inability to provide the public with the information needed to fully understand police violence in America. Deray also mentioned race and ethnicity issues along with police violence. I like how Deray’s work is persistent. He and his team continues posting stuff on twitter to make an impact. He is serious about his job and collects evidence and information from many sources on social media and newspaper. His presentation is effective because he uses personal stories and real events and screenshots to display to the image. Which are good presentation techniques that adds to persuasion and connects the audience. Samuel Sinyangwe is a researcher and activist and promotes telling the story differently by using data and research. I like his way of presentation because he uses current events which many people know about. He pulls up data on people who were killed by police. He went to great length to code the database by race and 304 black people were killed in 2014, which is 3 times more probability than white men. This data shows the significance of his research and proves the point that police violence and race is correlated. Both of the presenters talk in confident and empathetic tones which brings the message across well. Mapping Police Violence, Eyeo 2015