rgriswol_project-07

sketch

/*
* Rachel Griswold
* rgriswol@andrew.cmu.edu
* Section B
* Project 07
*
*/

function setup(){
	createCanvas(800, 800);
}

function draw(){
	background(0);
	stroke(255, 0, 0);
	strokeWeight(3);
	fill(255);
	drawScarabaeusCurve();
} 

function drawScarabaeusCurve(){
	// Scarabaeus:
	// http://mathworld.wolfram.com/Scarabaeus.html

	var x;
	var y;
	var nPoints = 500; 
	var a = mouseX;
	var b = mouseY;

	beginShape();
	for(var i = 0; i < nPoints; i++){
		var th = map(i, 0, nPoints, 0, TWO_PI);
		var r = b * cos(2 * th) - a * cos(th);
		x = r * cos(th) / 2 + width/2;
		y = r * sin(th) / 2 + height/2;
		vertex(x , y);
	}
	endShape(CLOSE);
}

For this project I decided to go with the “scarabaeus” curve, mostly because it had a cool name. I ended up liking the shape (reminded me of the suit of clubs) and originally I wanted to make nPoints = 5, because it made the shape turn into a star if you moved the mouse the right way, but I figured that kind of defeated the purpose of the whole “curve” bit.
I considered changing the colors too, but I liked the simple black-white-red look. I also find it interesting how you can end up making it just a circle.

rgriswol_LookingOutwards-06

Are internet memes art? Well, according to Oxford Dictionary, which defines art as “the expression or application of human creative skill and imagination” – yes, they are. While it seems silly to classify them as such, comedy in and of itself is an art form, and internet memes are used almost solely for comedic purposes.
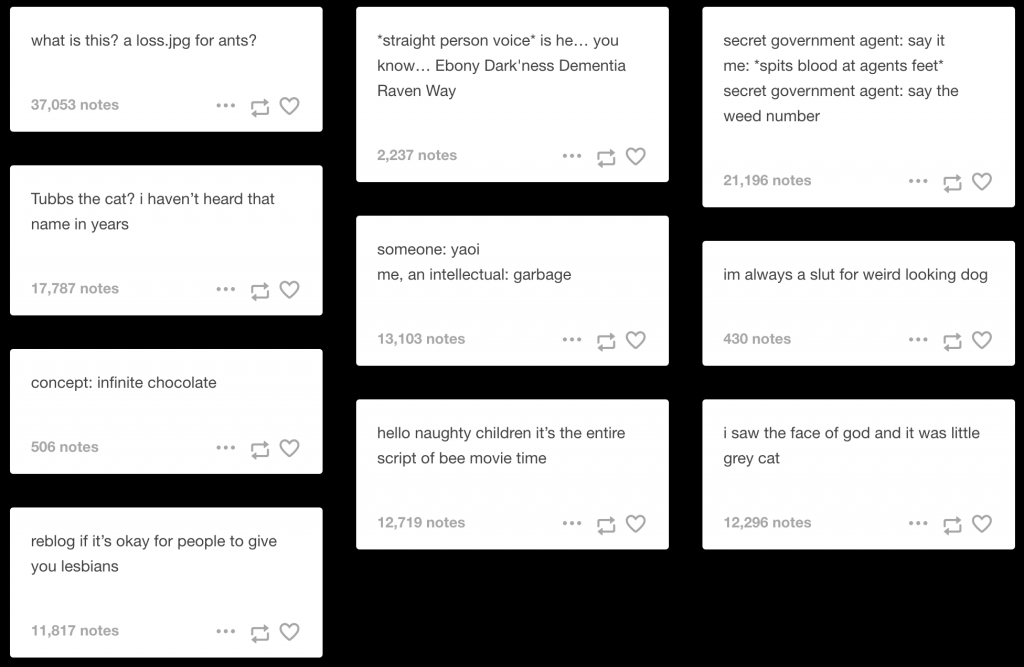
The tumblr blog “memelovingbot” was created by Nora Reed, a generative artist in New Mexico. She’s created multiple bots on tumblr as well as over 60 on twitter. While she does sometimes change the frequency of the bot’s posting and updates the bot when new memes get popular, the rest is completely up to the bot. It can’t do things like answer asks or respond to messages sent by other tumblr users, and it doesn’t have the ability to learn, but even with its rather simple format it still generates some pretty hilarious meme combinations.

Some examples of what the bot has come up with - as you can see from the number of notes, some posts are more popular than others.
Some examples of what the bot has come up with – as you can see from the number of notes, some posts are more popular than others.

The creator also open sourced the code, and it was made using Cheap Bots Done Quick which uses Tracery. All of this information (and more) can be found on the tumblr bot’s FAQ page. While you do have to be rather familiar with these memes to find this kind of meme-distortion funny, the blog is still worth a look regardless.

rgriswol_Project-06

sketch

/*
* Rachel Griswold
* rgriswol@andrew.cmu.edu
* Section B
* Project 06
*
*/

// Creates an abstract clock based on a simplified version of our solar system.
var m;
var s_init;
function setup(){
	createCanvas(800, 800);
}

function draw(){
	var mil = new Date().getMilliseconds(); // makes movement semi-continuous
	var s = second() + mil / 1000;
	var m = minute() + s / 60;
	var h = hour() + m / 60;

	var r = 33 + 159/h;
	var g = 10 + 242/h;
	var b = 65 + 187/h;

	background(r, g, b); // sky changes color depending on the hour

	var angleH = h * PI / 6 - PI / 2; // sets up the hour to move in terms of sin/cos
	var angleM = m * PI / 30 - PI / 2; // sets up the min to move in terms of sin/cos
	var angleS = s * PI / 30 - PI / 2; // sets up the sec to move in terms of sin/cos

	noStroke();
	fill(253, 236, 111);
	ellipse(width/2, height/2, 300, 300); // sun
	fill(100, 230, 100);
	ellipse(width/2 + cos(angleM) * 300, height/2 + sin(angleM) * 300, 80, 80); // earth
	fill(255);
	ellipse(width/2 + cos(angleM) * 300 + cos(angleS) * 80, height/2 + sin(angleM) * 300 + sin(angleS) * 80, 20, 20); // moon

	textSize(20);
	textAlign(CENTER);
	text(nf(hour() % 12,2,null)+":"+nf(minute(),2,null)+":"+nf(second(),2,null), width/2, height/2 + 10); // prints time on the sun

}

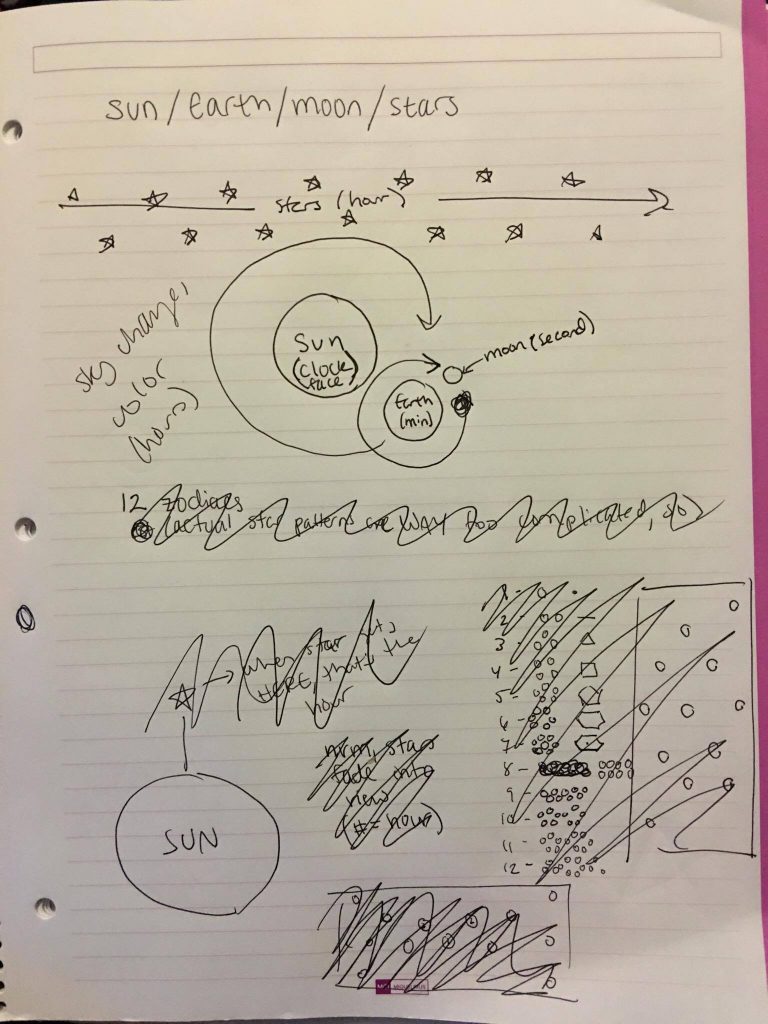
For this project (like my previous one) I was once again inspired by space. I decided to make a model based off of the rotation of the Earth around the sun and moon around the earth. Obviously the ratio of the velocity of the orbits aren’t similar to the real-life ratios, as this model is specifically meant to represent a typical hour/minute/second clock. The Earth represents the minutes, the moon represents the seconds, and the color changes of the sky represent the hours. I also printed the time (in numbers) on the sun to make it easier to understand how the movement of the ellipses and the changing color values correspond to the time.
I started with the sketch below. Initially I wanted to have stars pass in front of the sun like the zodiacs (there’s 12 zodiacs corresponding to each month, which works very nicely considering we use 12-hour clocks) but I realized they’d also either have to pass in front of or behind the Earth and moon (which felt weird) and it also meant I couldn’t include the time on the sun. So instead I decided to go with color changes to represent the hour, though I’d like to eventually figure out a way to make my original idea work.

14614434_698962960252897_1427463571_o

LookingOutwards-05

While I (along with the rest of the world) am very familiar with Frozen, I’d never really looked into how they animated the movie. I knew it was CGI, and I knew the basics of how they created the people in the movie, but I had ignored one major aspect: the snow.

Since their creation of Snow White and the Seven Dwarves in 1937, Disney has studied movement in order to create realistic-looking animation. With Snow White, it was studying the movements of a young woman, like walking and dancing; with The Lion King it was studying how lions move; and with Frozen, it was the movement of snow.

There was no software ready-made that would create the visual effects with snow that they wanted, so they had to start from scratch. They assembled a team of people (led by art director Michael Giaimo) to go study snow and figure out how to recreate it. Not only was it a new concept to tackle, it was a complicated one – snow comes in a huge number of varieties: powdery snow, wet snow, icy snow, etc. They had to figure out things like how snowballs looked when thrown against a wall and what it looks like to walk through the snow in a long skirt. While they didn’t have much time to make the deadline, Giaimo and his team put in considerable effort in making the snow look like it belonged in “a believable world.”

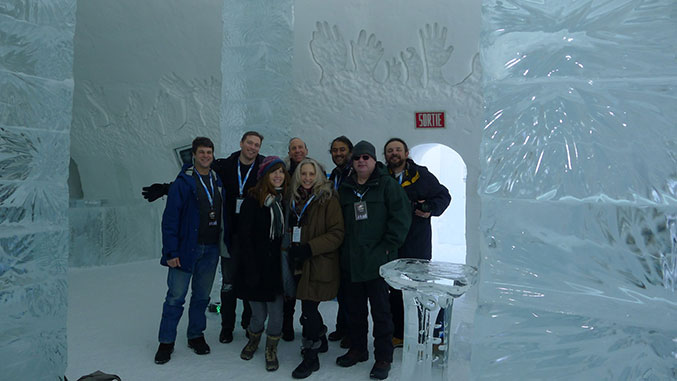
The art team also went to Quebec, Canada to visit the Ice Hotel as part of their research.

The above video includes an explanation of the algorithms used (which I fully admit I do not understand at all) as well as shots of the animation in action. It even includes formulas above some of the animations, often side-by-side, to show how changing certain variables effects how the snow looks.

Frozen was released in 2013 and was produced by Peter Del Vecho.

Project-05

sketch

/*
* Rachel Griswold
* rgriswol@andrew.cmu.edu
* Section B
* Project 05
*
*/

var v1x = -300;
var v1y = -70;
var v2x = -100;
var v2y = -110;
var v3x = 0;
var v3y = -300;
var v4x = 100;
var v4y = -110;
var v5x = 300;
var v5y = -70;
var v6x = 160;
var v6y = 90;
var v7x = 190;
var v7y = 300;
var v8x = 0;
var v8y = 210;
var v9x = -190;
var v9y = 300;
var v10x = -160;
var v10y = 90;

x0 = 80;
y0 = 60;

x02 = 160;
y02 = 140;

x03 = 130;
y03 = 110;

function setup() {
    angleMode(DEGREES);
    createCanvas(600, 730);
}

function draw() {
	background(42, 38, 64);

    noStroke();
    fill(72, 40, 62);
    ellipse(400, 140, 300, 200);
    ellipse(300, 200, 400, 200);
    ellipse(440, 250, 300, 150);
    ellipse(175, 600, 300, 200);
    ellipse(230, 550, 300, 200);
    ellipse(300, 600, 400, 200);
    ellipse(350, 550, 200, 200);

    fill(254, 254, 164);

    rotate(3);
    for (var q = 0; q < 600; q += 200){
        for (var i = 0; i < 600; i += 250){
            beginShape();
            vertex((v1x/10) + x0 + q, ((v1y/10) + y0)+i);
            vertex((v2x/10) + x0 + q, ((v2y/10) + y0)+i);
            vertex((v3x/10) + x0 + q, ((v3y/10) + y0)+i);
            vertex((v4x/10) + x0 + q, ((v4y/10) + y0)+i);
            vertex((v5x/10) + x0 + q, ((v5y/10) + y0)+i);
            vertex((v6x/10) + x0 + q, ((v6y/10) + y0)+i);
            vertex((v7x/10) + x0 + q, ((v7y/10) + y0)+i);
            vertex((v8x/10) + x0 + q, ((v8y/10) + y0)+i);
            vertex((v9x/10) + x0 + q, ((v9y/10) + y0)+i);
            vertex((v10x/10) + x0 + q, ((v10y/10) + y0)+i);
            endShape();
        }
    }

    for (var q = 0; q < 600; q += 200){
        for (var i = 0; i < 900; i += 250){
            beginShape();
            vertex((v1x/10) + x02 + q, ((v1y/10) + y02)+i);
            vertex((v2x/10) + x02 + q, ((v2y/10) + y02)+i);
            vertex((v3x/10) + x02 + q, ((v3y/10) + y02)+i);
            vertex((v4x/10) + x02 + q, ((v4y/10) + y02)+i);
            vertex((v5x/10) + x02 + q, ((v5y/10) + y02)+i);
            vertex((v6x/10) + x02 + q, ((v6y/10) + y02)+i);
            vertex((v7x/10) + x02 + q, ((v7y/10) + y02)+i);
            vertex((v8x/10) + x02 + q, ((v8y/10) + y02)+i);
            vertex((v9x/10) + x02 + q, ((v9y/10) + y02)+i);
            vertex((v10x/10) + x02 + q, ((v10y/10) + y02)+i);
            endShape();
        }
    }

    for (var q = 0; q < 600; q += 200){
        for (var i = 0; i < 900; i += 250){
            beginShape();
            vertex((v1x/20) + x03 + q, ((v1y/20) + y03)+i);
            vertex((v2x/20) + x03 + q, ((v2y/20) + y03)+i);
            vertex((v3x/20) + x03 + q, ((v3y/20) + y03)+i);
            vertex((v4x/20) + x03 + q, ((v4y/20) + y03)+i);
            vertex((v5x/20) + x03 + q, ((v5y/20) + y03)+i);
            vertex((v6x/20) + x03 + q, ((v6y/20) + y03)+i);
            vertex((v7x/20) + x03 + q, ((v7y/20) + y03)+i);
            vertex((v8x/20) + x03 + q, ((v8y/20) + y03)+i);
            vertex((v9x/20) + x03 + q, ((v9y/20) + y03)+i);
            vertex((v10x/20) + x03 + q, ((v10y/20) + y03)+i);
            endShape();
        }
    }
    noLoop();
}


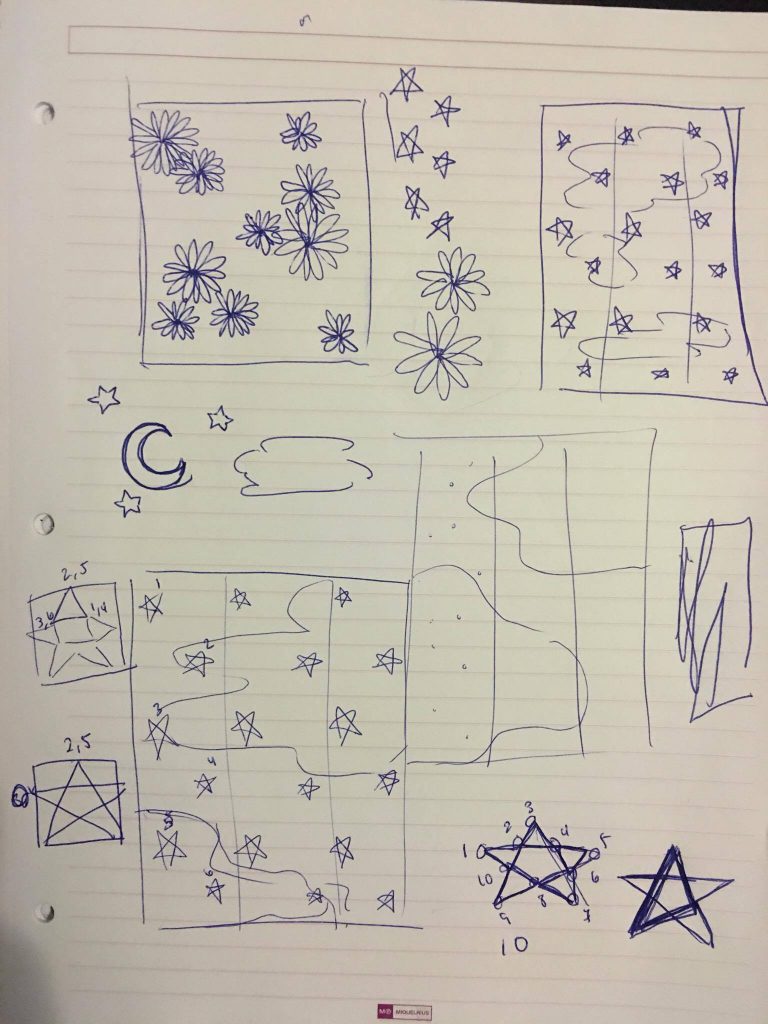
For this project I really wanted to create something to do with the night sky/space, because I love clothes with those kinds of patterns. I started with the sketches below. Being able to create the stars ended up being… considerably harder than I thought, but I think I learned a lot from it.

14488877_694978237318036_1600451096_o

rgriswol – LookingOutwards-04

Alex McLean, also known as Yaxu, released an album in 2016 called Spicule. What is unique about this album is that it is released as a live coding device on Pi Zero. You can also digitally download it. You can play mastered Spicule tracks “over high quality line outputs” and you can also plug it into your computer and “live code algorithmic patterns” to change and create “special versions” of Yaxu’s tracks. Yaxu also created TidalCycles, an open source live coding environment based off of his 16 years of experience with making algorithmic dance music. It makes sound through “SuperDirt” which in and of itself is live-codeable. It is also implemented through Haxell, a “pure functional programming language” which allows patterns to be created and combined with code. The patterns are also functions of rational time. Because the project is open source, many musicians can now use the project. Crowdfunding recently ended in August, but contributors got access to the album, pattern reel, and/or device depending on how much they donated.

Project-04-StringArt

sketch

/*
* Rachel Griswold
* rgriswol@andrew.cmu.edu
* Section B
* Project 04
*
*/

function setup() {
    createCanvas(640, 480);
}

function draw() {
	background(140, 205, 255);

	for (var i = 0; i < 320; i ++) {
		var n = (i * 100);
		stroke(252, 258, 192);
        strokeWeight(1);
    	line(width/2, height/2, 0 - n/2, n);
    	// ^ bottom right hand yellow lines
    	line(width/2, height/2, 640 + n/2, n);
    	// ^ bottom left hand yellow lines
    	line(width/2, 0, 0 - n/2, n);
    	// ^ top right hand yellow lines
    	line(width/2, 0, 640 + n/2, n);
    	// ^ top left hand yellow lines
    }
    for (var i = 0; i < 240; i = i + 10) {
    	stroke(252, 89, 83);
    	strokeWeight(2);
    	line(width/2, i, width/2 + i, height/2);
    	// upper right hand red-ish curve
    	line(width/2, height - i, width/2 + i, height/2);
    	// bottom right hand red-ish curve
    	line(width/2, i, width/2 - i, height/2);
    	// upper left hand red-ish curve
    	line(width/2, height - i, width/2 - i, height/2);
    	// bottom left hand red-ish curve

        strokeWeight(1.5);
    	line(width, 0, width/2 + i, height/2);
    	// upper right hand red-ish "triangle"
    	line(width, height, width/2 + i, height/2);
    	// bottom right hand red-ish "triangle"
    	line(0, 0, width/2 - i, height/2);
    	// upper left hand red-ish "triangle"
    	line(0, height, width/2 - i, height/2);
    	// bottom left hand red-ish "triangle"
    }
}


Although I feel like I learned a lot more about lines and loops, I still felt quite frustrated during this process and I feel like I still need to practice much more to be fully comfortable. The almost halo-like effect from the yellow lines wasn’t intentional at first, but after I figured out how to do it I actually ended up liking it.

Rachel Griswold – LookingOutwards-03

Elytra Filament Pavilion

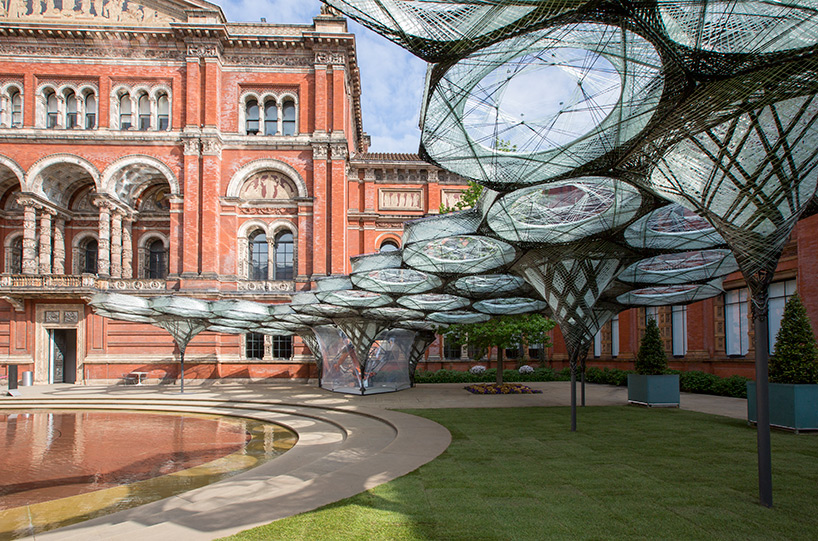
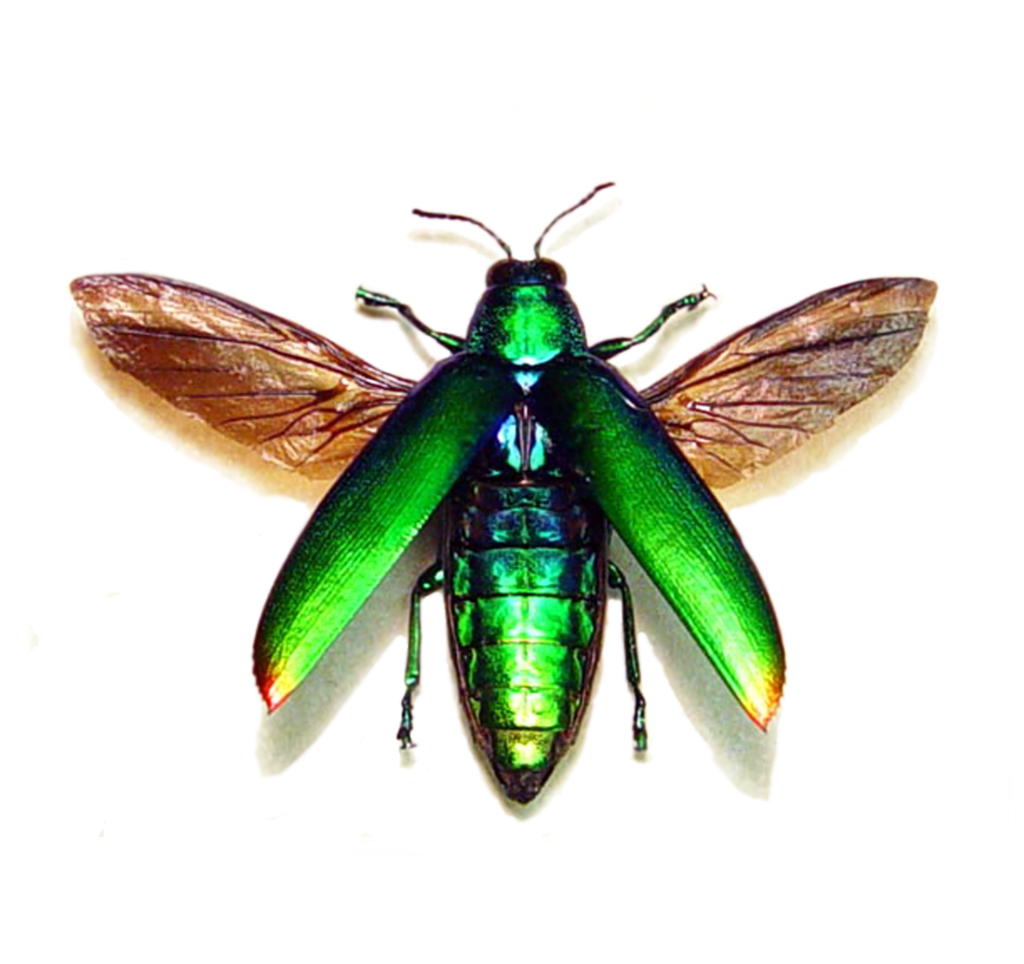
The Elytra Filament Pavillion is located in the Victoria and Albert Museum in London. It is kept in the John Madejski Garden where it will be on display from May 18th – November 6th, 2016. It is made by a robot called KUVA, which was programmed by a team from the University of Stuttgart. The robot weaves fibers across hexagonal structures, the weaving on the hexagons being denser in the center of the overall structure and lighter on the edges. It is incredibly lightweight and waterproof, and resembles a real-life spiderweb. Its design is inspired by the elytra beetle.

The beetle the design was based on.

Each piece of the hexagon takes around 3 hours to create, and the robot continues to build the canopy even as the exhibit is open to the public. Sensors are placed in the canopy fibers, allowing the robot to collect data and monitor how visitors use the pavilion, which will influence how the canopy grows. This means that everyone who visits the pavilion actually takes part in how the art develops, intentionally or not. The team’s goal was to create an “urban greenspace” that can “evolve, reconfigure, and adapt with the use of the courtyard.”

Here’s a link to the museum’s official page on the project. The page also includes the video below, which gives more information about the project and how it was created. I could not find any information about the algorithm that they used, except that they created it themselves.

Rachel Griswold – Project 03

sketch

/*
* Rachel Griswold
* rgriswol@andrew.cmu.edu
* Section B
* Project 03
*
*/

var x1w = 220;
var y1w = 140;
var x2w = 320;
var y2w = 40;
var x3w = 420;
var y3w = 140;
var x4w = 320;
var y4w = 240;

var x1y = 120;
var y1y = 240;
var x2y = 220;
var y2y = 140;
var x3y = 320;
var y3y = 240;
var x4y = 220;
var y4y = 340;

var x1b = 320;
var y1b = 240;
var x2b = 420;
var y2b = 140;
var x3b = 520;
var y3b = 240;
var x4b = 420;
var y4b = 340;

var x1p = 220;
var y1p = 340;
var x2p = 320;
var y2p = 240;
var x3p = 420;
var y3p = 340;
var x4p = 320;
var y4p = 440;

var fade = 0;

function setup() {
    createCanvas(640, 480);
    rectMode(CENTER);
}

function draw() {
	background(0);

//creates a square in the center that rotates and fades in and out of view
	fill(fade + mouseX);
	angleMode(RADIANS);
	var r = (mouseX, mouseX);
	push();
	translate(width/2, height/2);
	rotate(r);
	rect(0, 0, 60, 60);
	pop();

//creates similar circles, only they don't rotate but do change position
	ellipse(width/2 - mouseX, height/2 - mouseX, 30, 30);
	ellipse(width/2 + mouseX, height/2 + mouseX, 30, 30);
	ellipse(width/2 - mouseX, height/2 + mouseX, 30, 30);
	ellipse(width/2 + mouseX, height/2 - mouseX, 30, 30);

	fill(255); // white diamond, moves with mouseX
	noStroke();
	quad(x1w + mouseX, y1w - mouseX, x2w, y2w, x3w - mouseX, y3w - mouseX, x4w, y4w - mouseX * 2);

	fill(247, 249, 157); // yellow diamond, moves with mouseX
	noStroke();
	quad(x1y, y1y, x2y - mouseX, y2y + mouseX, x3y - mouseX * 2, y3y, x4y - mouseX, y4y - mouseX);

	fill(172, 217, 253); // blue diamond, moves with mouseX
	noStroke();
	quad(x1b + mouseX * 2, y1b, x2b + mouseX, y2b + mouseX, x3b, y3b, x4b + mouseX, y4b - mouseX);

	var pinkR = 216;
	var pinkG = 164;
	var pinkB = 221;

// makes pink diamond disappear in relation to mouseY (if in bottom half of canvas)
	if(mouseY > height/2){
		var pinkR = pinkR - mouseY + 240;
		var pinkG = pinkG - mouseY + 240;
		var pinkB = pinkB - mouseY + 240;
	}

	fill(pinkR, pinkG, pinkB); // pink diamond, moves with mouseX
	noStroke();
	quad(x1p + mouseX, y1p + mouseX, x2p, y2p + mouseX * 2, x3p - mouseX, y3p + mouseX, x4p, y4p);

}


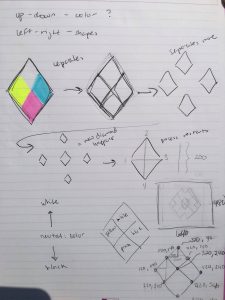
For this project I was inspired by a design from a show called Steven Universe. It was a lot of fun to play with fading colors and changing the shapes of the quadrilaterals. I included my original sketches at the bottom, and although the finished project is different from my original idea, I think I like how it turned out.

14339207_687662721382921_631824638_o

Project-02-Variable-Faces

sketch

/*
* Rachel Griswold
* rgriswol@andrew.cmu.edu
* Section B
* Project 02
*
*/

var faceWidth = 300;
var faceHeight = 300;
var eyebrowWidth = 50;
var eyebrowHeight = 10;
var eyeSize = 50;
var irisSize = 20;
var pupilSize = 10;
var noseBaseHeight = 75;
var noseBaseWidth = 30;
var noseTipHeight = 20;
var noseTipWidth = 30;
var noseTipArc1 = 3.14;
var noseTipArc2 = 6.28;
var mouthWidth = 20;
var mouthHeight = 20;
var mouthArc1 = 3.14;
var mouthArc2 = 0;
var irisColorR = 2;
var irisColorG = 174;
var irisColorB = 227;

function setup() {
    createCanvas(640, 480);
}

function draw() {
	var eyeL = width/2 - faceWidth * 0.25
	var eyeR = width/2 + faceWidth * 0.25
	var eyeL2 = height/2 - faceHeight * 0.17
	var eyeR2 = height/2 - faceHeight * 0.17
	background(26, 26, 26);

	fill(223, 157, 151)
	ellipse(width/2, height/2, faceWidth, faceHeight) // face

	fill(0)
	ellipse(eyeL, eyeL2, eyebrowWidth, eyebrowHeight) // eyebrow L
	ellipse(eyeR, eyeR2, eyebrowWidth, eyebrowHeight) // eyebrow R

	fill(255)
	ellipse(eyeL, height/2, eyeSize, eyeSize) // eye L
	ellipse(eyeR, height/2, eyeSize, eyeSize) // eye R

	fill(irisColorR, irisColorG, irisColorB)
	ellipse(eyeL, height/2, irisSize, irisSize) // iris L
	ellipse(eyeR, height/2, irisSize, irisSize) // iris R

	fill(0)
	ellipse(eyeL, height/2, pupilSize, pupilSize) // pupil L
	ellipse(eyeR, height/2, pupilSize, pupilSize) // pupil R

	fill(223, 157, 151)
	arc(width/2, height/1.9, noseBaseWidth, noseBaseHeight, 3.14, 0) // nose base
	arc(width/2, height/1.75, noseTipWidth, noseTipHeight, noseTipArc1, noseTipArc2) // nose tip

	fill(109, 27, 30)
	arc(width/2, height/1.45, mouthWidth, mouthHeight, mouthArc1, mouthArc2) // mouth
}

function mousePressed() {
	// when mouse is pressed, variables are randomly reassigned
	faceWidth = random(200, 400);
	faceHeight = random (200, 400);
	eyebrowWidth = random(45, 75);
	eyebrowHeight = random(5, 25);
	eyeSize = random(30, 70);
	irisSize = random(15, 25);
	pupilSize = random(5, 15);
	noseBaseWidth = random(20, 40);
	noseBaseHeight = random(50, 100);
	noseTipWidth = random(30, 60);
	noseTipHeight = random(10, 60);
	noseTipArc1 = random(0, 6.28);
	noseTipArc2 = random(0, 6.28);
	mouthWidth = random(10, 60);
	mouthHeight = random(10, 40);
	mouthArc1 = random(0, 6.28);
	mouthArc2 = random(0, 3.14);
	irisColorR = random(0, 255);
	irisColorG = random(0, 255);
	irisColorB = random(0, 255);

}

I wasn’t a fan of my original face from project 01, so I decided to create a new base-face from scratch. I wanted to make the face vary a lot, but as a result sometimes the randomly generated face looks pretty stupid. I wasn’t quite sure how to balance “lots of variability” with “not looking ridiculous” but I tried my best.