Looking Outwards – 04 Min Lee

LOOPLEX is an interactable user interface that distorts sound and colors through the hexagonal markers placed by the user on the device. As the user plays with the markers, a DV-cam inside the device keeps track of the different variations in the markers’ angles to trigger sound loops and changing color effects.

This project intrigued me because of its resemblance to a modern deejay’s turn-table. But LOOPLEX’s rendition of the turn-table incorporates both changing audio and colors through a more futuristic design. Instead of reacting to the physical touch of the user through a button or dial, the LOOPLEX uses a camera to sense the slightest changes in motion or position of the markers, meaning it could become an instrument for highly-skilled deejays and musicians in the future. As of yet, it is still a simple prototype that delivers on simple functions but in my opinion, it is a project that could be improved on for practical use in the real world.

Source:  https://vimeo.com/3546180

Project – 04 Sara Frankel String Art

sketch

var y1 = 0;
var y2 = 0;
var x1 = 0;
var x2 = 0;
var x3 = 0;

function setup() {
    createCanvas(400, 300);  
	background(0);
	for(var i = 0; i < 100; i++) { //for loop that is redrawing all of the lines
		y1 = lerp(height, 0, i/100); //increments lines at specific ratios
		x1 = lerp(0, width, i/100);
		y2 = lerp(0, height, i/100);
		x2 = lerp(width, 0, i/100);
		x3 = lerp(0, width, i/25);
		colorMode(HSB); // changes color values to those of saturation, not RGB
		strokeWeight(0.25); //decreases thickness of line
		stroke (280,map(100-i,100,0,60,0),100); //line of code that gradiates the color proportionally
		line(width, height/3, x3 - 1400, height * 2);
		colorMode(RGB); //color values back to RGB
		line(i,(height/2)+height*sin(map(i,0,100,0,2*PI))*.25,5*i,(height/2)-height*sin(map(i,0,100,0,2*PI))*.25); //creates lines that draw along a sin curve
		stroke(color(255));
		strokeWeight(0.5);
		line(x1 * i, y1, 0, 0);
		strokeWeight(1);
		stroke(color('#0B2838'));
		line(width/2, y1, x2, height/2);
		strokeWeight(2);
		stroke(color('#1F2654'));
		line(width/2, y2, x1, height/3);
		strokeWeight(0.05);
		stroke('pink');
		strokeWeight(1);
		line(width/2, height/2, x1, height * 0.125 - 50);
		stroke(color('10'));
		line(width/3, y2, x1, height/3);
		stroke(color('#513B70'));
		line(width/2 + 50, y2, x1, height/3);
		strokeWeight(0.25);
		stroke(color('#8E5D91'));
		line(width/2, y2, x1, height/4);
		strokeWeight(1);
		stroke(color('#B589A0'));
		line(width/2, y1, x2, height/4);
		line(width/2, height/2, x1, -height/8);

	}
}

I enjoyed doing this project as I really love looking at the play of negative space that tricks our eyes that these straight lines create a curved one. I also particularly enjoy experiencing and seeing the play of a color palette and how each color plays into the next.

Christine Chen-Project-04-String Art


Christine Chen-Project-04-String Art

/*
Christine Chen
Section E
cyc1@andrew.cmu.edu
Assignment-04-B 
*/

function setup() {
    createCanvas(400, 300);
}

function draw() {
    background(136, 164, 255); //background blue

    var increment = 7.5;
    //the smaller the increment it, the denser the lines

    //Blue pyramid-like lines in the center
    for (var a = 0; a < width; a = a + increment) {
        strokeWeight(0.9);
        stroke(0, 80, 105); 
        line (a, height, width - a, 0);
    }

    //LEFT LINES
    //rotate
    push(); 
    translate(width/2, height/2); 
    angleMode(DEGREES);
    rotate(90); 
    translate(-width/2, -height/2); 
        
    
    //Left side upper corner 
    //counting from outer blue lines to inner red lines
    //1st
    for (var a = 0; a < width; a = a + increment) {
        strokeWeight(0.4);
        stroke(0, 80, 105);
        line (0, a, a, 400);
    }
    
    //2nd 
    for (var a = 0; a < width; a = a + increment) {
        strokeWeight(0.4);
        stroke(50, 80, 105); 
        line (0, a, a, 300);
    }
    
    //3rd 
    for (var a = 0; a < width + 100; a = a + increment) {
        strokeWeight(0.4);
        stroke(100, 80, 105); 
        line (0, a, a, 250);
    }
    
    //4th
    for (var a = 0; a < width + 100; a = a + increment) {
        strokeWeight(0.4);
        stroke(150, 80, 105); 
        line (0, a, a, 220);
    }
    
    //5th
    for (var a = 0; a < width + 100; a = a + increment) {
        strokeWeight(0.4);
        stroke(255, 80, 105); 
        line (0, a, a, 200);
    }
    
    //Left side lower corner 
    //counting from outer blue lines to inner red lines
    //1st
    for (var a = 0; a < width; a = a + increment) {
        strokeWeight(0.4);
        stroke(0, 80, 105); 
        line (width, a, width - a, 400);
    }
    
    //2nd
    for (var a = 0; a < width; a = a + increment) {
        strokeWeight(0.4);
        stroke(50, 80, 105); 
        line (width, a, width - a, 300);
    }
    
    //3rd
    for (var a = 0; a < width; a = a + increment) {
        strokeWeight(0.4);
        stroke(100, 80, 105); 
        line (width, a, width - a, 250);
    }
    
    //4th
    for (var a = 0; a < width; a = a + increment) {
        strokeWeight(0.4);
        stroke(150, 80, 105); 
        line (width, a, width - a, 220);
    }
    
    //5th
    for (var a = 0; a < width; a = a + increment) {
        strokeWeight(0.4);
        stroke(255, 80, 105); //red line color
        line (width, a, width - a, 200);
    }

    pop(); 


    //RIGHT LINES
    //rotate
    push(); 
    translate(width/2, height/2); 
    angleMode(DEGREES);
    rotate(270); 
    translate(-width/2, -height/2); 
         
     
    //Right side lower corner
    //counting from outer blue lines to inner red lines
    //1st
    for (var a = 0; a < width; a = a + increment) {
        strokeWeight(0.4);
        stroke(0, 80, 105);
        line (0, a, a, 400);
    }
     
    //2nd 
    for (var a = 0; a < width; a = a + increment) {
        strokeWeight(0.4);
        stroke(50, 80, 105); 
        line (0, a, a, 300);
    }
     
    //3rd 
    for (var a = 0; a < width + 100; a = a + increment) {
        strokeWeight(0.4);
        stroke(100, 80, 105); 
        line (0, a, a, 250);
    }
     
    //4th
    for (var a = 0; a < width + 100; a = a + increment) {
        strokeWeight(0.4);
        stroke(150, 80, 105); 
        line (0, a, a, 220);
    }
     
    //5th
    for (var a = 0; a < width + 100; a = a + increment) {
        strokeWeight(0.4);
        stroke(255, 80, 105); 
        line (0, a, a, 200);
    }
     
    //Right side upper corner
    //counting from outer blue lines to inner red lines
    //1st
    for (var a = 0; a < width; a = a + increment) {
        strokeWeight(0.4);
        stroke(0, 80, 105); 
        line (width, a, width - a, 400);
         }
     
    //2nd
    for (var a = 0; a < width; a = a + increment) {
        strokeWeight(0.4);
        stroke(50, 80, 105); 
        line (width, a, width - a, 300);
    }
     
    //3rd
    for (var a = 0; a < width; a = a + increment) {
        strokeWeight(0.4);
        stroke(100, 80, 105); 
        line (width, a, width - a, 250);
    }
     
    //4th
    for (var a = 0; a < width; a = a + increment) {
        strokeWeight(0.4);
        stroke(150, 80, 105); 
        line (width, a, width - a, 220);
    }
     
    //5th
    for (var a = 0; a < width; a = a + increment) {
        strokeWeight(0.4);
        stroke(255, 80, 105); //red line color
        line (width, a, width - a, 200);
    }

    pop(); 
}

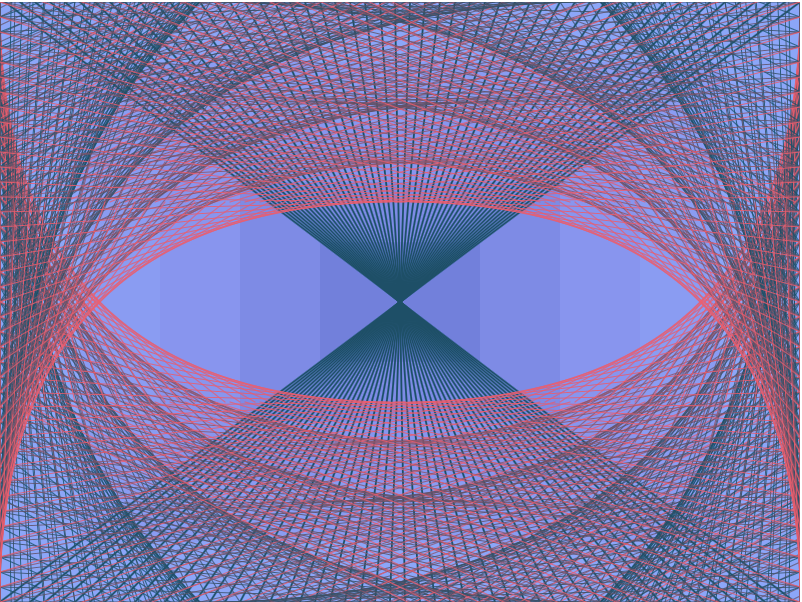
I think this project is particularly hard because it is so difficult to visualize what your codes are going to draw. However, once I got a part of my lines to work, it was easier to plan out what I want to create with the part I had. After playing around with my strings for a while, I finally settled with this piece where the left and right strings wraps around the middle to emphasize the forms of the pyramid-like strings in the center. Having the wrapping strings at the top and bottom isn’t as visually interesting and having the wrapping strings on four sides is just too much.

Looking Outwards 04

https://www.youtube.com/watch?v=wsITBynbeTU

This is a video and a link to the piece.

This project really interested me based on the interaction that the viewer can have and how much agency is actually given to the viewer. In my opinion the art that interests me most is usually the kind that I can interact with. This audio reactive installation was made by 3 artists in the artist collective, The Creators. The algorithms that generated the work probably had to do with the distance that the person was from the installation, similarly to mouseX, they might’ve had a camera that could base the sound and video movement off of a person’s proximity to said camera.  The artists’ concept is implemented into their execution, the viewers participation or lack thereof shows the concepts of causality, responsibility, and choice. In this piece, the viewer becomes the creator, the sound and visuals react to the choices of the viewer.

Catherine Coyle – Project 04 – String Art

cathstringart

// Catherine Coyle
// ccoyle@andrew.cmu.edu
// section C
// Project-04-String Art

var rightY = 0;
var leftY;
var colorV = 0;
var bgColor = 0;

function setup() {
	createCanvas(400, 300);
	leftY = height;
}

function draw() {
	background(200);
	// background gradient done w lines
	// the line gets smaller and lighter each round making a gradient
	for(var thickness = height*2; thickness > 1; thickness = thickness*.8) {
		strokeWeight(thickness);
		stroke(bgColor/2, bgColor/2, bgColor);
		line(0, height, width, height);
		bgColor += 20;
	}	
	strokeWeight(.5);
	// corner curves
	for(var topX = 0; topX < width; topX += 4) {
		// as one side of the line increases the other decreases making a curve
		// here are curves near the four corners
		stroke(colorV, 255-colorV, 150);
		line(width, leftY, width-topX, 0);
		line(topX, height, width, width-rightY);
		rightY += 4;
		line(topX, 0, 0, leftY);
		line(0, leftY, height-topX, height);
		leftY -= 4;
		// the color is continuously changing to make a gradient
		colorV += 2.5;
	}
	// yellow middle lines
	strokeWeight(1);
	stroke(253, 255, 137);
	for(var midX = 0; midX < width/2 - 50; midX += 8) {
		line(width/2 - 50, height/2 - 50 + midX, width/2 + 50 -midX, height/2 - 50);
		line(width/2 + 50, height/2 + 50 - midX, width/2 - 50 +midX, height/2 + 50);
	}
	noLoop();
}

I thought this was a really fun project! I didn’t do any sketches this time, instead I just experimented with different numbers to figure out how to make a curve and then added the curves in the middle. Additionally, I thought it would be cool to have a gradient background so I did this by using lines in a for-loop to follow the rest of the theme of the project.

ChristineSeo-Project04

sketch

// Christine Seo
// Section C
// mseo1@andrew.cmu.edu
// Project-04

function setup() {
  createCanvas(300, 400);
  mouseClicked();
}

function draw() {
  
}

function mouseClicked() {
  background(245, 229, 254);
  noStroke();
  
	    push();
	  for(var x = 0; x <= width; x += 30){ //rainbow dashes
	   for(var y = 0; y <= height; y += random(90)){
  	
     var r = random(220);
     var r1 = random(0, 5);
     var r2 = random(10, 40);
     
     colorMode(HSB,200); 
		 var colorC = color(r,r2,220);
		 fill(colorC);
     	ellipse(x, y, r, r1);
	   }
	  }
	  pop();

	 push();
	for (var y = 0; y < height; y += random(80)){ 
    
    strokeWeight(random(1, 5));
    stroke(250);
    line(0, 0, y-80, height/2); //top white lines
    line(width, height, y-80, height/2); //lower white lines
	  }
	pop();

	strokeWeight(random(1, 5));//midline in center
    stroke(250);
	line (0,height/2,width,height/2);


    push();
	for (var y = 0; y < height; y += random(40)){ //dark gray lines left bottom corner
    
    strokeWeight(random(1, 5));
    stroke(100);
    line(0, y, y+10, height);
  	}
	pop();
  
     push();
	for (var x = 0; x < width; x += random(40)){ //dark gray lines right top corner
    strokeWeight(random(1, 5));
    stroke(100);
    line(x, 0,width, x+10);
	  }
	pop();

    push();
  for (var x = 0; x < width; x += random(20)){ // light gray lines right top corner
    strokeWeight(random(1, 2));
    stroke(160);
    line(x-35, 0,width, x+35);
    }
  pop();

    push();
  for (var y = 0; y < height; y += random(20)){ // light gray lines left bottom corner
    
    strokeWeight(random(1, 2));
    stroke(160);
    line(0, y-35, y+35, height);
    }
  pop();


}

For this project, I wanted to play having a color scheme as well as use different corners of the canvas to create lines. When clicked, the movement of the lines are random (with restriction). Although getting the gist of using for() was difficult at first, I was able to get a hang of it and create something that I think is very successful.

Vicky Zhou – Project 04 – String Art

sketch

/* Vicky Zhou
Section E 
vzhou@andrew.cmu.edu
Project 04 -String Art*/

var x; //first x cord
var y; //first y cord
var x2; //second x cord
var y2; //second y cord
var dir =1; //direction of lines

function setup() {
    createCanvas(400, 300);
    background(0);
}

function draw() {
	for (var i = 0; i <= 1; i += 0.05){
		//creates upper right hand corner
		push();
		stroke(255);
		strokeWeight(0.02);
		x = lerp(0, width, i);
		y = 0;
		y2 = lerp(0, height, i);
		x2 = width;
		line(x, y, x2, y2);	
		pop();

		//creates lower left hand corner 
		push();
		stroke(255);
		strokeWeight(0.02);
		x = 0;
		y = lerp(0, height, i);
		x2 = lerp(0, width, i);
		y2 = height;
		line(x, y, x2, y2);
		pop();

	}

	//creates upper left hand corner in light yellow
	for(var i = 0; i <= width; i += 0.05){
		stroke(246, 236, 196);
			push();
			strokeWeight(0.5);
			x = lerp(width/2, height, i);
			y = 0;
			x2 = 0;
			y2 = lerp(height, width/2, i);
			line(x, y, x2, y2);
			pop();
	}

	//creates upper right hand corner in blue
	for(var i = 0; i <= width; i += 0.05){
		stroke('BLUE');
			push();
			strokeWeight(1);
			x = lerp(width/2, height, i);
			y = 0;
			x2 = 0;
			y2 = lerp(height, width/2, i);
			line(x, y, x2, y2);
			pop();
	}

	//creates lower right hand corner in white
	for(var i =0; i <= height; i += 0.05){
		stroke(255);
			push();
			strokeWeight(0.5);
			x = width;
			y = lerp(0, width/2, i);
			x2 = lerp(width/2, 0, i);
			y2 = height;
			line(x2, y2, x, y);
			pop();
	}

	//creates lower right hand corner in green
	for(var i =0; i <= height; i += 0.05){
		stroke('YELLOW');
			push();
			strokeWeight(1);
			x = width;
			y = lerp(0, width/2, i);
			x2 = lerp(width/2, 0, i);
			y2 = height;
			line(x2, y2, x, y);
			pop();
	}

	//creates top right red
	for(var i = 0; i <= width; i += 0.02){
		stroke('RED');
		strokeWeight(0.02);
		x = 0;
		y = lerp(width/3, width*(2/3), i);
		x2 = lerp(width/3, width*(2/3), i);
		y2 = 300;
		line(x, y*mouseY, x2, y2);
		}

}

Making this was a lot of fun and very interesting because of the ability to play with different line weights, and the different spacing with the lerp function. However, it got frustrating at times when I wanted to “flip” or “reflect” the exact bottom or top because sometimes I would have trouble remembering what x-cord and y-cord points would stay static and which ones would change. Overall, this project is cool because it provides for really dynamic and trippy motion graphic opportunities.

Justin Yook – Project 04 – String Art

stringArt

//Justin Yook
//Section C
//jyook@andrew.cmu.edu
//Project 04


var x1 = 0; 
var y1 = 0; 
var x2 = 0; 
var y2 = 300; 

function setup() {
    createCanvas(400, 300);
}

function draw() {
    background(0);
    //generate lines on BOTTOM LEFT (1st curve) (green)
    for (var step1 = 0; step1 <= 1; step1 += .02) {
        x2 = lerp(0, 400, step1);
        y1 = lerp(0, 300, step1);
        stroke(124, 252, 0);
        line(x1, y1, x2, y2);
    }
 
    //generate lines on TOP LEFT (2st curve) (green)
    for (var step2 = 0; step2 <= 1; step2 += .02){
        x2 = lerp(0, 400, 1 - step2);
        y1 = lerp(0, 300, step2);
        stroke(124, 252, 0);
        line(x1, y1, x2, height - y2);
    }

    //generate lines on BOTTOM LEFT (3nd curve) (red)
    for (var step3 = 0; step3 <= 1; step3 += .03) {
        x2 = lerp(0, 400, 2 * step3);
        y1 = lerp(0, 300, step3);
        stroke(255, 0, 0);
        line(x1, y1, x2, y2);
    }

    //generate lines on TOP LEFT (4rd curve) (red)
    for (var step4 = 0; step4 <= 1; step4 += .03){
        x2 = lerp(0, 400, 2 * (1 - step4));
        y1 = lerp(0, 300, step4);
        stroke(255, 0, 0);
        line(x1, y1, x2, height - y2);
    }

    //generate lines on BOTTOM LEFT (5th curve) (blue)
    for (var step5 = 0; step5 <= 1; step5 += .04) {
        x2 = lerp(0, 400, 4 * step5);
        y1 = lerp(0, 300, step5);
        stroke(0, 204, 204);
        line(x1, y1, x2, y2);
    }

    //generate lines on TOP LEFT (6th curve) (blue)
    for (var step6 = 0; step6 <= 1; step6 += .04){
        x2 = lerp(0, 400, 4 * (1 - step6));
        y1 = lerp(0, 300, step6);
        stroke(0, 204, 204);
        line(x1, y1, x2, height - y2);
    }
}

For my string art,  I wanted to create something asymmetrical because a lot of string art I usually see are not. So I decided to make “layers” of curves from the same sides (bottom left, and top left) and give a different color for each layer. Colors are supposed to represent the basic values of red, green, and blue.

Mimi Jiao – Project 4 String Art – Section E

check out the mouse click~
sketch

var x; //increment variable for width for bottom curves
var y; //increment variable for height for bottom curves
var a; //increment variable for width for top curves
var b; //increment variable for height for top curves
var angleIncrement; //location for where to draw line in circle
var r; //radius of the center strings forming circle

function setup() {
    createCanvas(400, 300);
}

function draw() {
    background(0);
    x = width / mouseX * 5;
    y = height / mouseY * 5;
    a = width / mouseY * 10;
    b = height / mouseX * 10;
    angleIncrement = mouseX / 100;
    r = width;

    //center circle
    if (mouseIsPressed) {
        for(var angle = 0; angle < 360; angle += mouseX / 100) {
            stroke(0, 0, 255);
            push();
            translate(width / 2, height / 2);
            line((r * sin(angle)) / tan(angle),
                  r * sin(angle),
                  r * sin(angle + angleIncrement) / tan(angle + angleIncrement),
                  r * sin(angle + angleIncrement));
            pop();
        }
    }

    //drawing the four curves on each corner of the canvas
    for(var i = 0; i < 50; i ++) {
        strokeWeight(1);

        //draws the first 20 red lines on the bottom left corner
        //draws green lines for the rest
        if (i >= 30) {
            stroke(0, 255, 0);
            line(0, y * i, x * i, height);
        }else {
            strokeWeight(1);
            stroke(i * 30, 0, 0);
            line(0, y * i,  (x * i), height);
        }

        //red on bottom right hand side 
        //stroke(255,0,0);
        stroke(i * 15, 0, 0);
        line(width, y * i, width - (x * i), height);

        //color changing curves on top 
        stroke(mouseX, 0, 255);
        line(0, height - (a * i), b * i, 0);
        line(width - (b * i), 0, width, height - (a * i));     
    }
}

I first started out making the most basic curve. After that, I began building symmetries and color changes into the code to make it more interactive and fun. Figuring out the circle took me a while since I haven’t touched math ever since junior year in high school, but the result was rewarding and I had a lot of fun doing so.

Justin Yook – Looking Outwards 04

Sculptures have distinct shape and distance from each other

Yuri Suzuki Design collaborated with High Atlanta to create the Sonic Playground, an outdoors display of sound-interactive sculptures. There are a total of six steel sculptures, and they manipulate sound depending on where visitors stand, listen, and talk. The calculations for each sculpture’s optimization were done with the softwares: Grasshopper, and Rhinoceros 3D; Grasshopper is a software for writing programs visually, and Rhinoceros 3D is for making 3D models. Combination of both softwares allowed the creators to control sound source, direction of the sound, and reflect sound from various sculpture pieces. The creator’s artistic sense is shown through the distinct shapes of the sculptures, and the bright colors added to them in order to make the sculptures seem more fun. I think that this project is interesting because of how interactive it can be; the idea of allowing people to interact by moving around the sculptures adds a new dimension to sound art.

Source: http://www.creativeapplications.net/sound/sonic-playground-playful-acoustics-by-yuri-suzuki-design/