EanGrady-Project06-Abstract Clock.

my-sketch.js

//Ean Grady
//section A
//egrady@andrew.cmu.edu
//Project-06

var prevSec;
var millisRolloverTime;

function setup() {
    createCanvas(300, 300);
    millisRolloverTime = 0;
}

function draw() {
    background(255);
    
    var H = hour();
    var M = minute();
    var S = second();
    
    fill(128, 100, 100);
    text("Hour: "   + H, 15, 22);
    text("Minute: " + M, 120, 22);
    text("Second: " + S, 220, 22);
    text("THIS IS A CLOCK", 100, 300);
    
    var hourBarWidth   = map(H, 0, 24, 0, TWO_PI);
    var minuteBarWidth = map(M, 0, 60, 0, TWO_PI);
    var secondBarWidth = map(S, 0, 60, 0, TWO_PI);
    var secondcolor = map(S, 0, 60, 255, 0);
    var minutecolor = map(M, 0, 60, 255, 0);
    var hourcolor = map(H, 0, 24, 255, 0);
    
    fill(hourcolor, 255, 100)
    arc(150, 150, 220, 220, 0, hourBarWidth, PIE);
    fill(minutecolor);
    arc(150, 150, 160, 160, 0, minuteBarWidth, PIE);
    fill(secondcolor, 255, 200);
    arc(150, 150, 100, 100, 0, secondBarWidth, PIE);

}

This project allowed me to familiarize myself with using arcs more comfortably, I also understand how to implement time in p5.js better.

Ean Grady-LookingOutwards-06

Matt DesLauriers, a self-titled creative developer, uses Node.js and HTML5 to create high-resolution generative artwork. His main project in this regard is called “Color Wander”, a high-resolution full-browser form of the generative artwork. He has a blog post describing some of the methods he used to make Color-Wander.  In order to make his art and renderings look more ‘polished’, he used various photos of snails, flowers, architecture and geometry as what he calls “distortion maps” to help drive the algorithm. Each particle in the algorithm is rendered as a “small line segment in the direction of its velocity.” Also in order to randomize whether some lines curl tightly or head straight, the artist randomized the scale of the noise.

I find this project interesting because it shows specifically how you would use randomization in creating art, which makes it easier to visualize and see when looking at the actual artwork.  Additionally, in the blog post, it shows some actual code, which is really interesting to look at and try to understand it.

Link to Color-Wander: http://color-wander.surge.sh/
Link to Color-Wander blogpost: https://mattdesl.svbtle.com/generative-art-with-nodejs-and-canvas

Ean Grady-Looking Outwards-05

http://niessnerlab.org/projects/thies2016face.html

Title: Face2Face
Creators: Justus Thies, Michael Zollhofer, Marc Stamminger, Christian Theobalt, Matthias Niebner
2016

TUM Visual Computing has created technology that allows “real-time face facial reenactment of a monocular target video sequence (e.g., Youtube video). Which essentially means that if a person is in front of their commodity webcam and have a video playing of another person talking, this webcam can allow the person’s facial expressions to replace the person in the video’s, in real-time. The project creators track facial expressions of the source and target individuals using a ‘dense photometric consistency measure’. Reenactment of the source’s facial expressions on the target is achieved through fast and efficient ‘deformation transfer’ between the source and target.

I find this work more interesting than inspiring, not to say it isn’t inspiring. It is especially interesting how fluid and realistic the facial reenactments look on the target (video example linked below). Obviously, this was made in 2016 and so the technology now is most likely better than what is shown, however, it is great that such technology exists. A more advanced version of this technology could bring a plethora of possibilities to many different fields, including drastically revolutionizing entertainment or even as a potential means of creating holograms.

Video below is a demonstration of the real-time reenactment.

Ean Grady-Looking Outwards-03

http://www.michael-hansmeyer.com/digital-grotesque-II

Digital Grotesque II (2017) is a full-scale 3D printed grotto (cave), designed by famous computational architect Michael Hansmeyer. It is interesting to consider the medium that computational fabrications such as this exist in because they are intricate and naturally built but also man-made. I admire the extreme amount of detailing in the caves that the computer generated, also it shows the full possibilities of computational architecture and that we no longer have to look at a building and consider the manpower or human-skill it takes to physically sculpt/design building art. The article states  the idea that, “while we can fabricate anything, design arguably appears confined to our instruments of design: we can only design what we can directly represent. “, which is interesting because although fabrication offers a wealth of new possibilities, it is limited due to its nature of control and execution, therefore the article poses the idea that we need new tools of design.

Video below shows the interior of the computationally fabricated grotto.

Ean Grady-Project3-Dynamic Drawing

sketch

//Ean Grady
//section B
//egrady@andrew.cmu.edu
//Project-03

function setup() {
    createCanvas(640, 480);
    fill(255);
}

function draw() {
    var r = int(mouseX)
    var g = int(mouseY)
    background(r, g, 100);
    var m = max(min(mouseX, 640), 0);
    var z = max(min(mouseY, 480), 0);
    var size = m;
    var size2 = z;
    noStroke();
    ellipseMode(RADIUS);
    fill(mouseY, mouseX, 100)
    ellipse(m * 200 / 400, z, size, size2);
    rect(200 + m * 200 / 400, z/2, size, size2);
    ellipse(400 + m * 200 / 400, z/3, size, size2);
    fill(mouseX, mouseY, 100)
    rect(100 + m * 200 / 400, z/4, size, size2);
    ellipse(350 + m * 200 / 400, z/5, size, size2);
    size = 400 - size;
    fill(mouseY, mouseX, 150)
    ellipseMode(CENTER);
    rect(300 + m * 200 / 400, z, size, size2);
    ellipse(150 + m * 200 / 400, z/2, size, size2);
    fill(mouseY, mouseX, mouseY)
    ellipse(250 + m * 200 / 400, z/3, size, size2);
    rect(50 + m * 200 / 400, z/4, size, size2);
    ellipse(450 + m * 200 / 400, z/5, size, size2);
    size = 320 - size;
    fill(mouseY, mouseX, 50)
    ellipseMode(CORNERS);
    ellipse(z * 200 / 400, m, size, size2);
    rect(200 + z * 200 / 400, m/2, size, size2);
    ellipse(400 + z * 200 / 400, m/3, size, size2);
    fill(mouseX, mouseY, 150)
    ellipse(100 + z * 200 / 400, m/4, size, size2);
    ellipse(150 + z * 200 / 400, m/5, size, size2);
    size = 340 - size;
    fill(mouseX, 100, mouseY);
    ellipseMode(CORNER);
    rect(250 + z * 200 / 400, m, size, size2);
    ellipse(300 + z * 200 / 400, m/2, size, size2);
    fill(mouseX, 100, mouseY)
    ellipse(350 + z * 200 / 400, m/3, size, size2);
    fill(100, mouseX, mouseY)
    ellipse(450 + z * 200 / 400, m/4, size, size2);
    rect(50 + z * 200 / 400, m/5, size, size2);
    fill(mouseY, mouseX, 100)
    ellipse(75 + z * 200 / 400, m/5, size, size2);
}

I really enjoyed this project because it allowed me to get familiar with using the mouseX and mouseY variables, I also began to start feeling a lot more comfortable with programming in p5.js through making the dynamic drawing. Essentially, what I did was start with the example dynamic drawing as a template and then worked from there.

Ean Grady-Project 2-Variable Face

sketch

//Ean Grady
//Section A
//egrady@andrew.cmu.edu
//Project-02

var x = 0
var y = 0
var z = 0
var x2 = 0
var y2 = 0
var z2 = 0
var b = 0
var n = 0
var m = 0
var trix1 = 160
var trix2 = 440
var rx1 = 205
var ry1 = 220
var rx2 = 315
var ry2 = 220
var w = 0
var e = 0
var r = 0
var i = 0
var o = 0
var p = 0
var size = 200

function setup() {
    createCanvas(640, 480);
}

function draw() {
    background (255, 255, 200);
    noStroke();

    //hair petals
    fill (x2, y2, z2)
    ellipse (215, 210, 70, 60)
    fill (x2, y2, z2)
    ellipse (272, 180, 70, 60)
    fill (x, y, z)
    ellipse (180, 265, 70, 60)
    fill (x2, y2, z2)
    ellipse (180, 330, 70, 60)
    fill (x, y, z)
    ellipse (215, 385, 70, 60)
    fill (x2, y2, z2)
    ellipse (280, 420, 70, 60)
    fill (x, y, z)
    ellipse (360, 405, 70, 60)
    fill (x2, y2, z2)
    ellipse (405, 355, 70, 60)
    fill (x, y, z)
    ellipse (415, 290, 70, 60)
    fill (x2, y2, z2)
    ellipse (395, 230, 70, 60)
    fill (x, y, z)
    ellipse (344, 185, 70, 60)

    //purple body
    fill (120, 20, 200)
    ellipse(300, 500, size, 200)

    //face
    fill (200, 205, 255)
    ellipse (300, 300, 250, 250)

    //eyes
    fill(w, e, r)
    arc(240, 260, 80, 40, 150, PI + QUARTER_PI, CHORD);
    arc(360, 260, 80, 40, 150, PI + QUARTER_PI, CHORD);
    fill(i, o, p)
    arc(240, 260, 80, 40, 20, PI + QUARTER_PI, CHORD);
    arc(360, 260, 80, 40, 20, PI + QUARTER_PI, CHORD);
    fill(255, 255, 255)
    ellipse(360, 260, 20, 20)
    ellipse(240, 260, 20, 20)
    fill(0, 0, 0)
    ellipse(360, 260, 10, 10)
    ellipse(240, 260, 10, 10)

    //mouth
    fill(255, 20, 123)
    rect(270, 300, 60, 100)
    fill(0, 0, 0)
    rect(275, 305, 50, 90)

    //eyebrows
    fill (0, 0, 0)
    rect (rx1, ry1, 80, 20)
    rect (rx2, ry2, 80, 20)

    //triangle hat
    fill(b, n, m)
    triangle(trix1, 210, trix2, 210, 300, 100);
}

function mousePressed() {
    x = random(0, 255);
    y = random(0, 255);
    z = random(0, 255);
    x2 = random(0, 255);
    y2 = random(0, 255);
    z2 = random(0, 255);
    b = random(0, 255);
    n = random(0, 255);
    m = random(0, 255);
    trix1 = random(100, 160)
    trix2 = random(440, 500)
    ry1 = random(220, 200)
    rx1 = random(200, 220)
    ry2 = random(220, 200)
    rx2 = random(310, 320)
    w = random(0, 255)
    e = random(0, 255)
    r = random(0, 255)
    i = random(0, 255)
    o = random(0, 255)
    p = random(0, 255)
    size = random(200, 250)
}   

For this project, I didn’t use a pre-drawn sketch of mine, I instead went straight into programming which proved to be the main problem. I don’t mind how my variable face turned out, but in the future, I want to start employing the use of drawings more to make it more organized.

Ean Grady-Looking Outwards-02

https://creators.vice.com/en_us/article/qkwvp7/generative-video-game-puts-you-inside-mind-bending-art-galleries

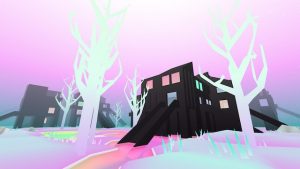
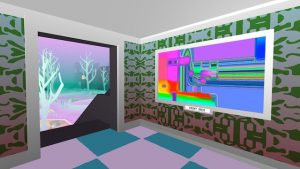
Strangethink’, an anonymous experimental video game designer, has created a video game, Secret Habitat, that features procedurally generated art galleries that the player can view, in his words he says that the game is, “an almost entirely procedurally-generated world consisting of hundreds of alien galleries containing thousands of pieces of computer-generated art, music and poetry”. In each of the galleries that Secret Habitat features, there are ‘reading machines’ that spit out generative poetry and also generative music. When players enter the game and walk into the gallery, they can view procedurally generated art while also listening to generative music in the background.

Strangethink says in the article that he made the game because he was curious about the effects of ambient music on the user experience, and how it affects their perception of various things. I admire the idea to use procedurally generative art and music because it allows for wildly varying tones, melodies, images to be shown therefore giving each player a different perception-based experience, which in turn allows for his creative vision to be employed. I’m very curious about what programming goes into making a procedural generator, it’s really interesting how his idea for wanting to give the user varying experiences is perfectly imagined through procedural generation.

Ean Grady-Looking Outwards-01

https://www.wired.com/2014/07/a-clever-device-that-turns-polluted-air-into-art/

This is a slightly older project I remember reading about a couple of years ago. Dmitry Morozov lives in Moscow and uses air pollution to make glitch art. Morozov created a small portable blue-tooth device, with an attached fake nose, that ‘sniffs’ out air pollution and transforms air data from vehicular gasses into the various shapes and colour that make up his glitch art. In creating the technology, Morozov used various sensors that detected certain gaseous elements in the environment and unified them with a ‘nose’, so to my knowledge, the artist used “off-the-shelf” commercial software. Each image that is produced from the device can be essentially viewed as an artistic grading system for air quality. It would be interesting to see how the artwork produced today using the device would compare to that of 10 years or so in the future.

I found this piece of technological art particularly inspiring because it shows that there is no end to the possibilities that come through the arrangement of art and computational technology. If someone can transform air pollution into visually appealing art using technology, I wonder what other ‘regular’ things that exist out in the world can be used to make art.

The video below shows Morozov’s device in-action.

Ean Grady-Project-01-Face

sketch

function setup() {
    createCanvas(500, 500)
    background(0, 0, 0)
    noStroke ();

    //background
    fill (120, 200, 400)
    rect(25, 25, 450, 450)
    fill (100, 100, 200)
    rect(50, 50, 400, 400)
    fill (120, 120, 200)
    rect (75, 75, 350, 350)
    fill (10, 200, 140)
    rect (100, 100, 300, 300)
    fill (20, 120, 240)
    rect (125, 125, 250, 250)

    //hair pt.1
    fill (0, 0, 0)
    ellipse (250, 170, 200, 200)

    //legs
    fill (80, 10, 100)
    ellipse (180, 400, 100, 250)
    ellipse (320, 400, 100, 250)

    //body
    fill (100, 10, 100)
    ellipse (250, 300, 250, 250)
    fill (150, 20, 50)
    ellipse (250, 300, 200, 200)
    fill (50, 50, 100)
    ellipse (250, 300, 150, 150)
    fill (0, 0, 0)
    ellipse (250, 300, 100, 100)

    //head
    fill (255, 228, 196)
    ellipse(250, 200, 200, 200)

    //eyes
    fill (255, 255, 255)
    ellipse (200, 200, 60, 50)
    ellipse (300, 200, 60, 50)
    fill (250, 128, 114)
    ellipse (200, 200, 40, 40)
    ellipse (300, 200, 40, 40)
    fill (0, 0, 0)
    ellipse (300, 200, 25, 25)
    ellipse (200, 200, 25, 25)

    //hair
    arc(260, 100, 50, 60, 0, HALF_PI);
    arc(240, 100, 50, 60, 0, HALF_PI);
    arc(220, 100, 50, 60, 0, HALF_PI);
    arc(200, 100, 50, 60, 0, HALF_PI);
    arc(180, 100, 50, 60, 0, HALF_PI);

    //mouth
    fill (250, 128, 114)
    ellipse (200, 280, 80, 60)
    fill (0, 0, 0)
    ellipse (200, 280, 70, 40)

    //nose
    fill (222, 184, 135)
    triangle (220, 250, 240, 210, 340, 260)

    //eyebrows
    fill (0, 0, 0)
    rect (175, 150, 50, 20)
    rect (275, 150, 50, 20)
}

function draw() {
}

For this project, my main goal was to make a visually ‘popping’ piece by experimenting with colour and shape placement. I really enjoyed coding the piece because it was both an interesting creative exercise and very beneficial in helping me become more comfortable with p5.js.