Timothy Liu — Looking Outwards — 09

An image of the Aguahoja I pavilion exhibited in the MIT Media Lab lobby in 2018.

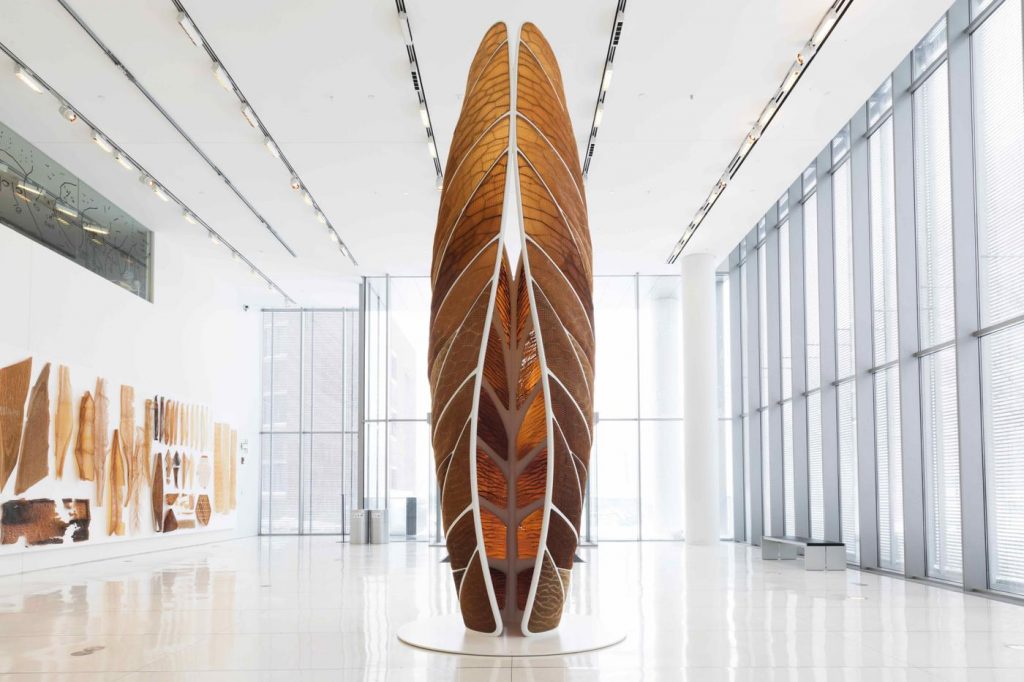
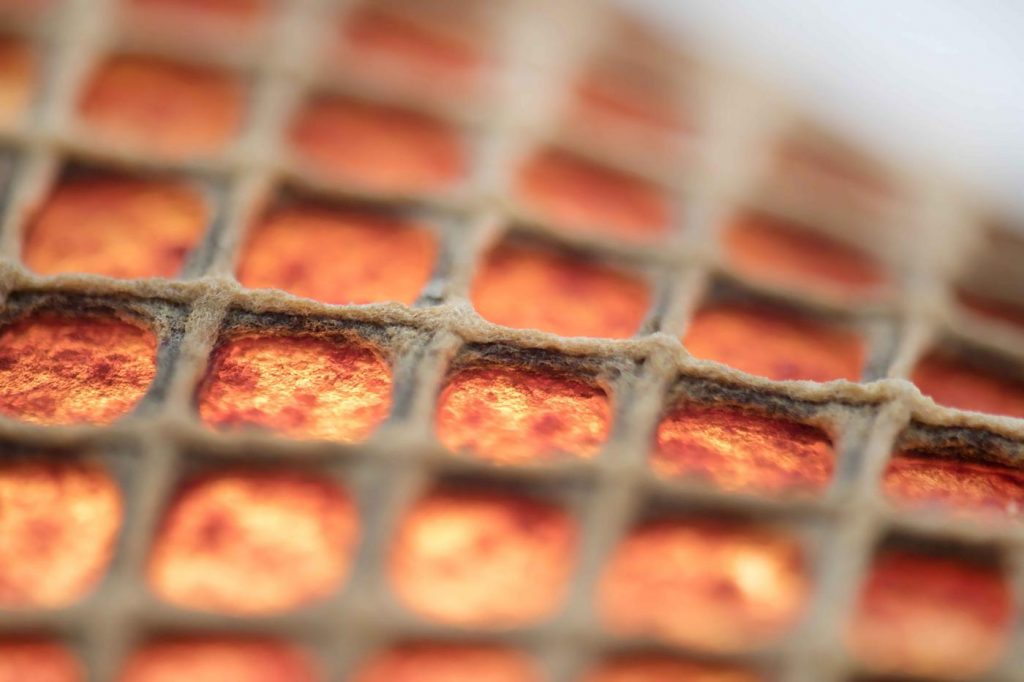
For my Looking Outwards this week, I looked at my classmate Shannon’s Looking Outwards from Week 3 on Aguahoja, a work by the MIT Media Lab. The prompt for that week was on Computational Fabrication, and I really liked the piece Shannon chose because of how majestic yet haunting it felt. Shannon described Aguahoja as an exploration of how human technology—specifically, 3D printing—could emulate natural and biological materials such as tree branches and bones. The MIT Media Lab took an innovative design approach using algorithms, water-based design, and digital fabrication to erect these massive sculptures that represent nature’s intricacies. 

I really enjoyed Shannon’s reflection on Aguahoja because it was concise yet contemplative, explaining how although Aguahoja is an effective representation of nature’s form, it still requires manpower and technology. One thing I would add onto her discussion points are the incredible amount of research the MIT team undertook to develop their algorithms for printing. It took them 6 whole years of research into computationally manufactured functional biopolymers for them to feel confident enough in their ability to emulate these biological structures, a testament to how wonderfully unique nature really is.


An example of one of the biological exoskeletons Aguahoja strove to emulate.

Sources:

https://www.media.mit.edu/projects/aguahoja/overview/

Carly Sacco – Project – 09 – Portrait

sketch

//Carly Sacco
//Section C
//csacco@andrew.cmu.edu
//Project 09: Computational Portrait

var myPic; //variable to reference my photo

function preload() {
	var origPic = "https://i.imgur.com/B5emP43.jpg"
	myPic = loadImage(origPic); //loading the image to the variable
}

function setup() {
	createCanvas(360, 480);
	myPic.loadPixels();
	frameRate(150); //how quickly the arc will be added
}

function draw() {
	//these variables link the pixels with the image
	var px = random(width);
	var py = random(height);
	var ix = constrain(floor(px), 0, width-1);
    var iy = constrain(floor(py), 0, height-1);
	//pixel color from the picture
	var pcolor = myPic.get(ix, iy);
	
	noStroke();
	fill(pcolor);
	//the two separate arcs used added together would be a complete circle
	arc(px, py, random(-15, 15), random(-15, 15), HALF_PI, PI); 
	arc(px, py, random(-15, 15), random(-15, 15), PI, HALF_PI);

	//the mouse can be used for more detailed filling in of the image
	var mouseColor = myPic.get(mouseX, mouseY);
	fill(mouseColor);
	ellipse(mouseX, mouseY, 8, 8);
}
	

After I chose this photo I thought to match the texture of the greenery in the background it would be fun to fill in the image with slightly jagged, but also rounded pieces. I used arc to do this and had two so that added together it would be a complete circle, but since they’re not there was more variation. I did, however make the mouse fill in with circles to get a more accurate filling in for details for the photo.

Shariq M. Shah – Project 09 – Portrait

shariqs-09-project

// Shariq M. Shah
// Project 09
// Section C

var underlyingImage;

function preload() {
    //changing example image
    var myImageURL = "https://i.imgur.com/hpfafgd.jpg[/img]";
    underlyingImage = loadImage(myImageURL);
}

function setup() {
    createCanvas(500, 500);
    background(0);
    underlyingImage.loadPixels();
    frameRate(10);
}

function draw() {
    var px = random(width);
    var py = random(height);
    var ix = constrain(floor(px), 0, width-1);
    var iy = constrain(floor(py), 0, height-1);
    var theColorAtLocationXY = underlyingImage.get(ix, iy);

    noStroke();
    fill(theColorAtLocationXY);
    //making size of "pixels" geometries proportional to distance from CENTER
    ellipse(px, py, 0.05 * dist(px, py, width/2, height/2), 0.05 * dist(px,     py, width/2, height/2));

    var theColorAtTheMouse = underlyingImage.get(mouseX, mouseY);
    stroke(theColorAtTheMouse);
    noFill();
    //drawing ellipses based on mouse location
    ellipse(pmouseX, pmouseY, 10, 10);
    //placing "mom" text at each ellipse
    textSize(0.03 * dist(px, py, width/2, height/2));
    text('mom', px, py);
}

In this project, I used a picture of my mom from when we went on a family trip to Chicago this summer. I used small ellipses and text that change in size based on their distance from the center to develop the computational portrait of my mom. In addition, small empty ellipses are drawn with colors of the picture as the user moves the mouse. The drawn ellipses, the “pixel” ellipses, and the text make up the overall computational portrait of my mom. She’ll love seeing this when I go back for Thanksgiving break.

My mom in Chicago.

Shariq M. Shah – Looking Outwards 09


The Looking Outwards that I found particularly interesting was Tai Manheim’s exploration of the work of Stamen, an artificial intelligence tool used to analyze wealth and poverty at an urban scale. The project was developed by Stamen and researchers at Carnegie Mellon University and it implements neural networks to develop machine learning frameworks that take in information on infrastructure in various neighborhoods and subsequently uses the information to make predictions on the average income of the areas. I found Tai’s explanations of the digital techniques and data structure networks that make this project possible to be highly informative and intriguing. With a project of this scope, there are inevitably associations and unintended associations made between income, race, crime, and location which can be used negatively for increased surveillance and policing strategies. This raises issues on the interface between Artificial Intelligence, machine learning, and politics, as the impressions and conclusions derived from a project like this may be based on hard data, but can be used negatively. There are also clear design incentives as to how residential areas can be organized better according to the data found from a project like this.

https://stamen.com/work/penny/

https://courses.ideate.cmu.edu/15-104/f2019/2019/10/06/taisei-manheim-looking-outward-07/

Carly Sacco – LookingOutwards – 09

The project I found that I thought was interesting, was Jai Sawkar’s first Looking Outwards on Sensacell’s New Interactive Floor in Valenciana, Spain. The floor has LED lights and sensors that light up as someone walks across it, with the lights fading as the user gets farther from the location. I think this project seems very fun to interact with and is a unique way to change up sidewalks, since they are now often something people never look at or think about now. 

I agree with Jai’s thoughts about this project where I also think this was a great way to intertwine computing with design and the product is something pleasant for people to interact with. This project does a good job at allowing new social interactions to come out of the creativity within the design.

Sarah Kang-Project-09-Computational Portrait

portrait

//sarah kang
//section c
//sarahk1@andrew.cmu.edu
//project-09-computational-portraits

var underlyingImage;

function preload() {
    var myImg = "https://i.imgur.com/kLHusSC.jpg";
    currImage = loadImage(myImg);
}

function setup() {
    createCanvas(244, 480);
    background(0);
    currImage.loadPixels();
    frameRate(100);
}

function draw() {
    var px = random(width);
    var py = random(height);
    var imgW = random(2, 20);
    var imgH = random(2, 20);
    var txtsize = random(1, 10);

    var ix = constrain(floor(px), 0, width-1);
    var iy = constrain(floor(py), 0, height-1);
    var theColorAtLocationXY = currImage.get(ix, iy);

    noStroke();
    fill(theColorAtLocationXY);
    ellipse(px, py, imgW, imgH);

    fill(theColorAtLocationXY);
    textSize(txtsize);
    textFont('Arial');
    text("chicken parm", mouseX, mouseY);

    /*var theColorAtTheMouse = currImage.get(mouseX, mouseY);
    stroke(theColorAtTheMouse);
    line(pmouseX, pmouseY, mouseX, mouseY);*/
}

This was the most recent portrait picture I had on my phone, from when I visited my best friend from home last weekend. I thought the random ellipses made nice compositions and texture with the color areas and palettes in this picture. “chicken parm” is also what we had for breakfast in this picture.

After a few minutes
my best friendd

Sarah Kang-Looking Outwards-09

Baby Groot, Guardians of the Galaxy Vol. 2, Framestore, 2017

For this week’s post, I found Youie Cho’s looking outwards post in week 5 to be particularly interesting because it had Baby Groot, my favorite Guardians of the Galaxy character. The artwork in focus is the computer graphics work of Framestore, a collective of film, advertising, and content artists. Like Youie, I’m also inspired and impressed by the attention to detail and careful development in putting Baby Groot’s animated character into the context of the movie, down to the details of its walking patterns and speed. I especially love how Framestore extensively researched the characteristics of babies and children when imagining Baby Groot’s character. Being aware of the these “behind-the-scenes” processes in Baby Groot’s character development enables viewers to make a more humanistic connection to the character in the movie and makes Baby Groot even more lovable.

Youie Cho’s original Looking Outwards Post

Austin Garcia – Looking Outwards 09 – Section C

I decided to look at Claire Yoon’s Looking Outwards 03. As someone who knows very little about fashion, I was interested in looking into this article on how 3d printing and computer generated forms could become clothing. Personally, high fashion has seemed like a far off community that I had very few intersecting interests with. This project though, and this idea that a piece of clothing could be created by someone in CAD software or even by an algorithm and printed by a computer presents incredibly interesting possibilities for the future of clothing and fashion.

In regards to this particular piece, I find the forms to be neat. They have a geometric yet also organic sense to them, and a complexity that I imagine would be facilitated by the computer design process.

Austin Garcia – Project 09 – Section C

sketch

/*		Austin Garcia
		Section C
		aegarcia@andrew.cmu.edu
		Assignment or Project
*/

var originalImage;

function preload() {
    var myImageURL = "https://i.imgur.com/UdorMH0.jpg";
    originalImage = loadImage(myImageURL); //load image
}

function setup() {
    createCanvas(500, 500);
    background(0);
    originalImage.loadPixels();
    frameRate(1000);
}

function draw() {
    var px = random(width); //x coordinate
    var py = random(height); //y coordinate
    var ix = constrain(floor(px), 0, width-1);
    var iy = constrain(floor(py), 0, height-1);
    var locationColor = originalImage.get(ix, iy); //get pixel color


    var rectSizeX = random(10, 50)
    var rectSizeY = 2

    noStroke();
    fill(locationColor);
    rect(px, py, rectSizeX, rectSizeY);

    var theColorAtTheMouse = originalImage.get(mouseX, mouseY);
    stroke(theColorAtTheMouse);
    ellipse(pmouseX, pmouseY, 1, 2*height + mouseY);
}

I wanted to explore vertical and horizontal lines converging to create this image my girlfriend took of me over the summer. I had the code generate short horizontal bars while having the mouse draw long vertical bars.

Kimberlyn Cho- Project 09- Portrait

ycho2-09


/*Kimberlyn Cho
ycho2@andrew.cmu.edu
Section C
Project 09 */

var underlyingImage;
//array of emoticons to choose from
var words = [";)", ":P", ">_<", "^.^", "<3"];
var expression = ["damnnn", "wow", "omg", "beautiful"]

function preload() {
    var myImageURL = "https://i.imgur.com/mZFEEAK.jpg";
    underlyingImage = loadImage(myImageURL);
};

function setup() {
    createCanvas(360, 480);
    background(0);
    underlyingImage.loadPixels();
    frameRate(10);
};

function draw() {
    var px = random(width);
    var py = random(height);
    var ix = constrain(floor(px), 0, width-1);
    var iy = constrain(floor(py), 0, height-1);
    var theColorAtLocationXY = underlyingImage.get(ix, iy);

    noStroke();
    fill(theColorAtLocationXY);
    //randomize emoticon choice
	var textchoice = floor(random(0, 5));
	//randomize emoticon size
	var sizechoice = floor(random(10, 20));
	textSize(sizechoice);
	//choosing from array of emoticons 
	text(words[textchoice], px, py);
};

function mousePressed() {
	//generating "damnnn" with mousePressed
	var theColorAtTheMouse = underlyingImage.get(mouseX, mouseY);
    fill(theColorAtTheMouse);
    var textchoice = floor(random(0, 4));
	var sizechoice = floor(random(10, 20));
	textSize(sizechoice);
    text(expression[textchoice], mouseX, mouseY);
};

I chose my best friend from home for this assignment because I miss her very much. I used cute emoticons to represent her lovable and adorable character. I randomized the size and emoticon choice to vary the process. Lastly, I generated my first reactions to seeing this photo with the mouse pressed function.

early development
progressed development
original photo