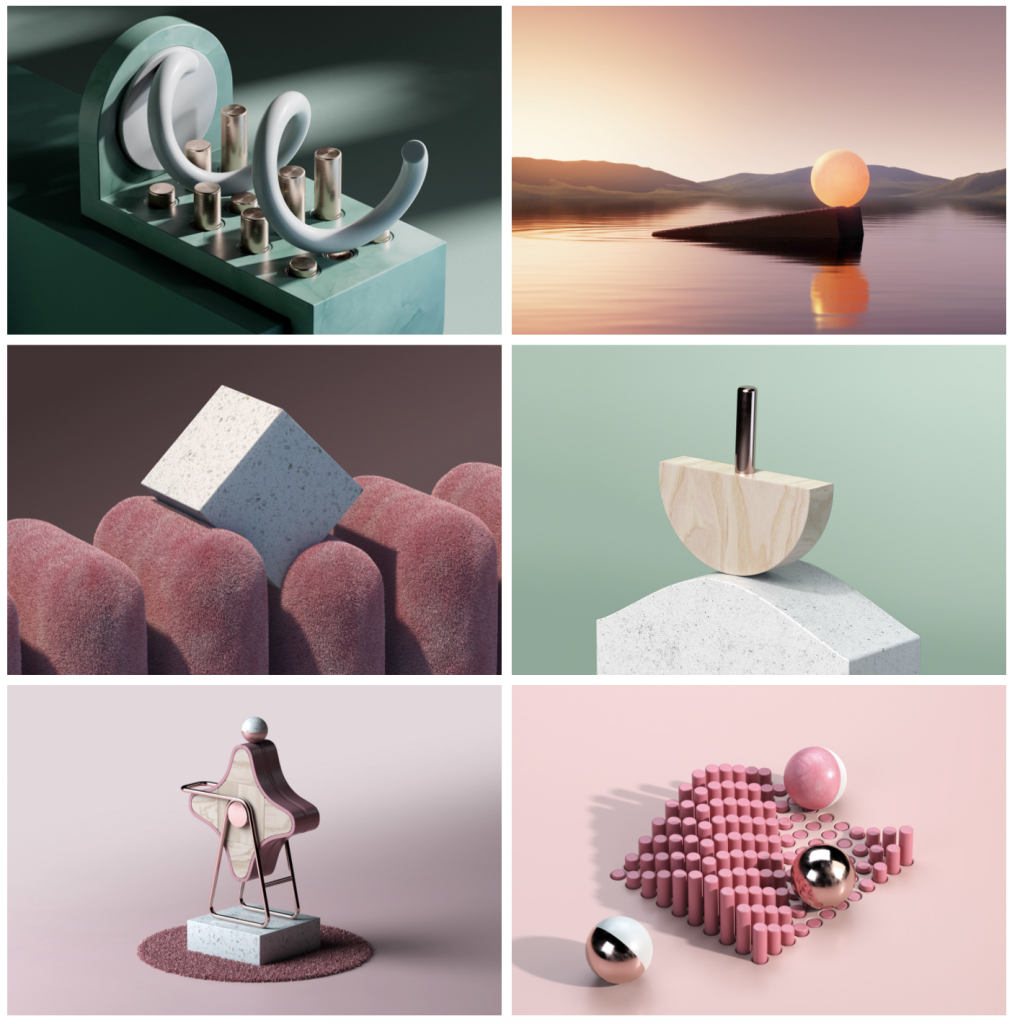
Andreas Wannerstedt’s 3-dimensional, motion-based works present such oddly satisfying feeling to audience.
Andreas Wannerstedt’s unique 3D sculptures show mesmerizing looping animations using playful and simple geometric shapes in balanced compositions. Along with motion, Wannerstedt applies organic textures as well as peaceful color palettes to display the various geometric shapes onto the 3D environment, creating a sense of “hypnotizing“ illusion. I found his synchronized animations with harmonizing tones really satisfying and relaxing to watch. I really admire how the behaviors of his animations differ from that of real world, defying gravity and friction. Such natural aspects of his motions entertains and aesthetically pleases the viewers with a touch of clean and tranquil feeling. Wannerstedt’s artistic sensibility surfaces. When he established his own, new atmosphere with the geometric shapes through motion and texture.
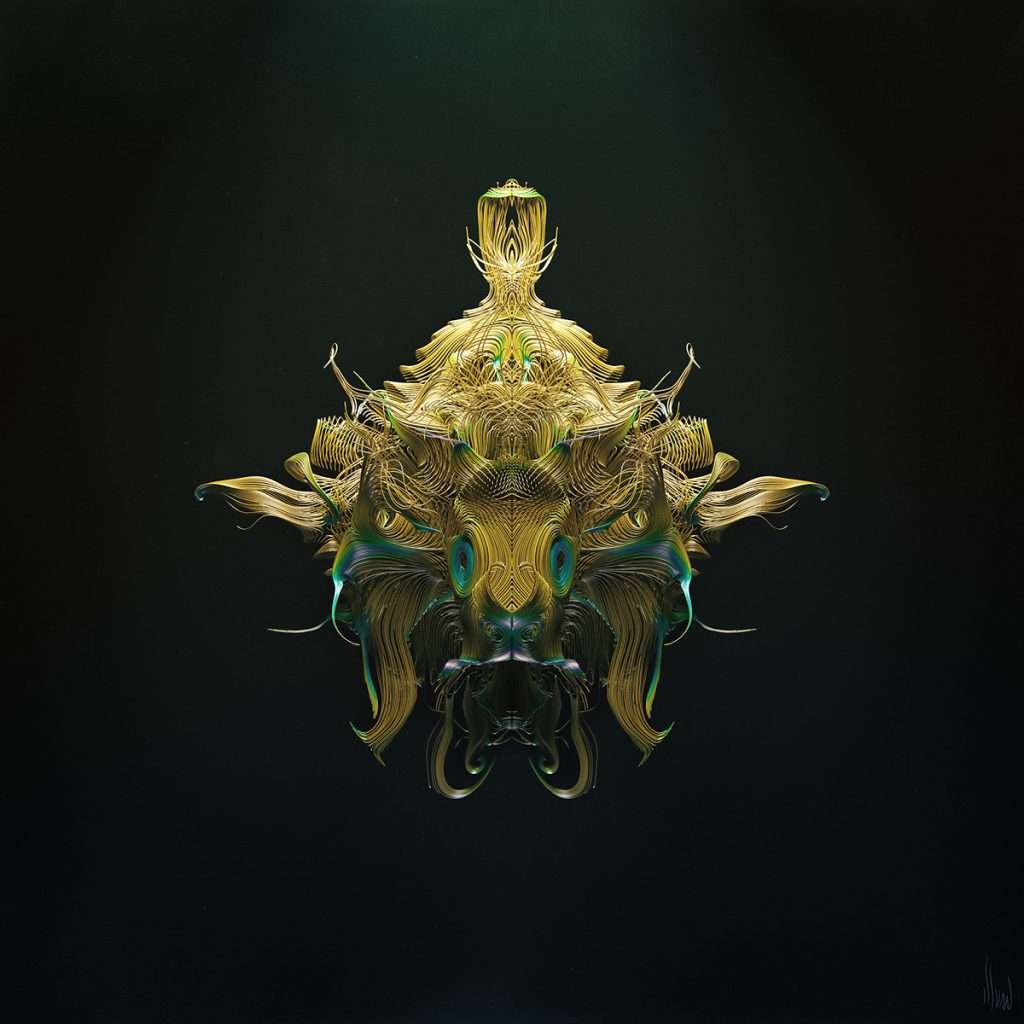
The project I have chosen for this blog post is “Artifacts of the Noisefield: Advection of points based on a math noise” by the artist ChaoticAtmospheres. According to the artist, the goal of the piece was to explore noise advection, which is the displacement of a point according to a mathematical equation. Starting with simple shapes, ChaoticAtmospheres used a computer algorithm to visually represent noise in 3-dimensional graphics. The resulting images are beautiful. They have clear resemblances to images in nature (especially insects). This comparison brings to light the deep connection between nature’s reaction to waves and the way humans can manipulate and use waves to produce entirely new artifacts of art & science. I admire the artist’s use of sound in their visual work, and their use of digital programming to bring the concept to life.
One image from the portfolio that was created for this project. “The final shape is composed of the trails describing the trajectory of each point in time.”
//Yeon Lee, Section C
//Project 5: Wallpaper


function setup() {
    createCanvas(500, 500);
    background(220);
    backgroundColor = color(255,251,241);
    cloudColor = color(255, 145, 179); //pink
    cloud_2Color = color(111, 220, 191); //green
    balloonColor = color(255, 141, 102); //orange
    balloon_2Color = color(255, 218, 102); //yellow
    noLoop();
}

function draw() {
    background(backgroundColor);

    //clouds
    for (var a = -30; a < width; a += 150) {
        for (var b = 0; b < height; b += 200) {
            push();
            translate(a, b);
            cloud();
            pop();
        }
    }

    //clouds #2
    for (var c = 50; c < width; c += 150) {
        for (var d = 100; d < height; d += 200) {
            push();
            translate(c, d);
            cloud_2();
            pop();
        }
    }

    //balloon
    for (var e = -20;  e < width; e += 150) {
        for (var f = 50; f < height; f += 200) {
            push();
            translate(e, f);
            balloon();
            pop();
        }
    }

    //balloon #2
    for (var g = 55;  g < width; g += 150) {
        for (var h = 160; h < height; h += 200) {
            push();
            translate(g, h);
            balloon_2();
            pop();
        }
    }
}

function cloud() { //draw cloud
    fill(cloudColor);
    noStroke();
    ellipse(30, 60, 15, 15);
    ellipse(40, 50, 20, 20);
    ellipse(60, 40, 30, 30);
    ellipse(80, 50, 20, 20);
    ellipse(90, 60, 15, 15);
    rect(30, 50.5, 58, 17);
}

function cloud_2() { //draw cloud again with different color
    fill(cloud_2Color);
    noStroke();
    ellipse(30, 60, 15, 15);
    ellipse(40, 50, 20, 20);
    ellipse(60, 40, 30, 30);
    ellipse(80, 50, 20, 20);
    ellipse(90, 60, 15, 15);
    rect(30, 50.5, 58, 17);
}

function balloon() { //draw balloon
    fill(balloonColor);
    noStroke();
    ellipse(50, 55, 45, 48);
    triangle(45, 84, 50, 50, 55, 84);
    fill(116,71,0);
    rect(50, 84, 1, 30);
}

function balloon_2() { //draw balloon with different color
    fill(balloon_2Color);
    noStroke();
    ellipse(50, 55, 45, 48);
    triangle(45, 84, 50, 50, 55, 84);
    fill(116,71,0);
    rect(50, 84, 1, 30);
}
My favorite part of this project was creating shapes like the cloud and balloons, and playing around with colors for better visualization. At first, I tried to illustrate the sky with flying balloons, but later I decided to make it entirely abstract with different colors of clouds just to resemble like a wallpaper on a kid’s room.
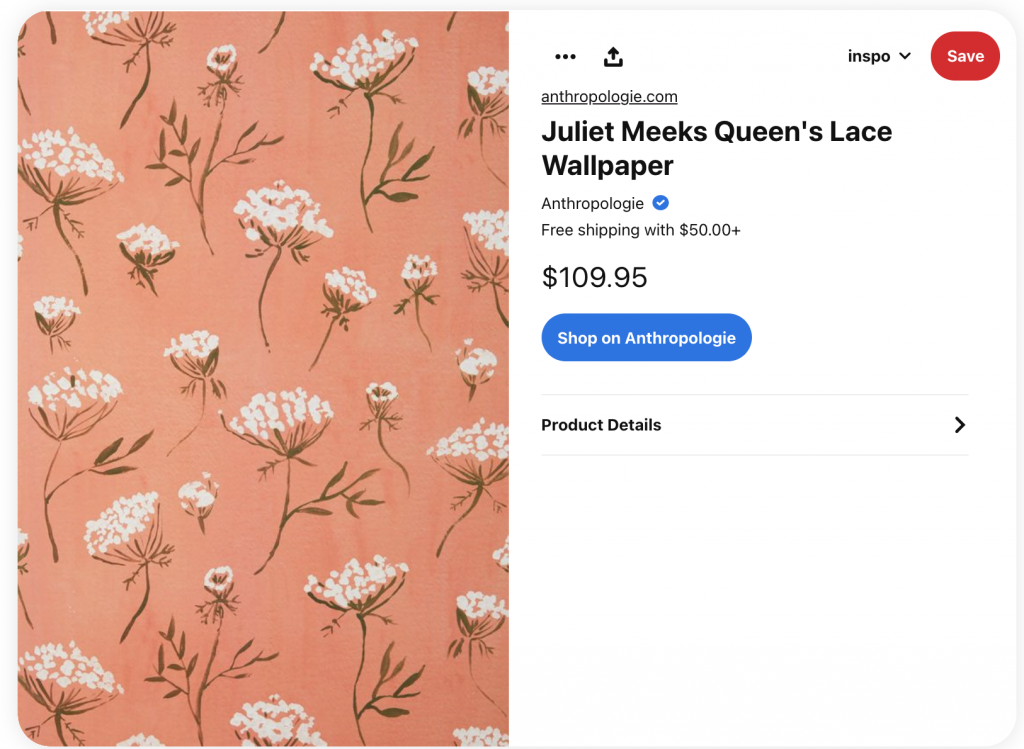
I was inspired by this wallpaper I found on Pinterest. I did 3 different flowers in a repeating pattern. I’m really proud of myself for this project! I’m happy with how it turned out.
//Brandon Yi
//Section A
//btyi@andrew.cmu.edu
//Project-05-A
function setup() {
    createCanvas(600, 600);
    background(0);
    rectMode(CENTER);
}

function draw() {
    //initializing variables
    var d=width/10;
    var x=d/2
    var y=d/2

    //iterating it over the background size
    for (var row = 0; row < width/d; row++) {
        y=d/2;
        for (var col = 0; col < height/d; col++) {
            tile(x,y,d);
            y+=d;
        }
        x+=d;
    }

    noLoop();
}
function tile(x,y,d) {
    //translation requires a push and pop
    push();
    stroke(152,255,255);
    strokeWeight(5);
    translate(x,y)
    fill(0);
    ellipse(0,0,d);
    ellipse(0,0,d-15);
    for (var i = 0; i < d; i+=10) {
        strokeWeight(2);
        stroke(104,0,208);
        noFill();
        rect(0,0,i,i)
    }
    pop();

}
The trickiest part of this program was making a for loop inside the function. On top of that, it was difficult to also make the entire program relative to the background size.
For this LO, I decided to look at the fashion website Dress-X which features digital clothing and is founded by Daria Shapovalova and Natalia Modenova. All the clothes are generated through 3D computer graphics instead of being physically manufactured so you will have to send them a photo of yourself, which will be sent back to you with the clothes photoshopped onto it. Some of the brands featured on the website do not use 3D digital design methods, so Dress-X has to create digital graphics for them. Since designers spend a lot of time creating intricate details on their physical clothes, the 3D artists have to also be careful in how they capture those physical properties and translate them into a digital space. They focus on creating 3D models that could also work in reality, keeping track of function and form. However, what I find the most interesting about this service is that you can try on the clothes using the Dress-X app, where AR is used to morph the clothes to your body as you move around. I supposed the app heavily relies on AI to identify the body and morph the clothes around it. Dress-X aims to reduce waste that comes from physical clothing production, such as the carbon footprint of manufacturing and increasing textile waste.
Check out Safiya Nygaard’s video where she tries out the digital clothes!
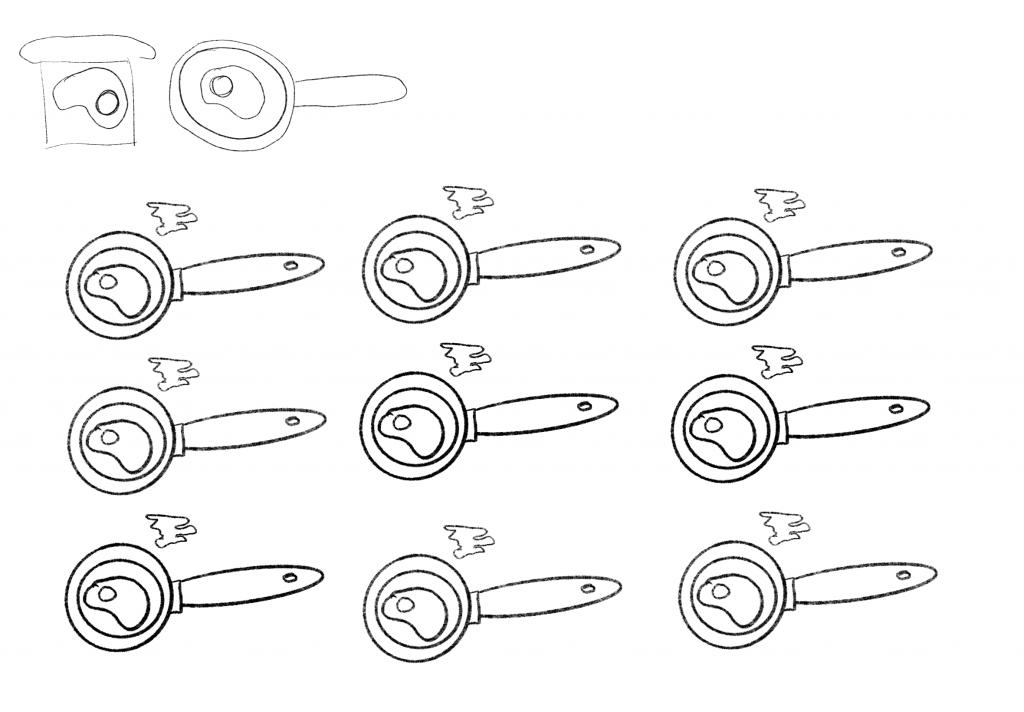
function setup() {
    createCanvas(600, 540);
}

function draw() {
    background(195, 230, 241);

    //steam
    for (var yUp = 85; yUp <= 500; yUp += 127) {
        for (var xUp = 75; xUp <= 600; xUp += 148) {
            steam(xUp, yUp);
        }
}

    //pan
    for (var yYah = 43; yYah <= 450; yYah += 128) {
        for (var xYah = 24; xYah <= 580; xYah += 148) {
            pan(xYah, yYah);
        }
    }

    //egg
    for (var y = 80; y <= 500; y += 128) {
        for (var x = 47; x <= 550; x += 148) {
            egg(x, y);
        }
    }

    //handle
    for (var yUp = 85; yUp <= 500; yUp += 127) {
        for (var xUp = 94; xUp <= 600; xUp += 148) {
            handle(xUp, yUp);
        }
}

function egg(x, y) {
    //whites
    noStroke();
    fill("white")
    circle(x + 3, y, 35)
    circle(x + 8, y + 5, 35)
    circle(x + 2, y + 7, 30)

    //shadow on whites
    //gray
    noStroke();
    fill(215, 215, 215)
    circle(x + 11.5, y + 8.5, 17)
    //white
    fill("white")
    circle(x + 8.5, y + 5.5, 21)

    //yolk shadow
    fill(222, 181, 67)
    circle(x - 2, y - 3, 13)

    //yolk
    noStroke();
    fill(237, 193, 72)
    circle(x -3, y - 3, 11)

    //yolk highlight
    noStroke();
    fill("white")
    circle(x - 4, y - 5, 3)
}

function pan (x, y) {
    //outer
    fill(161, 161, 161)
    circle(x + 30, y + 40, 76.5)

    //inner
    fill(0)
    circle(x + 30, y + 40, 72)

    //most inner
    fill(80, 80, 80)
    circle(x + 30, y + 40, 54)
}

function handle(x, y) {
    push();
    //translate(x,y)
    rectMode(CENTER);
    //rotate(radians(40))
    //handle
    fill(0)
    rect(x + 26, y, 55, 13, 10)
    //connector
    fill(196, 196, 196)
    rect(x, y, 6, 18, 2)
    pop();
    //hole
    fill(195, 230, 241)
    ellipse(x + 42, y, 10, 5)
}
}

function steam(x, y) {
    noStroke();
    //positive space
    fill(245, 250);
    ellipse(x + 5, y - 40, 35, 15)
    ellipse(x - 5, y - 50, 35, 14)
    ellipse(x - 3, y - 59, 30, 10)

    //negative space
    fill(195, 230, 241)
    ellipse(x - 3, y - 39, 28, 10)
    ellipse(x + 6, y - 50.5, 28, 9)
    ellipse(x - 13, y - 60, 28, 8)
}
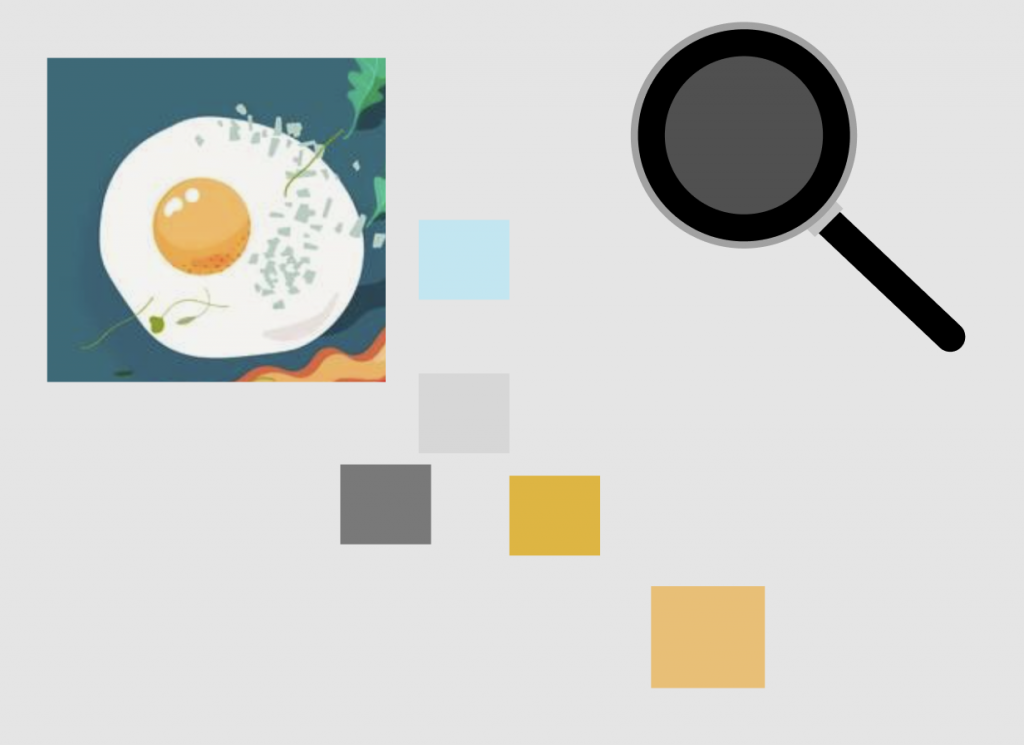
This project was really fun. The hardest part was understanding what details should be added to make the wallpaper seem more dimensional and dynamic. The process was very additive in that I had to iterate a few times to see what was missing in the wallpaper compositionally.
var x = 75;
var y = 75;
function setup() {
    createCanvas(600, 600);
    background(207, 241, 252);
    rectMode(CENTER);
    ellipseMode(CENTER);
}

function module(x, y) { //creating the individual circular modules
    noStroke();
    fill(255);
    ellipse(x, y, 150, 150);
    fill(207, 241, 252); //alternating fills of white and blue to create a visual pattern
    rect(x, y, (150/sqrt(2)),(150/sqrt(2)));
    fill(255);
    ellipse(x, y, 100, 100);
    fill(207, 241, 252);
    ellipse(x, y, 100, 50);
    ellipse(x, y, 50, 100);
    fill(255);
    ellipse(x, y, 80, 30);
    ellipse(x, y, 30, 80);
    fill(207, 241, 252);
    ellipse(x, y, 40, 40);
    fill(255);
    rect(x, y, (40/sqrt(2)),(40/sqrt(2)))
    fill(207, 241, 252);
    ellipse(x, y, 40, 10);
    ellipse(x, y, 10, 40);

}

function draw() {
    for (x = 75; x <= 725; x += 150) { // creating a grid to make a patterned wallpaper
        for (y = 75; y <= 725; y += 150){
            module(x, y);
        }
    }
}
I really like playing with geometry and colors, so I wanted to create something that can resemble a pattern or even a visual illusion when looked at from a distance.
Although I was not able to find titles to any specific pieces, the collection of 3D computer graphics that Paul Wiley created titled “FuturoCity” throughout the 1990s and 2000s. The scenes that he creates are vibrant and fantastical and creates a sense of fun and excitement. The art that is created with code is fun and although its style is considered outdated now, I think they are still interesting to look at now because of how quickly the world of computer generated images have changed. Wiley’s artistic style is captured well in this medium because it allows for relatively quick generations of fantastical landscapes that would take much longer if done by hand as it would have back then.
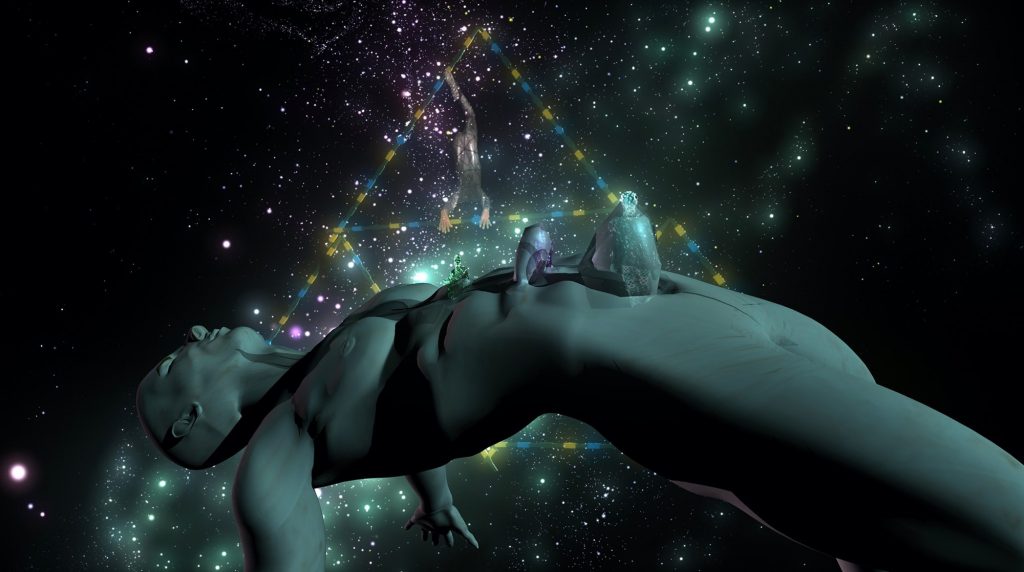
As soon as I read the prompt, I was reminded of the recent exhibition in the Miller ICA gallery by Jacolby Satterwhite.
Jacolby Satterwhite, Reifying Desire 6, 2014. HD digital video
Among many of his artworks in the gallery, the digital videos created by 3D computer graphics stood out to me the most. It was a very different experience from physical installations and 2D videos, because it seemed to be existing in its own world. The rotation of the camera angle and the individual movement of the characters and elements were really intriguing to me. I think the way lighting and shadow is programmed to be so natural is fascinating. I think this kind of 3D computer graphic medium is very appropriate for Jacolby Satterwhite’s work, as he as transforms existential uncertainty into a generative engine of resilience, reinvention, and celebration.
![[OLD SEMESTER] 15-104 • Introduction to Computing for Creative Practice](../../../../wp-content/uploads/2023/09/stop-banner.png)