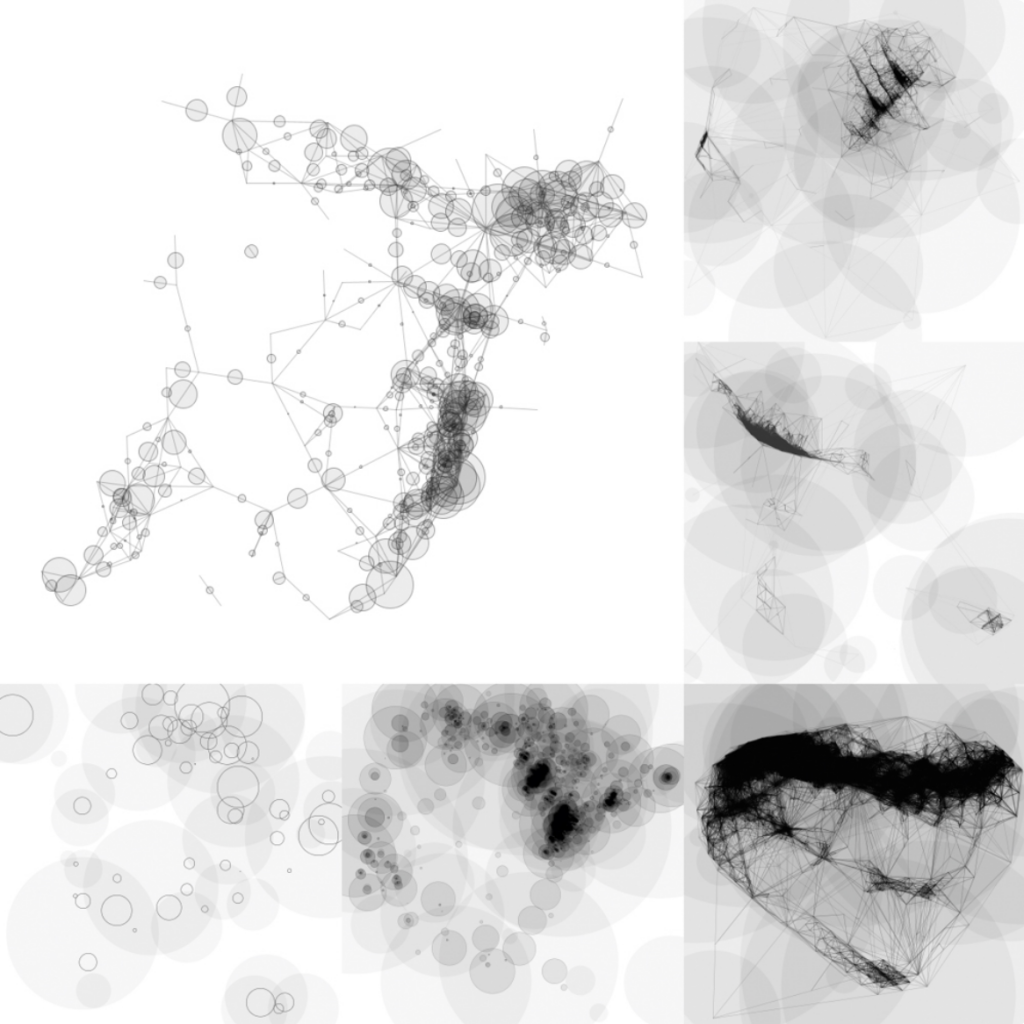
The project that I looked at for this week’s LO is “Emergence Algorithms in Processing” by Jesal Mehta in 2018. Even though this is considered more of Mehta’s exploration and design documentation, I still really enjoy seeing how he showed the algorithm slowly building up the piece and the contrast between the start and the end result. The circles in the piece are generated at random points of the canvas with random diameters. New circles are then drawn wherever two circles overlap and with new diameters that allow them to touch the two parent circles. The generation continues on, ultimately creating a full piece and pattern. I find it fascinating to see how a few simple circles can evolve into such a complicated piece. This also relates a lot to what we’ve already learned in class, and it makes me wonder how I could also explore randomness as Mehta did. The only controlled variable is the initial diameters, and the rest simply relies on the code and just pure randomness.
Author: Bob Ross
Project 5: Wallpaper
function setup() {
createCanvas(400, 400);
background(0);
noLoop();
}
function draw() {
stroke(255, 202, 141); //yellow
strokeWeight(0.5); //for diagonal lines
for (var x = 0; x <= 400; x += 50) { //draw diagonal lines
for (var y = 0; y <= 400; y += 50) {
line(x, y+height/8, x+width/8, y); // diagonal lines
line(x, y, x-width/8, y-height/8); // diagonal lines
}
}
strokeWeight(1.5); //for petals
hpetal (0, 50); //initial petal
for (var x = 0; x <= 400; x+=100) { //draw petals
for (var y = 50; y <= 450; y+=100) {
hpetal(x, y);
hpetal(x+50, y+50);
hpetal(x-50, y-50);
}
}
}
function hpetal (x, y) {
//left petal
fill(231, 193, 206); //pink
beginShape();
curveVertex(x, y);
curveVertex(x, y);
curveVertex(x+25, y-10);
curveVertex(x+50, y);
curveVertex(x+25, y+10);
curveVertex(x, y);
curveVertex(x, y);
endShape();
//right petal
fill(170, 201, 206); //pale green
beginShape();
curveVertex(x+50, y);
curveVertex(x+75, y-10);
curveVertex(x+100, y);
curveVertex(x+75, y+10);
curveVertex(x+50, y);
endShape();
//top petal
fill(244, 220, 208); //pale pink
beginShape();
curveVertex(x+50, y-50);
curveVertex(x+60, y-25);
curveVertex(x+50, y);
curveVertex(x+40, y-25);
curveVertex(x+50, y-50);
endShape();
//bottom petal
fill(170, 201, 229); //pale blue
beginShape();
curveVertex(x+50, y);
curveVertex(x+60, y+25);
curveVertex(x+50, y+50);
curveVertex(x+40, y+25);
curveVertex(x+50, y);
endShape();
}
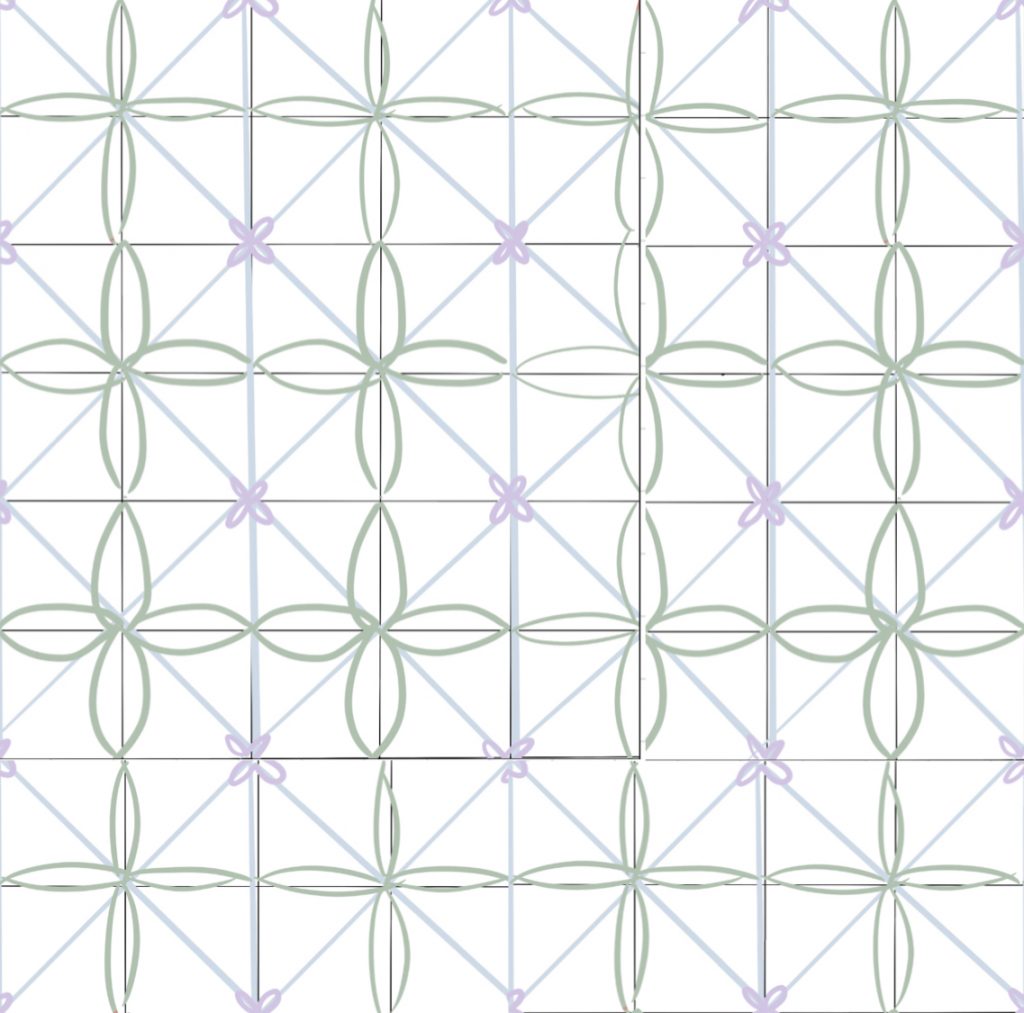
Through this project, I became more comfortable with using nested loops and understood better how they work. This is my initial sketch:
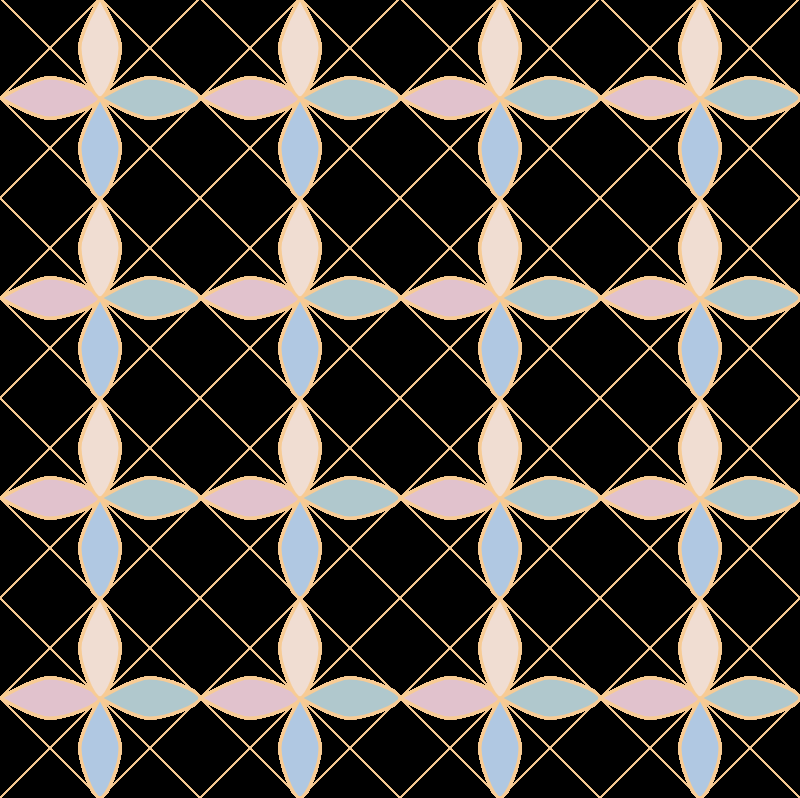
I wanted to create a wallpaper that involved these symmetrical petals, and so I started by drawing them. Then I explored a little by shifting and overlapping the petals for a more interesting effect. This is the version without the overlaps, which I quite enjoy as well:
My design doesn’t quite remind me of wallpaper, instead, I see it more as a pattern for a silk square scarf. I really enjoyed testing and adding different elements to generate a pattern for this project!
Looking Outwards 05: 3D Computer Graphics
One project that caught my attention immediately is “Spells” created by Sasha Vinogradova in 2021. “Spells” is a series composed of 3 pieces, “Air”, “Whisper”, and “Fire”, intending to express “the magic one feels when inspiration strikes”. The 3D strings in the work represent the energy streams that allow us to connect, feel, and create. I really like this project because the artist did an incredible job in creating dimensions. Although it’s a 2D image, the way the strings are twisted and wrapped in the space creates depth and the illusion of a 3D sphere. “Spells” was designed using C4D and Zbrush, which are both 3D software for the creative industries. I explored both of these tools, and I found their features to be quite fascinating. For instance, Zbrush can actually allow users to sculpt 3D figures through “digital clay”. This week’s LO allowed me to gain some insight on how digital art and computer graphics can now exceed 2D and allow artists to generate 3D and interactive art.
Project 4: String Art
var dx1;
var dy1;
var dx2;
var dy2;
var dx3;
var dy3;
var dx4;
var dy4;
var dx5;
var dy5;
var dx6;
var dy6;
var dx7;
var dy7;
var dx8;
var dy8;
var dx9;
var dy9;
var dx10;
var dy10;
var lines = 120; //for the left & right strings
var lines2 = 100; //for the top-> bottom & left -> right strings
var lines3 = 20; //for center strings
function setup() {
createCanvas(400, 300);
background(220);
//left blue+green strings
line(0, 0, 0, 300); //initial line
line(0, 300, 400, 0); //ending line
dx1 = (0-0)/lines;
dy1 = (300-0)/lines;
dx2 = (400-0)/lines;
dy2 = (0-300)/lines;
//right blue+red strings
line(0, 300, 400, 0); //initial line
line(400, 0, 400, 300); //ending line
dx3 = 400/lines;
dy3 = -300/lines;
dx4 = 0/lines;
dy4 = 300/lines;
//top -> bottom strings
line(0, 0, 400, 0); //initial line
line(0, 300, 400, 300); //ending line
dx5 = 400/lines2;
dy5 = 0/lines2;
dx6 = 400/lines2;
dy6 = 0/lines2;
//left -> right strings
line(0, 0, 0, 300); //initial line
line(400, 0, 400, 300); //ending line
dx7 = 0/lines2;
dy7 = 300/lines2;
dx8 = 0/lines2;
dy8 = 300/lines2;
//center piece
dx9 = 100/lines3;
dy9 = 150/lines3;
dx10 = 100/lines3;
dy10 = 150/lines3;
}
function draw() {
//left -> right strings initial points
var x7 = 0;
var y7 = 0;
var x8 = 400;
var y8 = 300;
//draw left -> right strings
for (var i = 0; i <= lines2; i += 1) {
stroke(255, 95, 90); //red
line(x7, y7, x8, y8);
x7 += dx7;
y7 += dy7;
x8 -= dx8;
y8 -= dy8;
}
//top -> bottom strings initial points
var x5 = 0;
var y5 = 0;
var x6 = 400;
var y6 = 300;
//draw top -> bottom strings
for (var i = 0; i <= lines2; i += 1) {
stroke(255, 105, 0); //orange
line(x5, y5, x6, y6);
x5 += dx5;
y5 += dy5;
x6 -= dx6;
y6 -= dy6;
}
//left blue+green strings initial points
var x1 = 0;
var y1 = 0;
var x2 = 0;
var y2 = 300;
//draw blue+green strings
for (var i = 0; i <= lines; i+= 1) {
stroke(0, random(50, 160), random(100, 200)); //pick random color from green & blue
line(x1, y1, x2, y2);
x1 += dx1;
y1 += dy1;
x2 += dx2;
y2 += dy2;
}
//right blue+red strings initial points
var x3 = 0;
var y3 = 300;
var x4 = 400;
var y4 = 0;
//draw blue+red strings
for (var i = 0; i <= lines; i+= 1) {
stroke(random(80, 150), 0, random(100, 200)); //pick random color from red & blue
line(x3, y3, x4, y4);
x3 += dx3;
y3 += dy3;
x4 += dx4;
y4 += dy4;
}
//center piece initial points
var x9 = 100;
var y9 = 150;
var x10 = 300;
var y10 = 150;
//draw center piece
for (var i = 0; i <= lines3; i += 1) {
stroke(225, 210, 225); //white
line(x9, y9, x10, y10);
x9 += dx9;
y9 += dy9;
x10 -= dx10;
y10 -= dy10;
}
noLoop();
}
I found it a bit challenging to visualize the way the strings would work in my head, and so the drafting part was quite difficult. However, I really liked how the strings overlapping created dimension in the piece.
Looking Outwards 4: Sound Art
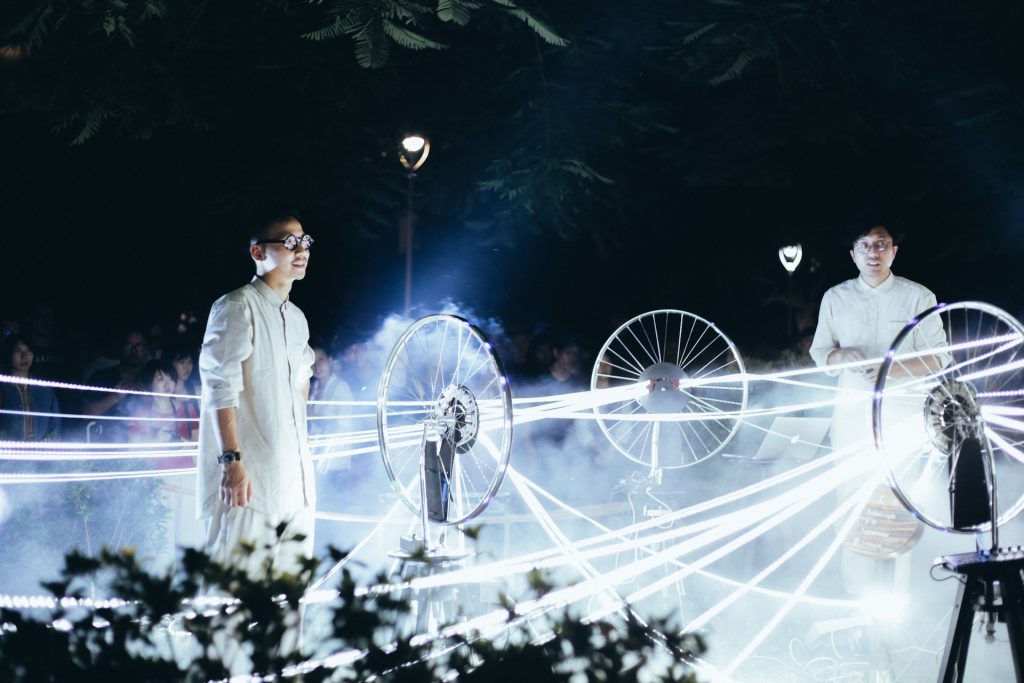
For this week’s LO, I looked into “Cycling Wheel: The Orchestra” created by Keith Lam, Seth Hon, and Alex Lai. The piece was first released in 2016 is composed of 3 sets of bicycle wheels and connecting strings. Together, the installation acts as a dynamic and interactive instrument for performance. The Hong Kong-based new media artist Keith Lam explains that the piece was based on the idea of Marcel’s Bicycle Wheel and that they wanted to remake the masterpiece by composing a multi-media performance. I love how they embedded audio and lighting in the wheel so the piece is very dynamic and interactive. The music created is very unique and the flashing lights really complement the orchestra. I also admire how there’s a live element where the artists are present and controlling those wheels in front of an audience. I suppose the algorithms behind the project helps to transform the mechanics of the wheel into variations in sounds and lights.
Project 3: Dynamic Drawing
var angle = 0;
function setup() {
createCanvas(600, 450);
}
function draw() {
// change the background color from light -> dark blue as mouse top -> bottom of canvas
if (mouseY < height/7) {
background (188, 210, 232); //lightest blue
} else if (mouseY < (height/7)*2) {
background (145, 186, 214);
} else if (mouseY < (height/7)*3) {
background (115, 165, 198);
} else if (mouseY < (height/7)*4) {
background (82, 138, 174);
} else if (mouseY < (height/7)*5) {
background (46, 89, 132);
} else if (mouseY < (height/7)*6) {
background (30, 63, 102);
} else {
background (23, 47, 77); //darkest blue
}
//a box at the center of the canvas
stroke(0);
strokeWeight(3);
line(250, 175, 250, 275); //left border of box
line(250, 175, 350, 175); //top border of box
line(350, 175, 350, 275); //right border of box
line(250, 275, 350, 275); //bottom border of box
fill(79, 37, 37); //brown color for box
rect(250, 175, 100, 100);
//open side of box if mouse touches border
if (mouseX < 250 & mouseY > 175 && mouseY < 275) { //if open left side
line(200, 150, 250, 175);
line(200, 300, 250, 275);
var r = 255; //pink fill
var g = 180;
var b = 200;
fill(r, g, b);
circle(mouseX, mouseY, 300-mouseX); //small circle attached to mouse
fill(r-mouseX, g-mouseX, b-mouseX); //opposite color from small circle
circle(0, mouseY, mouseX); //large circle on the side of canvas
} else if (mouseX > 350 & mouseY > 175 && mouseY < 275) { //if open right side
line(350, 175, 400, 150);
line(350, 275, 400, 300);
//rectangle spin on center, change size and spin angle
if(mouseX > 350 & mouseX <450) {
fill(235, 207, 52); //yellow
} else {
fill(52, 235, 116); //green
}
push();
translate(350, 225);
rotate(radians(angle));
rectMode(CENTER);
rect(50, 50, mouseX-300, mouseX-300); //size of rect increases as mouse goes to the right
pop();
if (mouseX > 350 & mouseX < 450){ //if on left side
angle += 3; //rotate clock-wise
} else { //if on right side
angle -= 3; //rotate counter clock-wise
}
} else if (mouseY < 175 & mouseX > 250 && mouseX < 350) { //if open top side
line(200, 150, 250, 175);
line(350, 175, 400, 150);
var circleX = 300;
var circleY = 150;
//let circle size depend on how close mouse is to circles
var size = constrain(dist(mouseX, mouseY, circleX, circleY),0, 30);
fill(115, 105, 205); //fill purple
circle(circleX, circleY, size); //first circle
circle(circleX, circleY-30, size*2); //2nd circle
circle(circleX, circleY-60, size); //3rd circle
circle(circleX, circleY-90, size*2); //4th circle
circle(circleX, circleY-120, size); //5th circle
} else if (mouseY > 275 & mouseX > 250 && mouseX < 350) { //if open bottom side
line(200, 300, 250, 275);
line(350, 275, 400, 300);
//random neon spike of lines that follows the mouse
stroke(255, 230, 0); //bright yellow
line(287.5, 362.5, mouseX, mouseY);
line(287.5, 362.5, mapx, mapy+180);
line(287.5, 362.5, mapx+40, mapy);
line(287.5, 362.5, mapx, mapy+200);
var mapx = map(mouseX, 250, 350, 210, 310); //map to a shorter length
var mapy = map(mouseY, 275, 450, 235, 410); //map to a shorter length
stroke(122, 255, 105); //bright green
line(287.5, 362.5, mapx, mapy);
line(287.5, 362.5, mapx-130, mapy-50);
line(287.5, 362.5, mapx-40, mapy-20);
line(287.5, 362.5, mapx-130, mapy+150);
line(287.5, 362.5, mapx-150, mapy-39);
stroke(248, 59, 255); //bright purple
line(287.5, 362.5, mapx*2, mapy*2);
line(287.5, 362.5, mapx*1.1, mapy);
line(287.5, 362.5, mapx, mapy+220);
line(287.5, 362.5, mapx+50, mapy);
line(287.5, 362.5, mapx-80, mapy);
stroke(150, 255, 250); //bright blue
line(287.5, 362.5, mapx*1.5, mapy);
line(287.5, 362.5, mapx-195, mapy+239);
line(287.5, 362.5, mapx-230, mapy+180);
line(287.5, 362.5, mapx+10, mapy+50);
line(287.5, 362.5, mapx, mapy+190);
line(287.5, 362.5, mapx*0.2, mapy*2);
stroke(255, 150, 217); //bright pink
line(287.5, 362.5, mapx-20, mapy);
line(287.5, 362.5, mapx-100, mapy);
line(287.5, 362.5, mapx-170, mapy+20);
}
}
The idea behind this drawing is a box that reveals different changing elements depending on where you put your mouse. The most challenging part of this project was figuring out how to make the elements change based on their interaction with mouseX and mouseY. I had to do some trial-and-error to get the effects that I wanted.
Looking Outwards 3: Computational Fabrication
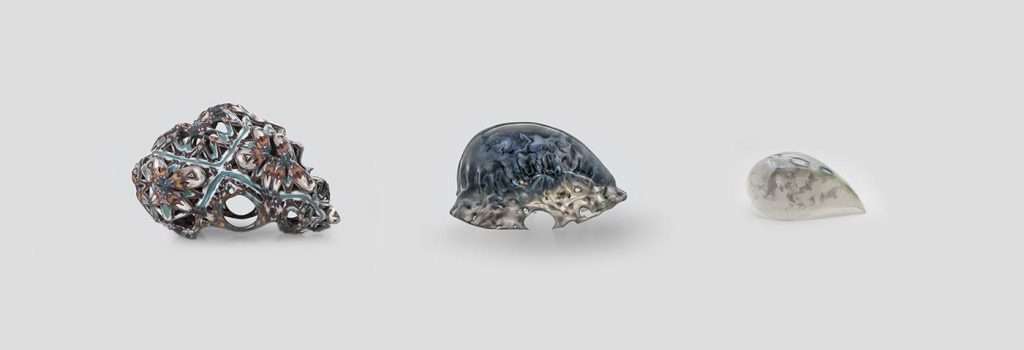
One computational fabrication project that I found particularly intriguing is the “Vespers” collection by Neri Oxman’s Mediated Matter Group at MIT. The collection contains three series, each with five 3D-printed and multi-material masks: the Past, Present, and Future.
I find the Future series to be most interesting as it explores death and rebirth by combining living and non-living materials in the masks. This was accomplished by integrating computational design with 3D printing and synthetic biology to direct the growth and expression of the microorganisms inside the mask. The algorithm and tools are customized so that the microorganisms reproduce the colors of the Past series and feature patterns based on the spatial logic in the Present series, maintaining cohesiveness throughout the entire collection and expressing the idea of “rebirth”. I’m impressed by “Vespers” because it’s not only incredibly innovative, but it’s also functional and relevant. The algorithms behind this can be used for so many other applications. For instance, it could be used to create smart packaging that reacts to its environment. This mask collection goes beyond traditional mediums of art; it thoroughly explores the intersection of computation, design, and biology.
Project 2: Variable Faces
var faceWidth = 250;
var faceHeight = 250;
var faceColorR = 30;
var faceColorG = 20;
var faceColorB = 80;
var randomEars = 0;
var randomEyes = 0;
var randomNose = 0;
var eyeWidth = 28;
var eyeHeight = 35;
var eyeColorR = 252;
var eyeColorG = 230;
var eyeColorB = 33;
function setup() {
createCanvas(640, 480);
}
function draw() {
//face
background(206, 219, 240); //light blue for background
fill(faceColorR, faceColorG, faceColorB); //color of face
ellipse(width / 2, height / 2, faceWidth, faceHeight); //face
//ears (randomly pick ears)
if (randomEars <= 1){ //round ears
circle(width/3, height/3, 60); //left round ears
circle(width - (width/3), height/3, 60); //right round ears
} else if (randomEars <= 2) { //triangle ears
triangle(190, 130, 260, 152 , 220, 200); //left triangle ears
triangle(450, 130, 380, 152, 420, 200); //right triangle ears
} else { //curved down ears
beginShape(); //left curved down ears
curveVertex(200, 210);
curveVertex(210, 230);
curveVertex(170, 180);
curveVertex(270, 137);
curveVertex(290, 240);
endShape();
beginShape(); //right curved down ears
curveVertex(440, 210);
curveVertex(430, 230);
curveVertex(470, 180);
curveVertex(370, 137);
curveVertex(350, 240);
endShape();
}
//eyes (randomly pick eyes)
if (randomEyes <= 1){ //round eyes
fill(eyeColorR, eyeColorG, eyeColorB); //changing eye color
ellipse(280, 230, eyeWidth, eyeHeight); //left black part of round eyes
fill(255, 255, 255);
ellipse(280, 236, 15, 17); //left white part of round eyes
fill(eyeColorR, eyeColorG, eyeColorB);
ellipse(360, 230, eyeWidth, eyeHeight); //right black part of round eyes
fill(255, 255, 255);
ellipse(360, 236, 15, 17); //right white part of round eyes
} else if (randomEyes <= 2){ //line eyes
fill(0, 0, 0); //black
rect(260, 230, 30, 5); //left line eyes
rect(350, 230, 30, 5); //right line eyes
} else { //reptile eyes
fill(0, 0, 0); //black
circle(275, 230, 50); //left black part of reptile eyes
fill(eyeColorR, eyeColorG, eyeColorB); //changing eye color
ellipse(275, 230, 5, 50); //left inside part of reptile eyes
fill(0, 0, 0); //black
circle(365, 230, 50); //right black part of reptile eyes
fill(eyeColorR, eyeColorG, eyeColorB); //changing eye color
ellipse(365, 230, 5, 50); //right inside part of reptile eyes
}
//nose (randomly pick nose)
fill(faceColorR + 50, faceColorG + 35, faceColorB + 10); //nose color slightly darker than face color
if (randomNose <= 1) { //pig snout
ellipse(width/2, height/2 + 30, 70, 40); //pig snout outside
ellipse(width/2 -10, height/2 +30, 8, 15); //pig snout left nostril
ellipse(width/2 +10, height/2 +30, 8, 15); //pig snout right nostril
} else if (randomNose <= 2) { //triangle nose
triangle(width/2 - 10, height/2 + 30, width/2 + 10, height/2 + 30, width/2, height/2 + 45); //triangle nose
} else { //curvy mouth + whiskers
fill(faceColorR, faceColorG, faceColorB);
arc(width/2 - 10, height/2 + 50, 20, 20, 0, radians(200)); //curvy mouth left
arc(width/2 + 10, height/2 + 50, 20, 20, radians(-20), PI); //curvy mouth right
fill(0, 0, 0); //black
line(240, 270, 180, 240); //left top whisker
line(400, 270, 460, 240); //right top whisker
line(240, 275, 175, 275); //left middle whisker
line(400, 275, 465, 275); //right middle whisker
line(240, 280, 180, 310); //left bottom whisker
line(400, 280, 460, 310); //right bottom whisker
}
}
function mousePressed(){
faceWidth = random(200, 250);
faceHeight = random(200, 250);
faceColorR = random(80, 170);
faceColorG = random(50, 150);
faceColorB = random(60, 200);
randomEars = random(0, 3);
randomEyes = random(0, 3);
randomNose = random(0, 3);
eyeWidth = random(20, 35);
eyeHeight = random(30, 38);
eyeColorR = random(185, 220);
eyeColorG = random (190, 235);
eyeColorB = random (130, 250);
}
The most interesting part of the project was testing out the code and seeing how the facial features change and create unique combinations. However, I did find it a bit challenging and time-consuming to design each of the variations.
Project 1: My Self Portrait
function setup() {
createCanvas(600, 600);
background(123, 151, 180);
}
function draw() {
stroke(0);
strokeWeight(4);
fill(247, 205, 174); //skin color
ellipse(300, 300, 340, 380); //face
line(200, 270, 270, 270); //left eyebrow
line(330, 270, 400, 270); //right eyebrow
stroke(0);
strokeWeight(3);
fill(127, 62, 41); //brown left eye
ellipse(235, 300, 30, 50);
ellipse(365, 300, 30, 50); //right eye
fill(236, 121, 67); //nose orange
triangle(300, 330, 290, 350, 310, 350);
fill(236, 121, 134); //mouth pink
arc(300, 390, 80, 50, -radians(5),radians(185),CHORD);
fill(246, 190, 185); //left cheek pink
ellipse(170, 360, 80, 30);
fill(246, 190, 185); //right cheek pink
ellipse(430, 360, 80, 30);
fill(248, 157, 54); //hat yellow
rect(180, 110, 240, 33);
triangle(210, 70, 180, 110, 240, 110);
triangle(270, 70, 240, 110, 300, 110);
triangle(330, 70, 300, 110, 360, 110);
triangle(390, 70, 360, 110, 420, 110);
fill(48, 0, 0); //hair brown
circle(120, 180, 80, 80);
circle(480, 180, 80, 80);
fill(243, 75, 44); //jewel red
square(204, 60, 12);
square(264, 60, 12);
square(324, 60, 12);
square(384, 60, 12);
noLoop();
}
The most interesting part of the project is figuring out which shapes work best for each facial feature and how a slight angle change can change the entire expression.
Looking Outwards 02: Generative Art
“Animal Imagination” is an artwork consisting of 50 iterations created by software artist LIA in 2018. The piece was created through an algorithmic system in which each iteration used different parameters for them to flow from one to another, evolving into a series of digital paintings. The artist used various shapes and colors to express elements from nature and animals. For instance, one piece involved a yellow and brown color scheme with overlapping circles of various transparencies, resembling the wildlife of the safari. I admire this project for how each individual iteration is unique and involves different elements, but they still transition very smoothly to each other. This provides a sense of harmony to the entire artwork, and I think that’s quite impressive. Another part of the project that I admire is how it’s very abstract with only lines, shapes, and patterns, yet it successfully captures the image of the sea, forest, and animals. From “Animal Imagination” as well as her other works, one can truly see how LIA emphasizes and works beautifully with abstract forms and fluidity.