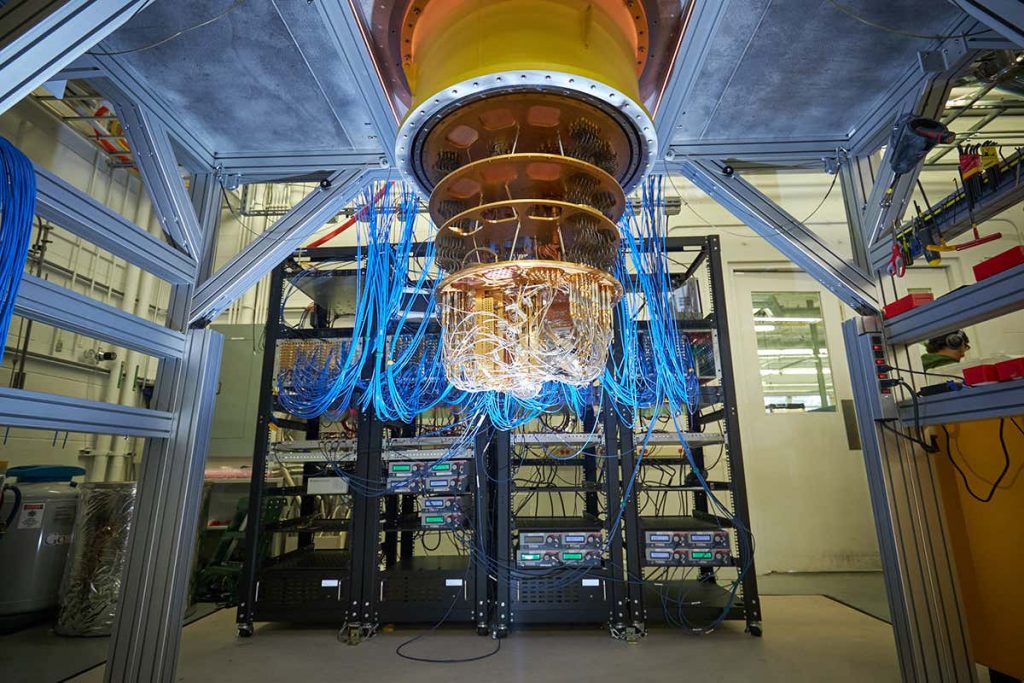
I have always been very interested in quantum computers. Out of all the quantum projects that are in progress right now, one of the most interesting is probably the quantum processor being built at Google. Their goal is to use this quantum processor to create “pure randomness”. The main idea around this randomness is derived from the fundamental concept in quantum physics, known as superposition. In quantum physics, superposition is referred to when the Qbits (quantum particles) exist in a state of being both 0 and 1 at the same time. While you are able to use quantum theory to calculate the probability of the bit being either 0 or 1, ultimately the particles in superposition are fundamentally random. With this level of pure randomness, it can help us make big strides in cybersecurity and encryption. In a world basically run by technology, it is important that we have a way of protecting ourselves from cyberattacks, and quantum processors may be the answer.
Category: SectionA
Clock Project
var fall;
var spring;
var winter;
var summer;
function setup() {
createCanvas(480, 480);
angleMode(DEGREES);
textAlign(CENTER);
rectMode(CENTER);
fall = {r1:108, g1:12, b1:12,
r2:75, g2:28, b2:0,
r3:189, g3:81, b3:19};
winter = {r1:253, g1:249, b1:231,
r2:202, g2:213, b2:255,
r3:21, g3:54, b3:186};
spring = {r1:177, g1:244, b1:249,
r2:253, g2:217, b2:73,
r3:255, g3:204, b3:255};
summer = {r1:123, g1:227, b1:243,
r2:255, g2:145, b2:145,
r3:250, g3:244, b3:228};
}
function draw() {
background(220);
translate(240, 240);
date();
rotate(-90);
let hr = hour();
let mn = minute();
let sc = second();
strokeWeight(30);
noFill();
if (m==3 || m==4 || m==5) {
secondscircle(sc, spring);
minutescircle(mn, spring);
hourscircle(hr, spring);
}
else if (m==6 || m==7 || m==8) {
secondscircle(sc, summer);
minutescircle(mn, summer);
hourscircle(hr, summer);
}
else if (m==9 || m==10 || m==11) {
secondscircle(sc, fall);
minutescircle(mn, fall);
hourscircle(hr, fall);
}
else {
secondscircle(sc, winter);
minutescircle(mn, winter);
hourscircle(hr, winter);
}
}
function date() {
stroke(0);
strokeWeight(9);
fill(255);
rect(0,0, width/2,height/3,20);
m = month();
d = day();
y = year();
textSize(50);
fill(0);
strokeWeight(1);
stroke(0);
textFont('Orbitron')
text(m + '.' + d + '.' + y, 0,15);
}
function secondscircle(sc, coloring) {
stroke(coloring.r1,coloring.g1,coloring.b1);
let secondsAngle = map(sc, 0, 60, 0, 360);
arc(0, 0, 450, 450, 0, secondsAngle);
}
function minutescircle(mn, coloring) {
stroke(coloring.r2,coloring.g2,coloring.b2);
let minutesAngle = map(mn, 0, 60, 0, 360);
arc(0, 0, 385, 385, 0, minutesAngle);
}
function hourscircle(hr, coloring) {
stroke(coloring.r3,coloring.g3,coloring.b3);
let hoursAngle = map(hr % 24, 0, 24, 0, 360);
arc(0, 0, 320, 320, 0, hoursAngle);
}
Some challenges I faced were trying to use objects as a system of carrying the different color schemes for the different seasons in the year. Once I got the hang of using objects, I realized how useful and helpful they can be.
Project 6 Abstract Clock
It was alot of fun making this peice. It was really hard to figure out where to start, but when I decided to split the hour, minute, and second into different parts, I was able to better figure out what to do.
var lengt = 10;
var hr;
var min;
var sec;
function setup() {
createCanvas(480, 480, WEBGL);
hr = hour();
min = minute();
sec = second();
text("p5.js vers 0.9.0 test.", 10, 15);
ellipse(240,240,480);
}
// drawing a plant that grows and dies at 24 hours but then grows from the stump again
function draw() {
background(220);
sec = second();
min = minute();
sec = second();
thePlant(hr);
theSky(min,hr);
theLeaves(sec);
}
function theLeaves(second){ //the leaves or flower changes based on the second
fill("purple");
cone(10+second,65,16,3);
}
function thePlant (hr){ //each hour adds length to the plant
fill("brown");
translate(0,100);
cylinder(60, 100, 16, 16);
//the actual plant
translate(0,-70);
fill("green");
cylinder(20, lengt*hr, 16, 16);
}
function theSky (min,hr){ //changes based on the 12 hr system
if (hr <= 12){
fill(0,0,0.3472*(min + (60*hr)));
}else{
fill(0,0,255 - 0.3472*(min + (60*hr)));
}
rect(-480,-480,960,960);
}
Looking Outward 06
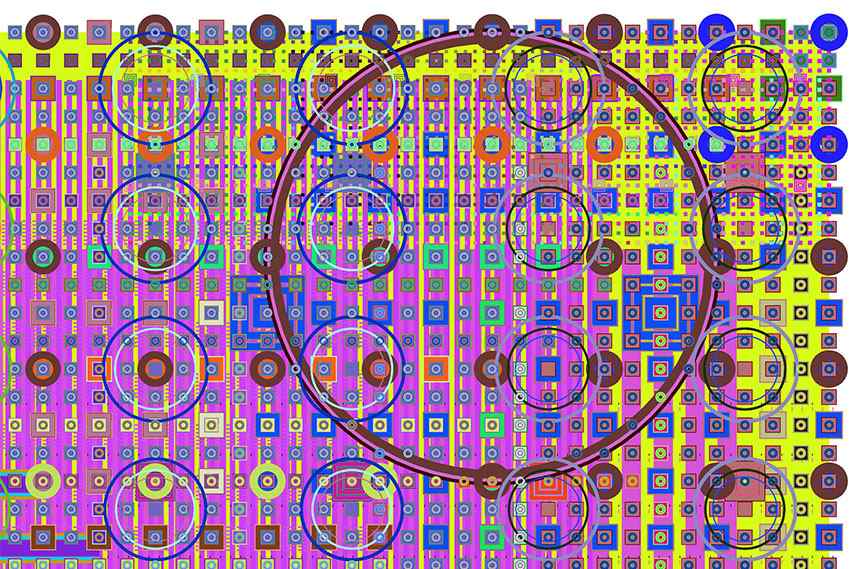
A particular work that I find interesting is e4708 by Mark Wilson. To describe the artwork, it looks like a collection of shapes like circles and squares that are repeated many times in neon colors. Some circles are on top of each other, while some circles are on top of squares. The colors make it seem like it’s a lucid dream just about to happen. The fact that I can’t exactly pinpoint what it is inspires me as it really does leave it up to the viewer to interpret the collection of shapes and spaces. I am unsure about the algorithms that the author uses, but he uses it well. Mark Wilson artistic sensibilities manifest in this piece as he is trying to leave it up to a larger audience. He created the piece by purchasing a personal computer and writing his own software. He mixes repetition, careful curation and randomness by the machine to create the piece. In conclusion, I really enjoy looking at this piece and the way it was created.
Abstract Clock
You can tell the time and date with this abstract clock. From inside out each hexagon tells seconds, minutes, hours, days, months, respectively. The red line indicates the start of a category. An interesting thing about using hexagons is that it is easy to use to approximate what time it is since it has 6 sides, and units of time are easily divided by 6.
//Luke Mattson
//section A
var today = new Date();
var now = [today.getSeconds(), today.getMinutes()+(today.getSeconds()/60), today.getHours()+(today.getMinutes()/60),today.getDate()+(today.getHours()/24),today.getMonth()+(today.getDate()/30)]
var highest = [60, 60, 24, 30, 12]
var angle = []
var rate = [360/60, 360/60/60, 360/60/60/24, 360/60/60/24/30,360/60/60/24/30/12]
var size = [47,94,141,188,235]
function setup(){
frameRate(1)
createCanvas(480, 480);
angleMode(DEGREES)
for (i=0; i<=6; i++) {
angle[i] = (now[i]/highest[i])*360
}
}
function draw(){
background(255,179,71)
fill(255,0,0)
rect(240,239,240,2)
translate(240,240)
for (i=0; i<=4; i++) {
push()
rotate(angle[i])
angle[i] += rate[i]
hexagon(size[i])
pop()
}
print(rate)
}
function hexagon(s){
noFill()
beginShape()
vertex(s,0)
vertex(s/2,s*sqrt(3)/2)
vertex(-s/2,s*sqrt(3)/2)
vertex(-s,0)
vertex(-s/2,-s*sqrt(3)/2)
vertex(s/2,-s*sqrt(3)/2)
endShape(CLOSE)
fill(130,200,200)
ellipse(s,0,s/5)
}
Looking Outwards 05
I’ve chosen to investigate the early stages of mainstream animated movies – I found a cool video of the early development stages of the movie Toy Story, just when “3D” animation was taking off.
I’d imagine that the process for animation back then was different than it is today – we have programs like Maya and Blender to help us render, process, and rig 3D models now.
Toy Story looked a lot different in this video than it did on release, and we can see the character design process (Woody was almost a villain!)
Tom Hanks seemed to have played an important role in determining the direction of the plot and characters.
https://www.youtube.com/watch?v=t2ejwJ0QXvs
Toy Story
Various Animators – Andrew Stanton & Pete Docter (named in the video)
Project-05
//Nami Numoto
//Section A
//mnumoto
var x = 0;
var y = 0;
function setup() {
createCanvas(600, 300);
background(191, 231, 242); //pastel blue
}
function kirby(x, y) {
stroke(0); //black outline
fill(224, 0, 91); //kirby feet pink! (feet come first because layers)
ellipse(x + 20, y + 35, 40, 20);
ellipse(x - 20, y + 35, 40, 20);
fill(243, 165, 170); //kirby main body/face pink! + arms as well
ellipse(x + 40, y + 10, 30, 25); //right arm ellipse
ellipse(x - 40, y + 10, 30, 25); //left arm ellipse
ellipse(x, y, 80, 80); //face ellipse
fill(235, 104, 150); //kirby blush pink!
ellipse(x - 20, y, 10, 5);
ellipse(x + 20, y, 10, 5);
//eyes going like ^^
line(x + 8, y - 5, x + 12, y - 15); //right
line(x + 12, y - 15, x + 16, y - 5);
line(x - 8, y - 5, x - 12, y - 15); //left
line(x - 12, y - 15, x - 16, y - 5);
//i don't think i like the mouth actually, not with the ^^ eyes.. leave it off
}
function draw() {
//set of loops for more-unit columns
for(let i = 0; i <= 3; i += 1) {
for(let column = 0; column <= 4; column += 1) {
kirby(x + (200 * column), y + i * 100);
}
}
//set of loops for less-unit columns
for(let i = 0; i <= 2; i += 1) {
for(let column = 0; column <= 3; column += 1) {
kirby(x + (200 * column) + 100, y + i * 100 + 50);
}
}
}
I’ve made a Kirby wallpaper – I didn’t want to copy Kirby in his original form exactly, so I made him smiling with his eyes 🙂
This was a lot of fun, I hope to make more drawings like this.
My Background – 05 Project
//Brandon Yi
//Section A
//btyi@andrew.cmu.edu
//Project-05-A
function setup() {
createCanvas(600, 600);
background(0);
rectMode(CENTER);
}
function draw() {
//initializing variables
var d=width/10;
var x=d/2
var y=d/2
//iterating it over the background size
for (var row = 0; row < width/d; row++) {
y=d/2;
for (var col = 0; col < height/d; col++) {
tile(x,y,d);
y+=d;
}
x+=d;
}
noLoop();
}
function tile(x,y,d) {
//translation requires a push and pop
push();
stroke(152,255,255);
strokeWeight(5);
translate(x,y)
fill(0);
ellipse(0,0,d);
ellipse(0,0,d-15);
for (var i = 0; i < d; i+=10) {
strokeWeight(2);
stroke(104,0,208);
noFill();
rect(0,0,i,i)
}
pop();
}
The trickiest part of this program was making a for loop inside the function. On top of that, it was difficult to also make the entire program relative to the background size.
Project 5 Wallpaper
It was really hard doing this becuase of translate as it took alot of calculation to figure out where the origin is.
function setup() {
createCanvas(600, 600, WEBGL);
background(220);
text("p5.js vers 0.9.0 test.", 10, 15);
}
function draw() {
//for the color
colorMode(RGB);
let from = color(random(0,255),random(0,255),random(0,255));
let to = color(random(0,255), random(0,255), random(0,255));
colorMode(RGB);
let interA = lerpColor(from, to, 0.33);
let interB = lerpColor(from, to, 0.66);
//for the pattern
for (var col = 0; col < 2; col += 1){
translate(-200,0);
for (var row = 0; row < 2; row += 1){
//translate(0,-150);
fill(from);
design();
}
}
for (var col = 0; col < 4; col += 1){
translate(200,0);
for (var row = 0; row < 4; row += 1){
//translate(0,150);
fill(interA);
design();
}
}
for (var col = 0; col < 2; col += 1){
translate(-200,0);
for (var row = 0; row < 2; row += 1){
//translate(0,-150);
design();
}
}
for (var col = 0; col < 2; col += 1){
translate(0,-200);
for (var row = 0; row < 2; row += 1){
//translate(0,-150);
fill(interB);
design();
}
}
for (var col = 0; col < 4; col += 1){
translate(0,200);
for (var row = 0; row < 4; row += 1){
//translate(0,-150);
fill(to);
design();
}
}
noLoop();
}
function design(){
fill
ellipsoid(30, 40, 30);
torus(60,20);
}
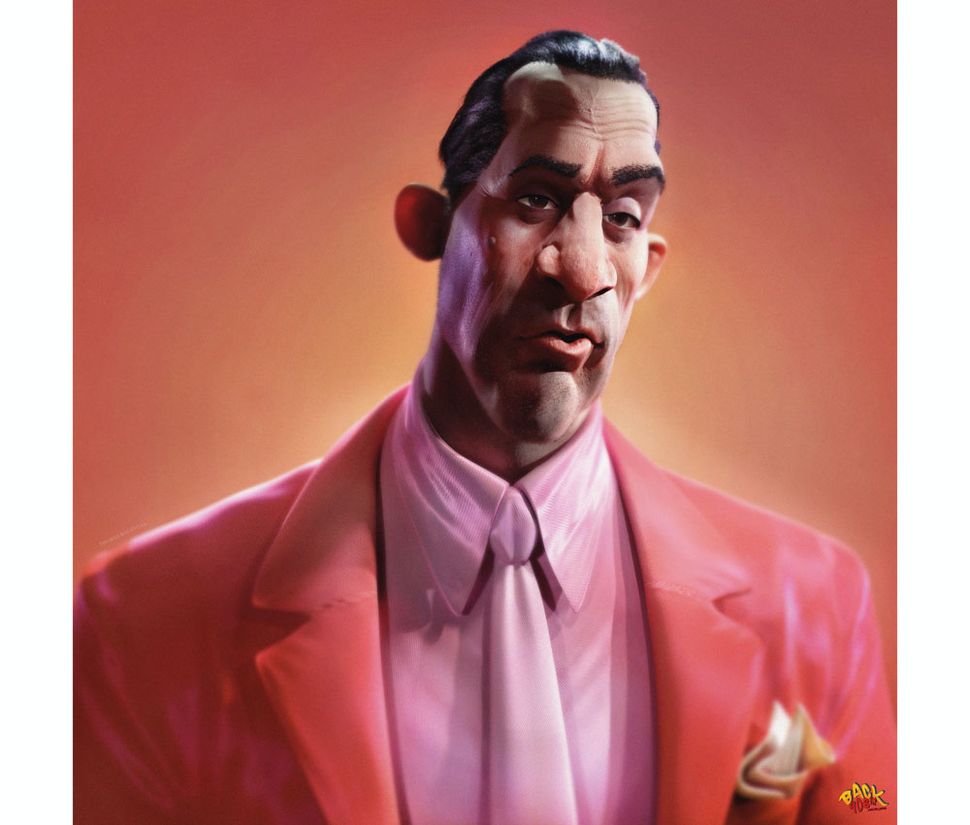
Looking Outward 05
One particular 3D art that I find interesting is Robert DeNiro by character artist Thomas Rousvoal. What is so cool about this piece is that Rousval is able to combine the personality and legendary facial expressions of DeNiro into an 3D piece art. It looks very realistic without losing that touch of cartoon that elevates the piece. Rousval paid a lot of attention to applying noise and grain to the 3D art, to express the personality of the piece. He uses a real 8K scanner to project onto UV’s, this enables him to start a new sculpture with different shapes while having layers of details of realistic skin.