Carley Johnson-Looking Outwards- 03

I’m inspired this week by an Ukranian architectural chef named Dina Kasko. Kasko uses the term “architectural chef” to describe the process of her cake making. She creates 3D silicon molds for all of her cakes, coded using graphical algorithms inspired by and made with knowledge from her mathematical background. All of her molds use sharp, modern, geometrical architecture to shape beautiful and satisfying desserts.

I love this artist partly because I love dessert, but also partly because she is able to make such beautiful art using the exciting enigma that is the 3D printer. I suppose her algorithms are highly detailed and singular to each of her projects. One project (pictured bellow) required molds and calculations for 81 singular cakes to make the geometry of this full piece work the way it does. Though not minimalist in artistic style myself, I am fascinated by the satisfaction and beauty of Kasko’s sleek style.

View this post on Instagram

This project was made for the presentation of new chocolate Ruby. The idea was to create a set of elements (cakes) that together would form a single composition. As a result, we got algorithmically modeled cake that consisted of 81 individual cakes, every single was unique in shape. This composition was made using a graphical algorithm editor Grasshopper that can build forms from the simple to the awe-inspiring. Inspyred by Matthew Shlian we took a pyramid and changed the tilt of each object and the area of each top plane, programming and scripting the set of cakes. All of the cakes are different. Inside: mousse with chocolate Ruby and meringue, ganache Ruby. I added a berry confit to the recipe to emphasize the berry flavor of chocolate and add accent. Also the biscuit with Ruby, with raspberries and of course a crispy layer with chocolate and royalty. . Этот проект был сделан специально для презентации нового шоколада Ruby от Cacao Barry в Шанхае. Идея заключалась в том, чтобы создать множество элементов (пирожных), которые вместе будут формировать единую композицию. В итоге мы получили динамический рисунок который состоит из 81 пирожного, каждое из которых уникально по форме. Эта композиция была сделана с использованием специального графического редактора алгоритмов Grasshopper, который может генерировать формы от простых до совершенно впечатляющих. Под впечатлением работ Matthew Shlian мы взяли пирамиду и изменили наклон каждого объекта и площадь каждой верхней плоскости, программируя набор пирожных. Все они разные по форме. Внутри: мусс с шоколадом Руби и меренгой, ганаш Руби, чтобы подчеркнуть ягодный вкус шоколада и добавить акцент я добавила в рецепт ягодное конфи, также бисквит с Руби с малиной и конечно хрустящий слой с шоколадом и роялтином. @dinarakasko #grasshopper3d #rhino3d#okmycake #pastryinspiration #chocolatejewels #pastryart #cake #kharkov #харьков #chefsofinstagram #gastroart #pastryart #dinarakasko #chefstalk #pastry #chefs #instadessert #foodporn #beautifulcuisine #siliconemould #baking #cakes #dessert #cakestagram #dessertporn #parametric #art #geometry #designmilk#торт#artselect

A post shared by Dinara Kasko (@dinarakasko) on

This is her project where she used algorithms to 3D print 80+ individual cakes to create the geometric swirling effect.

View this post on Instagram

Experiment. Tart #1 These tarts were made for the new issue of SoGood Magazine @sogoodmag This work is the result of collaboration with José Margulis @j.margulis Great talented artist from Venezuela who works with Geometric abstractionism and Kinetic art. He creates different 3D sculptures, visual compositions of colorful plastic sheets. I tried to transform his creations, made of plastic, aluminum and acrylic, into something edible, using basic techniques and ingredients. Yet, I wanted to preserve his message and feel. It had to be an installation-performance where the art was created by José Margulis and then transformed by me into an edible piece of art which would be later consumed – thus disappear. Composition: streusel, almond cream, confit strawberry – red currant, mousse with white chocolate Read more on my website dinarakasko.com . Експеримент. Тарт #1 Эти тарты были сделаны для нового выпуска кондитерского журнала SoGood Magazine. Эта работа является результатом совместной работы с José Margulis @j.margulis талантливым скульптором из Венесуэлы, который работает с геометрическим абстракционизмом и кинетическим искусством. Он создает различные 3D-скульптуры, визуальные композиции из красочных пластиковых листов. Я попыталась превратить его творения, сделанные из пластика, алюминия и акрила в кондитерские изделия, используя основные техники и ингредиенты. Тем не менее, я хотела сохранить его посыл и концепцию. Это должна была быть инсталляционная работа в которой мы трансформировали, превратили объект искусства в нечто съедобное, что вскоре исчезнет, подчеркивая эфемерность искусства, его мимолетность в нашей жизни. Внутри: ореховый штройзель, выпеченный миндальный крем, конфи клубника-красная смородина, мусс с белым шоколадом. Читайте всю статью на моем сайте dinarakasko.com . #dinarakasko #cake #desserts #pastrychef #chefstalk #okmycake #pastry #pastryinspiration #cakes #kharkov #харьков #pastryart #sweets #geometry #kineticart #art #jmargulis #geometricart #sculpture #kinetic #parametric

A post shared by Dinara Kasko (@dinarakasko) on

Another project where the top geometric design is created from chocolate shaped from 3D molds

Audrey Zheng – Looking Outwards – 03

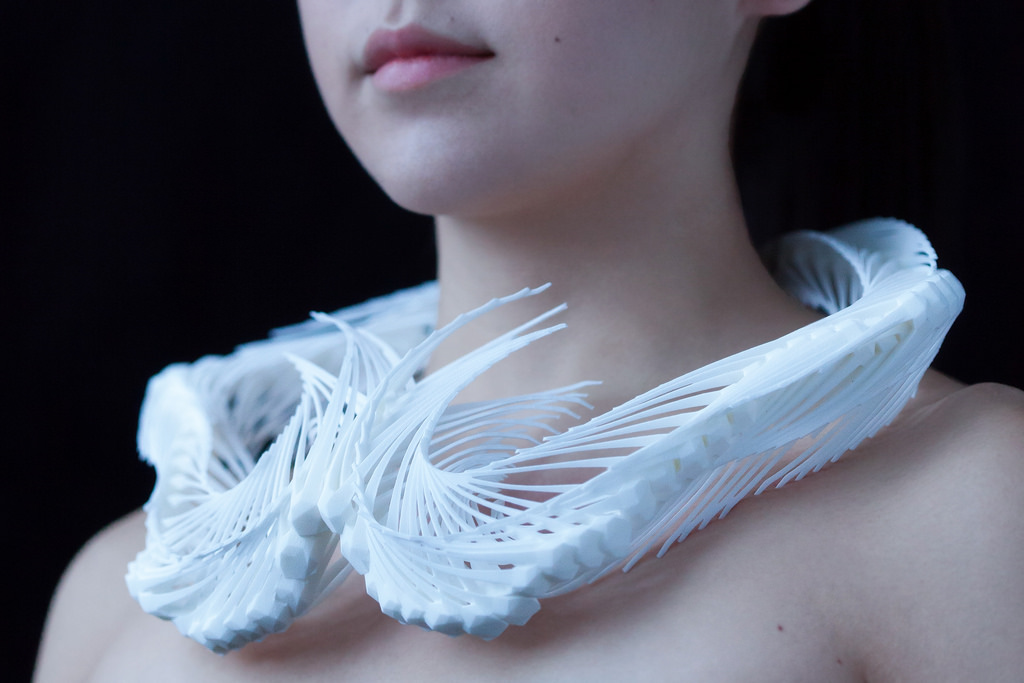
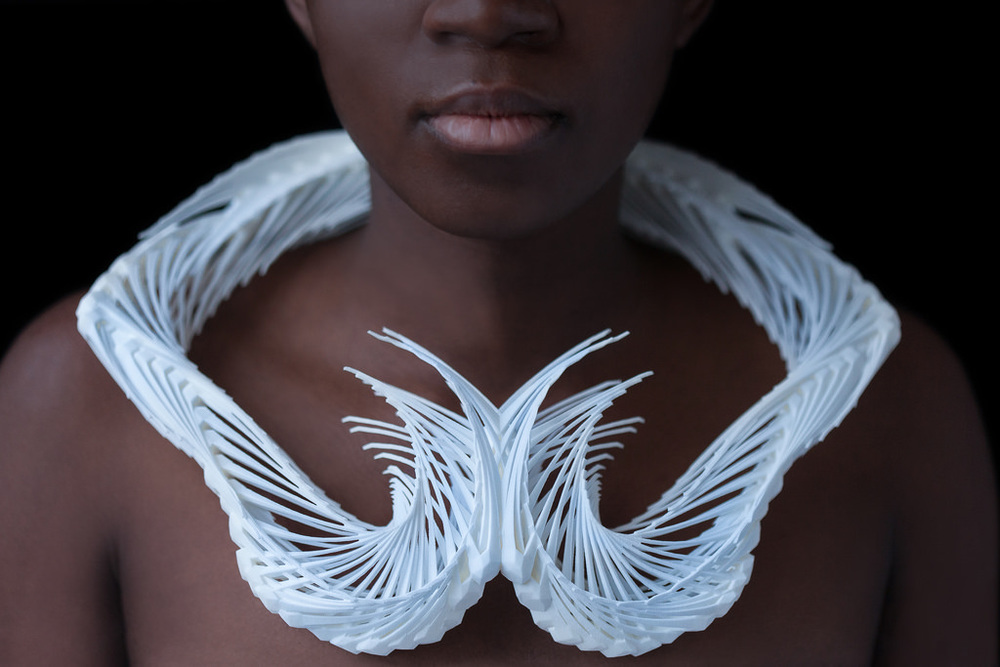
This virtual creature exists as a 3D printable module; it is constructed as a closed mesh, with a spring skeleton that prevents self-intersections. The composite, chronomorphologic model (of the virtual creature over time) retains these printable properties at each time-step. Therefore, no matter how intricate or complex, the digital geometry will always be exported as a valid, 3D printable mesh.

I was really impressed by CMU Architecture student Madeline Gannon and her investigations in the combination of Kinect-based body-scanning. The field of creative coding in architecture is new to me.

The necklace depicted in the first photo is actually a 3D squid pulled across space and time. It is one repeated form merged into a beautiful sculpture. I love the combination of natural (but not random) shape, and the intricate geometry ruled by parametrics. The squid changes shape as it’s being pulled, ruled by simulation physics. There is so much going on behind the scenes in this complex necklace.

The 3D model is then exported for 3D printing. These are one of the projects that are perfect examples of the intersection between digital design and physical fabrication. I think this is an excellent use of the software Reverb. Reverb is context aware, and allowed Madeline to design these ready to print wearables. This new tech uses computer vision to record chronomorphology –  a composite recording of an object’s movement. In this case it records the 3D squid which has rigged limbs. It is constructed as a closed mesh, with a spring skeleton that prevents self-intersections.

See more details about Madeline’s work here.

Deluna-Looking Outwards-02

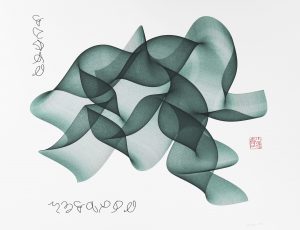
I had seen Roman Verostko’s work before and it has always been something that’s intrigued me. His works are obviously artificially made but the physicality of the actual work and the materials that they are made with create pieces that have a seemingly contradictory nature. By 1987, developed software that creates generative drawings. These artworks, which he has coined as algorist art, uses a step by step procedure to perform a specific task.
His software controls a machine arm called the pen plotter which creates his algorithmic drawings. He sees this arm as an extension of his own drawing arm. His earliest use of electronics in his art was in the sixties with his experimentation with audio visual programs.

http://dam.org/artists/phase-one/roman-verostko

Project 02- Variable Faces, Blowing bubbles

sketch

/* Samantha Ho
Section E 
sch1@andrew.cmu.edu
Project-02*/

var eyeSize = 20;
var faceW = 100;
var faceH = 150;
var textPlacement =100;
var textPlace =150;
var posx = 400;
var posy =200;
var mouthx = 320;
var mouthy = 276;
var mouthw = 100;
var mouthh = 150;
var mouthoutw = 100;
var mouthouth = 150;
var bubbax = 400;
var bubbay =200;
var bubbbx = 400;
var bubbby =200;

function setup(){
    createCanvas(640, 480);

}

function draw() {
    background(230,230,230);
    //face fill
    fill(230,240,250);
    noStroke();
    ellipse(width / 2.1, height / 2.4, faceW+100,  faceH+60);   
    //face
    strokeWeight(1);
    stroke(60,60,60);
    noFill();
    ellipse(width / 2, height / 2.4, faceW+100,  faceH+60);   
    //mouth
    noStroke();
    fill(200,0,0);
    ellipse(mouthx,mouthy, mouthw/1.6,  mouthh/26);  
    
    noFill();
    stroke(20,20,20);
    ellipse(mouthx,mouthy, mouthoutw/1.6,  mouthouth/26);  
    
    fill(200,0,0);
    noStroke();
    var eyeLX = width / 2 - faceW * 0.45;
    var eyeRX = width / 2 + faceW * 0.45;
    ellipse(eyeLX, height/2, eyeSize, eyeSize);
    ellipse(eyeRX, height/2, eyeSize, eyeSize);
    
    //bubble
    strokeWeight(5);
    stroke(216,216,216);
    fill(250,250,250);
    ellipse(posx+16,posy+76, faceW/2,  faceH/3);
    noStroke();
    fill(230,230,230);
    ellipse(posx+13, posy+80, faceW/2.5,  faceH/3.5);
    stroke(20,20,20);
    strokeWeight(1);
    noFill();
    ellipse(posx+18, posy+80, faceW/1.8,  faceH/2.6);
    
    //bubblea
    stroke(20,20,20);
    strokeWeight(1);
    noFill();
    ellipse(bubbax+18, bubbay+80, faceW/8,  faceH/10);
    //bubbleb
    stroke(20,20,20);
    strokeWeight(1);
    noFill();
    ellipse(bubbbx+18, bubbby+80, faceW/8,  faceH/9);
    
    //bubblewand
    strokeWeight(6);
    stroke(200,0,0);
    noFill();
    ellipse(420, 280, faceW/3.6,  faceH/4);
    rect(420, 301, faceW/70,  faceH/4);
    
    //text try
    noStroke();
    fill(216,216,216);
    textSize(50);
    textFont('Helvetica');
    text('bubbles', textPlacement,100);
    textPlacement = textPlacement +2;
    if(textPlacement>640){
       textPlacement = -350    };
    
    fill(219,216,216);
    textSize(50);
    textFont('Helvetica');
    text('bubbbbles', textPlace,100);
    textPlace = textPlace +6;
    if(textPlace>640){
        textPlace = -350    };
    angleMode(DEGREES);

}

function mousePressed() {
    mouthx= random(320,360);
    mouthw= random(100,40);
    mouthh= random(150,300);
    mouthoutw= random(90,50);
    mouthouth= random(140,400);
    posx = random(400,460);
    posy = random(220,40);
    bubbax = random(400,480);
    bubbay = random(220, 140);
    bubbbx = random(410,500);
    bubbby = random(230, 130);
}

I enjoyed playing around with the variables and I’m excited by the idea of computational animation. I played around with words and strokes, but couldn’t quite nail down how to do opacities on js. On the p5-js references page, the closest thing I could find was blendMode. That being said, I’m looking forward to exploring this further.

Judy Li-Project-03-Dynamic-Drawing

judyli:Face Project 03

/*
Judy Li
Section A
judyli@andrew.cmu.edu
Project-03
*/

var angle = 0;
var x = 1;

function setup() {
    createCanvas(640, 480);
    x = random(1,5);
}

function draw() {
    background(0,0,0);
    //otherobjects
    fill(255,255,102);
    noStroke();
    var m = max(min(mouseX, 640), 0);
    var size = m * 200.0 / 640.0;
    //foreground
    if (mouseX < width/2) {
        background(153,204,255);
        ellipse(175, 200.0, 200, 200);
    }
    else background(0,76,153);
    fill(224,224,200);
    ellipse(350 + m * 120.0/640.0, 200.0, size, size);
    if (mouseX < width/2) {
        noFill();
    }
    else fill (255,255,155);
    push();
    translate(100, 50);
    scale(x/.5);
    rotate(radians(angle));
    triangle(10, 7.5, 2.5, 20, 17.5, 20);
    triangle(10, 25, 2.5, 12.5, 17.5, 12.5);
    pop();
    push();
    translate(250, 100);
    scale(x/2);
    rotate(radians(angle));
    triangle(10, 7.5, 2.5, 20, 17.5, 20);
    triangle(10, 25, 2.5, 12.5, 17.5, 12.5);
    pop();
    push();
    translate(400, 150);
    scale(x);
    rotate(radians(angle));
    triangle(10, 7.5, 2.5, 20, 17.5, 20);
    triangle(10, 25, 2.5, 12.5, 17.5, 12.5);
    pop();
    push();
    translate(550, 200);
    scale(x/3);
    rotate(radians(angle));
    triangle(10, 7.5, 2.5, 20, 17.5, 20);
    triangle(10, 25, 2.5, 12.5, 17.5, 12.5);
    pop();
    push();
    translate(100, 150);
    scale(x/1.5);
    rotate(radians(angle));
    triangle(10, 7.5, 2.5, 20, 17.5, 20);
    triangle(10, 25, 2.5, 12.5, 17.5, 12.5);
    pop();
    push();
    translate(250, 200);
    scale(x/.5);
    rotate(radians(angle));
    triangle(10, 7.5, 2.5, 20, 17.5, 20);
    triangle(10, 25, 2.5, 12.5, 17.5, 12.5);
    pop();
    push();
    translate(400, 250);
    scale(x/2);
    rotate(radians(angle));
    triangle(10, 7.5, 2.5, 20, 17.5, 20);
    triangle(10, 25, 2.5, 12.5, 17.5, 12.5);
    pop();
    push();
    translate(550, 300);
    scale(x);
    rotate(radians(angle));
    triangle(10, 7.5, 2.5, 20, 17.5, 20);
    triangle(10, 25, 2.5, 12.5, 17.5, 12.5);
    pop();
    push();
    translate(100, 250);
    scale(x/3);
    rotate(radians(angle));
    triangle(10, 7.5, 2.5, 20, 17.5, 20);
    triangle(10, 25, 2.5, 12.5, 17.5, 12.5);
    pop();
    push();
    translate(250, 300);
    scale(x/1.5);
    rotate(radians(angle));
    triangle(10, 7.5, 2.5, 20, 17.5, 20);
    triangle(10, 25, 2.5, 12.5, 17.5, 12.5);
    pop();
    push();
    translate(400, 350);
    scale(x/.5);
    rotate(radians(angle));
    triangle(10, 7.5, 2.5, 20, 17.5, 20);
    triangle(10, 25, 2.5, 12.5, 17.5, 12.5);
    pop();
    push();
    translate(550, 400);
    scale(x/2.5);
    rotate(radians(angle));
    triangle(10, 7.5, 2.5, 20, 17.5, 20);
    triangle(10, 25, 2.5, 12.5, 17.5, 12.5);
    pop();
    angle = angle + 5;
}

I didn’t know where to begin with this project because there’s so much you can do. I liked the idea of day transitioning into night. So, I played with background and the foreground to create this. I wanted it to be a bit more playful and when you refresh the page, the sizes of the stars change with it!

Looking Outwards – 03

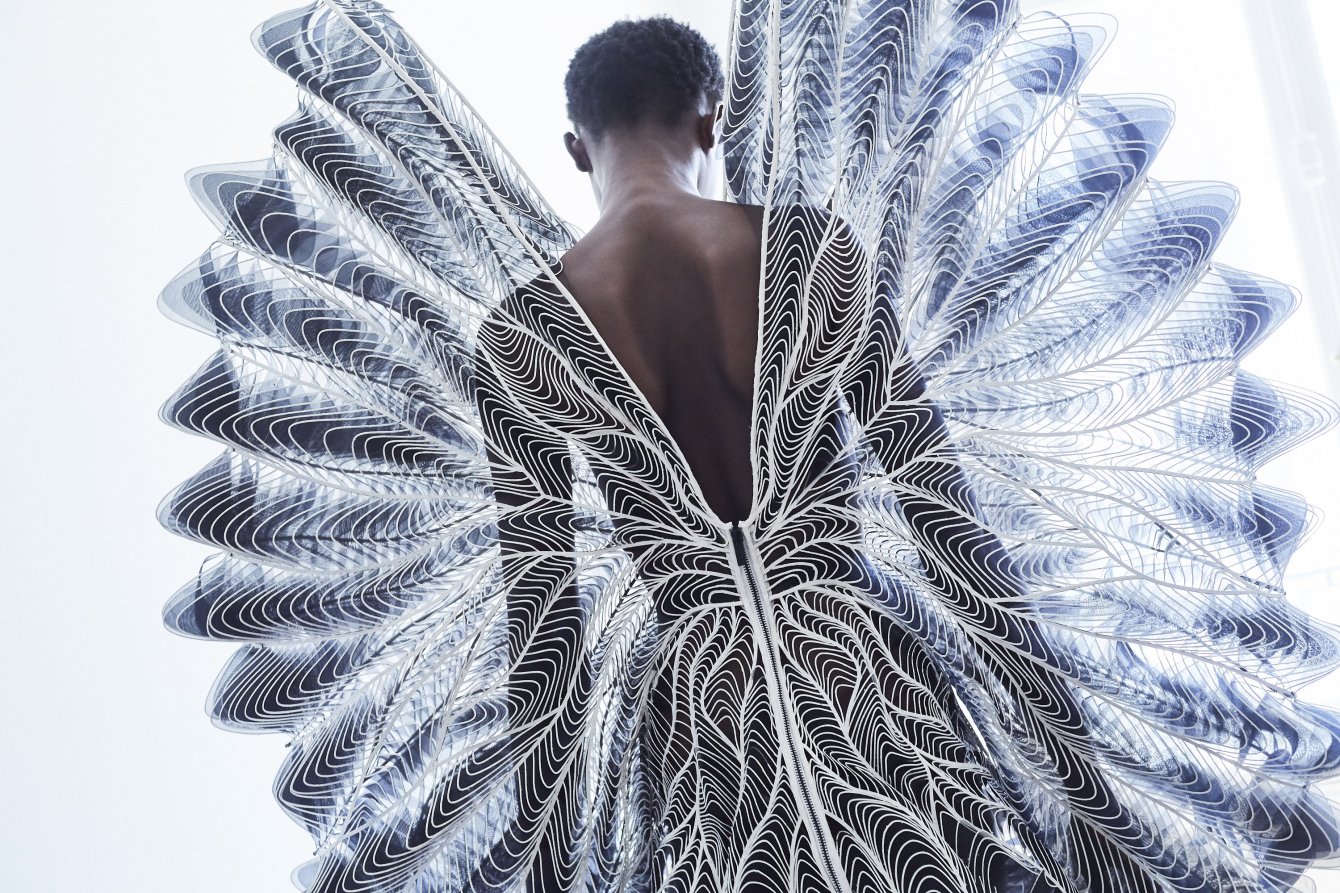
Syntopia | Behind the scenes | Iris van Herpen | Photo by Molly SJ Lowe.

Syntopia is a collection by Iris van Herpen that was inspired by the organic and inorganic, in which biology comes together with technology. She collaborated with other artists from Studio Drift to create life-like immersive sculptures through the use of movement. I believe that she was inspired to slow down time through chronophotography to capture the different layers. This new perspective helped change her style of work because she found a unique way of the usual draping of garments. She studied bird flight and avian motion carefully to get to her final results. Using the bird’s sound wave patterns, she was able to use a layering of acrylic and silk to mimic the architecture of a feather, and you can visually see that from the photo above.  I was really fascinated by her collections and the processes she and others go through to achieve their end results.

Syntopia – Behind the scenes
Couture of Syntopia – About the collection

AudreyZheng-Project02

sketch

/*
Audrey Zheng
Section A
audreyz@andrew.cmu.edu
Assignment-01
*/


var hair_length = 240;
var face_length = 193;
var hair_color = 72;
var eye_pupil = 18;
var cheek = 17;

function setup() {
    createCanvas(468, 584);
}

function draw() {


	background(220);

	//hair
	noStroke();
	fill(hair_color,15,15);
	rect(121,108,215,hair_length,100,100,20,20);


	//body
	noStroke();
	fill(200);
	rect(128,340,206,161, 50);

	//neck
	fill(221,169,112);
	rect(206,305,50,69,20);
	fill(250,194,133);
	rect(218,325,38,49,20);

	//ear
	fill(250,194,133);
	ellipseMode(CORNER);
	ellipse(130,220,38,47);
	ellipse(292,220,38,47);


	//earshadows
	fill(231,165,93);
	ellipse(138,228,27,33);
	ellipse(295,227,27,33);


	//face
	fill(250,194,133);
	rect(149,132,162,face_length,100);

	//bangs
	fill(hair_color,15,15);
	//arc(x, y, w, h, start, stop, [mode])
	arc(185, 120, 150, 80, 0, PI + QUARTER_PI + QUARTER_PI, OPEN);
	arc(98, 55, 100, 150, 0, HALF_PI + QUARTER_PI - 0.5,OPEN); //it goes counter clock-wise

	//eyes
	fill(255);
	rect(172,229,31,23,12);
	rect(254,229,31,23,12);
	fill(0);
	ellipse(179,229,18,eye_pupil);
	ellipse(260,229,18,eye_pupil);

	//nose
	fill(231,165,93);
	triangle(230, 251, 224, 270, 236, 270);

	//eyeliner
	noFill();
	stroke(90, 60, 50);
	strokeWeight(6);
	arc(170, 230, 40, 10, 3.24, 6, OPEN);
	arc(250, 230, 40, 10, 3.33, 6.1, OPEN);

	//cheeks
	noStroke();
	fill(255,172,172);
	rect(160,270,25,cheek,8);
	rect(277,270,25,cheek,8);

	//eyebrows
	stroke(hair_color,15,15);

	strokeWeight(12.0);
	strokeCap(ROUND);
	line(171, 206, 201, 201);
	line(260.5,202.5,291.45,207.81);

	//mouth

	 p2 = { x: 253, y: 254 };
	var p3 = { x: 253, y: 291 },
	 p4 = { x: 215, y: 295 };
	noFill();

	stroke(117,94,94);
	strokeWeight(4.0);
	curve(p2.x, p2.y, p3.x, p3.y, p4.x, p4.y, p4.x, p4.y);
}

function mousePressed() {
    // when the user clicks, these variables are reassigned
    // to random values within specified ranges. For example,
    // 'faceWidth' gets a random value between 75 and 150.
    hair_length = random(200, 300);
    face_length = random(190, 210);
    hair_color = random(40,120);
    eye_pupil = random(17,22);
    cheek = random(15,17);

    //eyeSize = random(10, 30);
}

//{ } are braces
// [] are brackets.

/* lol you can do this for comment too */

Miranda Luong- Looking Outwards-02

Bubbles Scanner 2 is a visual created by Dan Schiffman, the man behind Coding Train, a web series on Youtube. Using Processing, he created a loop in which stacks of “bubbles” are generated on top of each other. Each bubble is a different color with subtle transparency. I admire the fluidity of his visual; there is something very calming and melodic to it. This is most likely due to his pacing of the stacking which is slow and somewhat graceful. The positioning of the bubbles slightly change in horizontal position every time they are added creating mimicking natural motion, but never to the point that the stack looks like it should tilt over. From what I can guess, his code is continuously generating bubbles that draw on top of each other, with their vertical positions slightly increasing so that the bubbles look like there stacking. The artist’s intentionality is well received, which is what I most admire about his code, because although it is very simple, viewers understand the accuracy and detailed attention required to create such a graceful generative art.

Jason Zhu-Looking Outwards-02

Cinemagraphs: When Face Tracking Meets Animated GIFs

View post on imgur.com

View post on imgur.com

Created by Dr. Drew Woohoo. Titled CinemaGraph.Published March 11th, 2016.

CinemaGraph is an algorithm that generates animations around a selfie (picture of the face). I think it is really cool, especially given its relevance in today’s world. In fact, it similarly resembles tools like Snapchat and Instagram in the way it operates. I like to imagine it as a primitive version of the technology being employed, but admirable nonetheless given its context to what we’re learning in class now at an even more primal level.

From what I understand, the algorithm employs facial tracking algorithms that are able to pin certain defining features of any face inputted in order to overlay and appropriately warp certain elements on top of it accurately. I think the creators artistic abilities or sensibilities manifest in the algorithm through the overlays that are involved. Whether that be the ‘hipster’ overlay or the ‘portrait overlay’. Creating these overlays is just as tedious of a task as creating the algorithm that allows for such an overlay to naturally occur.

Jason Zhu-Project-02-Variable-Face

sketch

var eyeSize = 45;
var pupilSize = 15;
var faceWidth = 150;
var faceHeight = 150;
var mouthWidth = 10;
var mouthHeight = 10;
var skinColor = 250;
var hairColor = 142;
var hairHeight = 50;
var hairWidth = 50;
var bodyColor = 100;
var bodyAdjustor = 2.5
function setup() {
    createCanvas(300, 300);
}
 
function draw() {
    background(220,220,240);
    strokeWeight(0);
    //body
    var bodyPosition = width / 2 + bodyAdjustor
    fill(bodyColor, 150, 100);
    ellipse(bodyPosition, (height / 2) * 1.75, 200, 200);
    //Hair
    fill(hairColor, 150, 200);
    ellipse(width / 2, height / 3, faceWidth + 48, faceHeight + 22)
    //Face
    fill(skinColor, 220, 182);
    ellipse(width / 2, height / 2, faceWidth,  faceHeight);
    //Eyes
    fill(255);
    var eyeLX = (width / 2) * 1.09 - faceWidth * 0.25;
    var eyeRX = (width / 2) * .91 + faceWidth * 0.25;
    ellipse(eyeLX, height / 2, eyeSize, eyeSize);
    ellipse(eyeRX, height / 2, eyeSize, eyeSize);
    //Pupils
    fill(0);
    var PupilLX = (width / 2) * 1.09 - faceWidth * 0.25;
    var PupilRX = (width / 2) * .91 + faceWidth * 0.25;
    ellipse(PupilRX, height / 2, pupilSize, pupilSize);
    ellipse(PupilLX, height / 2, pupilSize, pupilSize);
    //Mouth
    fill(0);
    arc(width / 2, height / 1.5, mouthWidth, mouthHeight, TWO_PI, PI, OPEN);


}
 
function mousePressed() {
    // when the user clicks, these variables are reassigned
    // to random values within specified ranges. For example,
    // 'faceWidth' gets a random value between 75 and 150.
    eyeSize = random(35, 45);
    pupilSize = random(5, 15);
    mouthWidth = faceWidth / random(3, 10);
    mouthHeight = faceHeight / random(3, 10);
    skinColor = random(225, 255);
    hairColor = random(50, 220)
    bodyColor = random (0, 255)
    bodyAdjustor = random(-30, 30)
}

I found this assignment to be tremendously insightful as well as informative. I learned a lot about various principles such as the usage of variables as well as the randomization factor. Overall, this was an enjoyable and good assignment.