Mimi Jiao – Project 9 – Section E

try clicking me!

/* Mimi Jiao
wjiao@andrew.cmu.edu
Section E
Project-09
*/

var underlyingImage;
var clickCount;    
var string = "0";

function preload() {
    //preloading image into code 
    var myImageURL = "https://i.imgur.com/kkJQot1.jpg";
    underlyingImage = loadImage(myImageURL);
}

function setup() {
    //setting size of canvas to image size 
    createCanvas(underlyingImage.width, underlyingImage.height);
    background(0);
    underlyingImage.loadPixels();
    frameRate(300);
}

function draw() {
    strokeWeight(1);
    //finding color and location of the image
    var px = random(width);
    var py = random(height);
    var ix = constrain(floor(px), 0, width-1);
    var iy = constrain(floor(py), 0, height-1);
    var theColorAtLocationXY = underlyingImage.get(ix, iy);
    noFill();
    stroke(1);
    //setting up font size and type
    textSize(10);
    textFont('Courier New')
    stroke(theColorAtLocationXY);
    text("m i mi", px, py);
}

function mousePressed() {
    //if mouse is pressed, add these elements to the canvas
    textSize(20);
    //randomizes click count so that if it lands on a 
    //certain value, then something different will display
    clickCount = int(random(20));
    if (clickCount % 5 === 0) {
        strokeWeight(2);
        stroke(0, 255, 0);
        fill(255, 0, 0)
        string = "1";
    }else if (clickCount === 17) {
        strokeWeight(3);
        stroke(0, 0, 255);
        string = "error";
    }else {
        string = "0";
    }
    fill(255, 0, 0);
    text(string, mouseX, mouseY);
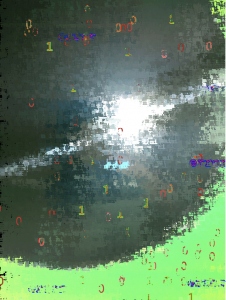
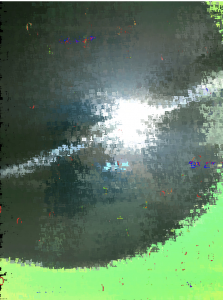
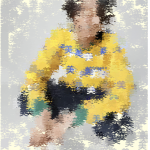
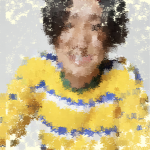
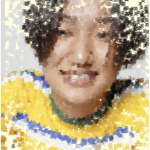
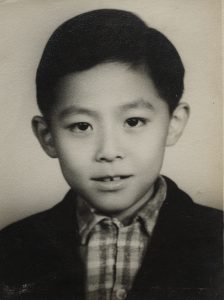
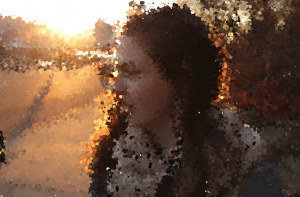
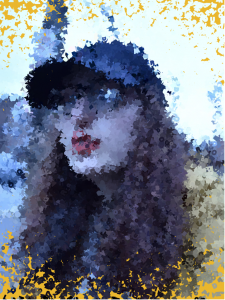
}

For this project, I was inspired by binary numbers and the primitive visuals of computer errors and coding. I used a picture I took of myself during the summer in a bathroom, adjusted the colors and made parts of it neon green to fit the aesthetic a bit more, and used my name, “mimi” to generate the image.
Here is the original image:

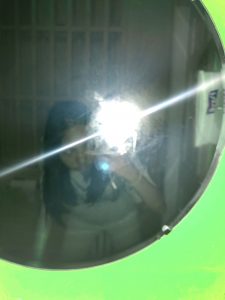
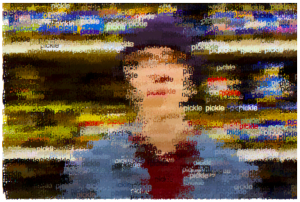
Here is the generated image:

Alice Fang – Project 9

after one image is formed, click for another!

/*
Alice Fang
Section E
acfang@andrew.cmu.edu
Project-09
*/

var friend = []; // picture of friend!
var state = 0; // indicates which picture

function preload() {
	var imgURL = [];
	imgURL[0] = "https://i.imgur.com/62FXNHg.jpg"; // full body
  	imgURL[1] = "https://i.imgur.com/ieqrCP3.jpg"; // torso
  	imgURL[2] = "https://i.imgur.com/e4nON6h.jpg"; // portrait

  	for (var i = 0; i < imgURL.length; i++) {
  		friend[i] = loadImage(imgURL[i]);
  	}
}

function setup() {
  createCanvas(270, 400);
  background('lightyellow');
  imageMode(CENTER);
  noStroke();
  friend[state].loadPixels();
}

function draw() {
	// select pixels from center of canvas outwards
	var pX = randomGaussian(width / 2, 75);
	var pY = randomGaussian(height / 2, 75);
	
	// constrain to canvas
	var cX = constrain(floor(pX), 0, width - 1);
	var cY = constrain(floor(pY), 0, height - 1);

	// get color from pixel
	var col = friend[state].get(cX, cY);

	fill(col); 
	textSize(16 - (state * 4));
	text("美", cX, cY);
}

function mousePressed() { // change image
	background('lightyellow'); // 'refresh' canvas
	state = state + 1;
	if (state > 2) state = 0;
}

This is a picture of my friend Meijie that I took for a photo class last semester! Originally, the shape I used for the color was an ellipse, and I spent a lot of time playing around with image ‘resolution’ compared to the underlying image. When I changed it to the character 美, which is ‘beauty’ in Chinese, and also part of her name, I didn’t like how large the character was and the lack of detail it created in the image. Because of that, I explored with changing the image from a full body shot, to a torso shot, to a closer crop of her face; I couldn’t decide which one I liked better so I decided to use all three! As the image zooms in, the resolution becomes sharper!

my friend!

Rachel Lee Project 09 Section E

sketch

/* Rachel Lee
Section E
rwlee@gmail.com
Project 09: Custom Pixel*/

var pic;

// preloads image
function preload() {
    pic = loadImage("https://i.imgur.com/iuFu4yy.jpg"); 
}

function setup() {
    createCanvas(358, 480);
    pic.loadPixels();
    background(255);
    imageMode(CENTER);
    frameRate(100);
}

function draw() {
	// randomizes position of pixel appearance 
    var x = constrain(floor(random(width)), 0, width - 1);
    var y = constrain(floor(random(height)), 0, height - 1);
    // randomizes arc width and height
    var w = random(5, 30);
    var h = random(5, 30);

    noStroke();
    // picks colors from pixel position 
    var picCol = pic.get(x, y);
    fill(picCol);
    // draws arcs as 'custom pixel'
    arc(x, y, w, h, HALF_PI, PI);
}

I decided to create a custom pixel portrait of my dad for his birthday this weekend. Due to its personal significance, I found this project to be super fun and rewarding, and hope he enjoys the project! I will be doing more of these in the future to try out different options.

Original photo
Custom pixel portrait stills
Close to near final stage

Eliza Pratt – Looking Outwards 09

“Norman,” a 3D drawing tool made by James Paterson, 2017

This week, my interest was piqued by Dani’s Looking Outwards 08. Her post details the work of James Paterson, an animator and software developer who uses javascript and VR technology to create computational art. For Paterson’s project Norman, as seen in the video above, he uses Javascript to create a tool that allows the user to draw in 3D space.  While learning about this artist, I found Dani’s analysis to be very informative in describing his creative process. Moreover, I agree with her remark that creating software such as this makes an intangible artistic concept more accessible to the public. One of the most beautiful aspects of this project is that Paterson has posted the source code for this drawing tool online so he can share this creative experience with others.

Dani Delgado Project-09

Click to increase frameRate!

sketch

/* Dani Delgado
Section E
ddelgad1@andrew.cmu.edu
Project-09
*/

//global variable for calling image
var sunset;
//global variables for adjusting the frame rate and size of the rects
var pixNo = 0;
var fr = 15;

function preload() {
	//load the underlaying image into the canvas
    var picture = "https://i.imgur.com/BBnFAII.jpg";
    sunset = loadImage(picture);
}

function setup() {
	//set the overall canvas settings
    createCanvas(480, 320);
    background(250, 240, 230);
    frameRate(fr);

    //draw the underlaying image
    sunset.loadPixels();    
}

function draw() {
    //first set variables to draw the rects at random locations
    var rx = random(width);
    var ry = random(height);
    //constrain these rectangles to the canvas
    var pixx = constrain(floor(rx), 0, width - 1);
    var pixy = constrain(floor(ry), 0, height - 1);
    //create this variable to call the colors from the underlaying image
    var colPix = sunset.get(pixx, pixy);
    //create the variables for size and roundness adjustments
    var size;
    var round;
    //create the variable that sets the objects at diff angles
    var pixAng = random(radians(360));

    //these if statements change the size and roundness of the rects based on quantity 
    if (pixNo < 600) {
        size = 20;
        round = 1;
    } else if (pixNo < 1200) {
       	size = 16;
       	round = 2;
    }else if (pixNo < 1800) {
    	size = 12; 
    	round = 4;
    } else if (pixNo < 2400) {
    	size = 8;
    	round = 6; 
    } else {
    	size = 5;
    	round = 5;
    }

    pixNo ++; 
    
    //set rect color and stroke
    noStroke();
    fill(colPix);

    //draw the rects
    push(); 
    translate(rx, ry);
    rotate(pixAng); 
    rect(0, 0, size, size, round);
    pop();
}

function mousePressed() {
	//this function will increase frame rate whenever mouse is pressed
	fr += 10;
	fr = constrain(fr, 15, 125);
	frameRate(fr);
}


For this project, I decided to use a picture I took of my friend Margot last year! I enjoyed the project, despite struggling with it at first (my colors were all messed up and flashing for a while). I played around with a few ideas, including using different shapes and having the pixels be denser in certain areas, but I ultimately decided on making it a quantity based portrait where the more “pixels” appear, the smaller and rounder they get (however, this was done in a step-down sort of way rather than a smooth way). I also added the “click to increase frameRate” feature because of how impatient I was to see the final product appear and I figured other people would get impatient too.

Original picture
Final computed portrait


Carley Johnson Portrait

sketch

/*Carley Johnson
Section E
cbjohnso@andrew.cmu.edu
Project 9
*/

var img;

function preload() {
    img = loadImage("https://i.imgur.com/evcbg0y.jpg");
}

function setup() {
  createCanvas(400, 580);
  imageMode(CENTER);
  noStroke();
  background(18, 121, 80);
  img.loadPixels();
 
}

function draw() {
  //change angle of the stroke
  var angle = random(360);
  var x = floor(random(img.width));
  var y = floor(random(img.height));
  var pix = img.get(x, y);
  
  //make "paint stroke"
  //push();
  //rotate(radians(angle));
  fill(pix, 128);
  rect(x, y, 30, 10, 10, 10, 0, 10);
  //pop();


}

This is my mother. I chose this picture for the smile, which is so fun and genuine. I actually really like this project, I missed them from last week. I feel like I learn more from the projects because I have more room to experiment and mess around with code from scratch, as opposed to the set, set of ways I can solve an assignment. I suppose that’s a very artist thing of me to say, though.

This is the original photo, isn’t she cute?!

Yingying Yan – Looking Outwards 09

This week I looked over Romi Jin’s looking outwards 5. She is my mentor from architecture, so I thought I could learn from her. Her looking outwards was about occluder simplification. The reason why she chose this is probably that the occluder simplification used bunny as an example, and she loves bunny.

Example showing the abstraction
Shown by the picture above, the bunny changed from a normal bunny to a distorted one. This is because the algorithm takes in very few inputs and simplifies the geometry in an abstract way. As Romi mentioned, this can be very useful when applying to larger and more complex shapes. This algorithm produced a unique and interesting graphic compare to the original. Yet, I think it needs to be developed more because it could be more visually appealing.

Jenna Kim(Jeeyoon Kim)- Looking Outwards- 09

Installation piece in Senyai
Sound Vector Drawing

Peer Review Here!

This week’s Looking Outwards post is a review of Howard’s Looking Outwards post from Week 3. I came across this Looking Outwards because I was so familiar with the architectural installation picture; I have seen it in real life. EPIPTHYTE lab, created by Cupkova and Craig, is an installation piece rests in Senyai restaurant. The cited project amazes me because although it looks like a simple, patterned installation, there is so much meaning and thought into it. The project is combined of 275 different slats pieced together perfectly to control the lighting and the acoustic levels of the restaurant as a whole. The software created the form of each piece and it was finally produced with laser cutter. I agree with the part about vault rising and falling perfectly to demonstrate the sensitivity of the wave like form. As a design student who had visited Senyai before, I want to add that this installation brings the audience a whole new experience; the installation immerses the audience into the space because of its meticulous form and pure white color.

Link to Original Work

Eliza Pratt – Project 09

sketch

/*
Eliza Pratt
Section E
elpratt@andrew.cmu.edu
Project - 09
*/

var pic;
var dev = 50; //starting deviation for coordinate positon

//array of letters to be drawn
var letter = ["A", "B", "C", "D", "E", "F", "G", "H", "I", 
                "J", "K", "L", "M", "N", "O", "P",  "Q", 
                "R", "S", "T", "U", "V", "W", "X", "Y", "Z"];

//loads image
function preload() {
    var friends = "https://i.imgur.com/7k2A67W.jpg";
    pic = loadImage(friends);
}

function setup() {
    createCanvas(360, 480);
    background(235, 184, 16);
    imageMode(CENTER);
    pic.loadPixels();

}

function draw() {

    //selects a random size
    var r = random(6, 10);

    //selects a random angle 
    var angle = random(360);

    //incrementally increases the deviation of coordinates 
    //after a certain number of frames
    if (frameCount > 600) dev = 100;
    else if (frameCount > 1000) dev = 240;

    //randomly assigns position
    var px = randomGaussian(width / 2, dev);
    var py = randomGaussian(height / 2, dev);

    //contrains random values to the canvas
    var picX = constrain(floor(px), 0, width);
    var picY = constrain(floor(py), 0, height);

    //retrieves color from pixel at random coordinate
    var col = pic.get(picX, picY);


    strokeWeight(2);
    stroke(col);
    noFill();
    textSize(r);

    //retrieves a random index for the letter array
    var i = floor(random(25));

    //draws and rotates letter
    push();
    translate(px, py);
    rotate(radians(angle));
    text(letter[i], 0, 0);
    pop();

}


This project was a lot of fun, and I think really helped me understand more about coding with images! I spent a lot of time experimenting with different ways to project the image – vertical lines, spirals, etc. I decided on letters because I thought it would be cool to have a variety of complex shapes to compose a single image. This is an image of my friend Dani that I took last year.

Rendering:

Emily Zhou –– Portrait

click the pickle to begin.

var img;
var pickle;
var pickleX;
var pickleY;
var runDraw = false;

function preload() {
    img = loadImage("https://i.imgur.com/ZZ3qlai.jpg");
    pickle = loadImage("https://i.imgur.com/EHVwUGX.png");
}

function setup() {
    createCanvas(480, 320);
    imageMode(CENTER);
    strokeWeight(5);
    background(255);
    img.loadPixels();

    pickleX = width / 2;
    pickleY = height / 2;
    image(pickle, pickleX, pickleY);
}

function draw() {
    if (runDraw) {
        var x = floor(random(img.width));
        var y = floor(random(img.height));
        var col = img.get(x, y);
        fill(col, 128);
        text("pickle", x, y);
    }
}

function mousePressed() {
    if (dist(mouseX, mouseY, pickleX, pickleY) < 50) {
        background(255);
        runDraw = true;
    }
}

The original photo.
Pickle text rendering.

The original photo shows my friend Sebastian standing in front of the pickle shelf at Giant Eagle. I went off the pickle theme and implemented a pickle button to begin the rendering of the image in text “pickle”. Lot of pickles.