LO 06: Randomness

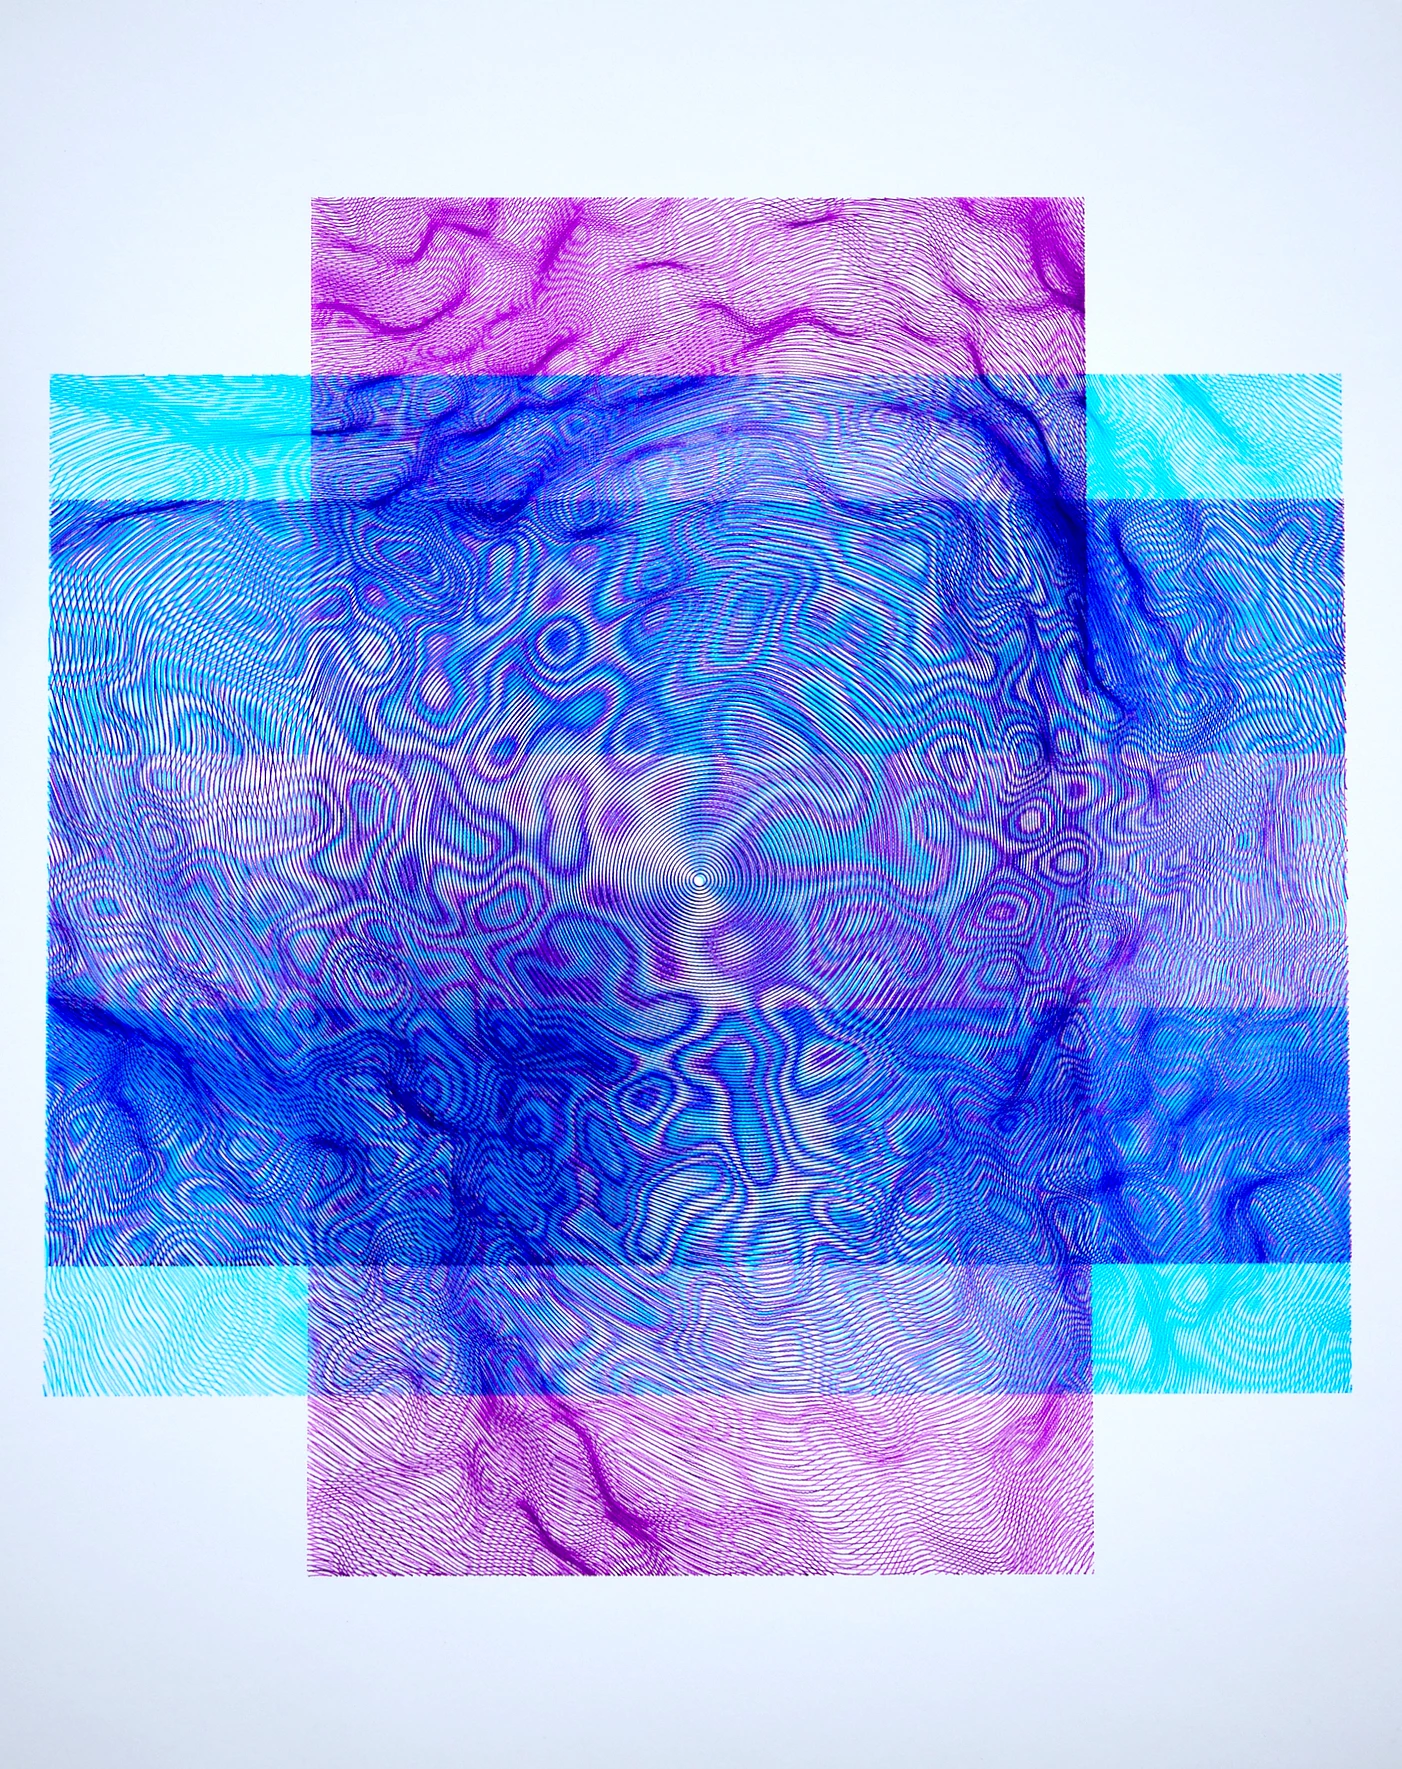
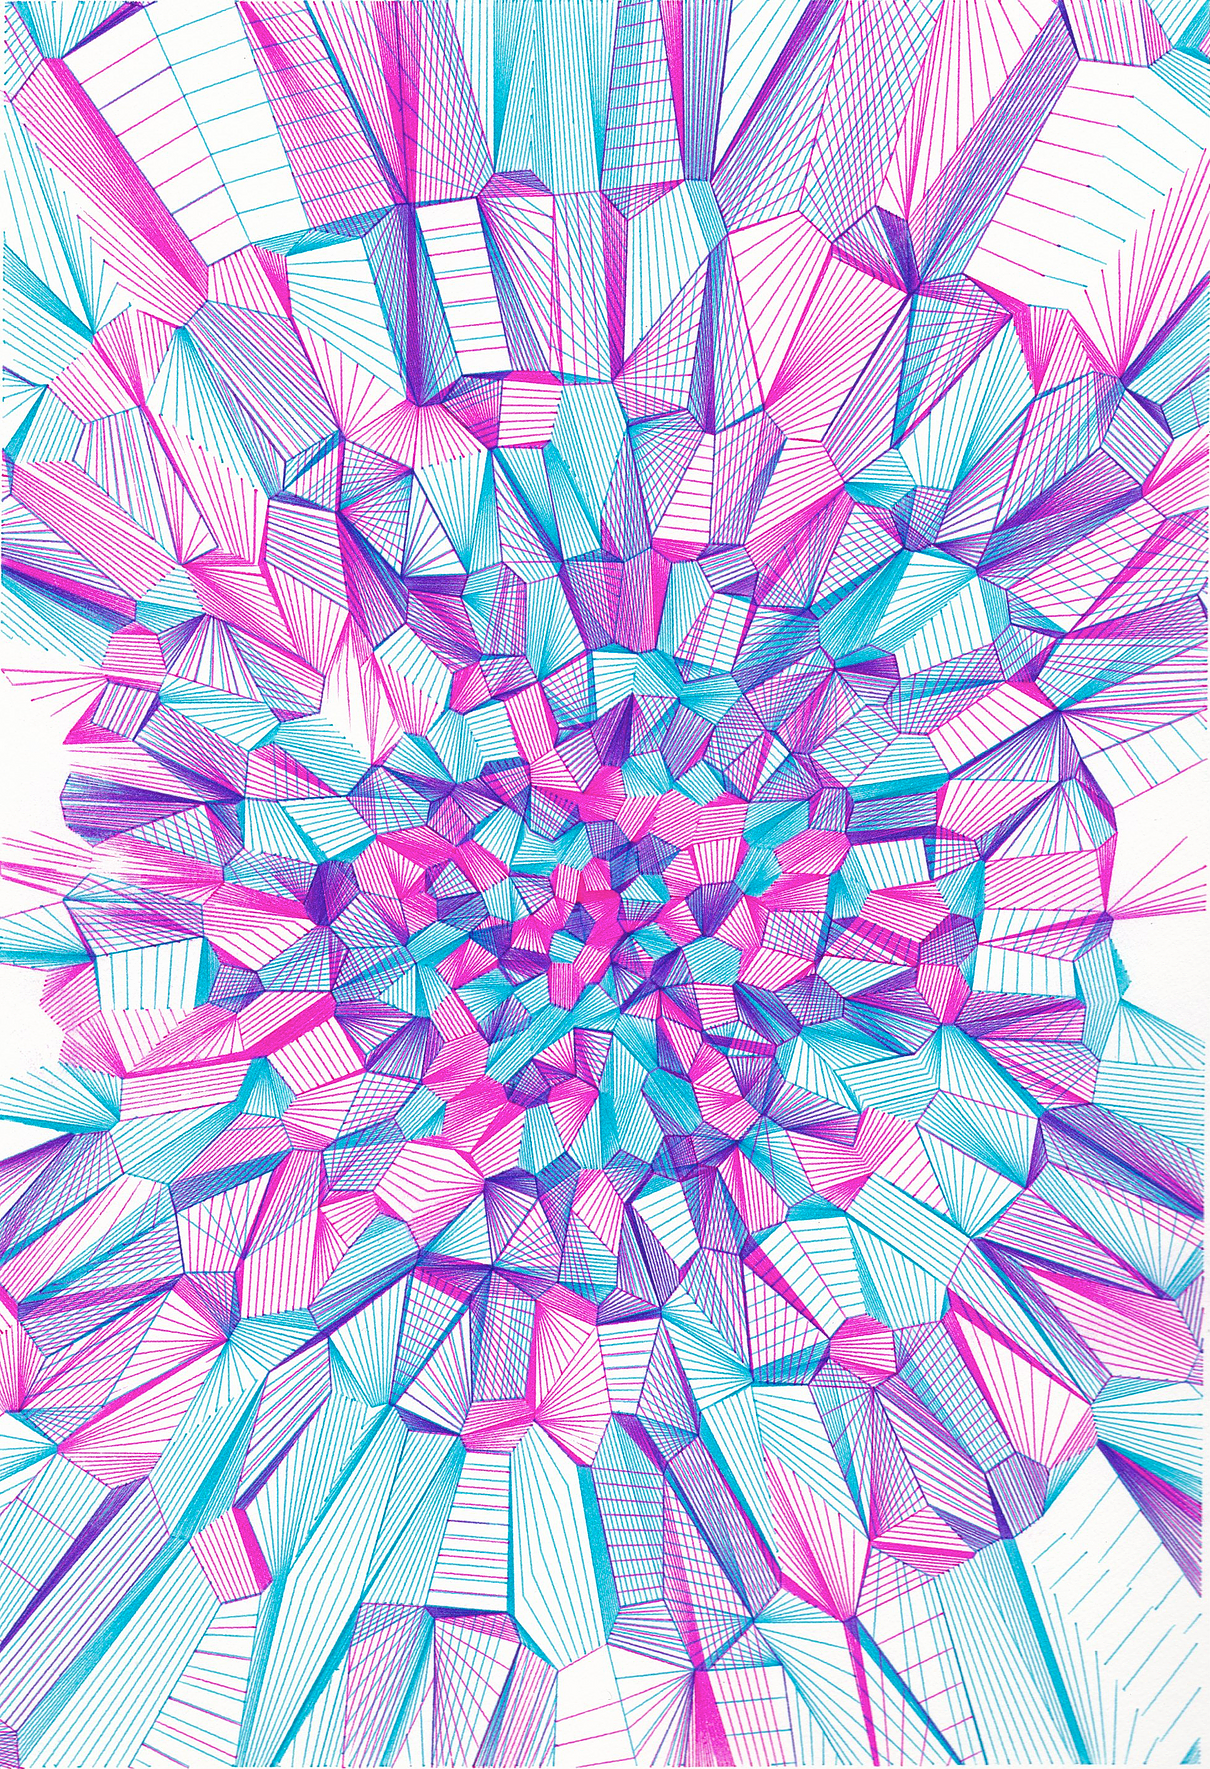
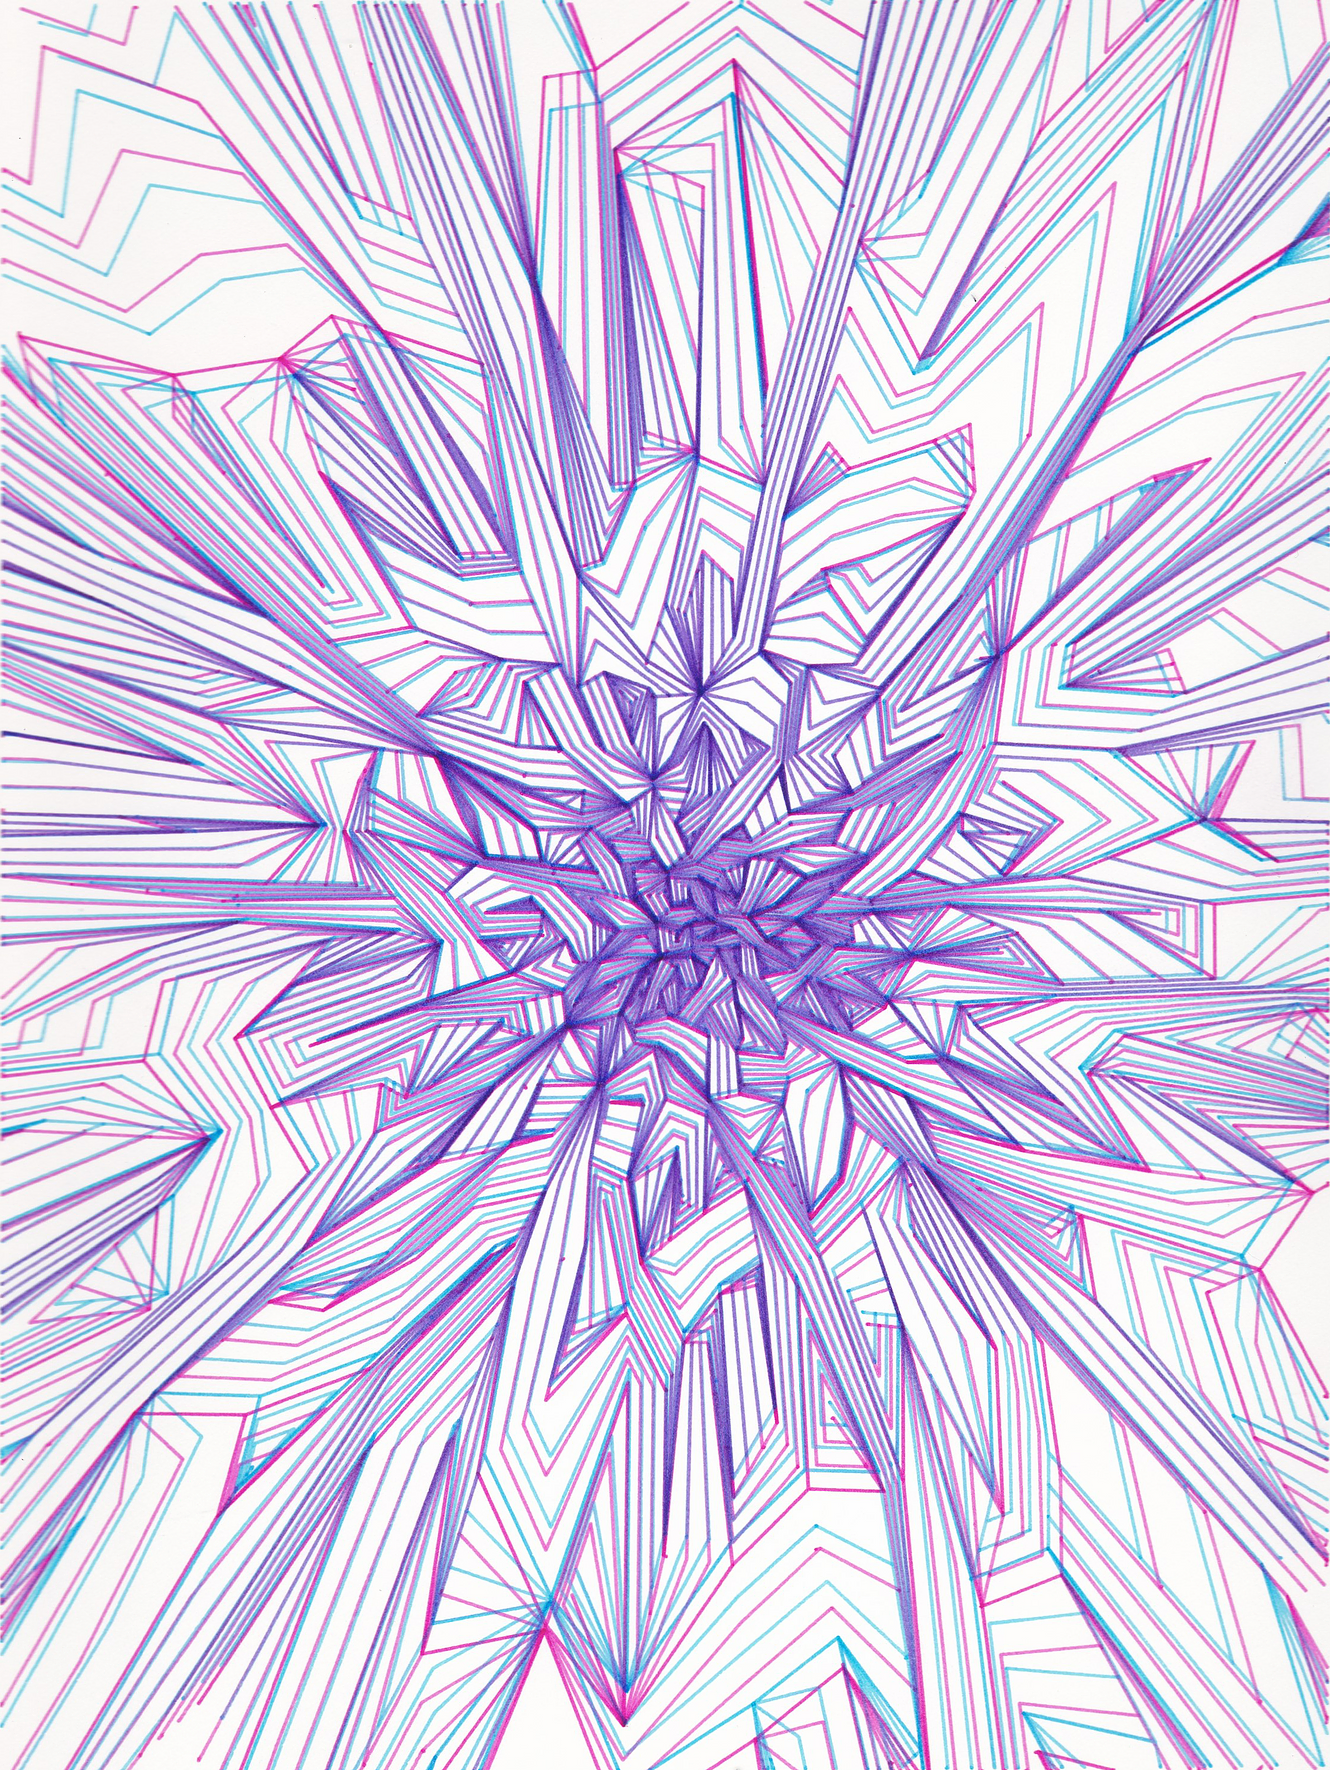
Geoffrey Bradway’s mesmerizing yet hallucinatory patterns are created with repeated overlays of dynamic lines using machine learning and artificial intelligence. Bradway generates powerful computational art that is beyond one’s imagination, specifically with a program called Python and a plotter called Axidraw V3 A3. When Bradway produces a collection of lines that structures using [A, B, C, D, …], the robot can merely translate this list of points into mechanical operations. For instance, a line [A, B, C] is rendered as “PENUP, GOTO(A), PENDOWN, GOTO(B), GOTO(C), PENUP.” I found his particular style of generating art really fascinating as he uses AI and robots to create beautiful, magnetic piece of art. I admire how he exploits the aspects of rapidness and accuracy in computers, and brilliant intelligence human beings have. Bradway’s artistic sensibility arises as he uses his intuition to direct his artworks the way he wants to shape it with multiple lines of codes.

Reference: https://www.chromatocosmos.com/pop-art

LO: 3D Computer Graphics

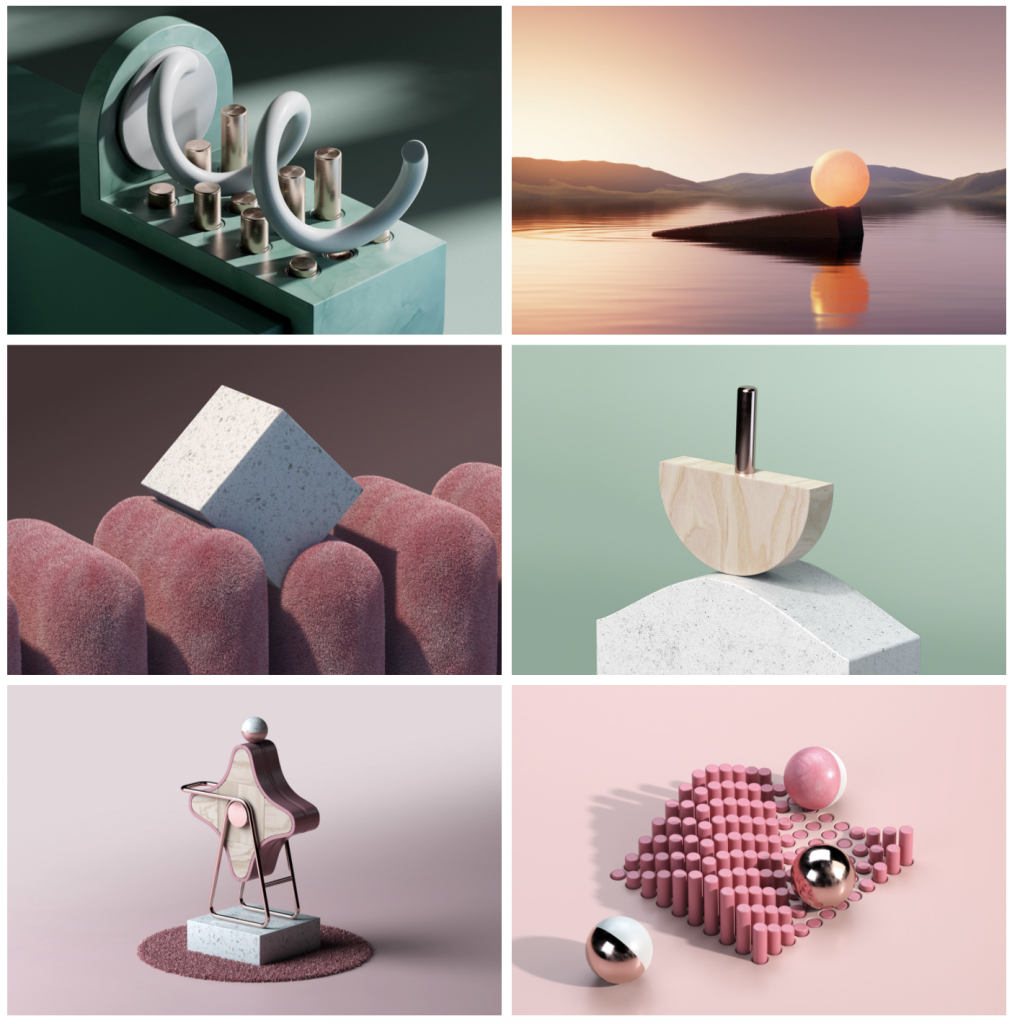
Andreas Wannerstedt’s 3-dimensional, motion-based works present such oddly satisfying feeling to audience.

Andreas Wannerstedt’s unique 3D sculptures show mesmerizing looping animations using playful and simple geometric shapes in balanced compositions. Along with motion, Wannerstedt applies organic textures as well as peaceful color palettes to display the various geometric shapes onto the 3D environment, creating a sense of “hypnotizing“ illusion. I found his synchronized animations with harmonizing tones really satisfying and relaxing to watch. I really admire how the behaviors of his animations differ from that of real world, defying gravity and friction. Such natural aspects of his motions entertains and aesthetically pleases the viewers with a touch of clean and tranquil feeling. Wannerstedt’s artistic sensibility surfaces. When he established his own, new atmosphere with the geometric shapes through motion and texture.   

Reference: https://andreaswannerstedt.se/

Project-05: Wallpaper

sketchDownload
//Yeon Lee, Section C
//Project 5: Wallpaper


function setup() {
    createCanvas(500, 500);
    background(220);
    backgroundColor = color(255,251,241);
    cloudColor = color(255, 145, 179); //pink
    cloud_2Color = color(111, 220, 191); //green
    balloonColor = color(255, 141, 102); //orange
    balloon_2Color = color(255, 218, 102); //yellow
    noLoop();
}

function draw() {
    background(backgroundColor);

    //clouds
    for (var a = -30; a < width; a += 150) {
        for (var b = 0; b < height; b += 200) {
            push();
            translate(a, b);
            cloud();
            pop();
        }
    }

    //clouds #2
    for (var c = 50; c < width; c += 150) {
        for (var d = 100; d < height; d += 200) {
            push();
            translate(c, d);
            cloud_2();
            pop();
        }
    }

    //balloon
    for (var e = -20;  e < width; e += 150) {
        for (var f = 50; f < height; f += 200) {
            push();
            translate(e, f);
            balloon();
            pop();
        }
    }

    //balloon #2
    for (var g = 55;  g < width; g += 150) {
        for (var h = 160; h < height; h += 200) {
            push();
            translate(g, h);
            balloon_2();
            pop();
        }
    }
}

function cloud() { //draw cloud 
    fill(cloudColor);
    noStroke();
    ellipse(30, 60, 15, 15);
    ellipse(40, 50, 20, 20);
    ellipse(60, 40, 30, 30);
    ellipse(80, 50, 20, 20);
    ellipse(90, 60, 15, 15);
    rect(30, 50.5, 58, 17);
}

function cloud_2() { //draw cloud again with different color
    fill(cloud_2Color);
    noStroke();
    ellipse(30, 60, 15, 15);
    ellipse(40, 50, 20, 20);
    ellipse(60, 40, 30, 30);
    ellipse(80, 50, 20, 20);
    ellipse(90, 60, 15, 15);
    rect(30, 50.5, 58, 17);
}

function balloon() { //draw balloon
    fill(balloonColor);
    noStroke();
    ellipse(50, 55, 45, 48);
    triangle(45, 84, 50, 50, 55, 84);
    fill(116,71,0);
    rect(50, 84, 1, 30);
}

function balloon_2() { //draw balloon with different color
    fill(balloon_2Color);
    noStroke();
    ellipse(50, 55, 45, 48);
    triangle(45, 84, 50, 50, 55, 84);
    fill(116,71,0);
    rect(50, 84, 1, 30);
}

My favorite part of this project was creating shapes like the cloud and balloons, and playing around with colors for better visualization. At first, I tried to illustrate the sky with flying balloons, but later I decided to make it entirely abstract with different colors of clouds just to resemble like a wallpaper on a kid’s room.

Project-04: String Art

sketch-beansDownload
//Yeon Lee, Section C
//Project-04: String Art

var dx1;
var dy1;
var dx2;
var dy2;
var dx3;
var dy3;
var numOfLines = 50;
var angle = 0;

function setup() {
    createCanvas(400, 300);
    background(244, 226, 116);
    dx = width / numOfLines;
    dy = height / numOfLines;    
    dx2 = 100 / numOfLines;
    dy2 = 200 / numOfLines;    
    dx3 = -100 / numOfLines;
    dy3 = -200 / numOfLines;
}

function draw() {
    var x1 = 0;
    var y1 = 0;
    var x2 = 0;
    var y2 = height;
    var x3 = 0;
    var y3 = 0;
    var x4 = width;
    var y4 = 0;
    var x5 = 0;
    var y5 = 0;
    var x6 = 0;
    var y6 = height / 3;    
    var x7 = width;
    var y7 = 0;
    var x8 = 0;
    var y8 = 0;    
    var x9 = 300;
    var y9 = 0;
    var x10 = 400;
    var y10 = 300;
    var x11 = 300;
    var y11 = 400;
    var x12 = 400;
    var y12 = 300;

    //draw torquoise lines on the left bottom
    for (var i = 0; i <= numOfLines; i ++) {
        stroke(123, 169, 147);
        line(x1, y1, x2, y2);
        y1 += dy;
        x2 += dx;
    }

    //draw pink lines on top right in the very back
    for (var i = 0; i <= numOfLines; i ++) {
        stroke(240,192,165);
        line(x3, y3, x4, y4);
        x3 += dx2;
        y4 += dy2;
    }    

    //draw purple lines on the left
    for (var i = 0; i <= numOfLines; i ++) { 
        stroke(177, 131, 222);
        line(x5, y5, x6, y6);
        x5 += dx2;
        y6 += dy2;
    }

    //draw light orange lines in the back
    for (var i = 0; i <= numOfLines; i ++) { 
        stroke(255, 195, 153);
        line(x7, y7, x8, y8);
        x7 += dx2;
        y8 += dy2;
    }    

    //draw light yellow lines in the back
    for (var i = 0; i <= numOfLines; i ++) {
        stroke(255,245,153);
        line(x7, y7, x8, y8);
        x7 += dx2;
        y8 += dy2;
    }    

    //draw light green lines on top right
    for (var i = 0; i <= numOfLines; i += 1) {
        stroke(127, 255, 180);
        line(x9, y9, x10, y10);
        x9 += dx3;
        y10 += dy3;
    }

    //draw blue lines on bottom right
    for (var i = 0; i <= numOfLines; i ++) {
        stroke(102,116,255);
        line(x11, y11, x12, y12);
        x11 += dx3;
        y12 += dy3;
    }

    noLoop();
}

I enjoyed playing around with variables to change the colors and shapes of the lines around. By overlapping lines on top of each other, one by one, I loved to mixture of colors and harmony it created among themselves.

LO: Sound Art

Kaeser plays with real time weather events to compose a piece of music.

Adrien Kaeser’s “Weather Thingy“ is a sound and computational art that uses real-time climate-related data to create custom-built sound effect and control the musical instruments. Each sound sensor is attached to a weather station on a tripod microphone to measure speed, rain, direction of wind, as well as a brightness sensor to assess ambient levels of light. Then, the sensor transforms the weather-events into MIDI inputs, which adjusts settings like chorus, pan, decay and LFO through a custom instrument panel. I found it really intriguing that the device interprets the differing stimulation of weather and connects user’s input to produce a variety of audio effects on the keyboard with a pair of knobs and four audio buttons. I really admire how weather can be rendered into auditory technology and computational data, and how Kaeser simply collaborated with the environment to compose an interesting musical piece. Kaeser’s artistic sensibility surfaces when he first came up with the idea of musical weather contraption, and later actually plays the music in such a novel way along with the nature.

Reference: https://medium.com/@JeremySCook/hear-the-environment-with-this-weather-thingy-c0d0502fca0e

Project 3: Dynamic Drawing

sketch-beansDownload
//Yeon Lee, Section C
//Project-03: Dynamic Drawing

var s = 100;
var starY = 0;

function setup() {
    createCanvas(600, 450);
}

function draw() {
    //background
    let s = map(mouseX, 0, width/2, 50, 100); 
    background(s, 100, 140); //use mouseX to change the background color and change the size of the moon/sun
  
    //moon + sun (could be either - moon on blue background and sun on pink background)
    fill(255, 250, 198); 
    ellipse(s, s, s);
  
    //stars
    s = 450 - mouseY; //use mouseY to scroll stars up and down (stars are up at night and they go down when it becomes the sun)
    fill(255, 250, 198, 200);
    circle(30, 30 + starY, 5);
    circle(40, 200 + starY, 5);
    circle(50, 100 + starY, 5);
    circle(70, 50 + starY, 5);
    circle(90, 100 + starY, 5);    
    circle(120, 130 + starY, 5);
    circle(150, 200 + starY, 5);
    circle(170, 40 + starY, 5);
    circle(200, 150 + starY, 5);
    circle(240, 100 + starY, 5);    
    circle(260, 240 + starY, 5);
    circle(290, 150 + starY, 5);
    circle(310, 40 + starY, 5);
    circle(330, 150 + starY, 5);
    circle(360, 30 + starY, 5);
    circle(380, 200 + starY, 5);
    circle(410, 50 + starY, 5);
    circle(440, 100 + starY, 5);    
    circle(470, 260 + starY, 5);
    circle(490, 150 + starY, 5);
    circle(510, 40 + starY, 5);
    circle(530, 150 + starY, 5);
    circle(550, 100 + starY, 5);  
    circle(570, 200 + starY, 5);
    circle(580, 150 + starY, 5);
    circle(590, 40 + starY, 5);
    starY = mouseY;

    //clouds
    fill(255, 255, 255, 100);
    rect(mouseX - 60, 30, 50, 25, 20); //use mouseX to move clouds left and right
    rect(mouseX, 30, 150, 25, 20);
    rect(mouseX - 20, 65, 120, 25, 20);
    rect(mouseX + 180, 130, 100, 25, 20);  
    rect(mouseX + 160, 150, 80, 25, 20);
    rect(mouseX + 290, 55, 35, 25, 20);
    rect(mouseX + 335, 55, 110, 25, 20);
    rect(mouseX + 365, 35, 130, 25, 20);
    noStroke();
   
    //desert
    fill(199, 141, 110); //third layer: light brown
    rect(0, 340, 600);
    rect(-100, 310, 330, 300, 20);    
    rect(0, 300, 130, 300, 20);
    ellipse(100, 345, 300, 50);
    ellipse(400, 360, 450, 60);
    rect(330, 320, 330, 400, 20);
    rect(420, 300, 330, 400, 20);
    rect(480, 290, 330, 400, 20);
    rect(540, 260, 330, 400, 20);
    fill(186, 85, 73); //second layer: red brown
    rect(0, 380, 600);
    rect(-20, 340, 140, 60, 300);
    rect(-50, 360, 260, 60, 300);
    ellipse(200, 390, 200, 40);  
    ellipse(400, 380, 500, 60); 
    fill(92, 21, 13); //first layer: dark brown
    rect(mouseX, 410, 600); //use mouseX to move the foreground left and right 
    ellipse(mouseX + 100, 410, 500, 20);
    ellipse(mouseX + 250, 405, 500, 30);
    rect(mouseX + 300, 360, 400, 300, 20);
    rect(mouseX + 340, 320, 400, 300, 20);
    rect(mouseX - 1000, 370, 500, 300, 20);
    rect(mouseX - 900, 350, 300, 300, 20);
    rect(mouseX - 2000, 400, 3000, 300);
 
    //cactus1
    fill(39, 7, 4);
    rect(mouseX - 420, 250, 25, 170, 5);
    ellipse(mouseX - 407.5, 251, 25, 28);
    rect(mouseX - 460, 330, 60, 20, 10);
    rect(mouseX - 460, 290, 20, 60, 20);

    //cactus2
    rect(mouseX + 130, 250, 25, 170, 5);
    ellipse(mouseX + 142.5, 251, 25, 28);
    rect(mouseX + 130, 280, 60, 15, 10);
    rect(mouseX + 175, 250, 15, 40, 10);
    rect(mouseX + 90, 330, 60, 20, 10);
    rect(mouseX + 90, 290, 20, 60, 20);
}

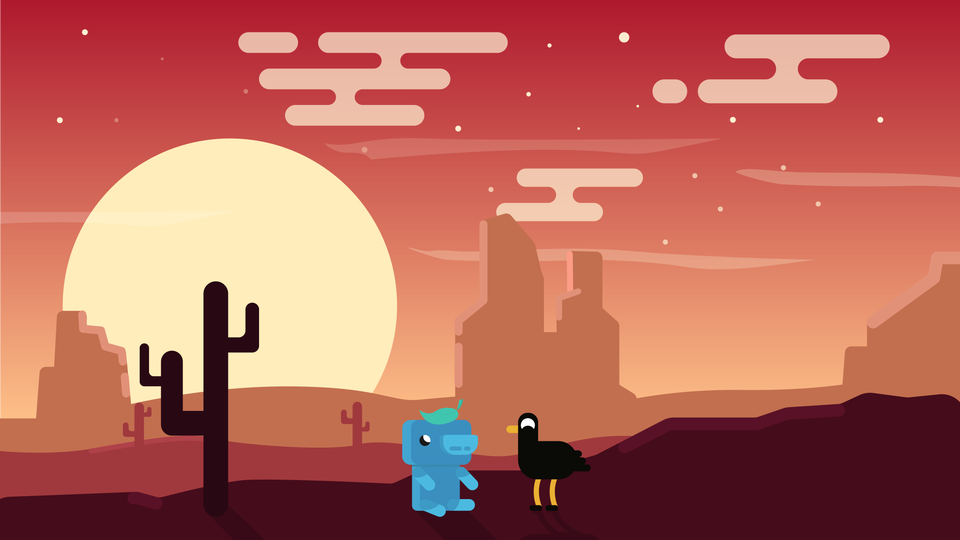
I was inspired by an artwork I found online and decided I would love to animate this illustration. I changed the background color from blue (representing night) to pink (representing sunrise). As user moves from left to right, the moon expands in size, depicting like a sun, and the cloud moves accordingly as well. Simultaneously, as user moves up and down, the stars shine at night. This project was really fun to play with mouseX and mouseY motions as well as use dynamic shapes to create a beautiful scenery.

LO: Computational Fabrication

The work generates a beautiful, intricate arrangements using continuous pattern and motion.

John Edmark’s “Blooms” is a 3D printed kinetic objects that uses mathematical formulas and concepts to create animation effect like spiral patterns. The work uses progressive rotations of the golden ratio, phi (ϕ), to generate interesting designs such as a sunflower or pinecone-like appearances. I really admire how it not only creates a special pattern each time under a strobe light, but also the synchronized “blooming” form under a constant rotational speed is really satisfying to watch. According to Edmark, the generated artwork increases our cognizance of the fine, delicate relationship between reality and consciousness. I found it absolutely fascinating that every time the bloom turns 137.5º, which is the angular version of phi, the sculpture seems to be illuminated. In the final form, Edmark manifests the simplest paramedic systems, but creates a vibrant visual property using pattern, movement, and light exposure.

Reference: http://www.johnedmark.com/phifib/2016/4/28/blooms-strobe-animated-phi-based-sculptures

Project 2: Variable Faces

sketch-beansDownload
//Yeon Lee, Section C
//Project-02: Variable Faces; Face Variables

var backgroundR = 180;
var backgroundG = 200;
var backgroundB = 255;
var head = 190;
var hoodieColorR = 253;
var hoodieColorG = 253;
var hoodieColorB = 150;
var headWidth = 150;
var headHeight = 150;
var eyeSize = 24;
var blushSize = 25;
var mouth =  1
 
function setup() {
    createCanvas(640, 480);
}
 
function draw() {
    background(backgroundR, backgroundG, backgroundB);

    //ears + head (back)
    var w = 330;
    var h = 250;
    var earSize = 80;
    var earY = h - 0.5 * head;
    var leftEarX = w + 0.45 * head; //hoodie size changes every time you click
    var rightEarX = w - 0.45 * head;

    fill(hoodieColorR, hoodieColorG, hoodieColorB); //hoodie color changes every time you click
    noStroke();
    ellipse(leftEarX, earY, earSize, earSize); //head with hoodie
    ellipse(rightEarX, earY, earSize, earSize);
    ellipse(w, 220, head, 1 * head); //cheek shape on the bottom
    ellipse(w, 280, 35 - head, head / 2);

    //head (front)
    fill(255, 255, 255);
    ellipse(w, h - 10, head / 1.2, head / 1.2); //face
    ellipse(w, h + 30, 45 - head, head / 2); //cheek shape on the bottom

    //eyebrows + eyes
    var leftEyeX = w - headWidth * 0.3; //eye size changes every time you click
    var rightEyeX = w + headWidth * 0.3;

    fill(45, 34, 25); 
    arc(leftEyeX, h - 40, 10, 5, PI, 0); //eyebrows
    arc(rightEyeX, h - 40, 10, 5, PI, 0);
    ellipse(leftEyeX, h, eyeSize, eyeSize); //eyes
    ellipse(rightEyeX, h, eyeSize, eyeSize);

    fill(255, 255, 255); //white part of eyes
    ellipse(leftEyeX + 6, h - 7, eyeSize / 5, eyeSize / 5);
    ellipse(rightEyeX + 6, h - 7, eyeSize / 5, eyeSize / 5); 
    ellipse(leftEyeX, h + 15, eyeSize, eyeSize / 4); //smiling eyes
    ellipse(rightEyeX, h + 15, eyeSize, eyeSize / 4);

    //nose
    var noseX = w;
    var noseY = head * 0.05 + 245; //nose size changes every time you click
    var noseSize = head / 45;
    fill(255, 182, 193);
    ellipse(noseX, noseY, noseSize, noseSize - 2);

    //blush
    var mouthSize = head / 35;
    var mouthW = noseSize * 3;
    var leftBlushX = w - mouthW * 5;
    var rightBlushX = w + mouthW * 5;

    fill(255, 139, 139, 50);
    ellipse(leftBlushX, h + 40, blushSize * 2, blushSize * 2);
    ellipse(rightBlushX, h + 40, blushSize * 2, blushSize * 2);

    //mouth
    var mouthX = w;
    var mouthY = head * 0.05 + 253;

    if (mouth < 2){ //mouth changes to either a smile or surprised every time you click 

        //smile
        fill(255, 106, 106);
        arc(mouthX, mouthY, 12, 20, 0, PI, CHORD);

    } else if (mouth < 3) {
        //surprise
        fill(255, 106, 106);
        ellipse(mouthX, mouthY + 10, 15, 20);
    }

}
 
function mousePressed() {
    // when you click, these variables are reassigned
    // to random values within specified ranges
    backgroundR = random(100, 150);
    backgroundG = random(100, 150);
    backgroundB = random(200, 250);    
    head = random(180, 300);
    hoodieColorR = random(220, 255);
    hoodieColorG = random(220, 255);
    hoodieColorB = random(130, 180);
    headWidth = random(100, 200);
    headHeight = random(100, 250);
    eyeSize = random(24, 34);
    blushSize = random(25, 30);
    mouth = random(1, 3);
}

At first, it was challenging to work with positioning locations, but I got used to arithmetic solutions and enjoyed assigning names to variables. I had a lot of fun experimenting with reassigning the random values when you click for mousePressed() function.

LO: Generative Art

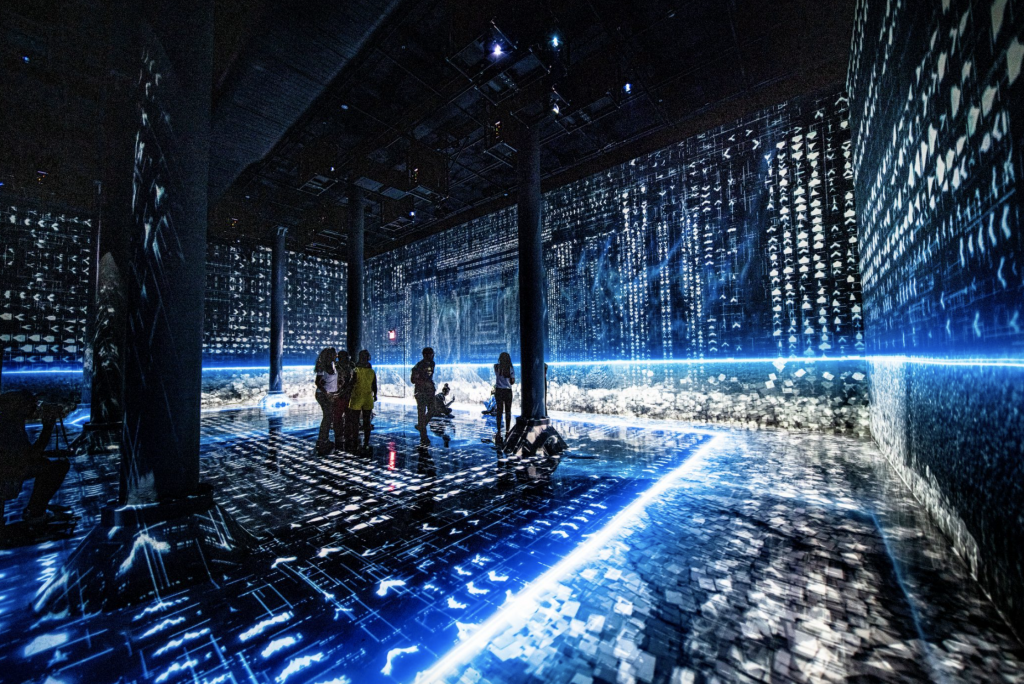
Refik Anadol’s “Machine Hallucinations” represent his most recent synesthetic reality experiments using projections.

Refik Anadol’s “Machine Hallucinations” is an generated A/V Performance and Installation art that uses Archive and Machine Learning algorithms to project 100 million photographic memories of New York City. The installation provides such cinematic experiences by multilayering and generating a vast, dynamic visual archive of the city. I found it absolutely intriguing how Anadol used artificial intelligence machine to produce photographs in motion to reflect the memories of the city. By creating a hallucinative imagery, it almost feels like another reality revealed in front of us. I also admire how the projection aspect makes even the audience like a part of the work as it illuminates and spotlights the people. In his work, Anadol attempts to represent the “reality, totality, and the depth of human imagination,” and unearth novel connections between collective consciousness and visual narrative using machine intelligence.

Reference: https://refikanadolstudio.com/projects/machine-hallucination/

Project 1: My Self Portrait

beans-sketch

//Yeon Lee, Section C
//Project 01: Self-Portrait (Face)

function setup() {
    createCanvas(600, 500);
    background(255, 192, 203);
}

function draw() {
    noStroke();

    //hair
    fill(32, 20, 7);     
    rect(165, 210, 270, 300);
    ellipse(300, 220, 270, 270);

    //shoulder
    fill(251, 206, 158);    
    rect(150, 450, 300, 140);
    ellipse(300, 450, 320, 50);

    //cloth
    fill(63, 146, 208);    
    rect(140, 470, 320, 100);
    ellipse(150, 475, 40, 100);
    ellipse(450, 475, 40, 100);

    //neck
	fill(251, 206, 158);    
    rect(270, 380, 60, 60);

    //ear
    ellipse(207, 280, 50, 50); 

    //side hair
    fill(32, 20, 7);   
    ellipse(200, 270, 10, 80); 

    //neck shadow
    fill(238, 189, 138);    
    ellipse(300, 380, 60, 40);

    //face
    fill(251, 206, 158);    
    ellipse(300, 260, 202, 250);

    //eyebrow
    fill(26, 15, 3);    
    arc(250, 250, 35, 13, PI, 0);
    arc(350, 250, 35, 13, PI, 0);
    
    //left eye
    fill(26, 15, 3);    
    ellipse(250, 280, 27, 32);
    fill(255, 255, 255);
    ellipse(255, 275, 7, 7);
    fill(238, 189, 138);
    arc(248, 298, 27, 10, PI, 0);

    //right eye
    fill(26, 15, 3);    
    ellipse(350, 280, 27, 32);
    fill(255, 255, 255);
    ellipse(355, 275, 7, 7);
    fill(238, 189, 138);
    arc(348, 298, 27, 10, PI, 0);
    
    //nose
    fill(238, 189, 138);    
    arc(300, 315, 20, 10, PI, 30);

    //mouth
    fill(216, 100, 100);    
	arc(300, 335, 50, 45, 0, PI, CHORD);

    //tongue
	fill(193, 66, 66);     
	ellipse(300, 348, 20, 10);

    //teeth
	fill(255, 255, 255);    
	ellipse(300, 335, 40, 5);

    //earring
    fill(255, 255, 255);    
    rect(199.5, 310, 1, 25);
    ellipse(200, 340, 10, 10);
    ellipse(200, 330, 7, 7);

    //front hair
    fill(32, 20, 7);     
    rect(168, 400, 35, 180);
    rect(395, 245, 40, 260);
    arc(190, 150, 270, 220, -0.2, HALF_PI);
    rotate(.80);
    translate(-180, -145)
    ellipse(580, 10, 150, 60);

    noLoop();
}

For this first project, it was quite challenging to work with arc(), PI/CHORD, rotate(), and translate() functions but it was really fun to explore with the codes. I had fun playing around with different colors and changing the sizes of the image I wanted to create.