![[OLD FALL 2017] 15-104 • Introduction to Computing for Creative Practice](../wp-content/uploads/2020/08/stop-banner.png)
This semester, you will use two different software systems for submitting your work.
1. Technical Assignments (“Assignments“) are submitted privately through Autolab. (Be sure to sign in by clicking Sign in with your CMU account, not the big red sign-in button! The only people who will see this work are you, the professor, and the course teaching assistants. Instructions for using Autolab are below.
2. Open-Ended Creative Assignments (“Projects“) and “Looking Outwards” reports are submitted publicly, through this WordPress website. Instructions for submitting assignments in this way, using this WordPress site, are here.
Instructions for Using Autolab.
- If you need to submit any work electronically, create a zip file of the file(s) you wish to submit. Please be sure to create a .zip file and not a .gzip, .tar or .rar file. See below for instructions on creating a zip file.
- Go to the Autolab website (https://autolab.andrew.cmu.edu/) . You must log in (authenticate) using your CMU Andrew ID and password. If you are registered for this course, you should be able to log in and see that you are registered in 15-104 (Fall 2015) or 60-212 in Autolab. IF YOU ARE REGISTERED BUT DO NOT SEE THIS COURSE, THEN EMAIL YOUR PROFESSOR IMMEDIATELY.
- You should see links for currently active assignments that you can hand in. Note that on most weeks, there will be multiple assignments. Click on the link for the assignment you want to hand in.
- Once you click on an assignment, you will see an Options menu. From here, you can download the assignment handout (i.e. starter code, if any), handin your .zip file, view your handin history or view the assignment/lab writeup instructions. To hand in, select “Handin your work”.
- You will see a text field to enter the filename you wish to submit. You can use the browse button to find the .zip file you want to submit. Once you select the correct file, click the Handin button to submit your work. You may submit as many times as you wish up until the deadline. WE WILL GRADE YOUR LAST SUBMISSION THAT WAS SUBMITTED ON TIME.
DO NOT HAND IN YOUR PROGRAM FILES VIA EMAIL TO YOUR INSTRUCTOR OR COURSE ASSISTANT. THESE WILL NOT BE GRADED! FILES SUBMITTED AFTER 11:59PM ON THE DUE DATE ARE CONSIDERED LATE. Please review the course late policy for more information.
Creating a zip file.
A zip file is a single file that contains copies of a collection of files in a compressed format. Since assignments often contain multiple files, a zip file is a way to transfer not just the content but the organization of the collection of files needed to run your programs. You can make zip files using command line tools or graphical desktop tools.
Note that in all cases, you should name or select the containing folder for all your project files rather than selecting individual files!
In general, you will hand in multiple assignments and projects for the week in a single zip file. The organization of your work is important. The directory hierarchy should look like this:
|
1 2 3 4 5 6 7 8 |
handin-02 placebo-02-a index.html sketch.js placebo-02-b index.html sketch.js README.txt |
Checklist for submission directory:
- The top-level directory name (
handin-02) is not critical. This is the all-encompassing folder you will “zip” into a submission file. - In this example, there are two technical assignments. Name these according to instructions – typically the form is AndrewID-WeekNumber-AorBorCetc. This example is for Week 2 and the user ID is
placebo. - Clean out extraneous files before you submit your work. Making backup versions and tests is great for development, but do not confuse your grader by submitting unnecessary files.
- Normally, you will provide additional information (your name, section, goals, how to run your code, features) in comments. In this case, Placebo provided extra information for Assignment-02-B in
README.txt.
Mac Finder and Windows Explorer (probably)
Using the Mac Finder or Windows Explorer (the graphical desktop tool that lets you navigate through your files), first locate the directory you wish to put into a zip file:
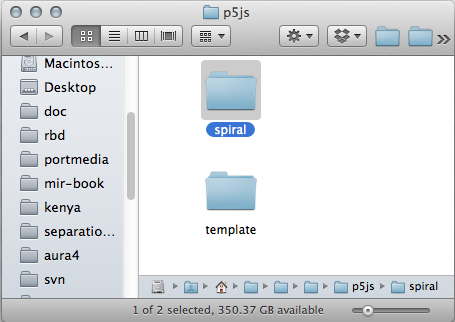
Next, hold down the right mouse button (or on a Mac hold down the Control key, then use the mouse or trackpad button) to get a menu:
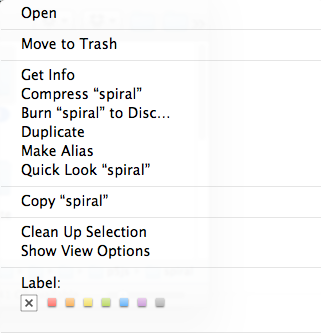
Select the “Compress” menu item (Mac) or “Send To.. Compressed (zipped) folder” (Windows) to make a zip file. You should see the newly created zip file in the same parent directory (folder):
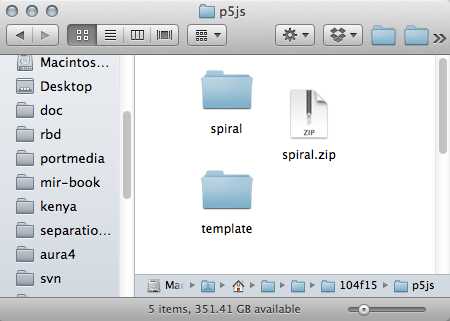
Note that on Windows, if you “open” the zip file, Windows will “look inside” the zip file as if it is an ordinary directory, but on Mac OS X, if you “open” the zip file, it will be decompressed and expanded back into a regular directory.
Mac command-line instructions
On a Mac, open a Terminal application. Here are some commands with annotations (do not type the colored annotations) to guide you:
~$
~$ cd doc/class/104f15/p5js/
~/doc/class/104f15/p5js$ ls
spiral template
— I want just the spiral directory in a zip file.
~/doc/class/104f15/p5js$ zip -r spiral.zip spiral adding: spiral/ (stored 0%) — output from zip showing what it is copying
adding: spiral/.DS_Store (deflated 96%)

adding: spiral/index.html (deflated 57%)

adding: spiral/libraries/ (stored 0%)

adding: spiral/libraries/p5.dom.js (deflated 77%)

adding: spiral/libraries/p5.js (deflated 77%)

adding: spiral/libraries/p5.sound.js (deflated 78%)

adding: spiral/sketch.js (deflated 44%)

~/doc/class/104f15/p5js$
ls — now list what’s here; see if spiral.zip created
spiral spiral.zip template
— now let’s unzip the file and make sure it’s all OK.
~/doc/class/104f15/p5js$ mkdir tmp
~/doc/class/104f15/p5js$ cd tmp
~/doc/class/104f15/p5js/tmp$ unzip ../spiral.zip Archive: ../spiral.zip — unzip tells us what it copies out of spiral.zip
creating: spiral/

inflating: spiral/.DS_Store

inflating: spiral/index.html

creating: spiral/libraries/

inflating: spiral/libraries/p5.dom.js

inflating: spiral/libraries/p5.js

inflating: spiral/libraries/p5.sound.js

inflating: spiral/sketch.js

~/doc/class/104f15/p5js/tmp$
ls — list the tmp directory
spiral
~/doc/class/104f15/p5js/tmp$ ls spiral
index.html libraries sketch.js
~/doc/class/104f15/p5js/tmp$
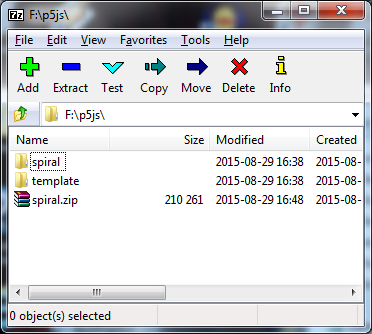
Windows 7-Zip Utility
There are many programs for Windows that work with zip files, but none are built-in. A simple-to-use program is 7-zip, which you can download from http://www.7-zip.org/.
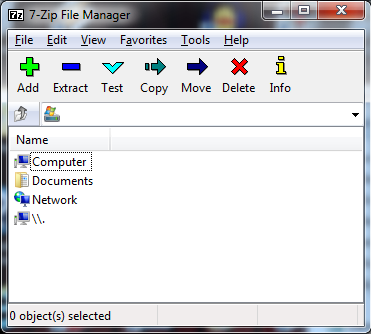
The 7-zip screen looks like this:
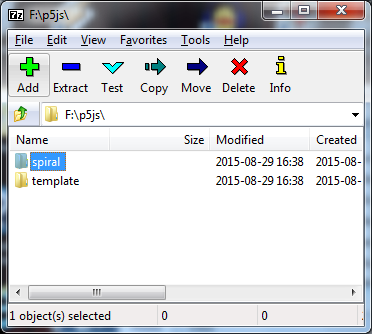
Navigate in the window to find your project directory, and select it:

Click on the “Add” button to create a zip file:
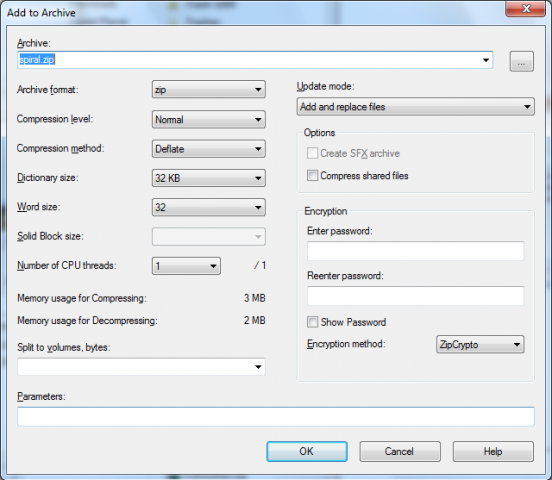
A dialog box will appear. Just click “OK”:
Your new zip file will appear in the 7-Zip window. (Your zip file will probably have a different icon.) The location of zip file will be the same location as your project directory: