![[OLD FALL 2017] 15-104 • Introduction to Computing for Creative Practice](../wp-content/uploads/2020/08/stop-banner.png)
The readings, assignments, and projects below constitute the Week 3 Deliverables and are due by 11:59pm EDT on Friday, September 15th:
- Technical Readings
- Looking Outwards 02 [Blog]
- Assignment-03-A (Two Circles) [Autolab]
- Assignment-03-B (Pong) [Autolab]
- Project-03: (Dynamic Drawing) [Blog]
1. Technical Readings
- Read sections Random Lines and Fadeout in Week 2 Notes. We did not cover these in class, but you should study and understand them. If you cannot answer the questions posed in the text, ask others on Piazza or talk to your TA.
- Learn about rotation to reinforce your project in Lab. Rather than rotating objects directly, p5.js achieves rotation by rotating the coordinate system, then drawing, then restoring the coordinate system. Generally, you write the sequence:
push(); // save the current coordinate system

translate(shiftX, shiftY); // shift coordinate system so that (shiftX, shiftY) becomes the origin (0,0)

rotate(radians(angleInDegrees)); // rotate the coordinate system around new (0,0)

// draw something here -- it will appear shifted by (shiftX,shiftY) and rotated

pop(); // restore the coordinate system - An Intuitive Guide to Rotation
- p5js accepts angles in ‘radians’, which is another unit to measure angles apart from ‘degrees’. This page explains these two units from the ground up – https://betterexplained.com/articles/intuitive-guide-to-angles-degrees-and-radians/
- Here are some examples showing the use of rotation:
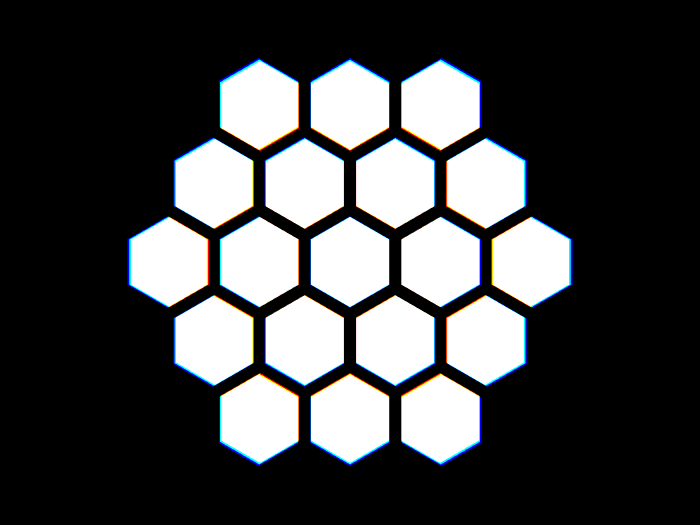
2. Looking Outwards 03: Computational Fabrication
This is to be your third Looking Outwards report. Our topic for this week is closely related to last week’s — generative art — but is specifically concerned with code that produces real physical forms. With computational digital fabrication, physical forms (such as objects, sculptures, and architectures) are generated by custom algorithms, and then realized in plastic, metal, and other materials through fabrication machinery such as 3D printers, laser cutters, CNC mills, and more.
First, please read this article by Prof. Levin (originally prepared for his advanced studio, last spring) which provides a partial overview of the field of parametric 3D fabrication. Then, some additional places to get started include (but are not limited to):
- The creators linked from the ScriptedbyPurpose exhibition.
- RobotsInArchitecture
- The Computational Fabrication Group at MIT
- Neri Oxman’s Mediated Matter Group at MIT
- The MAAD Program at CMU
- Flickr: Digital fabrication
- pinterest/watz: Digital fabrication
- pinterest/Andrew Kudless
- pinterest/Trang Nguyen
- Parametric World Tumblr
Identify a particular project or work which you find inspirational. In a blog post of about 100-200 words,
- Please discuss the project. What do you admire about it, and why do you admire these aspects of it?
- What do you know (or what do you suppose) about the algorithms that generated the work?
- It what ways are the creator’s artistic sensibilities manifest in the final form?
- Link (if possible) to the work. To the best of your abilities, be sure to provide the creator’s name, title of the work, and year of creation.
- Embed an image and/or a YouTube/Vimeo video of the project (if available).
- Add a caption to your image that explains what it is and/or where it came from.
- Label your blog post with the Category, LookingOutwards-03.
- Add a note if there was information you looked for but could not find.
3. Assignment-03-A (Two Circles)
Here’s an animated GIF showing a recording of a live interaction. Notice how the horizontal positions of the circles relate — in different ways — to the system property, mouseX:
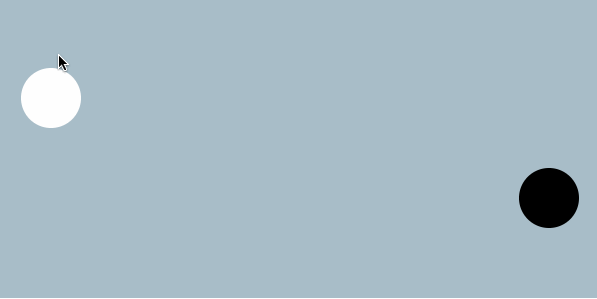
Below is a broken version of the code which generated the above program. Go ahead, run it; you’ll observe that the fixme variable, which controls the position of the black circle, ain’t right. Your job is to correct the value assigned to fixme, in order to reproduce the behavior shown in the GIF above.
|
The requirements are:
- Modify the given program, by correcting the expression assigned to
fixmein line #9.
Then, as per usual for all Assignments uploaded to Autolab:
- Put the following information as comments at the top of your program:
- Your name.
- Your lab section.
- Your email address, including @andrew.cmu.edu
- Assignment-03-A
- Name your project UserID
-03-a.For example, if your Andrew ID isplacebo, then your project directory (folder) name should beplacebo-03-a. You will submit this along with directory (folder) placebo-03-b in a zip file to Autolab, just like last week. - Zip (compress) and upload your two project folders to our course Autolab tool, using the provided instructions.
4. Assignment-03-B (Pong)

Pong Game (photo from Wikipedia)
Your game will be for a single player. This is a non-standard game, so read the description carefully: A ball starts in the center of the canvas and moves to the right. When it hits the right edge of the canvas, it reverses horizontal velocity, causing it to move leftward. The player’s goal is to touch the ball with the mouse when the ball is left of the center of the canvas. If that happens, the ball reverses direction and acquires a random vertical velocity. Once the ball is moving leftward, touching it again has no effect. Again the ball will bounce off the right side of the canvas, and since it has a vertical velocity, it can bounce off the top and bottom as well. If the player fails to touch the ball before it reaches the left edge of the canvas, the ball continues leftward out of sight. The game can only be restarted by reloading the web page.
Here is what a game might look like (only this example is rotated 90 degrees counterclockwise):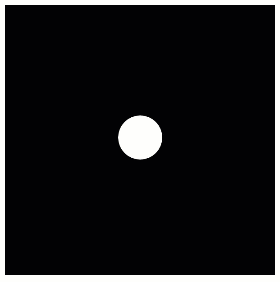
Other game details (if any) are left to you. The requirements you must satisfy are the following:
- The ball bounces off the top, right, and bottom sides of the canvas.
- The ball bounces when it first touches the side, e.g. when the right edge of the ball meets the right edge of the canvas.
- The ball must reverse horizontal direction from left to right only when the following are true:
- The ball’s horizontal velocity is in the leftward direction.
- The ball’s center is left of the center of the canvas.
- The cursor (
mouseX, mouseY) is within the borders of the ball. (You may find the functiondistvery useful here. Look it up at p5js.org.
- When the ball reverses horizontal direction by being touched, it receives a random vertical velocity that must be in some reasonable range from negative to positive.
- Name your project UserID
-03-b.For example, if your Andrew ID isplacebo, then your project directory (folder) name should beplacebo-03-b. - Zip (compress) and upload your two project folders to our course Autolab tool, using the provided instructions.
Be sure to include both Assignment-03-a and Assignment-03-b in one zip file. If you submit two separate files, only the last one will be graded.
You are free to add additional functions, which may include:
- Colors.
- Changing colors.
- Use a “Paddle” rather than the cursor to touch the ball.
- Additional constraints on hitting the ball, e.g. the paddle must be below the ball to reverse its direction.
- Horizontal velocity depends on how or where the ball is touched/hit.
- Sounds.
- Keeping score.
- Restarting the game automatically when the ball is missed.
5. Project-03: Dynamic Drawing
In this Project, which (as usual for Projects) is to be uploaded to our course WordPress blog, you will create a drawing that changes when the mouse moves. Here are some examples to get you started thinking:
Animation by David Whyte
(Notice that these images are not controlled by the mouse, but you can imagine that many could be.)
Here is an example written in p5.js and using the mouse. It is intentionally very basic, but it conveys some elements we expect to see in your project: the dynamics of the image are at least as important as the image itself, motion is controlled directly by the human gesture of mouse movement, multiple parameters are coordinated (in this case size and position of two squares) and coupled to the mouse movement (and notice that some parameters increase while others decrease). The comments at the end of the Project 2 description regarding minimally viable solutions apply here.
function setup() {
    createCanvas(400, 400);
    rectMode(CENTER);
}

function draw() {
    background(0);
    fill(255, 255, 0);
    // restrict mouseX to 0-400
    var m = max(min(mouseX, 400), 0);
    var size = m * 350.0 / 400.0;
    rect(10 + m * 190.0 / 400.0, 200.0,
         size, size);
    fill(0, 0, 255);
    size = 350 - size;
    rect(200 + m * 190.0 / 400.0, 200.0,
         size, size);
}
Finally, here are the Project-03 Requirements:
- Using a canvas size whose dimensions are 640×480 (or 480×640, whichever you prefer), create an interactive program in p5.js that generates a dynamic drawing controlled by the mouse.
- You can use
mouseX,mouseYor both to control your image. - You must control at least 4 different aspects of image elements – size, position, angle, color, etc.
- Some parameters must move in contrary motion, e.g. larger and darker, left and right, clockwise and upward (are these really contrary? at least they are not similar).
- The image should not have random or non-deterministic elements. Each time the cursor moves to a particular point, the image should be the same.
- Comment your code – it should be easy to tell how the code works, e.g. explain coordinate calculations (“increases from 10 to 30 as mouse moves down”) and describe what parts of the drawing are drawn by different parts of your code. (Note: adding comments while you are programming to document your thought process is a good idea.)
- When you’re done, embed your p5.js sketch in a blog post on this site, using the (usual) instructions here. Make sure that your p5.js code is visible and attractively formatted in the post.
- In your blog post, write a sentence or two reflecting on your process and product. In discussing your process, it would be nice to see any of your paper sketches from your notebook; these could be as simple as photos captured with your phone.
- Label your project’s blog post with the Category Project-03-Dynamic-Drawing.