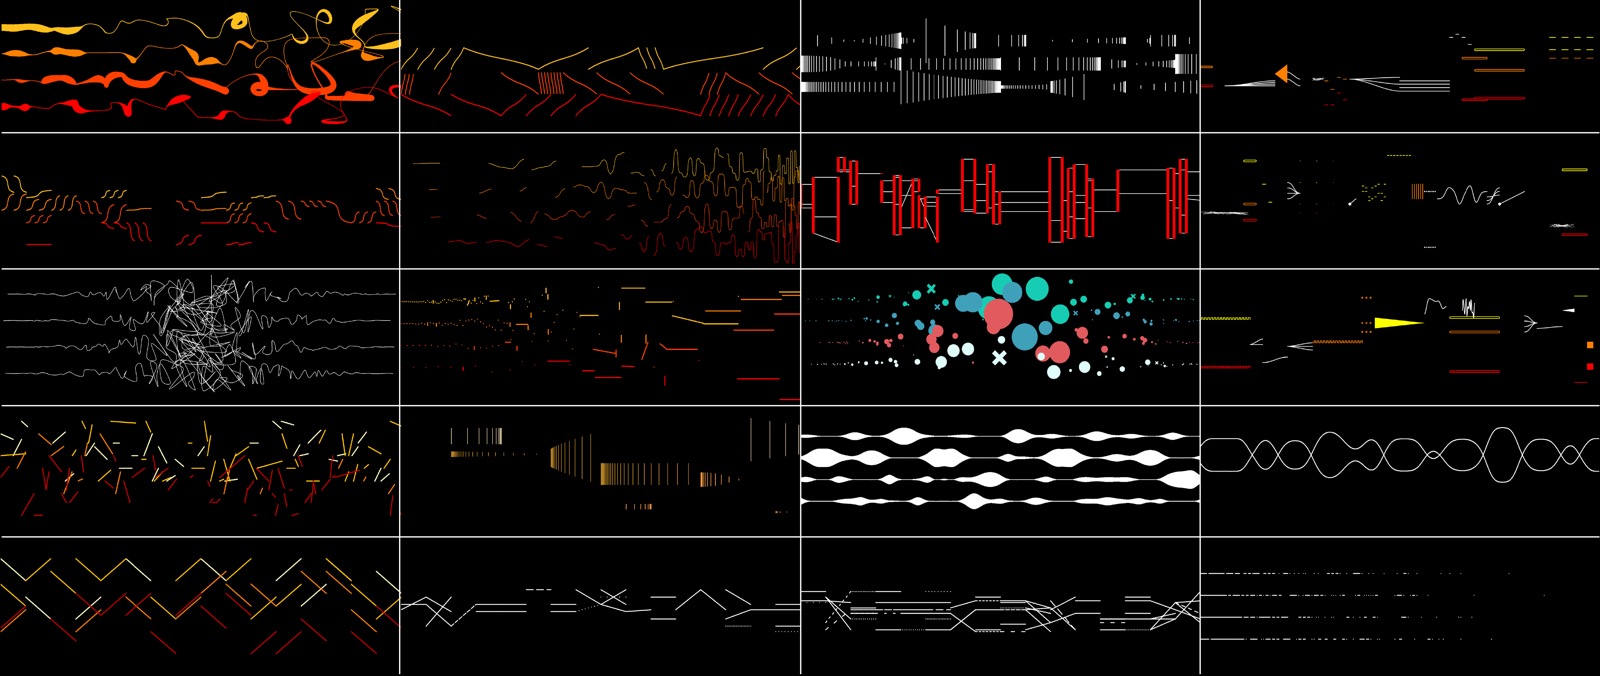
Project-04: String Art

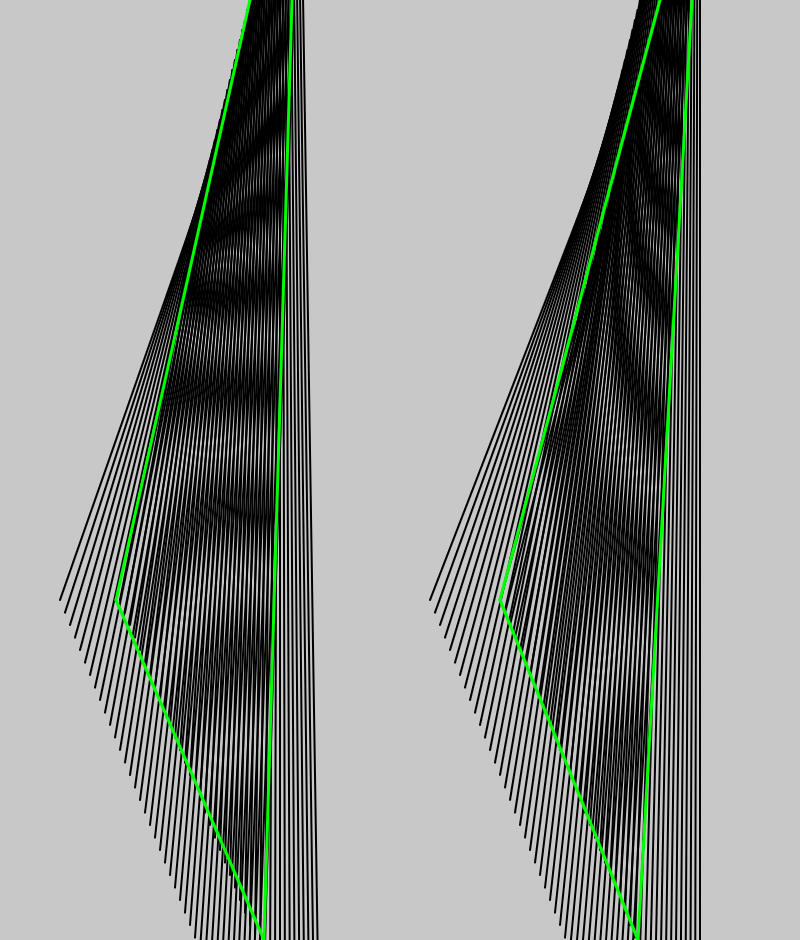
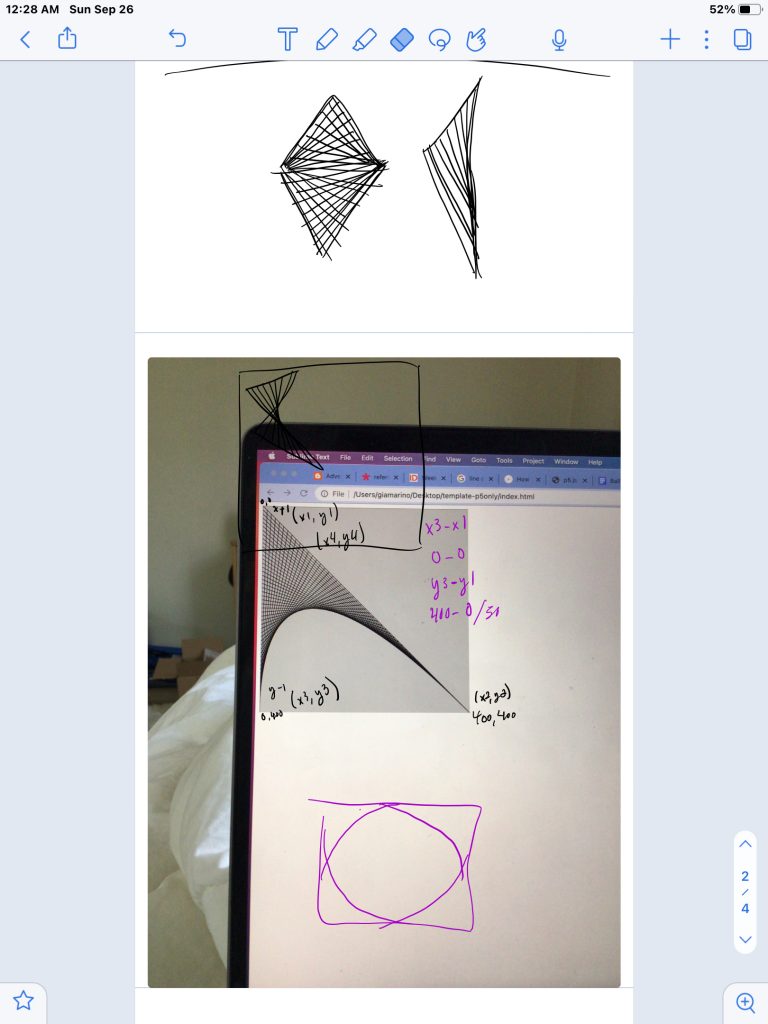
kstargio-04-projDownload
// coordinated for basic star shape:
//lineA:
var lineAx1 = 0
var lineAy1 = 0
var lineAx2 = 0
var lineAy2 = -125
//lineB:
var lineBx1 = 119
var lineBy1 = -39
var lineBx2 = 0
var lineBy2 = 0
//lineC:
var lineCx1 = 0
var lineCy1 = 0
var lineCx2 = 73
var lineCy2 = 101
//lineD:
var lineDx1 = -73
var lineDy1 = 101
var lineDx2 = 0
var lineDy2 = 0
//lineE:
var lineEx1 = 0
var lineEy1 = 0
var lineEx2 = -119
var lineEy2 = -39

//distance for string art end points variables initialized:
var dx1;
var dy1;
var dx2;
var dy2;
var numLines = 40;	//number of string art lines in each 'shape'
var rot = 0		//rotation effect (DISABLED bc of noLoop() call; comment out noLoop() to see rotation)
// color variables for shading effect:
var r = 0;
var g = 50;
var b = 100;

function setup() {
    createCanvas(400, 300);
    background(200);
}

function draw() {
    background(200);					// called for rotation effect
	translate(width/2, height/2);		// center canvas
	//rotation effect (DISABLED while noLoop() is activated):
	rotate(radians(rot));
	rot += 1;
	// color variables for shade change effect re-defined after each rotation:
	r = 0;
	g = 50;
	b = 100;
	//lines to create basic star shape, coordinates set by variables:
    line(lineAx1, lineAy1, lineAx2, lineAy2);
    line(lineBx1, lineBy1, lineBx2, lineBy2);
    line(lineCx1, lineCy1, lineCx2, lineCy2);
    line(lineDx1, lineDy1, lineDx2, lineDy2);
    line(lineEx1, lineEy1, lineEx2, lineEy2);
	// drawLines() called to create the string art effect:
	drawLines(lineAx1, lineAy1, lineAx2, lineAy2, lineBx1, lineBy1, lineBx2, lineBy2);
	drawLines(lineBx1, lineBy1, lineBx2, lineBy2, lineCx1, lineCy1, lineCx2, lineCy2);
	drawLines(lineCx1, lineCy1, lineCx2, lineCy2, lineDx1, lineDy1, lineDx2, lineDy2);
	drawLines(lineDx1, lineDy1, lineDx2, lineDy2, lineEx1, lineEy1, lineEx2, lineEy2);
	drawLines(lineEx2, lineEy2, lineEx1, lineEy1, lineAx1, lineAy1, lineAx2, lineAy2);
    // comment noLoop() out to see roration:
    noLoop();
}

	//drawLines function made for string art effect, takes x and y coordinates of both connecting lines (8 parameters):
function drawLines(line1x1, line1y1, line1x2, line1y2, line2x1, line2y1, line2x2, line2y2) {
    // set distance between end points for string lines:
    dx1 = (line1x2-line1x1)/numLines;
    dy1 = (line1y2-line1y1)/numLines;
    dx2 = (line2x2-line2x1)/numLines;
    dy2 = (line2y2-line2y1)/numLines;
	//initialize variables for string line end points:
    var x1 = line1x1;
    var y1 = line1y1;
    var x2 = line2x1;
    var y2 = line2y1;
	// string lines drawn until specified number of lines is hit:
    for (var i = 0; i <= numLines; i += 1) {
		stroke(r, g, b);
        line(x1, y1, x2, y2);
		// string line variables update to create string art effect:
        x1 += dx1;
        y1 += dy1;
        x2 += dx2;
        y2 += dy2;
		//color effect:
        if (i <= numLines/2) {
			r += 255/numLines;
			g -= 255/numLines;
			b += 100/numLines;
		} else {
			r -= 255/numLines;
			g += 255/numLines;
			b -= 100/numLines;
		}
    }
}

I decided to do a star shape for this project, and I’ve attached an image of my initial sketches. It took me a while to figure out how I wanted to use the ‘string art’ style, but I like the outcome that this method created.

Initial sketches to visualize a star with the ‘string art’ style.

Project-04: String Art

sketch
var dx1;
var dy1;
var dx2;
var dy2;

var numLines = 20;

function setup() {
    createCanvas(400, 300);
    background(0);

    //setting up star shaped template
    rectMode(CENTER);
    fill(50);
    noStroke();
    // stroke(255,0,0);
    push();

    translate(200, 150);
    rotate(radians(45));
    rect(0, 0, 200, 200);

    pop();
    translate(200, 150);
    rect(0, 0, 200, 200);

    //increments
    dx1 = (100-100)/numLines;
    dy1 = (250-200)/numLines;
    dx2 = (340-200)/numLines;
    dy2 = (151-291)/numLines;

}

function draw() {
    stroke(255);
    // reference: line(100, 50, 100, 250);
    // reference: line(200, 291, 340, 151);

    //line1_top left to bottom center
    var x1 = 100;
    var y1 = 50;
    var x2 = 200;
    var y2 = 291;
    for (var i = 0; i <= numLines; i += 1) {
        line(x1, y1, x2, y2);
        x1 += dx1;
        y1 += dy1;
        x2 += -dx2;
        y2 += dy2;
    }

    //line 2_bottom left to right center
    var x1 = 100;
    var y1 = 250;
    var x2 = 340;
    var y2 = 151;
    for (var i = 0; i <= numLines; i += 1) {
        line(x1, y1, x2, y2);
        x1 += dx1;
        y1 += -dy1;
        x2 += -dx2;
        y2 += -dy2;
    }

    //line3_bottom right to top center
    var x1 = 300;
    var y1 = 250;
    var x2 = 200;
    var y2 = 10;
    for (var i = 0; i <= numLines; i += 1) {
        line(x1, y1, x2, y2);
        x1 += dx1;
        y1 += -dy1;
        x2 += dx2;
        y2 += -dy2;
    }

    //line 4_top right to left center
    var x1 = 300;
    var y1 = 50;
    var x2 = 60;
    var y2 = 151;
    for (var i = 0; i <= numLines; i += 1) {
        line(x1, y1, x2, y2);
        x1 += dx1;
        y1 += dy1;
        x2 += dx2;
        y2 += dy2;
    noLoop();
    }

     //line 5_top left to top center
    var x1 = 100;
    var y1 = 50;
    var x2 = 200;
    var y2 = 10;
    for (var i = 0; i <= numLines; i += 1) {
        line(x1, y1, x2, y2);
        x1 += dx1;
        y1 += dy1;
        x2 += -dx2;
        y2 += -dy2;
    noLoop();
    }

     //line 6_bottom right to bottom center
    var x1 = 300;
    var y1 = 250;
    var x2 = 200;
    var y2 = 290;
    for (var i = 0; i <= numLines; i += 1) {
        line(x1, y1, x2, y2);
        x1 += dx1;
        y1 += -dy1;
        x2 += dx2;
        y2 += dy2;
    noLoop();
    }


}

I really enjoy creating geometric patterns, so it was really intriguing for me to learn how I can modify the increments and number of lines to create a pattern.

Looking Outwards 04: Sound Art

The project that grabbed my attention immediately was FORMS–String quartet created by Playmodes. One of the reasons is because I come from a strings background, but as I skimmed through the articles the simple and geometric design really matched my eye, which seemed to be designed similarly with the aesthetic I have been exploring a lot recently.

I think it’s fascinating that the performance is both visual and sonic, and that the performer’s playing of the instrument is converted to a visual pattern in real time. The visuals also reminded me of the mobile instrument games I used to play, so it was even more entertaining. This program seem to use size, shape, and color as a variable to express the different instruments rhythm and dynamic, which I assume is taken into programming as the decibels and pitch is measured from the recording of the performance. I think the choice of using simple geometric shapes and gradient colors show the artist’s attempt to combine modern design aesthetics and classical music to invite a wider variety of audiences to this source of entertainment. 

Project 4- String Art

sketch
//Eva Oney
//eoney
//section C

var c1 = 0;
var c2 = 255;

function setup() {
    createCanvas(400, 300);
    background(220);
    text("p5.js vers 0.9.0 test.", 10, 15);

}

function draw() {
    background(0);
    //loop for lines coming off the x axis
    for (var i = 1; i <= 500; i += 5) {
        stroke(255,0,0);
//I found my x and y values by originally setting x1 and x2 to mouseX
//and mouseY, then when I found a position I liked, I printed the value
//of mouseX and mouseY and got (15,400)
        line(400 + i, 0, 15 +i, 150);
        line(15 + i, 150, 400 +i, 400);
    }
    //loop for lines coming off the y axis
    for(var i = 0; i <=500; i +=5) {
        stroke(0,0,255);
        line(0, 400 + i, 200, 15 + i );
        line(400, 400 + i, 200, 15 +i);
    }
    noLoop();
 }

I kept my code pretty simple so I could focus on understanding how the loops and parameters actually affect the image. I am not a math wiz by nature, so it is a little difficult for me to understand but I am slowly getting the hang of it.

Looking Outwards- Sound

The project that I decided to look at was Expressions, by Kynd and Yu Miyashita. I found the video to be captivatingly intricate, and I was shocked when I read that it was all digitally rendered. I was even more shocked when I found out it was rendered in 2D, using various layering and shading techniques as opposed to 3D vectors. 

The images themselves were really cool, but the soundscape that went with it really elevated the experience. A brief warning if you are going to watch it, make sure to turn your sound down. I got blasted with an intense high pitched screech in my ear right off the bat (which was cool… but scary). I thought the interactivity between the sound and visuals was really compelling.

When reading about the piece at: https://www.creativeapplications.net/sound/expressions-paint-and-pixel-matiere-at-micro-scale/

I learned that the developer used WebGL which is a JavaScript api, made to render 2D and 3D graphics, and then went in on TouchDesigner to add detail. When looking at WebGL samples, I found that they are very similar to what we are doing now. I also know that we can use WebGL in p5.js, so maybe they’re the same thing? It was hard to find information on it. But anyways, it was interesting to see what I could do in the future if I keep up with programming.

Project 4: String Art

sketch

var dx1;
var dy1;
var dx2;
var dy2;
var dx3;
var dy3;
var dx4;
var dy4;
var dx5;
var dy5;
var dx6;
var dy6;
var dx7;
var dy7;
var dx8;
var dy8;
var dx9;
var dy9;
var dx10;
var dy10;
var dx11;
var dy11;
var dx12;
var dy12;
var dx13;
var dy13;
var dx14;
var dy14;
var dx15;
var dy15;
var dx16;
var dy16;
var dx17;
var dy17;
var dx18;
var dy18;
var numLines = 30;


function setup() {
    createCanvas(400, 400);
    background("yellow");

    //white middle strings
    dx1 = (180-50)/numLines;
    dy1 = (250-150)/numLines;
    dx2 = (270-340)/numLines;
    dy2 = (200-100)/numLines;
    
    //left white strings
    dx3 = (150-110)/numLines;
    dy3 = (150-100)/numLines;
    dx4 = (260-300)/numLines;
    dy4 = (140-50)/numLines;

    //middle white strings
    dx5 = (150-50)/numLines;
    dy5 = (260-150)/numLines;
    dx6 = (140-90)/numLines;
    dy6 = (30-150)/numLines;

    //upper black strings
    dx7 = (230-100)/numLines;
    dy7 = (280-350)/numLines;
    dx8 = (350-150)/numLines;
    dy8 = (180-280)/numLines;

    //loweer black strings
    dx9 = (320-200)/numLines;
    dy9 = (250-50)/numLines;
    dx10 = (200-250)/numLines;
    dy10 = (300-30)/numLines;

    //left blue strings
    dx11 = (250-150)/numLines;
    dy11 = (80-200)/numLines;
    dx12 = (120-100)/numLines;
    dy12 = (20-250)/numLines;

    //middle blue strings
    dx13 = (240-150)/numLines;
    dy13 = (80-200)/numLines;
    dx14 = (220-100)/numLines;
    dy14 = (120-250)/numLines;

    //right blue strings
    dx15 = (240-150)/numLines;
    dy15 = (80-200)/numLines;
    dx16 = (220-100)/numLines;
    dy16 = (120-250)/numLines;

}

function draw() {
    var x1 = 50;
    var y1 = 150;

    var x2 = 270;
    var y2 = 200;

    var x3 = 50;
    var y3 = 150;

    var x4 = 20;
    var y4 = 150;

    var x5 = 100;
    var y5 = 180;

    var x6 = 90;
    var y6 = 350;

    var x7 = 300
    var y7 = 250;

    var x8 = 250;
    var y8 = 180;

    var x9 = 320;
    var y9 = 250;

    var x10 = 380;
    var y10 = 80;

    var x11 = 150;
    var y11 = 200;

    var x12 = 100;
    var y12 = 250;

    var x13 = 250;
    var y13 = 200;

    var x14 = 80;
    var y14 = 250;

    var x15 = 220;
    var y15 = 200;

    var x16 = 180;
    var y16 = 250;

    for (var i = 0; i <= numLines; i += 1) {
        stroke("white")
        line(x1, y1, x2, y2);
        x1 += dx1;
        y1 += dy1;
        x2 -= dx2;
        y2 -= dy2;
        line(x3, y3, x4, y4);
        x3 -= dx3;
        y3 -= dx3;
        x4 += dx4;
        y4 += dy4;
        line(x5, y5, x6, y6);
        x5 -= dx5;
        y5 -= dx5;
        x6 += dx6;
        y6 += dy6;

        stroke("black")
        line(x7, y7, x8, y8);
        x7 -= dx7;
        y7 -= dx7;
        x8 += dx8;
        y8 += dy8;
        line(x9, y9, x10, y10);
        x9 -= dx9;
        y9 -= dx9;
        x10 += dx10;
        y10 += dy10;

        stroke("blue")
        line(x11, y11, x12, y12);
        x11 += dx11;
        y11 += dx11;
        x12 += dx12;
        y12+= dy12;

        line(x13, y13, x14, y14);
        x13 += dx13;
        y13 += dx13;
        x14 += dx14;
        y14+= dy14;

        line(x15, y15, x16, y16);
        x15 += dx15;
        y15 += dx15;
        x16 += dx16;
        y16+= dy16;


    }
    noLoop();
}

The difficult part of this project was understanding what numbers to change in order to get the shape that I wanted and why it changed, but when I did, I just kept adding to my canvas and adjusting the numbers to get the design I wanted.

LO: Sound Art

Video of Artwork

Artist: Abe Pazos and Mei-Fang Liau

SketchDaily0018, created in 2017

This sound art piece created by Abe Pazos and Mei-Fang Liau interests me because through the use of light, movement, and line weight, the visualization of the sounds almost creates a three dimensional space that captures viewers. I think it’s so interesting how these artists were able to create a visualization of a sound that is so fitting for it. In this piece, I notice that whenever there is a vibration in the sound, the lines begin to flash. How I imagine them doing this is somehow creating a link between the vibrato to correspond to the lights flashing. This element adds a more significant and unique meaning to the art because those patterns can only be displayed when it is played with this sound.

Week 4: String Art Project

sketch
//Brandon Yi
//btyi
//Section A
var dx1;
var dy1;
var dx2;
var dy2;
var numLines = 25;

function setup() {
    createCanvas(300, 400);
    background(200);
    line(10,10,10,390);
    line(10,390,290,390);
    line(10,10,290,10);
    line(290,10,290,390);
    dx = (290-10)/numLines; //setting x increments
    dy = (390-10)/numLines; //setting y increments
}

function draw() {
    //setting moveable points for increments
    var x1 = 290;
    var y1 = 390;
    var x2 = 10;
    var y2 = 10;
    var x3 = 10;
    var y3 = 10;
    
    for (var i = 0; i <= numLines; i += 1) {
        line(10, 10, x1, y1);
        x1 -= dx;
        line(290,390,x2,y2);
        y2 += dy;
        line(290,10,x3,y3);
        x3 += dx;
        y3 += dy;

    }
    noLoop();
}

I had a little bit of trouble working around the diagonal piece of my artwork. I think at first I struggled a little bit to understand my own code, but after solidifying the idea that dx and dy are the increments, it made sense that I would need to use them in my code for the diagonal piece.

Project-04: String Art

Emilio Bustamante

My main objective is to create organic shapes when I overlap different lines groups between each other.


var dx1;
var dy1;
var dx2;
var dy2;
var numLines = 40;

function setup() {
    createCanvas(400, 470);
    background(200);
    dx1 = (150-50)/numLines;
    dy1 = (300-50)/numLines;
    dx2 = (350-300)/numLines;
    dy2 = (100-300)/numLines;
}
function draw() {
//drawing in the right
  translate(100, 0);
//group of lines in the left
    var x1 = 150;
    var y1 = 300;
    var x2 = 200;
    var y2 = 120;
    for (var i = 0; i <= numLines; i += 1) {
        line(x1, y1, x2, y2);
        x1 += dx1;
        y1 += dy1;
        x2 += dx2;
        y2 += dy2;
    }
//group of lines in the right
    var x1 = 115;
    var y1 = 300;
    var x2 = 200;
    var y2 = 80;
    for (var i = 0; i <= numLines; i += 1) {
        line(x1, y1, x2, y2);
        x1 += dx1;
        y1 += dy1;
        x2 += dx2;
        y2 += dy2;
    }
//drawing in the left 
  translate(-200,0); 
//group of lines in the left
    var x1 = 160;
    var y1 = 300;
    var x2 = 200;
    var y2 = 100;
    for (var i = 0; i <= numLines; i += 1) {
        line(x1, y1, x2, y2);
        x1 += dx1;
        y1 += dy1;
        x2 += dx2;
        y2 += dy2;
    }
//group of lines in the right
    var x1 = 130;
    var y1 = 300;
    var x2 = 200;
    var y2 = 100;
    for (var i = 0; i <= numLines; i += 1) {
        line(x1, y1, x2, y2);
        x1 += dx1;
        y1 += dy1;
        x2 += dx2;
        y2 += dy2;
    }
//contour for drawing in the left
    translate(100,0);
    stroke(0,255,0);
    strokeWeight(1.5);
    line(125,0,58,300);
    line(58,300,132,470);
    line(132,470,146,0);
//contour for drawing in the right
    translate(200,0);
    line(130,0,50,300);
    line(50,300,119,470);
    line(119,470,146,0);
    noLoop();
}

Project 04 – String Art

sketch

//Gia Marino
//gnmarino
//section D

var dx1;
var dy1;
var dx2;
var dy2;
var numLines = 50; //how many lines drawn between line 1 and line 2

function setup() {
    createCanvas(400, 300);
    background(200);
   
}

function draw() {


    //draw bottom left string art - line 1: (0, 0) (0, 300) line 2: (0, 300) (400, 300)

    drawStringArt(0, 0, 0, height, 0, height, width, height);

    //draw bottom right string art - line 1: (0, 300) (400, 300) line 2: (400, 300) (400, 0)

    drawStringArt(0, height, width, height, width, height, width, 0);

    //draw top right string art - line 2: (400, 300, 400, 0, 400, 0, 0, 0)

    drawStringArt(width, height, width, 0, width, 0, 0, 0);

    //draw top left string art - line 2: (400, 0, 0, 0, 0, 0, 0, 300)

    drawStringArt(width, 0, 0, 0, 0, 0, 0, height);
    
    noLoop();
}

    //function that creates string art shape
function drawStringArt(ix1, iy1, ix2, iy2, ix3, iy3, ix4, iy4) {

    line(ix1, iy1, ix2, iy2); //line 1 
    line(ix3, iy3, ix4, iy4); //line 2 

    dx1 = (ix2-ix1)/numLines; //change in x variables in line 1
    dy1 = (iy2-iy1)/numLines; //change in y variables in line 1
    dx2 = (ix4-ix3)/numLines; //change in x variables in line 2
    dy2 = (iy4-iy3)/numLines; //change in y variables in line 2  

    //repeats drawing lines to make string art
    //starts at the beginning of line 1 and line 2 
    //finishes shape at the end of line 1 and line 2

    for (var i = 0; i <= numLines; i += 1) {

        line(ix1, iy1, ix3, iy3);
        ix1 += dx1;
        iy1 += dy1;
        ix3 += dx2;
        iy3 += dy2;
    }  
}


I feel like the most difficult part of this project was understanding the math and then understanding how the code works. This was necessary for me to create code that was more readable and now it is very easy to add onto.

A picture of my process of figuring out the math and how I wanted the piece to look