![[OLD FALL 2017] 15-104 • Introduction to Computing for Creative Practice](../../../../wp-content/uploads/2020/08/stop-banner.png)
// helen tsui
// 15-104 section d
// hyt@andrew.cmu.edu
// project-09-Pixel-Portraits

var portrait;

function preload() {
    var portraitURL = "https://i.imgur.com/kQn5qoD.jpg";
    portrait = loadImage(portraitURL);
}


function setup() {
    // retrieve and load pixels + other properties
    createCanvas(450, 450);
    background(193, 226, 177);
    portrait.loadPixels();
    frameRate(100);
}


function draw() {
    // initialize dots' location
    var px = random(0, width);
    var py = random(0, height);

    // retrieve color at specific pixels
    var ix = constrain(floor(px), 0, width-1);
    var iy = constrain(floor(py), 0, height-1);
    var theColorAtLocationXY = portrait.get(ix, iy);

    var brightnessVal = brightness(theColorAtLocationXY);
    fill(theColorAtLocationXY);
    var circleSize;

    // set brightness value if statement for drawing lines or circles
    if (brightnessVal > 40) {
        strokeWeight(3);
        stroke(theColorAtLocationXY);
        //var circleSize = random(5, 10);
        line(px - random(0, 10), py - random(-10, 10), px, py);
    } if (brightnessVal <= 40) {
        fill(theColorAtLocationXY);
        noStroke();
        circleSize = random(5, 15);
        ellipse(px, py, circleSize, circleSize);
    }
}
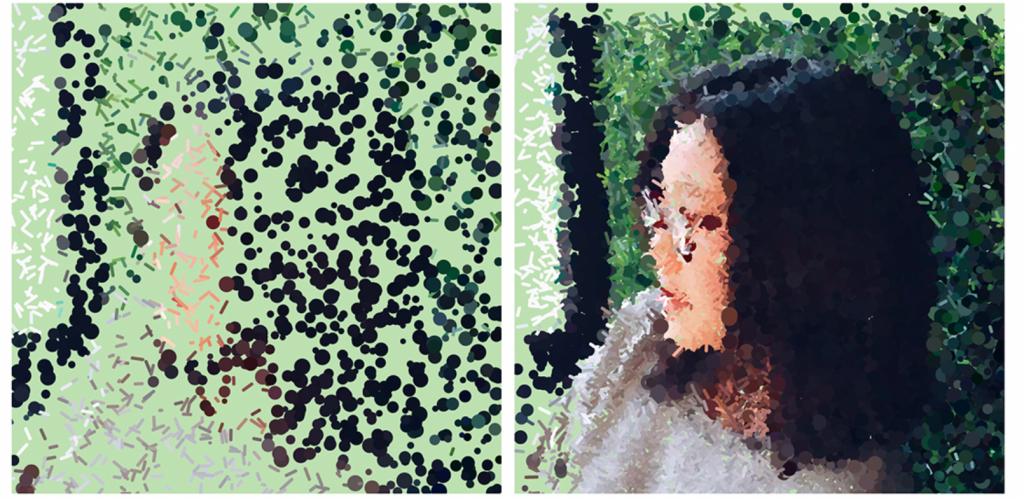
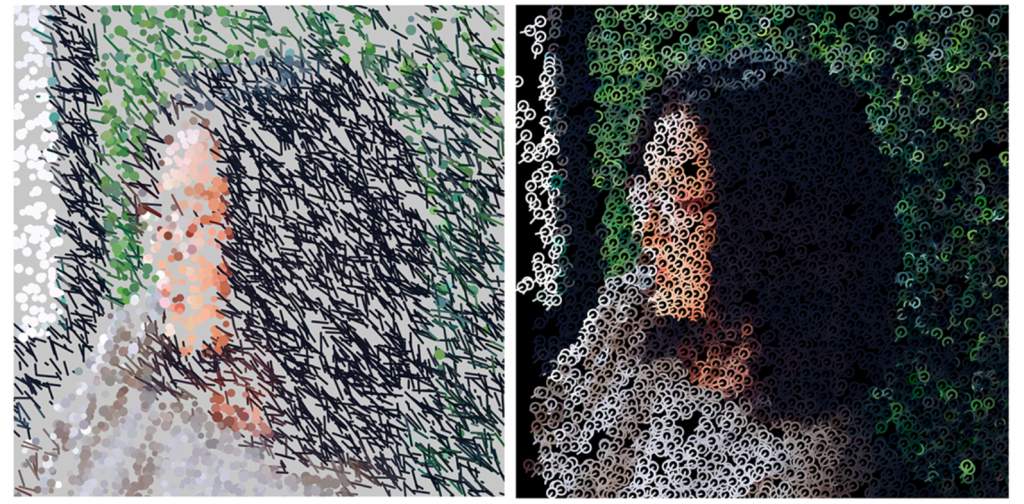
For this project, I primarily focused on the relationship between color values and the shape used. When I was looking at the photo, I wanted to pixelate and highlight my face in a more detailed manner, so I decided to illustrate that part with lines; the hair and background part, according to my color meter, were mostly under 40 (brightness) and therefore I set it so that it creates more blurry circles. I think this project was helpful in terms of understanding retrieving the pixels, brightness, as well as pixel location properties better.