karinac-LookingOutwards-06

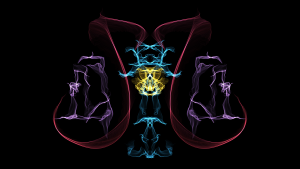
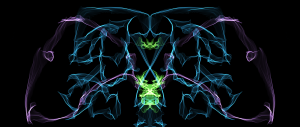
These drawings were created by an app called Silk, developed by Yuri Vishnevsky. Users can generate their own art by picking colors and dragging their mouse through the canvas. Random algorithms are generated as your mouse moves across the screen to create the effect of the different strokes that can be seen in the pictures. When you stop mouse your mouse, colors and shapes are still generated around your mouse due to the random code in the software.

I thought this app is the perfect way to create interactive and generative art. I was really intrigued by the design of this app because it utilizes the random algorithms to create a piece of cool art that people can enjoy looking at.

Here is the link to the online website:
http://weavesilk.com/

karinac-Project-04

karinac-Project-04

//Karina Chiu
//Section C
//karinac@andrew.cmu.edu
//Project-04

function setup() {
    createCanvas(500, 500);
    background(0);
}

function draw() {
    //points of triangle
    var x1 = width/3;
    var y1 = height/3;
    var x2 = width/3;
    var y2 = height-(height/3);
    var x3 = width-(width/3);
    var y3 = height/3;
    var x4 = width-(width/3);
    var y4 = height-(height/3);

    stroke(255,100,0);
    strokeWeight(2);
    rectMode(CENTER);
    fill(250,200,0);
    rect(width/2,height/2,width/3,height/3);


    for (var i = 0; i < 50; i +=2) {
        strokeWeight(0.2);

        //lines outside square
        line(x1, y1, 1, i*10);
        line(x1, y1, i*10, 1);
        line(x2, y2, 1, height-i*10);
        line(x2, y2, i*10, height-1);
        line(x3, y3, width-i*10, 1);
        line(x3, y3, width-1, i*10);
        line(x4, x4, width-1, height-i*10);
        line(x4, x4, width-i*10, height-1);
    }

}

At first, I did not know how I wanted this project to look. I just played around with the loop function to draw lines until I came across a design that I could branch off of. I implemented this design that is based off of the concept of light, which includes the source of light in the middle and the rays that come from it. The most difficult part for me was definitely coming up with a design that was proud to create. After that process was over and I could see a clear picture of what I wanted to draw, the rest was straightforward.

karinac-Project-05

karinac-Project-05

//Karina Chiu
//Section C
//karinac@andrew.cmu.edu
//Project-05

function setup() {
    createCanvas(500,500);
}
 
function draw() {
    background(138,0,45);

    //first set of boxes
    for (var y = 30; y < height-30; y += 90) {
        for (var x = 30; x < width-30; x += 90) {
            stroke(250);
            strokeWeight(10);
        	noFill();
            rect(x, y, 70, 70);
        }
    }

    //underneath layer of boxes
    for (var a = 50; a < height-80; a += 90) {
        for (var b = 50; b < width-80; b += 90) {
            stroke(250);
            strokeWeight(6);
            noFill();
            rect(a, b, 70, 70);
        }
    }
}

I wanted to create a wallpaper with simple geometric designs that are not too distracting. The hardest part I faced was trying to find the parameters for the loop.

karinac-LookingOutwards-05

Related image

I never completely understood what computer graphics was and how it could be applied to the fine arts. My whole life I thought that CGI (computer-generated imagery) only applied to generating the characters of famous blockbuster films, such as Avatar. I imagined everything else to be a product of built sets or live models and a green screen. However, after looking into more and more films, from Inception to I found that 3D computer graphics are much more extensive than simply creating the characters. I no longer hold that preconceived notion that computer graphics are solely confined to a specific industry.

The picture shown above is the end setting to Disney’s film, Maleficent. After reading multiple articles on CGI in films and watching videos of films’ production processes, I was in awe as I found that there were so many more uses for computer graphics in the film industry to create sets and images in place of actually physically constructing them. The most common software used in these types of films is called Autodesk 3dsmax. Otherwise, computer graphic designers tend to generate the algorithms themselves.

Image result for maleficent setting

karinac-LookingOutwards-04

Mileece has spent many years studying sound design. In the process, she created a garden, the Tree Weaver, that produces acoustic sound through currents and wave frequencies. The sound produced by the movement of the hands utilises GSR (Galvanic Skin Response) while the human interactive sections use biosensors connected to a bigger system that chooses sound based upon factors such as firmness and location of the touch. This project really inspired me since Mileece took something artificial, the sound design creation process, and perfectly blended it with nature and everyday life to enhance the features of these plants inside the garden and really immerse those who visit. There are times when I believe that technology could not emulate sound produced by humans or actual instruments, but Mileece integrated the technology in such a natural way that it seems real.

karinac-Project-03

karinac-Project-03

//Karina Chiu
//Section C
//karinac@andrew.cmu.edu
//Project-03

var bgRed = 0;
var bgGreen = 0;
var bgBlue = 64;


function setup() {
    createCanvas(600,400);
    drawSky();
}


function drawSky() {

	//background color changes using mouse movement

   	background(bgRed,bgGreen,bgBlue);

   	var bgX = mouseX
    
   	//day time bgcolor(187,228,248)
	if (bgX > 200 & bgX < 400) {
		bgX = 200
	}

    //transition to night time
    if (bgX >= 400) {
		bgX = 200 - (mouseX-400)
	}


	//day time transition to blue
	//bgcolor(187,228,248)
	//200 is the starting point of blue sky

	bgRed = bgX*((187-0)/200) + 0;
	bgGreen = bgX*((228-0)/200) + 0;
	bgBlue = bgX*((248-64)/200) + 64;


	//call drawSky function
	window.setInterval(drawSky, 100);
}


function draw() {

	//sun

	var sunSize = 0.4*mouseX
	var sunX = mouseX
	//parametric equation for path of sun
	var sunY = 80 + 0.0033*Math.pow(sunX-300,2)


	if (sunX <= 50) {
		sunX = 50
	}

	if (sunX >= 550) {
		sunX = 550
	}


	fill(255,201,14);
	noStroke();
	ellipseMode(CENTER);
	ellipse(sunX,sunY,sunSize,sunSize);


	//skyline

	fill(0);
	noStroke();

	//left buildings
	rect(0,height-200,45,200);
	rect(50,height-250,75,250);
	rect(55,height-260,65,10);
	rect(60,height-270,55,10);
	rect(65,height-280,45,10);

	//disproportionate building - right
	triangle(475,height-220,525,800,575,height-200);
	triangle(482,height-240,525,650,570,height-260);
	triangle(487,height-280,525,500,562,height-270);

	//dome building
	rect(150,height-110,200,110);
	rect(160,height-125,180,125);
	rect(165,height-130,170,130);
	ellipseMode(CENTER);
	ellipse(250,height-130,160,130);
	rect(240,height-198,20,10);
	rect(248,170,5,100);

	//bottom skyline
	rect(0,height-150,100,150);
	rect(100,height-100,100,100);
	rect(350,height-220,70,220);
	rect(380,height-300,50,325);
	rect(420,height-200,20,200);
	rect(440,height-120,60,120);
	rect(520,height-150,80,150);

	//windows
	fill(240);
	rect(388,120,22,5);
	rect(388,130,34,5);
	rect(388,140,34,5);
	rect(60,160,5,5);
	rect(70,160,5,5);
	rect(80,180,5,5);
	rect(90,180,5,5);
	rect(100,180,5,5);
	rect(110,180,5,5);
	rect(70,190,5,5);
	rect(110,190,5,5);
	rect(100,200,5,5);
	rect(110,200,5,5);
	rect(60,220,5,5);
	rect(70,220,5,5);
	rect(90,220,5,5);
	rect(110,230,5,5);
	rect(60,240,5,5);
	rect(80,240,5,5);
	rect(90,240,5,5);
	rect(100,240,5,5);
	rect(180,282,20,3);
	rect(210,282,20,3);
	rect(240,282,20,3);
	rect(270,282,20,3);
	rect(300,282,20,3);
	rect(490,200,10,20);
	rect(530,210,5,5);
	rect(540,210,5,5);
	rect(550,210,5,5);
	rect(520,220,5,5);
	rect(530,220,5,5);
	rect(510,240,5,5);
	rect(540,240,5,5);
	rect(550,240,5,5);
	rect(490,170,5,5);
	rect(500,170,5,5);
	rect(530,170,5,5);
	rect(550,170,5,5);
	rect(540,160,5,5);
	rect(550,160,5,5);
	rect(500,140,5,5);
	rect(510,140,5,5);
	rect(360,190,5,15);
	rect(370,210,5,15);
	rect(370,230,5,15);
}

The part I struggled with the most was definitely trying to come up with equations for the parabolic pathway of the sun as well as the color equation for the sky. After a lot of trial and error on paper, I was finally able to come up with something and transfer it to the computer and work from there.
karinac-LookingOutwards-03

http://pdf.mmci.uni-saarland.de/projects/DirectionalScreens/

This is the new directional screen created by a group of six individuals, whose goal was to maximize a movie screen’s image quality across all perspectives of the audience members. Currently, much of the light and energy from screens are also displayed onto the walls, ceilings, and floors. To solve this problem by creating greater energy efficiency, this team of people created a new screen using CNC mills to design individual square panels compiled with tiny mirroring facet surfaces to project light solely onto the audience. This new design further accentuates the resolution and color reproductions of the project being exhibited, making it up to 15 times brighter than a simple matted screen. I was amazed at how practical and universal this new design could be in the future world of cinema. Before, I held the preconceived notion that computational fabrication was purely a visual art. Little did I know that it could also very well be applied in everyday life.

karinac-LookingOutwards-02

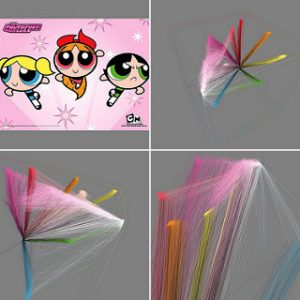
This particular work is part of Leonardo Solaas’s coding experiment called Walking in Color Space. He wanted to generate art that made color seem explosive and omnipresent. Therefore, the artist took sample pictures, in this case, the Powerpuff girls, and extracted the colors. He then took those colors and projected them in a 3-D manner by adjusting and specifying the direction of the colors to create these trajectories that you see in the picture. In addition to the various translations of the image, Solaas introduced contrasting colors in the multiple trajectories to make the color variations stand out and more visible.

I was intrigued by this work because the artist utilized an already existing image and made it his own simply by taking the colors and directing the lines in a 3-D setting.


karinac-Project-02-Variable-Face

project-02

//Karina Chiu
//karinac@andrew.cmu.edu
//Section C
//Project-02

var faceWidth = 360
var faceHeight = 320
var leftX = 200   //left-eye-pupil
var leftY = 290   //left-eye-pupil
var rightX = 300  //right-eye-pupil
var rightY = 290  //right-eye-pupil
var beakX = 220   //position of beak
var beakY = 360	  //position of beak
var comb = 110    //height of comb

function setup() {
	createCanvas(500,500);
}

function draw() {
	background(192,183,227);

	//head
	stroke(0);
	strokeWeight(5);
	fill(245,202,52);
	ellipse(250,300,faceWidth,faceHeight);

	//left-outer-eye
	strokeWeight(3);
	fill(250);
	ellipse(190,290,110,110);

	//right-outer-eye
	fill(250);
	ellipse(310,285,140,140);

	//left-pupil
	fill(0);
	ellipse(leftX,leftY,10,10);

	//right-pupil
	fill(0);
	ellipse(rightX,rightY,10,10);

	//beak
	fill(235,143,31);
	triangle(beakX,beakY,250,440,500-beakX,beakY);

	//chicken-comb
	fill(250,0,0);
	triangle(180,comb,240,220,300,comb);
}


function mousePressed() {
	
	//when mouse is clicked, random values are
	//assigned to the variables

	faceWidth = random(300,450);
	faceHeight = random(290,370);
	leftX = random(150,220);
	leftY = random(255,330);
	rightX = random(270,350);
	rightY = random(245,340);
	beakX = random(200,220);
	beakY = random(360,370);
	comb = random(80,110);

}

In my childhood, I loved drawing cartoon animals with exaggerated eyeballs, so I decided to try drawing them in this project. It took me a few times to write the ‘random’ code lines, but I eventually grasped the concept.

karinac-Project-01

karinac-portrait

function setup() {
	createCanvas(500,600);
	background(172,214,234);
	}

function draw() {
	//hair
	stroke(25,0,0);
	strokeWeight(10);
	fill(40,0,0);
	arc(225,250,300,250,PI,PI);
	rect(75,250,300,300);

	//shirt
	noStroke();
	fill(250,242,140);
	rect(100,525,250,125);
	stroke(150,150,150);
	strokeWeight(3);
	arc(225,525,250,150,PI,PI);

	//neck
	stroke(194,141,109);
	strokeWeight(4);
	fill(207,165,141);
	rect(175,400,108,70);
	stroke(150,150,150);
	strokeWeight(7);
	fill(207,165,141);
	arc(229,460,112,140,0,PI);

	//face
	stroke(194,141,109);
	strokeWeight(5);
	fill(207,165,141);
	ellipse(225,300,250,275);

	//left eye
	noStroke();
	fill(250,250,250);
	ellipse(170,310,50,50);
	fill(30,0,0);
	ellipse(175,305,35,35);

	//right eye
	noStroke();
	fill(250,250,250);
	ellipse(281,310,50,50);
	fill(30,0,0);
	ellipse(286,305,35,35);

	//left eyebrow
	noFill();
	stroke(0);
	strokeWeight(3);
	arc(170,275,60,10,PI,PI);

	//right eyebrow
	noFill();
	stroke(0);
	strokeWeight(3);
	arc(280,275,60,10,PI,PI);

	//nose
	noStroke();
	fill(194,141,109);
	triangle(200,365,225,320,250,365,20);

	//smile
	stroke(0);
	strokeWeight(2);
	fill(250,250,250);
	arc(225,380,110,80,0,PI);
	line(170,380,280,380);


	//headphones
	noFill();
	stroke(165,10,10);
	strokeWeight(20);
	arc(225,303,315,372,PI,PI);
	stroke(110,10,10);
	strokeWeight(35);
	arc(225,170,220,90,PI,PI);
	line(65,275,65,355);
	line(385,275,385,355);
	noStroke();
	fill(165,10,10);
	rect(30,265,40,100,30);
	rect(380,265,40,100,30);
	stroke(250,250,250);
	strokeWeight(5);
	line(65,372,65,405);
	line(65,405,85,415);
	line(85,415,55,435);
	line(55,435,85,460);
	line(85,460,55,485);
	line(55,485,85,492);
	line(85,492,85,600);

	//music note
	fill(0);
	stroke(0);
	strokeWeight(5);
	line(420,92,420,137);
	line(390,95,390,140);
	strokeWeight(6);
	line(390,95,420,92);
	strokeWeight(5);
	ellipse(380,140,20,10);
	ellipse(410,138,20,10);
	strokeWeight(3);
	line(457,25,457,60);
	ellipse(450,60,15,8);
	
	//hair-top
	fill(40,0,0);
	stroke(34,0,0);
	strokeWeight(3);
	rotate(QUARTER_PI-.13);
	ellipse(270,95,90,230);


}

I knew from the beginning that in addition to coding a self-portrait I wanted to display something that represented who I am.  So naturally, even though it took extra time and effort, I had to include the headphones since music has always been a huge part of my life.

The most challenging ad time-consuming feature was the front bangs of the hair layered on top of the headphones. The process consisted of a lot of trial and error as I struggled with the orientation of the ellipse.

Overall, I learned a lot through this process and I’m happy with how it turned out.