//Robert Managad
//Section-E
//rmanagad@andrew.cmu.edu
//

var underlyingImage;

function preload() {
    var myImageURL = "https://i.imgur.com/oZsaEpS.jpg";
    underlyingImage = loadImage(myImageURL);
}

function setup() {
    createCanvas(480, 320);
    background(0);
    underlyingImage.loadPixels();
    frameRate(60);
}

function draw() {
	var randomSize = random(5, 10);
	var randomDetailSize = random(1, 3);
	var pxDetailX = constrain(200, 280);
	var pxDetailY = constrain(40, 100)
    var px = random(width);
    var py = random(height);
    var dx = 5;
    var ix = constrain(floor(px), 0, width-1);
    var iy = constrain(floor(py), 0, height-1);
    var ixM = constrain(floor(mouseX), 0, width-1);
    var iyM =  constrain(floor(mouseY), 0, width-1);
    // creating variations in opacity
    var theColorAtLocationXY =  [red(underlyingImage.get(ix, iy)) + 5,
                                green(underlyingImage.get(ix, iy)) + 10,
                                blue(underlyingImage.get(ix, iy)),
                                + 90]
    var theColorAtLocationXYM =  [red(underlyingImage.get(ixM, iyM)) + 20,
                                green(underlyingImage.get(ixM, iyM)) + 10,
                                blue(underlyingImage.get(ixM, iyM)),
                                + 50]
    rectMode(CENTER);

    //creates stroke, no-fill rectangles for interactivity
    if (mouseIsPressed) {
   	strokeWeight(random(2, 6));
    stroke(theColorAtLocationXYM);
    rect(mouseX, mouseY, randomSize * 2, randomSize * 3);
	}
	noStroke();
	fill(theColorAtLocationXY);
	//larger pixels outside the face area
	if (px < 200 || px > 280 || py < 40 || py > 140) {
	ellipse(px, py, randomSize*3, randomSize*3.5);
	rect(px, py, randomSize*1.5, randomSize*1.5);
	}
	//smaller pixels within the face area
	else if (px > 200 || px < 280 || py > 40 || py < 140) {
	rect(px, py, randomSize*1.5, randomSize*1.5);
	}


}
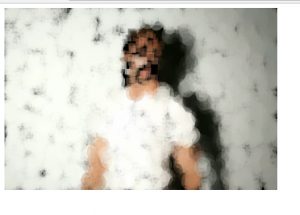
I developed my pixel portrait program with a foggy window idea in mind, hence the changes in opacities and layering of randomly-generated pixels. To somewhat speed up the process of visualizing the background image, I incorporated an if statement involving mousePressed, where as long as the mouse is pressed strokes of rectangles will be drawn.
Below is a full canvas illustrating the background image, a self portrait.

![[OLD FALL 2017] 15-104 • Introduction to Computing for Creative Practice](wp-content/uploads/2020/08/stop-banner.png)