Jenna Kim (Jeeyoon Kim)- Project 7- Wallpaper

jeeyoonk07

/* Jenna Kim (Jeeyoon Kim)
Section E
jeeyoonk@andrew.cmu.edu
Project 7
*/

var nPoints = 360

function setup() {
    createCanvas(500, 500);
    
}

function draw() {
	//drawing curve
	background(130, 20, 40);
	push();
	translate(width / 2, height / 2);
	drawAstroidCurve();
	pop(); 

	fill(255, 100);
	textSize (30);
	textFont('Roboto');

	text("CHAOS", width / 2 - 50, 480);
}

function drawAstroidCurve() { //
	// Astroid;
	//Link: http://mathworld.wolfram.com/Astroid.html
	var x; 
	var y;
	var xR = constrain(mouseX, 0, 500);
	var ellipseR = map(mouseX, 0, 500, 10, 120);
	var a = map(xR, 0, 500, 40, 30);
	var b = map(xR, 0, 500, 50, 300);
	var h = constrain(mouseY, 0, 400);


	stroke(255);
	strokeWeight(0.5);

	//chaotic ASTROID CURVE
	beginShape();
	fill(130, 20, 40);
	for (var i = 0; i < nPoints; i++) {
		x = (4 * a * cos(i)) + (b * cos(3 * h * i));
	    y = (2 * a * sin(i)) - (b * sin(3 * h * i));
        vertex(x, y);
	};
	endShape(CLOSE);

	noStroke();
	fill(255);
	ellipse(3, 5, ellipseR, 50);
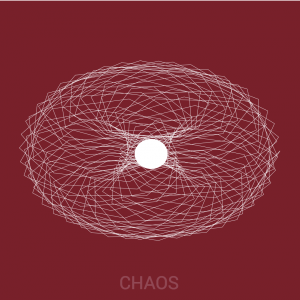
}

For this project, I wanted curves that combine to create a chaotic feeling. The ellipse in the middle is supposed to represent a ball of string, and make the whole canvas look like the string is “unraveling” from the ball of string (the ellipse in the middle). I used an Astroid curve from the MathWorld site to reference the function. At first, I was confused on how to utilize map(); and constrain(); to explore different curves and its sizes and limits. However, I eventually understood these concepts through this project. Throughout out the project, I was really amazed on how many variations of curves an asteroid that create although I input certain constraints.

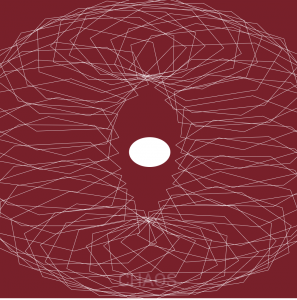
Below are my process work. The top picture shows that I struggled for awhile on how to make the curves show in thin lines. I realized that I had to fill them with background color. The bottom picture is another part of the process. I explored different constrain();.


Jenna Kim (Jeeyoon Kim)- Looking Outwards-6

“PPPP”
He kept developing his original idea (the first photo on the very top).
“PPPP”- more development
His another project called “NNN”

Manolo Gamboa Naon’s project, “PPPP”, is a generative, random digital art had been developed over a long time. Its vibrant colors and interesting geometric forms blend in beautifully. . His project is very admirable because through this project, he shows that making errors is essential to generative artists and errors are “beautiful”. He shows that as he develops more series to this project, he demonstrates growth of his style through series of errors. It is definitely fascinating to see how he develops so many styles and combination of color from one idea. The algorithms and the randomness in the work are generated from Processing, a programming tool that he learned when he started studying design. Although this simple random art seems to be simple with its geometric forms, he manifested his artistic ability in the color palette and the pattern. Although the colors are so bold and striking, the different colors interact well with each other. Also, we can see inspiration from artists and designers such as Ben Fry, Joshua David, Ivan Ivanoff, and many more.

Link: “https://www.artnome.com/news/2018/8/8/generative-art-finds-its-prodigy”

Jenna Kim (Jeeyoon Kim)- Project 6- Abstract Clock

jeeyoonk06

var x = [];
var y = [];

function setup() {
    createCanvas(500, 500);
    for (i = 0; i < 100; i++){
    	x[i] = random(50, 450);
    	y[i] = random(50, 450);
    }
}

function draw() {
	background(1, 41, 71);
	var S = second(); //variables for time
	var M = minute();
	var H = hour();

	var Hmap = map(H, 0, 20, 0, 500); // ground (pink block) adds up every "HR"
	for(i = 0; i < H; i++)
		stroke(255);
        strokeWeight(2);
		fill(255, 138, 143);
		rect(0, 460, Hmap, 40);

	stroke(255); //fire fly JAR
	strokeWeight(2);
	line(192, 196, 289, 196);
	line(192, 196, 192, 242);
	line(192, 242, 163, 274);
	line(163, 274, 163, 460);
	line(163, 460, 318, 460);
	line(318, 460, 318, 274);
	line(318, 274, 289, 242);
	line(289, 242, 289, 196);

	push(); //Jar lid
	translate(260, -78)
	fill(255);
	rotate(PI / 3);
	rect(192, 196, 10, 100); 
    pop();

    for(i = 0; i < S; i++){ //tiny firefly appears every "SEC"
    	fill(247, 246, 146);
    	noStroke();
    	ellipse(x[i], y[i], 4, 4);
    }

    push(); //firefly rotates every "MIN"
    translate(width / 2, height / 2);
    noStroke();
    ellipseMode(CENTER);
    fill(255);
    rotate(radians(M * 6));
    stroke(255);
    strokeWeight(0.8);
    line(85, 70, 87, 80); //left bug tentacle
    stroke(255);
    strokeWeight(0.8);
    line(75, 60, 74, 80); //right bug tentacle
    noStroke();
    fill(249, 196, 65); //body
    ellipse(80, 40, 19, 50);
    fill(247, 216, 146);
    ellipse(80, 40, 17, 30);
    fill(244, 224, 189);
    ellipse(80, 40, 14, 18);
    fill(45, 16, 35); //wings
    ellipse(75, 50, 10, 33);
    fill(45, 16, 35); //wings
    ellipse(85, 50, 10, 33);
    fill(255, 0, 68); //head
    ellipse(80, 65, 12, 12);
    fill(0); //left eye
    ellipse(85, 70, 5, 5);
    fill(0);
    ellipse(75, 70, 5, 5);
    pop();

}

For this project, I was inspired by the fireflies I saw in my backyard. The tiny firefly adds up every second, pink block adds up every hour, and the firefly in the middle rotates every minute. From last week to this week, my biggest challenge had been understanding “arrays” and “loops”. Through this project, I could understand these concepts better, and I had fun exploring different styles, color, and movements of the parts of the project.

I did a quick sketch before going into Illustrator.
Drawing on Illustrator helps me visualize more clearly.

Jenna Kim (Jeeyoon Kim)- Looking Outwards-5


(Guide to Snow Simulation in Frozen)

Frozen Snow Simulation is a project by the graphics community to illustrate real snow in the animation environment. Since already existing 3D graphics only have techniques for solids and liquids, and making graphics for wet and dense snow is difficult, the graphics team had to use a grid that creates self collision and breaking of the snow. The algorithm used for this project is called Matterhorn, which made basis for most of the snow effects in the movie. The designers started with Matterhorn and changed the look for a perfect snow. The creator’s artistic sensibilities manifested in the final form because he carefully considered the composition, details of the snow, and style/ elegance of the whole animation into Frozen. I admire this project because in order to create the real, specific effects of the snow, a team of forty people came together to simulate snow that gives both reality and fits into the style of the movie.

Link: http://www.cgmeetup.net/home/making-of-disneys-frozen-snow-simulation/

Jenna Kim (Jeeyoon Kim)- Project 5- Wallpaper

jennakim05

/* Jenna Kim (Jeeyoon Kim)
Section E
jeeyoonk@andrew.cmu.edu
Week 5 Project: Mr. Avocado and Ms. Eggy
*/
function setup() {
    createCanvas(600, 600);
    noStroke();
}

function draw() {
    background(245, 138, 125);

    for (var y = 0; y < height; y += 100) { //avocado peel
        for (var x = 0; x < width; x += 70) {
            fill(79, 50, 54);
            ellipse(x, y, 30, 30);
            ellipse(x, y + 30, 40, 40);
      }
    }
    for (var y=0;y < height;y += 100){ //inside of avocado
      for (var x = 10;x < width;x += 70){
        fill(204, 228, 182);
        ellipse(x - 10, y, 25, 25);
        ellipse(x - 10, y + 25, 35, 35);
        fill(79, 50, 54); 
        ellipse(x - 15, y, 3, 3); //left eye
        ellipse(x - 7, y, 3, 3); //right eye
      }
    }

    for (var y = 0;y < height;y += 100){ //avocado seed!
      for (var x = 10;x < width;x += 70){
        fill(79, 50, 54);
        ellipse(x - 10, y + 30, 15, 15);
      }
    } 
    for(var y = 70;y < height * 3 / 2;y += 100){ //egg! 🙂
    for(var x = 30;x < width;x += 70){
      fill(255); //white part
      ellipse(x, y, 40, 50);
      fill(252, 210, 94); //yolk
      ellipse(x, y, 20, 20);
      fill(252, 210, 94); //eyes
      ellipse(x - 10, y - 10, 4, 4); //left eye
      ellipse(x + 10, y - 10, 4, 4); //right eye
    }
  }
    noLoop();
}

For this project, I designed a pattern for a kind of pajamas I want for myself. 🙂
I made a pattern of avocados and eggs, my favorite food. Although this project was also challenging as the assignments a and b, I enjoyed using my creativity and apply what I learned from this week’s lecture and recitation. Through keep experimenting with the coding, I started to understand the loops fully than before. I know that next time, I can further improve by using % operator.

Jenna Kim (Jeeyoon Kim)- Looking Outwards-4

Final Display of “Sonic Playground”

using the software “Grasshopper”
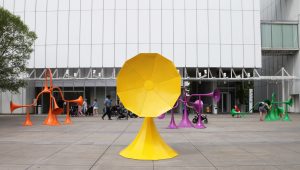
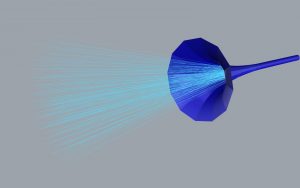
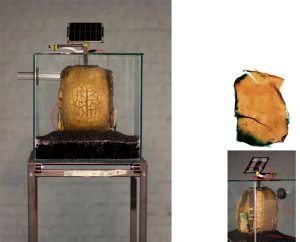
using the “Grasshopper”
(software)[/caption]

This project is called the “Sonic Playground”, by Yuri Suzuki. It is an installation piece placed outside to transmit sound in unique ways. The colorful, vibrant hue and interesting form of the installation attract people to be part of this unusual experience. The installation is intended to modify the sounds surrounding our everyday lives. I admire this piece because not only this piece used combination of softwares and music, but it was meant to create more playful, fun, comfortable environment for the users; it gives a experience in which people who are passing by can have pleasant feeling in a short amount of time. This is important for me because it is one of the goals of a designer; I need to be a better, more friendly place for the users. The software used for this project was Grasshopper and Rhinoceros, which are 3D geometrical software that can treat “sound” using ray tracing techniques. These techniques allow the audience to send out sound in different locations. The creator’s artistic sensibilities are shown in the final form because Suzuki really put emphasis on the form and the vibrant color of the installation. I personally love how she really play with the form because I can see the interesting twist to it; at the same time, I can easily recognize that the form has to do with music and sound.

Link:http://www.creativeapplications.net/sound/sonic-playground-playful-acoustics-by-yuri-suzuki-design/

Jenna Kim (Jeeyoon Kim)- Project 4- String Art

jennakim04

/* Jenna Kim (Jeeyoon Kim)
Section E
jeeyoonk@andrew.cmu.edu
Project 04
*/

function setup() {
    createCanvas(400, 300);
    var fishX;
	var fishY;
	var fishH;
	var fishW;
}

function draw() {
	background(100,149,237);
	fishX = 150;
    fishY = 140;
    fishH = 50;
    fishW = 100;

    noStroke(0);
    fill(100, 200, 300); //tail
    triangle(fishX + fishW - 10, fishY, fishX + fishW + 50, fishY - 30, fishX + fishW + 50, fishY + 30); 
    fill(102, 196, 184) // body of the fish
    ellipse(fishX + fishW / 2, fishY, fishW, fishH); 
    fill(0); //eye
    ellipse(fishW * 1 / 5 + fishX, fishY - 10, 10, 10);

	var x1 = 1;
	var x2 = 10;
	var x3 = 0;
	var x4 = 40;
	var y1 = 1;
	var y2 = 3;
	var y3 = 30;
	var y4 = 80;

	// bottom LEFT
	for (var i = 0; i < width / 3; i ++){
		x1 += 30;
		y1 += 10;
		strokeWeight(1);
		stroke(10, 100, 132 );
		fill(0, 0, 0);
		line(i, y1, x1, height);

		x1 += 1;
		y1 += 3;
	}
	// top RIGHT
	for (var a = 0; a < width / 3; a ++){
		x2 += 10;
		y2 += 10;
		strokeWeight(1);
		stroke(255, 0, 0);
		line(width - a, y2 , x2, 1);

		x2 += 6;
		y2 += 5;
	}
	// top LEFT
	for (var b  = 0; b < height / 2; b ++){
		x3 += 15;
		y3 += 5;
		strokeWeight(1);
		stroke(255, 255, 255);
		line(b, height - y3, x3, 1);

		x3 += 6;
		y3 += 5;
	}
	// bottom RIGHT (SHIP LIGHT***)
	for (var f  = 0; f < height / 2; f ++){
		x4 += 5;
		y4 += 30;
		strokeWeight(1);
		stroke(255, 255, 0);
		line(f, height, x4, y4);

		x4 -= 1;
		y4 -= 30;
	}
	textSize(15);
	fill(250, 250, 250);
	text('quiz fishy', 170, 180)
	
}

Through this project, I learned how each variable works with each other to create curves. I know learning about the string art will be very useful for future media art projects (like the ones from Lunar Gala last year).

Jenna Kim (Jeeyoon Kim)- Looking Outwards-2


Artist using 3D pen tool to duplicate the Nissan Car.[/caption]

The project that involves algorithms and made into 3D form through fabrication machinery is Nissan’s project to create World’s largest 3D pen sculpture. Nissan gathered many skilled artists to use 3Doodler 3D pen technology to create this sculpture, which took about 800 hours and required 13.8km of plastic strands. I admire this project because it demonstrates how advanced 3D printing is now, and as a design student taking a products design class, I am mesmerized the extent of different 3D tools to create new projects like this. The algorithm that was generated, the 3Doodler, allows the artist to freely produce 3D shapes, forms, and patterns. The artists’ artistic sensibilities definitely manifest in the final form because the artists delicately expressed every details in order to duplicate Nissan Qashqai exactly.

Link:https://courses.ideate.cmu.edu/15-104/f2018/wp-admin/post-new.ph

Jenna Kim (Jeeyoon Kim)- Project 3- Dynamic Drawing

jennakim03

/* Jenna Kim (Jeeyoon Kim)
Section E
jeeyoonk@andrew.cmu.edu
Project 03
*/

var xpan = 200;
var ypan = 130;
var panWidth = 145;
var panHeight = 83;
var xhandle = 44;
var yhandle = 120;
var handleWidth = 84;
var handleHeight = 12;

var xegg = 200;
var yegg = 87;
var eggWidth = 71;
var eggHeight = 100;

var xnewpan = 456; 
var ynewpan = 324;
var newpanWidth = 277;
var newpanHeight = 161;
var newxhandle = 155;
var newyhandle = 320;
var newhandleWidth = 164;
var newhandleHeight = 24;

var angle1 = 6;
var distance = 0.1;

function setup() {
    createCanvas(640, 480);
}


function draw() {
	//background color "change" when you move the cursor
	background(234, 210, 249);
	colorMode(RGB);
	R = (mouseX / width) * 255;
	G = (mouseY / width) * 255;
	var c = color(R, G, 200);
	background(c);

  //egg rotating around mouse
  noStroke(0);
  fill(255); //
  stroke(0);
  push();
  translate(mouseX, mouseY);
  rotate(radians(angle1));
  ellipse(50, 50, eggWidth, eggHeight);
  pop();
  angle1 = angle1 + 6;
  distance = distance + 0.1;

//when you drag to the right, the egg size increase!!
if (mouseX > 420) {
    eggWidth += 0.5;
    eggHeight +=0.5
}

	//if mouse is Pressed, Fried Egg appears (size change/position change)
if (mouseIsPressed) {
	//new pan drawing
	noStroke(0);
  	fill(114, 114, 114);
  	ellipse(xnewpan, ynewpan, newpanWidth, newpanHeight);
  	fill(94, 94, 94);
  	ellipse(xnewpan, ynewpan - 10, newpanWidth, newpanHeight);
  	rect(newxhandle, newyhandle, newhandleWidth, newhandleHeight);

  	//Fried Egg
  noStroke(0);
  	fill(256);
  	ellipse(456, 316, 160, 110);
  	fill(249, 183, 65);
  	ellipse(447, 306, 71, 42);
  } else {
	push();
  	//pan drawing
  	fill(114, 114, 114);
  	ellipse(xpan, ypan, panWidth, panHeight);
  	fill(94, 94, 94);
  	ellipse(xpan, ypan - 10, panWidth, panHeight);
  	rect(xhandle, yhandle, handleWidth, handleHeight);
  	pop();
}
  print(mouseIsPressed);

  textSize(17);
  fill(50);
  text('dancing egg', mouseX + 5, mouseY, 100, 100);

}

“DON’T FORGET TO PRESS THE CANVAS”

For this project, I put five interactions in total; swinging of the egg, egg transforming to another position, and size of the pan changing when mouse is clicked, egg size increasing slowly as the mouse moves to the right, and color change of the background when mouse is moved around the canvas. Through this project, I learned that there are so many different interactions you can do just by moving, dragging, clicking the mouse.

Jenna Kim (Jeeyoon Kim)- Looking Outwards-2

The intelligent beehive (in many different views)

The project, “Genesis of a Micronal Skin”, is a research project/ an installation project by AnneMarie Maes created to examine the idea of Intelligent Beehives through “thorough” research of microbial skin. The Guerilla Beehive is a device that senses the pollution of the current environment. Not only this device looks out for for bees’ wellbeing, but it also changes color depending on the situation of our environment. She was inspired from the idea that we as humans need to alter our lifestyles for the environment for sustainable future (which is a major topic discussed in my Design major). She used different resources such as 3D rendering of pollen grain, cellulose skin growcontainer with bacteria and yeast cells, and many more. This project is admirable because through this installation/ project, the AnneMarie Maes delivers a story about our environment to the audience. It’s also interesting how AnneMarie created a harmony between man made material and natural material. The algorithm that generated the work used “pattern recognition” to record the images captured by infrared camera when a membrane was being developed through microbial cellulose. Creator’s artistic sensibilities manifested in the algorithm because she used it to produce the outer skin in the form of a beehive and graphical rendering of microbial movements. Although she used her artistic sensibilities to create this installation, she could have improved on the form because it is difficult to tell if the form was intended to be a beehive.